


Jamiel
-
Posts
1,379 -
Joined
-
Last visited
-
Days Won
1
Content Type
Profiles
Forums
Blogs
Gallery
Events
Exhibition Layout Details
Store
Posts posted by Jamiel
-
-
9 hours ago, lezz01 said:
I don't remember a Tiger in B o B. There was a Jagdpanther and a Panzer IV. I think you are referring to Saving Privet Ryan where the Tiger didn't have the right wheels. It really looked the part and had me fooled right up until the sticky bomb scene when it was revealed that it didn't have overlapping road wheels. Fury used a real Tiger and a fake Tiger and they CGI'd the real one on to the fake one for the combat scene as the real one is far to valuable to risk being damaged for a film. There's a doco about it. I believe that it's the only working Tiger in the world right now but Crompton has at least one in the works and the parts for a couple more.
Regards Lez.
You are right, I interviewed the VFX supervisor of 'Band of Brothers' and he talked about the getting things right, but not the specific tanks, although I think did mention the DC3s.
'Fury' is an interesting example, they may have got the Tiger right, but the plot was the problem there. I don't think that even the best tank commander with one Sherman can destroy a complete German battalion. The fight between the three Shermans and the Tiger is a good scene though.
For a war film, I think the recent remake of 'All Quiet on the Western Front' was quite stunning, if a not the jolliest couple of hours of film. It lost out to 'Avatar. the Way of Water' for the VFX Oscar, but I felt had the best visual effects I had seen in a long time, in service of the plot and not jsut for show.
Before I returned to modelling railways I bought a Tamayia Tiger and T34 tanks, and almost finished building one until I realised that it was trains that I really wanted to model.-
 5
5
-
-
- Popular Post
- Popular Post
I did my master’s dissertation on reproducing historical locations on film. I made a recreation of York station in 1957 mixing footage shot at York station in 2015 and the Pickering on the North Yorkshire Moors Railway, plus CG elements and matte painting.
One of the conclusions I came to is that you cannot get everything right when it comes to experts. On this forum we have far more knowledge than the majority of people do about railways, so we wonder why they cannot get it right when filming railways.
I suspect that if you watch ‘Downton Abbey’ with an expert, or collector of plates and dinner services, they would point out that some of the plates they are eating off are far too late for the period of the programme. Similarly, for anything that someone is an expert on.
TV shows are telling a story, they are not a documentary of the history of railways, costume, cutlery or whatever your own specialist knowledge covers. They do their best within the budget and the expertise of the crew.
If it were a documentary on the history of railways during the World War 2, then I would say they should get it right.
Some shows do go to great lengths to get things right, ‘Band of Brothers’ made sure that the tanks used were the tanks in the story, or with the Tiger tank, they built a very close replica from an existing tank (one too few wheels along the tracks I think).
Railways are too expensive to buy the exact rolling stock and bring it to a film set, they simply have to use a preserved railway within reasonable travel of the shoot’s location. They could use CGI to recreate the trains, but it would not be cost effective, unless say it was a drama about the Mallard’s record breaking run 90 years ago, so for most people if it is a steam train and not a diesel or electric that is good enough.
At the end of the day, if you are invested in the characters and plot enough then it is fine, and if you are not, then everyone can just have fun picking apart the what you are watching.
Film and TV drama is based on ‘the suspension of disbelief’ and if you buy into it then good, if not then it won't work anyway.
Just to say , this does not mean I give film makers a free pass, the HSTs in the background of many shots in ‘Quadrophenia’ set in the 1960’s really jarred with me, but then I didn’t like the film, so my suspension of disbelief had already gone, in fact I liked the HSTs better than most of the characters. As for the tanks in 60s World War 2 films…………
Here is a still from my master's project 'York 1957', it has many inaccuracies, but I hope feels about right. That shot took me about 2-3 weeks to plan, shoot and put together on the computer. Plus camera and sound and travel and research (which I already had a head start on for the railway information). I doubt a TV show, or even most films would have the budget for one shot to cover that, unless it was the key element of the film. If it is just someone getting train back home for the weekend, then a ‘steam train’ will do.
I found out later that the wooden ends of the main roof were replaced in the 60’s.
I know the trolley and boxes are too near the edge, but I had to mask the feet of the people on the Pickering platform.
The modern light on 76079 still bugs me, I may go back and fix that and the end station roof one day, but NYMR had it on that day.
Link a to short video of the ‘build’ for that shot. http://www.jamielochhead.co.uk/York1957/StationBuildv01.mp4
Link a to the 1 minute final piece, there were three different versions all had different mistakes to ask research questions about. http://www.jamielochhead.co.uk/York1957/York1957Blue.mov
Jamie-
10
-
 6
6
-
 6
6
-
2 hours ago, maico said:
When I was focus puller you had to be careful with older Cooke primes. Some project a pronounced curved plane of focus. Focus in the middle and the edges were out and vice versa. Zeiss are flat field.
In my time in the industry I can't recall any Sony lenses. It was Zeiss, Panavision Primo, Leica, Cooke zooms, and the odd Angénieux zoom and Canon superspeed primes. Long lens would be converted Canon still lenses.
Sony lenses have no character and are only good for technical photography, hence VFX supervisors liking them, and cinematographers not. I have only ever seen Sony lenses used for green screen shots or to get VFX elements.
The list you give is very accurate, Cookes have lots of issues but lots of charter, Zeiss are lovely as are Panavision. I did see a shot done with a Cooke anamorphic of a pans past Dutch houses, and it looked like an accordion, the inaccuracies in the lenses were too much for the shot, but the budget didn't reach to having alternate lenses for shots like that, and to be honest the film was quite dreadful anyway. Great camera crew though, and nice art department.-
 2
2
-
1
-
-
Interestingly one of the characteristics of films/movies, and especially wide screen images is the amount of distortion giving ‘character’ to the look.
Lens aberration, the splitting of colours into a prism effect, by the edges of the lens gives the edges of films a look that helps make the centre of the image more attractive and guide the viewer to focus on that space. Many lenses only have a limited central area in focus as well.
Using anamorphic lenses also accentuates this, and if you watch any JJ Abrahams films (not something I would personally recommend!) additional lens flares are often added in post-production to create a ‘more filmic look’.
Some digital film cameras offer a cropped view, just taking the part of the image in the centre, with less distortion, or it can be done is post production as Tony has above.
There is an argument between sharper being better but lacking character, and shots with character but lacking detail. This also mirrors the differences in choices made between still and moving image photography.
Exposure on a moving image and the ‘lens angle’ (time the footage is exposed) is also a great difference between still and moving image, too much detail is uncomfortable on the eye, Steven Spielberg used this to make sequences in ‘Saving Private Ryan’ visually hard as well as the horrific acts being depicted.
Depth of focus also has very different aims in films, often there is a small depth of focus again to highlight where the director wants you to look, but still photography often has a deep focus allowing a lot of detail to be looked at. I would suspect that to mimic a small depth of focus for taking photographs of model railways in a filmic manner you would have to use a macro lens.
Personally, I prefer the wide shots without a crop as it loses the character of the lens, but that is probably because I am used to viewing moving images a great deal.
A lot of the choice is do you want to document as much as possible on a model, or to try and reproduce how the model would look if it were a photograph of the real thing. That might lead to a lot of photographs being made black and white and with grain (or noise as photoshop calls it).
As an aside, a question that is often asked by cinematographers at the start of a film is what lenses would the visual effects (VFX) department like to use? VFX usually reply Sony Spherical lenses, very accurate very little distortion and without character (very easy to use in post-production) and then the cinematographer will suggest 1960s hand ground anamorphic Cooks lenses. The VFX department then conceded the Cooks lenses look far better and ask to shoot lens charts so that the distortion can be reproduced in post.
I think the point I am trying to make is that sharper is not always better and sometimes you want to create a shot that is more about character. Very useful when reproducing a period look, but not very useful when documenting a how much work has gone into making a fantastic layout.-
1
-
3
-
4
-
-
I posted this on Tony Wright's thread, a few pictures of my build of the MR Tar Tank. I gather Jol was a bit disappointed not to see people’s builds of this kit on the forum.
Not as beautifully made as the one posted on the previous page, but it will fit my layout well as a well worn 60 year old tank.It is my first brass/white metal wagon kit, picked up at the York show a couple of weeks ago. Pretty much built as per the instructions, with a couple of tiny additions and couple of mistakes along the way.
Do solder the tank plates flat as instructed and don’t bend them to see how they fit before soldering them together. Still, it makes of a well worn 60 year old wagon.
I did find the closeness of detail on a wagon kit a little more challenging for my level of soldering compared with a coach or loco, but it was a really enjoyable build and a bit of filing, sanding and Wet & Dry has sorted out most of the solder spills.
My second London Road Models kit (L&Y class 23 0-6-0 was the first), and as well as being lovely people to have a chat with at a show, they do make lovely kits. Maybe a L&Y big boilered 0-8-0 at some time in the future, not quite right for my layout, but far too tempting to resist for long.
I have posted more details of the build in my Elerby thread linked in my signature.
I really do recommend this kit, even it is only a storage tank parked in siding most of time, occasionally shunted by an 0-6-0 or 0-4-0, possibly my Sentinel when the layout is back up, it would make a great addition to a layout.
Jamie-
18
-
-
1 minute ago, Compound2632 said:
Splendid. I've had one sitting in the to do pile since it came out - a bit intimidated by rolling the plates, but I've now got a set of rolling bars... Not so long ago @Jol Wilkinson commented over on the Small Suppliers subforum that he'd not seen any of these built on RMWeb, which made me feel doubly guilty!
Definitely solder the tank plates together before rolling them (as per the instructions). With the centre tube it will just form by pressing it around that, but I suspect using rolling bars will make it far neater than my build.
Other than that it goes together really easily. I used 180 degree solder for the brass tank sections, and low melt for the white metal and the parts once attached to the brass, with the exception of the top of the six tank supports which I went back to the 180 degree solder for.
Hope that helps.-
1
-
 1
1
-
-
Just discovered your thread, this look a lovely project.
As someone who commuted through London Bridge Station and worked in the Corn Exchange on Southwark Street (probably just outside your area covered I suspect) many years ago this is must to follow, plus I love urban layouts and your buildings look really good.
Thank you for posting.
Jamie-
3
-
1
-
 1
1
-
-
- Popular Post
- Popular Post
My first brass/white metal wagon kit. A lovely model from London Road Models picked up at the York show a couple of weeks ago. Pretty much built as per the instructions, with a couple of tiny additions and couple of mistakes along the way. Do solder the tank plates flat as instructed and don’t bend them to see how they fit before soldering them together. Still, it makes for a well worn 60 year old wagon that will fit my layout well.
I did find the closeness of detail on a wagon kit a little more challenging for my level of soldering compared with a coach or loco, but it was a really enjoyable build and a bit of filing, sanding and Wet & Dry has sorted out most of the solder spills.
My second London Road Models kit, and as well as being lovely people to have a chat with at a show, they do make lovely kits. Maybe a L&Y big boilered 0-8-0 at some time in the future, not quite right for my layout, but far too tempting to resist for long.
I have posted more details of the build in my Elerby thread linked in my signature.
Thanks for all the encouragement and knowledge from contributors to this thread, to the members of Leeds MRS and of course Tony Wright.
Jamie-
29
-
Hi
Back to a bit of modelling. Really nice to just build a kit, rather than scratch building or partial scratch like the TransPennine, which although very rewarding takes a lot longer as you have to think (and by which, I mean procrastinate) about very little bit you do.
AT the York show a couple of weeks ago as well as seeing a lot of the people from LMRS, which was lovely, I also bought a London Road Models MR tank wagon kit.
I built it pretty much as described with a couple of mistakes and a couple of additions. I rolled the tank plates to see who they fit before soldering them, so the shape of the tank is not that of a perfect new wagon, but will fit the part of a 60 year old bashed about tank wagon for my layout.
I didn’t like how the waning handle on the filler was done, and tried my won version, which snapped off, and then looked at photos of the real thing (Paul Bartlett’s site) and made a better fitting out of a cut down grab handle fitting, with the wire through that, and soldered onto a shaped bit of brass offcut. I am pleased with the result.
I added brake hangers, although the very small ones at the centre of the brake gear I left off, and I added Smiths couplings. But made then solid instead of sprung as I doubt it will need that, hence the brass soldered to the inside of the frames.
I also didn't punch out the rivets on the top ot the tank braces, but used some rivet strip. It would have been better punched though.
A wagon with so many details is a challenge for my level of soldering, so lot of sanding, Wet & Dry and filing to finish things off. Compared with a coach, or even a loco there are a lot of small parts close together, and bit of solder ran or I was too heavy with it.
I am very pleased with the result, which may have to wait for some etching primer, which I will buy when I am ready to do the next lot of painting on the TransPennine.
Lots of photos, in chronological order.
Hopefully more soon.
Jamie-
15
-
 1
1
-
-
That is wonderful urban building modelling, you could post it in the ‘Show us your scratchbuilt building’ thread. A very inspiring thread.
https://www.rmweb.co.uk/forums/topic/74067-show-us-your-scratchbuilt-building/page/77/
I suspect there may be a few who would like to buy your stonework details, although some would no doubt paint the roses the wrong colour (subjective depending on which side of the Pennines you live).
Jamie -
Just a post to say I am still around, not much if any modelling, other things have taken priority.
I have rewritten a bit chunk of the degree course I lead, which takes ages, and has lots of forms. Apparently you can’t just say we’ll do a bit more on the editing modules and a bit less on the self-motivated research module. You have to prove that it is all fits the outline of the course and satisfies the academic standards set for a UK degree. I’m joking, I take it all very seriously, and I love teaching on the course at Salford.
There has also been some sad news from both my and my partner’s sides of the family, so that has knocked us back a bit.
I have also been doing some artworks for vinyl releases, which has taken up all my creative energy. I can’t share them as since I’ve been paid for them, so I don’t own the copyright. I do think they are some of the best covers I have created though.
The main bit of news is that we were planning to move this year, but now that has been put back a little as we may have better funds to allow us to get somewhere much nicer and with space for the shed to go back up, and when that happens modelling can start again in earnest and Ellerby will hopefully being running again.
I suspect 3 years being stored in the garage here will mean that there will be a good amount remedial work to be done, wiring. There was a bit of track I wanted to relay, and I might also consider changing the DCC controller as I suspect there are better control systems out there now than the Gaugemaster I bought in 2008. If I stick with that, the hand controller needs a new speed potentiometer, and Gaugemaster charge to have those replaced (not part of their guarantee that everyone think exists for everything).
I will also have to check the shed is all OK and rebuild that, but this time I think I will get an electrician to do lighting and heating and might get a builder to make a proper base so there is no cold coming in from underneath.
So hopefully a big year for the layout ahead, but not much in terms of modelling but just getting it all back to where it was 3 years ago.
Jamie-
4
-
7
-
-
- Popular Post
- Popular Post
On the subject of recreating a specific time for a railway location, I did my Master’s in Film dissertation on that subject.
Here is an animation of the build for one of the shots combining shoots at Pickering Station and York Station with stills, model shots and stock images. I didn’t know at the time that the ends to the station roof were replaced in the 60’s, and repainting the colour of the end roofs would have been far too much work given the time for the work.
https://www.jamielochhead.co.uk/jpegs/Trains/StationBuildv01.mp4
You might have to click the link for the video, it is on my website, not a video sharing site. I would be happy for someone to PM me so that I can insert a video, if it can be done. Here are a couple of stills from the clip.
The luggage is also far too close to the edge of the platform and its perspective need a bit of tuning, but its function is to hide the people’s feet which I couldn’t remove. Obviously a film shoot would have a clear platform and no one taking flash photos of the train, I didn’t have that luxury. For a limited budget, I feel it was pretty successful, and in terms of the research it worked very well.I was aiming for York Station in 1957, I made 3 versions all with different inaccuracies, and then got feedback from a focus group of people, some from this forum, some from model rail clubs, family and fellow students of different ages on the course.
I also interviewed the Visual Effects Supervisors of ‘Band of Brothers’, the second ‘Nanny McPhee’ film and the pre viz lead for ‘Hugo’.
My conclusion was that it wasn’t so much how accurate you can be, but who the film (or models in the case of this thread and forum) or work is aimed at. If the audience is yourself, then rule 1 applies, but beyond that I feel it is mainly a case of trying to satisfy your perceived audience.
For the ‘Nanny McPhee and the Big Bang’ the Visual Effects supervisor was asked to create London in the 1940’s as seen by a child, lots of barrage balloons and sandbags, not many bombed out buildings. For ‘Band of Brothers’ the production strived for as much accuracy as possible given they were representing a very important time in the lives of people still living. They even built a replica Tiger Tank, but I think it has one too few wheels at the side given the tank it was converted from, but when shot in the series that was not apparent.
For my short piece, I found that even people who knew York station well did not pick up on some things. The only people who picked up on the semaphore signals being out of time (changed to light signals about 1951 for the East Coast Main Line around York I think) were those who had built a model of another ECML station set in the early 50’s. Most people, me included, missed the wooden roof ends.
I know that this forum has a great deal of knowledge and so work shown here is presumably aimed at experts, but I think when you start to get to that level of knowledge it is impossible to please everyone.
Personally, I think that getting a feel for things is what I am aiming for, and that allows for a degree of flexibility. Generally, people expect to see semaphore signals alongside steam trains, regional coloured station signs, and similarly for other periods. There was no one day when all steam locos, semaphore signals and red coaches disappeared, but in terms of feel there are certain things that fit well together.
I suspect it is just the same for experts in any field, if you watch ‘Downton Abbey’ with an antiques expert I am sure they could find plates that were not made in that specific time, similarly for costume, or any of a number of departments. Both films (and TV) and modellers do their best, but ultimately there will always be some suspension of disbelief.
I am building (very slowly) a layout set in a fictional location, so I do respect that those building a real location and at a specific time are aiming for something more demanding that I might set for myself.
Edit: Here is a link to one of the 3 versions of the full piece, 1.11 mins, each had different inaccuracies for the research, plus those I made anyway.
https://www.jamielochhead.co.uk/York1957/York1957Blue.mov-
10
-
6
-
4
-
1
-
Not great photos, sorry.
Working on the dive chassis for the Buffet car, still to do a bit of leveling. I might have to remove the patch I added to the arch over the motor, and make it a bit lower. I will also have to level out the bogie outside which is riding up a little on the far side in this photo.
I also think I have found a problem with the Worsley Works etches. They appear to be missing the two thin windows wither side of the back door.
The windows are there on the DC Kits, or maybe Silver Fox version.
This was already a replacement as Worsley originally sent two of the other side. I could let them know, but I suspect they might not be very happy to be asked for a second time for a replacement.
A partial solution would be to cut the etch and the spare at the door and patch that on the end. I have a feeling that cutting out the window from the etch is likely to result in damage, or bending to the etch. Mu gut feeling is to do the partial patch and live with k owing one window is missing.
Toughts?
-
1
-
2
-
-
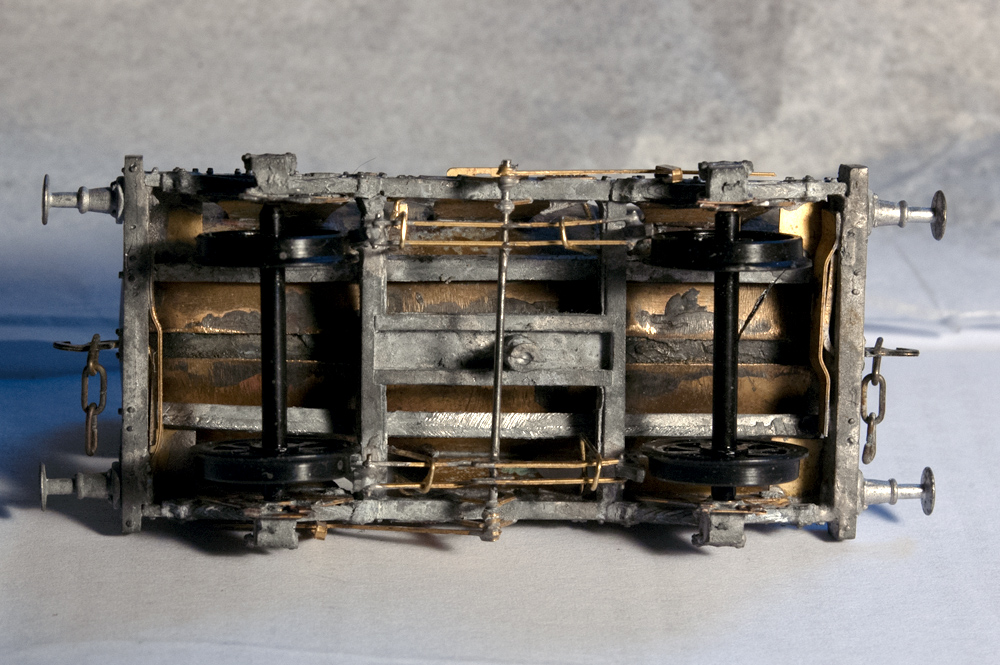
A couple of photos of a High Level Lo-Rider motor bogie. Really lovely kit, recommended to me by Mike Edge for a Class 124 TransPennine I am building. Comet chassis, and various other parts for the bodies.
The Lo-Rider is designed as a replacement for Hornby and Lima bogies, but it can be modified for other builds. I have used the mounting points to add scratch built top bracket and that fits through a top mount on the chassis.
The top mount adds a couple of millimetres to the height, but still as low as a Replica Railways motor chassis, and only at a fifth of the chassis, not the whole length. It will be interesting to see it compares in power to that, but if necessary, I could add a another motor bogie to one of the other units.
-
14
-
2
-
-
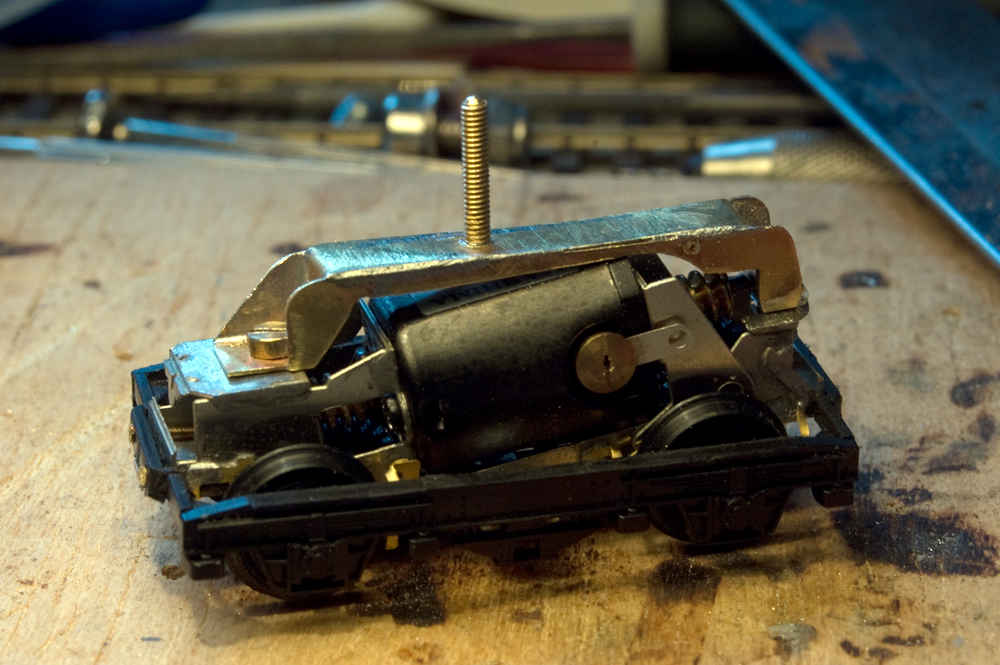
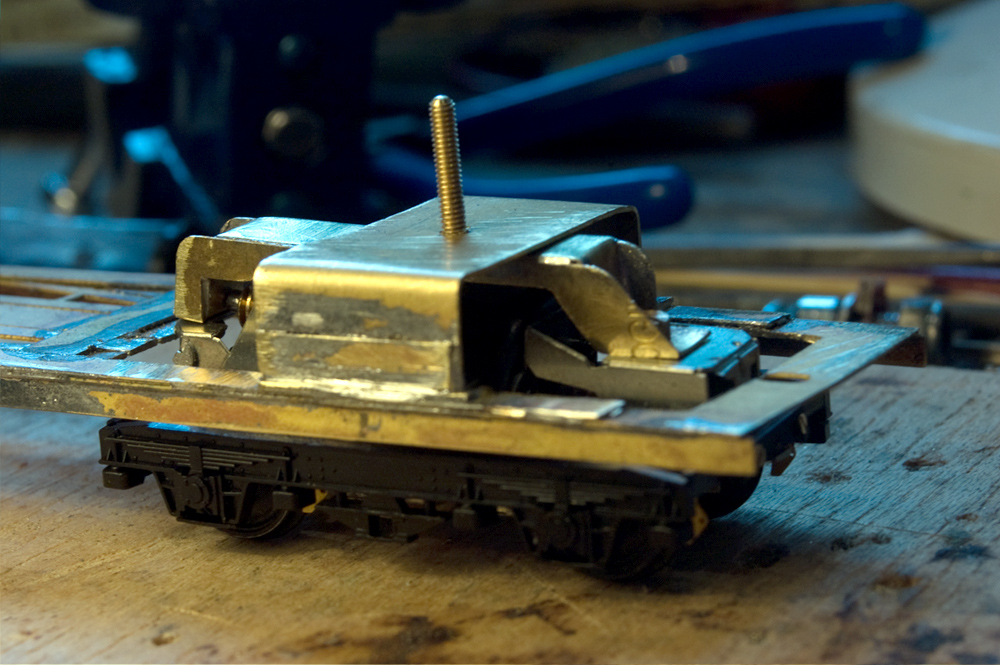
I have built a top mount for the bogie. As it will take the force needed to pull 6 coaches/units (unless I find I should add another drive unit in the adjacent car), a brass strip bent to shape, reinforced at the sides with brass from off-cuts box.
I filed the sides back so that they are clear of the top of the motor, and they screw into the holes designed for the compensation (which I haven’t used). The bolts were cut down with nuts in place to allow their unscrewing to re-die the threads.
The wheels have a little side play, I could add more washers if I find it is too much. The etched brakes are pulled clear to prevent shorts (hopefully).
The pickups and wiring are still to do.
The Trix frame is pretty much left intact, just the bottom for the wheel mountings cut away, and screwed on with the bolts provided in the High level kit.
The chassis mounting is made from the section cut out, bent and drilled. The protruding bolt will be cut down to size, and washers will be used to adjust the ride height.
It all needs testing and painting, but it has been a really good build, and again thanks to Mike Edge for the recommendation and to High Level kits for the bogie kit.
-
9
-
-
Hi
I am looking for a supplier of Polyol 23 as I have had good results for casting parts for both rolling sock and buildings with it in the past, but I am having some difficulty in finding it on-line.
A should have kept a scan of the receipt in my modelling folder, but I can’t remember who I got it from last time, about 5 years ago.
Does anyone know a good supplier of that resin?
Failing that is there a similar resin you could recommend?
I used to pay around £20-£25 for 1 litre pots I think.
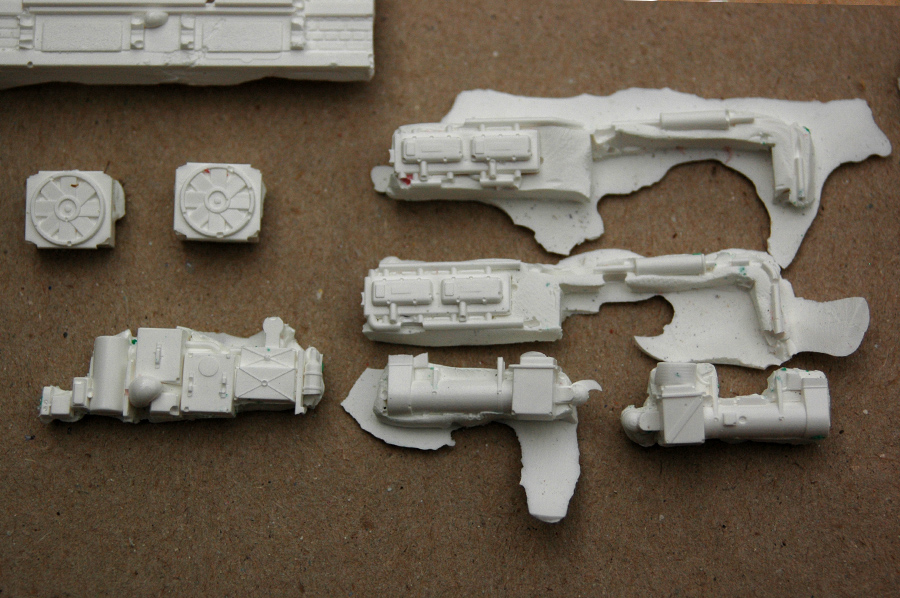
Just to give a bit of life to the request, here are some examples of models where I have incorporated resin casts into them.
A few bubbles in there I know, but with a little filler they make really good parts for DMU underframes.
Here are a couple of photos on underframes in progress with a mix of resin, brass and white metal parts. The cab roofs are also resin casts.
A building in progress where I have cost off sections from a Kibri kit to make a much larger build.
Brickwork painted, and a cast dome at the far end too.
Jamie
-
8
-
1
-
-
6 hours ago, Ozexpatriate said:
He is responsible for the Russ Wilson deal. Seattle fans were upset at the time, but they're probably breathing a sigh of relief.
It's difficult to explain how the QB that took the Seahawks to two Super Bowls is the same player.
Better player than general manager.-
 1
1
-
-
16 hours ago, Tony Wright said:
I mentioned some little time ago that I'm conducting a series for BRM highlighting 'budget modelling'.
I've acquired some 'tatty' OO locos and stock at very cheap prices (thanks Elaine) with a view to tidying them up, improving them, detailing them to turn them (I hope) into 'presentable' models.
However, what does one do with something like this?
This was given to me by Elaine of Elaine's Trains. I wonder who thought this was a good idea?
Anyway, as well as buying some low-cost models from her, I also bought this.........
A second-hand Hornby B12/3. The previous owner had done nothing to it, other than install a decoder in the tender; meaning it was DCC 'On-Board'. All for £75.00!
I certainly think this qualifies as 'budget modelling', given that it's such an excellent model at source.
Guess what was the first thing I did? Yes, get rid of the decoder (a Hattons' one - I assume that it's at the 'low-cost' end of chips?).
And the second thing? Fix all the extra bits supplied by Hornby.
Photographing this, set me thinking. With the discussion regarding RTR or kit-building, what about this below for a comparison?
I built this from a PDK kit which Ian Rathbone painted.
How does it compare? Well, from the 'cost' aspect, £75.00 wouldn't buy the drive which is in this! Then there's the cost of all the other components, plus the painting price.
If anything, the Hornby driving wheels have better-looking spokes than the Markits ones under this.
Of course I've had the 'pleasure' of making this model, which is difficult to put a price on.
And, on the layout.............
I've added lamps, a crew and put real coal in the tender.
Which are pre-requisites for any loco I build/modify.
The Hornby one is a bit 'bulled-up' in comparison, though I do have a picture of 61576 with brass beading on the splashers (though I'm not sure about the highlighted hinge straps or dart). Anyway, it'll be renumbered to a South Lynn-allocated B12 and weathered.
There are two things where I think the Hornby B12 doesn't compare quite so well. It doesn't have the subtlety of Ian's painting (which is exquisite) and it can't take 'The Leicester', which is loaded to nine cars, six of which are metal kit-builds. This one, being packed with ballast, has no trouble.
I would also add that the small details do not seem anywhere near as good as your model. Yes, the overall Hornby model is very nice, and the body very good, but guard irons are too thick and plasticky as are the details ahead of the splashers, which are not helped by being picked out in red. Similarly for the brake gear.
It may be an optical illusion but the front bogie wheels also look too wide compared with your PDK kit. The cab glazing is made to be handled and not break but doesn’t have the subtlety of your build.Small details like the wire from the side of the boiler are rarely fitted to RTR locos, and are difficult to add to a plastic model.
Such details are easier to fit and stronger when made of metal and can be soldered on, so part of the comparison is the benefits of working with brass and metals compared with plastic.
Ian Rathbones’ painting does make a huge difference as you say.I do have a Hornby B12, and think it is a lovely model, but compared with your build it doesn’t have character, and somehow feels too precise compared to the original engines which had a lifetime of wear. It is a nice model to start detailing though.
I bought it second hand missing a guard iron, so rather than adding one replacement, make new ones for both sies would be an improvement. Personally, on the plus side, but definitely a negative for Tony, it has a quite an expensive DCC sound chip fitted and sounds great.-
3
-
1
-
-
I just heard that a lot of women feel sympathy for the New York Jets fans, they are very familiar with ‘four plays’ followed by a lot of disappointment. 😀
Still better than being a Broncos fans this week, which I have been for over 25 years. This is definitely not an John Elway, Terrell Davis and Mike Shanahan team. I had high hopes for Sean Payton leading the team this year, maybe time to get a brown paper bag to wear over my head. I must admit the Dolphins look amazing this year, but still no excuse for 70 points.
-
1
-
-
Once I started putting the next pieces together it went quickly.
I left the PCB to set overnight glued on with Aradite.
Fitting the brakes was actually really easy and they will not foul the pickups.
Worms glued on (Loctite as advised by everyone here), it really takes quickly, I wanted to adjust one of the worms a little, but it was done. They work fine anyway.
A couple of the end plates cut to fit across the ends, and the tiny screws fit the end of the Trix outsides really well.
Very happy how it has gone. Although it is designed for Hornby or Lima bogies it adjusts to scratch building well.
Still to do, fit the pickups, cut down the bolts to fit the top mount. Make and screw on the top mount from brass strip. Then measure the depth, build and fit the bogie at the other end (with pickups added). I have to remember how the piping down the sides of the chassis fit below which changes the depth of the bogie mount a little. After that, build to chassis part of the mount, probably from the section I cut out. I do have to bear in mind that all the traction for the DMU will pass through the top pivot, so I will use wide washers to prevent it riding up and pivoting vertically around that point.
I could have done with a little more light for the photos, so have had to sharpen them a little in Photoshop, which never looks good. Still here are the photos to show today’s progress.
Enjoying this build, very grateful to Mike Edge for the recommendation. Doing the test runs of the motor, it does feel quite a powerful motor and assembly, so I will see if I can get away with just one power bogie, but will double up if necessary. I will also have pickups on all four of the centre bogies on the 6 car set, and it will run through a DCC chip.
Thanks for all the likes on the thread too. One of those lovely mornings when you suddenly see several dozen ticks as someone has browsed through a large section of the thread. A big thank you for that, and for everyone who tick or comment as the posts go up.-
10
-
-
Thanks for the advice, I will glue the worms in position with Loctite.
A couple of photos of progress. Motor just sitting in position and the chassis with a cutout ready for motor bogie.
The start of term has meant a lot of time being put into work, but also, I have been quite ill for the last three weeks, including a visit to A&E, but to a large extent due to GPs not being interested in seeing their patients these days. Feeling better now.
Anyway, pleased with how it is going. Trying to decide if I want to put the etched brakes I have on this bogie, my gut feeling is that you wouldn’t spot them if there or not in the middle of the train. That said, there is always the problem that I would know. Which would always irk me.
-
6
-
3
-
-
9 hours ago, Ozexpatriate said:
I don't listen to the noise, but it's not blindness, it is data.
The NFL is more and more dependent on elite quarterbacks. In the last 10 Super Bowls, only four were not repeat wins for a QB and one of those was Patrick Mahomes' first win. (The others were Russ Wilson, Matt Stafford and Nick Foles.)
The other six wins were repeat wins - Peyton Manning, Brady, and Mahomes. Recent data would suggest a Super Bowl-winning QB gives a team a 60% chance.
With the exception of Foles (who was a late season backup, and that delightful Eagles win, over Brady and the Pats, was a bit miraculous) all of them were high-performing (if not elite) QBs.
Besides Flacco (XLVII) you have to go back 20 years to XXXVII to Brad Johnson and the Bucs to see a non-elite QB win a Super Bowl.
I think with the defence The Jets have, they are more similar to The Ravens and Steelers who both won with less than elite quarterbacks, Flacco and Rothlisberger was still developing at the time.
I think they would have been a lot like the 2015 Broncos, with an experienced, but past their best quarterback and a great team around them. When Manning retired though it might be cautionary tale for The Jets.
Tom Brady could be considered the best quarterback ever, but his first Superbowl win was coming off the bench as a sixth round pick to replace Drew Bledsoe. Similarly to some extent for Kurt Warner with the Rams for Trent Green in 1999. Neither were known quarterbacks before their first, and quite amazing seasons.
Last year we had an ‘almost’ from the most obscure quarterbacks you could name in Brock Purdey, had he not been injured in the NFC title game.
Zack Wilson has been tried, and is definitely not a Brady or Warner, but might aspire to a be Flacco, which I feel is The Jets best option. Go defence first and don’t lose the game with the quarterback option right now, and maybe get Flacco back as backup.
I think you are right about the pedigree of the likely winner of this year’s Superbowl, given the dependency on quarterbacks and the number of outstanding ones currently in the game, particularly in the AFC, two in the AFC East alone.
-
So many US sports journalists talking about every quarterback who has retired in the last three years as a replacement for Aaron Rodgers. They are so blinded by the cult of celebrity and seem to think that the only QB who can lead a team to a Superbowl is someone who won one before.
Joe Flacco would be a great backup, he’s been with the Jets recently as well, but he isn’t going to learn the offense in the next week, and the others out there retired because they couldn’t play anymore. Brady would still have something, but why would he want to be a replacement for Rodgers? Too much ego between those too.
Thankfully The Jets coach Robert Sala is talking about his QB Zack Wilson’s performance and how they won the game, and so are a few sensible journalists.
Personally, I am sick of Aaron Rodgers who seemed to learn from Brett Favre how to be as much of a soap opera as he did about play on the field. As a Broncos supporter, I am no fan of the Jets offensive coordinator Nathanial Hackett either, but I do like Sala, and hope he pulls through this. The rest of the team are good, the defence amazing.
It was an interesting first week, The Chiefs, Bills, Ravens, Bengals and Chargers all lost. Maimi and Dallas looked amazing, as did The Lions, but it is week one, overreaction time for journalists and fans, I’m sure a lot of things will even out in the coming weeks.
-
1
-
-
25 minutes ago, Michael Edge said:
Cyano is fine for fixing the worm but you need to be very careful with the gears on the axles, it can easily creep along and lock the bearings. Personally I hate this sort of thing and would always go for grub screw fastening, I spent many years encouraging Chris to do it with all his gearboxes - maybe the Lorider is still the old design. Another option may be to raise a burr on the axle where the gearwheel fits, you can do this by rolling the axle with a rough file.
Thanks Mike. I had already used glue on the gearshafts. The axel is OK as it is a tight fit. It will be cyano for the worms as you suggest.
Thank you for recommending the 'Lo Rider' bogie, it is a really nice little kit to build.
Jamie


Wright writes.....
in Modelling musings & miscellany
Posted
Interesting, I suspect the negotiations were not accurate, but loss of life on the final day of WW1 was represented very well, and even if the negotiations were not completely accurate it showed how senseless the attacks that took place after the signing of the peace treaty before the 11am armistice came into effect were.