-
Posts
1,379 -
Joined
-
Last visited
-
Days Won
1
Content Type
Profiles
Forums
Blogs
Gallery
Events
Exhibition Layout Details
Store
Posts posted by Jamiel
-
-
23 minutes ago, Barry O said:
Jamie Airbus and Boeing superglue wings together...
Make sure the worm, gears and brass rods are clean. You can use cyano to glue the gears and worms to the brass and steel rods with care.
I have a few HL gearboxes which work OK using the glue as described.
Baz
Thanks Baz, that reassures me about the bogie build, but does not help my dislike if flying much!
Thanks as well Lez, all good advice.
On with the build.-
 1
1
-
 3
3
-
-
25 minutes ago, Izzy said:
I’ve used a few HL boxes now and my method is to use a little cryno to keep the worm in place, and cut the shafts very slightly over width, so a very small amount sticks out, and just dab a bit of cryno on the outside furthest from the particular gear just to hold them in place as the forces are rotational and not sideways. Are the final drive gears not screw fit now as most of the others are? Much better.
Bob
Thanks for that. The cogs don't have the grub screw like the Comet and similar gear boxes I have made before, so the glue will be doing the work there. -
A question.
Is cyano/superglue really a good solution for joining steel to either brass or plastic?
Motor and gears sitting place on a High Level kits ‘Lo Rider’, before setting them in place.


In the instructions it says to glue the worm gears and also cogs and bushes in place using cyano/superglue.
Is cyano really OK for a brass to steel join? Won’t it dry and fail? I suspect plastic to steel will be better with cyano.Maybe I have a prejudice against cyano staying stuck in the long run.
I may not be reading the instructions well, but it seems a bit unclear as to how to locate the gear shafts in place. Should I burnish the ends with hammer to spread them a little, or should I glue and pack spacers inside the frame.
Just to say it is a nice kit, and I am maybe over thinking things, or maybe just being a bit dumb.
Any thoughts and advice would be appreciated.
Jamie
-
 1
1
-
 1
1
-
-
A question.
Here are photos of the motor and gears sitting in place.

In the instructions it says to glue the worm gears and also cogs and bushes in place using cyano/superglue.
Is cyano really OK for a brass to steel join? Won’t it dry and fail? I suspect plastic to steel will be better with cyano.
I may not be reading the instructions well, but it seems a bit unclear as to how to locate the gear shafts in place. Should I burnish the ends with hammer to spread them a little, or should I glue and pack spacers inside the frame. Plenty of spacers, both washers and plastic tube are supplied.
Any thoughts and advice would be appreciated.
Jamie
-
I picked up a few things at the EM gauge North expo in Wakefield a couple of weeks ago, as well as seeing some lovely layouts. A nice chat with a few people as well. London Road models have a lovely tanker kit as well, but they sold out the first morning, so that will be something to get hold of soon. See https://www.rmweb.co.uk/topic/179635-london-road-models-new-kits/
One thing I got is a High Level Kits ‘Lo-Rider’ motor bogie, as recommended to me by Mike Edge.
I have started putting it together his weekend. A nice etch to build, very well made. There are a few variations if you wish to use Hornby or Lima mounts, but I have followed the suggestion to build the frame with all parts retained if you are using it for a kit of your own.


I did open out the holes for the front end gearshaft a bit too much, so I took it out to the width of the axel bushes and fitted those to the bogie frame rather than the gearshaft. It turns well, and I will just have to use a bit of packing, or the washers to hold the cogs in the correct place. I am sure it will work fine.

I have made the bogie uncompensated, partly as the layout doesn’t have any inclines, but I also feel that since this will mount on a pivot above the centre of the bogie that will allow for any rocking needed for good track adhesion.
I have added an extra nut on the back end of the bogie so that I can screw on an arching piece of brass to hold the bogie, copying how Steve Johnson used the Lo Rider on his Glasgow Blue Train.
http://www.stephenjohnsonrailways.co.uk/images/Class-303-Motor-Bogie.gif
http://www.stephenjohnsonrailways.co.uk/Class 303.htm
On a completely different subject, a couple of weeks ago I discovered that one of the bootleg cover artworks I had made and shared for collectors has been used for a vinyl release, but more than that was included in the rock photographer Ross Halfin’s book on collecting Led Zeppelin vinyl. I was asked by a well-known Led Zeppelin collector to make a cover in the style of ‘Sgt. Pepper’ a few years ago. I am happier about it than I look.


I did know about this artwork being used by the label Swinging Pig, and they even credited me on the cover. I did have to go to Ebay, or maybe Discogs for a copy though, which cost me a few £s at the time. Still a nice thing to own and one of my favorite artworks I have made.

This week was also my first anniversary of moving to Salford University to lead the BA in ‘Post Production & VFX’. It is a lovely place to work, a very supporting atmosphere and I inherited a great staff for the course. We had great student feedback at the end of the year too. It has been a very good move.
Anyway, more on the motor-bogie soon and class 124.
Jamie
-
 10
10
-
 1
1
-
 1
1
-
 2
2
-
-
- Popular Post
- Popular Post
Here are three parcels train photos from the Facebook group ‘Rail Thing - REAL Trainspotting (1945-1968)’
https://www.facebook.com/groups/rtRealTrainspotting
The first has such a wonderful mix of rolling stock, a Class 28 in Furness in 1968, with a slightly wonky front right buffer (hard to not straighten that when modelling).
There was much discussion of the wagons and coaches behind.
Lots of LMS design vans (maybe a Stove R near the back?), and a GW Fruit D van between the Mk1 GUV and the Mk1 BG (in blue and grey).
Last two are Thompson BZ, with what looks like a SR PMV ahead of the GUV
Photo by taken and shared by Ian Thompson

Leeds City Station, West Yorkshire, 19th July 1963.
Dave Chatterton spotted a Holbeck Black Five 44828 shunting parcel vans.
Shared by Edward Bear
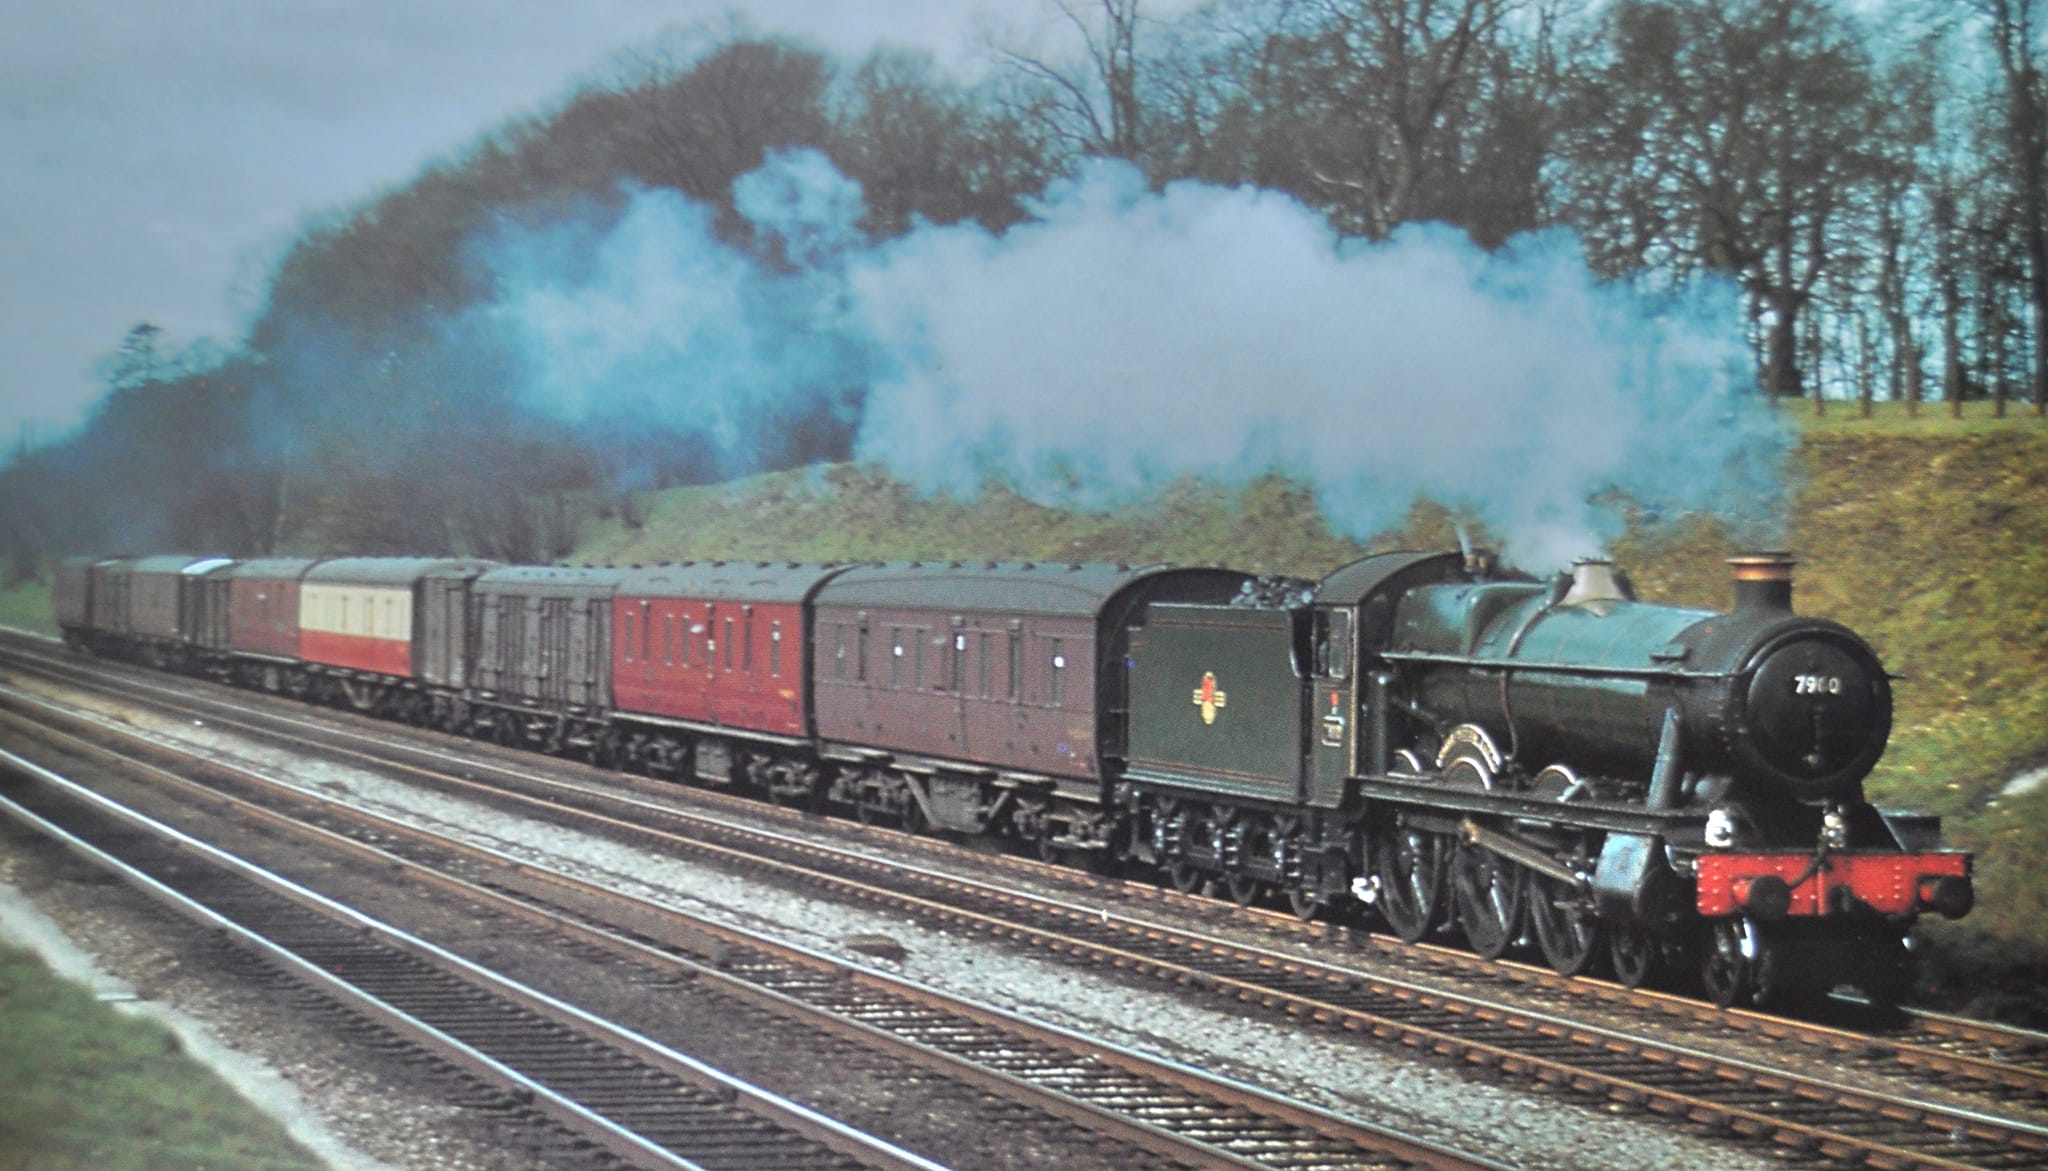
Hall 7900 on an up parcels at Twyford. I don’t have any further information about this photo, but it has a lovely mix of rolling stock in the train.

I am not sure where I got this last image from, I did search this thread as it would seem a likely source, but nothing came up. Apologies if this is repost, or is indeed your photo
York 1981, a Class 40 on the Redbank parcels, all MK1 brakes and GUVs I think, but such a lovely photo.

-
 34
34
-
I saw one of the Midland Railway D838 Coal Tar/Creosote Tank wagons at the Wakefield show today, they look just as good, if not even better, in real life.
Evidently others thought so too, as all the kits had sold in the first few hours, but more will be available from the on-line shop soon I was told, so I will be making an order very soon.
-
 3
3
-
-
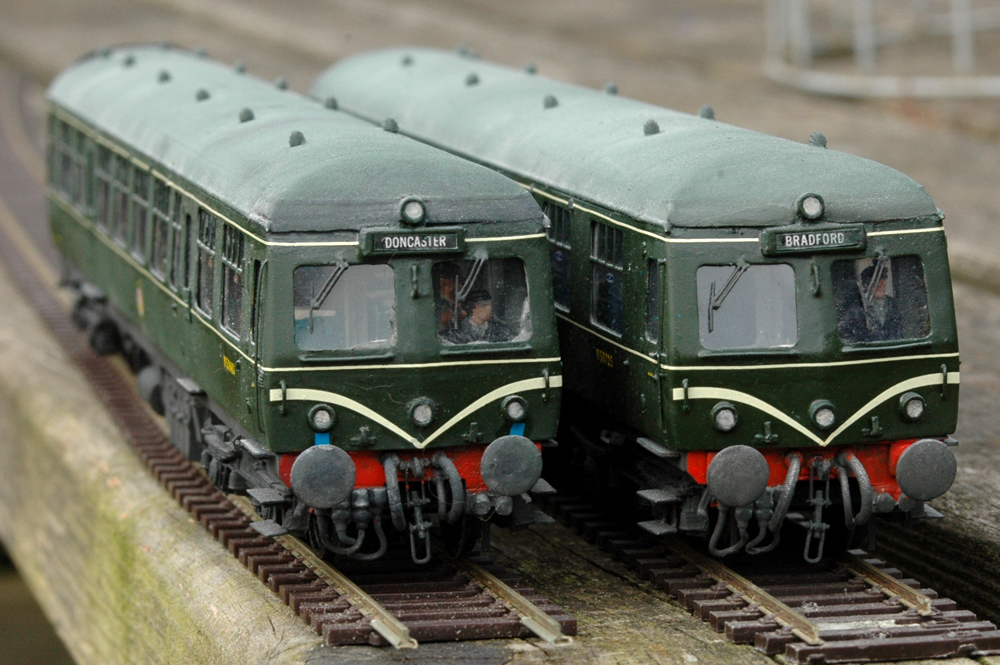
I would add the Class 124 Transpennine in the cross country DMU category. Not much change since my previous post on my build. A bit of glazing, and few first class transfers added inside, now the joy of adding curtains to come.

Looking at the cost of the Bachman Blue Pullman, a six car DMU would certainly be a hefty outlay for many modellers, so I can understand the reticence of the RTR manufacturers. DMUs by their nature of usually being short haul trains quite based around certain localities, so it isn’t like an express locomotive something that would pass from one region to another, or a BR Standard loco which was assigned to many different areas.
Perhaps we should instate ‘law 2’, if you build one, a RTR manufacturer will release on 18 months later.
I love the joy of building stock, but there is also something special about having something that cannot be just taken out of a box, as Tony Wright has said many times about ownership of stock you build yourself.While talking about builds, I have a couple of questions for the thread.
Do people add extra weight to a coach (or DMU unit) with a brass chassis and body? The roof and ends in my build are Replica Railways MK1 plastic coaches, so slightly lighter than say a full Comet kit coach.
I am planning to use one High Level Kits ‘Low Rider’ bogie to power a 6 car DMU set of mostly brass build (as above), is that likely to be enough on layout without any inclines?
Also, in a 6 car unit, how many units would people recommend having pick up current from the track. I am planning both bogies on the drive unit, one of the two middle ones, but could run some pickups and power through from other units. This question might just be the inverse of how good is the writing on your layout I know.
Any advice would gratefully appreciated.
Jamie
-
 7
7
-
-
Edit of my previous post, it looks like the website was briefly offline and I tried at the wrong time.
Jamie -
Thank you, Phil, St Endoc and Barry, for your replies. I will get in touch and sort out visits, modelling and maybe a drink too.
A bit more work this last week.
Glazing being added to one of the DMBs, a strip of LEDs has also been added to the roof and wiring done. I also painted the inside cream.
Two attempts at the glazng, I didn’t get the glazing flush with the top of the windows an when I tried to nude it up all the Glue ‘n’ Glaze smeared. It did not look too bad, but I knew I would never be happy with it, so I prized it off and started again.

Second attempt.


First class and no smoking transfers added.

Next it is the curtains and the interior bulkheads/doors/frames. That is ‘fun’ thinking back to the Class 120 DMU.
While it was drying is also decided to fix the tanker and CCT that the mice took bigger chunks out of. I decided that casting off the other end was overkill and just went for plasticard and filler. Sorry not the best photos.


Sanded/filed back, and one buffer replaced from a Dapol Standard 4 kit, plus a bit of a patch for the other one, that latter waiting to be sanded back. Definitely a layout wagon, the buffers might one day be replaced by cast ones on all the wagons.


Just filler on the old Lima CCT body. I tried adding detail by drilling holes, but it didn’t work so have filled that back in I also used a bit heated and stretched sprue bent to shape for the top edge.


Sorry for the poor photo, the holes filled and rivet transfers added.

The buffer bean and some of the underside could also do with some detailing, and maybe even flush glazed windows, which I seem to remember Shawplan do some.
Also, we are starting to look at possibly finding somewhere where we have a bit more space and hopefully the shed and layout being set up again, so after a slow period for modelling due to a lack of opportunity to run it, things might start moving again a bit faster.
Jamie
-
 9
9
-
-
Thanks Paul
The crane is really interesting, being a Midland/Eastern regions modeller, I hadn't seen anything like that.
I had spotted the yellow ends, and wondered if that was just a 70s livery. It does look like the batch you say, DW150392 on Paul Barlett’s page does have a very similar colouring, very faded too.
It would be a lovely train to model if you are doing the WR in the 70s. I must see if there is a good midland equivalent, but probably with not such an interesting crane.
Jamie -
I wonder if it is the same (type of) the coach seen in this photo from the mid 70s at Dawlish?
The roof profile looks the same, interesting white pipe, or maybe grab rail at frame level.
I presume with a crane behind it.
Photo by Colin Marsden shared on Facebook by Nigel Kidd, though 'Rail Thing - 70s UK Railscene'.
Jamie
-
 1
1
-
-
On 09/07/2023 at 20:27, farren said:
Lovely little loco to build. I am honoured that my build was helpful. I have PM'ed you some images in case they are good references.
Love your Claughton.
Jamie -
On 02/07/2023 at 17:37, Mallard60022 said:
Good afternoon J.
My first visit to your site and I am glad I did visit. I'm well impressed with your TP Unit.
You seem like a man after my own heart with Wagons and Vans, however you obviously have far more patience than me. However, I find making those to be a really relaxing and Mindful exercise. From 2020, through to the end of 2022, I must have made dozens!
Quick ask. I noticed the part Complete Comet Caprotti 5. Have you got that on the round tuit?
I made one some years back and that resides with the owner of Hills of the North and Grantham the Streamliner Years. You might have met him?
You also appear to have had conversations with Barry O of the Leeds MRC, on here at least? He is one of Red Leader's Wing men; Red Leader being Graham of Hills and Grantham! I mention this, as having a Visual Aid (my ex Caprotti B5 may encourage you to finish off that one of yours?
If you happen to know Graham I'm sure he'd loan it to you if it is still with him and if not, at least send you some pics.
I'm also happy to chat about it. I has been my most successful Loco Build, but I manged to finish it before Geoff Brewin passed away and he gave me a 2/1!!!!!!
I believe You live in York, so if you fancy a quick meet up at the Tap to talk Caprotti 5s, I'll pop up from Retford for an hour or so. Any excuse for a Pint!
Take care and I am pleased to hear that your new Position in Manchester is suiting you so well.
Regards,
Phil
Hi Phil
Sorry not to reply sooner, it has been a busy week.
Thank you for your comments.
With the Comet Caprotti Black 5, I am at point where I need to do the motion, but am not experienced enough to do that, so will seek help from an experienced modeller. I would also like to run the L&Y Class 23 a bit and check it doesn’t have any tight spots when on a layout. The Caprotti does seem to have a tight spot, so help will be needed there, maybe even using the experience of the first underframe and starting again and being more careful, or perhaps a visit tome Tony Wright for help.
I used to be a member at Leeds MRS, so I know Barry and many of the others there.
I am waiting for summer leave, or possibly later before taking on those tasks.
I am similarly in need of help finishing the Transpennine, as I need to get someone to roll the etched sides for the other 4 units. Although I manged to get the tumblehome for the driving units done, it is a bit rough, perhaps to be hidden with some light weathering.It would be lovely to meet up, but unfortunately my layout is packed away and my modelling takes place in my small work room, opposite my computer, so my place isn’t the best for visitors.
I like the idea of a pint and a chat about trains and model railways though. Let me get the planning for the next academic year out of the way and I will try and be a bit more sociable.
All the best.
Jamie-
 2
2
-
-
3 hours ago, Ray M said:
What is the first coach behind 40106? Looks like a rake of MK1 Pullmans, but I didn't think that the MK1 Pullmans had brake coaches, and it doesn't look like at pre-BR Pullman brake. Could it be a MK1 brake painted up to match, or am I wrong about the coaches? -
- Popular Post
- Popular Post
Class 124 Transpennine DMU driving motor brake in progress.
Worsley works sides, DC Kits cabs (reworked from EMU Class 303 cabs), Replica Railways MK1 coach bodies and roofs, Comet frame and detailing components, MTK bogies and detailing components, Trix bogie outsides, Craftsman Kits DMU detailing parts, A1 Models etched grills packs. Brass fret offcuts and various gauges of wire.Resin casts for all the following, a Trix Class 124 for the cab roof, from Dapol DMU detailing components for the engines, Stone heaters, most underframe boxes and also for the driver (and will be for the passengers).
An LED behind the headcode box and a LED strip will go in the roof, and then a layer of baking paper to diffuse and dull it.
Barbie Doll packing is used for the curved side windows (very important this one).

‘Mongrel modelling’ might be good term for this build. It also needs a good clean after using some ‘Duck Brand’ masking tape that left a gummy deposit on the sides and also ripped off paint on some edges. I guess you get what you pay for with masking tape, and I’m sure that was in a bargain bin somewhere, and there it should have stayed.
The other motor brake is a bit behind this and then just the other 4 cars to build, a couple have the underframes done, but I will have to wait until I can get the bodysides rolled. Lots of good suggestions here when I asked but I don’t have the skill to do them, so will have to pay to get the rolling done properly.
More on this build which has been on and off for a few years on my Ellerby layout thread.
-
 21
21
-
 9
9
-
Roof painted and retouching the edges that the cheap marking tape took the paint off. There is still a bit of tacky deposit from that tape, so more washing with white spirit and a cloth rather than paper, as you can see using kitchen towel has left a lot of dusty paper deposits.
Tank Grey was far too dark, so a layer of Humbrol Matt 140 Gull Grey has gone on. It will be duster with a bark grey or black, but the airbrush is a bit splattery for that the moment, so more cleaning before I try that.

This angle and light shows that I need to get the other body sides run through a roller to curve them. Normally it doesn’t show and a little weathering will hide it as well.


The back end needs more doing, obviously the corridor connectors, lower edge of the exhausts and quite a bit of weathering. This view will not be seen once the rake is all together.
The bogies need weathering too.
Still pretty much ready for the rest of the glazing, the interiors and the lighting, so I can get back to modelling rather than a bit of paint and then a day or two’s wait.
Marking all done for uni, moderation and exam boards, and then a lot of leave to use up. I have also been doing more CD artworks for bootleg groups and my website, which is fun to play with Photoshop.
-
 16
16
-
-
Since I last posted it has mostly been helping students with their final submissions and then the annual slog of marking. Some lovely work, some disappointments, but all in all I am very happy to be a lecturer at Salford University and not where I was before which is currently 2nd from bottom of the university rankings, and deservedly so from my experience. Enough schadenfreude against my old employer. Actually there is never enough of that.
I have done little bits of modelling between the marking and to be honest it was good for it happen that way.
I sprayed the roof with a mix of Phoenix BR Dull Grey 1966-85 and Humbrol black mix, but wasn’t happy with the colour, it felt a bit yellow to me. I also showed that I needed some undercoat. So I used Halfords Grey Primer, which worked well, but showed a few little pocks in the roof. I also realised I had the front three roof vents too far back, so prized them off and repositioned them.
A couple of rounds of filling, sanding and light Halfords priming, and I was happy.
I decided to try Humbrol Tank Grey Matt 67 for the roof colour, so here it is drying.
I also grave the underframes a prime, Phoenix Self Etch, until I ran out, then just went straight to Humbrol Matt Black. I also had a bit of Humbrol black satin that I used up on bits of the underframe. I will see if it shows, there is weathering still to do.
The airbrush is on its last legs. The air valve wasn’t moving, I tried pushing it with the back end of the needle and that got it working. The button was not reaching the valve, not sure if something had broken off, or the base of it is too gunked up to push fully down. I cut a 4mm piece of brass rod and dropped it in ahead of the button base, and that got it working. So not in the best condition but working. I store it in a coffee jar of white spirit, so the valve gets a bit sticky as it is wet, usually by the time I have done what I want to do it eases up. I would like to get a bit more out of it, and I don’t do fine work with it, just overall coats and fine layers of weathering.
The first time I masked the body I used Duck Brand Tape, made in China for the marking. AVOID at all costs. Where I pressed it on to the gutter at the top it took of the green, but that is easy to hand paint back. On the sides it left a thick tacky deposit of glue behind, which I washed off with where spirit. I went to the box and dig out better tape for the masking you see, and also cut paper to cover the sides so that the tape was only contacting the gutters.
Anyway, almost at the end of the marking and just some exam boards, year review and external examining, but I should have time for some modelling and leave to use up.
-
 8
8
-
 1
1
-
-
The cab roof glued on and filler to patch the join.


Sanded, filled, sanded and filled a few times to get it smooth. A thin Evergreen strip added for the ca roof join, this will be sanded back a little when it has set for a while.

The roof vents were cut off the Replica Mk1 bodies, kept in safely, and tiny rings added to bulk the base a little.

Side view. When I saw this photo, I went back and pushed the brass loop in tighter.

Front view.

I have stuffed a tissue in the cab behind the glazing so that the dust from the sanding doesn’t mess up the inside. The outside will be washed and dusted. Lesson learned from making the Bullied Diesel.
I am pleased how the roof is looking, a little more sanding and filing on the roof vents before painting. I will also hand paint the join under the roof lip.
-
 10
10
-
-
The front glazing done, fairly successful. It looks fine from above, but if you look up at the left side there is a little gap at the top. Not the best photos.


I didn’t mix the grey paint enough on the touch up, so it is still gloss, so I will repaint that inside the cab before fixing the roof on.
Away at work for the next few days, so no more work on the Transpennine until next weekend. Plenty of work giving guidance to students on their end of semester submissions though.
-
 9
9
-
 6
6
-
 1
1
-
-
Something I have been putting off for ages, but now have made a start, glazing the cab windows.
The one you see below is the third or fourth one cut for this place. First on was OK, but then I lost it. Next one fairly good but I realised that the bottom edge had to slope up a little to take in account of the angle in at the top of the sides. Next one scrapped in the rough stage, and now this one.
All cut from the curved edge of a Barbie box, courtesy of my daughter.
There are tiny notches to allow for the back of the under window grab handles protruding a little.
This is one piece covering the middle and left side window, one is cut ready for the right side. That too may get more versions until I am completely happy with it.
I painted a thin line of black around the inner edge of the window space, with enamel. I also ran a black marked along the edge of the glazing as well to try and avoid prism lighting on the edges.
Using Glue ‘n’ Glaze to fix, and held with croc clips from my modelling thingy. I also used a cocktail stick dipped in a little Glue ‘n’ Glaze in a bottle top to add a little glue around the edges.
Paper wound round to stop scratching.

When editing the photo, I saw some Glue ‘n’ Glaze had dripped on the lamp holder. I quickly got a scalpel and peeled it off while still tacky. It was all over that lower edge.
Leaving this for an hour to make sure it is really set before adding the right window.
Jamie
-
 7
7
-
 2
2
-
 1
1
-
-
- Popular Post
- Popular Post
I had a lovely chat with Tony at the end of the first day of the York show’s first day last week. I thanked him, and by inference, everyone else who contributes to this thread for the inspiration to me, and other modellers.
Tony asked if I post to the thread, which I do very occasionally. Here are some photos of current and past work to give some contribution. I am a particularly slow modeller, so I tend not to post in progress work here, as the finished things may a be a couple or more years away. I am also very bad at starting new project before finishing the last one.
Class 124 Transpennine DMU, 6 car in progress.


Thank you for suggestions for curving the tumbleholme on the Worsley Works etches a while ago. I tried various suggestions, but think the safest thing will be to pay someone with a roller of suitable length to do the rolling. I don’t have the expertise to do it myself without the worry of ruining an etch.
The 124's are a mix of Worsely Works, Comet, MJT, Replica Railways, DC Kits, Craftsman, A1, Dapol spares/cast off in resin, and host of other bits.
Class 120 Swinden units, a bit dusty from sitting on the shelf. Middle unit still in progress, waiting for some parts.

Class 129 parcels unit, tempted to lower the bogies/frame on this a little.

L&Y Class23 from a London Road kit. An actually finished project.

Comet Caprotti Black 5, needs finishing, probably with a little help.

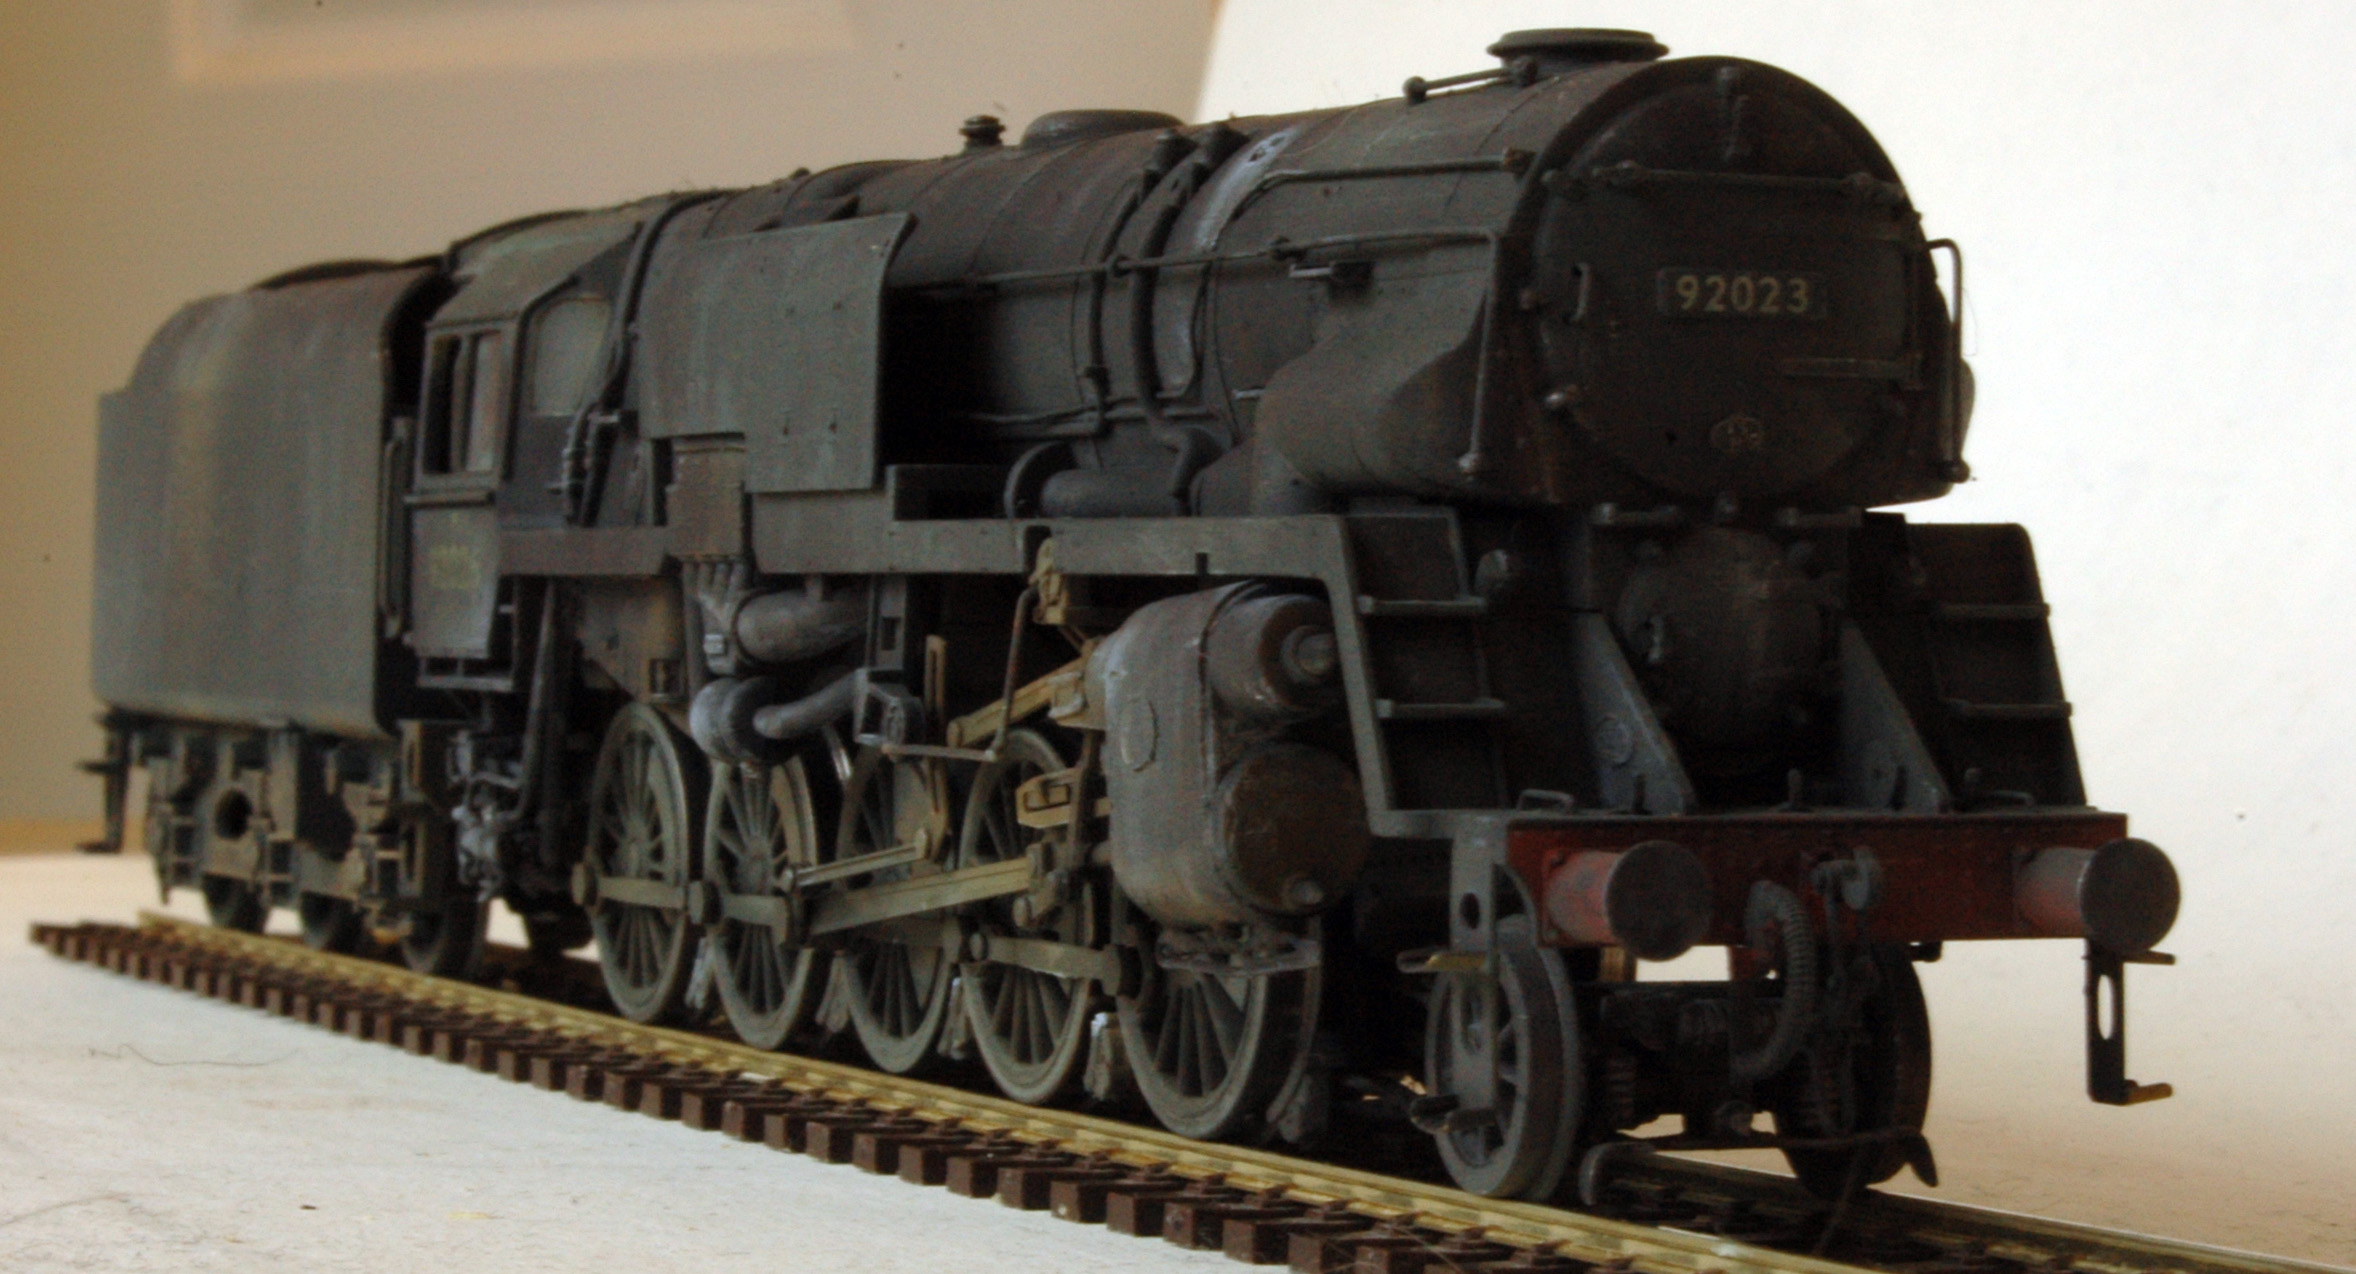
Horby Crosti 9F detailed and weathered to an utterly filthy state. May go back and do a better job on the brakes.

A couple of RTR diesels weathered. Bachmann LMS twin and Heljan Co-bo.


It is making buildings I feel most comfortable with though.
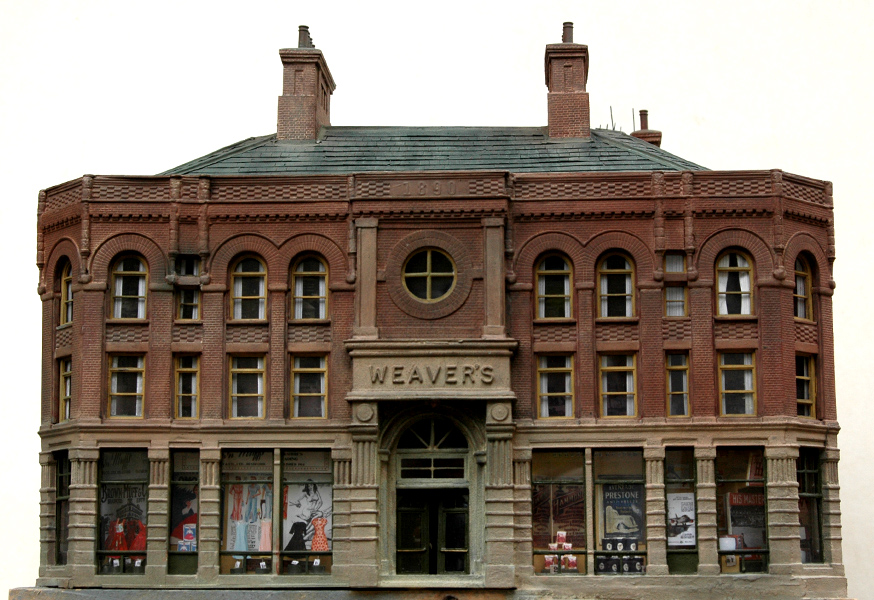
Department store kit bashed from two Walthers buildings.


Main station building scratch built based on the Midland Hendon Station and plans seen at the NRM, with a slightly bashed, or anglicized Kibri shop next door.


Arcade currently in progress. Parts of the same Kibri kit as above, with resin cast off sections and scratch built sections. Based on the Vicar Lane Arcades in Leeds.

Water tower based on the West Ham one, scratch built, the first building I made.


Goods office, scratch built, based on a building at Birmingham New Street.

Various other projects, some actually finished on my layout thread, kit wagons, signal box, Comet LMS inspection coach, etc. The layout is a fictional location set on the BR Midland region in the 60’s, but drawing on a number of different references.
Unfortunately, the layout is stored in the garage as I had to pack away my shed due to space when we moved a couple of years ago. Hopefully it will all get set up again, and the things I have been building will start to fit together.
Thanks for the inspiration from Tony and others shown on this thread and I will post again, at some point. Sorry for the long post.
Jamie
-
 43
43
-
 17
17
-
 5
5
-
Photographed close up is a bit harsh on the headcode box detail, but from a normal viewing distance I think it is looking OK. Needs a little more tidying, and a fine wash of lack/dark grey to tint off the edges that can be seen.
I think it looks better than the brass frame I built though. I have done a first coat of off-white inside and some also some wood edge painting around the door. More to do on that.
I have cut the curved cab windows, but feel they are a 'get it right first-time' or make them again thing, so I am finding anything else to do rather than fit them, and I will fit the windscreen wipers just before doing the windows to protect them. Nearly there though for that step.


For the people inside the units I tried casting them in resin. I discovered that the kind of small detail and shapes you get on people often create bubbles that don’t fill, without the kind of pressure injection use for plastic kits, or a grater level of resin skill than I have. Consequently a lot are missing bits of their heads, or arm details. I have started filling the bits with model filler, although some feel more like characters from ‘The Thing’ (1982 film), I will hide them inside where they will only form silhouettes.
Interior panels being painted as well, and some with seats added.

The driver is one of the better resin casts, although before taking a photo this close I didn’t see the very small bubbles or the Kirk Douglas chin cleft. A bit of sanding and I think he will look OK. It seems a waste to cut one of the plastic characters in half.

Tiny steps forward, but at least I am modelling again, well until students submissions and marking in a couple of week’s time.
-
 6
6
-
-
I hadn’t taken well (adequately) lit photos of the two Class 120 driving units, so to start here are a few.


The corridor connectors will need cutting back, and the lighting cables to join between cars need painting but hopefully will look like vacuum pipes but the layout has been packed away for a couple of years so I want to test it running before feeling it is finished.
Progress on the Class 124 Transpennine now.
I decided against the brass frames for the headcode boxes as I felt they masked too much of the centre, so have filed the edges with very fine Evergreen strip, cut back with a scalpel and a little model filler. They will still need a bit of careful sanding before painting, but I feel keep the proportions better.


Here are a few views of one of the driving unit taken in natural light, slow but careful progress.

The inner ends how the hacking away at the MK1 coach bodies, but when placed back to back and with a bit of sooty weathering I think these parts will not be noticeable.


The underframes for the two motor second brakes.


Seating for one of the driving units and panels between the different sections of seating.

The brown seats are cut from Replica Railways MK1 coach open interiors, and I get some boxes to use as goods somewhere eon the layout.

A few purchases from yesterday’s York Model Railway show, my first show since before the pandemic.

Fantastic after sales service from SLW for their class 124, new windows. Huge thanks to Phil for those, and a lovely chat, even though I am a one time only buyer so far. The new Class 25/3s look a amazing too.
Digi Trains 2pin connectors and Langley Models chimney pots, some great stuff on their stand.
I also bought vol 31 of the Railways Memories series, Retford etc. by Bellcode.
I really enjoyed the exhibition, talked to Mike Edge and Tony Wright as well as chats on a few stands, A1 and Langley Models in particular.
Some great layouts, especially Chapel en le Frith, by Leeds MRS I remember when that was all just fields, well plywood baseboards.
I did miss some old the past regular traders. I knew Wizard were stopping doing shows, as I had a chat last time they were there, they do fine with the website, and the fuss of packing everything up for a few days every couple of weeks was no longer worth it.
Sadly, Eileen’s Emporium are now gone. Shawplan, Replica Railways and Phoenix Precision Paints were not there either. I know all can be accessed on-line, but it did make the show seem a little thinner.
Sorry for the long post, but at least I have had a productive weekend of modelling, and also gardening, the latter less rewarding.
Jamie
-
 13
13
-
 1
1
-










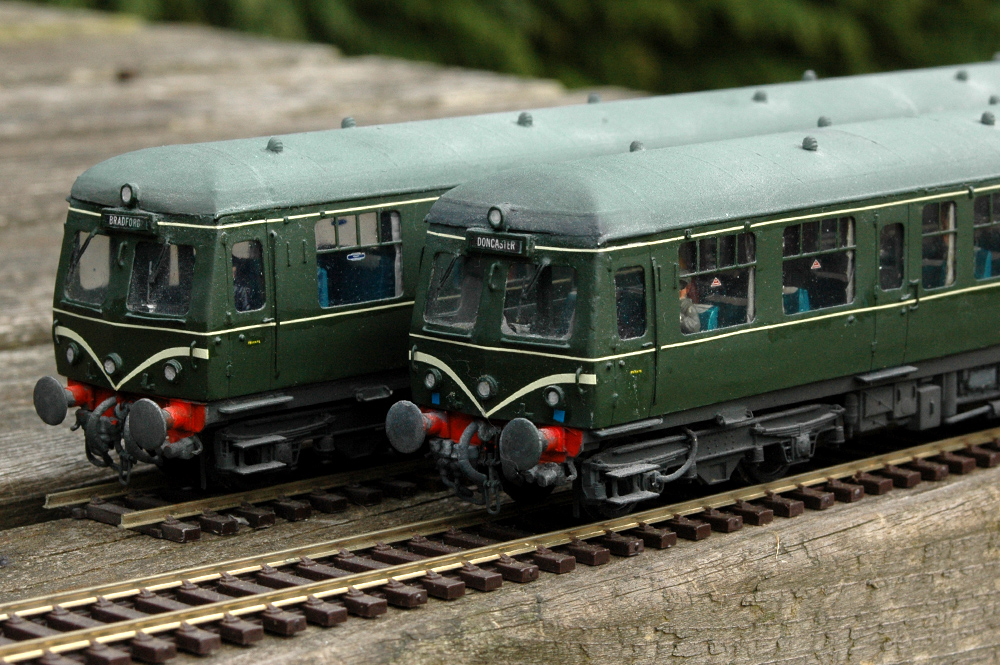
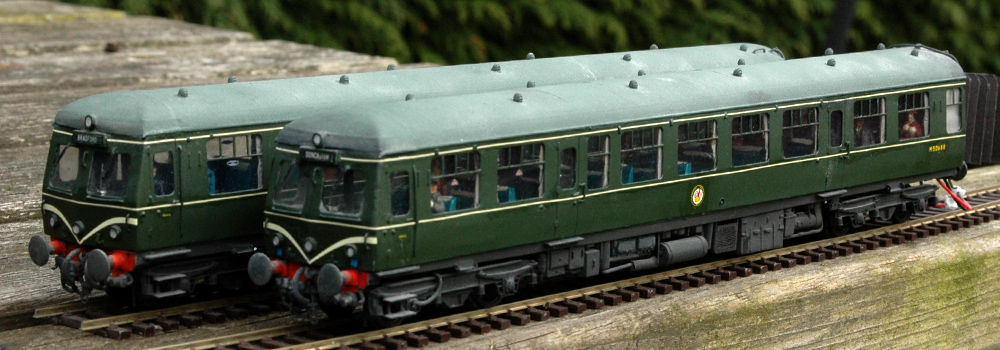
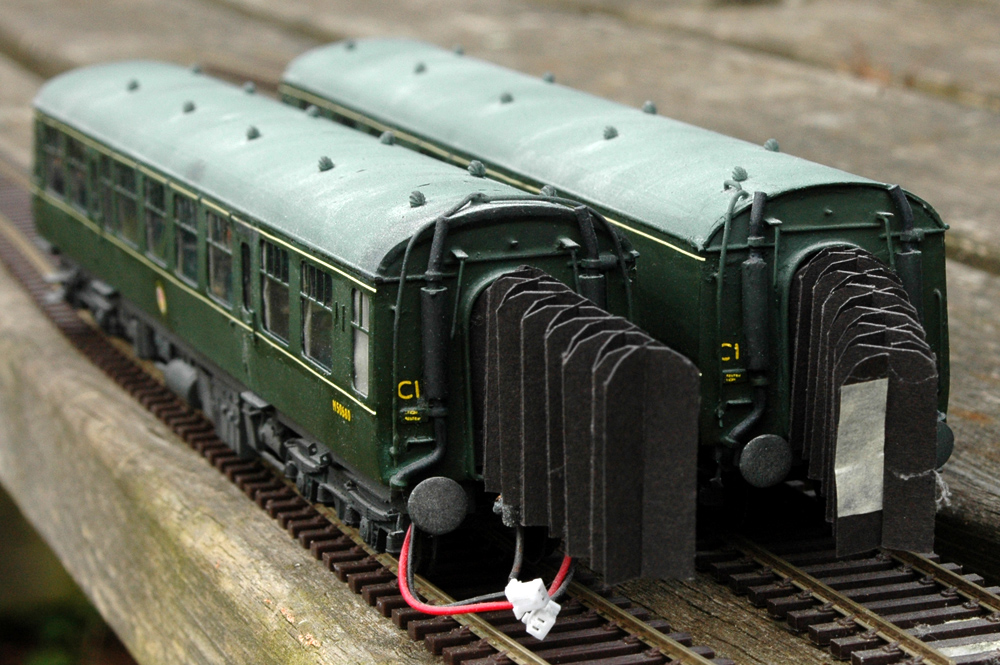


Wright writes.....
in Modelling musings & miscellany
Posted · Edited by Jamiel
Possibly so, but I did only buy it two weeks ago.
It might be influenced by my choice of gear ratio which is the mid one offered, which might have meant that an old worm had to be used.
I was lucky to get the bogie kit, they have been out of stock for a while, so it was put together for me after I emailed about availability, for which I am very grateful.
Jamie