


Charlie586
-
Posts
764 -
Joined
-
Last visited
Content Type
Profiles
Forums
Blogs
Gallery
Events
Exhibition Layout Details
Store
Posts posted by Charlie586
-
-
7 hours ago, lezz01 said:
Yeh I saw that RTR version as well but I choked on the £4500 so I thought I'd best not mention it. Given that there's a Haynes manual for it you could probably scratch build it. There is a hull available from Fleetscale Store in 1/36th scale but it's 2.70 meters long so you're gonna need a big display cabinet for it.
Regards Lez.
Thanks Lez. The Titanic has almost filled my bit of our cabinet, not really any room for more huge ones without the proper planning permission. A 1:400 , same as Titanic scale, would just squeeze into my half.
I didn't realise there was a Haynes manual, I'll add that to my Xmas list.
-
 5
5
-
-
7 hours ago, Schooner said:
You can get one RTR tho'

...although for four and half grand I'd want better reef points than that. And a bloody good DCC sound with smoke generator!
Thanks. That's a fair bit out of my price range. I think their victory looks better, bit cheaper without sails, but still silly money.
-
 4
4
-
-
8 hours ago, phil_sutters said:
The Russians had the Baikal, before WW1, from a kit of metal parts by Armstrong Whitworth - construction and wooden parts were provided locally. But that was with Russian 5ft gauge tracks, not Brunelian broad gauge.
Thanks Phil, just had an interesting half hour of Googling.
Plenty of diagrams and photos, but I probably ought to stick to the layout first before starting another...
http://www.tynebuiltships.co.uk/B-Ships/Baikal6-1896.jpg
-
4
-
 1
1
-
 1
1
-
-
Thanks Mikkel. I suppose it should be the SS Great Britain next, but I doubt there's a kit for that. Nothing that big for a good few years. A train ferry would be good, shame there wasn't a broad gauge one (as far as I know)
-
2
-
 1
1
-
1
-
-
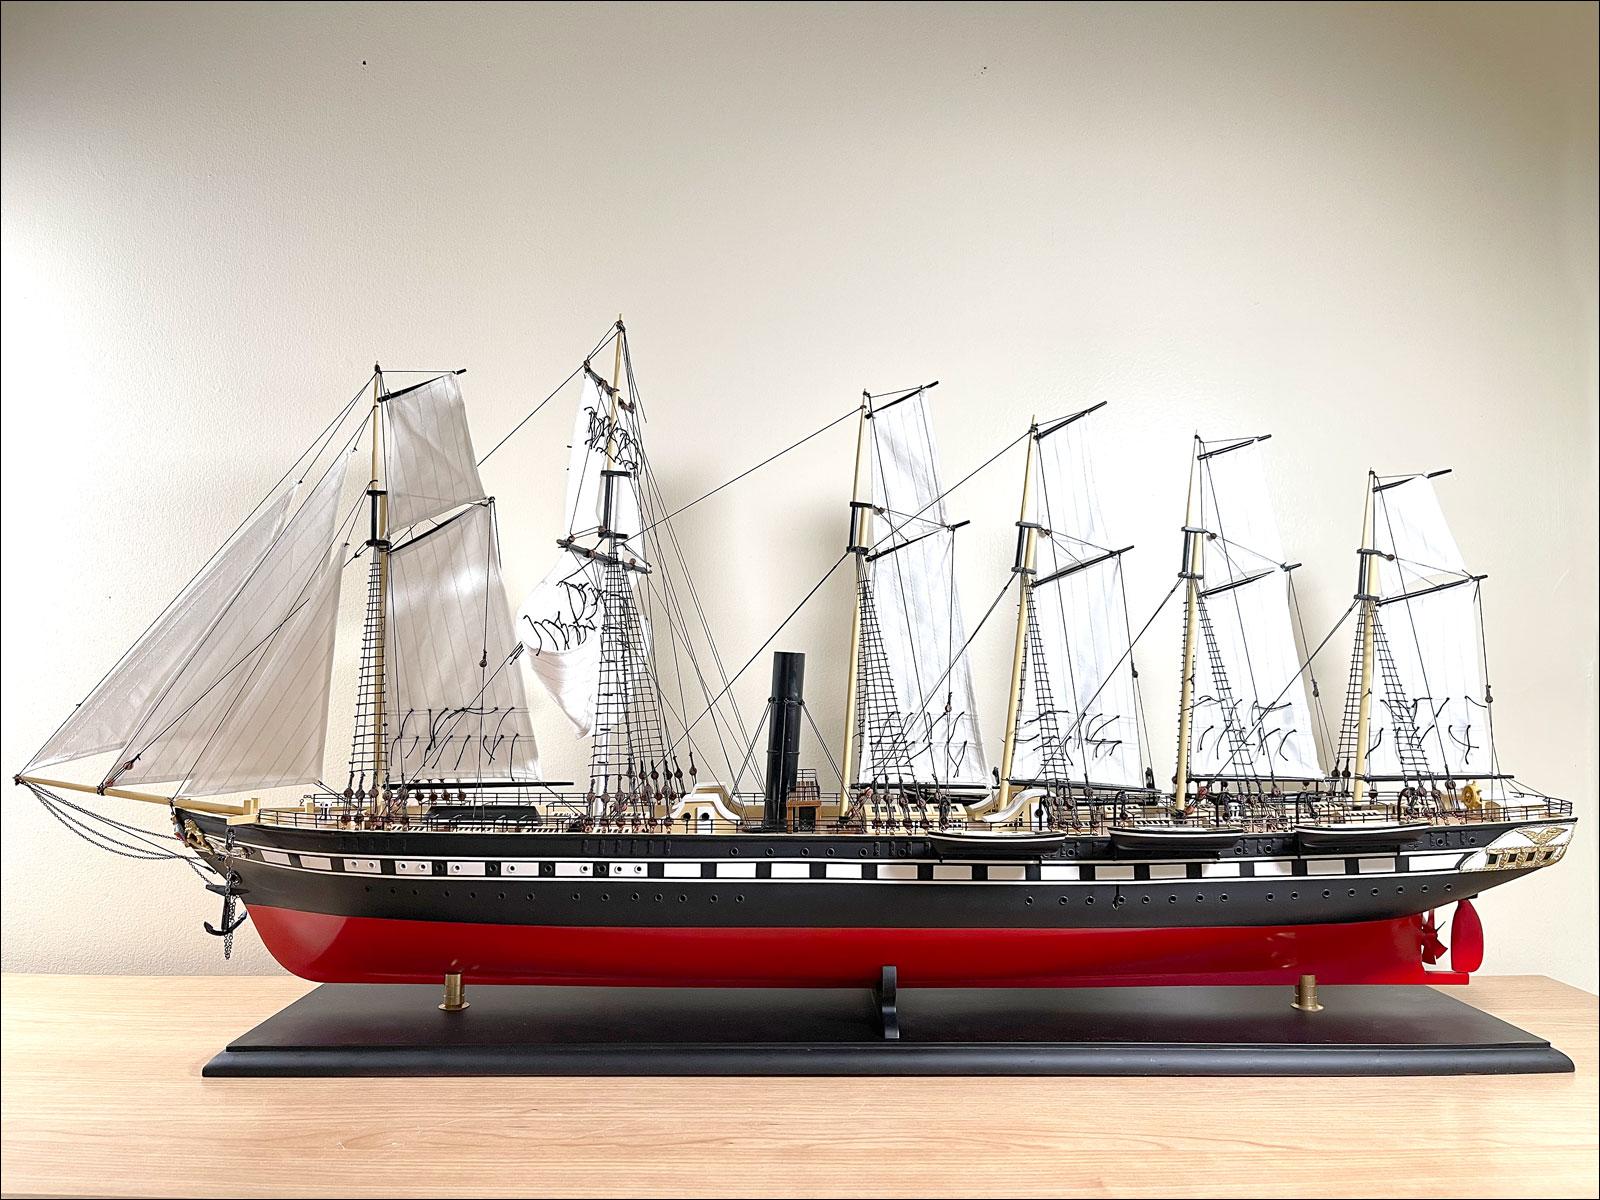
Eventually finished the boat
Quite enjoyed doing it. It took a month or so longer than it should because I added internal lights, so had to drill holes and rebuild some parts differently to fit them in
I found some tiny people on thingiverse, shrunk them down to 1:400 scale and printed and have started to paint, but there is little I can actually do apart from add a few blobs of paint here and there ( they're about 4-5 mm high)
Anyway, back to the trains now. I've not got the morning metalwork time I used to have at the moment so things have slowed to a crawl.
Started adding transoms to pointwork.
Done a bit to E3 roof, 3d printed lamps. On the broad gauge data sheet it says the carriages originally had lamps on the centre of clerestory which was later changed to one either side of clerestory. No date given for the change, but I'm doing 1880, not long after they were built so I'm assuming central ones.
Finally
I've got a little helper. I need to move the board before it gets trashed, but I'm thinking of eventually making a wood lid to sit over the top so I can work on it at table and not have to constantly move it.
-
15
-
-
Yeah there's only 16 in the kit, which I presume is correct (they come in 2 parts on the sprue)
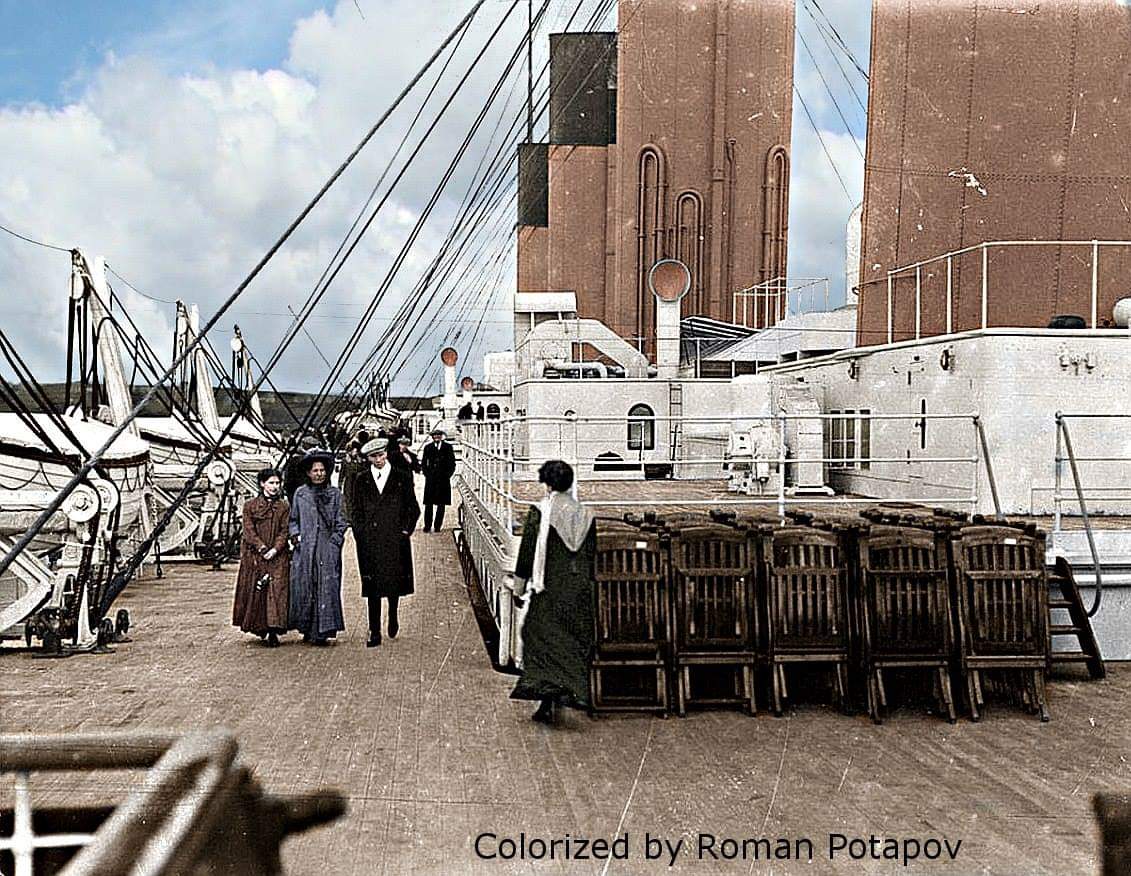
Found some colourised photos while googling
[Embedded]
Lots more here
https://www.titanicmuseum.org/titanic-in-colour-exhibition/
-
10
-
-
Still not doing much, but I have been tidying and sorting things into small boxes (takeaway / margarine tubs etc) so will be easier to pick up when I restart. Just got round to ordering the thinner plasticard strip for carriage rooves. I was going to use the thicker stuff I have, but changed my mind.
Finished the T64 artwork. This is obviously just a render, haven't got around to printing it yet. I like this layout despite it being later than 1880, transitional eaves, guards compartment and lookouts, it seems to have everything. There's quite a big queue of part finished coaches, but I can never resist adding another or two.
Also, totally unrelated to Wantage Road (I think), I got a 1:400 titanic airfix kit for xmas.
This may keep me busy for a while, but work will resume eventually...
-
11
-
 1
1
-
-
Still no modelling done, but I'll restart in new year. Probably.
Anyway, have a good day and new year wishes to everyone.
-
6
-
 2
2
-
6
-
-
On 07/12/2022 at 08:49, Mikkel said:
So perhaps they used elephants for the shunting.
It's also an interesting study in eaves panels.
Or they maybe used a giraffe, it would have to duck for any bridges obviously.
I did dig the broad gauge society article out, and have nearly finished a t64 diagram cad, as it's got the transitional eaves and end brake compartment. It's coaches 5 and 8 (from left)in the second row up from bottom
That's all I have done in last month though. I'll restart properly next year.
-
3
-
4
-
-
9 hours ago, Compound2632 said:
They'd gone through the same exercise twenty years earlier with the conversion of the South Wales main line.
Looking again at the "dump" photo, there must have been one or two BG engines retained for moving stock about, to get the convertibles into the works for transfer to their new underframes?
I hadn't thought of that. I suppose a horse or two could pull a 46ft carriage to the works, but to properly shunt them they would need an engine and a spare. There must have been broad gauge rails retained within the carriage and engine works for a good few years after 1892.
There's a good article on this photo, by I think John Lewis, in a broad gauge society magazine where he identifies a lot of the carriages. I ought to dig that article out.
-
3
-
2
-
-
1 hour ago, MrWolf said:
It looks as though there's a lot of convertible coaches in that line up.
They planned for the end of broad gauge well in advance, I can't remember the date off hand but I'm sure convertibles were being built around 1885, possibly earlier.
The previous generation of coaches were similar to the third line of coaches up from the bottom (or 4th line up if you count the empty track), more of a square box than the later style.
-
6
-
-
The broad gauge carriage dump is probably a good place to compare the roof before I blow 7 quid on more plasticard strip
(Embedded Wikimedia )
Bottom left is closest to the one I'm after. They were quite prominent on the real thing.
-
9
-
-
Another small update, been testing the plasticard strip I've got for rain strips
This is 20 thou x 20 thou on the spare roof I hand formed the other week. It's the smallest strip I've got, it does look a bit big but weathering might help. Slaters also do a 10 x 20 thou, ebay seems to be the cheapest place to buy just that on its own. Not sure if I need it or will get away with this.
Also started chopping the angle to shape for the running boards. Still a lot more to do on the coach.
-
12
-
-
7 hours ago, Nick Gough said:
That really looks good Charlie - I like it!
Thanks Nick.
-
3
-
-
Soldered a bit more to the underframe yesterday.
Needs a good tidy up. A few of the spring hangers are a bit wonky, the other side is neater. The springs and axleboxes are white metal so I'll do them last. The running boards that come with the etch are very difficult to bend with the tools I've got, so I bought some plasticard angle which needs trimming to shape.
Roof isn't attached yet, still needs cutting back a bit. The first class compartments are in place but you can only really see a little bit of blue seat.
-
7
-
9
-
-
Roof superglued together. Needs a tad more tidying and maybe a tiny bit of filler before priming, plus lamps etc. I'll do a test of my usual grey primer and whiteish airbrush acrylic on a scrap piece first though just to check final colour.
Meant to post this the other day, I found this thread on building 7mm broad gauge coaches on Western Thunder.
https://www.westernthunder.co.uk/threads/on-heathers-workbench-wider-and-longer.5065/
There's really good detail and photos and as there isn't really any instructions it's come in helpful.
-
4
-
3
-
-
I've used my socket set on smaller pieces of brass/nickel for the various splashers, smoke box surround etc. Not tried anything as large as a roof yet though.
Little bit of cutting out clerestory holes while watching telly last night. Needs a bit more but it won't be that visible so I won't go silly on it.
-
8
-
-
31 minutes ago, MrWolf said:
If it were a largeish piece of metal and you had rollers, I would say yes, cut out the areas you need to first. But with a small piece of plastic, you may struggle to create a uniform curve with bits cut out, also it is more likely to try and spring back into its flat state.
I am thinking of trying a brass roof with 3d clerestory side on the next one. I'm just not sure if the surface difference will be too obvious. I haven't got proper rollers but i find brass is a lot easier than plasticard to shape with basic tools.
-
4
-
-
20 minutes ago, ChrisN said:
I tend to use jars for short coaches and whiskey bottles for longer ones, but it is getting the right diameter and the right length. I put the water inside so I can wrap boot laces around it. (I was advised masking tape but as soon as it heats up it falls off!)
The broad gauge 10ft wide roof seems a fair bit flatter than the ratio standard ones I compared it to. A whisky bottle might still work, but I gave up drinking about 10 years ago, I'll have to ask around.
The electrical tape I used started peeling but just held it in place long enough to cool down.
-
2
-
1
-
-
14 minutes ago, lezz01 said:
The problem with using a thermos is that there is a vacuum gap between the inside and outside of the flask so you don't get the full heat of the water transferred to the outer case Charlie.
Regards Lez.
I didn't pour the water inside, Lezz. I laid it on its side in a washing up bowl with just boiled water in. I picked the thermos because it was the only thing I had about the right diameter, straight and long enough for a 45ft coach.
-
4
-
-
Had a little go this afternoon with thinner plasticard (0.45mm ish), a lot more tape and longer in the boiling water. Left it to cool by itself rather than plonking in cold water.
Come out a lot better. I now need to cut lumps of it away where it meets the clerestory, maybe I should have done that when it was flat?
-
8
-
-
9 hours ago, lezz01 said:
The reason I said use waste pipe is because it's heat resistant.
Regards Lez.
Good point. I'll have to try it and see, if not then find a better way of clamping it to flask.
-
2
-
-
Thanks Lezz and Northroader. I think a combination of me just using tape and not leaving it in the water long enough didn't give it a chance. I've got some plastic drainpipe offcuts at allotment so I'll have a go with them.
-
2
-
-
Still not much more than nothing going on, but have done a roof test
Plasticard (about .75mm). I did try boiling water around my allotment thermos flask but it just didn't help it take shape. Eventually teased it to roughly the right profile but, annoyingly, it needs to be a few mm wider. I'll try again and will use this for a standard/narrow gauge roof.
3d Clerestory sides and ends with plasticard roof. Formed as above then superglue. Sides were a bit thin so it's not perfect but will hopefully pass.
Above that is an R2 printed with compartments as one piece to see if would work or not. The tumblehome area is a bit bowed where it was printing a large area at a time. It could work better if slowed down more, this took 4 ish hours. I tried to paint to see if it would still be too noticeable and it is. I may sand/fill and repaint at some point but want to concentrate on just one Coach.
-
7
-


Wantage Road 1880 4mm Broad Gauge
in Layout topics
Posted
This is the other thing what I've been doing during the radio silence of 4 months or so,
Amending the carriage CAD to the infamous early broad gauge Sleeper Car. Unfortunately I can't find a diagram/drawing to link to online, but the carriage was split into two compartments (male and female) with dormitory style beds (4 in womens, 7 in mens) rammed up against each other ensuring a cosy night next to a stranger. Obviously it didn't catch on and was abandoned, I think it was converted to a saloon.
I haven't fully finished the cad or printed it yet as have a major backlog in the carriage area, but will get round to it eventually.