

.jpg.53c9d65e8bc0e2dd75554de69a9ceaa0.jpg)
Grasslands
-
Posts
353 -
Joined
-
Last visited
Content Type
Profiles
Forums
Blogs
Gallery
Events
Exhibition Layout Details
Store
Posts posted by Grasslands
-
-
I would second Nitromors, but it is a very nasty substance, don't get it on anything (including your hands). I often use it to 'reset' white metal models. I would make sure that you remove any plastic components (they will melt).
Although I may have put you off a bit there, I want to stress the speed of the paint/glue strip and how efficient it is at removing glues and paint. It really is impressive.
-
I searched the Newbury store and they were all sold out. I then visited one of the Swindon stores and they only had one of the smaller ones left. I phoned my parents in Birmingham and they managed to get me the big one.
It should be appearing in Swindon this weekend

-
I will go and investigate these cabinets tonight. I am interested in the larger ones.
-
Although not appropriate for the AEC Matador there are some rubber wheels available for normal road commercial vehicles. They are used by people running on the Faller Car System for their bus and truck motorisations.
Thanks for the link and sorry for the late reply. My flat is being deconstructed for our big move to Swindon. I was hoping that I would have this project finished before the move, but no
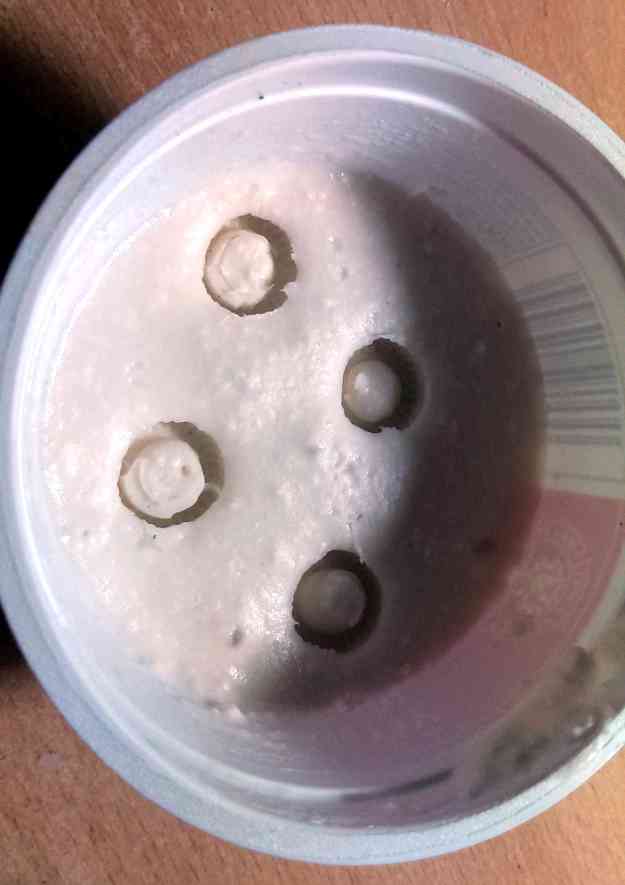
. I will put some more updates up when I have rebuilt my workbench and found my tools.Oh! and my attempt at making silicon tyres was a failure. The algenate worked well as a mould, but the silicon never set. I presume I should probably be a bit more careful with my setting agent proportions next time.
Tom
-
To sum the reported QA issues:
1) Tight screws
2) Wobbly wheels not to gauge
3) Excess flash on the bogies, precipitating derailment.
>None of which have been present in any of my own models, but reported plenty of times by other users...
Thanks for clearing that up for me. I am yet to put a chip in either of my examples so not too sure whether tight screws are an issue. Overly tightened screws is a problem I often find with die-cast cars. Took both my Desert Sand and Kernow weathered maroon version to my Dad's to do some running and didn't come across these problems so hopefully mine are okay.
-
Me. Ordered yesterday by phone. Really should stop ordering Westerns.I expect that the profit lies in producing limited editions at premium price rather than larger runs for the mass market at a lower price? The demand is generated by the hype over limited editions. How many RMweb-ers have pre ordered D1015?
What exactly are the QA issues? Forgive me for asking, I just don't really want to crawl through 121 pages to find the answer. I remember talk of tight screw fittings when the Desert Sand one was released. My two Westerns run fine.
-
Based on the BRM review it has a lovelly finish, and looks really great, but i must admit quite a bit of disappointment with the cab detail. I know alot of people wanted to see some cheaper model alternatives, but this model is still going to cost over or just under £100 and I can't quite fight past the feeling that we are being charged more for less. I would have personally paid the extra to get a model that is up to the detail spec of my Hornby A4s or current Bachmann output. I know there is the higher detail option, but it is just that: 'higher', not 'super'.
I have spent a while considering whether to cancel my order (based on my thoughts above). My reasoning was that I didn't really want to support a backward step in the amazing detail that we have enjoyed on our models for the past few years. Having seen the model again at Warley I discovered that you can't really see inside the cab when the tender is on. After a few conversations with others at Warley, I decided that life is far too short to worry about the detail level and manufacturing processes of this model train. I suddenly remembered I'm suppose to be enjoying this hobby. I'll keep the pre-order.
-
 4
4
-
-
Based on the BRM review it has a lovelly finish, and looks really great, but i must admit quite a bit of disappointment with the cab detail. I know alot of people wanted to see some cheaper model alternatives, but this model is still going to cost over or just under £100 and I can't quite fight past the feeling that we are being charged more for less. I would have personally paid the extra to get a model that is up to the detail spec of my Hornby A4s or current Bachmann output. I know there is the higher detail option, but it is just that: 'higher', not 'super'.
-
2
-
-
I remember being slightly alarmed by the noise of my first Dapol Class 22 when I popped it on the track. I then remembered that I am use to my near-silent army of Heljan diesels. My Dapol Western kicks out the same soft-clicky noise as my 22.
-
Inspiring ....
I really like how slowly and smoothly it works. I was expecting it to launch itself like a rocket - don't know why.
Thanks, I'm yet to discover how it will operate on the RC controller. There is a speed regulator that I am yet to fit, so fingers crossed.
When you have the steering working you will have to automate the winches for the crane
The winch on the crane would be great wouldn't it? I would really like to do a construction vehicle, and do some 'live' quarrying.
...R
PS I'm nearly as impressed that you have so much clear desk space for the demo.
That really is encouraging!
Excellent!
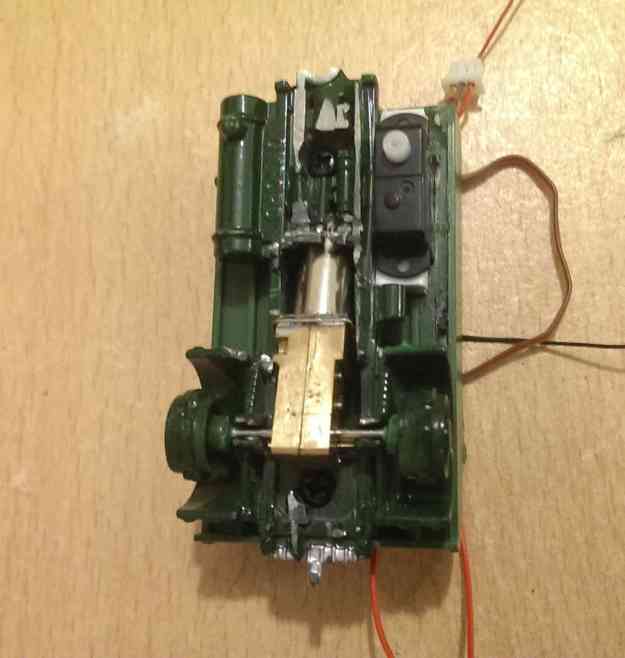
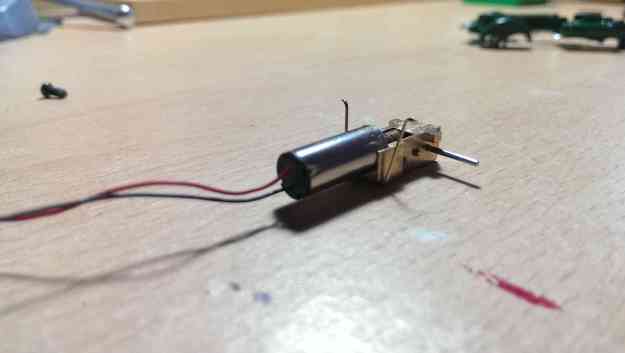
What's the capacitor that you've wired across the motor?
It is a blue disc-shaped one, which has '473' written on it. I presume it is to do with TV interference?
Best go home and see how my white silicon tyres are getting on

-
Footplate of Kidderminster have them on their website:
http://www.footplate.co.uk/index.php?main_page=product_info&cPath=100_101&products_id=1375
-
Sorry that it has been a bit quiet on here recently. I was working last weekend and I couldn’t go much further without the battery charger arriving in the post. The charger has now arrived, so work can continue.
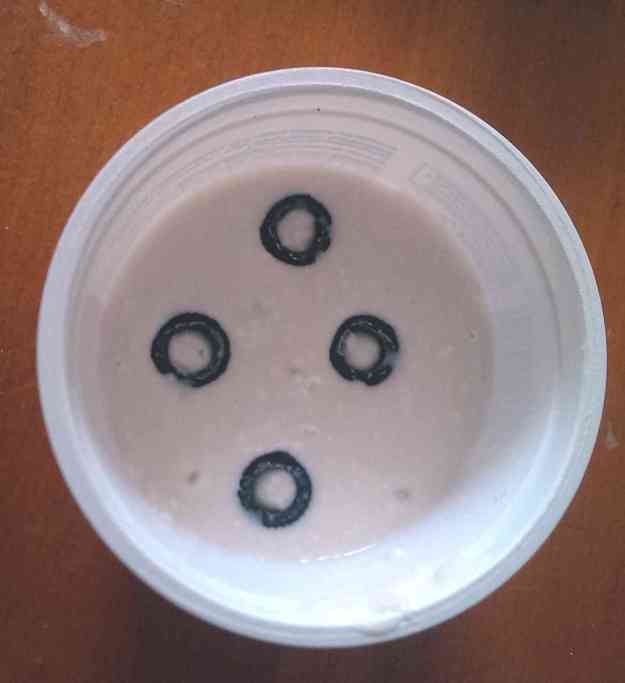
I did some experiments with elastic bands wrapped around the tyres and this really increased the traction, so I have decided to have a go at making some tyres out of silicon rubber and an alginate mould. I was quite excited about this until I realised that the rubber isn’t black!!! I decided to go ahead with the moulding anyway... annoying!
I also tried translating the instructions using Google translate, which made me feel a bit more confident in approaching the wiring. I was very confused about which wires to solder the capacitor on to. Based on images from one of the German forums I eventually soldered the capacitor across both the black and red wires on the motor (I’m far from an electrics wiz).
Finally, I cut away some of the flooring and fitted the servo, and the on/off switch.

Here is a video of the cars first trial run on mains power (with no steering).
-
2
-
-
I am still waiting for my battery charger to arrive, so I haven't made significant progress.
I did some more traction tests this evening and Robin was quite right. I found some rubber hair ties (from when I use to have a pony tail) which were small enough to go round the wheels. These definitly made a difference to the traction of the model.
So what options do i have for making or buying tyres? Someone makes tyres out of Maskol fluid in a little german model car magazine I bought. I presume I could mold some out of rubber? I've never done anything like that before. Or i could go down the root of cutting slots in the existing tyres for rubber bands?
Any help RE suppliers of suitable rubber or tyres appreciated.
-
So what livery options are possible for these models? I presume the Southern livery is the main one. Wasn't there also a darker green and rusty brown colour scheme? This is a model that would be quite interesting to offer in non-lined base colours too.
-
RE: the roco Double Fairlie, wasn't the other issue that no one could work out whether it was going to actually be OO9 or if it was HOn3?
-
£185 - steeper than I expected, but I presume this is quite a risky new market for Heljan. I'm game.
-
Hi Robin
This AEC truck actually has rubber tyres. I decided to retain them because the softness of the rubber was about the same as the tyres that came with the kit.
The rubber band idea is good and I will try that later.
I have a few videos of the car driving around on my desk (without a steering servo) which I will post up soon.
I can always try doing this:
-
Thanks for all the great pictures. I'm looking forward to the video of the finished product.
Be very gentle with the wires from the motor. I broke a wire off a similar motor and when I opened it up to see if I could solder in a new wire I lost one of the brushes - tiny hair-thin wires. I think if I get another motor I will put a drop of epoxy where each wire exits the body for added durability.
...R
Thanks Robin, I will watch those pesky little wires. a drop of glue sounds like a good idea.
I have managed to bring the front wheels back into the body now and I have also fitted the back wheels.
This evening the truck had it's first proper trial using my gaugemaster controller on low voltage. There was previous discussion about the diecast truck being too heavy. The opposite is the case, as it really needs a fair bit of weight over the back tyres to make sure there is minimal slippage from the tyres. This won't stop it running, but it will impact how it runs on uneven surfaces. I wonder how I can put a good weight on the back without having to convert the pick-truck into a box van. Suggestions appreciated.
I could also do with some help RE: wiring, but will post up the wiring diagram another day.
I cannot do much else until my battery charger arrives in the post.
Night
Tom
-
Hi Tom
The BR blue livery was only ever carried in BR service by D2554 (05001) while she was on the Isle Of Wight in her departmental role. D2595 is in blue but this is a fictitious livery and is the only 05 therefore to have a yellow buffer beam, all others having standard red beams.
Regarding the question about the height of the buffer beam, it's reported in some magazines that 05001 has had it's buffer beams cut back and steps moved while on the island, this is untrue !
See below, a picture never lies
Hope this helps
Robin
PS Have got my hands dirty on both D2587 and D2595
Hi Robin
Thanks for the info regarding the BR Blue version. Not a big fan of that livery, so I presume I will get a green one. I wonder if the Heljan one will have cut-away buffer beams or full length? I would presume cut-away (based on the pictures the photos they printed with the announcement).
Where did you get the chance to get hands on with D2587 and D2595?
Tom
-
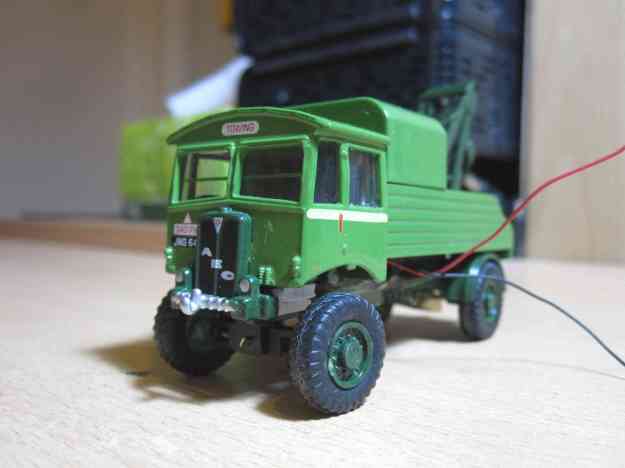
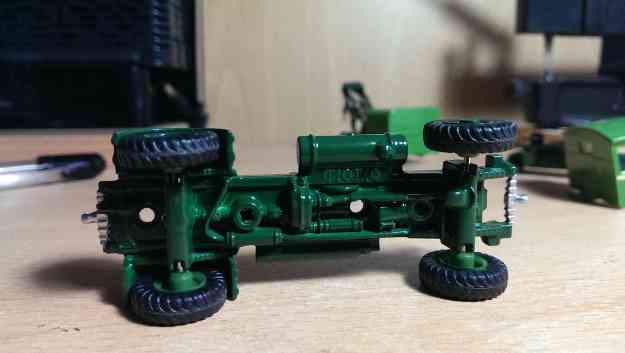
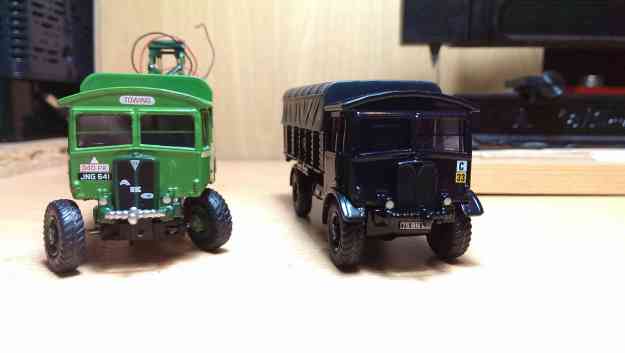
I thought I would provide some description and photos about my progress from last week.
As you can see from the above pictures, I chose the Oxford Die-cast AEC pick-up truck, mainly because of the ground clearance beneath the chassis. The main risk of using this truck is the difference in size of the AEC trucks wheels compared to those provided with the conversion RC kit.
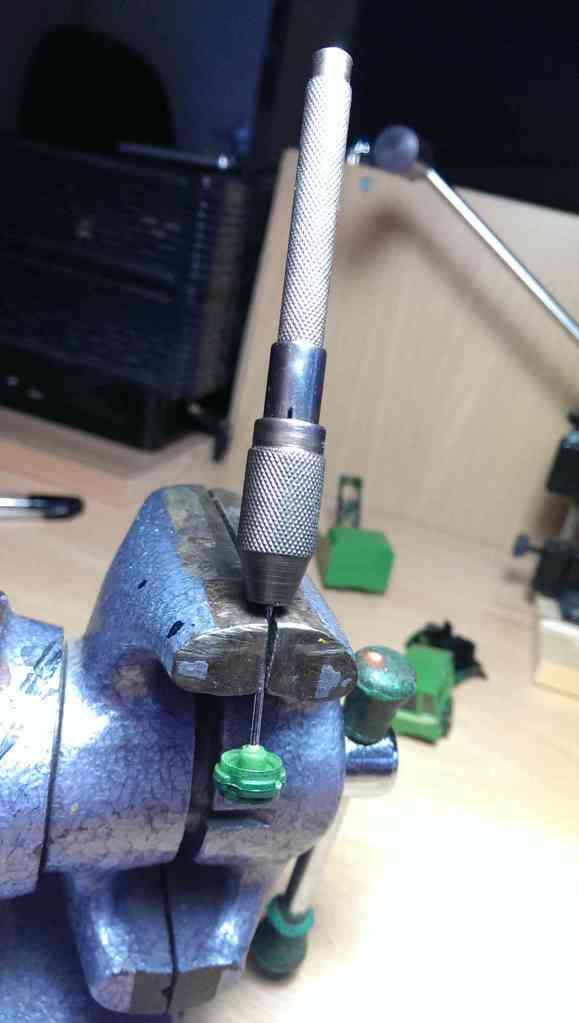
Wheel removal
The Oxford Die-cast wheels are held onto the axle with an abrasive tipped axle (not quite a thread, but more a cross hatching).
This meant that a bit of gradual pulling (using a pin vice and brute strength) releases the wheels. The Oxford Die-cast tyres are made of a similar rubber to those provided in my kit, which should be great for traction.
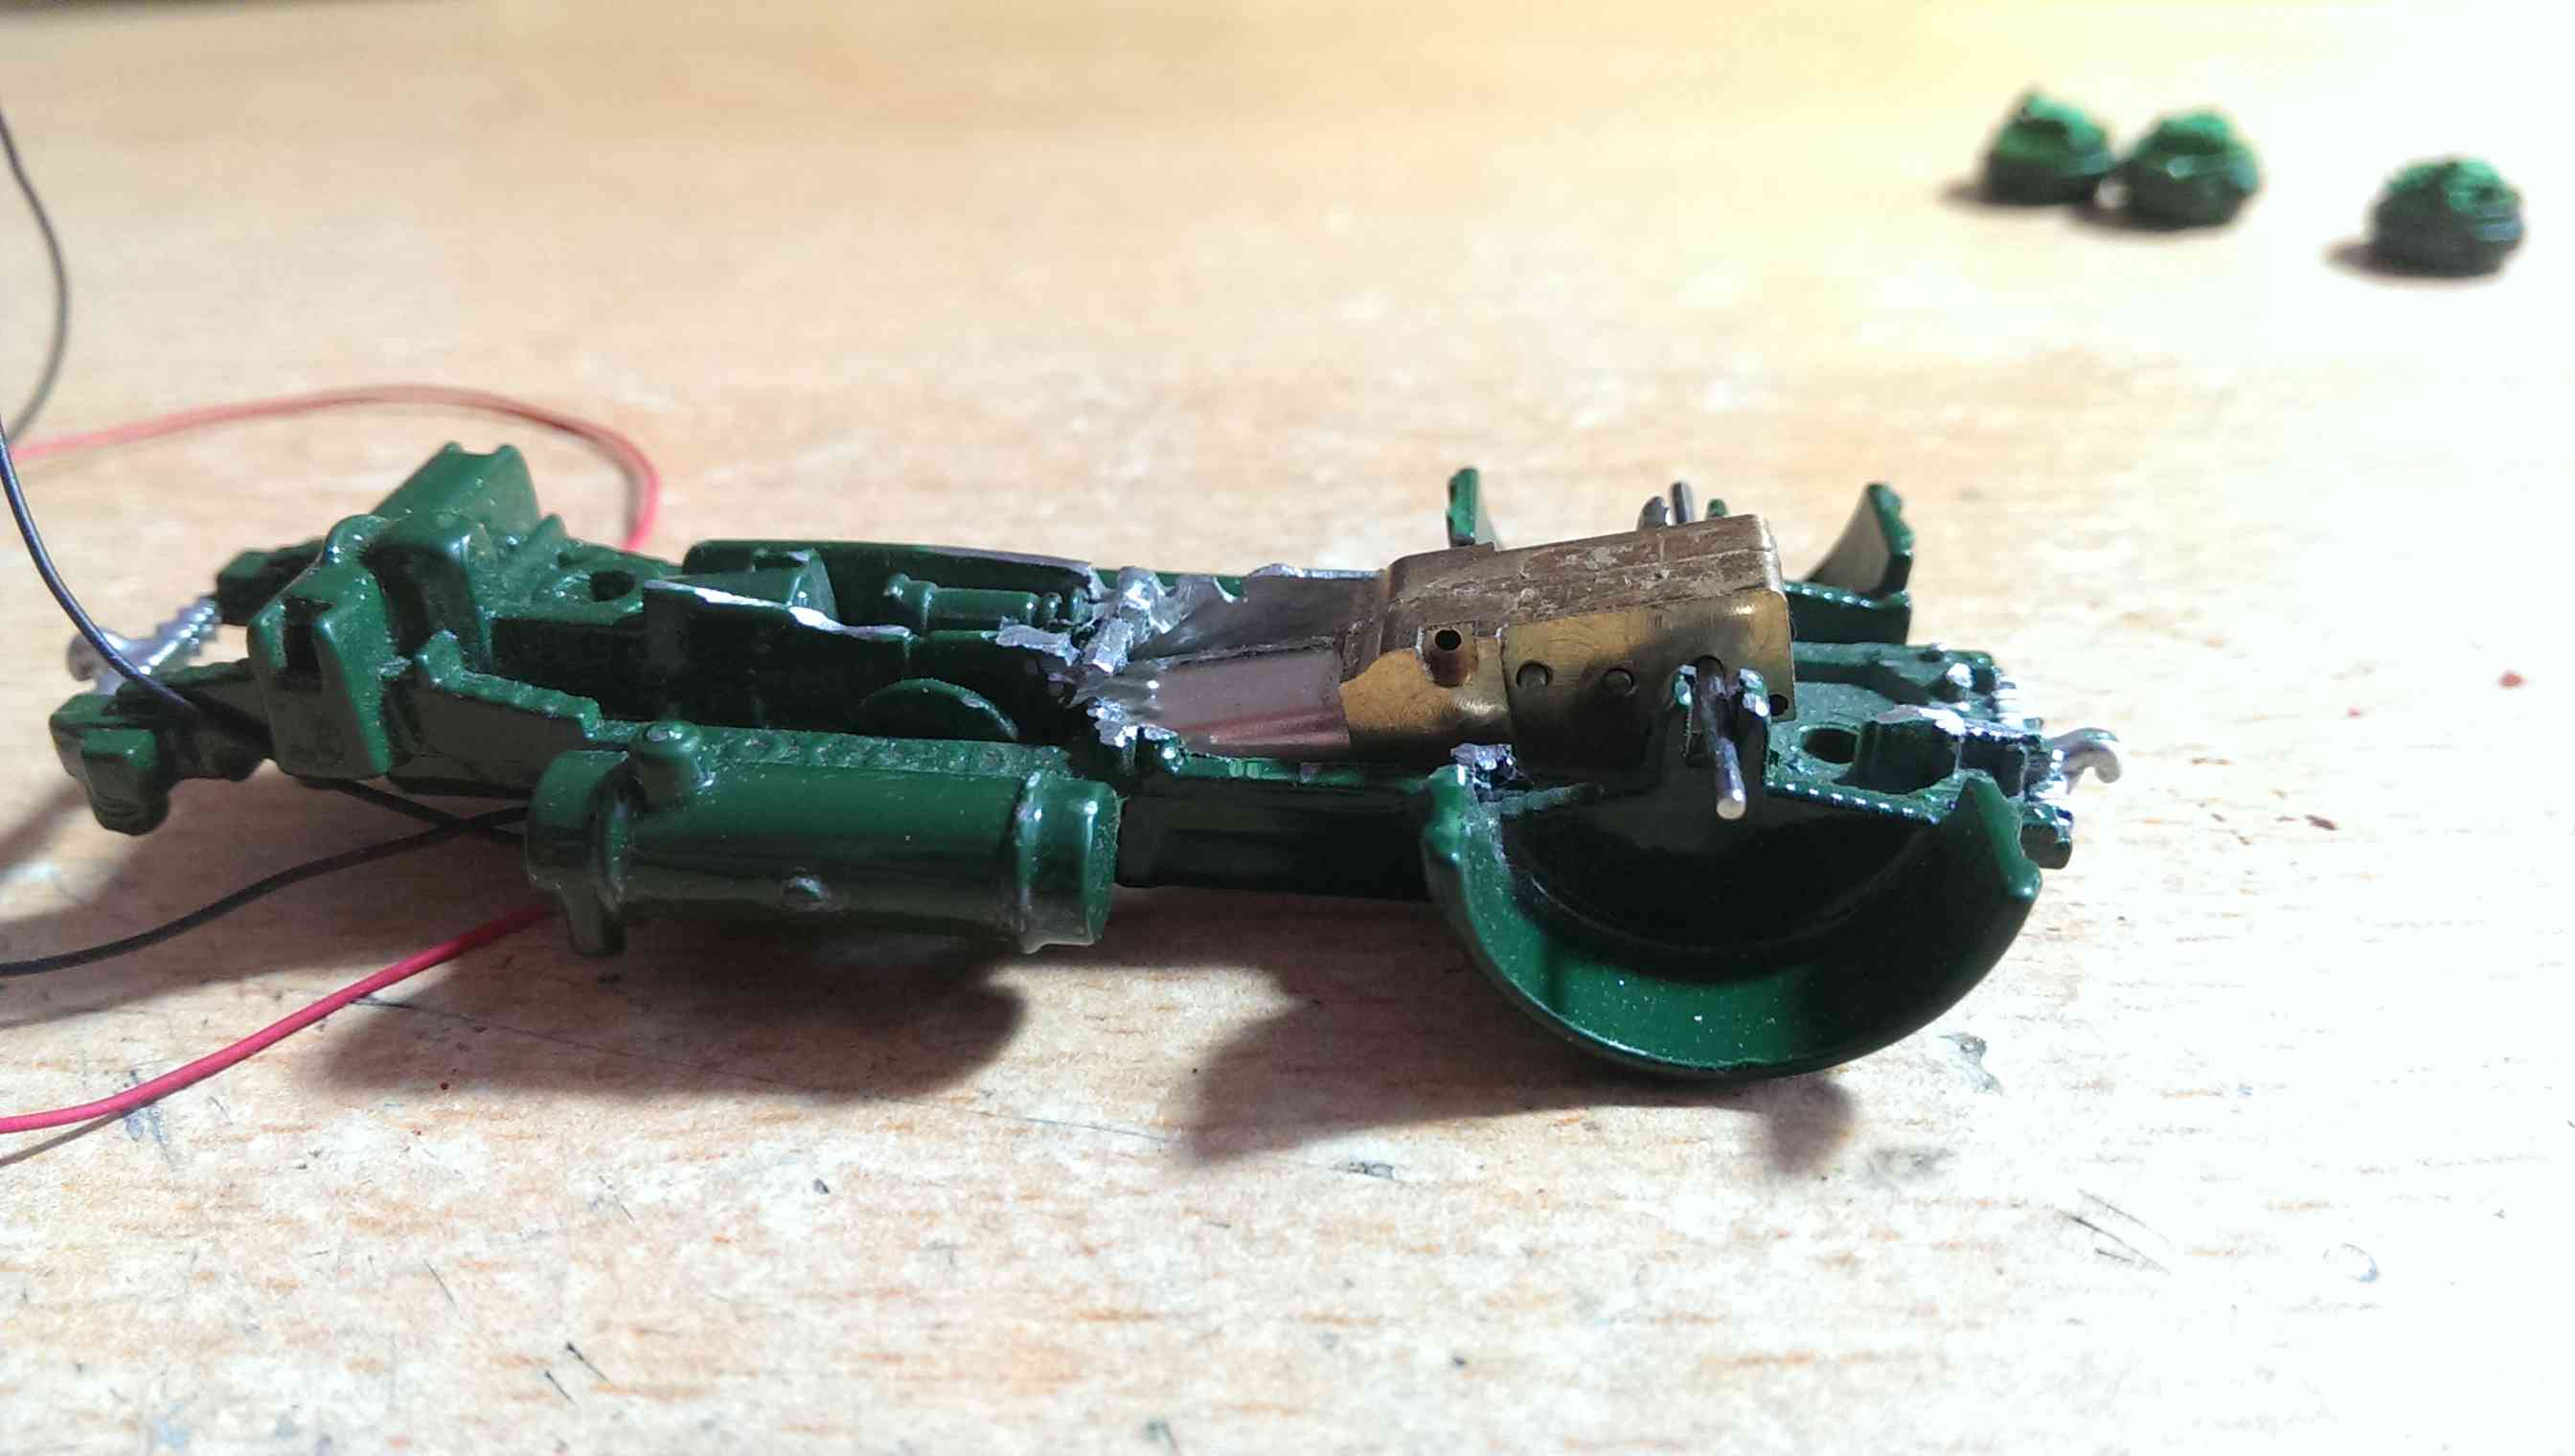
Motor positioning
The next job was to provide enough space for the motor on the die-cast chassis. I cut away at the rear of the chassis with a mini drill armed with a disc cutter. After losing about five disc cutters, I managed to clear a nice space for the motor.
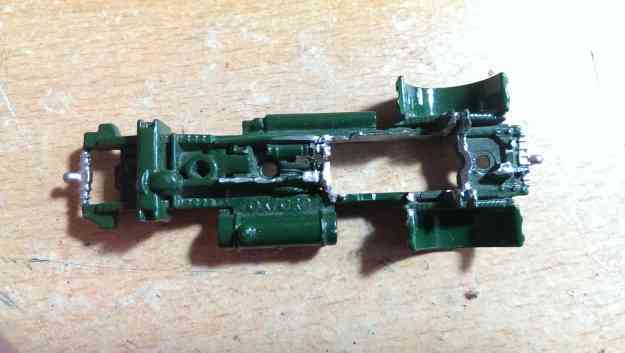
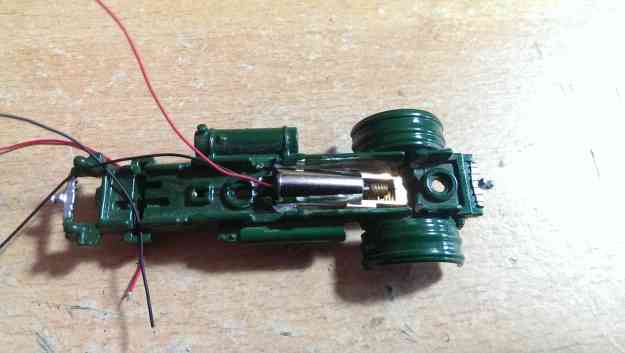
I soldered a small bit of wire to the brass gearbox, which acts as a simple harness to keep the motor inside the chassis.
Building the front axle
The steering axle is a lovely, simple kit. I didn’t realise that the kit is made so that the axle will move across the x, y and z axes, so I am very pleased (as I thought I would have to adapt it for up/down movement). The plastic is also very rigid, with little chance of distortion, it looks laser cut.
The wheels supplied are quite small and the rear wheels are constructed to take a double tyre (which would look a bit silly on non-lorry models). In order to fit the AEC’s original wheels I replaced the kits brass axle pins and converted new ones out of the AEC axles. I didn’t want to risk widening the holes in the steering kit to take the wider AEC axles, so I milled down the AEC axles with a mini drill and a file.
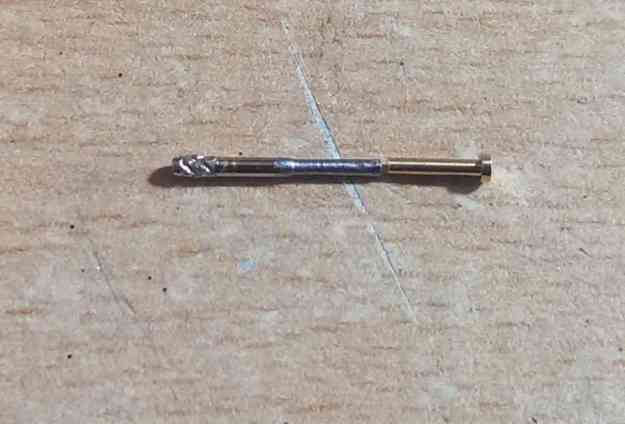
Picture above - To the left - newly milled axles, made out of the AEC axle.To the right - the kits original brass plunger axle.

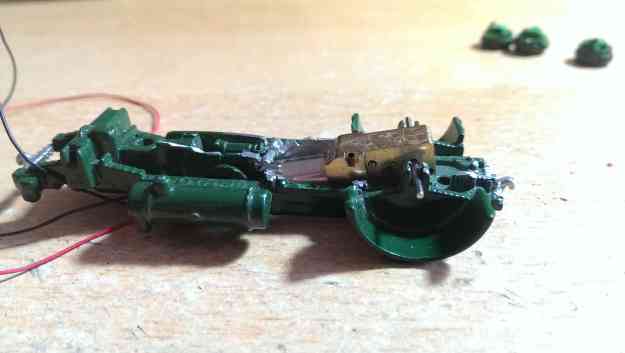
Fitting the steering axle
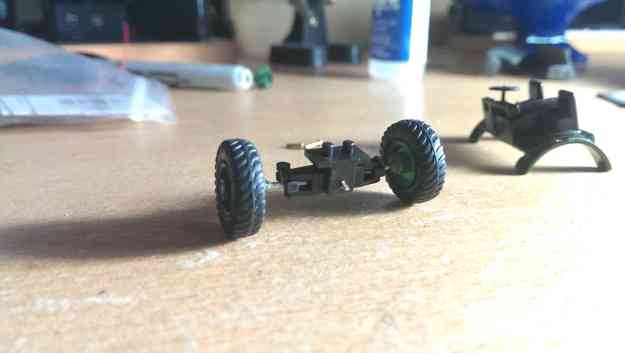
I decided that the steering column needed so much space beneath the body that it would be better to cut away the front of the AEC chassis and fit it directly to the cab. I also removed the mud guards, so the wheels wouldn’t collide with them.
Thoughts on progress so far
It was at this stage that I started to realise that the wheels were too far stretched out from the steering axle. This gives the impression of some monster truck adaptation, which I quite like.
The problem is that the rear axle is fixed in the motor gear box, and is nowhere near as lengthy as the front one. Thus when the back wheels go on, the final product will look a bit stupid. So my next task will be to carefully de-construct the steering axle and re-mill the front axles until they are a bit closer to the body.
I have ordered some spare axles (just in case).
Expect an update soon.
-
2
-
-
I have finally got around to making a pre-order for one. I have chosen BR Black with 11xx numbers. This will suit my 1950s layout. Would quite like a green or blue one for my later period layout. How many examples gained BR Blue? Were they all painted with red buffer beams (not a big fan of this livery)? And finally did any retain the full length of buffer beam in BR green or BR Blue?
Cheers
Tom
-
1
-
-
Your battery is 180mA, which should be fine for around four hours work. My lorries (at 1:43 scale, 7mm) have 220mA batteries, and they will do at least five hours exhibition duty before requiring recharge - and they have larger motors and more vehicle weight.Wiring batteries together, either in series or parallel complicates charging significantly (balancing) so is better avoided unless you can remove them and charge them independently, or buy pre-built 2xbattery.
Hi Giles
Thanks for the input. Wow i never thought that the battery could last that long.
I do not have loads of time tonight, but here are some pictures of progress


-
1
-
-
Are those 4 white things sockets for servo connectors?
If so I presume the ESC is separate from the receiver.
The Deltang units have the ESC incorporated in the receiver board for about the same size board as in your picture. However on the Deltang boards the connections must be soldered on - makes for more trouble but a smaller board.
Will the system you have work from a single LiPo cell?
...R
For £28 you can buy the DelTang receiver/esc pre-wired, which makes it really easy..... I'm a fan of the Deltang stuff, and can recommend it.
I think the motor/gearbox shown will have no problem at all with a die-cast body (depending one the ratio selected). I've been playing with a Ford Pop, and a similar motor gearbox, and power isn't a problem.
As a general rule, scale 'toys' are not a good starting point for a scale performing model
Mikroantriebe is another source of 1:87 RC components
Just incase it wasn't clear, the receiver that came with my kit is a DelTang model. The kit also came with a speed regulator.
The model will work off one LiPo cell, but i suppose it would be possible to wire up two for extra running time. When the kit arrived one of the first things I thought was 'How am I going to charge that battery?'
I am glad I did a bit of research on LiPo batteries last night, as it seems they have quite a specific way of charging and draining. This website was very helpful: http://www.rchelicopterfun.com/rc-lipo-batteries.html
Any one have any experience of wiring up multiple 1 cell LiPo's in series (if it's called series)?
-
Will the die cast bodies be too heavy? Just a thought...
I hope not, but I am fairly committed to this AEC truck now. I have a OO9 armoured simplex that runs on a smaller motor, which is a weighty little thing, so hopefully it will be okay.


%252520Isle%252520of%252520Wight%252520Steam%252520Railway-L.jpg&w=800&h=534&ei=MUdQUuiNB5Cr0AW_s4DIBw&zoom=1&ved=1t:3588,r:0,s:0,i:82&iact=rc&page=1&tbnh=183&tbnw=270&start=0&ndsp=41&tx=99&ty=69)
DS499 SR Shunting Tractor - First Test Run
in Kitbuilding & Scratchbuilding
Posted
Looking good. Here are some shots of the side skirts on mine.