


Southernboy
-
Posts
884 -
Joined
-
Last visited
-
Days Won
1
Content Type
Profiles
Forums
Blogs
Gallery
Events
Exhibition Layout Details
Store
Posts posted by Southernboy
-
-
Thankyou Missy, that's very kind of you

My creative/artistic side comes from my family: Both Grandfathers were architectural engineers, and my Father is an artist - in fact as a child my bedroom was also his studio, so I guess it's sort of 'in the blood'.
I work as a graphic designer.
But I would say that whilst there may be some creative tendency in my family - I've learned as much again from reading model railway forums
One thing with the hut: Someone suggested to me recently that in N gauge it's worth 'scaling up' the key features of a model, because otherwise in such a small scale they could be lost, and thereby the essential character or essence of what you're replicating.
I thought this was an interesting point so exaggerated the grain in the woodwork. I wonder whether it's this, as much as the paint applied, which brings it to life?
-------------------------------------------------------------------
Oldddudders:
"Simply visionary in approach... "
Steady on old chap!
That's very flattering - But it's simply an expression of my fascination with the period combined with my (re)-discovery of railway modelling as relaxing hobby.
But don't let that stop you (thankyou!)
-
 1
1
-
-
Frankland update No. 4
Welcome to everyone tuning in from RMWeb...
And now here is the news broadcast from Frankland.
--------------------------------------------------------------------------------------------------------------------------------------
First is a report from the purchasing department:
I won a few eBay bargains. Here are my favourites:
A car for £4.30 ...
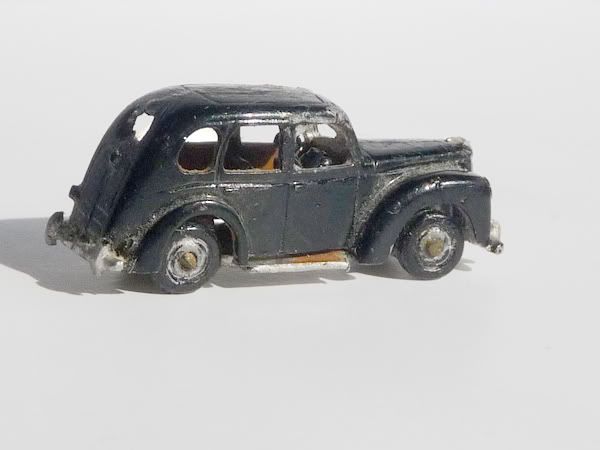
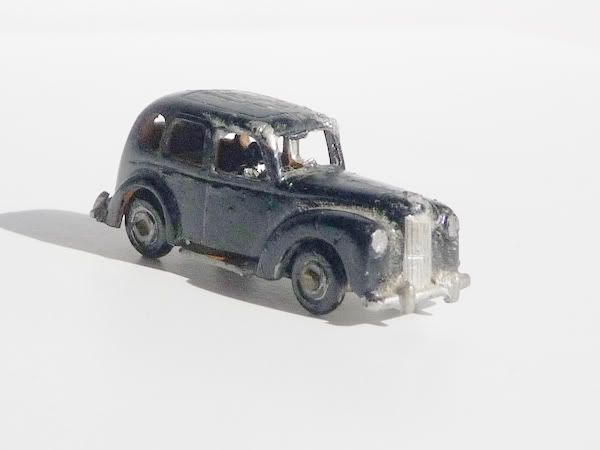
Obviously it could do with a rub-down and repaint. I think it's a Black Standard Flying Twelve (??) introduced in 1935.
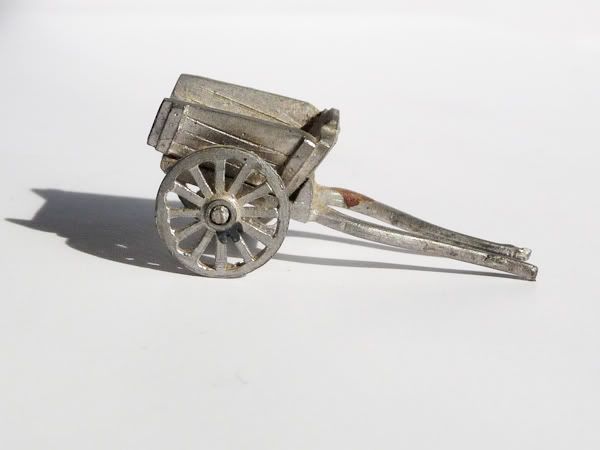
For £1.04 this unpainted cart, which I think will eventually sit in a corner of the station yard.
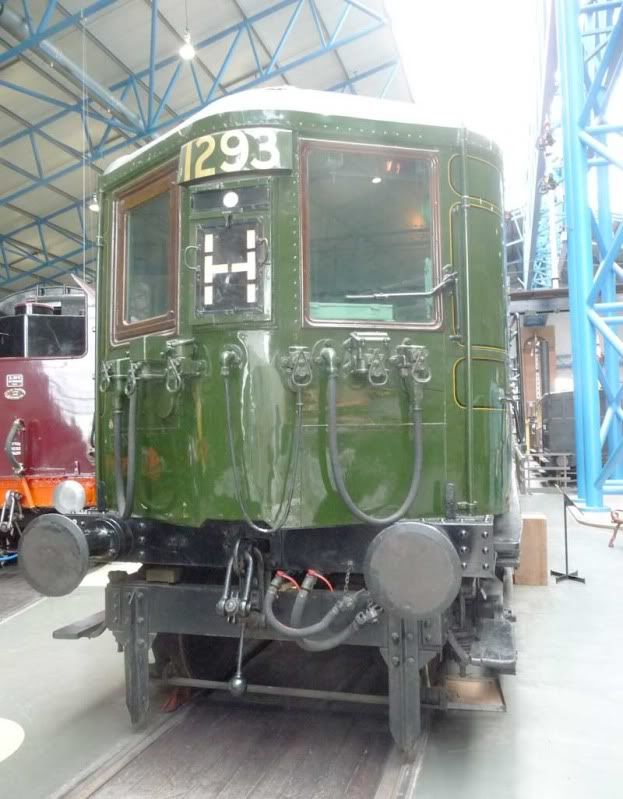
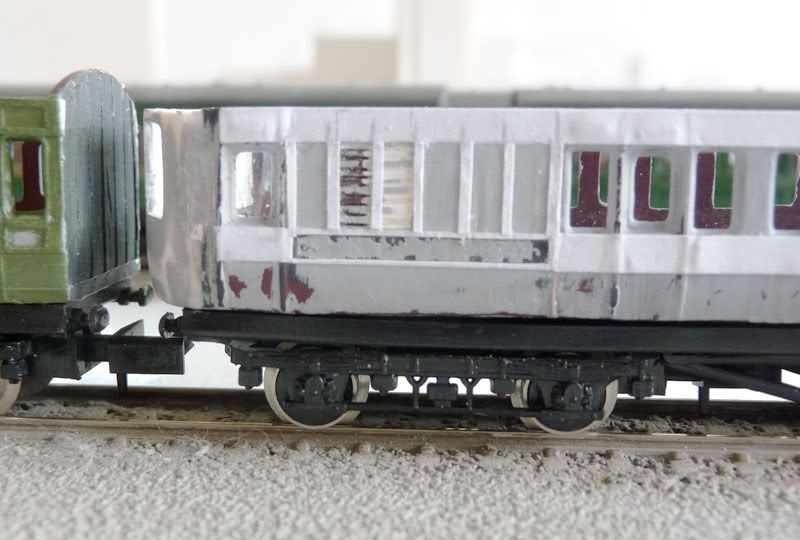
Most intriguing of all - this item appeared on eBay and the carriage at the bottom immediately caught my eye. This was the eBay picture ...
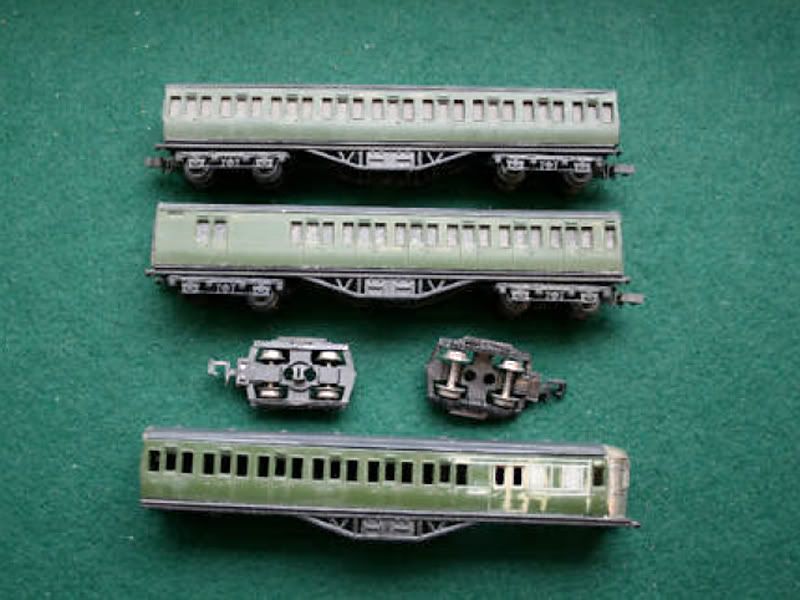
I really wanted this to see how it had been constructed (and hopefully learn from what I saw). I won it for £10.05.
And here it is ...
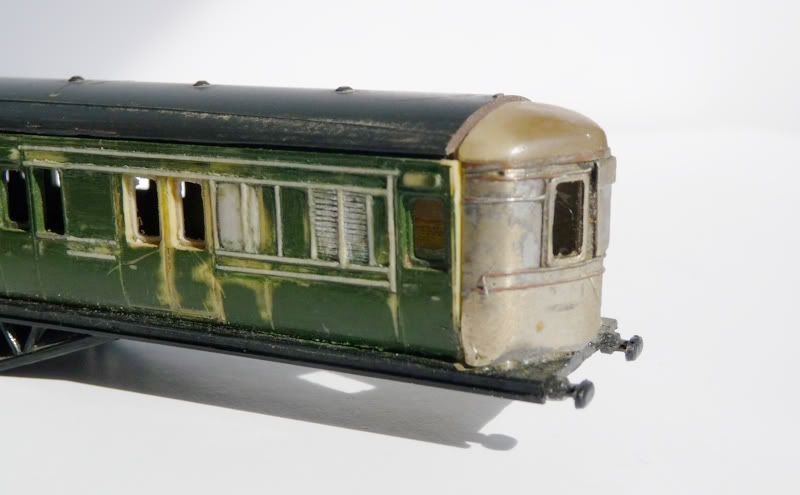
Just look at the ultra-fine beading around the cab and along the first-half of the carriage. Likewise, the louvers just behind the cab door are so precise for such a small scale. To me this is exquisite work. Does anyone have any pointers to techniques and materials which may have been used? For instance, the panelling on the side is far finer than any Microstrip I have seen.

The domed roof over the cab appears to be moulded, although I don't know what material was used - it's a translucent amber colour.
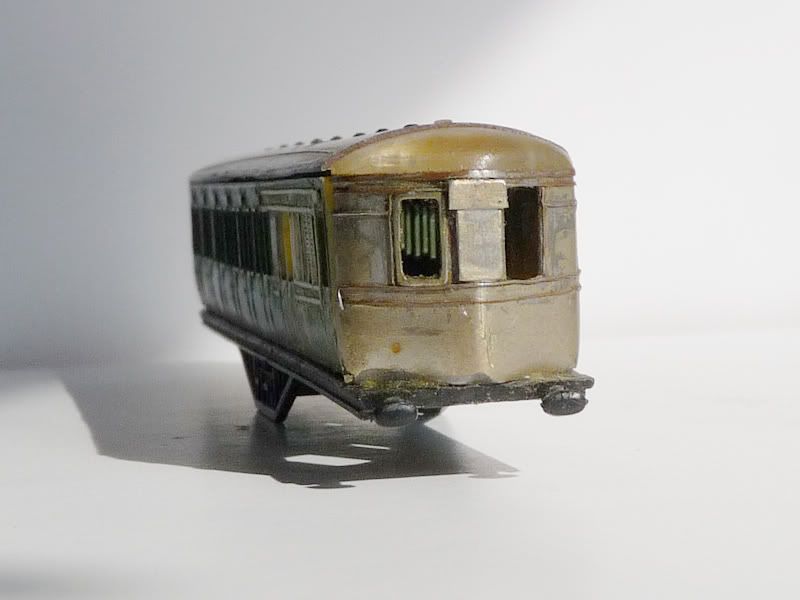
Either way, although it's unfinished it's a great source of inspiration to me and well worth the money.
--------------------------------------------------------------------------------------------------------------------------------------
The other main purchase (from a retailer, not eBay) was a box of unpainted Preiser people and animals.
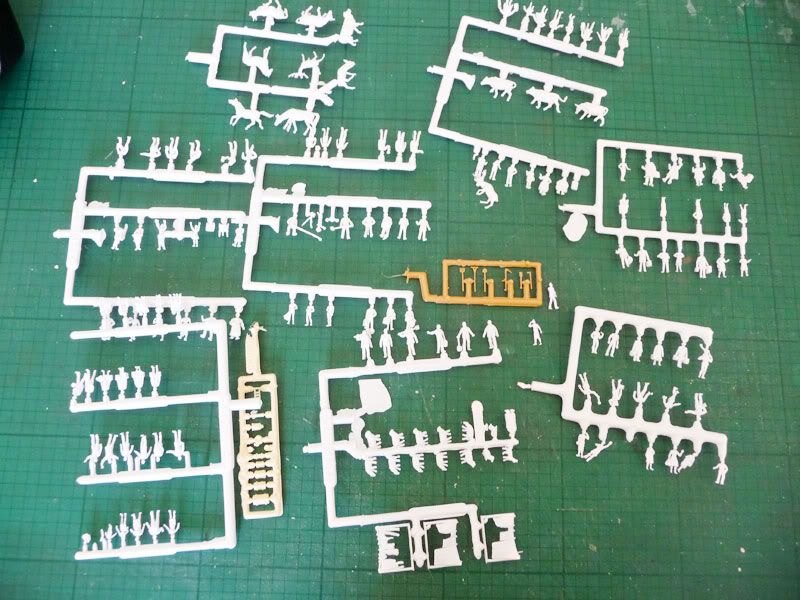
It has all sorts of people, some washing lines, some trunks and sacks, gardening tools, but most importantly for Frankland - the figures are mainly very 'old-school' (hats, suits, longer skirts etc) - and can be painted in period colour clothing. At £21.75 for 120 figures, they work out at 18p each, rather than the £9.00 or more you pay for a box of six painted figures (ie. £1.50+ each). I won't tackle these for a while - I just wanted to get hold of some to see if they'd be right for when the time comes.
--------------------------------------------------------------------------------------------------------------------------------------
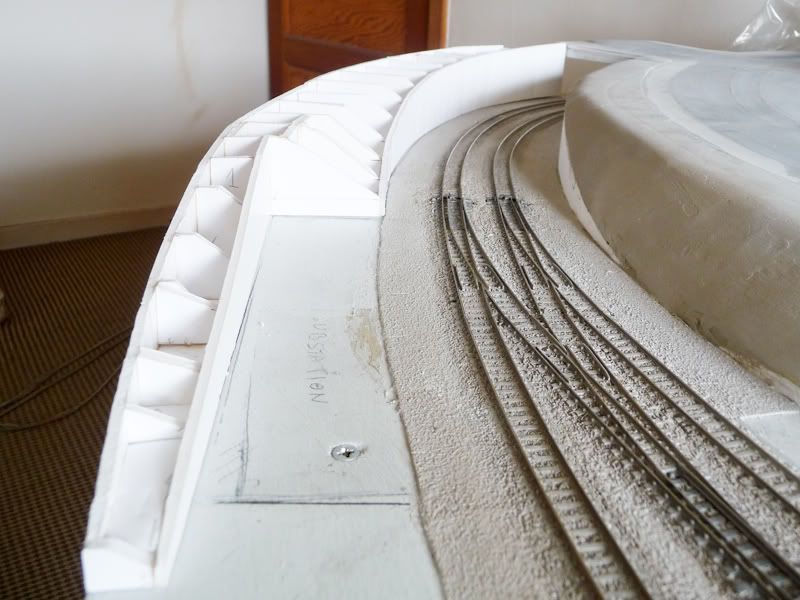
Landscaping:
I decided to complete the cutting which is front-left of the layout.
Here on the left is the base. It's a removable section so I can easily work on this area in the future.
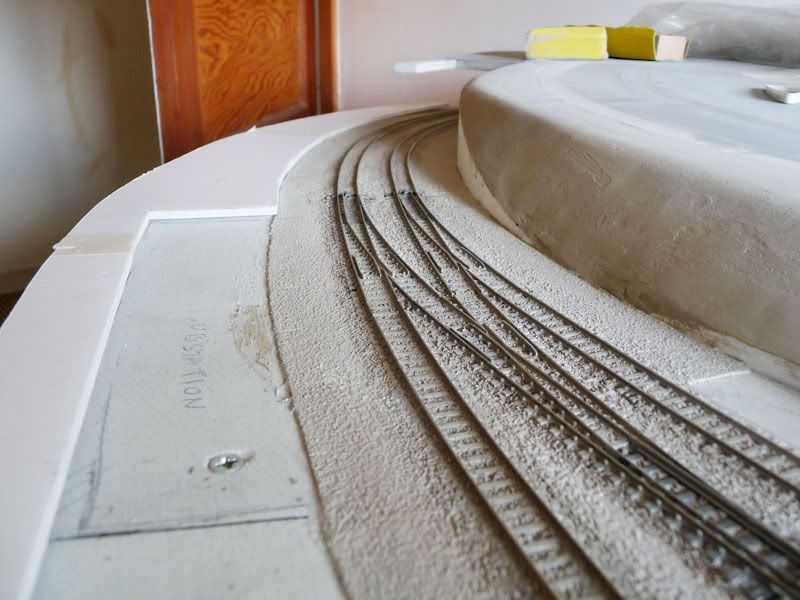
It's foam-board construction, and was later topped and skimmed with plaster.
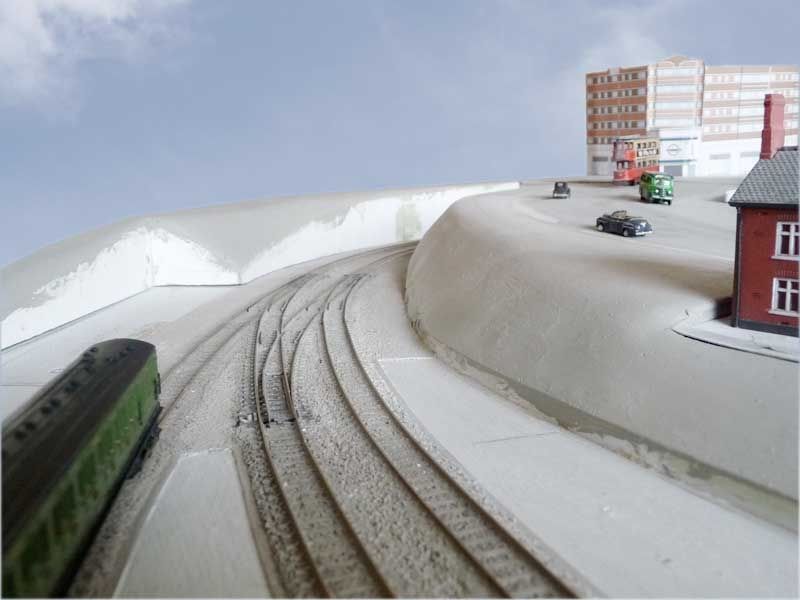
Here it is with a Photoshop sky. The skyline will one day have the backs of houses and trees.
--------------------------------------------------------------------------------------------------------------------------------------
Buildings:
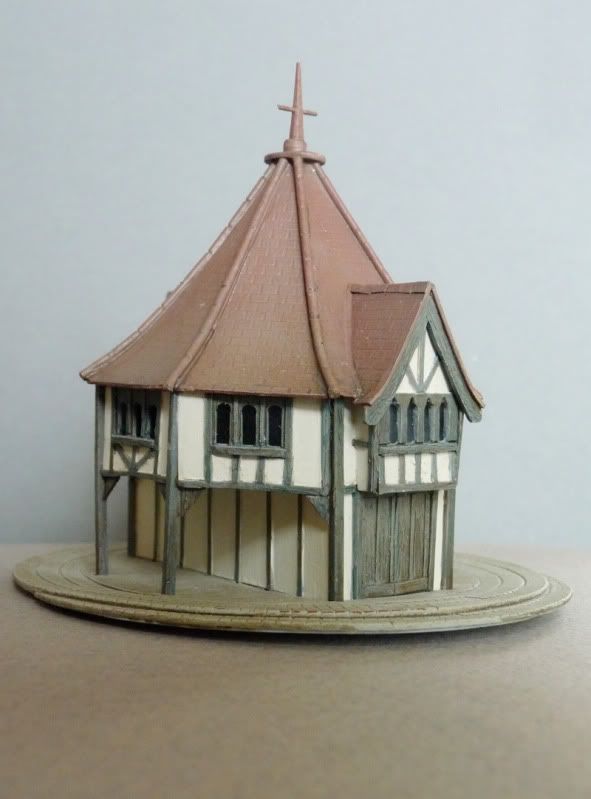
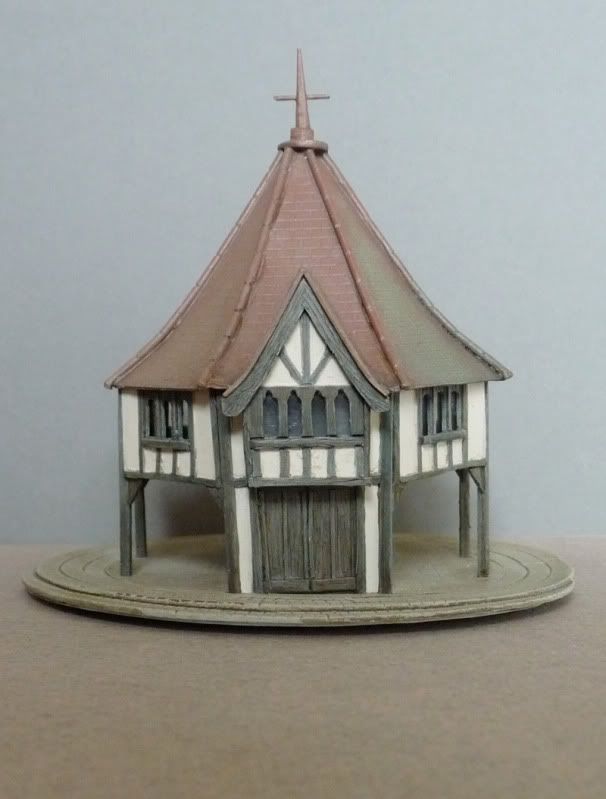
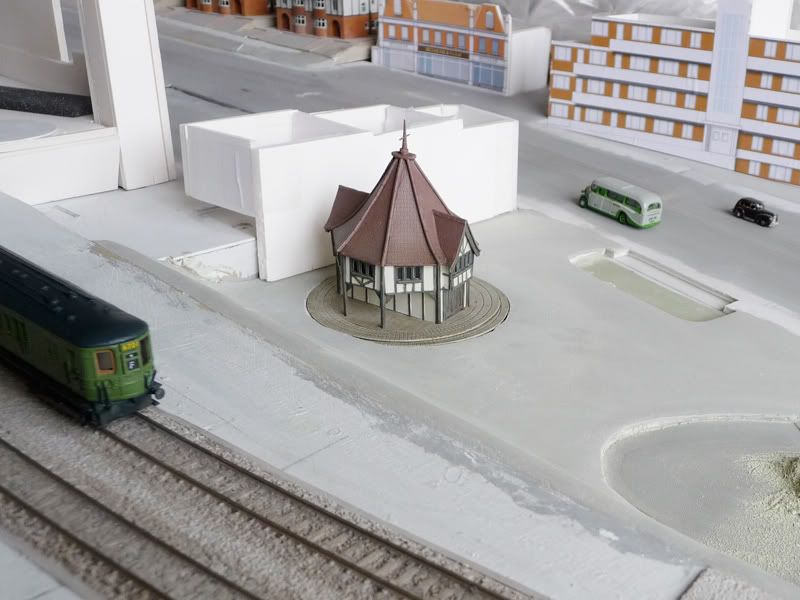
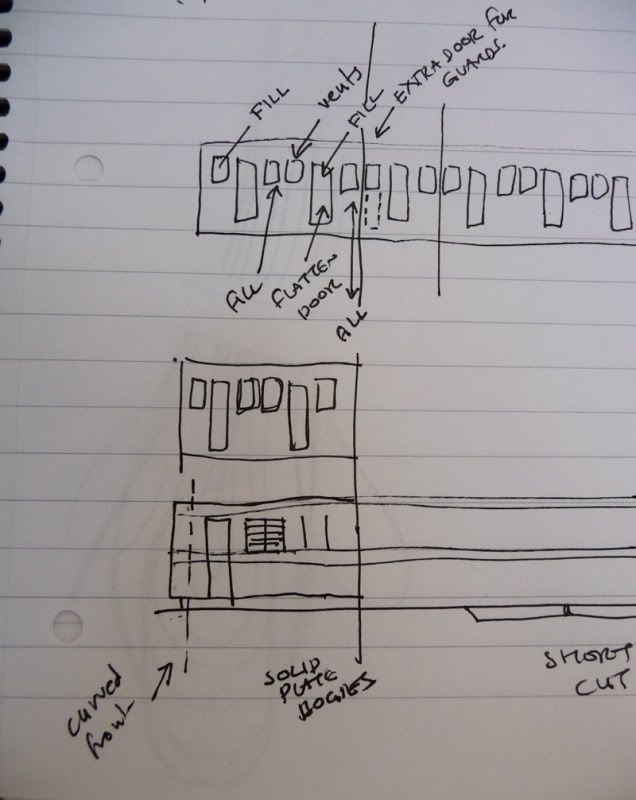
In London's Soho Square is this picturesque gardeners' hut, built in 1890.
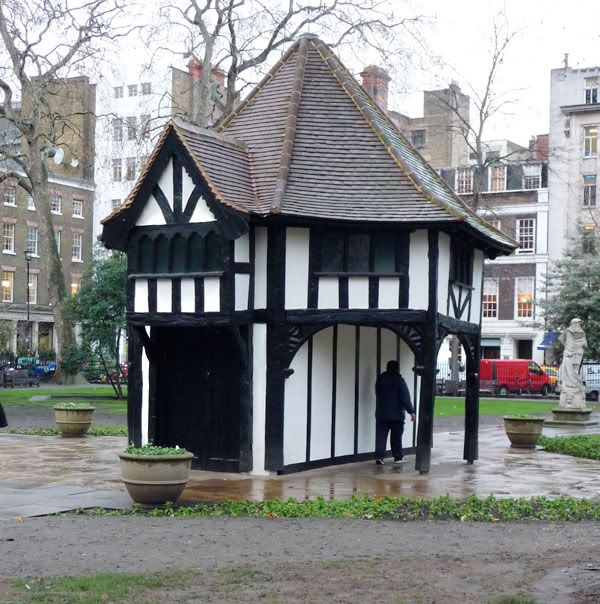
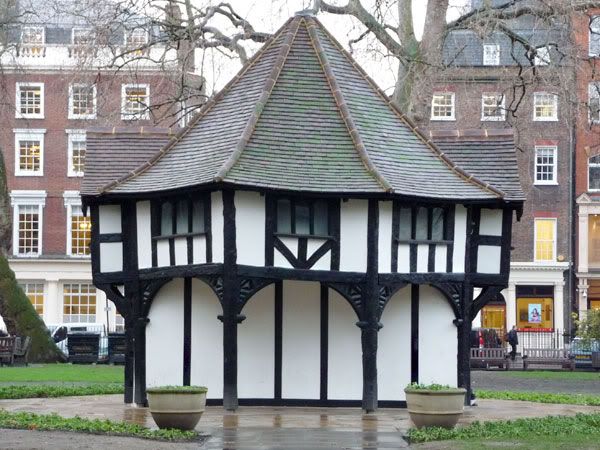
I wanted to make a version for Frankland.
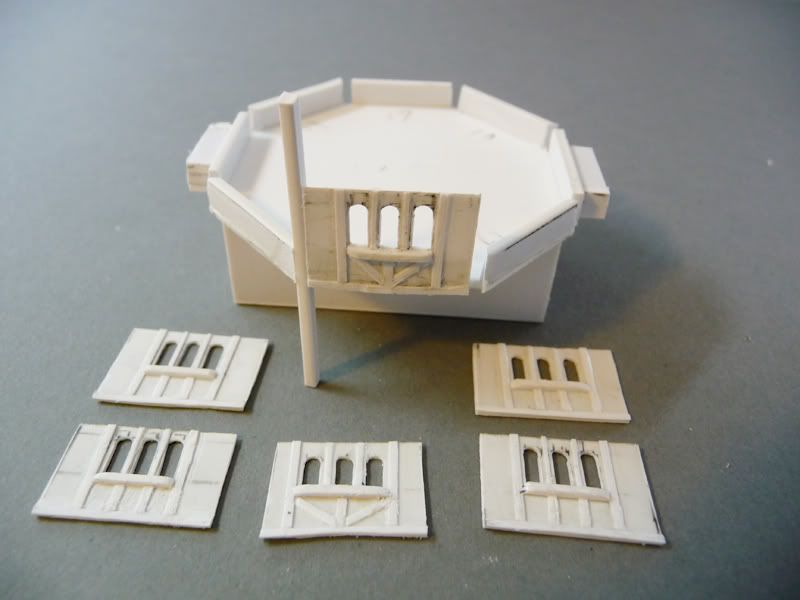
The first two pictures below show the basic body shell and upper-floor panels being constructed from Platicard and Microstrip.
The upright strip is just a spacer at this point as the outside uprights will be fixed in place last (so the ground floor sides can be detailed and painted more easily).
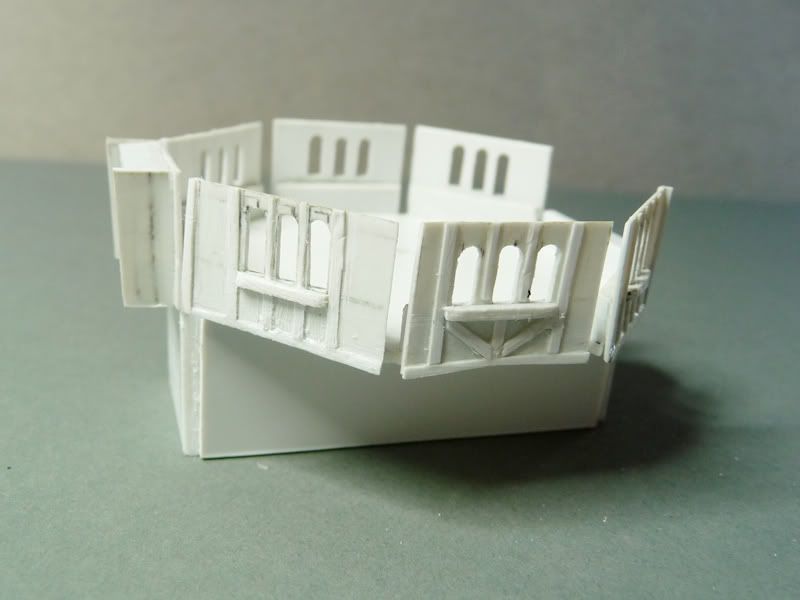
Next: Main components are in place and roughly painted.
The timbers on the original are rough-hewn, following the popular 'Arts and Crafts' rustic-look of the time. So I've tried replicating this with rough cutting and deep slicing into the beams.
After a little filling and filing everything went together nicely.
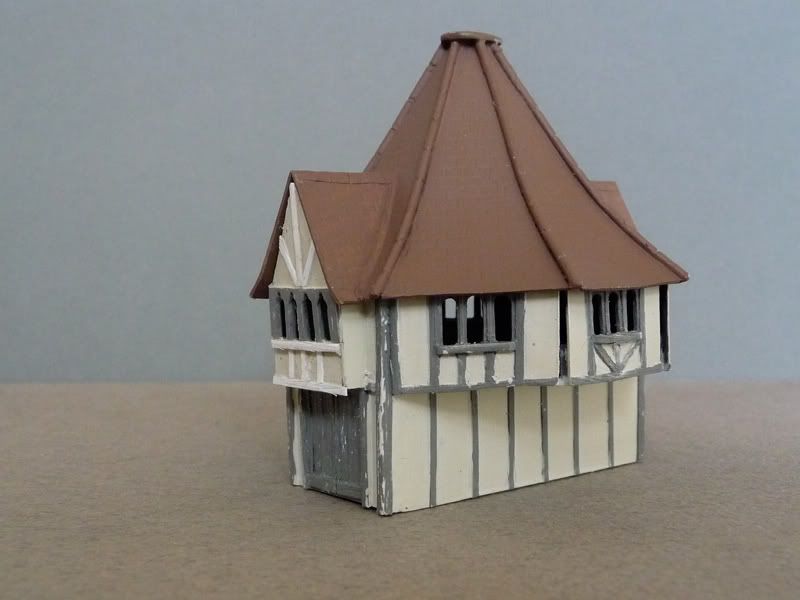
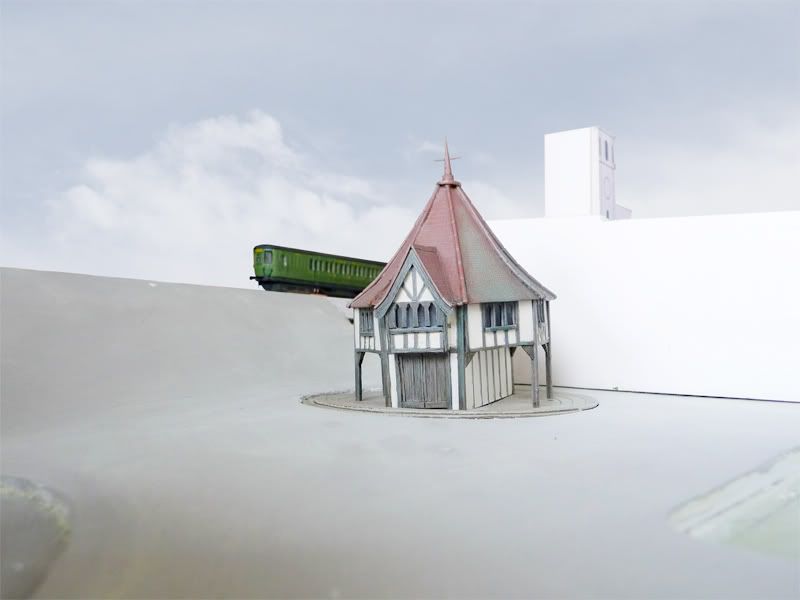
So here's the finished product.
It's not an exact copy of the original, and I wanted it to look a little less well-kept and tired, but I hope it captures an essence - especially the irregular sides and rough woodwork.
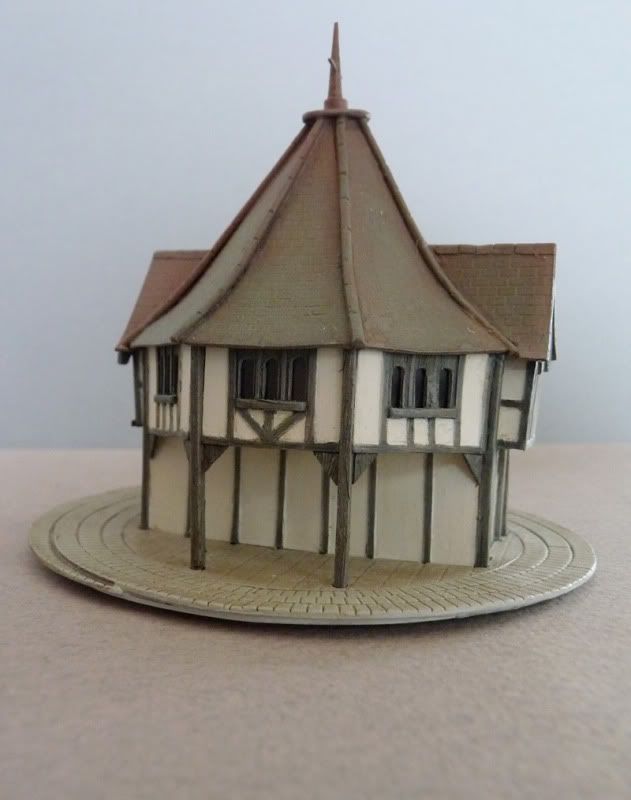
The roof, building and paved base are made as three separate units to make it easy to go back later and add detailing and more weathering if I want.
And here's where it will sit on the layout.
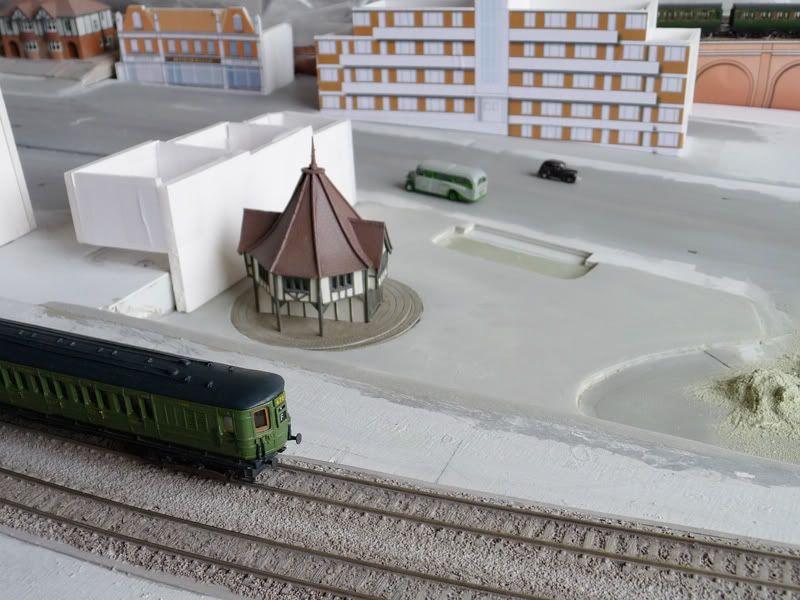
This area will eventually be a small wooded park. Trees will obscure much of the hut, you'll just catch tantalising glimpses of it through gaps in the trees.
And that is the end of the news.
Mark
-
12
-
 1
1
-
-
And more votes of respect from me - great details. I don't think I'd ever think to cut a car in half to create a 'low-relief' scene.
-
Good progress again Simon.
Just to clarify your last post ... you painted window frames with a cocktail stick?
That's an interesting technique - is it your tried and tested way, or just because you didn't have a suitable brush handy (like a long haired rigger, which is what I'd instinctively use)?
You've got me curious so more questions if you don't mind
Does just one pass work for each line? Do you find the paint flows evenly (no blobs?). Any hints or tips? I may have a go at that sometime.
Thanks
Mark
-
Happy Birthday Simon! Hope you had a good day at Crich.
I used to help out there when I was a young teen. Must go back and visit one day.
-
Every picture a winner! I particularly like all the work your doing around the points prior to ballasting.
I can see the fire hydrant better in that last photo, it's really neat. I guess that's a home-made job?
-
That really looks convincing: A multitude of well observed details nicely reproduced - you've certainly given me some inspiration (and put my pace of work to shame!)
Thanks for the 'step-by-step' pictures and commentary. It can be interesting and helpful to see the work process in detail.
-
Ditto ... and I'm looking forward to seeing this area come together. Keep those posts coming
-
Ditto to comments above ...
I think I'm going to like this
-
Hello Simon,
Yes exactly, I was curious as to your method in comparison to Frankland. (I couldn't make out the hole in the baseboard from your original picture.)
On Frankland I used T-Girder construction, so the entire length/width underneath the viaduct is open from underneath, but even so, in N gauge it still doesn't give much space to get a hand and screwdriver inside. The sides to my viaducts will be detachable for extra manoeuvrability in the event of point failure.
Mark
-
I like the concept / urban setting / viaducts and the scenic work / details so far - also your plans for future development.
One thing I'm curious about:

The point motor seems to be sandwiched between the underneath of the track and the top of the baseboard, and very difficult to initially position and fix, or later to remove or work on ... is that the case? Or do you have some clever trick or technique? (Sorry if I missed something).
Anyway, good luck and I'll follow your updates.
-
2
-
-
Thanks for your further comments everyone ... they really are much appreciated
My work on Frankland combines my design training, my interest in the period as a whole, and my decision a couple of years back to return to railway modelling (from a childhood trainset) as a recreational activity. So for me it all sits together quite naturally and happily.
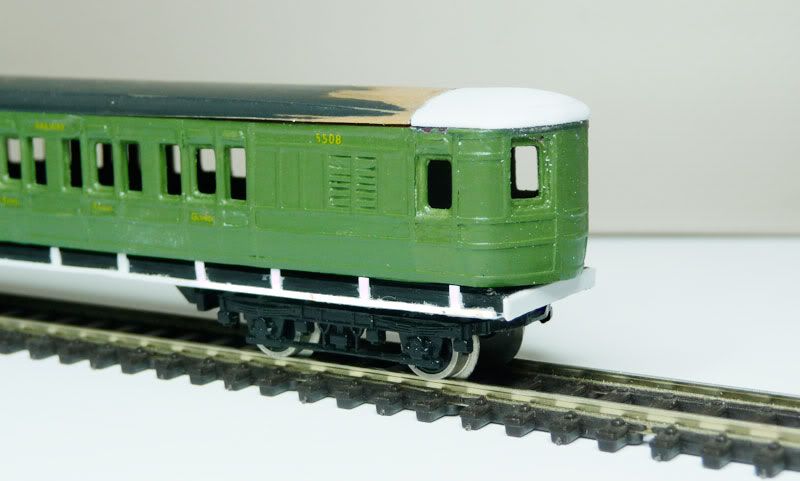
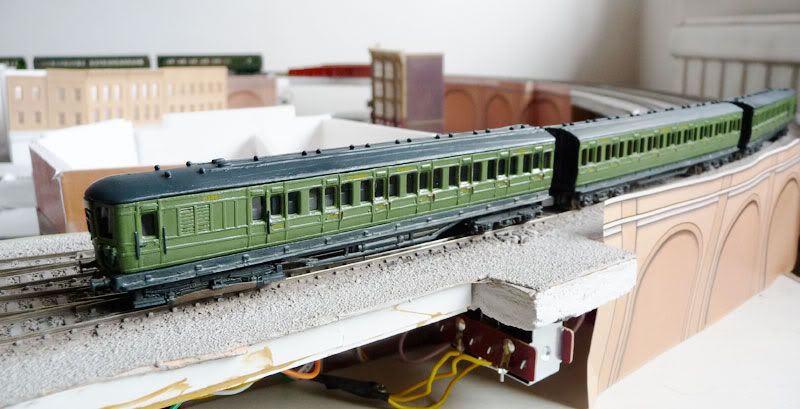
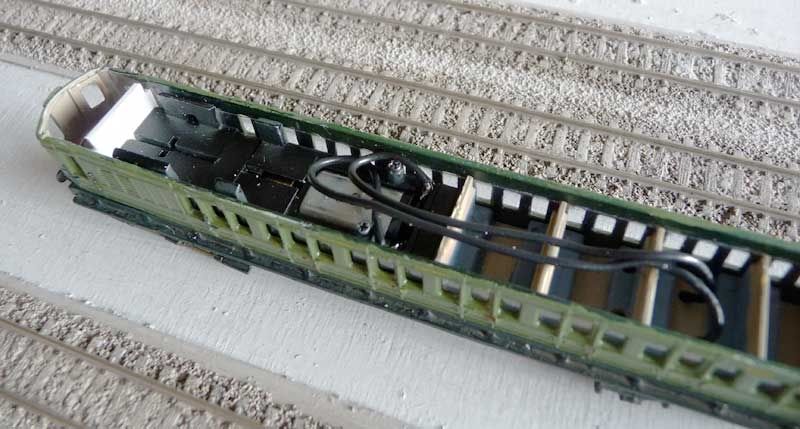
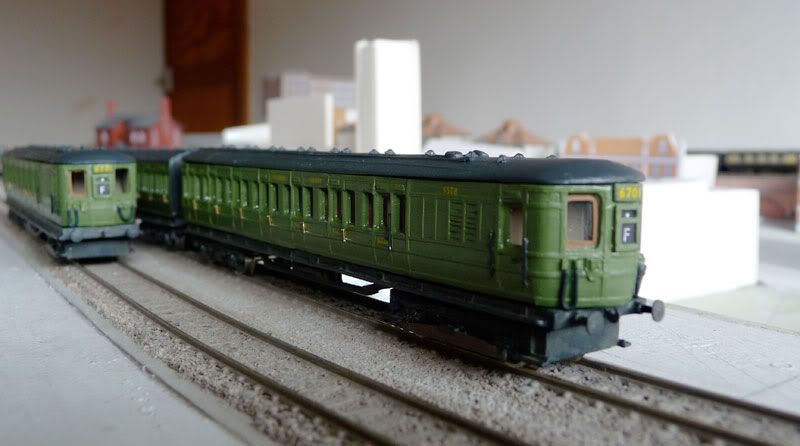
I used the motor from a 108 to power the 3-SUB.
With the 108 set the second coach also has power pickups (but for bi-direction lighting, not for powering the motor). I'm currently adapting these for the trailer car of the 3-SUB so that I have three bogies across two carriages picking up power. I hope this will give me exceptionally reliable running.
I may experiment with a different motor with the next unit - we'll see - still 'early days' on a big learning curve for me at the moment.
Updates will be more frequent in future.
Well thanks again for your posts - I must say I do feel encouraged by so much positive feedback
Mark
-
3
-
-
Hello L49, thanks for your comments.
You may have seen my layout on NRM (linked in my signature).
I clocked the set on Harford Street and was curious as to what it was. It certainly shares similarities with the Crystal Palace stock. Good luck with your conversion. I used the motor from a Farish 107 DMU for my unit.
The Lesney E1s certainly do the trick, although I'd like to repaint and detail them further, change the adverts etc.
Hello Bernard,
Yes, original units varied from 49' to 52' overall length, but were later lengthened on new frames. I see what you mean about the difference in window position / width of compartments between the two types of Farish coach (I'm looking at them right now), thanks for that.
There's something about the bowed cab fronts which I find pleasing. From my purely personal point of view the cab fronts of later units are less interesting, until we get to the 4-CORs.
Thanks again,
Mark
-
1
-
-
Thanks for comments gents,
"The early 3rd rail suburban units are rarely modelled but there's an almost endless variety of different types."
That's true. And if you extend the scope to LBSCR overhead units the choice becomes even more interesting. My plans for a future layout include both third rail and overhead lines running alongside.
-
1
-
-
- Popular Post
- Popular Post
Frankland Update No. 3
Hello everyone, here is the news.
Frankland has finally made the move from the old RMW to the new.
Firstly a quick reminder of where we were:
Frankland exists in the inter-war years when clean, white, art-deco architecture heralds a brave new world and aspirational young things buy into the mock-tudor suburbs from which they travel to work by the Southern Railway's expanding network of newly electrified suburban lines.
Here is the original plan. It has not changed much ...

--------------------------------------------------------------
My last post was in September 2009 - so some catching up to do.
Part of the reason for my lack of updates was the publication of these two books, which were top of my 2009 Christmas list.
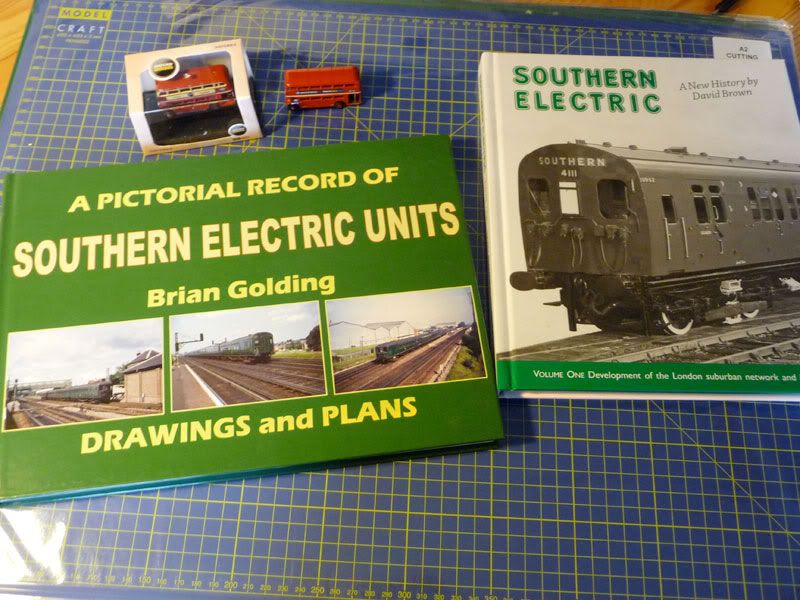
I've always had a fascination with this subject matter - but had little knowledge of it. So I've been reading the books over and over again ...
I now feel better informed and more confident about what I'm doing
--------------------------------------------------------------
Next a precis of work in recent months.
Last time I posted the layout was looking something like this ...
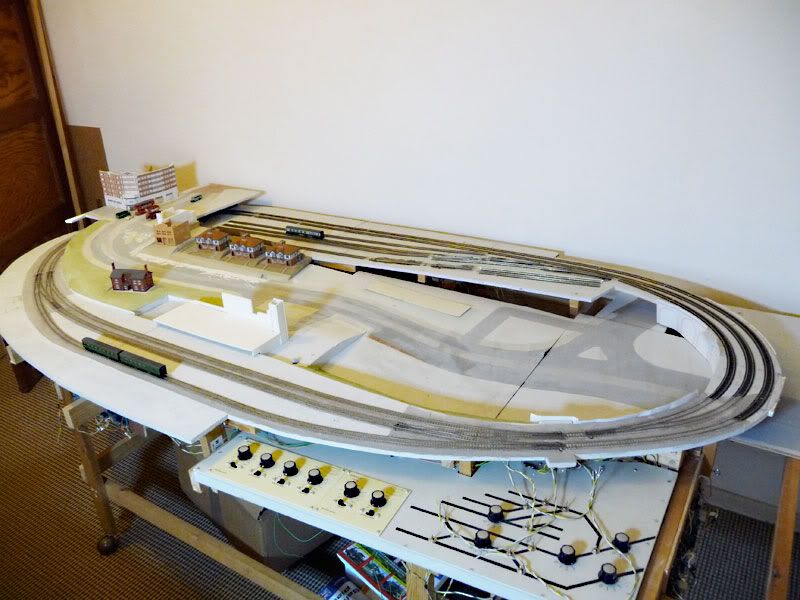
It was starting to feel a bit soulless - so I decided to mock up a few buildings.
I mounted scale drawings of original buildings onto foam board.
The drawings are largely based on pictures in the London Transport Photographic Archive and/or from Google searches (etc).
To-date I have:
A parade of shops
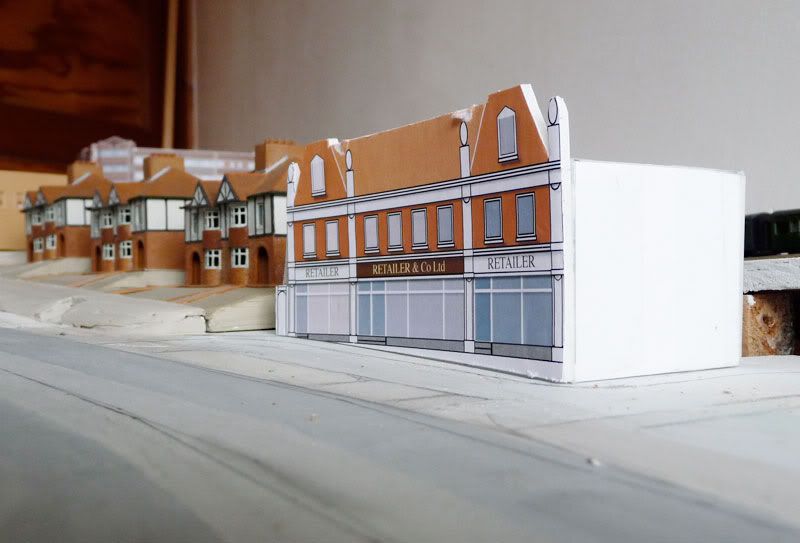
Victorian houses with extended shop-fronts
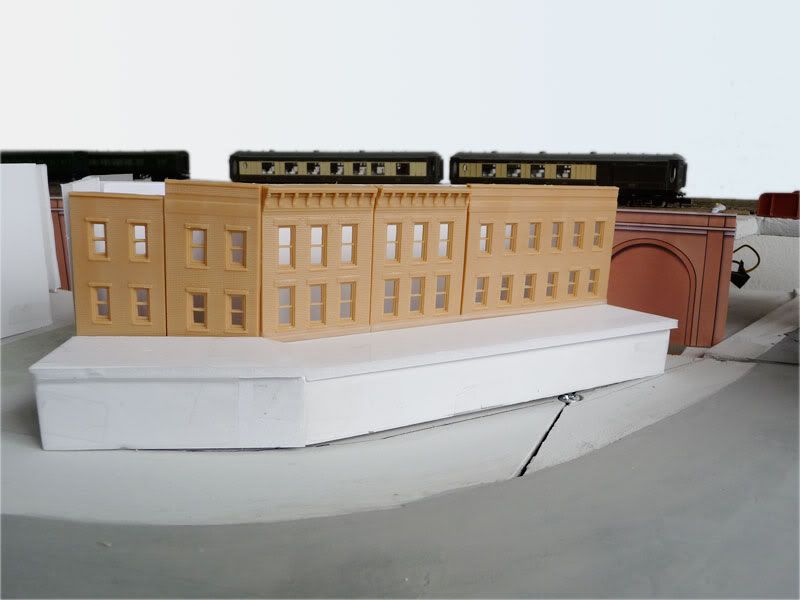
Art Deco flats
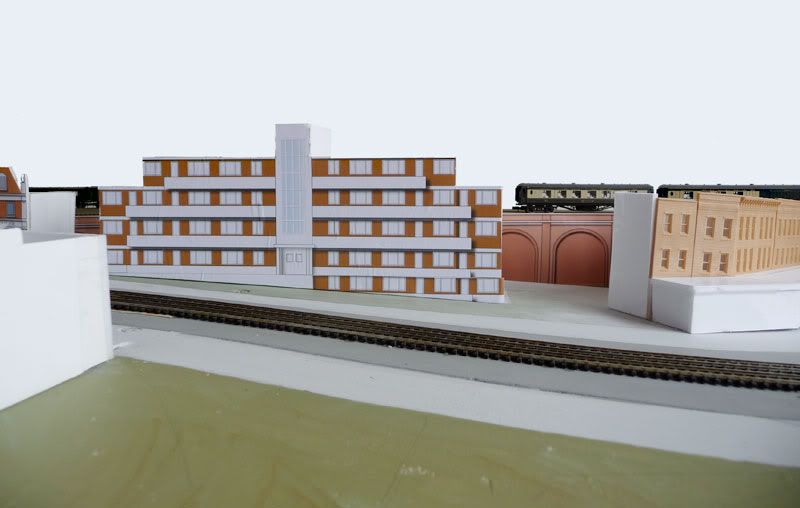
A cinema (The Astoria in Brixton, with jade tiles on the upper face)
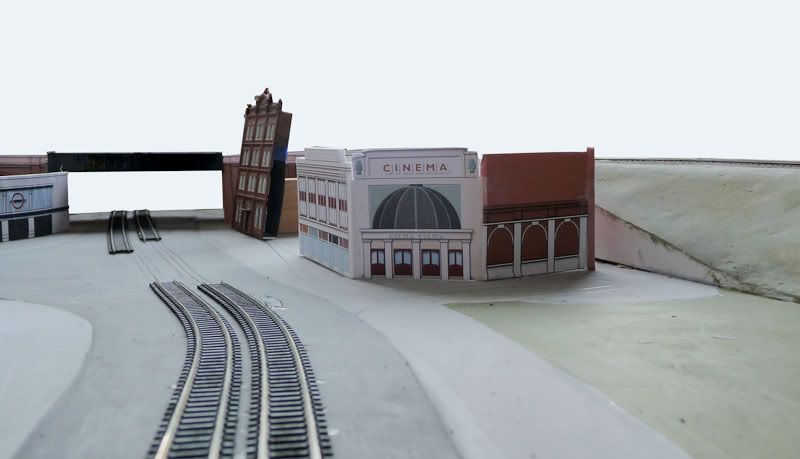
A Northern Line tube station
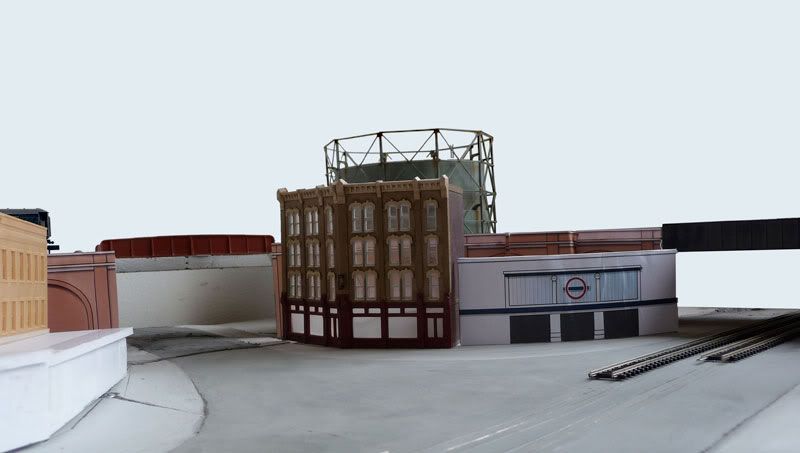
It now feels like the layout has some life to it
(pictures below with a Photoshop sky). 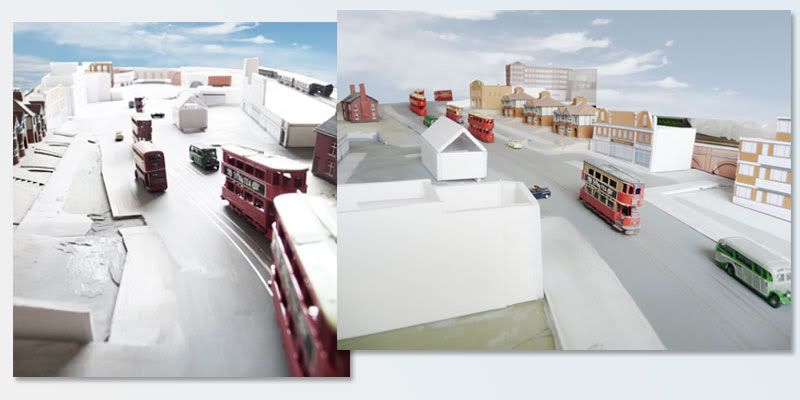
At some future point the buildings will be properly reproduced, and plenty of trees and grass will be added to create a picture postcard 'leafy suburb'.
--------------------------------------------------------------
Stock:
To test the water my first tentative venture into modifying stock was a basic repaint of a Dapol van
Here's the original ...
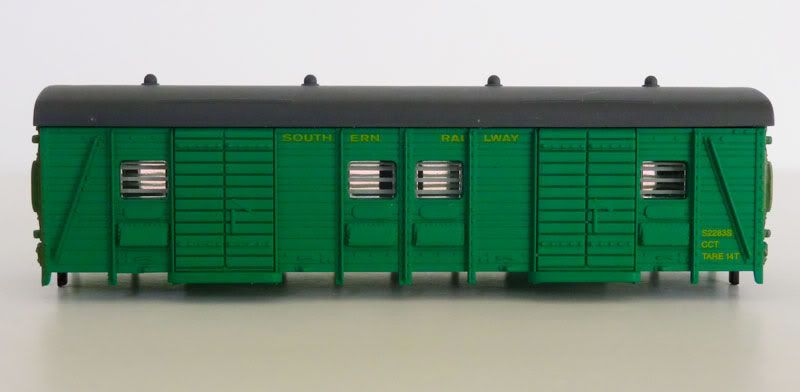
I repainted it and added decals.
And had a go at highlighting additional details.
I was quite pleased with the result.
-------------------------------------------------------
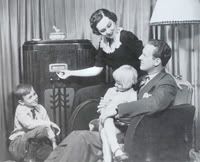
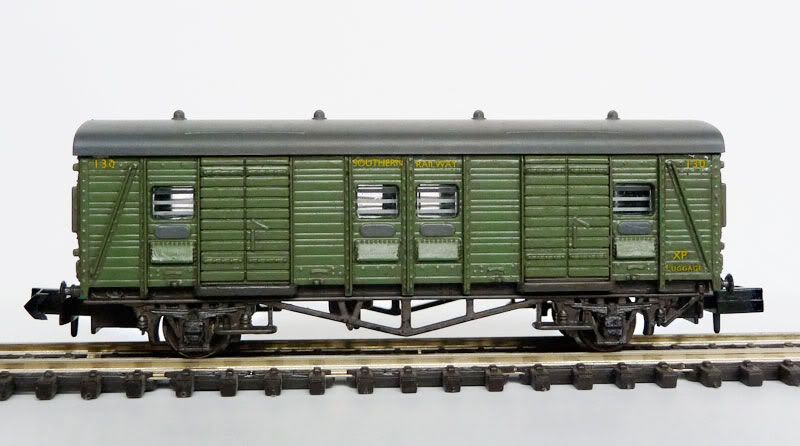
When I was a child I used to pass by a shop in Wimbledon which sold postcards of old forms of electrical transport. They fascinated me.
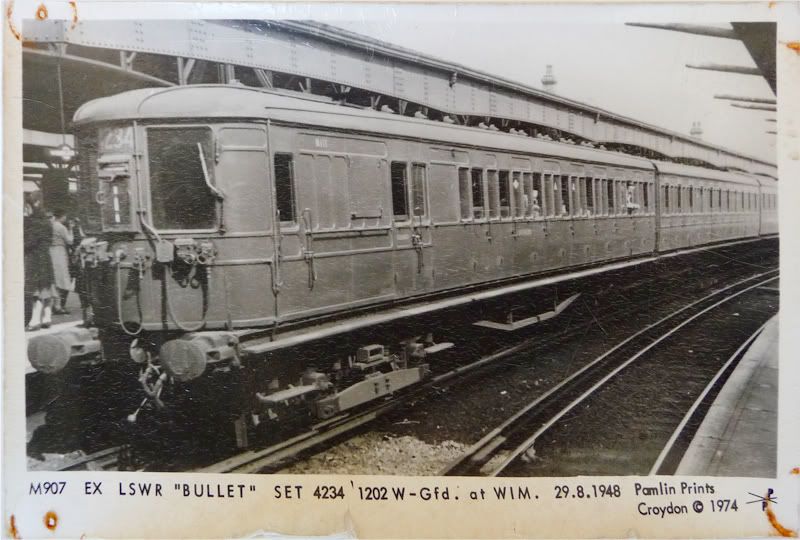
I decided to build one ... so with this in mind, when in York in the Spring I took some pictures. Here are two of them ...
This is a later 3-SUB than the one in the postcard (which had panels) - but it's a good guide to the general look and feel of the units.
I also have some Mike King drawings.
The key characteristic I wanted to capture was the 'torpedo' or 'bullet' front to the units
Anyway - I bought these off eBay for £15.00
and did some sketches
I filled some windows as appropriate, and used sections of self-adhesive labels from which I cut out areas to leave a 'panelled' effect.
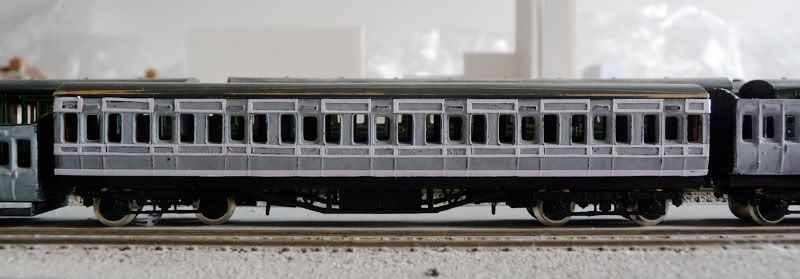
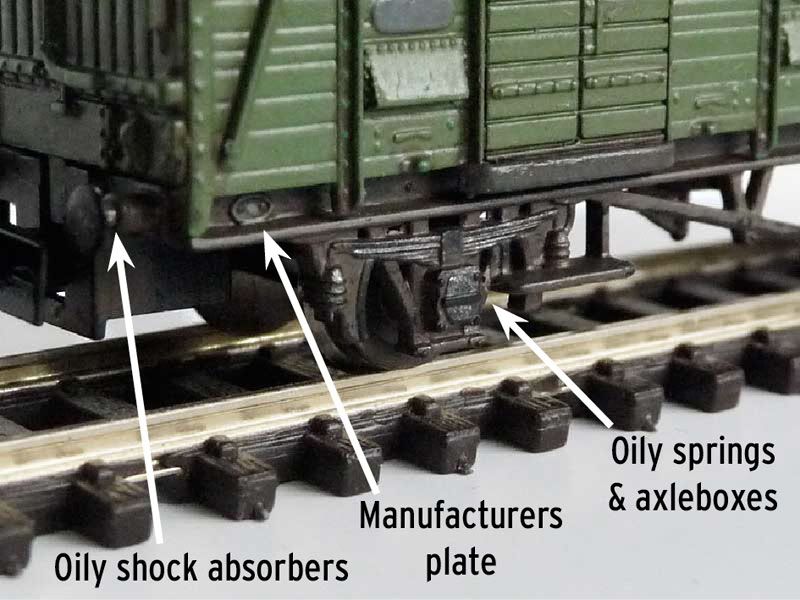
Plasticard was used to create running boards, cab fronts and the the domed roof at each end.
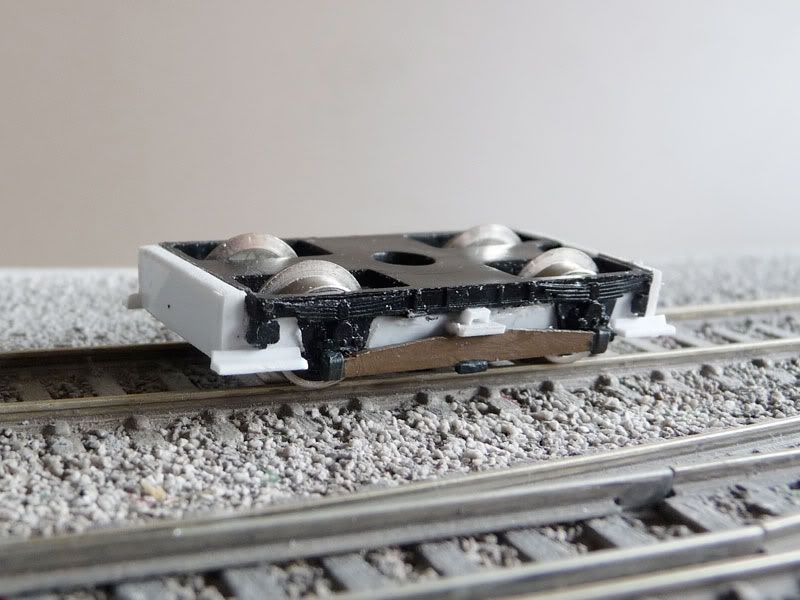
Likewise Plasticard was used to modify the bogies.
Here's the (nearly) finished unit.
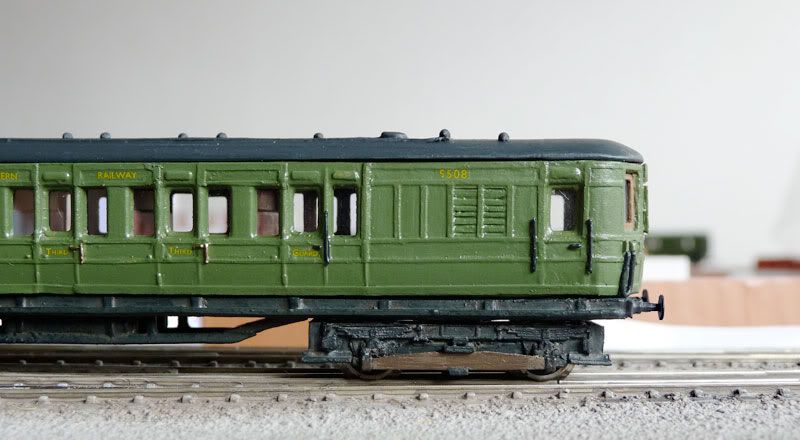
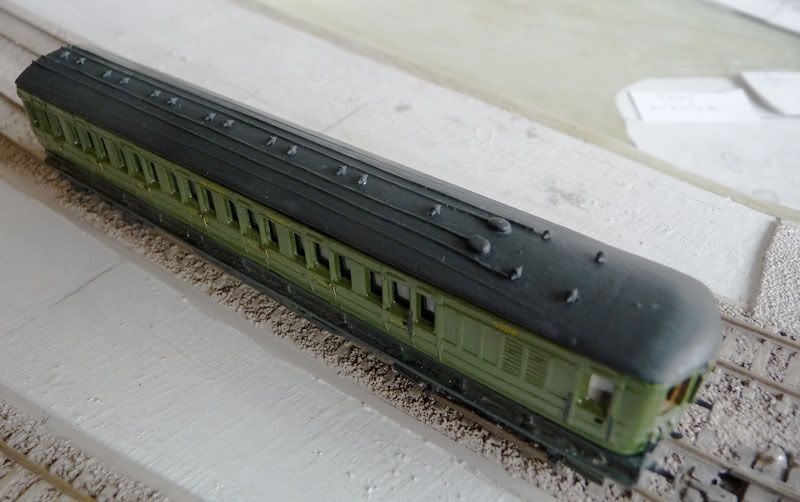
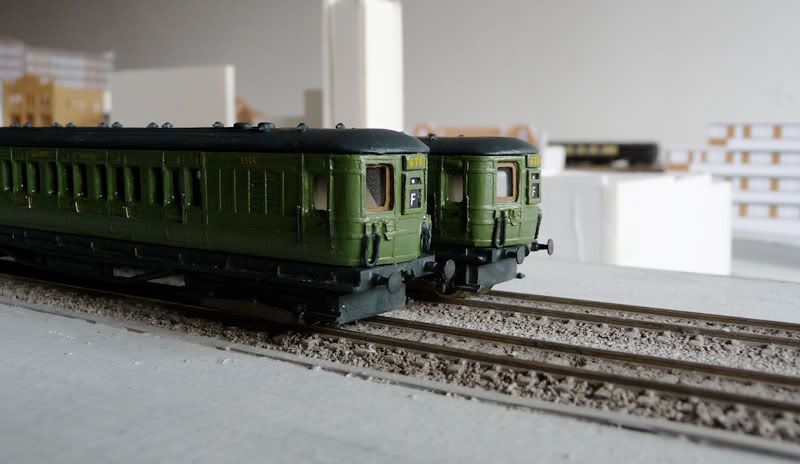
There are inaccuracies - but for me the exercise was about whether I could even make a unit in the first place - so 'essence of' was acceptable to me. There are still a few things to do, such as coupling chains and additional cab-front cables, but it's 95% finished.
-----------------------------------------------------------
Finally: Signalling
When I started the layout I intended to simply have a few 2-aspect signals, switched by point movements, as a token gesture to that side of things.
Since then I've been persuaded otherwise.
Additionally I found a website (see link below) with signalling plans for the SR conversion to colour light signalling around the London termini in the 1920s and 30s, from which I learned quite a lot. This gave me inspiration and more confidence, and with some help I came up with this plan ...
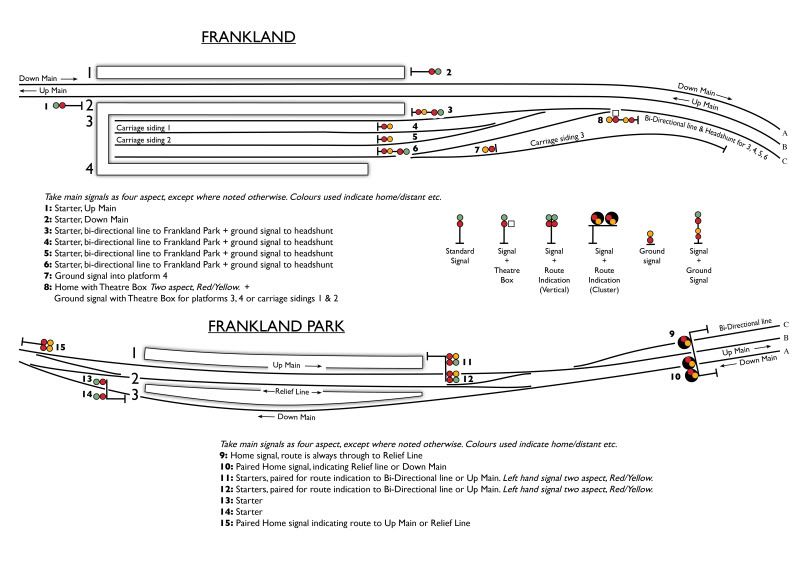
It will be some while in the future before I install signalling. But when I do I'm particularly looking forward to making some cluster signals
You can see an example of cluster signals at the bottom of this page. They're quite distinctive and should be an interesting detail helping to place my layout in a very definite time and place.--------------------------------------------------------------
And that is the end of the news.

Comments most welcome,
Mark
-
20
-
That looks good
May I ask what the set cost (sorry if I missed it in a previous post). -
Tasty
I'm modelling the 1930s, but always on the lookout for track / trams / motors that can be adapted.
-
Hello Gordon,
Just to say I've been following your progress for some while and am glad to have finally caught up with you on this new incarnation of RMWeb.
Keep the updates coming please as I find plenty of inspiration and education from your posts.
Mark


Frankland: N gauge Southern Railway
in Layout topics
Posted
Thankyou everyone for your feedback - all very much appreciated
MrSimon:
The finest Microstrip I have is 010 x 040, the retailers I've used don't sell anything finer.
Do you or does anyone else know where to buy anything finer? 010 x 020, or 010 x 010 perhaps?
I did see the Oxford Diecast tram. It looks to be a nice model but unfortunately is not representative of those which ran in South London. But thanks for pointing it out. They are bringing out a Low Loader Taxi and Jaguar SS at some point though, which I look forward to
bcnPete
I much admire your modelling, so glad to know you enjoy my updates. That's a compliment indeed!
Dave777
My plan is to be a little abstract with most of the Preiser figures: Just get the general colours right for clothing and a splash of flesh for faces and hands.
A few I will detail more precisely where they will be more prominent, eg, traffic police and other key figures where the gaze is more likely to hone in on them more ... at least that's the plan.
Although I do tend to get carried away with detail sometimes, so that could be 'famous last words'
SteveBedding
I'm pretty much a novice myself - only been doing this three years. In terms of planning and preparation you seem to be well ahead of where I was at the start of Frankland. I think that bodes well for your plans and I've enjoyed following your updates.
I don't know how long it will take to paint the figures ... (as above) ... I guess it's a matter of 'watch this space'
Well thanks again to everyone who has commented. It really is encouraging.
Mark