

.thumb.jpg.2fffa28944b81026f58fa37077aebce8.jpg)
Entry posted by Grasslands
1,986 views
 I have been trying to answer three niggling questions:
- How can I fix the Bachmann chassis into the brass kit body?
- How can I fill the gap between the chassis and the front of the loco (see left)?
- Can I refit any of the little details from the original brass chassis to the Bachmann one (sand boxes and the lubricator arm)?
As most of my time in this hobby is spent thinking about how to solve such problems (rather than actually doing anything) I decided, in the mean time, to see if I could deconstruct the old chassis.
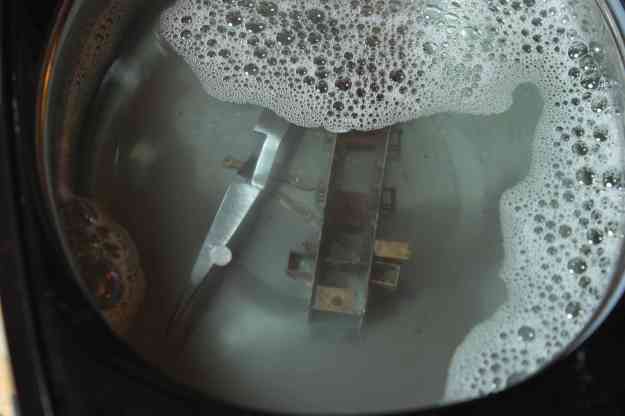
The old brass chassis
I knew I wanted to retrieve the lubricator arm assembly and maybe the brake rigging from the old brass chassis, but I had foolishly soldered all the parts (including the axle bolts) into place. I also wanted to see if I could get the wheels off intact (for use in the future).
After a bit of soldering-iron wrestling, I managed to get all the wheels, gears and motor away from the chassis. I could now strip the brass chassis back to bare metal.
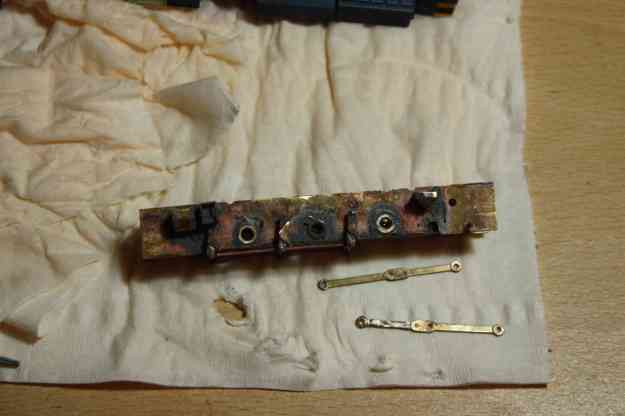
Paint stripping
I have a range of chemicals (normally used for other household or DIY applications) that I use for paint stripping. For metals and brass, there is a chemical I use that can remove paint in a matter of minutes…Nitromors!
‘All Purpose Nitromors’ is a paint and varnish remover which I bought from Homebase or B&Q. This is one of those chemicals where you heed the warnings on the tin! This is vicious stuff! On my first trial with Nitromors (stripping white metal figures) the chemical ate through my rubber gloves and burnt my hands!
It will eat plastic, so if you have any plastic detail on a model, it is very important to remove it. It will also eat any glue joints, so unless you have soldered your model together, expect it to fall apart too (such qualities can also be quite useful).
I have a small metal pie-tin than I fill with Nitromors and then drop my models in (I think plastic containers are too risky).
As expected, after a few scrubs with a toothbrush, the brass chassis was back to bare metal. After a good rinse and scrub with soda crystals I dropped the chassis into my sonic cleaner, which removed any remaining residue.
I noticed after this step that the solder joints had become quite brittle, which makes me wonder whether the sonic cleaner was the cause (I hope not).
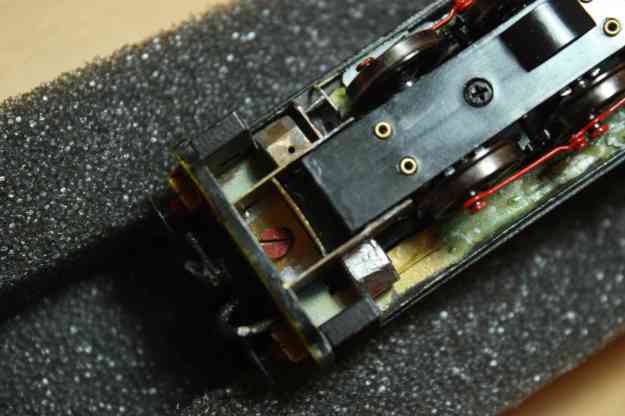
Bachmann Chassis
As the chassis appeared a bit more fragile after the ‘purge’, I decided to cut off the brake rigging (deciding that I wasn’t that precious about including it on the new chassis).
I then noticed that the Bachmann chassis was actually thin enough to sit inside part of the old brass chassis frame. I decided to cut the front end of the brass chassis off and change the position of the spacers, which miraculously allowed me to refit the front end of the brass chassis around the Bachmann one, thus:
- filling the annoying gap at the front of the engine;
- creating a front mounting for the chassis; and
- retaining the front-end chassis detail
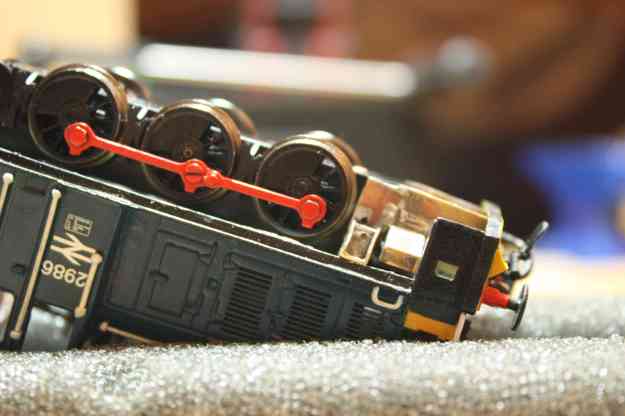
Result! Granted, the rear section will not be quite as simple, but I will tackle this next.
See my blog for further projects: GrasslandsModels.wordpress.com
-
 6
6

2 Comments
Recommended Comments
Create an account or sign in to comment
You need to be a member in order to leave a comment
Create an account
Sign up for a new account in our community. It's easy!
Register a new accountSign in
Already have an account? Sign in here.
Sign In Now