


aberdare
-
Posts
987 -
Joined
-
Last visited
Content Type
Profiles
Forums
Blogs
Gallery
Events
Exhibition Layout Details
Store
Posts posted by aberdare
-
-
I'll add my 'me too' to that as well.
Now that our internet issues seem to be resolved it should be a pleasure to view them rather than a chore.
Come on Jeff!! my first visit today and I expected to see them

Impatient of East Yorks (Jim)
-
 1
1
-
-
Hi Jeff
Just catching up again and things have moved on really quickly, it must be the fastest moving thread on here.
After reading through the comments I'm in the less is more camp for the top of the fells so I'm happy to see no vent - interesting feature though it is - and I don't think there should be a building or part thereof either. It' been a few years now that I walked around the fells but I seem to remember most things like that are lower down the slopes, may have to browse through all my old books and photos if I get time.
Michaels idea on the walls is also a good one, keep that top bit clear except for the rough grass and sheep.
All in all it is looking great though and I envy your progress, I'm still stuck in a low gear or is it reverse!!
The MiniNatur stuff is great, bit dear for me though which is why I am playing about with underlay, string and furry, hairy stuff acquired from the wife when she had to give up some of her hobbies.
Keep up the good work, it's all coming together really, really well.
Jim
Managed a longer post as the wife had to retire to bed early tonight and I could nick her laptop instead of struggling with the old one and a dongle, the latter of which bombs me out after a sentence or two.
-
-
1
-
-
Grass! really!
I thought it was an illusion by my poor old colour blind eyes.
Looking good Jeff.
Even though I can see the difference now I hadn't until Andy pointed it out - thanks Andy.
Jim
-
I must be the only Lunester who didn't know what a 4F was
 until I googled it.
I'm sure you lot will help expand my knowledge beyond early GWR
Jim
-
Snip *I'm wondering if I should add a bit more paint....*
No, it looks just fine to me. Like Andy says there may be one or two spots where it could be darker but I think you got it spot on first time.
Nice work Jeff.
I will know how to do my mainline now .....when I get that far!
Jim
-
I'll be the one in the green mankini......!!!!

'Gulp!!' - er, I'll be the one hiding behind the um, the err, well anything really making sure you aren't before I put in an appearance
Just in case you you are wondering what I look like I can just be seen in profile on the Pickering exhibition thread in the first picture of post 36 talking to Michael, i'm far left hiding behind a wire.
I seem to do a lot of hiding

Jim
-
Hi Jeff
Ballasting looking good so far, with regard to Peters post I like the finish at point C as it blends in really well. Looking forward to seeing the final results.
When you have your day out at the NYMR if it is on the Sunday we could meet up as that is one of my 'days off' and it's a plaace I visit fairly regularly anyway.
Jim
-
Hi Rich
No wondering here, now I know who you are and what you do you will be easy to remember.
As for the lack of CAD when setting out I was pretty good at engineering drawing and only disposed of a drawing board
and other equipment 10 years ago when I gave it to my son when at Uni, I think he moved onto to CAD later though.
No work in the shed as we had unexpected family visits so it will be Friday before I can get any serious work done,
it looks like a bomb site currently but I hope to get it done over the weekend.
Jim -
Hi John
Thanks for the comment and I have to admit I have cut some chairs from the sleepers and am thinking of sticking them on, I follow the Far North Line but have yet to visit again, I'll get around to it soon.
Thanks for your post Michael
I had read somewhere before that the slide switches had been used but not having any to hand I couldn't try them out, I know you can buy them cheaply enough but it is always nice to pick them up and try them to see if they feel just right. I like what you have done and may adopt something similar later. In the meantime I will stick with what I have as its robustness is pretty grandchild proof, my grandson is pretty good (age 6) but his younger sister hasn't quite grasped the concept of gently yet and if she sees us changing points she has to join in. So mods in the future maybe, thanks again.
Hi John
Thank you and I will have to pop over to Hintock one evening. My wife was out with her companion the other day to give me a break and she came back with some RM magazines from 2011, they were only a few pence each and she thought they may be of interest, well one of them was the May edition which featured Hintock so it was interesting to read the article as I was not modelling then and had never seen it. A happy coincidence seeing as how I am a follower, the wife is obviously learning my tastes pretty quickly.
As for bouncing, your are right, we don't even though we think we can.
Thank you to all the comments and likes etc.
More to come later as some work has occurred on top of the boards too.
Jim
-
1
-
-
Hi Jeff
The ballasting is looking good so far, it will be interesting to see how it turns out later, like one or two others on here I have an unlimited supply of ash when the weather cools and I use that for mine. Some of the photographs I have show piles of it in various places on the lineside, waiting for a wagon to take it away maybe.
Just a little of topic for a minute, but I had a day out last month - taking some of Lindas relations on a York moors tour - and I took them to Glaisdale near Grosmont, I don't know if you have ever been but there is a road and pack horse bridge over the river and a viaduct above that. I thought of you and took a few pics which may prove useful to someone if not yourself, not the right area but hey, information is information. A lovely little spot to visit if you are into that sort of thing


Catch you later
Jim
-
3
-
-
Thanks Dave & Dave
It's a great space and the same size as my garage the the original Mk I started in back in the 70s and I am looking forward to getting it all set up.
Thanks Chris,
Things have settled down now so I have more time and thanks to the hard work from our care worker I now have a much clearer mindset.
As for the shed I am halfway through insulating it and hope to complete it by next week and get some lighting fitted before the nights draw in too far, it is also alarmed though I had to disarm while I was working in that area, all back now though.
After I bolted Hemyock back together I had to assess the damage which was really only to the track and odd bits of groundwork, so the cut or join was patched up and the boards leveled - so much easier in a shed that doesn't lean - and all the affected track was lifted. Is this known as 'doing a Larry' now for those who followed Coachmans Greenfield thread. The track was then relaid and fixed again, I also took the opportunity to modify the Peco points so that the spring mechanism was removed and tidied up the sleepers, I think they look much better now.

The track being lifted

The modified Peco point
Of course I then had the issue of how I was going to lock the point when I changed it manually, as this was something that had bothered me for some time I had plenty of drawings of complex spring systems and a collection of springs, wire and various bits of metal. However, it was while doing something completely unrelated that I found a solution, a simple ball catch for a cupboard! I forgot whatever I was doing and dropped into 'I wonder if' mode and with the aid of a length of wood, a doorknob, a couple of screws and a pin I had it sussed. As I have had a number of all these items for 10 years or more from renovation work in the past I classed this as not costing me a penny, most important seeing that I have blown my modelling budget on a shed.
Anyway here it is, a bit Heath Robinson but it works.

a simple push/pull system held in place by the ball catch, a pin in the other end is fixed in another bolt and up to the point, no flexing anyway it is as solid as it looks, I never have been one for aesthetics under the baseboard. It's probably been done before somewhere but maybe not for free, future ones will be neater as I will have to buy some dowel.
I meant to take a picture of the proposed track plan too - I still prefer pencil and paper - but that will have to wait, I left it outside in the shed, oops.
More later
Jim
-
6
-
-
Hi Jeff
Sand is good to use, in real life some of the Culm valley was laid on a sand/ballast mix as it was only a light railway. So that is what I have started to use and like you I always sieve everything I use to get the finest particles, keep up the good work.
I spent a bit of time catching up and like the idea of the aqueduct - there was a S&C layout in RM in 2011 with one but they never really showed it, bit of a shame really. The rock faces in the cuttings, well what can one say, I thought number 1 was OK, 2 was pretty poor but 3 is fantastic, another job well done. Last but not least the stone walling is great and I admire your patience in achieving so much but plenty more to do.
I had a old friend round the other week who asked me how my ballast didn't turn green when I added PVA, like you I fill the gaps between sleepers and add the ballast, it seems much easier that way too.
JIm
-
1
-
-
- Popular Post
- Popular Post
It's been quite while since I was last on here so apologies to those that posted and did not receive a reply.
Life has been full of ups and downs over the last few months with too many of the latter in the first of them, but not all downs are bad as I will explain later. With the wifes health causing concern modelling took a back seat and when I tried to start again things went wrong and plenty of mistakes were made, quite a few bits ended up in the bin in frustration and as the weather warmed up the modelling room (conservatory) got hot, the models suffered from neglect and I got pretty fed up with it all. Even when I went out to the layout to do something easier the winter had took it's toll in the old garage and motivation went completely, I wondered what had been the bl--dy point of it all. I was on the point of giving up.
However you can't keep a good man down for long and a couple months ago me and the missus decided it was time for a big down of own making - this tatty old asbestos garage. So it was emptied and I set to on some 12" to the foot demolition.

It had a 4.5" drop from the front left corner to the back right corner but the high spot was actually in the middle which was higher than either corner.

going

going

gone
A wave of the magic screwdriver and.....

Hey presto - a new railway shed

Hemyock - which had been cut in half - sits at the far end on the right, magic screwdriver in the foreground.
That was a couple of months ago now and things are starting to move on now the enthusiasm has been rekindled but more on that later. In the meantime there are a few more appointments to attend and I will then complete the insulation that is half done and then look to repair the neglected models.
It feels good to be back and dare I say it - steaming along. My wireless card in the laptop packed up a short time ago so I'm now on a dongle which is a bit erratic so apologies for any missing words/punctuation. (I think I got em all) I know I wouldn't have laughed that off a few months ago, the laptop would have joined the old garage
Catch you again in a day or two.
Jim
-
23
-
Ello, ello, ello! Wot's going on here then?
I was last on around 4 months ago waiting the big surprise and what do I get, a half naked man in a mankini
Just a flying visit but will be back later
There's also a lot of funny buttons but I couldn't find a 'That's silly' one
catch you later
Jim
-
If you look along the edge of the setts where they run parallel to the track, you'll notice that the setts do not cover the sleepers (to access the chairs easier I suppose?) but there are old sleepers there butting up to the rail.
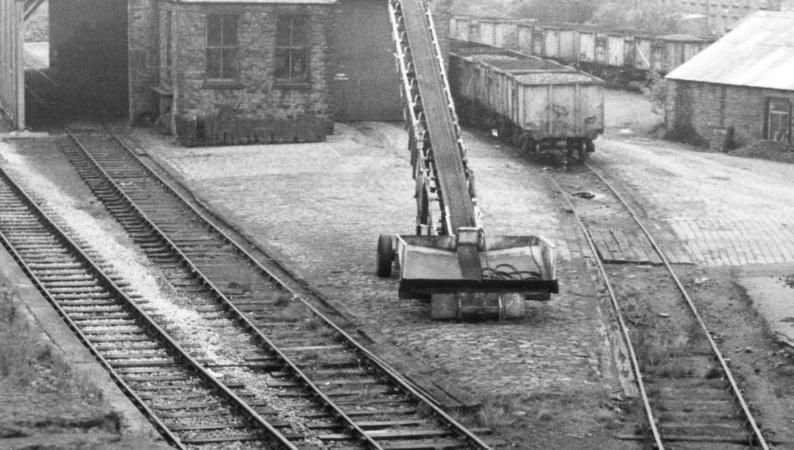
Jason
I see what you mean now, I hadn't seen a yard with the setts laid like before up against the other sleepers, either that or I have just not looked closely enough. It looks worth modelling so I hope you are going to give it a go.
Jim
-
Jeff
That's a drastic change.
I do like that last shot of the fell though, being colour blind it looks just like the real thing.

-
Hi Jason
I love to see setts in a yard and personally I would put them between the rails as well, especially if the traffic in the yard drove over them.
As for the sleepers on sleepers I don't know what you mean?
Jim
-
Phew!
Good decision there Jeff as when I was catching up and saw those first pics I was gobsmacked at the steepness, it will look much better now.
I know there are always things we would like, in my case a wooden trestle viaduct but I wont because it won't be right. When you go prototypical you have to be careful what you do so forget rocks and concentrate on all the new things tou have learny,.so good to see the right decision made.
Right a last quick look about then some sleep so I can crack on with my model again tomorrow before vacating the dining table for the weekend.
Jim
-
I think Jeff must have got fed up with those days of very few posts so came up with the idea of another secret to tempt us in. We are now all on tenterhooks waiting......and waiting........
Will Luneyleaks reveal all or is this another Lunestergate cover up.
More questions than answers so far, is the internal wall coming down to extend the fell? that's huge! is he going too ...Oh no that's just TOO silly, oh well I'll just have to wait then.
Jim (sitting hear twiddling thumbs but checking for updates every 10 minutes)
-
Thanks Duncan - it's the detail that matters to me as I would like it to be as accurate as possible so I hope this build carries on as it has started, that is with no mistakes, it's the first one where I have not scrapped bits and started again. I must be getting better.
Hi Mikkel - Yes I do seem to like building things in a similar way to the originals and the detail inside may be seen, I would like to try and get those atmospheric pictures from the period so am hoping I can get enough 'sunlight' through the windows to reveal the scene inside. A bit like your signature photo above, I'd better think of some inside details now then.
Jim
-
Time for another update.
After a bit of time away from modelling it is time to break out the plastic strip and knives again for some more building, this time it is the Engine shed. For those of you who don't know what it looks like see the following link http://www.disused-stations.org.uk/h/hemyock/index34.shtml it is the building on the left.
Unfortunately for me that is about as good as any photographs get so apart from some additional information in GWR Engine sheds on size and roof type that is all I have to go on. When making up some drawings I had to decide on how many windows there were and what they may have looked like, so it was a case of studying the shadows on the shed floor, it looked as if there were four and they were square with a thicker bar under the top row of panes, I assumed that there must also be four on the opposite side. They appeared to be quite long windows so I made several drawings of differing widths and number of panes until I was happy they looked right - to me anyway.
As they would be fitted into the framework I wanted to make them first so that I could build the frame around them. this would also ensure that they were square, be a good fit and also give the frame a bit of strength. a couple of nights was spent making all eight of them up and this is what I had.

The usual cruel close-up to show some added strips to the wider sections to increase the outer frame size. I did think of having smaller panes but another 96 little strips, Hmm maybe not!

The frame was then started and consisted of the top rail and the vertical supports only so that the fitting of the windows could take place.

Once I was happy with the fit they were glued firmly in place again checking for squareness, the additional bracing bars were fitted in between the windows and the whole frame was now fairly rigid, the decision then was how to to fill in the frames themselves. I used the Tiverton Museum book which includes a shot of the internal frame albeit much later in life when it was a shed and had a few of the original timbers inside, I wasn't sure how accurate this was but liked the unusual design so used it anyway. I don't think there will be too many people tell me it's wrong seeing that it was pulled down over 80 years ago.
I made up one centre section to see how it went before deciding to continue, this is it.

and both sides completed

The eagle eyed among you may have noticed that the two end sections ( lefthand side) are different sizes, this is because one side is shorter than the other because the shed has an angled corner to it to avoid being hit by the engine due to the angle and closeness it sits against the track.
This was going to present a few problems of its own especially with that door being an odd shape too but first onto the far end and get the easy bit out of the way.
Sides and end assembled.

Now for the tricky end, I couldn't assemble this flat on the drawing as I had with the other parts so had to do it upright and check for squareness on the plan while adding the parts. The next photo shows part of the build with spacers between the sides and door frame, note the left door post which is a 3.2mm square section filed down to a triangle to get the post shape to add the planking.

and the doorway completed.

That's as far as it has got until I fix the roof trusses and start the planking, by then I should have a fairly rigid and damage resistant frame ready for the slates, yes slates, so I get a rest from roof tiles this time.
Jim
-
19
-
-
Hi Jeff
Pity that you ran out of plaster as that Valley would be almost complete by now, once a bit of colour is in the bottom we will have a good idea of how it will look under the viaduct so I hope you get the plaster you need tomorrow.
It seems to have grown quickly but in looking back it has actually taken a fair bit of time.
Jim
-
Well done John for reaching that Golden Spike moment which is something we would all like to achieve at some point, even so I am sure there will still be the odd tweak here and there yet.
I look forward to the day when I can celebrate in the same way.
Jim
-
1
-


Kirkby Luneside (Original): End of the line....
in Settle & Carlisle LAYOUTS
Posted
Hi Jeff
Those stiles look really good and of course the wall itself following the valley, I did notice the sheep fold up top as well.
They may only be small changes but they are important ones that help complete the whole.
Keep up the good work.
Envious of E.Yorks.