


Jesse Sim
-
Posts
1,805 -
Joined
-
Last visited
Content Type
Profiles
Forums
Blogs
Gallery
Events
Exhibition Layout Details
Store
Posts posted by Jesse Sim
-
-
On 25/04/2024 at 05:26, Woodcock29 said:
Jesse
Did you build the DJH kit I sold you?
Andrew
No not yet, one day.
-
 2
2
-
-
1 hour ago, jwealleans said:
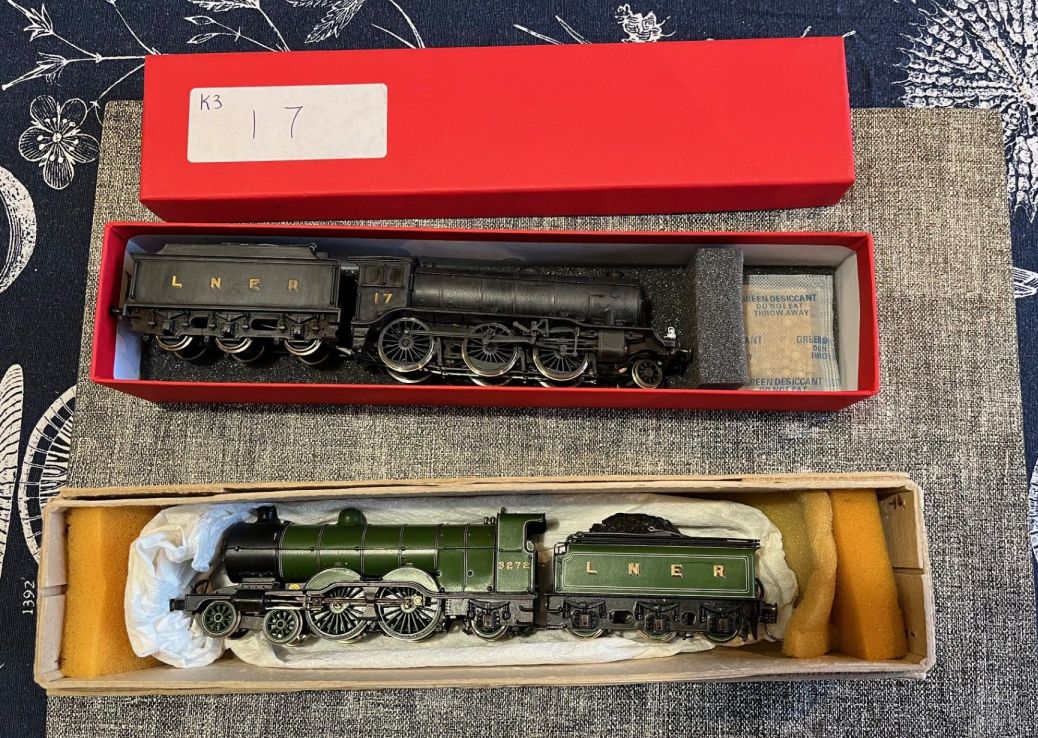
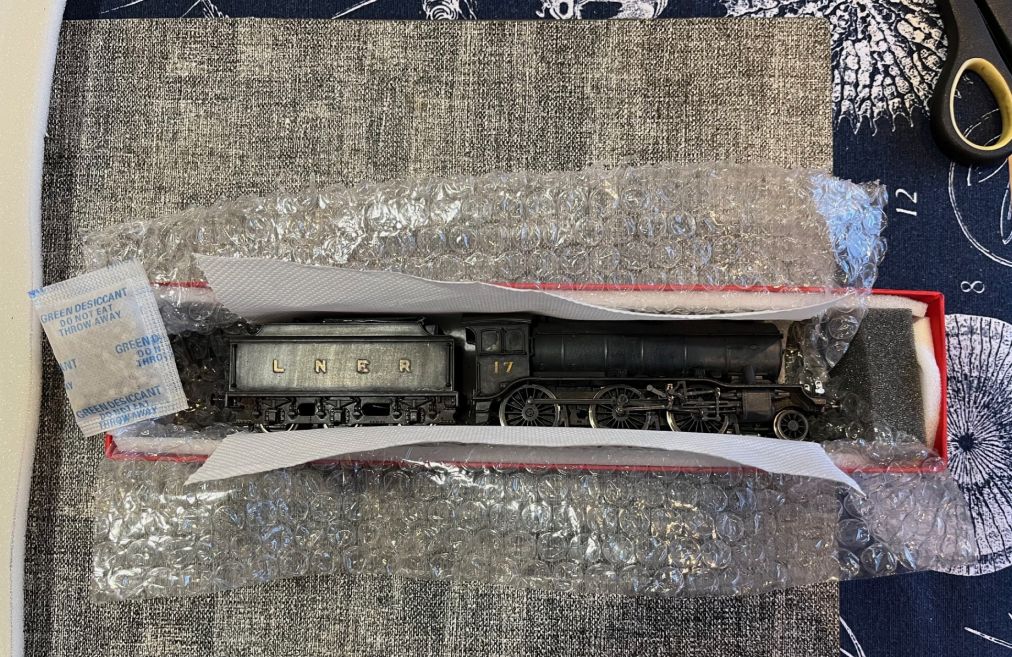
I have had a request from a young Australian reader to show how I make up loco boxes for my kit built locos. I don't think this is terribly revolutionary, but no-one knows everything and maybe it'll be of help to someone, so here we go. Given that my stock travels a fair bit, it's important that it's protected and not too badly shaken about in transit. I try to have this kind of arrangement for all my exhibition stock. RTR locos usually travel in their original boxes, unless these become damaged or unusable for some other reason.

These are tonight's subjects, K3 17 (Bachmann/Wright) and C1 3272 (scratchbuilt, Mike Shepard). 17 came to me from Tom Foster and 3272, by the good offices of Roy Mears, from Hitchin.
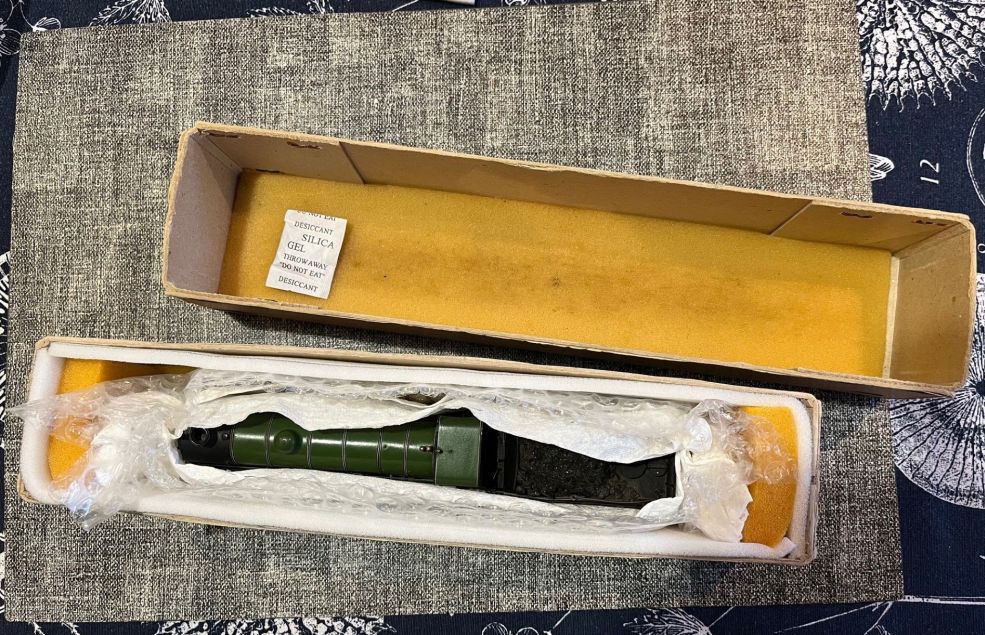
I buy boxes at shows from Cheltenham Model Centre if I need any, although other retailers sell similar ones. 17 has one such box which came with it from Tom. 3272 is in the box it came in, which is that from an ABS V4 kit. These are a deeper box, so the engine can stand upright rather than lie on its side. Coopercraft used to do this size of box in dark blue and white and I have quite a few like that. NuCast and SEF boxes are very similar. I'm not sure upright or prone makes much difference if the box is properly padded.
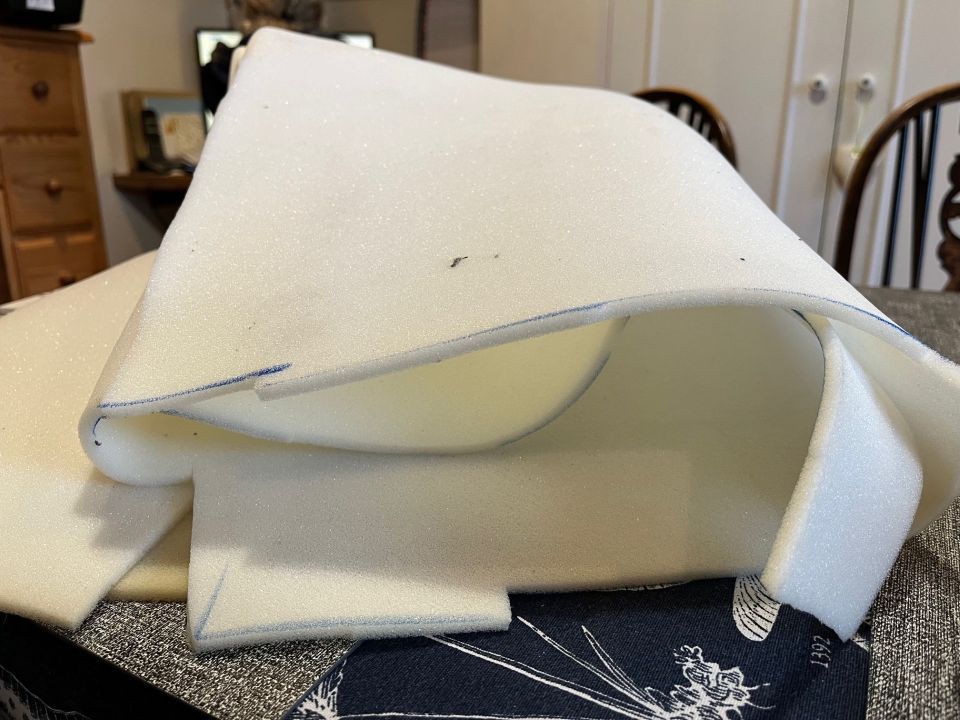
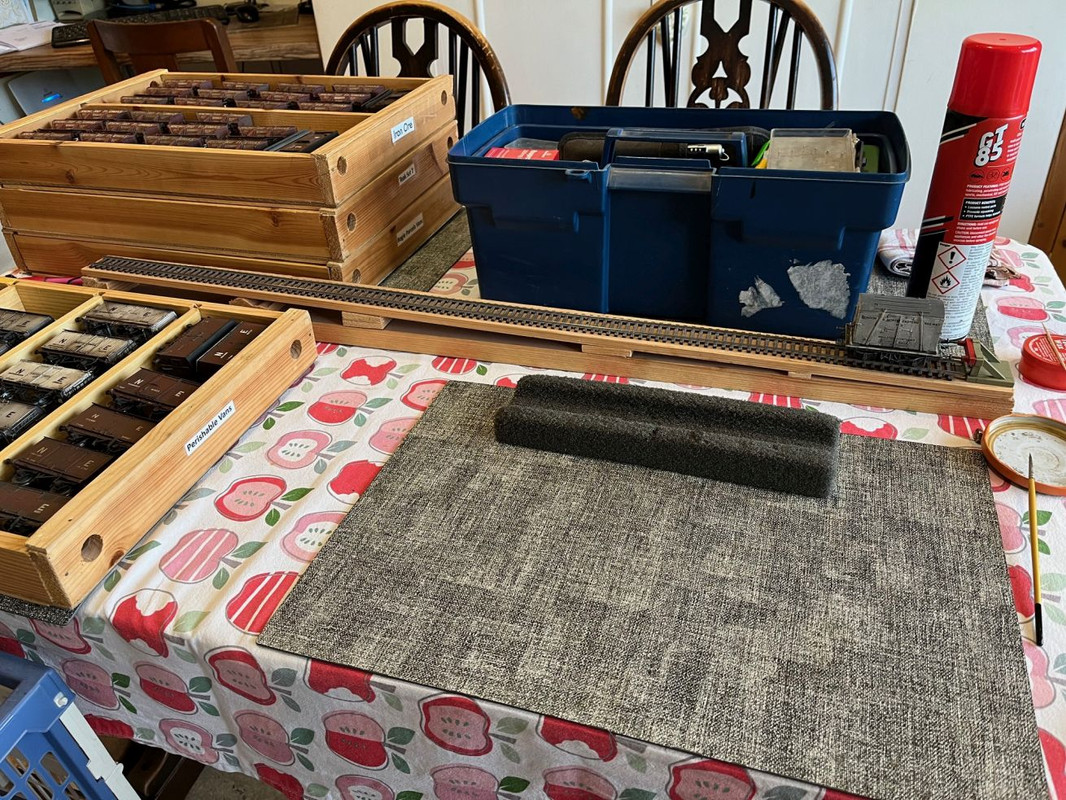
I use upholstery foam as the basic material. 1/4" or 3/8" are equally good. I used to get it from a local upholsterer but they have since closed so I ordered this last lot online. You can buy it by the metre and it's not expensive. From memory this piece was 2m x 3m originally and it's lasted several years.
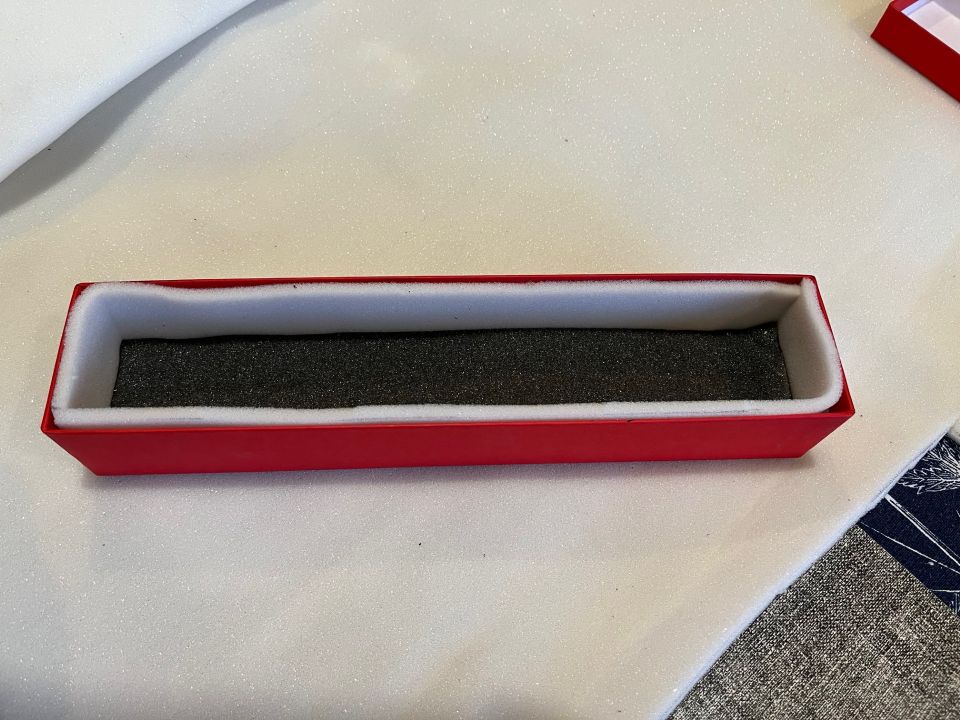
The Cheltenham boxes come with a foam bottom insert so I keep this. It's easy enough to make one by this method if your box doesn't have one.
This part is as simple as drawing round the box and cutting it out. Make each side piece long enough to do side and end so you don't have any fiddly little bits. Put the side pieces in and use the bottom piece to hold them in place. You can use double sided tape or tape loops to hold everything in place if you're especially tidy minded, but the idea is that the box will end up so full that nothing can really move about.
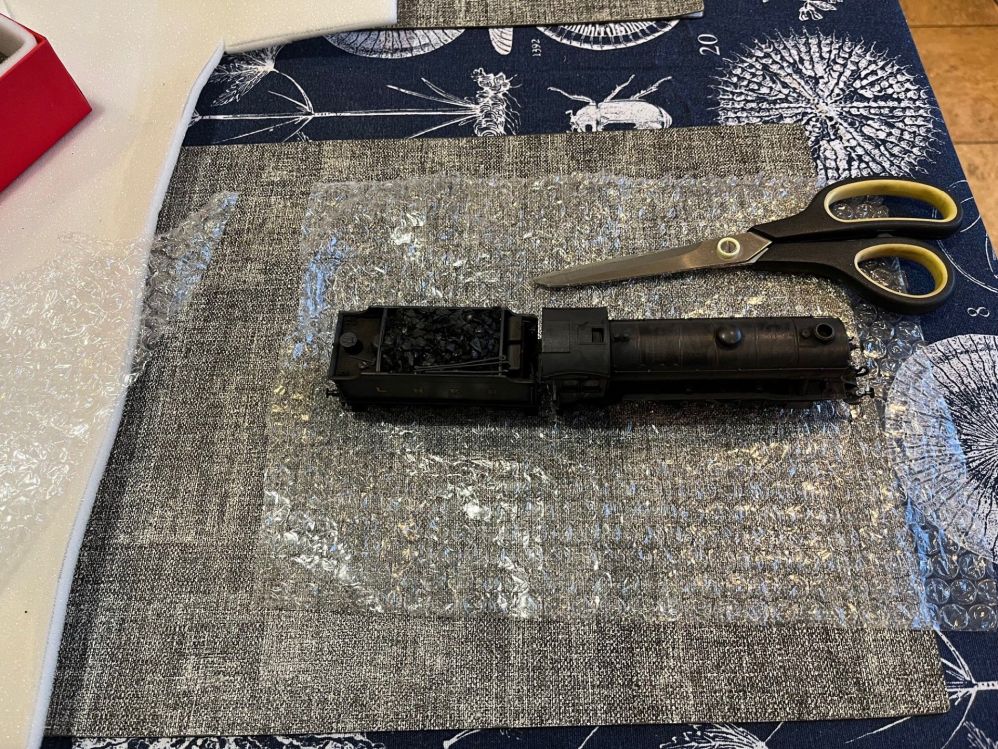
One of the problems with snugly packed locos is getting them out of the box. I make a cradle of bubblewrap longer than the loco and wide enough to allow me to pick it up out of the box. Now, I have heard of paintwork being marked by bubblewrap if left in contact with it for a long time, so although that has not happened to me to date, another layer is needed. I keep the acid free tissue which kit etches come in for this purpose, or you can just use kitchen roll.
17 snugly packed away. I have kept the larger foam pieces which came with the box to prevent it sliding lengthways. These are easily made from packaging or even rolled up kitchen roll or offcuts of your thin foam. I also always keep the little desiccant packets which seem to be included in everything these days and slip one of those in.
3272 equally snugly packed showing that it stays upright. Again I've kept the existing packing in the lid, the larger pieces at each end and a desiccant packet In each case just pulling up the bubblewrap at each side of the engine makes a cradle to lift it from the box and packing it away again is the reverse operation.
Fairly straight forward, i though you might have created a hole in a big piece of foam.
-
4 hours ago, jwealleans said:
I did ask if you were planning to bid before I did, I should point out.
Yes you did, glad it’s done to a good home. Replacing the motor was what put me off it, not because I can’t do that, but with the amount of projects on the go, I didn’t need another one. But I’m now finding myself on the hunt for another C1..
-
2
-
 1
1
-
-
5 hours ago, jwealleans said:
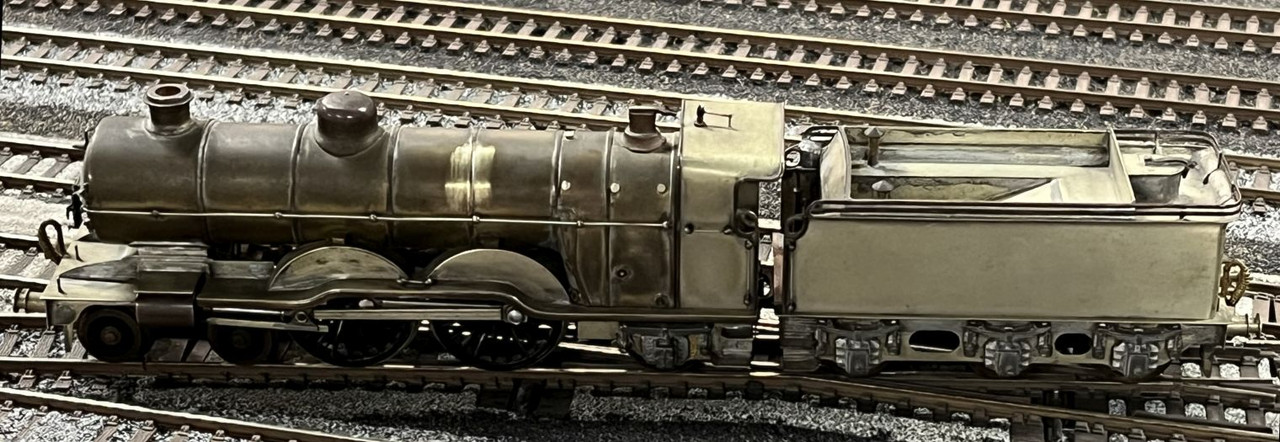
Preparation for Bristol continues: another loco testing session at the weekend on part of the layout which was up for electrical maintenance.
I had to take a couple of pictures of this on the layout while i was there: those who read Sir's thread may have already seen it. Expect to see more at the show.
Not so hot on dead frog points (only picking up off the driving wheels) but fine tearing down the main line. Just as a C1 should be used.
I should have had a punt on it… seems like a cracker of a loco.
-
1
-
-
15 hours ago, jwealleans said:
I use PB and nickel silver for pickups - both have their advantages and their place.
I've been beavering away with loco cleaning and stock testing over the weekend and up to last night. Checking stock for free running and obvious damage - not overly onerous but there's a lot to cover.
There was the usual round of repairs too: the cattle wagon had lost its couplings at both ends, the RTR wagon was tight on the wheelsets and needed a bearing recessing a little, the carriage didn't roll well and turned out to still have the masking tape on the wheels from when the bogie was sprayed (it's done 3 shows like that), the H & B van lost an axleguard when I was taking the wheels out to oil them and I had to glue the W iron back on again. The GN horsebox had lost the door controller and the brake van had a cracked gearbox (which is what they call the Kadee mounting/pivoting affair).
I also had two roofs coming adrift in the Scotch Goods stock and a corridor handrail fallen off one of the carriages. We've come back from shows with much worse. Loco-wise I had a couple of failed solder joints on loco-tender connections but that was about all. One of them was on a Hornby pacific, which is unusual. I'm back up to Grahams this weekend for some more testing so we ought to be in fair shape for Bristol.
Is that that wagon wheelbase jig/tool?
Does anyone know where to get one?
-
3 hours ago, Tony Wright said:
Good evening Rohan,
The one thing I like most about old 'talkies' (other than their often 'gritty' appearance) is that I can understand every word that's said.
The other night, Mo and I started watching Oppenheimer and gave up because most of the dialogue was mumbled; into incoherency at times! A multi-award winner it might be, but what has happened to actors' diction?
I find it everywhere in the media today (and I'm not going deaf!). Incomprehensible gibberish at times, accents so thick as to be able to be cut by a knife and spoken grammar so appalling (he's took a dive, the other day!) that an ear would have been cuffed in my teaching days! If this is what 'inclusivity' in the media means, I'm glad I'm old!
Apologies for the rant.
Regards,
Tony.
Tony we don’t watch films anymore, we read the subtitles and watch half the movie.
-
3
-
 1
1
-
 1
1
-
1
-
-
- Popular Post
- Popular Post
56 minutes ago, 2750Papyrus said:Excellent video, Jesse. I have always been slightly surprised that a guy in his 20's, living on the other side of the world, was so interested in the 1930s LNER. This is my own area of interest but i haven't achieved as much as you though I've been trying for longer! The fiddle yard to support the sequence shown must be spacious.
I particularly liked the variety of coaching stock making up the secondary services. Please can we have more as the layout progresses?
I blame this This thread for my interest. It goes back to March 2014, I just turned 18, walked into my local newsagent on my birthday and grabbed the latest BRM and in all her glory on the front cover was Grantham. I was hooked. Sold all my stock that wasn’t LNER and started annoying everyone left right and centre. Graham(@LNER4479) copped it first, then @Tony Wright and now it’s @jwealleans🤣. All jokes aside Grantham had a profound effect on me, as did the group of people building her and I would not be the modeller I am today without the three mentioned modellers, they are not alone either there many, many more who have helped, continue to still help me.
The variety in the secondary services was another aspect that had drawn me to the LNER. You had the new prestige services of the Flying Scotsman and the Streamliners flying past humble workings of ancient ex-grouping stock. As the LNER was one of the poorest they kept old stock in revenue earning service. I’ve tried to show this but some things take time and I may move faster than others, but I’m that fast, still some decent kit building to replace RTR coaches.
The fiddleyard isn’t actually that big, compared to other layouts, she’s quite small. However, I have tried to fit as much as I can into the room, there’s nearly a dozen kick back sidings, some trains run more than once with simple loco changes to give the impression it’s an entirely different train.

-
18
-
1
-
1
-
1
-
28 minutes ago, Barry Ten said:
Nice vid, Jesse (and Foo Fighters of course). Some friends of mine were at Thirlmere on Easter Monday.
I thought some of my other taste in music my scare some viewers.
-
 3
3
-
2
-
-
8 hours ago, Woodcock29 said:
Andrew (currently in Doha on my way to the UK!)
I’ll get my shopping list emailed to you.
-
3
-
-
- Popular Post
- Popular Post
Evening all,
Last week a friend from the UK visited, we spent the morning down at Thirlmere Railway Museum before heading home to run the sequence. Ashley has a decent fan base on Instagram and is fantastic at taking videos which just an iPhone, so whilst I operated the sequence he filmed some of the trains passing by. I have since edited that footage into one, added an intro, and some voiceover work.
I hope you enjoy seeing some trains run, the layout is still very much a work in progress, as is the stock.
-
29
-
1
-
 1
1
-
- Popular Post
- Popular Post
Evening all,
Last week a friend from the UK visited, we spent the morning down at Thirlmere Railway Museum before heading home to run the sequence. Ashley has a decent fan base on Instagram and is fantastic at taking videos which just an iPhone, so whilst I operated the sequence he filmed some of the trains passing by. I have since edited that footage into one, added an intro, and some voiceover work.
I hope you enjoy seeing some trains run, the layout is still very much a work in progress, as is the stock.
Sorry for hijacking Tony.-
36
-
9
-
2
-
Well, as I said, I’ve never seen 4903 modelled. I didn’t say a 4903 never existed 😉
-
1
-
 1
1
-
-
13 minutes ago, jwealleans said:
Impressive sausagery.
I knew you’d like my sausage
-
 1
1
-
6
-
-
- Popular Post
- Popular Post
Good old fashioned “why are you building this when you could have bought one from Hornby”.
Back in 2020 I took a delivery from Mr King, containing some resin conflats and one of his W1 conversions. I got on with the build but never finished her- I had to buy a SEF tender to suit as I was under the impression it was a specially made one for her, not realising it was streamlined corridor tender. Then came the Hornby announcement, I immediately ordered the W1 in original condition but I decided I wanted to finish the rebuilt project. More years went and I can finally say she’s nearing completion.
The tender is from a Hornby Bittern model, I need to remove the tender over head wires warning markers, and the non corridor tender that was from the W1’s donor A4 will go behind Bittern to become 4903 Peregrine. I’ve never seen 4903 modelled and being an avid fan of Tolkien (Peregrin (Pippin) Took) it was a no brainer, even if the spelling is different.
I tried to use as much of the original parts from the donor A4 and I also tried to not lost too much lining…which I don’t think I’ve accomplished. I’m hoping to patch paint her and weather her to blend it together, the curved lining is already giving me nightmares….I have a K3 to do as well.
Shes not perfect and definitely not in the same league as the Hornby 10000 but she’s mine, can’t wait to get her painted.
-
26
-
10
-
6
-
1 hour ago, Chuffer Davies said:
The only models that are unsuitable (without significant modification at least) to convert to DCC are locos where one or both of the motor’s brushes are earthed directly to the chassis. The models I know to have such motors are the Hornby Dublo, Triang Rovex, K’s and Mainline split frame locos. Any motor where the terminals are (or can be) isolated from the frames can be operated under DCC so I would expect the O4/3 to be suitable.
Frank
I know most motors can be DCC’d, but I was hoping for a quick turn around on the model to get it straight into traffic. Lazy? Perhaps…
-
On 03/04/2024 at 07:04, Tony Wright said:
What a fantastic event the York Show was over the Easter weekend. Brilliant, one of the best in the calendar. May I please thank the organisers, all the exhibitors, all those with whom I spoke and, most especially, those who donated to CRUK, either because of my fixing their models, direct donations or material donations? Mo and I made over £260.00 for the charity (who suggested Yorkshire folk were parsimonious? Whoever it was, they're dead wrong!).
Speaking of Mo...........
Here she is behind my display, checking all the monies (without her diligence, everything would be a muddle - as is always the case when she's not with me). My most-grateful thanks.
I had little chance to photograph anything...........
Though Andy Ross' incredible workshop in 7mm was a must.
Bob Dawson always has something new to show, and this year it was this OO9 micro layout.
His grandson, Scott Waterfield.............
Showed how a magazine cover free hut could be made into a lovely model.
I put some of Peter Lawson's locos up for sale.........
This Gibson 'Austin Seven' sold, though for no more than the current price of the kit.
This Little Engines O4/3, however, didn't.
Neither did this DJH Crab. Since Peter used prototype references, I must conclude that someone had cleaned the '3' on the cabside.
I'll be putting pictures on here soon of many more of his locos I'm trying to sell.
All run beautifully.
Tony is the O4/3 suitable for DCC? I’ve been on the hunt for an O4 that could pull one of my heavy trains…
-
On 24/03/2024 at 02:06, gr.king said:
That gives you ages to scratch build the locos, ready for them...
How quick do you think I work? 🤣
-
1
-
1
-
-
On 22/03/2024 at 21:12, gr.king said:
Balance the books by scratch building some locos to go with a chimney and some lamps, if you ever get those.
I should have them Wednesday week, that’s when my mate gets here after travelling via Melbourne and NZ for a few weeks.
-
1
-
-
On 18/02/2024 at 21:13, jwealleans said:
Nothing worse when you send a friend some bogies and he scratchbuilds the wagon better than yours 🥲
-
13
-
1
-
1
-
2
-
1
-
-
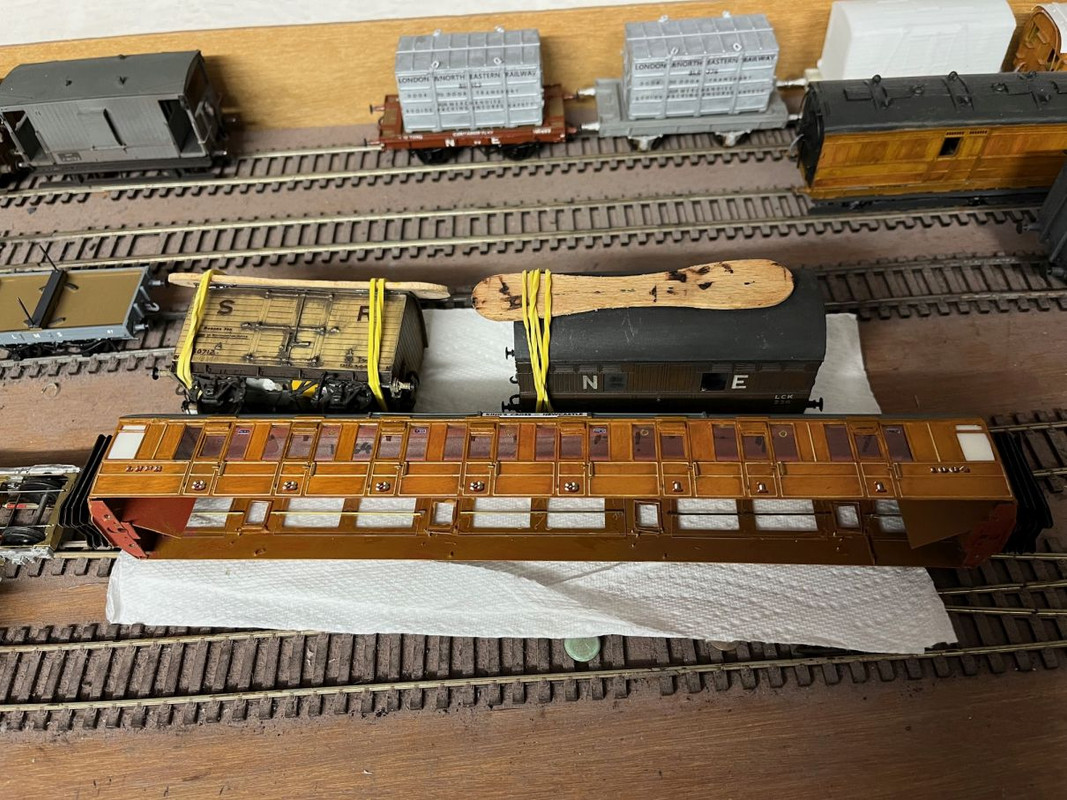
More wagons for Woolmer Green
Alrignt, bit of a big update this evening.
First off we have those RTR bashed LNER Dia. 2 wagons. One featured earlier, it was one chosen for carrying horse , so here are the remaining three, with maybe two or three more to feature later on.
As I mentioned earlier these are altered from various Bachmann wagons and majority of the work was changing the brakes, adding four door bangers (two each side), and repainting/lettering. The main let down is that the wagons are about 5 odd millimetres short. If I had a small layout where only a few wagons featured they might stand out, but four wagons spread out over different trains mixed in with 40 odd other wagons? I think they’ll be fine and they’re a good “layout wagon”. So… to disguise them even more they received some sheeted loads:
This particular one I originally had lettered as part of the CLC, but I decided to paint over and re- letter her in post 36 livery, I’ve seen this before in some photos. However I’ve left the pre-36 numbering for some
variation, as if the wagon is waiting for a complete re-paint.
Another view of the same wagon showing the ends of my tarps. I do my tarps as if they’re real. I glue the top, leave it over night and then the sides and ends are pulled down and tied like the real thing, I think it looks more realistic. This wagon seems to be loaded with a crate perhaps, flat top and perfectly squared edges…
This will go perfectly along side this wagon; a whitemetal GCR variant (I forget the diagram) from Wizards models. She had a load origionally, that I did a few years ago, I wasn’t happy so I decided to re do her. Unfortunately it ruined the paint job, so, not having the same colour paint I decided to do a similar patch paint to the diagram 2. Using different shades of grey I use for LNER freight grey I painted over the areas that had lost paint in ways that showed the wagon had been repaired in areas and repainted quickly. I also had her lettered for the Cheshire lines, so I’ve left the L and repainted the left side and lettered her in post 36’ livery.
I think it’s worked beautifully and really
shows a tatty in use wagon in dire need for repair.
I also built the crate out of plastikard and I made the transfers on the computer. ‘CDS’ is a homage to my grandfather Charles (C), my mum Donna (D) and my dad Steve (S). The ‘Brighton’ has no relevance to the town in the UK, it’s another reference to my grandfather who’s trucking company was called Brighton Transport, no idea where he got Brighton from though…
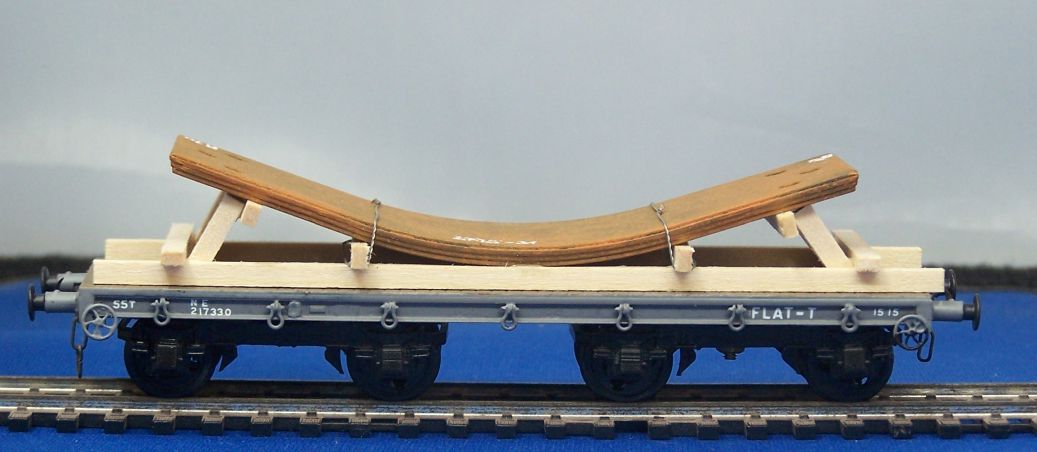
Last, but not least, the LNER Flat T. I’ve repainted her back into grey like I said I would. The black just didn’t look right, even though technically she should be black being a steel underframe.
She’s also had a load made up which has taken inspiration from photograph in Tatlows.
It’s very hard trying to make it exactly the same, but it’s still turned out quite nice. I need to make more lashing rings still for her, but I would consider her finished.
-
11
-
-
23 hours ago, Tony Wright said:
Good evening Jesse,
Let me think about it, please.
I've thought about it (for a millisecond), so undone!
Seriously, despite at least three B1 tenders arriving in the next few days, I've persevered today with the one where the original lining 'reacted' to the paint.
And...........
Amazingly, with a further rub-down and repaint, I've now lined/lettered/numbered the whole loco and tender today and I think I've got away with it.
I've tried lining with a bow pen, but all I do is cock-up, so it's down to transfer lining (in this case some old KEMCO BR mixed traffic lining, which went on fine - unlike a more-recent product which was hopelessly misaligned).
Now no professional painter would use transfer lining (except for transfer paper they paint themselves, for the likes of boiler bands). The transfer lining is far too coarse and doesn't have the thin cream line.
However,
I built this V2, and painted/lined it in exactly the same way as the B1, but sable-applied enamel dry-brush weathering has toned it right down.
Thus............
On a layout, in action, I think my artisan, non-professional finish is adequate.
Anyway, it's done in the spirit of self-reliance, something I regularly advocate (though not always with personal success). In fact, showing my hypocrisy, I'll hand the B1 over to Geoff Haynes to weather (I'm in credit).
He weathered this other V2 I painted after mechanically rebuilding it...............
Which, if you recall, came from you - in hideous green! Geoff lined the valance prior to weathering it.
Again, as a 'layout loco', I think my basic painting is adequate.
For all those who are sending B1 tenders, thanks again, and fear not. They'll all be put to good use.
Regards,
Tony.
I think paint reacting is one of the most annoying things that can happen when building/painting a model. I’ve had it happen a couple of times and it normally only happens when the model you’re working on is near finished.
-
6
-
-
Tony, I have a B1 tender, I’ll swap it for say… a K2?? Done. Lock her in. No take backs or do overs. Pinky promise.
-
5
-
-
On 15/03/2024 at 10:22, St Enodoc said:
A good comparison. I actually prefer Sovereign Hill as it is more compact and you can see more in a given time. On the other hand, there are no trams to ride!
A lovely spot. I once had an excellent steak dinner in the Caledonian Inn there. Not far from the Coonawarra wineries too.
If Sovereign Hill ever decides to add a heritage railway, boy I’d be beside myself.
-
1
-
-
22 hours ago, St Enodoc said:
We had another good running session today, with ten of us on duty plus a spectator (@Jesse Sim's dad Steve). We ran 22-and-a half trains, the half being the down branch goods (train 20) which is still making its leisurely way from St Blazey to Pentowan.
With three signalmen, two yardmasters and five drivers, in retrospect I think the workload balance was slightly wrong and we would have done better with a "shunter/driver" at Pentowan and only four drivers. Two reasons for this - it would have speeded up shunting trains, running round and turning locos at the terminus and would also have allocated more trains to each driver.
As everyone gets more confident with the new sequence, particularly having more trains in play at a time than before, I think things will flow more smoothly and we can look forward to the day when we have an up and a down main line train, an up and a down branch train and a further train between Pentowan and Polperran in action at once.
Notwithstanding, everyone had fun and enjoyed a good look at 18100 (still with no lights, although having spent a while yesterday comparing the ESU manual with the DecoderPro roster entry for its cousin 18000, I think I have a slightly better idea of where to go with this - possibly...), 7820 and the four recently-built china-clay wagons, all of which are new since our last session.
It was lovely John, dad throughly enjoyed himself. He apologises again for almost taking out that signal.
-
1
-
1
-
1
-
5
-


Wright writes.....
in Modelling musings & miscellany
Posted
As an
alcoholicAustralian I must say...