


Greenmodelmonkey
-
Posts
277 -
Joined
-
Last visited
Content Type
Profiles
Forums
Blogs
Gallery
Events
Exhibition Layout Details
Store
Posts posted by Greenmodelmonkey
-
-
Yours is not the only driver to bust a lower door hinge :-( I was trying out a white metal figure for size when he slipped and ended up inside the cab on the floor, getting him out also broke the hinge and brought out the brake standard for good measure.........
Question, how do I get into the cab to put the brake standard back without bashing the door again, any ideas ? The door I guess if it cannot be fixed I will just have to glue slightly ajar. Ho hum, upward and onward eh ?
Try this link which takes you to a kind chap who provides a very good article on how he has dismantled the loco right down to getting inside the cab (if you dare of course)...
https://albionyard.wordpress.com/2016/11/23/wordless-wednesday-dapols-08/
-
-
Shorter = Fatter............1:48 = A bit smaller...........but if the scan isn't you, it doesn't matter.
And if you chop a section from his legs he really will be out of proportion, noticeable if he is standing at the door.......he may well be worse than the Heljan scan of the Prairie everyone is so worried about

Hmmm... think he may will have to go back to engine shed for a rest and I will look for a replacement driver
Still not happy that he broke the door hinge as he got into the cab.
However I did get the Station Master to have a look and he said said hinge was very fragile in the first place and suggested others should be made aware of this. He also mentioned the door did not shut anyway as there is some mould flash which was not trimmed flush with door frame on this side of the loco during production phase. He said he had seen this before on the other locos purchased at same time from same batch. He said the other door shuts OK as there is no flash to prevent it from closing.
-
-
He's gonna bop his nut in there too!
Maybe you should get him at 1:48 so he can see out of the windows

Errrr... know what you mean .....just checked his height and he is a scale 6'4" but his mate is 5'10" (the Station Master from 'Modelu'also). Hmmm.. 3D scanning does produce accurate renditions in all dimensions (I might have a word Modelu to see if print could be made a little shorter than the original chap was likely to have been in real life..). Failing that I could reduce him by a foot if I cut off his feet.
-
There is good news and bad news....
The good news I now have a driver in the cab the bad news is that the lower door hinge broke when he clambered in...

-
 5
5
-
-
Yes, exactly the same problem. Managed to unclip the roof next to the cab and raise slightly, and then gently slide some cardboard down the gap to get the other clips. The diagram included with the loco shows to lugs from the roof panel but fails to show the clips coming up from the body.
Yes thats how I did it to start with as there is nowhere to grip the roof due to the side handrails, think they may have dropped a clanger on roof removal. Far easier if you gently push in the body but make sure you don't push on the metal door grab handles located on the sides otherwise you risk pushing them into the body to far.
-
Has anyone had difficulty in taking the roof off as the only safe way to remove mine was to gently (or "gentry" as instruction say) squeeze sides of the loco body then pull roof upwards rather than squeezing the roof as the instructions state. When I eventually got the roof off I realised the clips were on the body with location lips facing outwards and location onto the roof sides so squeezing the roof makes it tighter to get roof off. I did get roof off by following instructions but realise it only came off because I was pulling so hard in order to overcome the clips which were being squeezed even tighter, gently squeezing did nothing.
Has anyone found roof difficult to remove like me?
-
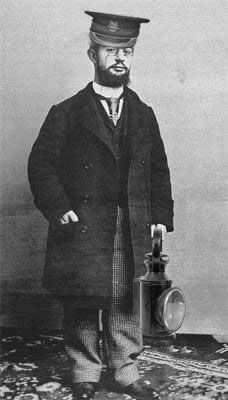
Yes agreed make the most of loco as it's taken out of the box with non evasive mods. I have just painted a nice 7mm scale 3D printed figure from 'Modelu' (not strictly a diesel driver but looked the best for the 1960's era and was probably a typical pose used now and again). Link to a very interesting new site and the chap I painted... http://www.modelu3d.co.uk/product/ws065-loco-crew-standing-with-hands-in-pockets/
For info primed him with white primer from Halfords first and used humbrol enamels for rest. I will upload photo of my chap latter.

-
12
-
-
In the latest BRM magazine which reviews the new Dapol Class it looked as though the reason for the brass bushes is becoming more apparent....
It's a probably due to 3D parts on the side frames such as springs and axle boxes being underscale (i.e. no to scale depth) and bushes used to put connecting rods in the correct 'out board' position (something which will be lost if bushes are removed)
I also suggest the side frames are not in the right place compared to the real thing (don't forget this is made for 32mm gauge not Scale 7 which could add a further 1mm to chassis width).
Having said that I have no complaints as it's a stunning model and realise that we can't have everything absolutely correct at the price so there will be compromises which can be overcome in many ways as suggest on this forum. Keep up the good work all as its very interesting!
-
Yes agreed make the most of loco as it's taken out of the box with non evasive mods. I have just painted a nice 7mm scale 3D printed figure from 'Modelu' (not strictly a diesel driver but looked the best for the 1960's era and was probably a typical pose used now and again). Link to a very interesting new site and the chap I painted...I think I'm going to add a driver and 2nd man and enjoy mine has it comes from Dapol after all it's a lot better than I could build lol.
Cheers
http://www.modelu3d.co.uk/product/ws065-loco-crew-standing-with-hands-in-pockets/
For info primed him with white primer from Halfords first and used humbrol enamels for rest. I will upload photo of my chap latter.
-
2
-
-
Agreed - I would recommend getting in touch with DCC Supplies then and getting his name on the list for spares/diagram, or getting similar springs and replacing such - the springing is a little on the slack side anyway and could do with upgrading? Failing that, would Richard Webster know?
I am a little wary of using blackening solution (although I have one that, dies/neutralises after 3 mins, with or without extra cleaning) my loco seems well oiled - unlike me, sadly! - even on some of the paintwork. May I ask what ratio/brand of IPA you use?
One can blacken them (but that maybe a risky strategy), use a permanent marker pen, or use 'Black Magic' paint, as that sticks to anything......
Yes David, that's prudent, as you correctly point out, blackening can leave areas exposed to oxidisation etc. Have you any ideas about taking some of the 'slack' out of the joints on the rods?
Good advice. These Sharpie pens seem all the rage now. I may just used some IPA wipes. Just wondering how I can clean the lower cab sides and running plate of oil w/o damaging the paint. I tend to use Labelle oils, sparingly, but my loco came with lots of oil on it from new - I mopped the worst up with a cotton bud.
I never know which brand/ratio/mix of IPA to use on model's paint work...any recommendations greatly appreciated.
ATVB
CME
-
Hi I've never used isopropyl has a degreaser is it ok to use on metal and plastics also would you strip loco down to blacken the brass spacers or do them on loco.
Cheers
Its fine for metal and plastics. No need not strip down just degrease bushes/washers with a cotton bud soaked in isopropyl then use chemical black solution you manage need to run in black solution with cotton bud several time to get depth of colour or use a black permanent marker (I find Sharpie pens are the best) then lightly oil using oil Dapol recomend in their instruction sheets. If you were worried about possible damage then suggest try on paints chassis underneath just to show its OK.
-
1
-
-
Thanks, your reply is much appreciated, makes me wonder which cab is prototypical, or if they both are?
Those are sage words of advice thanks, as I mentioned in a previous Post, if it aint broke then dont fix it....IF I were to convert the collets/bushes/axles, like you, I believe that a brass washer in their place would be prudent-theres bound to be some sideways movement, so washers, or smaller collets/bushes would be required. My other option is to paint the OEM parts black, leave as they are, and run the loco until something breaks/wears out and then modify.
Yes agreed will just used metal black solution on mine will
degrease with isopropyl alcohol first
-
Hi GWC,
Thanks for your reply - I agree, I believe that it will have to be an all or nothing situation - I am wondering if I should invest in a wheel puller, I have another little shunter chassis that may need attention in that regard too. In general I dont like taking wheels like this off of models like this - ie interference/press-fit - in case anything distorts (makes one grateful for Slaters' wheels) - but you have led the way so it should be okay as a one off fix. Thanks for the tip on the Loctite I shall have to check which one I have in stock - I used to use similar when racing RC cars etc.
It is puzzling why the collets/bushes are in place as washers would have sufficed as would have shorter axles (the latter affecting the former of course).
May I ask when cutting yours by hand, did you avoid the use of a miniature cutting disc so as to avoid heat build up?
Also how do the cabs compare on the MMP to the Dapol models - the Dapol looks smaller....or is that an optical illusion?
I am now pondering the slack in the rods around the centre drivers - I am wondering if they could be bushed out or similar. Our layout has some real 'mileage' to it and I am more than a little concerned that the rods etc will wear further with this amount of play in them - only time will tell.
I have to say though the 08 has turned out to be a fine model and good VFM - most tweaks for specific running numbers are mildly cosmetic and easy to do.
I wont be fettling my 08 (just running-in turns and shelf dwelling over the past few weeks) just yet as I have too many other things on the go and I would like to attend to the 08 in one or two modelling sessions and dedicate time and thought to it. I may just run it as is and paint the collets/bushes matt black - weather the loco - and run it like that, but knowing me, I shall be sat there, one day, thinking, 'well if I strip it all down now, I can crack on with it and it's all finished' and within minutes it will be in pieces LOL!
,
ATVB
CME
Be careful about the wear if you are thinking of removing brass bushes as die cast material against 'like-for-like' diecast material will wear quicker than if bushes were left in (or suggest put a thinner brass washer in place of the bush to minimise the risk). I will only change if I was to convert to S7 so will leave alone as I don't want to risk spoiling the loco.
-
1
-
-
So, after a diversion to the other running post on Peco 0 gauge, http://www.rmweb.co.uk/community/index.php?/topic/117608-building-o-gauge-track-using-peco-individulay-advice-sought/
to return to the chairs, the Peco individulay IL-702 (IL-713 for slide chair), seem to match the Peco track the best.
They have a thicker area under the rail, but have the square ends and three bolt pattern to match, and also have the inner jaw reduced in height to clear larger flanges better than the C&L type. They are also cheaper to buy.
IL-702
C&L three bolt
First tests show care is need to fine sand the underside of the chair before glueing and be prepared to sand the underside of the sleeper to get the perfect height afterwards.
I am not sure the C&L chairs would match the height exactly, they cannot be to far different of course.
My aim was to keep the points as simple but robust as possible, with reasonable detail added to the stretcher tiebar, and to keep the costs to a minimum.
I was tempted by the brass chairs in the C&L range, but cost is the main problem.
Stephen
If you decided to use C&L chairs then I can't see the point in sanding bottom of chairs really as reduction could be made on sleeper height only or use C&L sleepers which will then match Peco height height anyway there is about a 0,5 mm difference between Peco chair heights and C&L and Exactoscale chairs (Peco chair height is underscale to prototype by ~ 0,5mm or nearly a scale inch).
-
On another thread about Peco individulay 0 gauge points and track mention was made that the chairs are different to the track, but the ones that came are pretty close, and I wonder if they have been altered , explaining why "new" is on some listings.
They seem alright to me for general use and match Peco track chairs enough. I have been told that C&L and Exactoscale do equivalents that are more detailed, but the C&L website has no pictures in close up so comparisons are difficult. The cost seems lower for C&L etc, but that is for track building and if the Peco cost more, it is only for a smaller pack to do the points. I will work out a cost comparison though for C&L three bolt pattern.
Stephen
Peco chairs are crudely formed and not same as those on flexitrack chairs. Photo of chairs on Peco site are not a real photo of actual items. Also holes are provided to secure chairs to sleepers using pins which is just an old fasioned way of fixing to wooden sleepers. C&L chairs are more protypical but not perfect, Exactoscale are the Rolls-Royce standard but yoy still have to cut and modifiychairs for pointwork. In my recent experince buildings C&L point has become quiet expensive (in my opinion its far cheaper to buy and modifiy a Peco point than to scratch build).
-
Is the ambis a detailed tiebar system?, I can only see details for 00, not O gauge.however I suspect a home produced one would suffice here, especially on cost grounds
C&L Finescale sell 7mm Ambis tiebars great product and very impressed with use of paxolin to create stretcher, highly recommended!
-
Suggest taking a look at post number 50 in the following link on this website to see what you can do with a peco 0 gauge point to make it operate more effectively and visually more prototypical after simple modifications. It also shows a comparison between a scratch built point using C&L and Exactoscale components but using Peco Code 125 rail as it fits these components better than the C&L bullhead rail....
http://www.rmweb.co.uk/community/index.php?/topic/111464-gwr-scale-track-components/
The topic as whole is aimed at my experince in trying to build a GWR point, the issues I encountered and how I overcame them to produce both a finescale a scratch built version, a modified Peco point and how I achieved this.
Hope you find it interesting!
-
Thought it would be easier to show photos of my points on this thread to help...
Scratch Built 'USING Peco Code 124 RAIL' v Peco Modified
SORRY JUST NOTICED PHOTOS DID NOT COPY ACROSS SO SUGGEST YOU FOLLOW THE LINK IN MY ORIGINAL POST ABOVE TO VIEW THEM....
-
Thought it would be easier to show photos of my points on this thread to help...
Scratch Built 'USING Peco Code 124 RAIL' v Peco Modified (Note: Ambis stretchers not shown in these photos, they are being reworked, and yes I still have the odd angled sleepers, so no need to comment on this as I know... LoL)
Hope the photos show what can be done to improve a Peco O gauge point to make it look more prototypical. When painted and weathered it should will look the part even further.
It was quicker to modify than to scratch build (and cheaper) and I do still have a preference for my scratch built version. Again if you don't know the prototype in detail and are not as concerned about fidelity then it is good enough for most (I hope!).
Hope you find photos interesting as a comparison....
IMG_0084_edited-1.jpg
IMG_0083_edited-1.jpg
IMG_0078.JPG
IMG_0082_edited-1.jpg
Attached Thumbnails
IMG_0080_edited-2.jpg
Hi the following topic link should help you...http://www.rmweb.co.uk/community/index.php?/topic/111464-gwr-scale-track-components/
This topic was posted by me on the this website. The good news is that contained in it is a fix if you want to use Peco rail as this rail section fits the C&L and Exactoscale chairs better than the C&L bullhead rail without any modification.
As for Peco individual components I tried them but hey are too crude mouldings compared to the chairs on their flexitrack an point work hence I moved to using C&L and Exactoscale chairs but using Peco rail section. The towards the end of the topic you will see a point made as described above using Peco rail section.
Hope his helps,
Mick
-
Hi guys
I am planning on building some O gauge trackwork using Peco code 124 individulay items
They do sleepering - running chairs and slide chairs - all in plastic
I will be building to 0-MF standards with 1.5mm flangeways and 1.75 through the checkrails.
With only the single type of 'normal' chair available it means I am going to have to chop chairs down for clearance - for eg between the running rail and the checkrail. Due to the fact I am building short and tight turnouts my checkrails are only supported by 4 timbers so I need to get as much support as I can from the chairs but also need to chop them down quite a bit to get the 1.75 required between the rails.
Has anyone here made track using these components - if so could you offer some advice - or photos of how you did it please
PS - I know C&L offer more chair options but for this project I would like to stick to the Peco parts ( the Peco rail is different in profile )
Hi the following topic link should help you...
http://www.rmweb.co.uk/community/index.php?/topic/111464-gwr-scale-track-components/
This topic was posted by me on the this website. The good news is that contained in it is a fix if you want to use Peco rail as this rail section fits the C&L and Exactoscale chairs better than the C&L bullhead rail without any modification.
As for Peco individual components I tried them but hey are too crude mouldings compared to the chairs on their flexitrack an point work hence I moved to using C&L and Exactoscale chairs but using Peco rail section. The towards the end of the topic you will see a point made as described above using Peco rail section.
Hope his helps,
Mick
-
Can confirm there is no door on the inside! Still wouldn't stop me buying them though, as I've still got one more on order, and if I needed 10, I'd still buy them. I currently don't have the time to build kits, so having a rtr 16t min is a great help.
Don't disagree so they are still good value but observation was it would not take too much to make them better inside as there is some missing detail which is visible especially in this scale.
-
Was that comment addressed to me?
Which kits??
ATVB
CME
No definatly not you it was to HMRSpaul apologies...
 )
)


Dapol 08
in Dapol
Posted · Edited by Greenmodelmonkey
Dead easy as mine just disintegrated if you put any pressure on it. The rungs are held into ladder uprights by osmosis, or could be just the paint as they are not bonded in any way. The very tiny pins at either end of ladder and towards the top of ladder upright are pushed into brackets protruding from the body. These are held in a similar way. Just give ladder a slight wiggle and it will break the paint bond and should all start to disintegrate like mine did. It's almost I possible to reassemble once in bits (trust me I know!). Nice ladder poor assembly process.