

SRman
-
Posts
7,457 -
Joined
-
Last visited
-
Days Won
1
Content Type
Profiles
Forums
Blogs
Gallery
Events
Exhibition Layout Details
Store
Blog Comments posted by SRman
-
-
An interesting article that I missed when it was originally posted.
I would add to more recent posts that D829 from the Torbay Express set does have lights. I bought this set as a bargain way of getting a maroon Warship, with a couple of free coaches thrown in. 😎
I fitted sound into this model but the lights were already there.
-
 4
4
-
 1
1
-
-
I might have to do this next time too. I did a short stretch of glued third rail to see how effective it might be (in OO), and it worked quite well. I used heavy items to weigh it down while setting, but even so, a couple of bits moved while setting.
Previous third and fourth rail stretches I laid were on my lower level lines representing the London underground, and I fiddled around with the Peco plastic chairs; that was a back-breaking and slightly frustrating job.
P_20200617_102457_vHDR_Auto by Jeffrey Lynn, on Flickr(No, that isn't a Southern Electric in the photo!!
 )
)
-
1
-
-
This can build into a very good model, but, as others have said, it is unnecessarily over-complicated. I agree the sides, or at least the doors, could have been done in one piece - the separate etched hinges for the doors offer no real improvement over a single plastic moulding.
For all of that, Ratio omitted to include the grilles for behind the windows. I used some from Blacksmith Models, but Roxey Mouldings also offer similar items.
That's not to say it's not worth building: quite the contrary. This kit will be a very rewarding experience once you have finished it.
This photo was taken after I had repainted mine, so it lacks any transfers here. It was previously heavily weathered in Southern olive green, so the windows remain weathered, but you can just make out the grilles behind them.
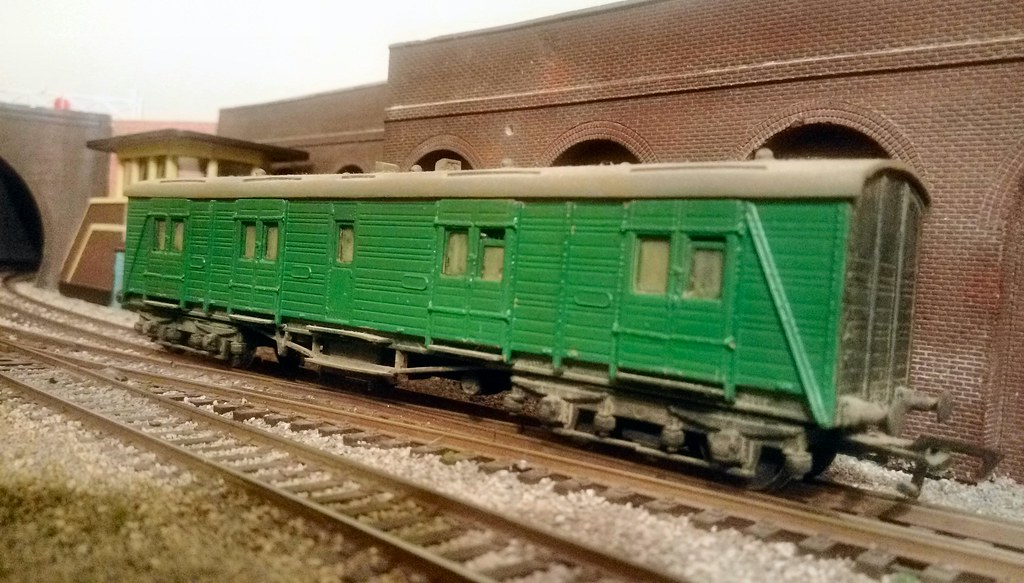
Ratio Kit Bogie B by Jeffrey Lynn, on Flickr-
2
-
-
A photo of what I was talking about in yesterday's post.
Power Bogie Frames Adapted and Fitted cropped by Jeffrey Lynn, on Flickr -

I do like that lined black livery, and was tempted myself, but with two A-Bs on the way already, I think I'll have to just stop at admiring your model.

-
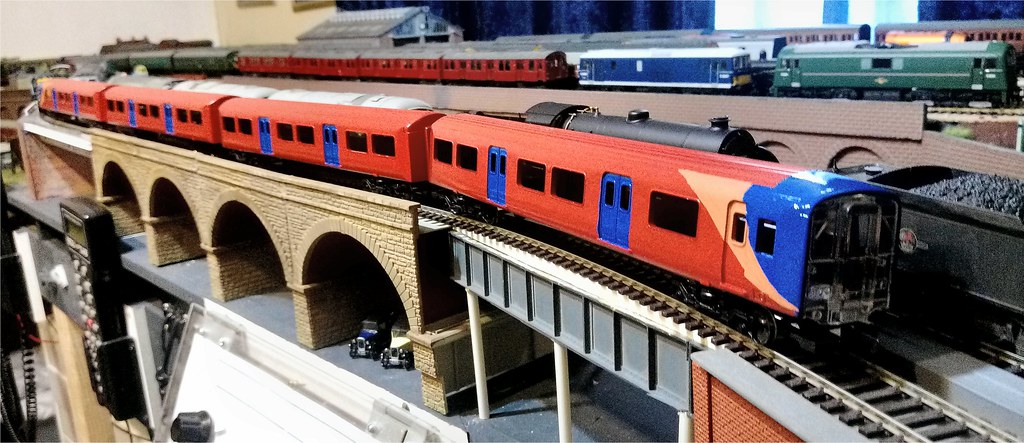
I expended a little bit of energy tonight and fitted the side frames to the motor bogies on the 455/9 unit. Like the previous 455/8 and 319/1 units I built, the side frames had to lose 1mm from their wheelbases to match up with the Replica motorised chassis I used for each of them. The chassis bogies have clip in side frames that are blank, and also act as a good, solid backing for the kit side frames after they have been cut and rejoined. I usually cut either side of the central bolster/air bag moulding and rejoin the 'arms' with the axleboxes and springs to the central unit after a small amount of filing - the cuts themselves lose almost enough material, but need just a little more taken off.
After that, I filed the backing plates to match the profile of the kit side frames, then press-fitted them back onto the relevant bogies.
A quick test (still on address 3 until I get the vinyls with the unit and coach numbers on), and all is well with it. I'll have to note on the motor coach (MSO) base which way is 'forwards', for future reference when forming the unit up.
-
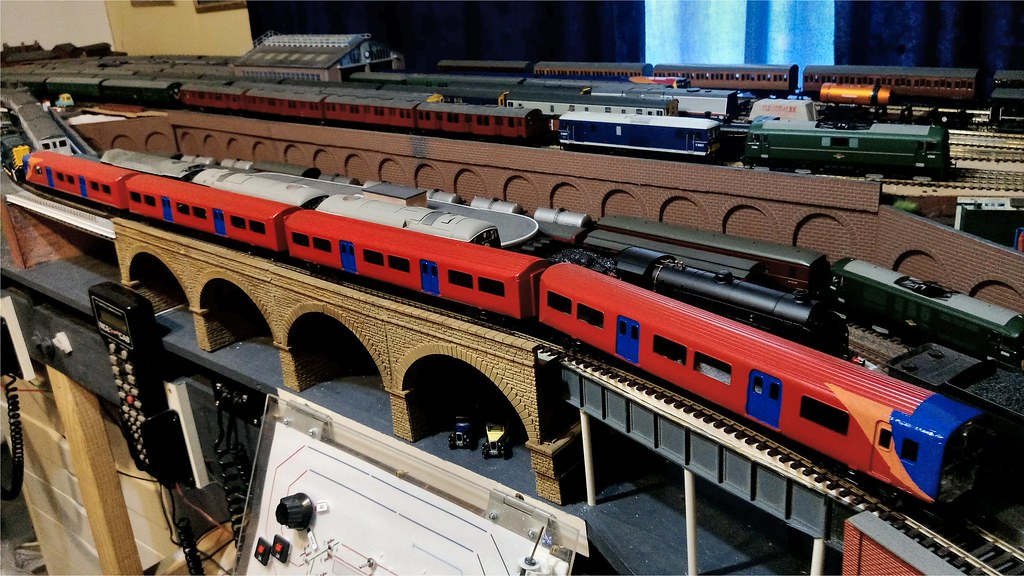
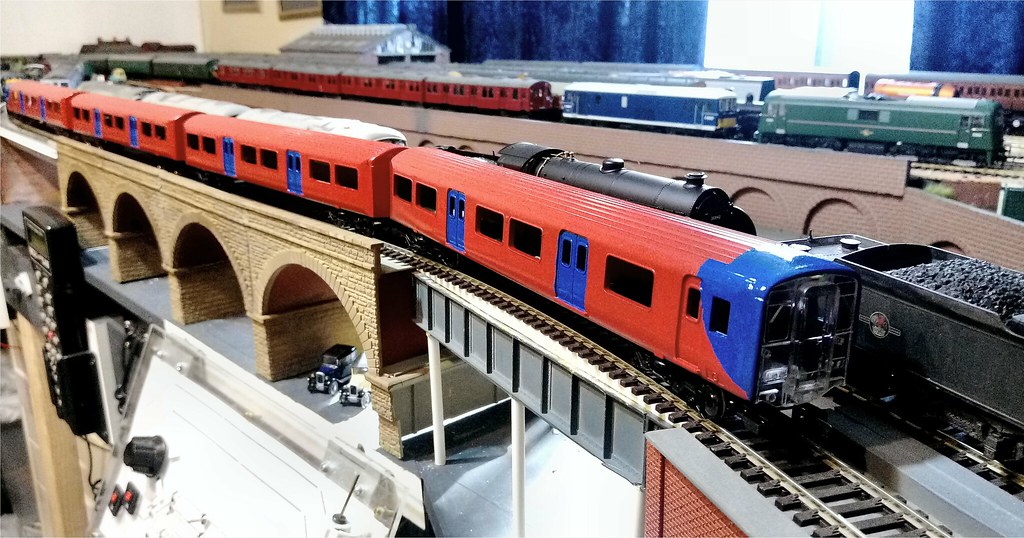
More progress on the 455/9, with all windows now fitted.
The front end painting is still very rough, and can't really be completed properly until the vinyls arrive and I can match the colours to the vinyls.
Fitting the Windows - 5 cropped by Jeffrey Lynn, on Flickr
Fitting the Windows - 4 by Jeffrey Lynn, on Flickr -
I have inserted the windows in the first coach, a TSO, and no problems have shown up at all. As always, I have used Krystal Klear as the glue for the windows.
Fitting the Windows - 2 by Jeffrey Lynn, on Flickr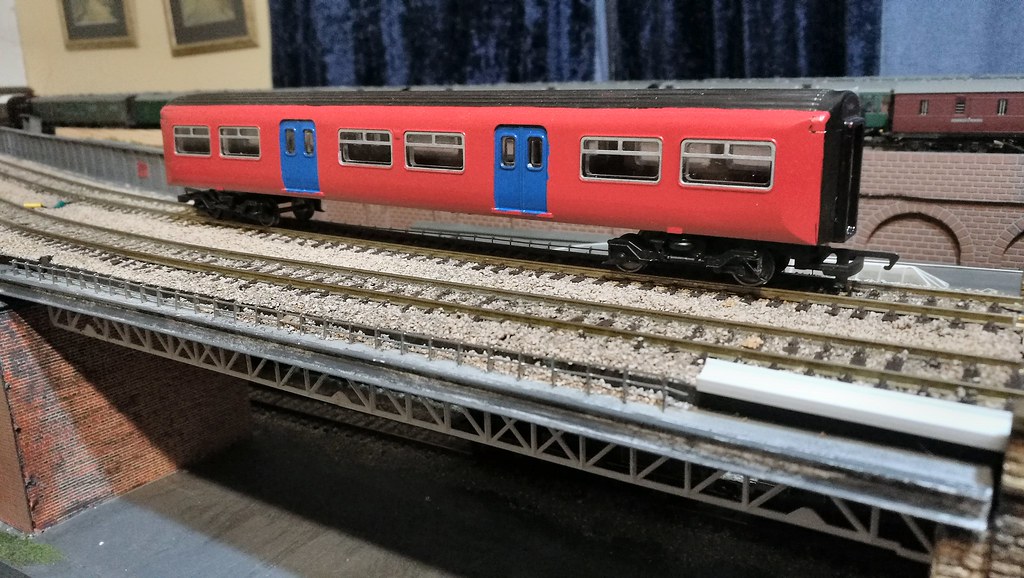
Fitting the Windows - 1 by Jeffrey Lynn, on Flickr -
4EPBsmallavatar.thumb.jpg.340dedce76355ae3f1b7af830db7062f.jpg)
I'm not happy with the tenshodo motors at all, so have just ordered two Black Beetle motor bogies: 30mm wheelbase with 12mm wheels. I'm not too worried about whether the wheels are spoked or solid.
-
Hi Ian.
Sorry for the delay in replying - the blogs don't report comments in the same way the main forums do.
I am still awaiting the vinyls from Electra. I haven't heard any progress from Adam at this stage.
The red I used was Ford Flame Red in the car spray paint ranges here in Oz. If you are anywhere other than Australia, the colour ranges may not match or could have different names for the same shades.
The blue is a Revell colour in their model paint range, just brushed on, and the orange is in the standard Humbrol range, again brushed on. -
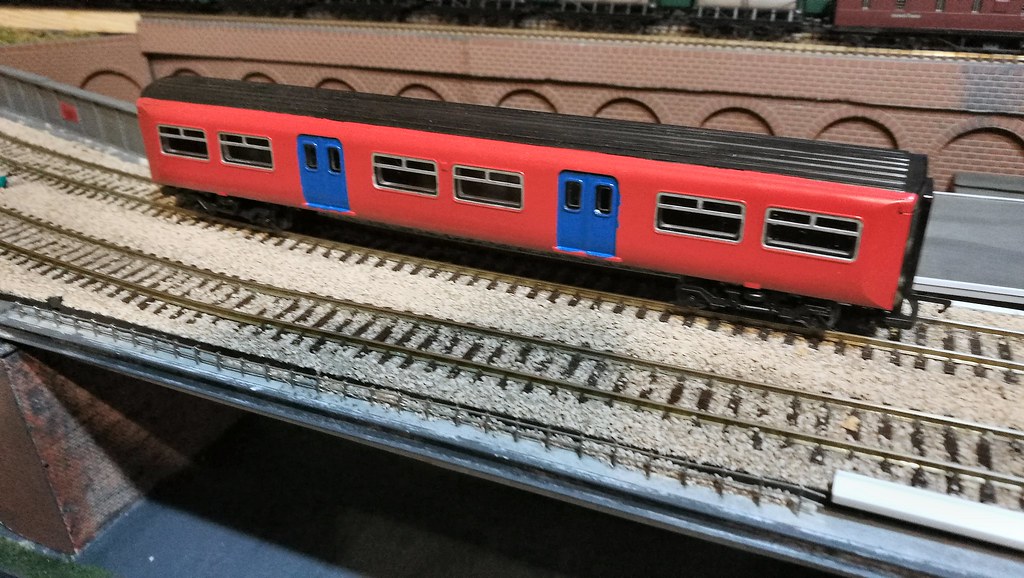
Thanks Colin. I must admit the orange and the blue are as rough as old bags, but the red came out very well.
-
Thanks, stadman.
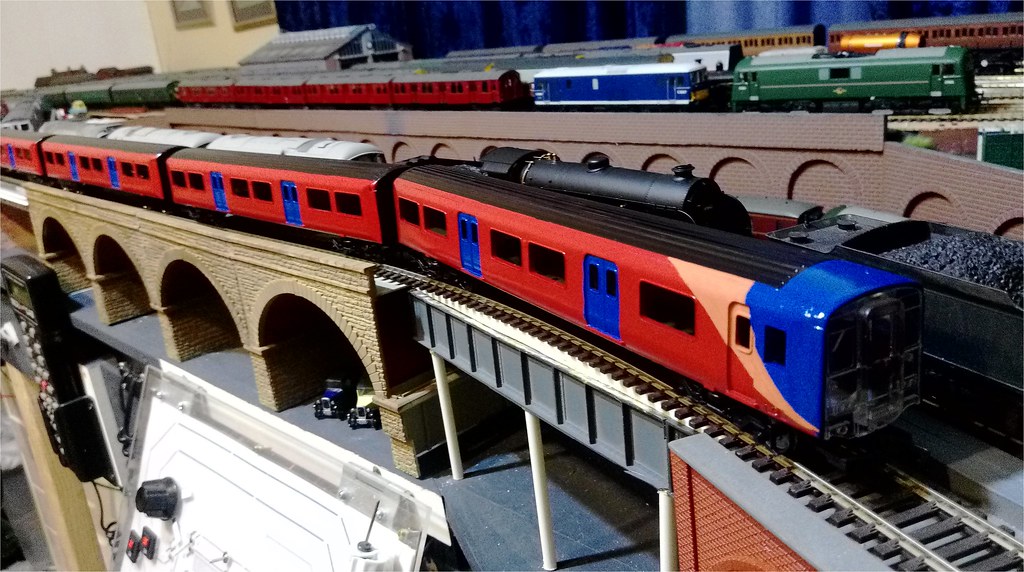
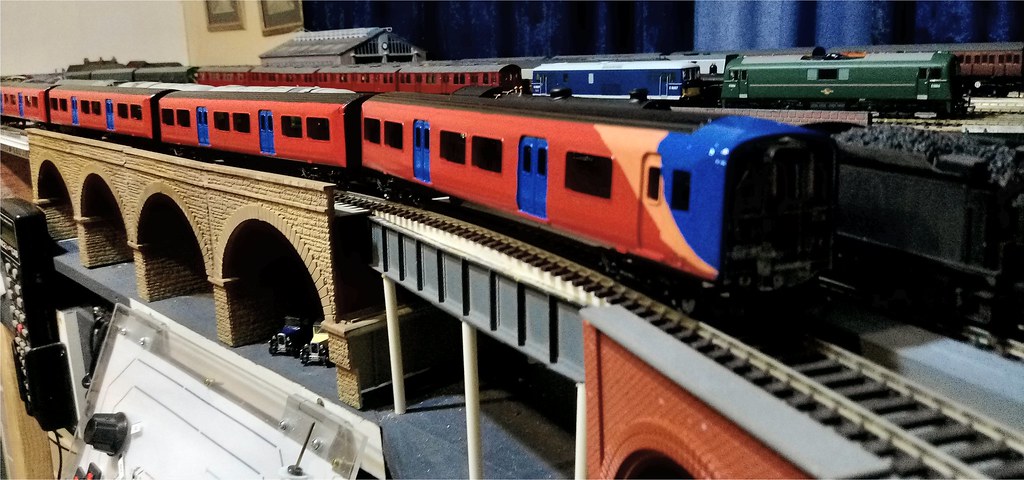
They are looking slightly more complete, livery-wise, and have had the black roofs and ends added.
-
And again, this time with the orange 'swooshes' added. Both the blue and the orange are very crudely done at the moment. When Adam (Electra Railway Graphics) comes up with the vinyl overlays, I'll see what needs to be tidied up to get minimum 'show through' of the base colours.
-
Some blue bits added to the Bratchell 455/9.
-
Sorry d00m, I missed your comment until now.
I have wired these strips directly to the track pickups, so no intermediate decoders ... For an underground train I figured there was really no need to be able to switch the lights off. There's no reason why you could not add decoders, apart from expense - for this six car unit, there are already two decoders on board for the DM cars, so four extra decoders would be required.
For modern units with fluorescent lighting, the colours tend to be colder than older units with incandescent bulbs. Even so, many operators and builders have now realised the impersonal feel cold-coloured lighting and cold internal decors give, and are tending to warmer lighting and colours nowadays. With the cheap lighting strips I have used, it is a relatively easy job to swap them over and experiment with effects.
These cheap lighting strips come with the LEDs wired in sets of three with a built in resistor for each triplet. They still come out extremely bright on 12 volts. -

Well, Bachmann are also doing the class 450 variant, although I have already converted two class 350/1 units (the cheap Silverlink ones) to 450s using Electra Railway Graphics vinyls.
As to class 319 units, I would love a RTR one in OO. Bachmann/Farish are bringing one out in N scale, so there is a chance they could scale it up to OO in the future.
In the meantime, I have built a Bratchell Models kit for a 319/1. These are not difficult kits to get up and running, but do take a bit more effort to detail and render "complete" (i.e. with seats and finer details including such things as lights. They aren't cheap, but then again, the cost of 4-car units from the major manufacturers has also risen quite dramatically in recent times. Incidentally, the class 450 conversions released some nice pantographs for use elsewhere, including one for my class 319. In my case, because i run a third rail layout, the pantograph will never actually be used. -
Thanks for that info; very useful to know when I get to weathering both of the Bachmann panniers ... and the old Hornby one I tarted up a long time ago but have to reline now. The Hornby one has separate handrails and Romford/Markits wheels fitted, and will eventually go onto DCC with a refurbished X04 motor with a neo-magnet fitted.
It does make some sense of the various close-up photos of the LT pannier tanks in several of the colour albums I have on my bookshelves. -
And here it is in service. I have painted the pantograph a light grey to match the photos of the real one. It sits a little higher than it should, but I can't do much about that. Maybe later when I can get some supplies of smaller plastic sections I can redo the major parts of the support framework and lower it a little. For now, it looks the part. Once gain, this is a blended photo with two different focal lengths because of dim lighting , which is not conducive to good depth of field.At a later stage I will be fitting working head and tail lights to the driving trailers.

-
Some minor additions to the "wiring" in the pantograph well. There should be more of it, but even the bits I have done are not entirely clear in the photos I have. I know one of my runs has no obvious purpose, but I could say the same about what I can make out in the photo of the real one. What I have done is tried to get something that looks representative, rather than being slavishly accurate (beyond my skills!).

-
The Q23 and Q27 stocks weren't really flush glazed, but they weren't as deeply recessed as my models have ended up. Still, the result is not too bad. Once I put transfers on, I'll matt varnish them too.
I am trying to glaze the Q38 car now, but am not really happy with the result. I may rip out the moulded glazing again,and just do my own. -
I suppose I should add installing passengers to the list of things to do!
-
Yes, the variety of liveries is one of the reasons I hung onto some of the older Lima bodies. I have eight operational chassis for the 12 bodies!
-
I don't think I've ever had a truly quiet Lima model, although I have had a couple of really good runners - one I still have was good enough to convert to DCC (a class 31). For the most part, I haven't considered Lima locomotives worth the effort to convert, but every so often a good 'un comes along.
The wheels and electrical pickup arrangements also play a part in my decisions; none of my pure Lima class 73s passed my criteria, and even this one with the ModelTorque motor only just got in. Having added the Hornby bogie, it has now become far more acceptable.
One other thing I have not mentioned before: an added bonus of the Hornby bogie was the NEM pocket and much smaller coupling. -
I bit the bullet and took the old decoder out, and added a Lenz Standard+ v.2 in its place. This decoder has improved the running out of sight, although it looks like I'll have to add an extra resistance into the line, as even on the lowest settings, the locomotive jumps forwards. The running itself is now extremely steady, so having BEMF controls seems to be part of the answer with this motor.
I used JMRI Decoder Pro to create a speed table and limit the top speed to something reasonable (the real locomotives had an official top speed of 90 mph, although at least two have been clocked at 107 mph on the Bournemouth line).
There is more to do, but I am now pretty happy with the quality of the running of this locomotive.
I have been progressively fitting etched nameplates to all of my locomotives, but Broadlands has eluded me as none of the plate manufacturers that I can deal with from here in Australia seem to offer them.
.thumb.jpg.60c53fcbcaa34017b05b8919d1a9e6d2.jpg)


Copenhagen to Penzance by rail
in The Farthing layouts
A blog by Mikkel in RMweb Blogs
Posted
That's quite a trip. Wonderful stuff, and great photos.