

.jpg.39bdeb0f4590433c28aa87d745975f8d.jpg)
DavidLong
-
Posts
1,395 -
Joined
-
Last visited
Content Type
Profiles
Forums
Blogs
Gallery
Events
Exhibition Layout Details
Store
Posts posted by DavidLong
-
-
One that irritates me (and I say this knowing that my own English is appalling) is incorrect use of collision and describing allisions as being collisions. Most stories about how a ship collided with something are incorrect as the ship had actually allided with something.
I must admit that I wasn't aware of that distinction, jjb. The Oxford dictionary does describe it as 'rare' and does specify it to be used in a nautical context:
verb. Maritime Law. rare. no object To hit against something. Now Maritime Law: (of a vessel) to collide with another which is stationary, or with a static object or structure.
Thanks for the information
David
-
Kevin,
I seem to recall a 7mm scale model of a portion of the Turnchapel branch in LSWR days. It featured the bridge and the area to the east of it. I am fairly certain that it was featured in BRM but can't recall the date, probably post-2000. If I turn out my copies I may find it.
David
The good news, Kevin, is that I found the issue of BRM (September 2005) but the bad news is that the layout is called 'Laira Bridge' which is just before the junction for the Turnchapel branch! A nice layout but not very helpful to your project. Sorry!
By the way, just in case you are interested, there are some photos of the layout here:
http://www.rmweb.co.uk/forum/viewtopic.php?t=13176
Scroll down past some other excellent layouts at the Wigan show 2007.
David
-
Kevin,
I seem to recall a 7mm scale model of a portion of the Turnchapel branch in LSWR days. It featured the bridge and the area to the east of it. I am fairly certain that it was featured in BRM but can't recall the date, probably post-2000. If I turn out my copies I may find it.
David
-
Ian,
Any information about the 'stay alive' used in the Terrier?
David
-
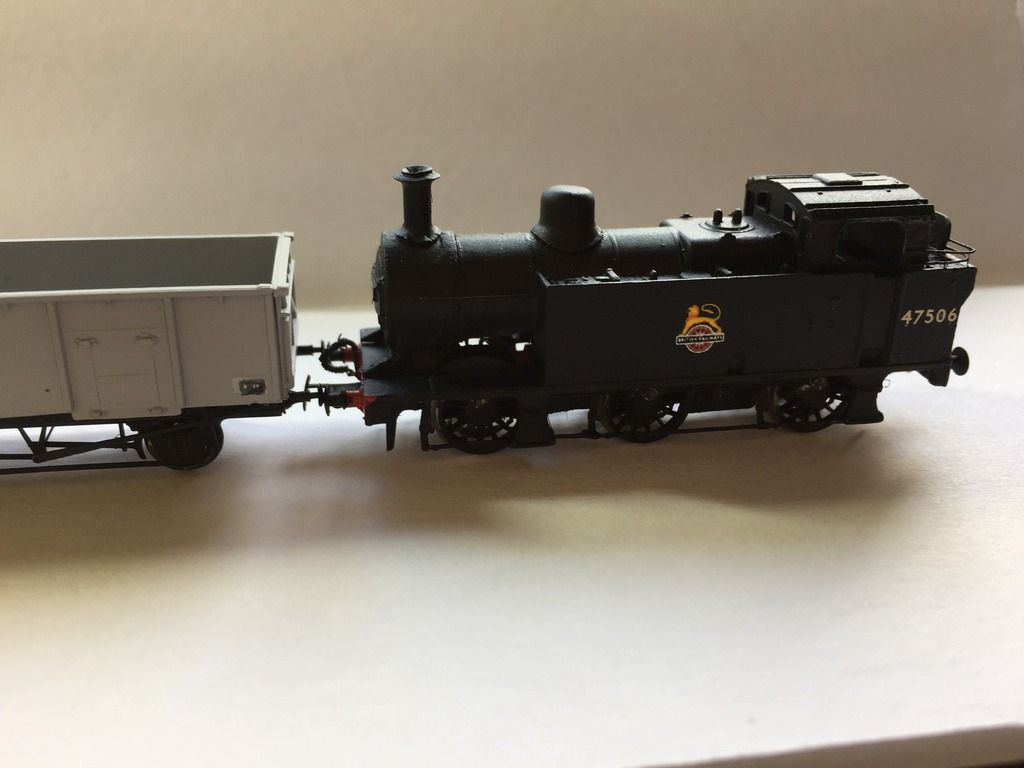
Having got the blue 08 finished I thought I would give an 04 another try. A second 2mmSA chassis built worked no better than the first until I made up and fitted a second set of wheels. It now seems the original set of wheels have a few issues I hadn't spotted...... The etched balance weights to make them look a bit more 04 like have yet to be added to the newer wheels. The wheel bosses stand too proud to be able to fit the alternative etched 04 wheel overlays.
I have again used another of the ebay coreless can's. Great value for those that managed to get some. With an internal body width of 8.5mm there is space to again sit a CT DCX76 on top of the motor, but perhaps not sufficient for those that would want to install a Zimo MX649 sound chip.
Although I know blue 04's weren't common the loco was acquired cheap a few years back because the main footplate casting was a bit poor around the steps area, so it was stripped and replacements from scrap N/S etch have been made. The buffer beams are the versions on the chassis etch without DG coupling slots because I use a lower height setting than most and will have to make the slots myself to suit.
Izzy
Yes, Bob, it's me again!
Did you use the same slotted bearings/keeper plate method as you used on the 08?
David
-
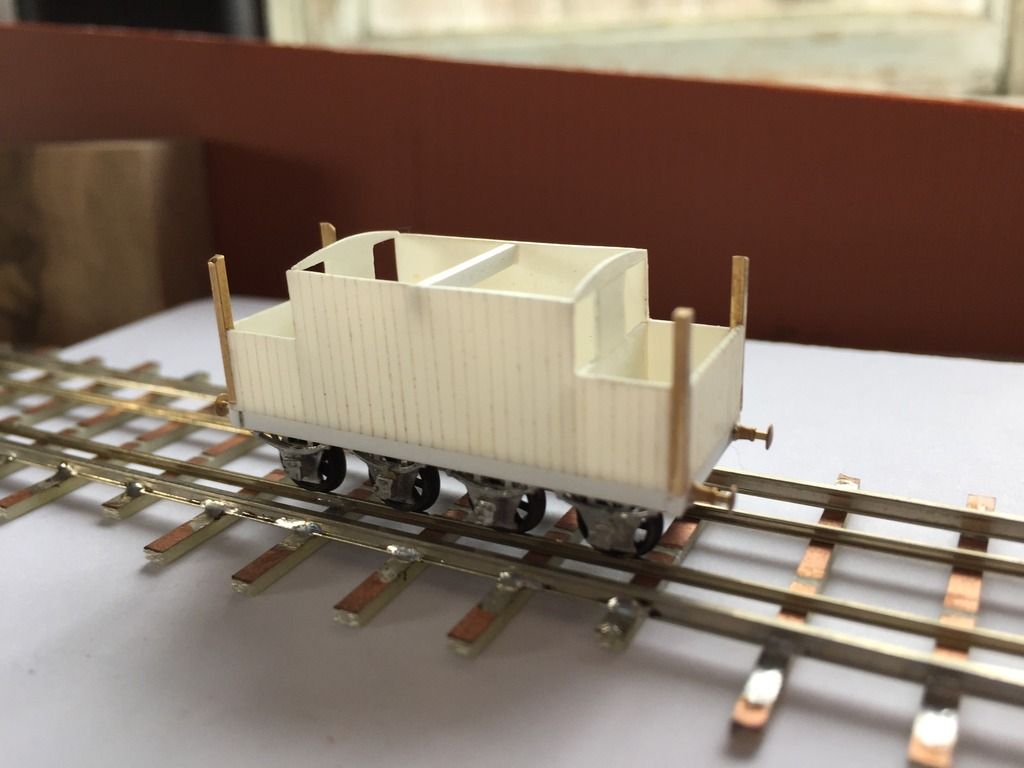
Moving on to the upperworks... The instructions require the modeller to drill 0.3mm holes in the 'splashplate to take the strapping. I left this 'til later! I did however CAREFULLY drill out the buffer locations in the pre-marked positions.
Next stage is to fix the end supports (whitemetal) to the baseframe (whitemetal). I actually used superglue for this - but a word of warning. The end stanchions are VERY delicate! I actually dismembered one whist cleaning it up (and I have to thank Steve Simms, the 'No2 Shopkeeper for a very speedy replacement). However, I may have a solution - see the end-note.
The half-assembled base frame can now be attached to the etched running gear.
The next stage is to fit the 'splash-plates' over the 'anchor straps'. I cleared the etched slot with a 0.35mm drill and the process went fairly well - then the anchorstraps have to be bent to 90 deg to lie flat on the splashplate. At this point I used the pre-exisiting hole in the anchorstrap to drill the hole in the splashplate. I very quickly learned that the torque associated with the process snapped the end of the anchorstrap! These were then soldered down with 'Carrs Solder Paste' (no connection!). The beauty of the paste is that any excess can be removed with a fibreglass brush after the process.
The drawback with this method is that things like pin-vices and fibreglass pens are working very close to those delicate stanchions!
 AT-06 - a delicate drill-job.jpg
Still, I got the job done, and the unit is now very nearly ready for a swim in 'nickel-black' - after visiting a certain stand at the Southampton Show tomorrow!).
Now a recommendation. If I make any more of these little beauties, I will leave the end stanchions off until I've fixed the baseplate etc to the underframe. This would also allow the option of making a much firmer soldered connection. Right -just the V-hangers and brake levers to fix....
Regards
Ian
Ah yes, Steve Simms! Tony's lesser known 'alter ego'

About the photos, Ian. In 2mm scale, even more than in larger scales, depth of field is important. The aperture setting needs to be as high as the camera will take it. My ten year old Minolta will go to f8 on the aperture setting and this has turned out to be ok for our scale. Here's an example:

Hope this helps
David
-
 7
7
-
-
Hi Tony,
Nice choice in the Hull & Barnsley. I've long had a bit of a soft spot for this line as a small number of volumes on my bookshelf would testify. It also fits with my liking for those from the 'second division' of pre-grouping railways such as the Furness, the North Staffs, the Maryport and Carlisle. They usually had to fight for their existence against bigger and more powerful neighbours.
Any thoughts on motive power? You certainly wouldn't have to be too concerned about the production of domes as it was one of those railways that seemed to have an aversion to them! Even to the end the motive power was a tad idiosyncratic as the local pick-up freights were handled by WD 2-8-0s which probably didn't overstretch their capabilities.
David
-
Maurice Hopper, on 22 Jan 2017 - 06:04, said:
A pedant writes:
It looks like 21C107 in Mr Bulleid's intriguing numbering system and before it had received its name. Maybe a small re-enactment of the naming ceremony at the platform could be called for

David, I am sure you know the intriguing numbering was a copy of the system for French steam locos current at the time of construction. Bullied had some links with the French engines who used the following....
C = 0-6-0 ...... as in Q1s
1 = 2 as in 2-6-0 .... so John's green N would have become 1C37
2 = 4 as in 4-6-0 ...... so an Aurthur would be 2Cxx
And 21C as in 4-6-2
And D as in the 0-8-0 Southern Z class........ perhaps there is a question here for Round Britain Quiz!
Quite so. Maurice, but it always baffled me why the Pacifics weren't 2C1xxx. The system was also responsible for the Q1s being known as 'Charlies' (as in C for . . .). I first came across this when, many years ago, John Charman wrote an article about his scratchbuild of a Q1 but didn't feel the need to explain the origin of the nickname and I was too stupid to spot the connection! John was apparently encouraged to build one at the insistence of his wife who had been employed as a secretary in the CME's office in the time of Oliver Bulleid and Mrs Charman couldn't understand why the Q1 was deemed to be ugly.
Glad everyone had a good day at Wadebridge.
David
-
4
-
-
Hi Nick, David.
I'll try and answer the questions as best I can, and hope it will make things clearer. First off though there is no need to slot the frames if you don't want to, it's just my basic build method which I thought I aught to mention as the N/S keeper strip is quite obvious in the chassis shots.
Firstly, it isn't like the recent Farish locos with separate hornblock type bearings that slide into the frame. I did think about making some, but this seemed an easier/simpler method I could use to advantage.
Basically the normal PB axle bearings were soldered into the frames, as you would with 'standard' construction, and then using mostly a rat tailed needle file the holes were opened up downwards until a slot was formed to the bottom of the frame. This will of course quite probably horrify many modellers, and is why I called it crude, which it is. But if done slowly and carefully a decent result can be obtained. Past about 0.5mm depth if the slot widens a bit - more than a good running fit - then it doesn't really matter because it's very doubtful the wheels in use on track will drop further than this in the frames.
This leaves a slot with a U shaped bearing at the top of it. If you think logically about it, a locos axles just mainly rest/run on the top of a bearing with the rest preventing it from moving back/forth/down, so with bearing surfaces also at the front/back it can only move down. The keeper strip determines how far. Virtually none for the rear driven axle, 0.5 - 0.8mm for the others.
Here's a shot with the keeper strip removed. I can't/don't want to drop out the wheels because this would mean having to unsolder the outside brake rigging, which is hinged to move out of the way, but only when absolutely neccesary. But I hope this may make things a bit clearer including the spring wire pickups on the front two axles - none on the rear - no space.
regards,
Izzy/Bob
Oh the keeper strip, sorry. Just a bit of scrap etch from a 2mm SA coach kit, so 10thou I would think.
Many thanks for that explanation, Bob. Is there enough movement in the axles to make it worthwhile to joint the rods? I'm getting a real downer on rigid coupled chassis, these days especially those with short wheelbases but we don't seem to do compensation in 2mm scale; apart from Mr Watt who builds impossibly small Caledonian locos which probably wouldn't run without it! We don't seem to have access to any commercial stay-alives that are small enough for locos like the 08 for which they would be ideal. Nigel Cliffe has described how to build one but I have insufficient understanding of how to do it.
David
-
1
-
-
I was surprised how well it works some Aluminium to protect the electric ring and away you go, I think the idea is it heats the whole frame evenly
mini blow torches are for creme brulee or silver soldering
Nick
It would a lot easier with an RSU like this:
https://traders.scalefour.org/LondonRoadModels/various/soldering-materials-and-tools/
Unfortunately it is about £80 more than when I bought mine but I wouldn't be without it.
David
-
Phil Copleston, on 14 Jan 2017 - 16:51, said:
Here's a 'heads-up' for a rather unique 2mm finescale 'fix' next Saturday 21st January 2017:
For one day only - John Greenwood's superb 2mm finescale layout 'Wadebridge' will be appearing at The John Betjeman Centre (the original Wadebridge station building), Southern Way, Wadebridge, Cornwall, PL27 7BX. http://www.wadebridge-concern-for-the-aged.co.uk
Not a model railway exhibition, but part of The John Betjeman Centre's event, "Remembering 50 years since the Last Passenger Train from Wadebridge Station" - the last regular passenger train left on 28th January 1967. The Bodmin & Wenford Railway will also be presenting a display, so other railway interest will be there too.
Open 10am - 3pm. Admission will be FREE!
So if you're in the area next Saturday (or travelling from afar) - please call in and see us (John, Jerry and me) and make yourselves known. You will be very welcome!
03-20160917_155806_001 (1500) (crop).jpgWest Country class No.34007 'Wadebridge' at Wadebridge (minus nameplates) on the Down Atlantic Coast Express (ACE). This one-day event will be held in the real station buildings, as seen here on John's 2mm rendition of this station and famous train!
And for the Wadebridge station gricers...
This is Wadebridge station looking east from the footbridge on Molesworth Street, September 1968 (Douglas Nicholls, Cornwall Railway Society)
A pedant writes:
It looks like 21C107 in Mr Bulleid's intriguing numbering system and before it had received its name. Maybe a small re-enactment of the naming ceremony at the platform could be called for
David
-
Thanks very much for that information about the 08 chassis, Bob. A couple of questions:
What is the thickness of the nickel strip that you used?
I didn't quite understand the sentence " It's done quite crudely, my usual style, by just filing downwards after soldering the bearings into the frames, so they are really just half-bearings now". Could you elaborate a little more as it sounds to be a critical part of the process.
David
-
Dave,
Many thanks for the update but one item missing was the N version of the J94. I think that in a previous message you indicated Autumn 2017. Is that still the case?
David
-
What are peoples thoughts on wagon weights, having trawled this and another forum together with the 2mm archive I appear non the wiser using a digital scale I note that some wagons come in @ 4 grams while a rtr conversion using drop in wheels is 5 grams with a etched example @ 7 grams. I only run short trains so additional weight should not be a problem

Nick
Nick,
I mentioned this issue in a response to Gareth Ashenden over on the workbench thread a couple of days ago. This is what I said:
Most of my short, non-bogie stock weighs in at between 6 and 10 grams, although I did get a bit carried away with one van which comes in at 12 grams! If you haven't already got one, a small digital scale such as this is useful for 2mm scale:
http://www.ebay.co.u...5wAAOSwwo1XclLg
David
-
I've come back to the brake van I started sometime in March. It needs a roof, foot boards, and possibly brakes. I say possibly because once the foot boards are there I'm not sure they'll be visible and I have no idea how to do them either. Thoughts welcomed. Also, is there a recommended weight for brakevans? This is very light and I'm a bit worried about it staying on the track.
Great Northern 20T Brakevan:
Coming along very nicely, Gareth.
I'm not sure that brake vans need to be treated any differently to other small vehicles when it comes to weight. Most of my short, non-bogie stock weighs in at between 6 and 10 grammes, although I did get a bit carried away with one van which comes in at 12 grammes! If you haven't already got one, a small digital scale such as this is useful for 2mm scale:
It's from Ebay UK but I'm sure that Ebay US would have something similar. No use for a larger scale as it's not big enough!
David
-
1
-
-
They look to have the small headcode boxes to me. Where are you seeing them with no box?
Roy
Have a look here:
No sign of a 2-character headcode box. They weren't plated over until the 1970s. The 122s preceded the 121s and 2-character boxes were the norm. The 121s gained a 4-character box as, by then, that was the standard.
David
-
A lot of comments here about the style and content of the headcodes. At least the 4mm Class 122 has the headcode boxes which are noticeably absent on the N gauge version. It must be a case of 'in this small scale no-one will notice' syndrome . . .
David
-
Good man, Jeremy. I knew you could be trusted! Do note that the DGs don't have to go on the bogie and can be mounted on the buffer beam which means that you can also have a full compliment of pipes without a swinging coupling fouling them.
A couple of snaps here of examples:


With your high value turnouts (C8, C9, D10 ?) there shouldn't be any trouble backing trains over them but it may be as well to check with one loco and train first. I do think that the couplings on the coaches will have to be on the bogie though, too much end swing otherwise. Kadees should be good within rakes I would think.
David
-
5
-
-
cornish trains jez, on 29 Nov 2016 - 11:17, said:
Decided to get the airbrush out last night and paint the pantograph well. Quite pleased with how it's turned out. Just the side grills to paint, varnish and transfers to go and maybe a little light weathering!
Best regards,
Jeremy
Very nice work, as usual, Jeremy. But those couplings are going to have to go . . .

David
-
1
-
-
For the oldies amongst us:
'Meaty, Beaty, Big & Bouncy' - The Who 1971
Nice work, as usual, Mark.
David
-
For anyone wanting Dapol loco bodies to go with Chris' latest offerings it may be useful to look here:
https://www.dccsupplies.com/cl-735/Dapol-n-spares.htm
No complete M7 bodies at present but amongst the spares there seem to be enough parts to put one together. They have 28xx/38xx bodies and also those for GWR 4-6-0s although there's no mention of tenders. It may be worth giving DCC Supplies a call to find out what the position is regarding tenders. I've just bought a 48xx body from them for a very reasonable £15.60 + post.
For the 51xx, BR Lines have just about every available version of Big Prairie body.
Some very useful additions to the range from Chris.
David
-
I have finally finished the Jinty conversion I started about three years ago. Well, it still needs weathering, so maybe it's not actually done.
I have also been finishing up a few part completed projects. A BR brake van, BR plywood van, Presflo, and several mineral.

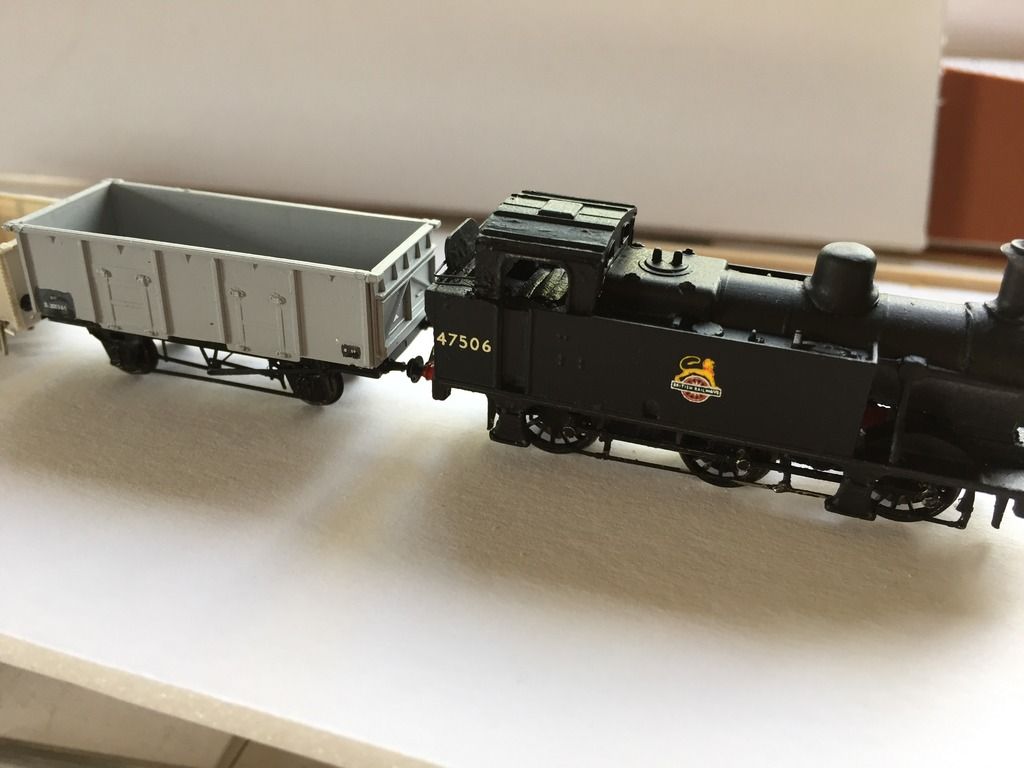
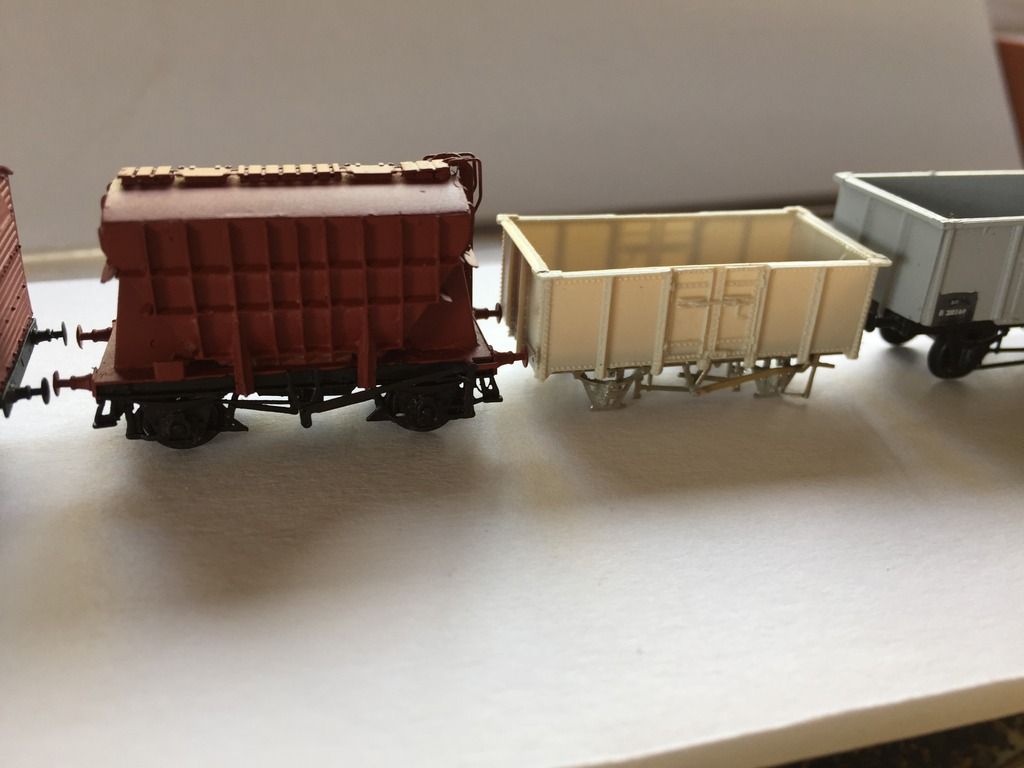
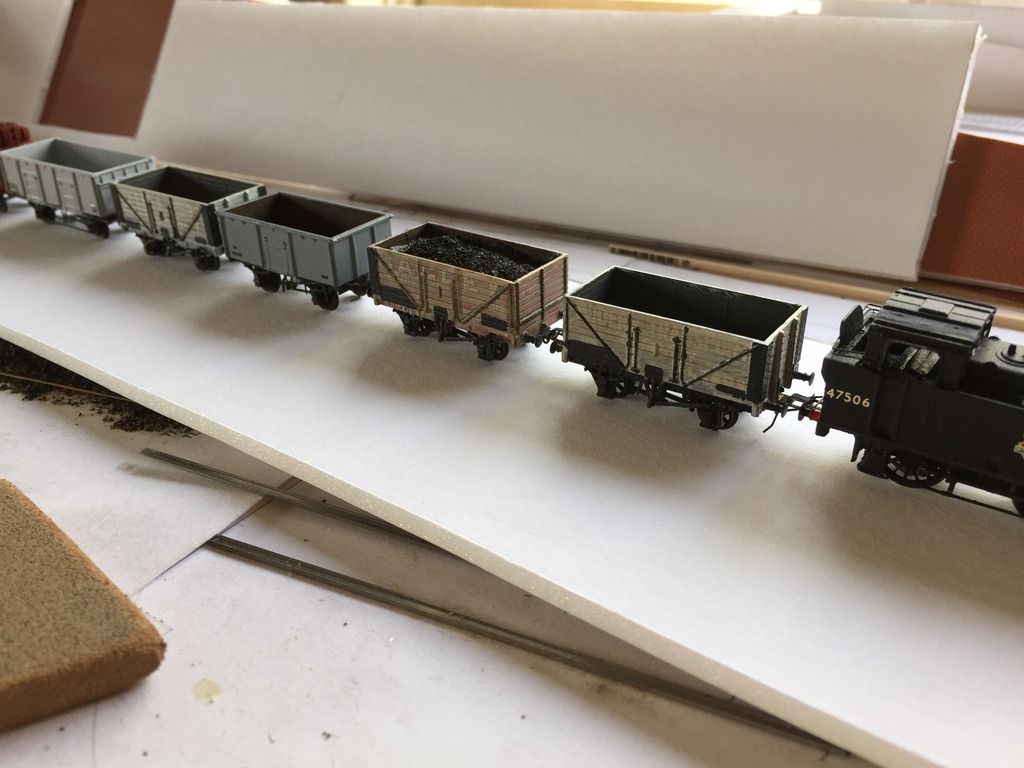
Once again, I have run out of wheels (a perpetual problem) and I still have four 16T minerals to build.
Some really nice modelling there, Gareth and especially well done with the ex-PO mineral wagons.
David
-
That surely could do with some laser-cut glazing...
Chris
My thoughts entirely. Same goes for the Autotrailer. If only . . .
David
-
I have both types of Siphon. Did I do the B-set? I must have forgotten.
Chris
Chris,
You did indeed produce a B set underframe. I have a pair waiting for me to build a suitable layout! You actually sold it as a Collett 60' underframe which I believe may be suitable for the Dapol Collett coaches. It would be nice if this etch could be available again.
David


Etched loco chassis
in 2mm Finescale
Posted
An Aberdare! A Kruger could be on the horizon . . .
David