Jump to content
 
  • entries
    134
  • comments
    483
  • views
    99,831

Moving to P4 (Post 6)


Knuckles

552 views

Whilst I await that point blade (phoned Len other day) I finally managed to work out what I think I need. Bill Bedford RCH 1907 Sprung W Irons. Might try a truck conversion whilst I wait. if you have any suggestions as to a good flat base doner (kit or RTR) please tell me.


Don't really know what I'm doing as the instructions as usual with most etches asume you have some idea what you are doing.

This is what I did...
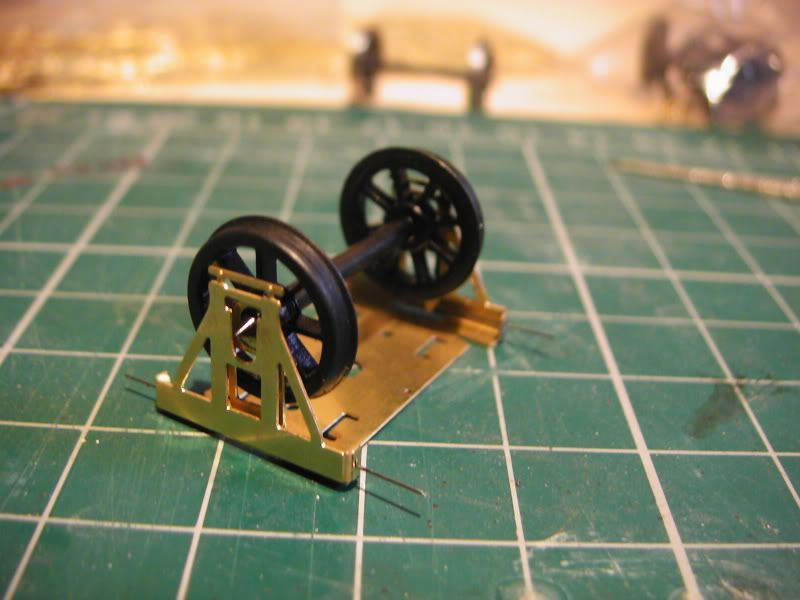
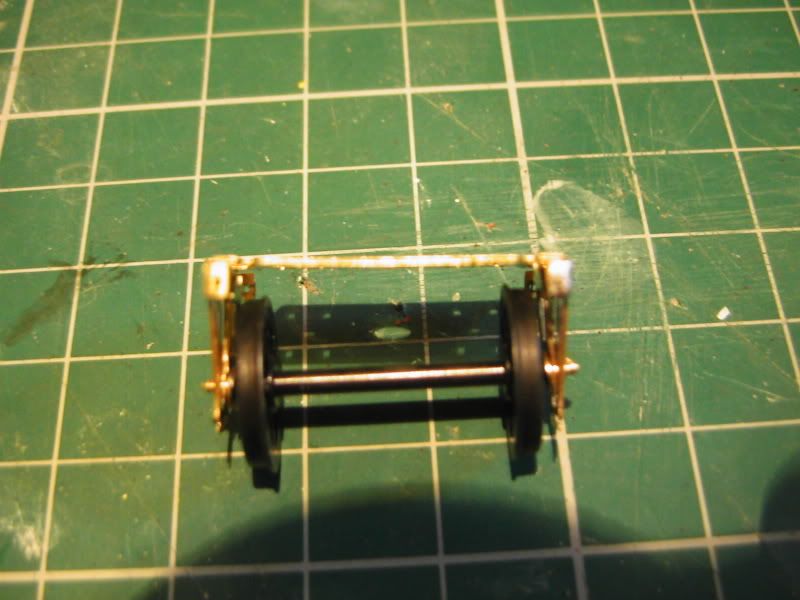
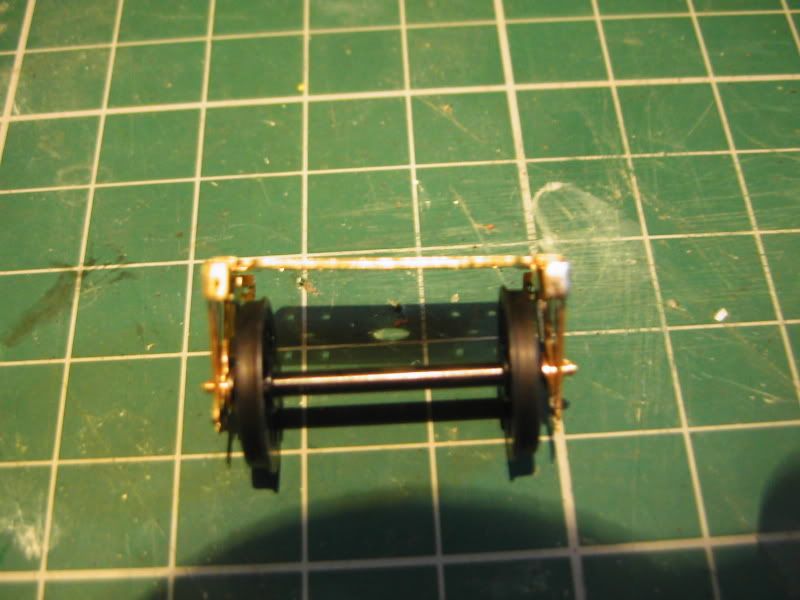
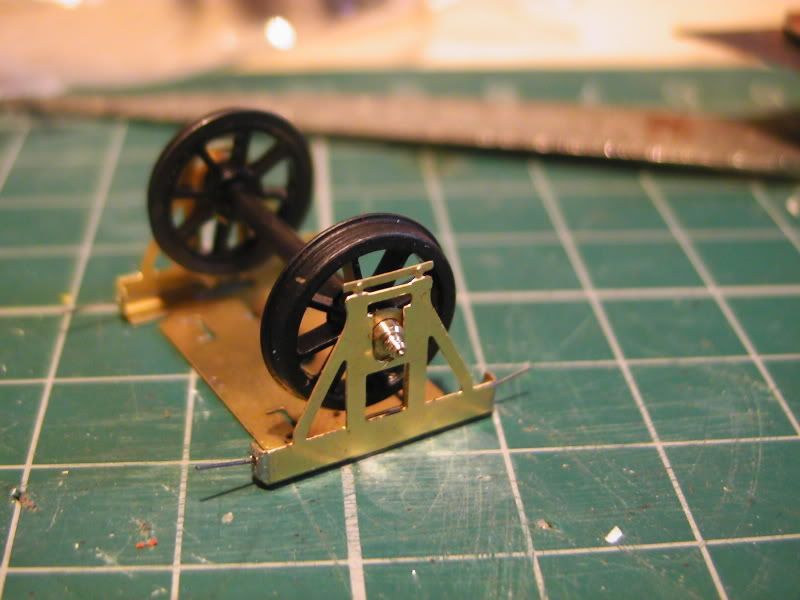
Clamped the wire in the err 'thing', :scared: then spent a while trying to get it in those 2 holes with out falling out. I did solder them in but found that that reduced the springyness to almost nothing so I cliped the wire out, filed the solder away and drilled new holes. After that I did the same again and just about managed to fit the (I think Alan Gibson - from S4 stores) wheelset inside and bent a bit of pressure in. This kind of worked and I was going to ask how to reduce sideplay, front and back play and a few other things but as I were taking these 1st 5 photographs it occured to me that maybie you need bearings (again, nothing in instructions as they assume the builder knows everything, even if it is bloody obvious!) so after much sighing I finally managed to fit the wheels, 2 bearings, 2 swinging spring things into the W irons and this solved many problems, all apart from one. A bearing would bet stuck every so often, so now I'm thinking maybe I am supposed to solder the bearings to the 'things'

Is that right? :cry:

1st 5...

PIC_2731.jpg

PIC_2732.jpg

PIC_2733.jpg

PIC_2734.jpg

PIC_2735.jpg

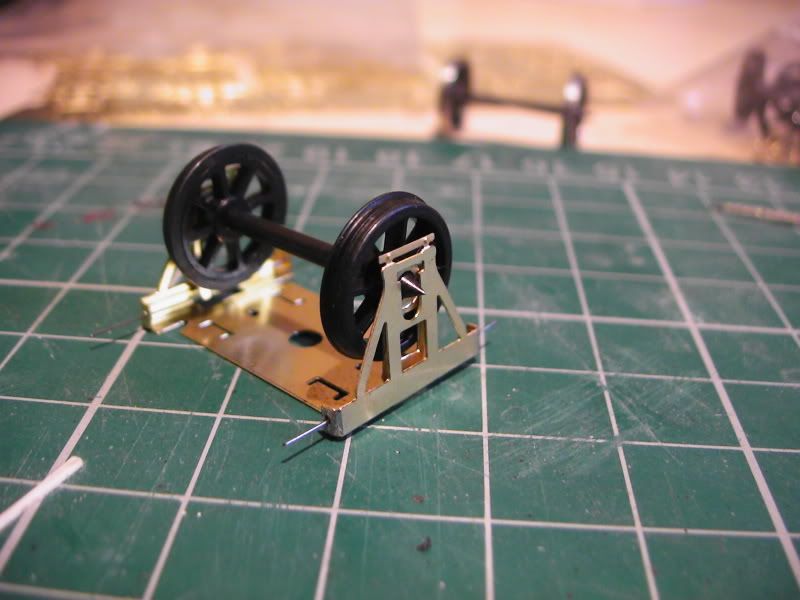
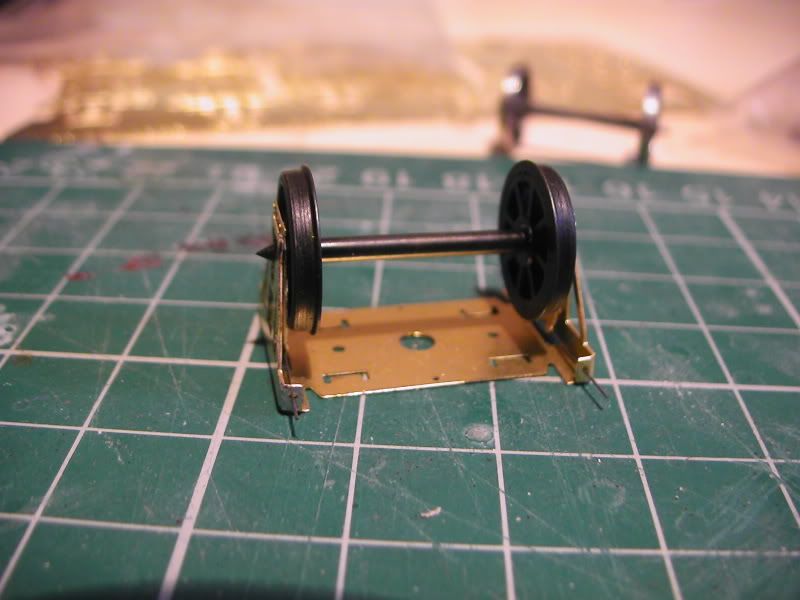
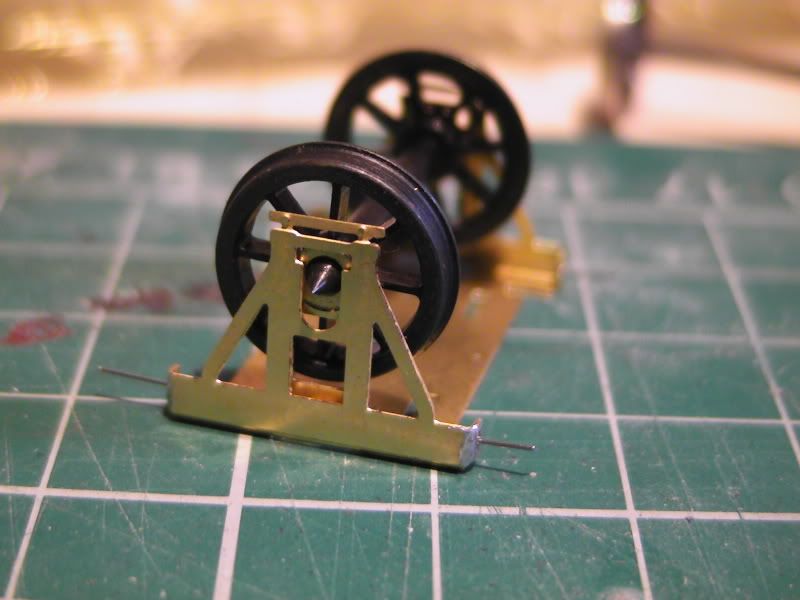
last 4, these are with unsoldered bearings fiddled in...

PIC_2737.jpg

PIC_2738.jpg

PIC_2739.jpg

PIC_2740.jpg

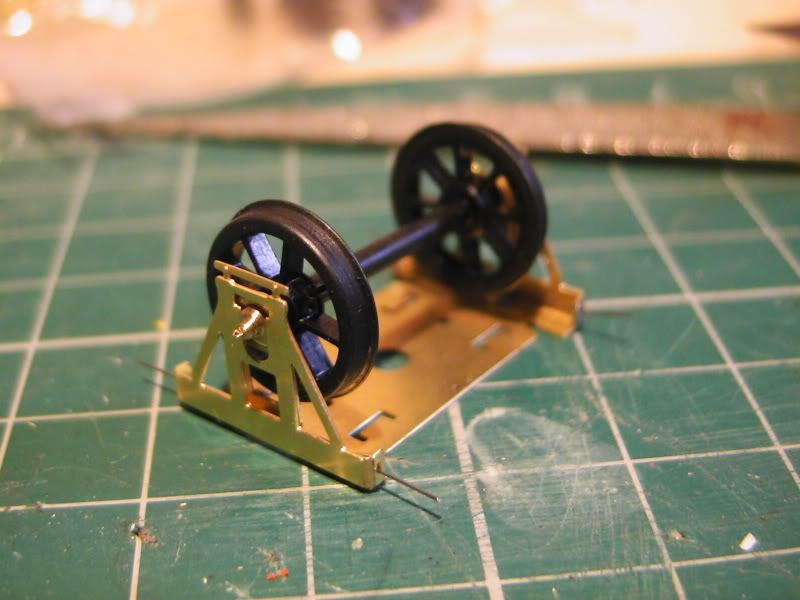
Also is it correct for these to be bent non parrelel? I feel such a n00b.

EDIT: I had a go at soldering them in, seems much better and easier but I stil have the problem of them sticking in the slide sometimes. I gently filed a teeny weeny non noticable amount away from the W iron slider and this seems to have solved the issue. When the springing is working is it normal to have the W irons splay sideways?

9 Comments


Recommended Comments

So far, so good. You've worked out that the wire needs to be a bit longer and that you need bearings, so you're about half way there.


It's worth putting a bend in the ends of the wires to retain them but, before you do that, take them apart and make the bends in flat plate that goes across the floor. These are where those U-shaped cutouts can be seen (I usually make these bends first, but you've already done the other ones). This will greatly increase the strength and rigidity of the unit. Then run a fillet of solder along the inside of the bend at the top of the W irons (i.e.behind where the spring wire goes). Again this will add strength.


IIRC Bill doesn't recommend soldering the bearings in, but I always do but with an absolute minimum of solder. I also file down the pointed end on the outside of the bearing to minimise the amount of material that will need to be removed from inside the cosmetic axleboxes.


Yes, they do tend to splay out when you press down on them because the pointed end of the axle moves out of the bearing. In practice this isn't a problem because the forces and movement are very much less when they only have a wagon (not your hand) to support.


Nick

  • Like 1
Link to comment

Now...........


Take the wheels out of this etch, take a large hammer and crush the etch completely.

When you are satisfied that the piece of brass will never produce anything remotely interesting, take another w-iron etch and repeat what you have just done, but this time folding it up so that all the fold-lines are on the inside.

You should find the the second one will work much better than this one, and you will be left with a spare etch that can be hammered to pulp in a moment of frustration, or set aside in case you ever want to build a six-wheeled wagon.

Link to comment
... this time folding it up so that all the fold-lines are on the inside...

Whoops! I hadn't noticed that...

Nick

Link to comment
  • RMweb Gold

Any Parkside Dundas wagon kit ought to be suitable for this, although you may well have to remove plastic rib sections from the underside (I sometimes replace the kit floor with an equivilent piece of 30 or 40 thou plasticard). I've also used these W irons on Ratio and Airfix kits as well.


Don't be put off, you're on the right track and with the good advice from Nick and Bill in mind, your next one will be just right.


You did right in soldering the bearing to the carrier, by the way, I also do that, just a very small amount of solder is all you need, like Nick says.


Any you also worked out the bit about gently filing the inside of the W iron to give a bit more room for the bearing and carrier to move up and down, something I also do.

Link to comment

Seems like I'm on the right track then. :)


I didn't expect the creator of these etches to suggest I batter one into pulp! Guess it's a good way of saying I messed it up. :D I could use a battered one as a scrap yard component when rusted up. Etches on wrong side - ok! Easily made mistake. I'm not a complete brass etch or solder n00b but I was unsure on which way to do these. But.. the 2 rivets are on the outside on that thin bar below the W irons - isn't that correct?


Rather than hammering it, isn't there a way I could solder strength into it rather than wasting it? I did pay for it, after all.


I found soldering the bearings in place to be easy, but I think that's just becasue I'm comfortable with my soldering technique, practice etc.


-


Will have to work out how to mate it with another and a truck to properly test everything.

Link to comment
...But.. the 2 rivets are on the outside on that thin bar below the W irons - isn't that correct?

The bar should be folded back on the outside of the W iron. As you have it at present they'll then be on the inside.


Rather than hammering it, isn't there a way I could solder strength into it rather than wasting it?

If you try bending it back the other way it will most likely break. Even if it doesn't, there'll be no strength left in the brass. Probably best to practice your hammering technique as Bill suggests.


Nick

Link to comment

Hi Knuckles -


Welcome to the learning curve! You know you've *really* messed up when you fall off the inside of the loop & hit your head on the floor!


One suggestion I'd make is - do you live near a model railway club? Most clubs cater for everyone - from total novice to 'God's Gift' - and most are only too happy to impart their knowledge.


If not. it might well be worth investing in any of the good books on loco & rollingstock construction. For instance any good kits folds will have a half-etch line on the inside. This isn't just convention - it makes the metal easier to work & a good kit designer (such as Bill) will have taken the 'half etch' into consideration when working out the scale dimension across the inside faces.


I cannot comment on the suspension system - it looks like a version of the 'Continuous Spring Beam' (CSB) used in some loco kits. I don't know if Bills website has a generic instruction sheet downloadable, but it might be worth searching 'CSB' and the full wording here and on Google.


Also, dont be afraid to ask questions - on the blog or (better) on the forum 'Modelling Questions, help & tips' - RMWeb is, after all, the biggest model railway club in the world!


Regs


Ian

Link to comment

I'm a member of Coventry Model Railway Club but so far it's only me who's having a go at P4, all this is more alien to them than it is me.


Posibly to be seen in a future post; I have rebent the etch the correct way and strengthened it slightly with solder at the mini tabs you bend inwards to retain the wire, those 4. seems to splay less but it stil splays a little. if it's normal to have a bit of splay I won't wory but being my first I can only really go on opinions of your good selves.

Link to comment
Seems like I'm on the right track then. :)I didn't expect the creator of these etches to suggest I batter one into pulp! Guess it's a good way of saying I messed it up. :D

I think you just had an interesting learning experience........

There is one difficult lesson that everyone who wants to do quality work must learn at some stage and that is about not being 'precious' about your work. You are likely to send more time, effort and heartache trying to repair pieces that have gone wrong that the piece is worth. It is usually better to scrap the wrong piece and substitute a new one. Try it. Do another w-iron and see if it looks better when you've finished.


As for the splaying; there is a machining tolerance on both the axles and the bearings so a small amount of splay is possible.

Link to comment

Create an account or sign in to comment

You need to be a member in order to leave a comment

Create an account

Sign up for a new account in our community. It's easy!

Register a new account

Sign in

Already have an account? Sign in here.

Sign In Now
×
×
  • Create New...