Jump to content
 

Scratchbuilt GWR one-plank wagon (1)


Mikkel

4,643 views

blog-0736530001377238387.jpg.406877ca679694850d69637a042a2850.jpg


As part of the wagon building programme for Farthing, I wanted one of the early 1-plank opens with wooden solebars. There is no 4mm kit available, but then RMwebber Wagonman pointed out that they are in fact a very straightforward design. So I thought it would be a good opportunity to gain some experience in scratchbuilding wagons, which I’ve never tried before.


Img_1583b.jpg


I chose to build one of the 18ft types - namely no. 5141, of which there is a drawing and photo in "GWR Goods Wagons" by Atkins et al. Thanks to RMwebber Buffalo, another good photo was found in the BGS Broadsheet No. 46.


Img_1557.jpg


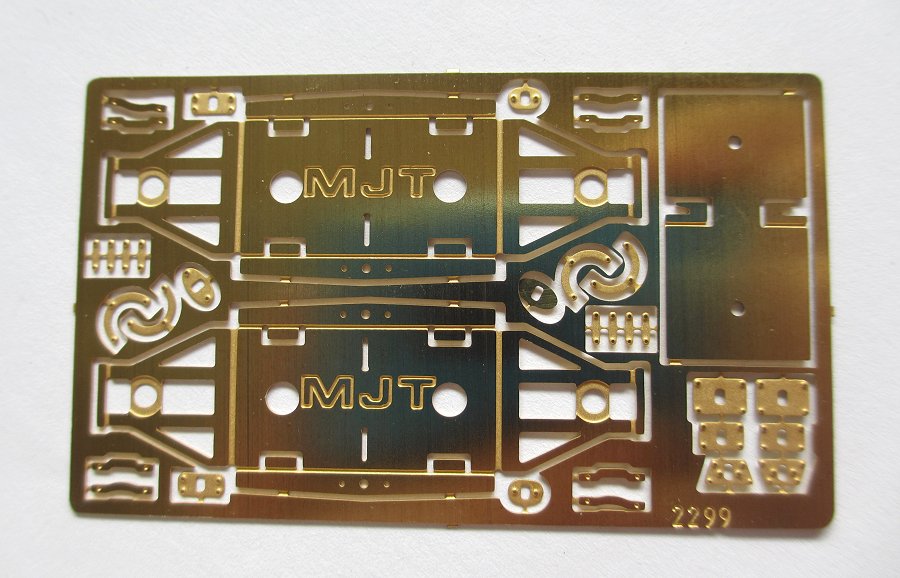
Yet another RMwebber - Miss P - recently pointed me in the direction of the MJT range of underframe components. This etch for their (rocking) axleguard units is very nice and has the added advantage of some good plates and rivet strips.


Img_1166.jpg


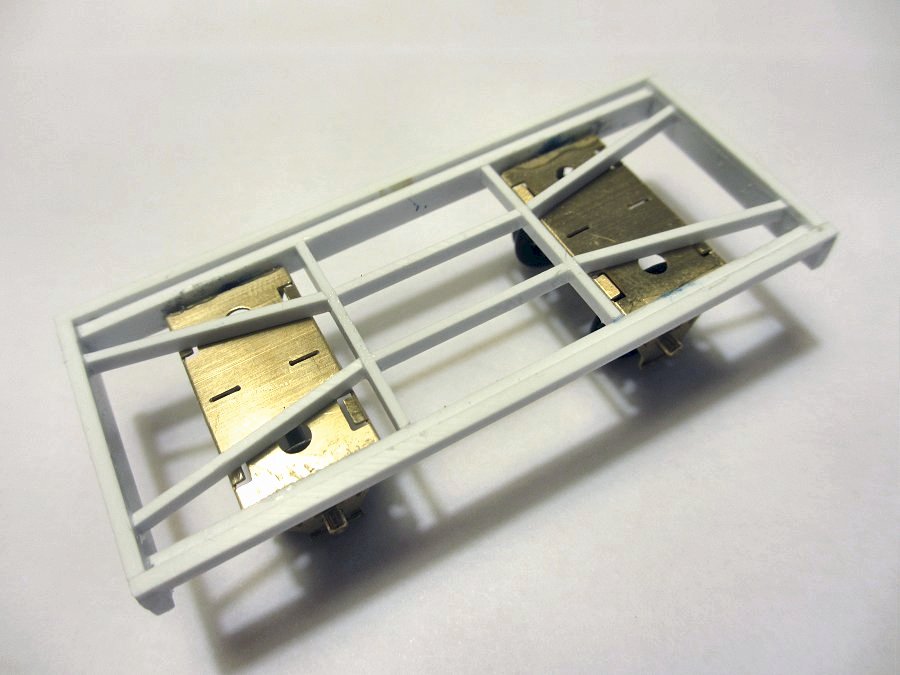
The axleguard units fold up nicely in just a few seconds. They are designed to be compensated by allowing one unit to rock under the wagon, but I didn't really see the need in my case. There are guide holes on the back for punching rivets, but I didn't have an appropriate tool and so will add them later.


Img_1180.jpg


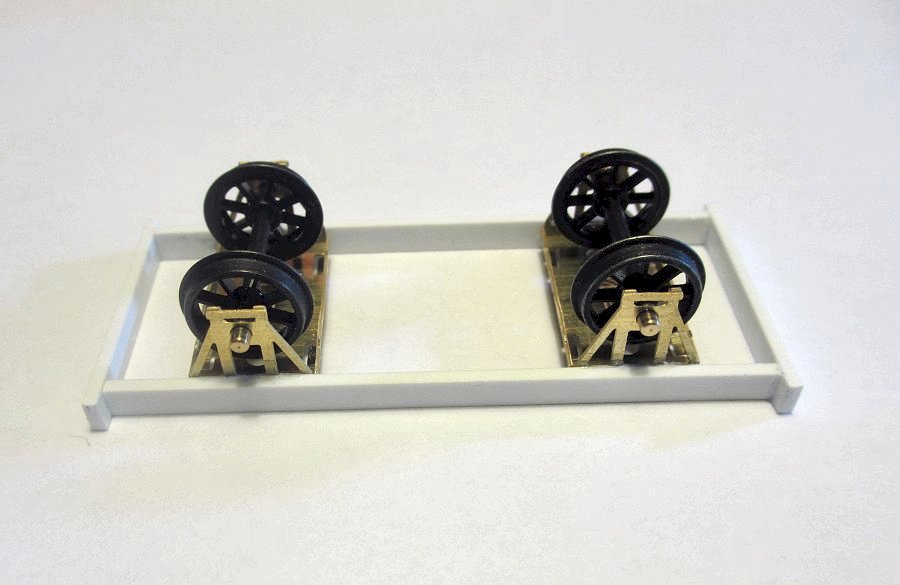
I built the wagon directly on the axleguards. This seemed easier and safer at the time. In light of what happened later, it would probably have been better to build the body first, then add the axleguards. Regardless, this shot illustrates that scratchbuilding a wagon doesn't have to be rocket science.


Img_1200.jpg


"GWR Goods Wagons" has a useful cross-section diagram in the introductory section which shows how wagons with wooden solebars were built up. I tried to follow this as far as possible. Here the "side rail" has been added to the solebars. On these particular wagons, the side rail extended over the headstocks as seen here.


Img_1184.jpg


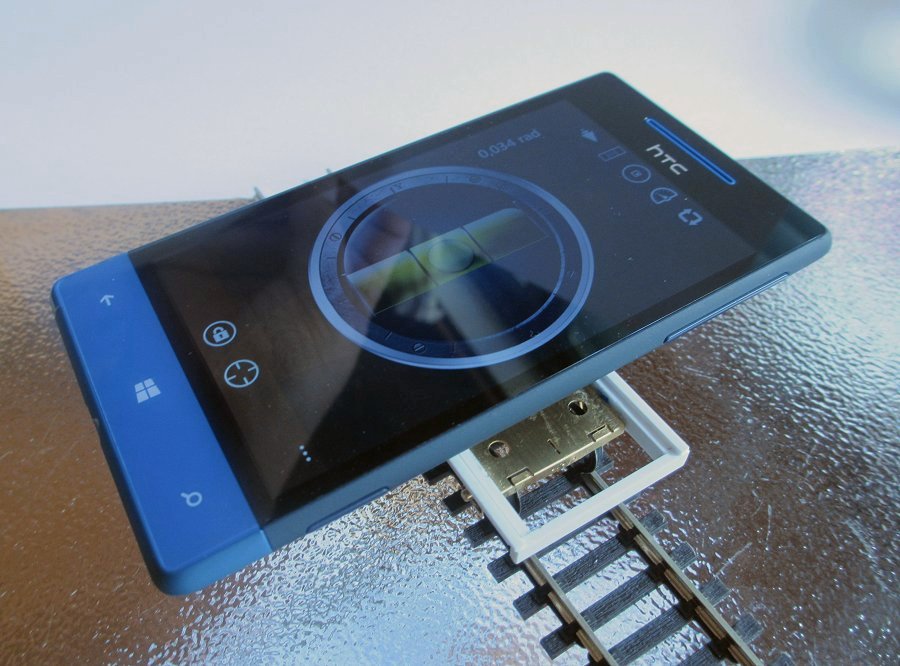
Gotta keep things level. This wagon was partly built while on holiday, so I used an app in my smartphone which turns it into a spirit level - a tip I got from Phil Parker's Blog (the exact page eludes me). There are various apps available for this purposes, I use one called "Carpenter's Friend".


Img_1256.jpg


I tried to build up the underframe bracing using an illustration in "GWR Goods Wagons." That's one of the nice things about scratchbuilding, you begin to understand how things were constructed.


Img_1265.jpg


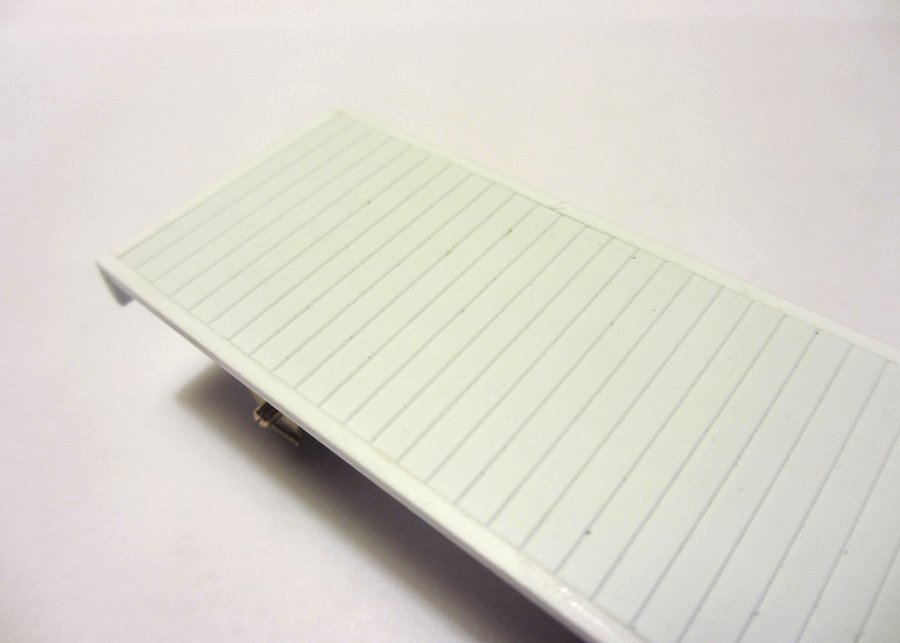
Here the floor has been fitted between the side rails. The floor planks should extend to the end of the wagon, but because the styrene sheet is thin it would look wrong when seen from the end. So I added separate deeper styrene sections at the ends. This trick cannot be seen when the wagon is fully built up.


Img_1524.jpg


Uh-oh! Up to this point things had been going smoothly. I was becoming smug. I had visions of scratchbuilding the Eiffel Tower. Blindfolded. In 1:1. Then I put the wagon on the drawing and came right back to earth: The body was sitting too high on the axleguards.


Img_1526.jpg


There followed a lengthy process of dismantling nearly everything, swearing, becoming impatient, getting glue all over the place, blaming the government, swearing some more and finally managing to re-assemble the whole thing. I ended up back where I started, but with the axleguards now at the right height and the side planks added.


Img_1550.jpg


The side- and end- planks were 11 inches heigh.The siderails can be seen inside the wagon, as per the prototype.


Img_1528.jpg


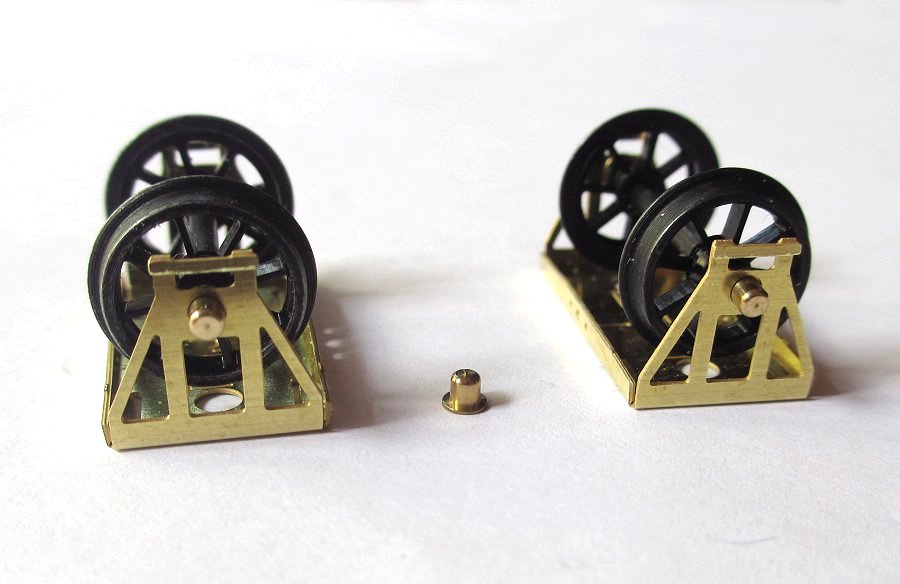
MJT have some nice GWR grease axleboxes (right) that are a good fit with the axleguards unit I was using. But they are fitted with the standard 4 (5?) leaf springs, which later became standard - whereas no. 5141 that I was building had 9-leaf springs. MJT also have some universal 9-leaf springs, but only separately (left).


Img_1529.jpg


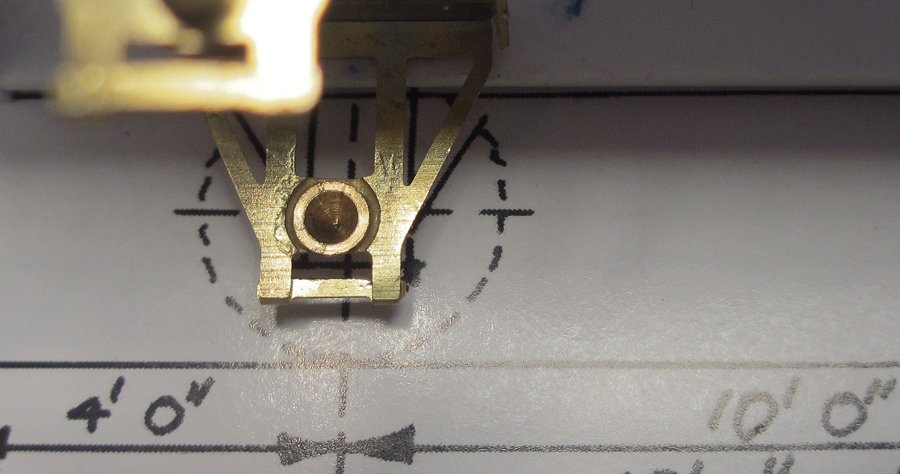
So I cut away the 4-leaf springs and prepared the 9-leaf ones for adding to the grease axleboxes instead.The hole in the back of the axlebox fits over the bearings in the axleguards.


Img_1586.jpg


Miss One Planker wearing her jewellery. Axleboxes, springs and detailing in place.


Img_1558.jpg


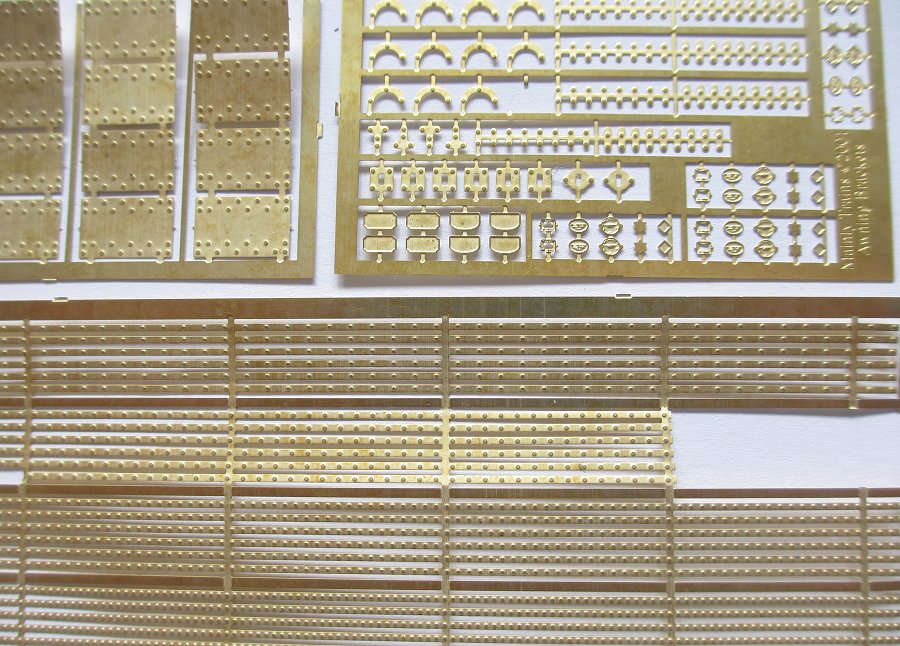
For the detailing I bought this nice set of wagon detailing etches from Mainly Trains. As it turned out I only used a few of the parts, as most of it was already on the MJT axleguard etches, which are even crisper.


Img_1590.jpg


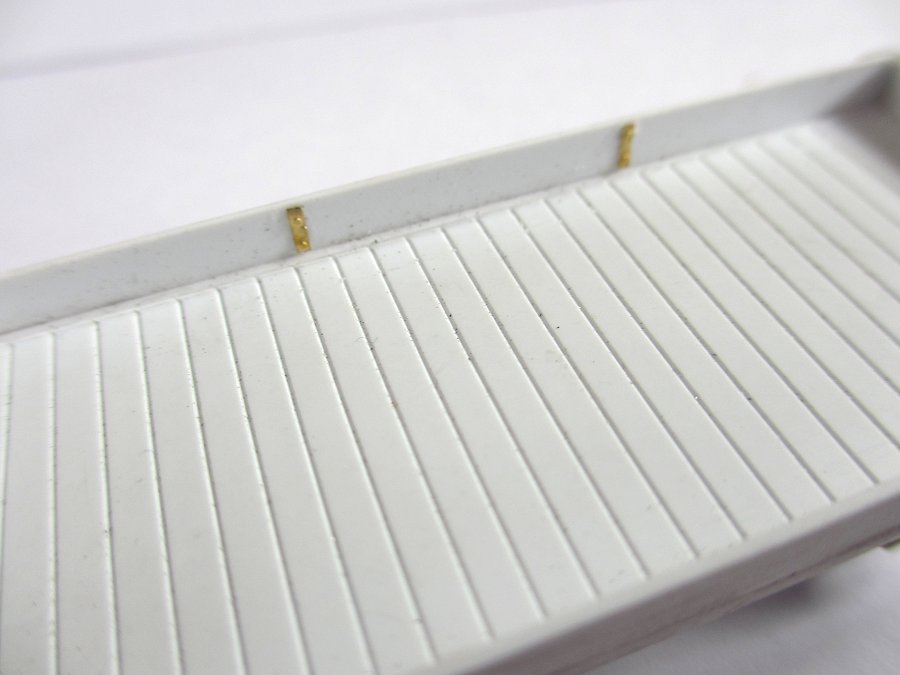
The one-plankers had wooden end stanchions with metal plates, which adds character to the wagons, I think. I had planned to use the cornerplates from the Mainly Trains etch seen above, but the rivet pattern was wrong. So instead I used scrap parts from the etch, and will add the rivets later.


Img_1583b.jpg


So this is how far I've come. She's a little dirty here and there after the unplanned rebuild, but that should clean up. I need to add buffers, brake gear and not least rivets. For the latter I've ordered some rivet transfers, which will be interesting to try out. Many thanks to Wagonman, Buffalo and Miss P. for the help and tips so far.

  • Like 23
  • Craftsmanship/clever 2

21 Comments


Recommended Comments

Hi Mikkel


I read your thread earlier on the GWR forum and thought we would see one of these later, a great bit of work and one that I may copy later. 


I started to build a CC! van (Pooley) on one of my breaks earlier in the year maybe I need to complete it next time.


Great work as usual.


Jim

Link to comment
  • RMweb Gold

Evening Mikkel,


Blimey! I'm blown away,  A truly beautiful build and everything is crisp and not full of scribblings and pen marks like in the case of my Manning Wardle scratch build.


The attention to detail not just in the wagon itself is wonderful. Truly inspirational.


I'm not familiar with the wagon type but I'm looking forwards to seeing it finished. Looking at this I need to get my skates on on complete my Diagram AA13 brake van that's sat next to me.


Look forwards to the next update.


Cheers,


Mark

Link to comment


From my personal "shake the box" level this very educational. Your excellent text and photographs make it seem comparatively simple. I think this would be a good subject for a newcomer - in my case a Great Northern or North Eastern prototype.


Thank you,


Tony.

Link to comment

Very tasty. I really must get one of those Mainly Trains etches - looks very useful indeed. I think we've all cussed and sworn in setting heights of bodies on W-irons and making sure there is still enough 'up and down' clearance between boxes and springs - I start with a buffer height jig using buffer holes in the headstocks, and work downwards from there. (Snooze 109 for those who can get to it.)


Looking forward to the old-fashioned brakegear!!!

Link to comment
  • RMweb Gold

Lovely Mikkel and well worth the expletives uttered during its construction! Another of your inspirational posts, I'm looking forward to seeing it painted.


Dave

Link to comment
  • RMweb Gold

Thanks everyone. I do think this is a good prototype for first steps in scratchbuilding wagons. I tried to illustrate that with the photos, so I'm glad if it's of use to others. It has certainly made me realize that it isn't so complicated as it may seem - although other wagons are of course more complex.


Thanks for the tip about a bufferhole height jig, Miss P, will try that next time. I'm itching to finish the wagon but will be going off on some work travel so it will have to wait a little while.

Link to comment

I'm trying to locate the forum thread where a broadside view of 5141 was posted (the equivalent of the 3/4 view in plate 338 of the bible), in the context of discussing wagon red and grey etc, but can't find it!

Link to comment

That's looking good, Mikkel. It will be good to see it in red!

...Thanks for the tip about a bufferhole height jig, Miss P, will try that next time....

I've used a Bill Bedford jig for several years, I think they are still available from Eileen's. IIRC, it comes with different bases to fit 00, EM and P4 track.

I'm trying to locate the forum thread where a broadside view of 5141 was posted (the equivalent of the 3/4 view in plate 338 of the bible), in the context of discussing wagon red and grey etc, but can't find it!

Try a PM, around 17th Aug.


Nick

Link to comment

Try a PM, around 17th Aug.


Thanks Nick. I'm about as reliable today as the BBC webpage scorecard for the Test Match, which is currently showing three batsmen as not out.

Link to comment
  • RMweb Premium

Great step by step build Mikkel. Those rivet transfers like to adhere to varnish. Took me quite a few builds until settling with a spay of primer, then varnish before applying the rivets and then spay painting. Come to think of it I prefer to punch them!

Looking farward to seeing this finished.

Link to comment
  • RMweb Premium

Hi Mikkel,


Couldn't agree more with the other comments about neatness and precision.  It's precisely this attention to detail that makes everything about Farthing so realistic.  Those pictures could easily belong to a 7mm project such is the level of fine work.  Brilliant stuff as per usual.


Mike

Link to comment
  • RMweb Gold

Cheers all, much appreciated. I'm certainly learning a lot from this little project.


Will investigate the Bill Bedord jig, thanks. 


Sasquatch, thanks for that tip about the rivet transfers. I wasn't aware that they work best with a varnish undercoat. It could be a problem for me as I like to brushpaint on top of sprayed primer, so putting a layer of varnish in between that may not work so well. I'll do some experimenting. If all else fails, I'll bite the bullet and make the rivets from sliced plastic rod.

Link to comment
  • RMweb Gold

Lovely work Mikkel. It may be the Axlegaurds are intended to be fixed to the underside of the floor with no thought about 'proper' framing. I seem to remember putting packing under them to adjust the height. I used to make all my EM gauge wagons compensated mostly by rocking axleguards but gave that up when I went to 0 gauge and found it unecessary work. You obviously have the right skills for making wagons I hope to see more (work your way through Atkins et al?)

Don

Link to comment
  • RMweb Gold

Thanks again, Job :-)


Don,  I can't blame MJT for my problem with the height of the axleguards on the body, I simply slipped up somehow :-)  Your experiences with the rocking feature are interesting. I did actually build one unit rocking to experiment with it, but somehow it seemed odd to have "loose" bits on a wagon (says the man who runs everything with the wrong gauge!).


In any case, with my very small layouts track does not take so long to do, and so getting the trackwork even is a manageable task. I can imagine that on large layouts, the rocking axleguards can be useful as there may be more places where  the trackwork is inevitably a little uneven. Although I am speaking as a complete novice in all this!

Link to comment
  • RMweb Gold

Hi Richard, it's certainly fun to scratchbuild, but at this point it's still very much dabbling :-)

Link to comment
  • RMweb Gold

Thanks. I have since found a photo on the web which I think shows one of these wagons at Round Oak ironworks:
 
post-738-0-48254200-1474145172.jpg.5fcfbf0407a7efac7b82597d44e63f67.jpg


Edited by Mikkel
Link to comment

Create an account or sign in to comment

You need to be a member in order to leave a comment

Create an account

Sign up for a new account in our community. It's easy!

Register a new account

Sign in

Already have an account? Sign in here.

Sign In Now

×
×
  • Create New...