

Ian Morgan
-
Posts
2,077 -
Joined
-
Last visited
Content Type
Profiles
Forums
Blogs
Gallery
Events
Exhibition Layout Details
Store
Blog Comments posted by Ian Morgan
-
-

I used some of Andrew's figures for our 'Tribute to Brunel' layout in the Great Model Railway Challenge. However, my research was based more on My Fair Lady than reality.

While Langley castings were used for the less well to do
Taking a stroll alongside Brunel's atmospheric railway representation, that was almost unseen on the TV.
Apologies that my modelling efforts are far inferior to @Mikkel
-
 4
4
-
-

It is almost a Virtual 2mmFS Minimeet with quite a number of 2mmFS layouts represented
")
-
 1
1
-
-
But we all know that 'proper' 3 wheelers should have two at the front
-

Thanks, but I would not use a door again
-
1
-
-
I tried Copydex for ballast on 'Freshwater', following various suggestions to use it. It seemed to work OK, until I tried to remove excess ballast from sleeper tops after it had 'set'. It pulled long strings of glue and ballast from the track along with the one piece of ballast I had in the tweezers. I gave up and doused the whole lot in dilute PVA, and removed the excess ballast once that had set.
-
 1
1
-
-
Here is the best photo I have found of the signal at Freshwater (an earlier one had a wooden post, but was replaced when the platform was extended). It also shows that it should be a lot shorter than what I built. Most signals on the island seem to be rather short for some reason. It could have the plate you describe. It is also not clear if it has a balance weight fitted. My excuse is that I only found this photo this year. Is it really 6 years since I made the model?
-
I had a play with a Seuthe smoke generator I have had knocking about for a long time. It produced too much smoke, and the smoke moves too fast for this scale, so I will not be bothering with it. Perhaps I should try one of those 'mist' generators?
-
Well, currently the next booking is TINGS, and possibly a resheduled Ally Palley at the end of August, but too soon to be sure for either of them at the moment.
Mostly the rodding is out of the way of the track cleaner. It is just part of the FPL that is slightly above rail level. The manual point levers are a different matter. I have placed inverted plastic shot glasses over them at the moment while I work on the layout.
-
1
-
-
Some things never change - like the umbrella prod to the boy who stood in front of the camera while watching the boats
-
2
-
-
So it looks like a grumpy old git then?
-
 2
2
-
-
I realised I did not include a photo of the painted winch with the extra pipework:

-
1
-
-
Did early versions have a hollow wheelhouse rather than the solid resin block? Or did you create that yourself?
-

I am still struggling with slopes on Freshwater, which looks like it should be flat. However, the platform leads into the station building then to the road without steps, the road leads into the goods yard at track level by the front siding, at cart loading height to the shed door, which is at platform height on the other side. However, it was possible to drive from the goods yard area on to the platform of the station concourse.

I have used air drying clay on wire tree armatures, and it dried overnight, but that was a very thin coating. I would worry about cracking if drying too quickly, and if the layout baseboard 'flexes'. Some more flexible filler might be a better solution. Polyfilla with lots of PVA glue mixed in, maybe?
-
1
-
-
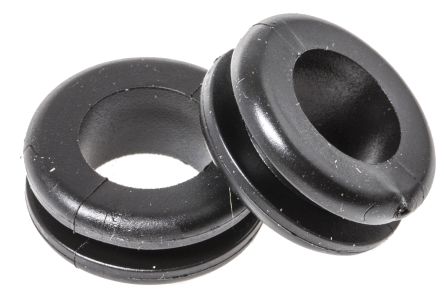
It's called a rubber grommet.
-
It looked a treat Pete, and even attracted a time-travelling visitor

-
1
-
 1
1
-
-
It might be helpful to draw the frog sections on your diagram in yellow, and mark where the insulation gaps are. The yellow frogs (poisonous?) can then be connected with yellow wire to your frog switches.
-
Neil,
you will be welcomed back - we have plenty of things to keep you busy on Camford Junction,
Ian
-
I used DraftSight (free) to create the design, and TruView (also free) to produce high quality PDF files for the front and rear images.
As a brief introduction, I created a rough outline on layer 0 of the shape and size of the items I required and the overall sheet size (300mmx150mm).
Then I drew the front view of the image in a new layer, using the layer 0 outlines as a guide, and leaving out the bits that should be half etched. I then 'filled' all the shapes with solid green colour. Then I copied all the items from this layer into another new layer for the rear, and changed the fill colour to magenta. Then I added the half etched parts in magenta. Use of the two colours helped to show what is happening. The shape outlines were deleted, just leaving the area fill.
When I was happy with everything,I saved the final file, and took two copies. In one copy, I deleted everything that was not in the 'front' layer, and changed the colours to black on a white background. The second file, I deleted everything except items on the 'rear' layer. flipped it about the centre line and changed it to black on a white background.
These two files were then read into TruView and exported to PDF (scale 1:1) and the two PDF files emailed to PPD. How hard could it be?
Good luck,
Ian
-
Nick and Andy, two very good ideas there. I will consider them. Still a long way to go, and some other things to finish before exhibitions in April.
Ian
-
Keep trying. 'Freshwater' took me a long time to get right (not to speak of other loco chassis I have tried to build over the last 25 years that all ended in failure). This one has gone better as I managed to avoid most of the errors I made with 'Freshwater'.
-
Yes, Chris' chassis should be available soonish, plus I have some bits donated to me by Reg Dear that were intended to become a third O2 for his Ventnor layout (now on permanent display at Havenstreet museum). I am hoping that with a combination of these, and the N Brass G6, I might be able to cobble something together.
-
Unfortunately, the M7 is too big for my layout, I need to build an O2 next.
-
I wasn't planning to, because the curtains would be closed when the lights were on.
-
but the last photo shows off the brickwork detail nicely.


")


Undecided sky (1867)
in The Farthing layouts
A blog by Mikkel in RMweb Blogs
Posted
The layouts for the final had to join together at the end, so our layout did not really make sense on its own and was broken down. The N scale Royal Albert Bridge has been re-formed as its own layout, and was shown at the last TINGS exhibition and is still having scenery improved. The atmospheric railway section has been cut down and is a static diorama in my display cabinet. Another member of the team kept the Maidenhead bridge to create another diorama.
Mortimer station, Starcross pumping house, Box tunnel and IKB popping out from his pile of chains are still knocking around somewhere.
Read more about our Tribute to Brunel on rmweb here