

kirtleypete
-
Posts
1,394 -
Joined
-
Last visited
Content Type
Profiles
Forums
Blogs
Gallery
Events
Exhibition Layout Details
Store
Posts posted by kirtleypete
-
-
Everything I have heard about Megapoints has been positive. They seem to have done what Peco should have done; there is nothing wrong with servos, it's the way they are used.
Peter
-
This is a Dapol 7 plank open decorated as fictional PO wagon using printed paper -
Can't wait to get my hands on the vans, there's huge potential with those,
Peter
-
 2
2
-
-
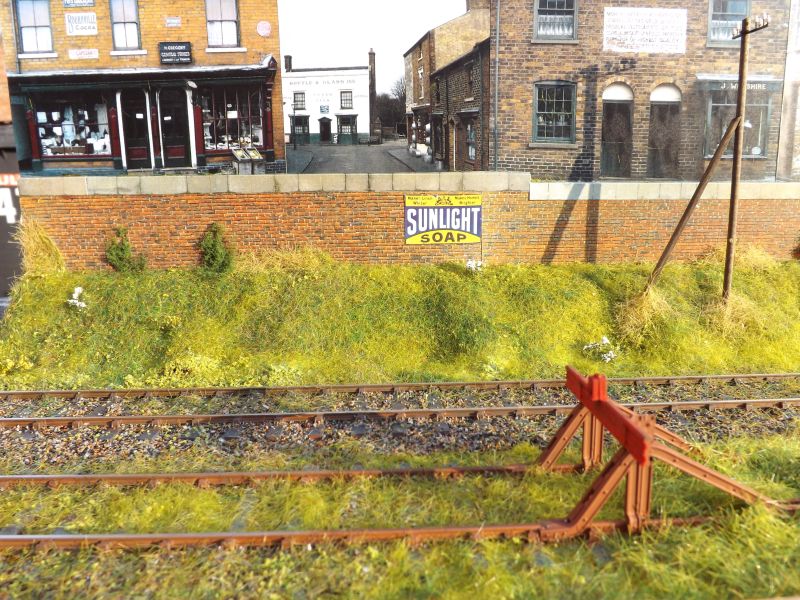
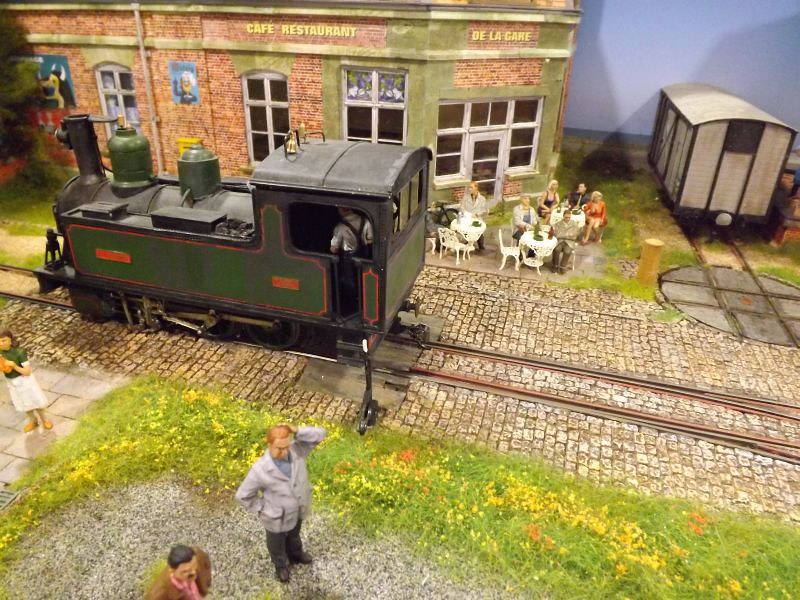
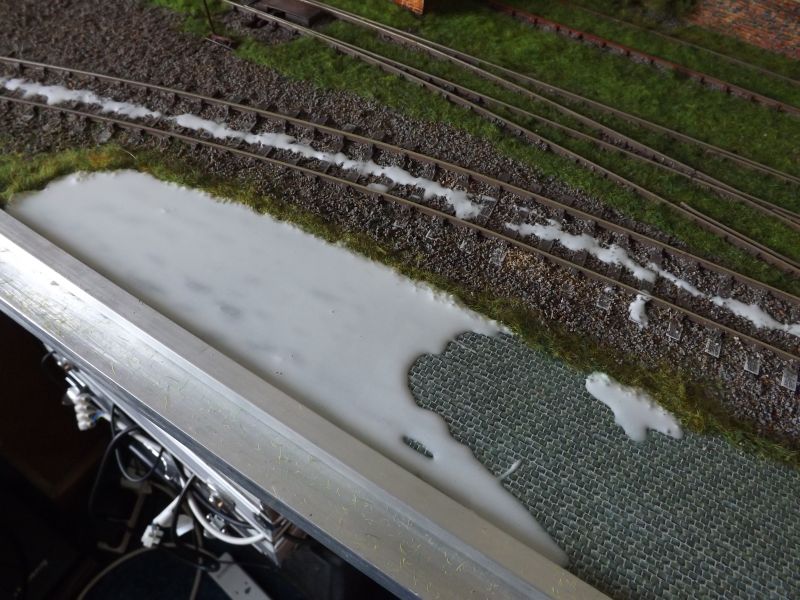
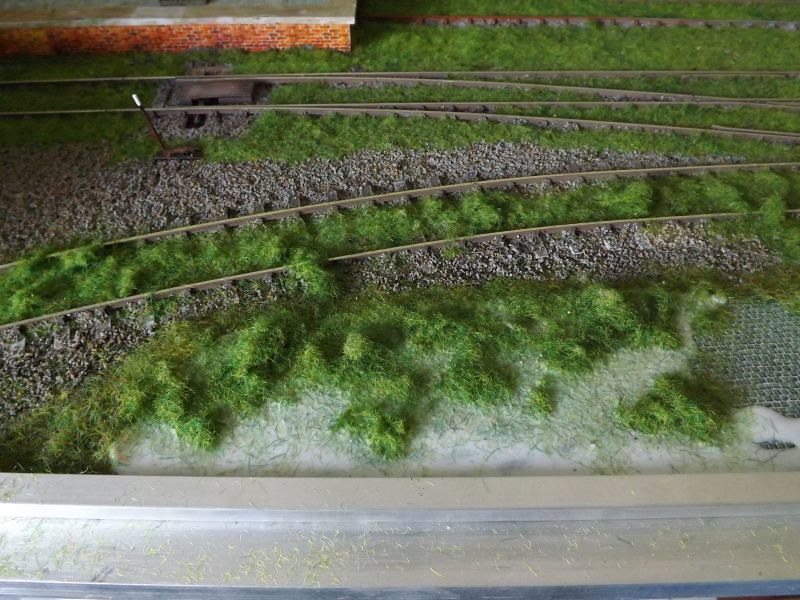
I've been working on the LMS layout again, on the board where the lines cross a river. There's more detailing to do but it's finished enough to photograph. The Skytrex dry stone walls are superb.
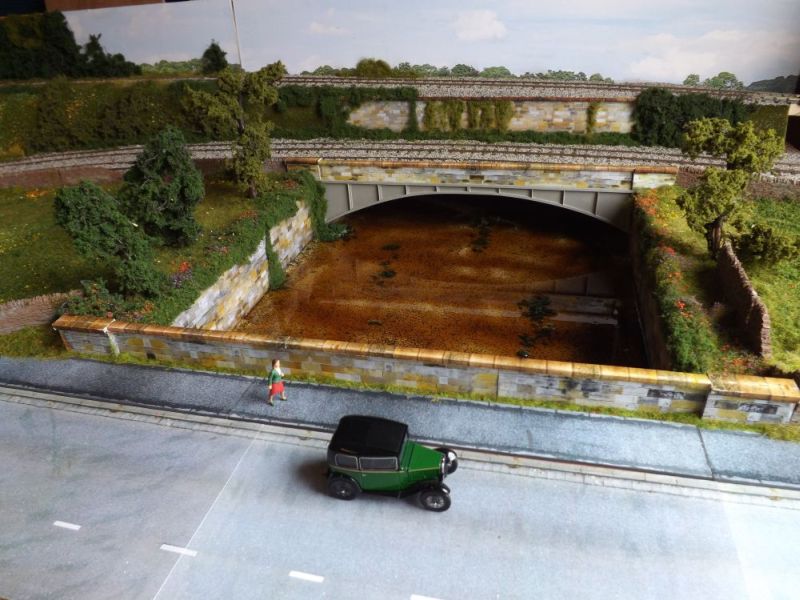
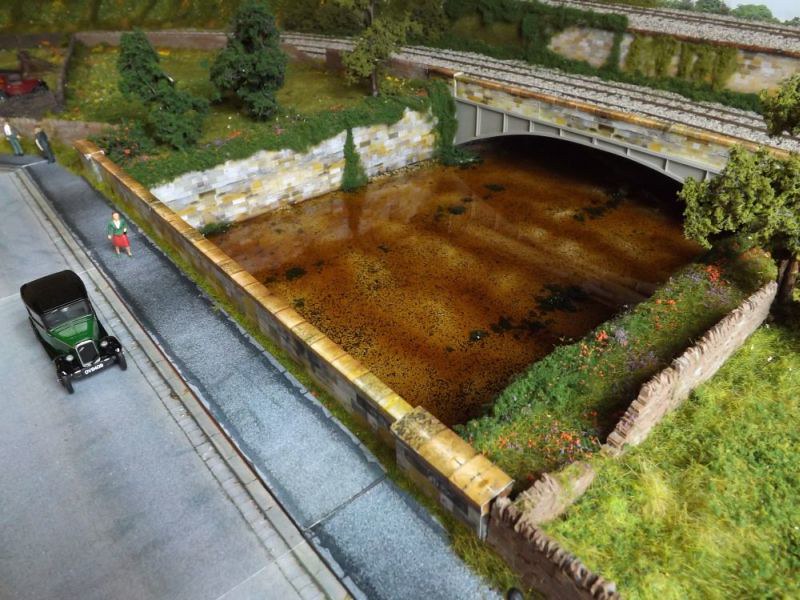

I'll be adding a bus stop where the people are standing and some swans and ducks on the river.
Once the varnish in the river has dried I can take these boards down and move on to the main station.
Peter
-
4
-
-
I painted mine olive green which looks right, and that's the colour the Bluebell use.
Peter
-
1
-
-
I went to Bakewell exhibition at the weekend and took some video of John Smith's layout 'Johannesdorf'...this is the Youtube link:
I've also got a video of Saltdean...
...and Mers les Bains.
Peter
-
4
-
-
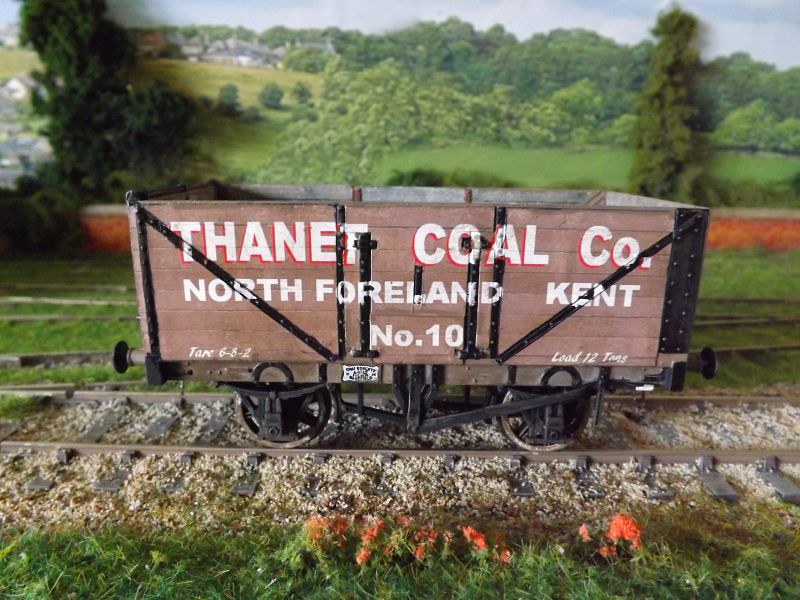
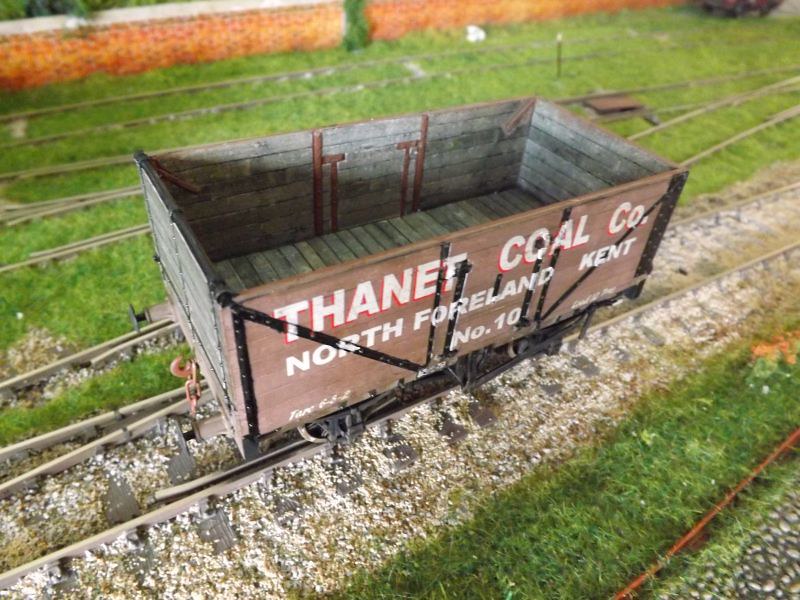
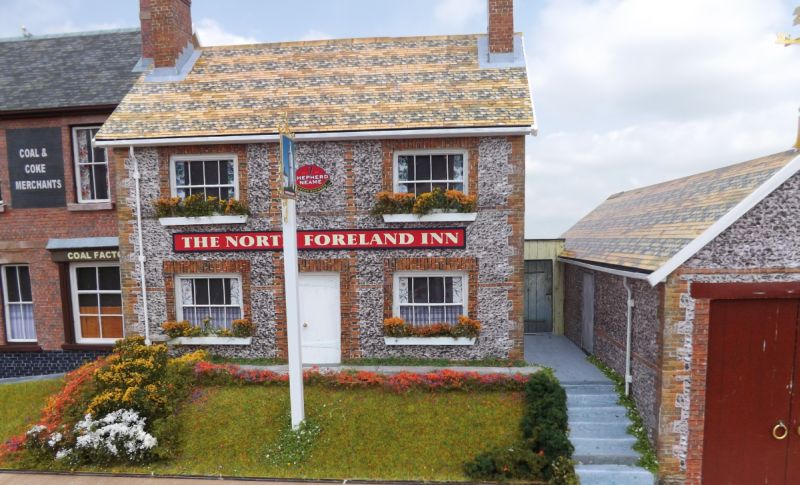
Alongside working on the LMS layout, I've built a couple of buildings for John Smith's new 0 gauge layout 'North Foreland; they'll stand against the backscene at the end of the layout opposite the station building.
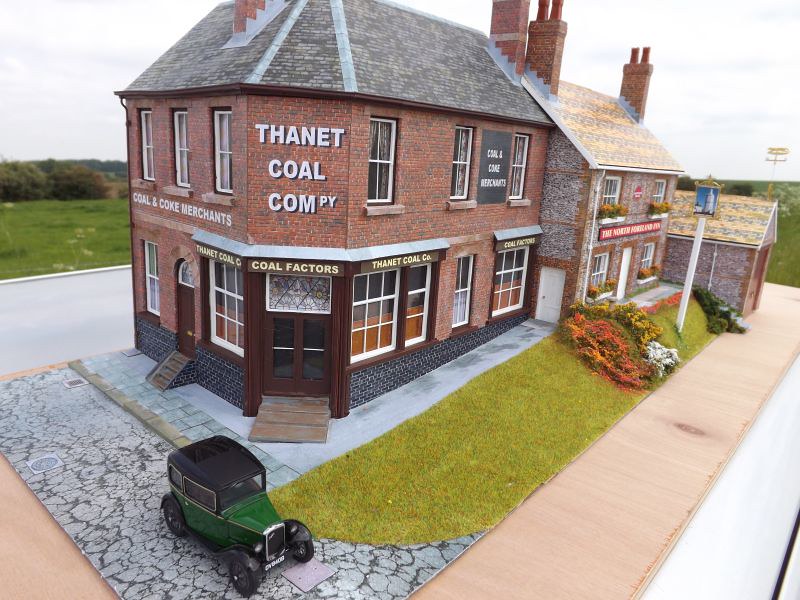
The scene could do with some figures, but they can be added later.
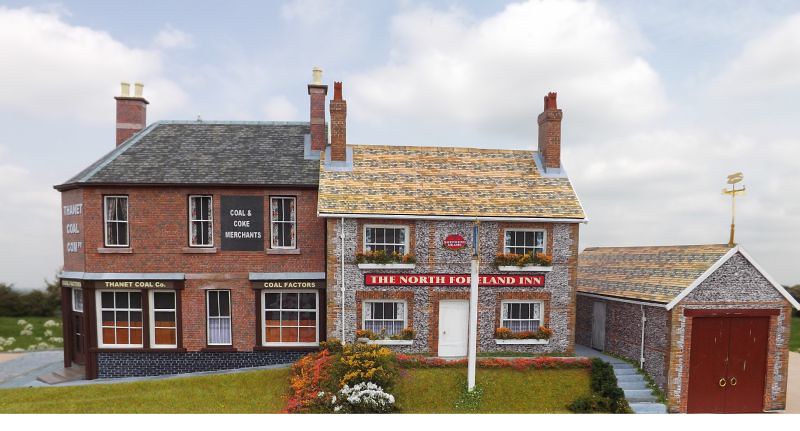
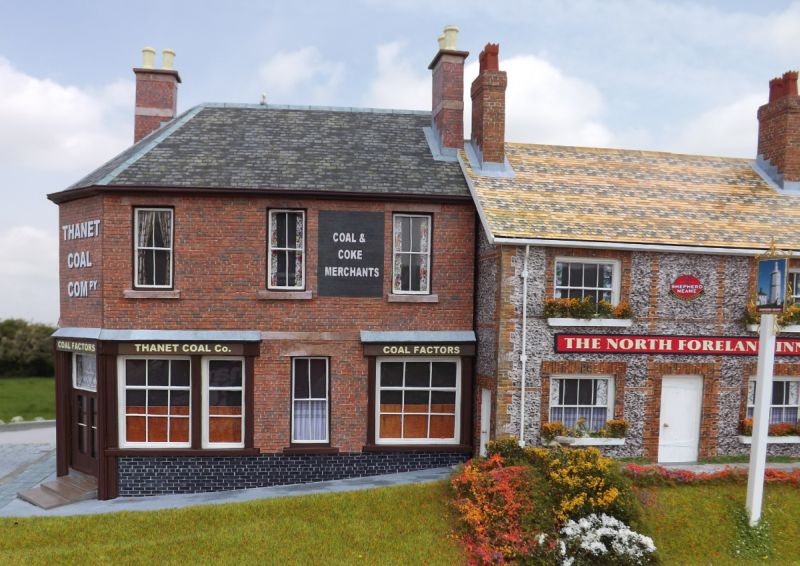
The Thanet Coal Co is modelled on a building in Maidstone which is pictured in the Lightmoor Press book on PO wagons from the area.
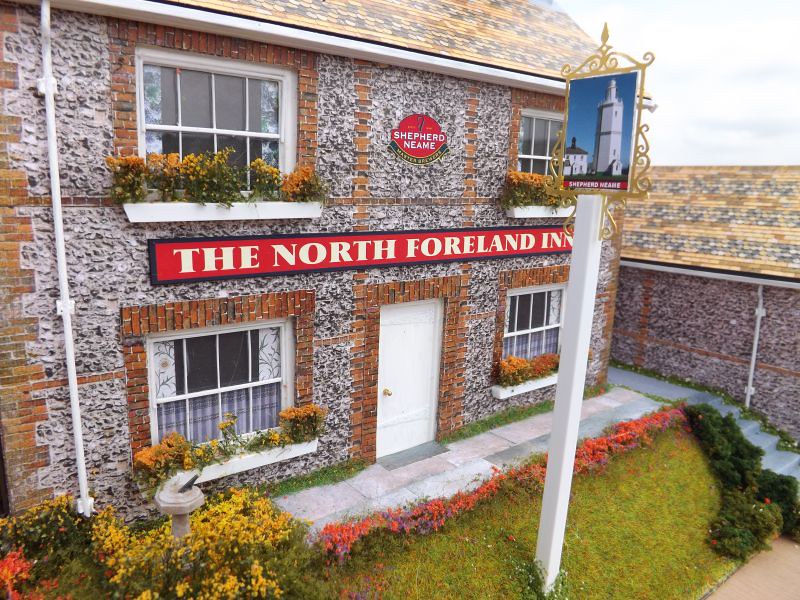
The pub sign is a picture of the real North Foreland lighthouse...a picture of it will be on the backscene.

They best pint of Spitfire in Kent! Unfortunately the period of the layout is 1947 so we might have to settle for ordinary bitter.
Peter-
5
-
-
All the buildings us my building papers for the slate, stone and brick Rich. If you look on www.kirtleymodels.com they are all illustrated.
Doncaster GOG show was really good, an excellent venue which is much easier to get to than Halifax or Cleckheaton from where I live.
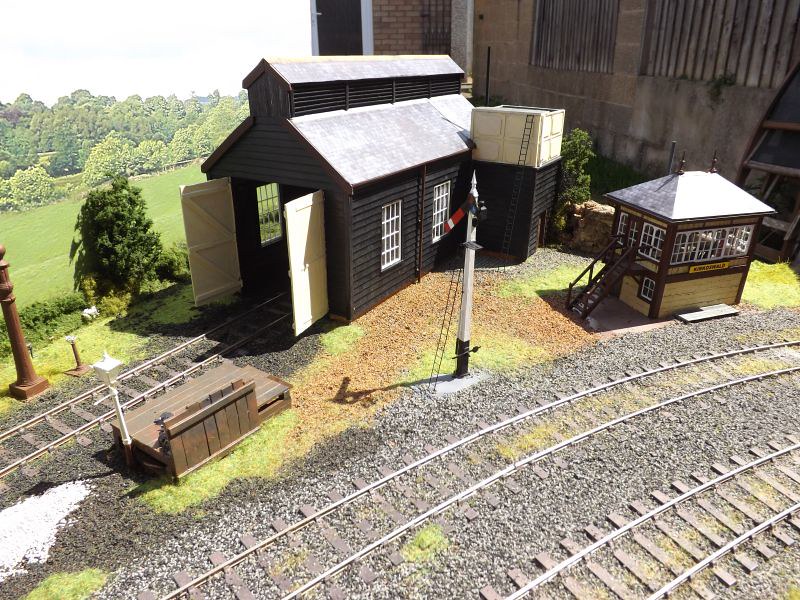
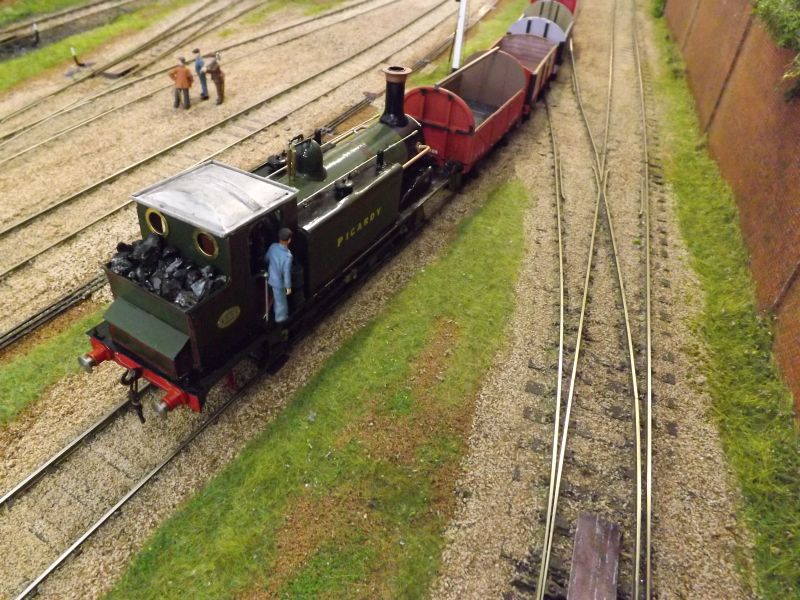
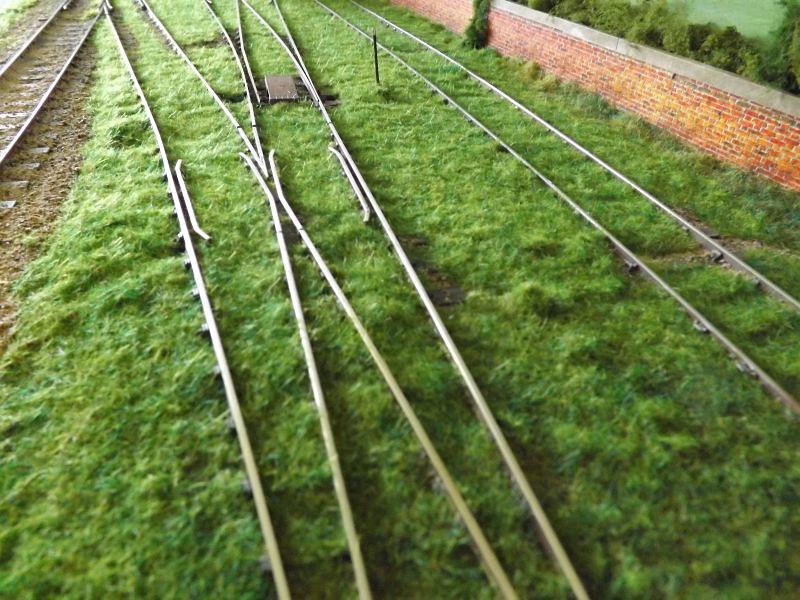
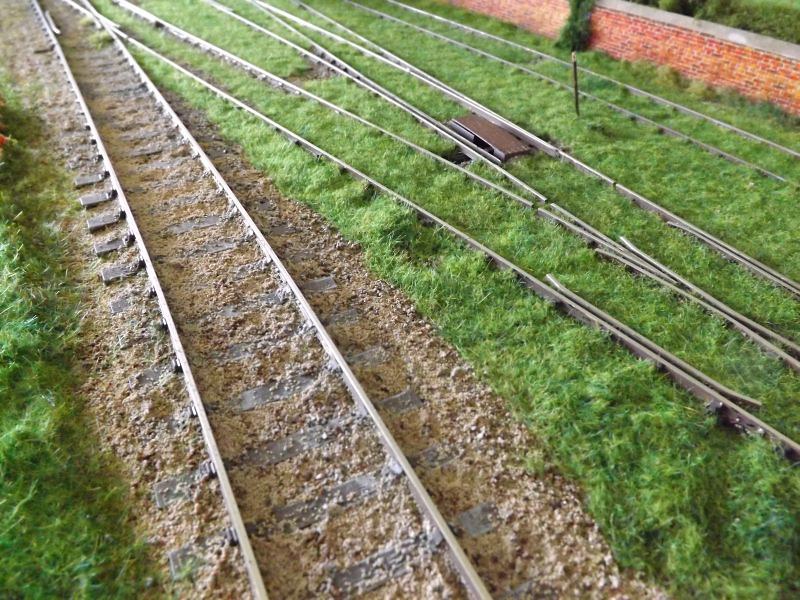
I've been working on the loco shed area of the LMS layout I'm building:
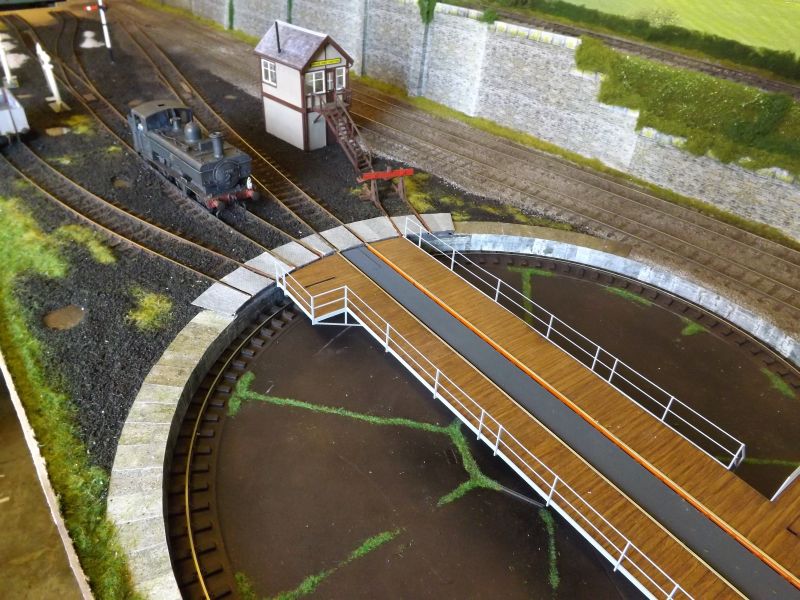
The 70' turntable comes from Realmodel in Germany and needs a bit of work to make it look British. It comes ready made, with a coreless motor and DCC sound decoder so it is operated just like a loco. The sound decoder includes the sounds of the turntable, but also background sounds such as passing trains, birdsong and even a thunder storm! It wasn't cheap, but it's superb.
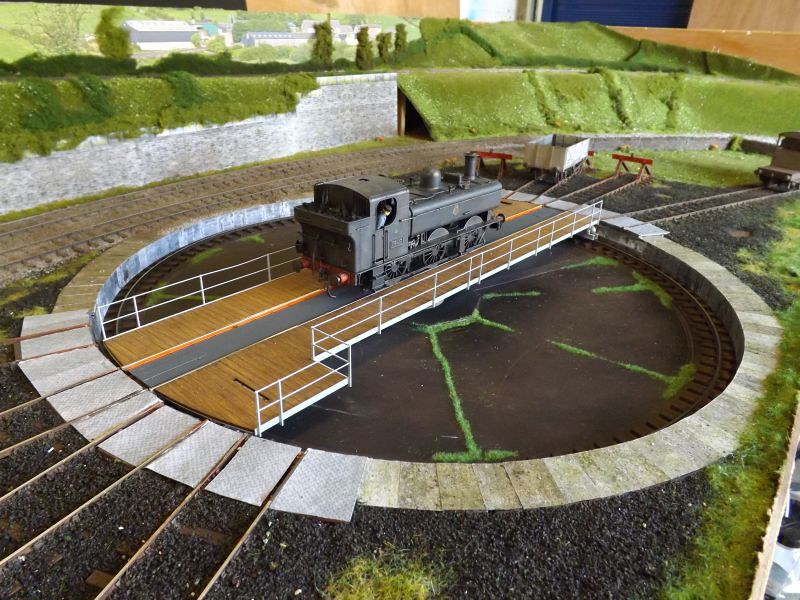
I'm using my Lionheart Pannier as my test loco.

I built an LMS standard signal box to make a change from the Midland boxes at the stations. The branch to the terminus station can be seen running along the top of the retaining wall, climbing towards the left of the picture.
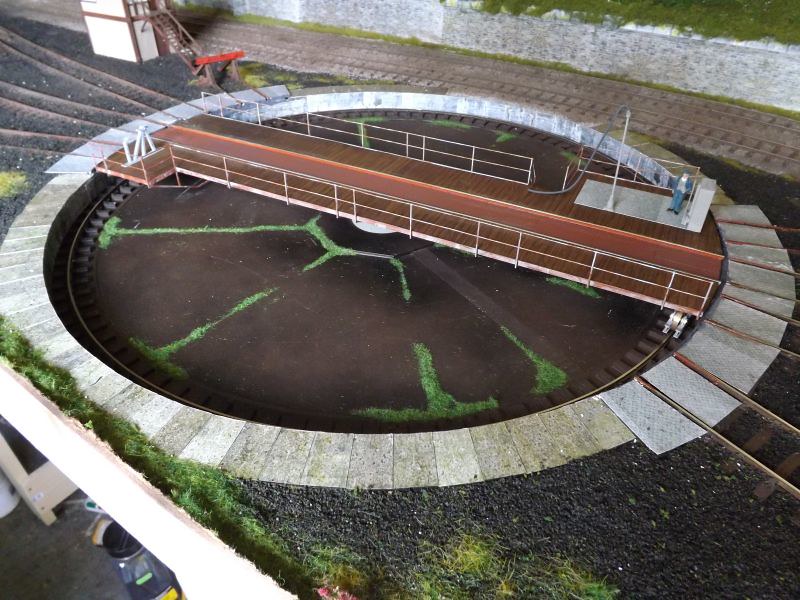
This is the turntable after being weathered and detailed.
Peter
-
1
-
-
With Doncaster 0 gauge show tomorrow it seems like a good time to begin a thread here for my company which I will keep updated by describing and illustrating the models I'm working on.
For those that don't know me I specialise in commission built buildings and layouts in all scales from 4mm up to 16mm, and also produce a range of printed accessories for 0 gauge and gauge 1. I have a range of modelling books and another range on French railways, all of which are available from Amazon.
My website is www.kirtleymodels.com - everything I produce is described on there.
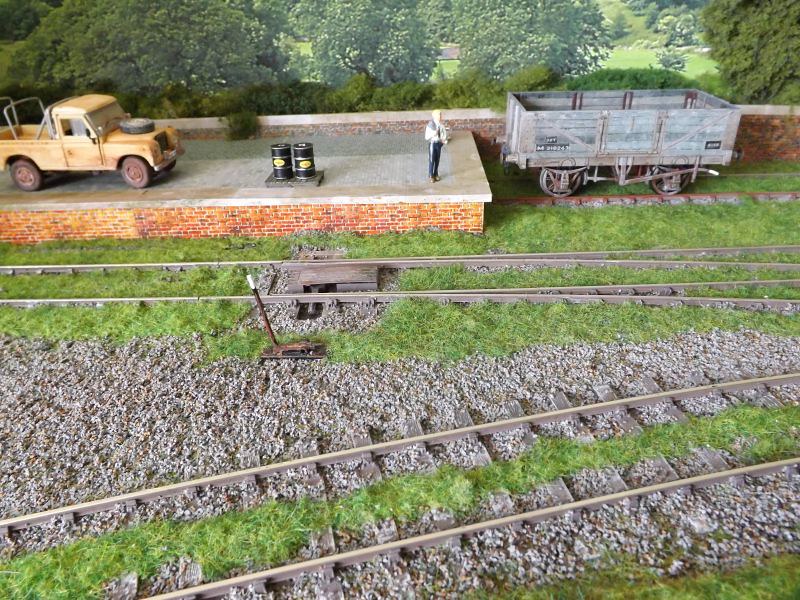
At the moment I am building an 0 gauge layout for a customer based on the Settle and Carlisle which will be delivered during August; it includes a branch terminus so here are some pictures of that section. The station building is a model of Barnoldswick.
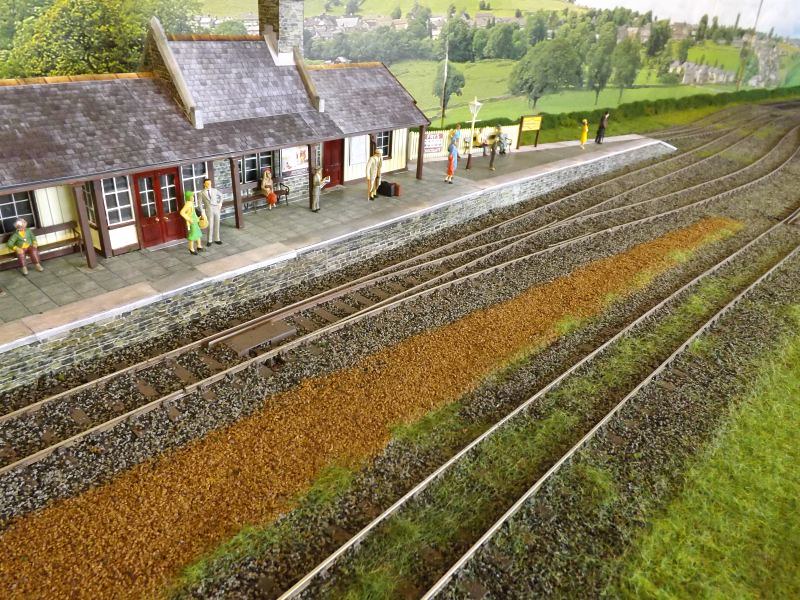
The space available was just 9' x 2' so it was a squeeze fitting it all in. The line will connect with the rest of the layout in due course.
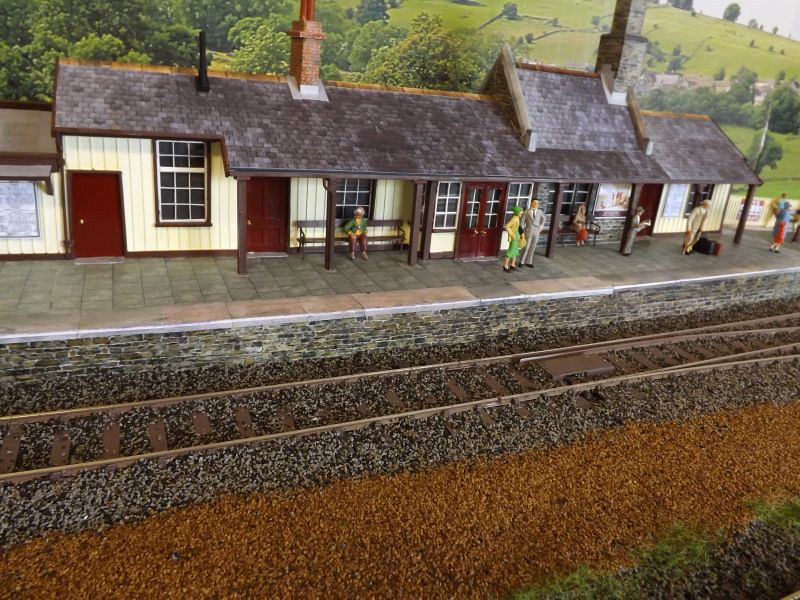
I've also built the station building for the main station, based on Lazonby.
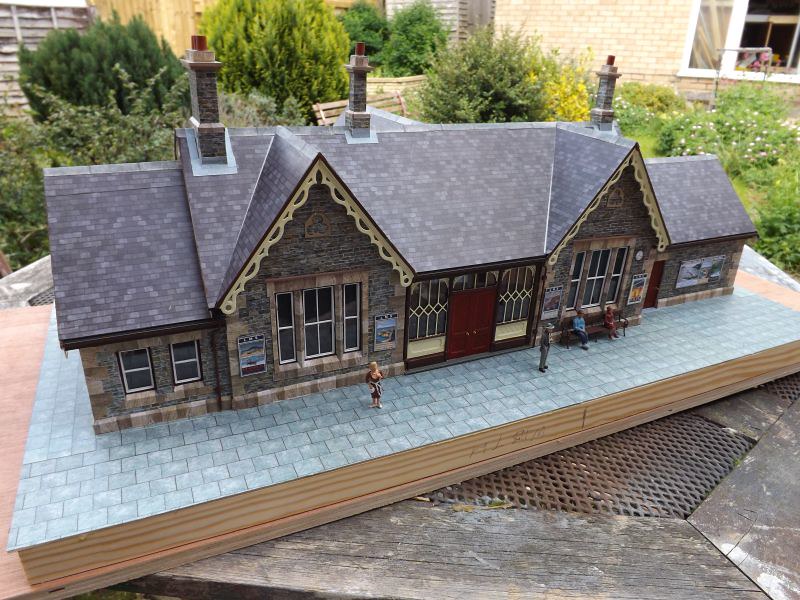
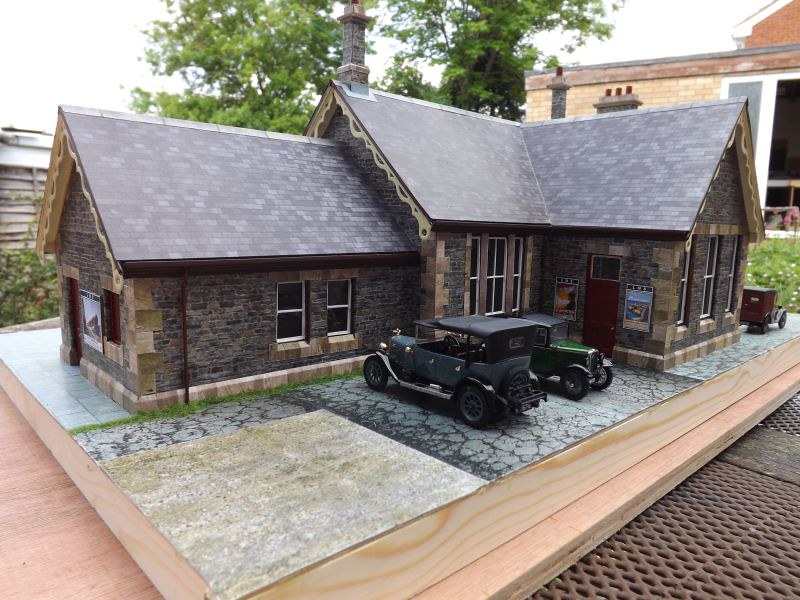
The roof has been sprayed with Dullcote since I took the pictures - on an indoor layout the shine seen here won't be an issue.
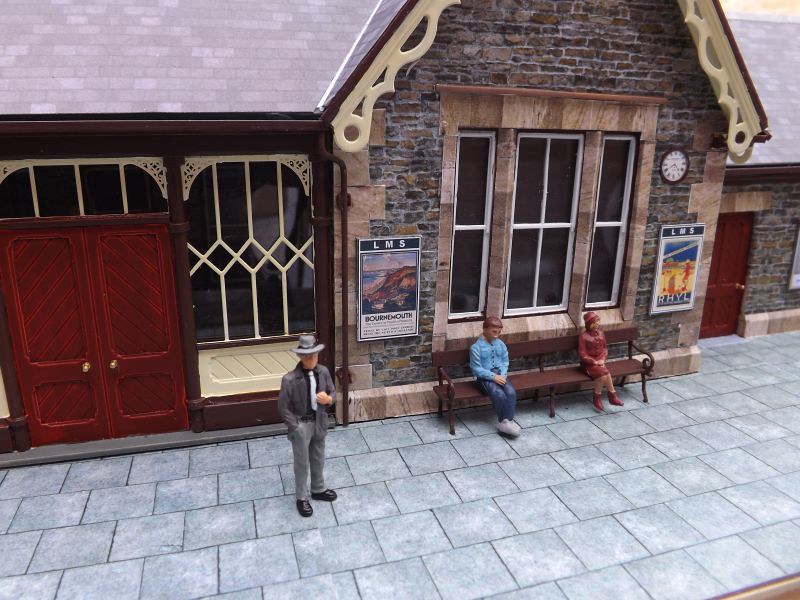
Now I've got to make sure all the other clocks on the layout show the same time!
I'll post more pictures as work progresses; I'm working on the loco shed at the moment.
Peter
-
16
-
-
Heljan are about to do the Class 25.
Peter
-
Masterpeice Models did a 14xx recently so the market for them might well have gone.
Peter
-
Wonderful seeing that....I used to go to cubs in the scout hut nearby and clearly recall the branch goods passing by each evening in the early 60's. It's about all that is left of the branch these days other than Coaley goods shed.
Peter
-
I've put my new 0 gauge Forest of Dean shelf layout in the 'layouts' section, here... http://www.rmweb.co.uk/community/index.php?/topic/111269-a-single-from-brighton-to-lydney-please/
Peter
-
2
-
-
-
-
That's why models of black loco's should always be grey, never black. The trick is to photograph a model...if it looks real you've cracked it, if it looks like a model you haven't!
Peter
-
It's down to personal preference, there is always more than one way to achieve a result. This way works for me so I thought I'd share it.
Peter
-
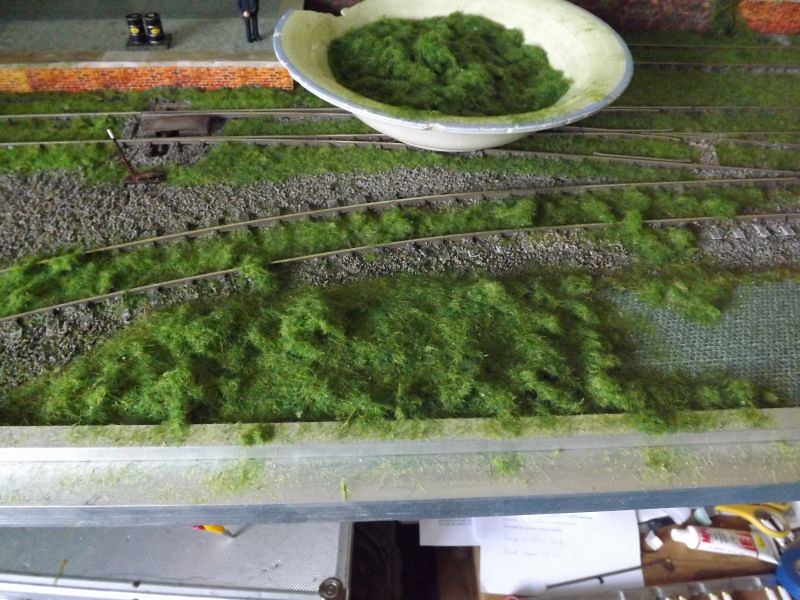
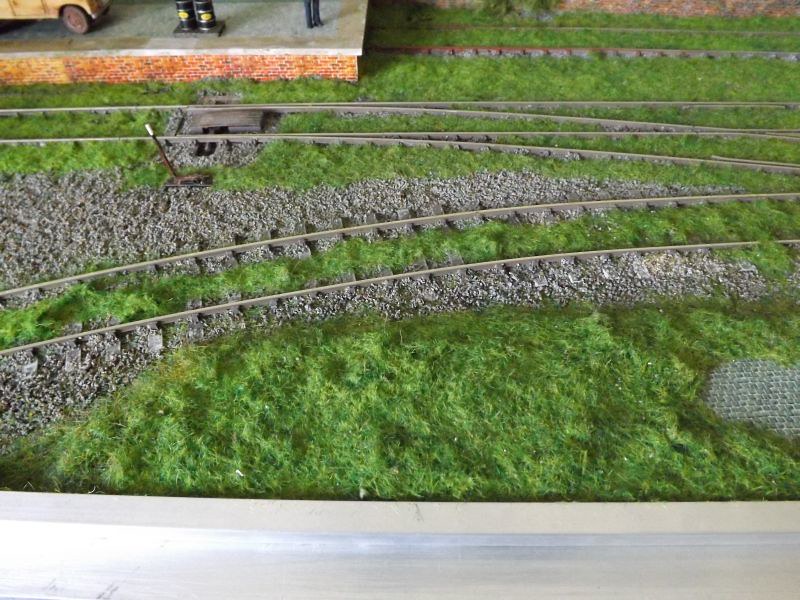
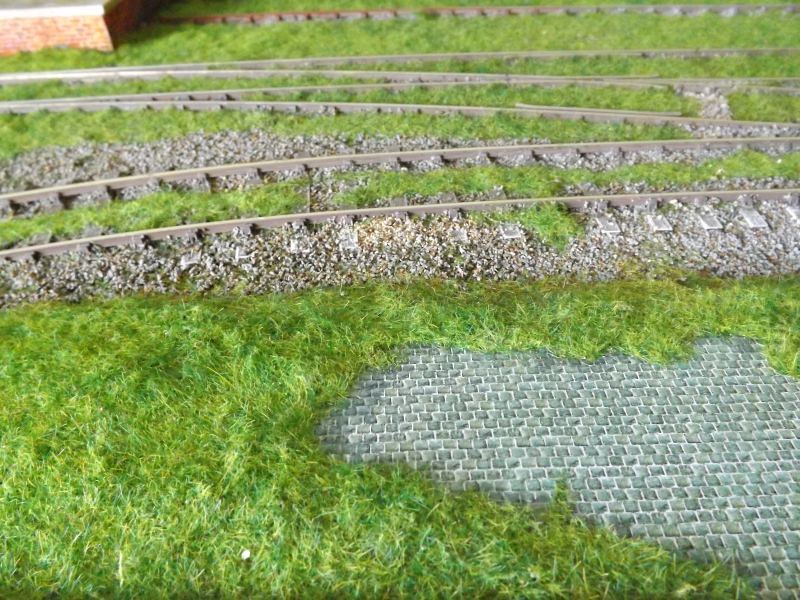
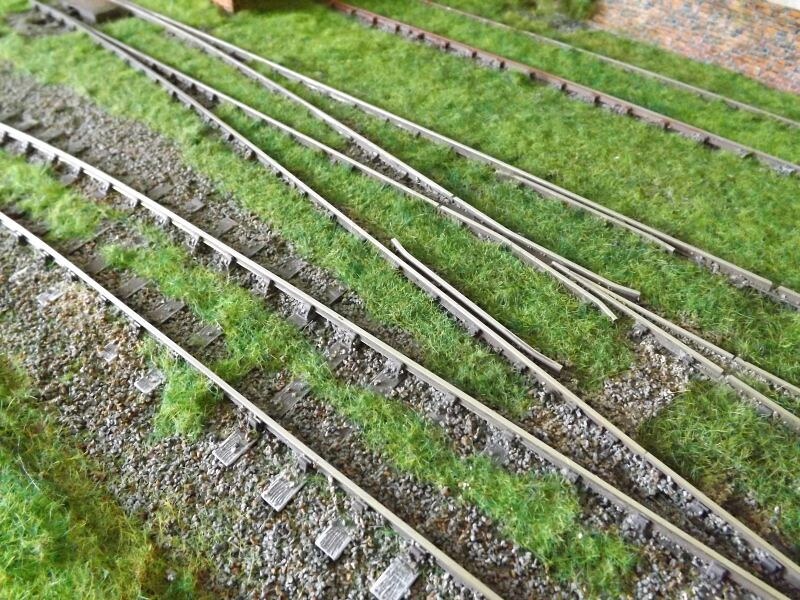
Following on from my post above, I want to share these pictures to emphasise the point that you can do all sorts of different types of grass without needing an expensive applicator. All the grass in these pictures was done in the same way, using ordinary PVA as the glue and my fingers to apply the grass.
This scene is 0 scale and uses longer strands in various colours, with dead grass around the telegraph pole.
This is 1/32nd scale and shows how the grass can be sprayed with Photomount and sprinkled with flowers.
It's quite possible to use longer grass between the rails without affecting running.
Laying down quite a thick layer of PVA helped fill in the gaps between the rocks here, and longer fibres were used alongside the track with shorter grass on the flat surfaces.
On a sloping surface I paint the PVA on using a 1" paintbrush, using it straight from the bottle rather than diluting it and using a thinner layer than I'd use on a flat area. Any bare patches can be filled in afterwards with more grass or some weeds or flowers.
It looks effective to have earth showing rather than covering the whole area with grass; the brown ground cover was done first and the grass added on top.
Peter
-
5
-
-
I'm going to add a contribution, but some of you won't like it. Here's what I've done over the last couple of days....
It's a 0 scale shelf layout, just something to play with at home in anticipation of a Dapol 08 arriving soon.
There is no static grass in this picture. There are lots of strands sold as static grass, but there is no static grass. I think it looks OK.
Here's what I do.......
I put a pool of diluted PVA over the area where I want the grass to stick.
Then using my fingers I sprinkle static grass fibres onto the PVA, quite thickly until no more white can be seen. I don't push it itno the glue, just sprinkle it on the top.
I mix four of five different colours and lengths in a bowl, never just use one bag as it comes.
After an hour, I go over the top of the grass with an ordianry domestic vacuum cleaner nozzle, about four inches above the grass. All the strands stand up, but are sufficiently held by the glue to remain in place.
It still looks quite rough, but then after three or so hours I go over it again only this time with the nozzle close to the grass, only a few mm above it. All the loose fibres come off (to be emptied out and resused), and the grass that's left is what will remain on the model. The fibres are standing up as they should, the lengths and colours are varied and it looks good.
Below is the same area as it was when it was finished.
I wanted a spring scene with quite a bright green, but with the grass kept short by being nibbled by sheep (as the layout is meant to represent the Forest of Dean, somewhere similar to Marsh Sidings at Parkend).
These pictures show more of the layout....obviously the technique can be used with a mixture of colours and I've used lengths up to 12mm long on other layouts and it's just fine with them.
On small areas I don't bother with the vacuum cleaner, blowing the strands works just as well. You can add flowers by giving the grass a light spray with Photomount and just sprinkling them on...I use the coloured scatters from Greenscene.
You don't need expensive equipment in order to model grass. The introduction of packs of static grass fibres is one of the greatest advances in scenic modelling of the last twenty years, but don't believe everything you're told about how to apply it...and the first question to ask is whether the person telling you is trying to sell you an applicator!
I know what people will say...this isn't static grass. They're right, it isn't.
So what!!
If you'd like to see pictures of other layouts using different colours and lengths I'll be happy to oblige.
Peter
-
1
-
-
Having ordered an 08 I thought I'd better have something to put behind it so I bought one of each of the first three Dapol wagons and I thought people might be interesting in seeing them. I know they are generic but they're ideal for a little shunting layout just to play with at home. I couldn't resist modifying them, of course.....
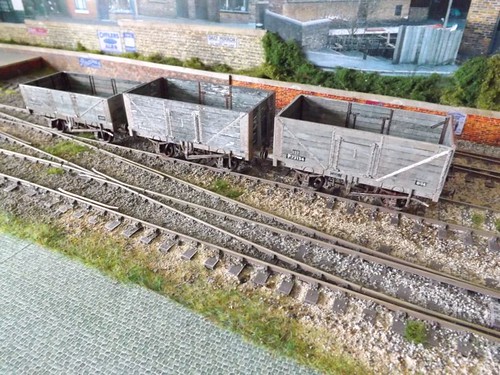
I wanted them to look like pretty neglected wagons around 1960, just to see if I could reproduce that look.
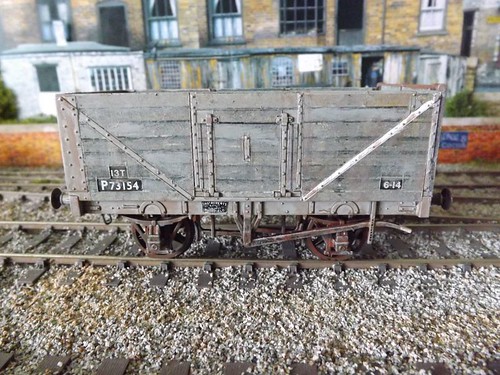
All the planking has been covered with paper printed with a photo of real planking, just cut out and glued in place with a cut out where the black panels are. The Charles Roberts works plate is from a photo of the real thing.
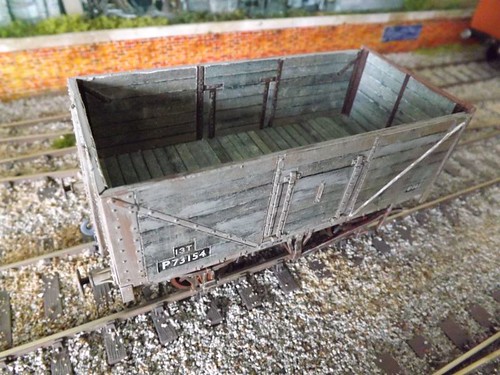
The wagons as they come just have a plain brown interior - adding the bare wood transforms them, just leaving the brown strapping showing.
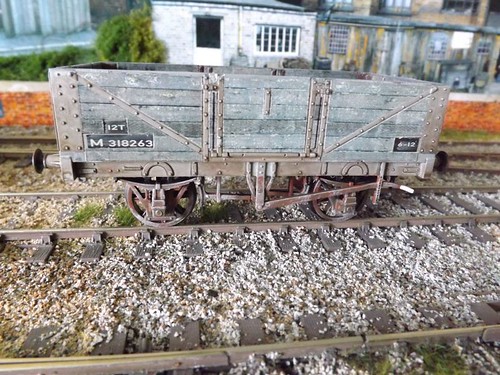
If I do another I'll print the black lettering panels onto the planking sheet rather than cutting a hole; apart from anything else the number will need altering.
The hole does look a lot more obvious in the picture than it does looking at the model.
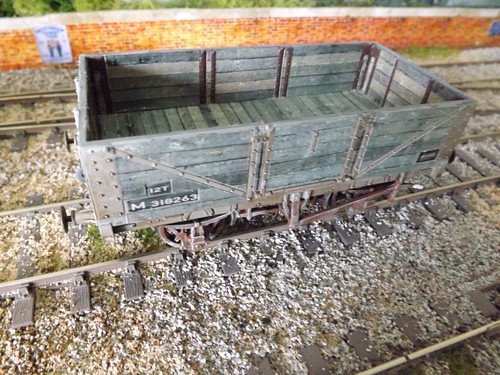

The work took about an hour and a half per wagon including the painting, though doing the three together saves time. They certainly don't look like they did when they came out of the box!
Peter-
14
-
-
-
I know it's jumping the gun but there are some good cab interior shots online, especially on Flickr. I hope Dapol have made it easy to get into the cab, at the very least it's going to need a driver. The biggest problem is going to be recreating the smell of the frying sausages.
I model the LBSCR in the 1880's and I've ordered an 08...there's just something about them!
Peter -
Mike Waldron of EB Models is happy to produce more of his LBSCR kits in 7mm scale (he produces the kit for Belgravia). Possible loco's include the Lyons 0-4-2, the C/C1 0-6-0's and some of the singles such as the 'G' or the one off 'Sussex'. If anyone is interested e-mail me at peter.smith5547@gmail.com and I'll pass it on to Mike.....it needs three or four people to make altering the 4mm artwork them worthwhile.
Peter
-
1
-
-
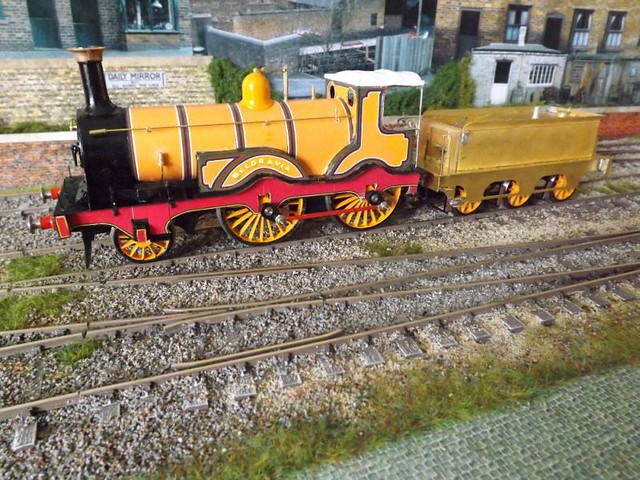
'Belgravia' has moved on enough to photograph her again, although the other side needs finishing off.
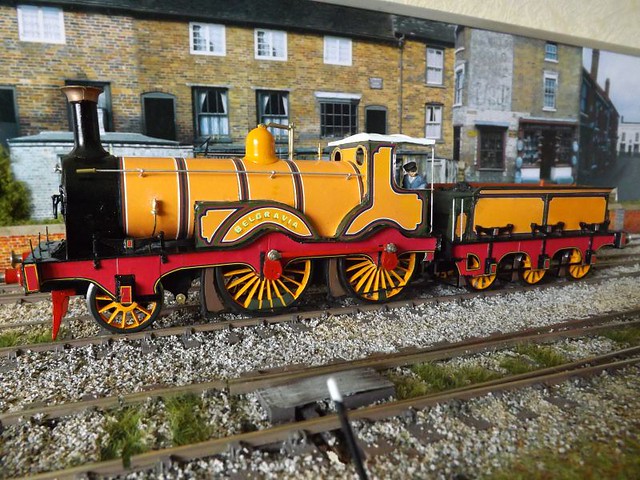
She sits too high on the chassis but any lower and the wheels short out on the body; overscale flanges combined with scale sized wheels unfortunately. It's more important that she runs and hopefully it won't be noticable on the layout.
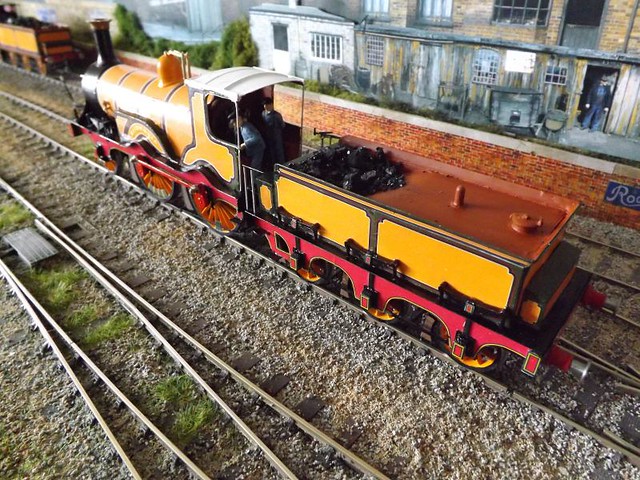

Peter
-
17
-
-
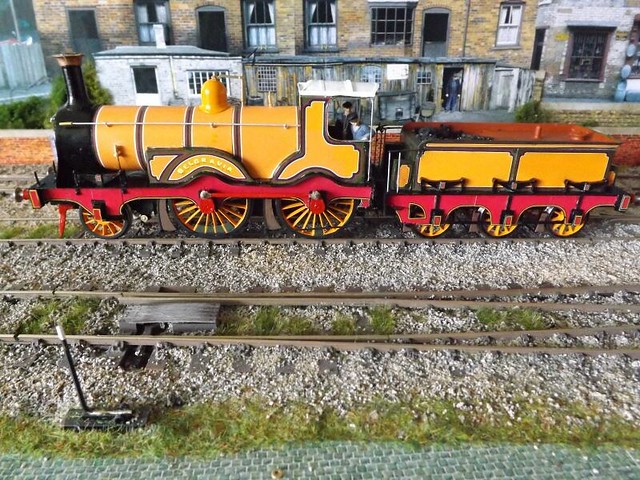
The latest addition to the loco's on Saltdean is a 'Belgravia' 2-4-0....not finished, but she's running so what's left to do is just decoration. She's another of Mike Waldron's kits, a pleasure to build.
The only problem I've got is the springs for the driving wheels, which were underhung; fit them, and you can't get the body off. They'll need to be removable, but fitted securely enough to stay in place during normal running. More thought required!
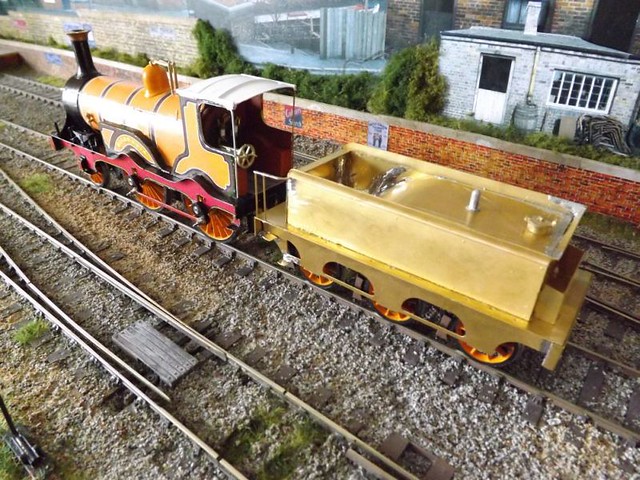
Peter
-
6
-

Kirtley Model Buildings
in Smaller Suppliers
Posted
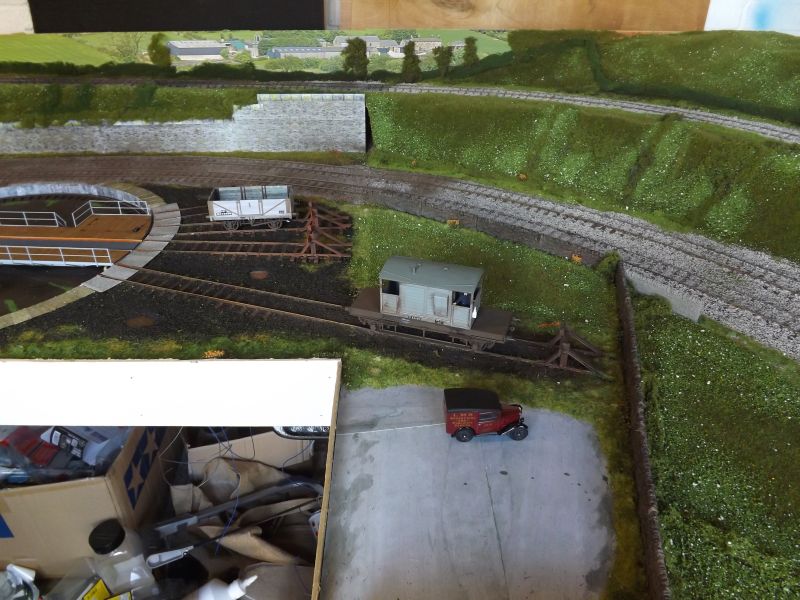
I've finished the corner of the LMS layout and this can be taken down now so I can begin work on the main station. I've only got BR or LBSCR stock so I put on some BR road vehicles to match the train.
I've also built Lazonby signal box ready to use at the main station:
The LMS used the stone and brown colours from the early 30's onwards, with yellow and black nameboards.
Peter