


kirtleypete
-
Posts
1,394 -
Joined
-
Last visited
Content Type
Profiles
Forums
Blogs
Gallery
Events
Exhibition Layout Details
Store
Posts posted by kirtleypete
-
-
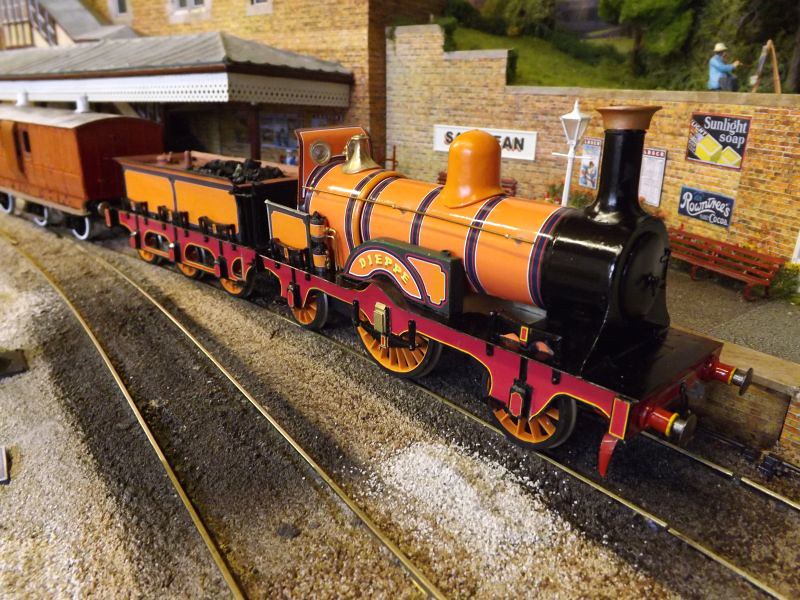
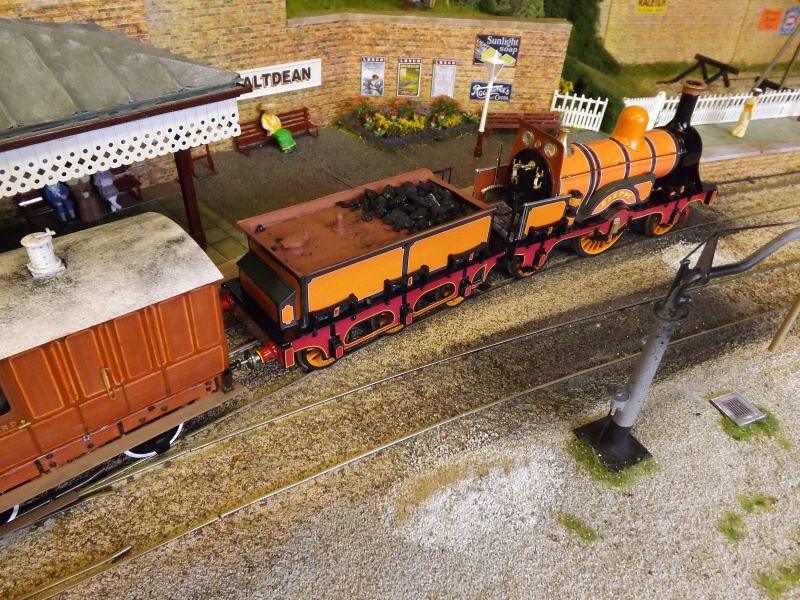
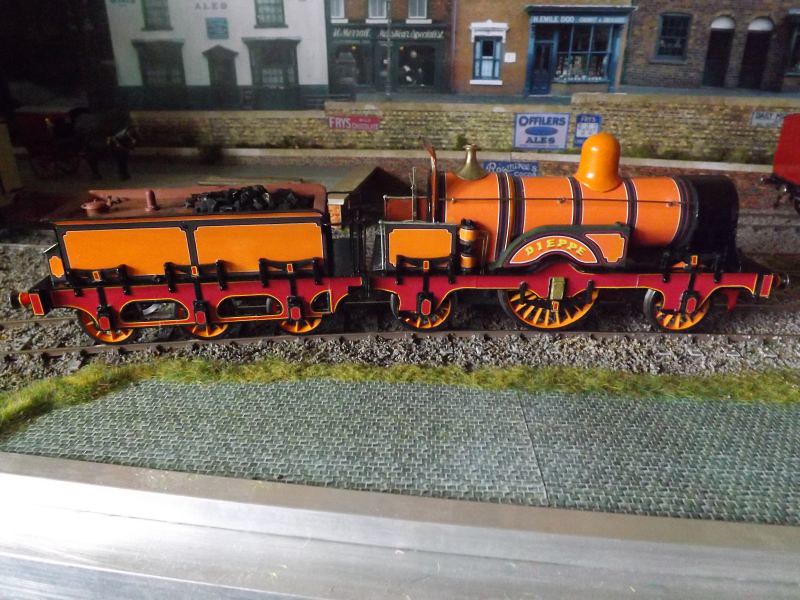
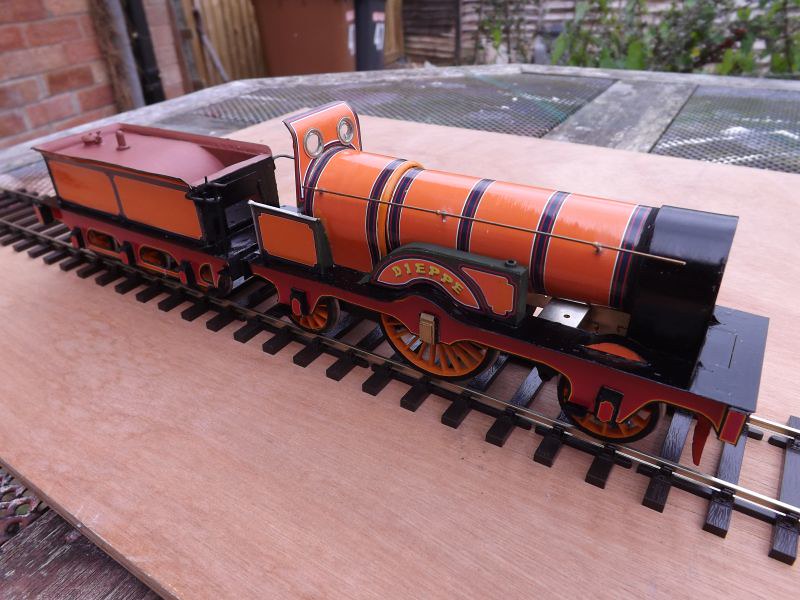
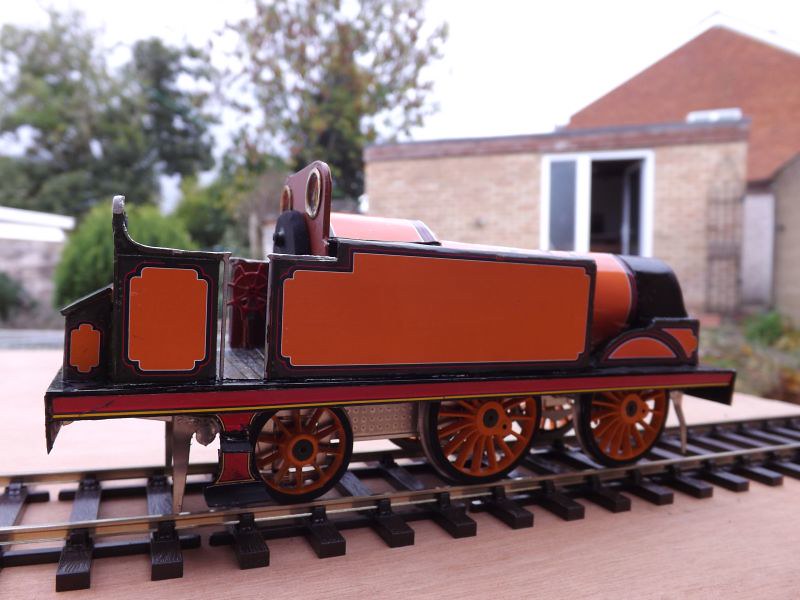
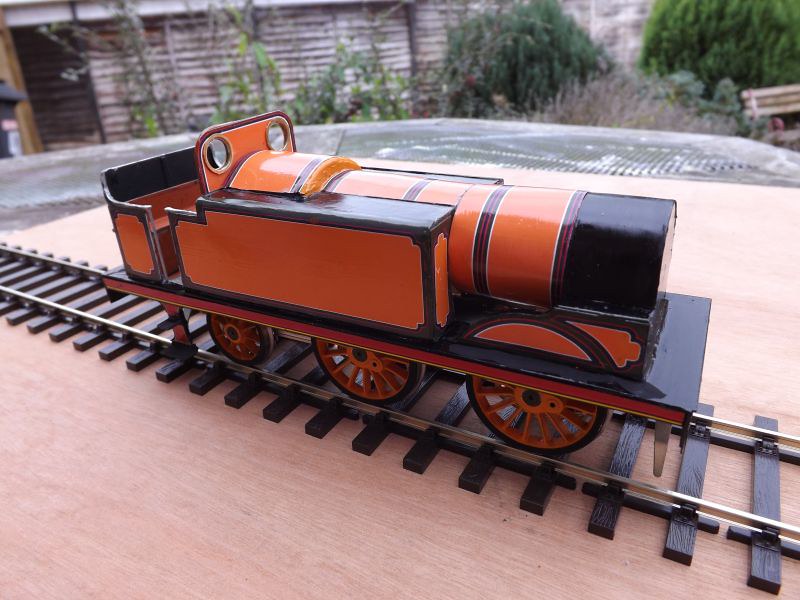
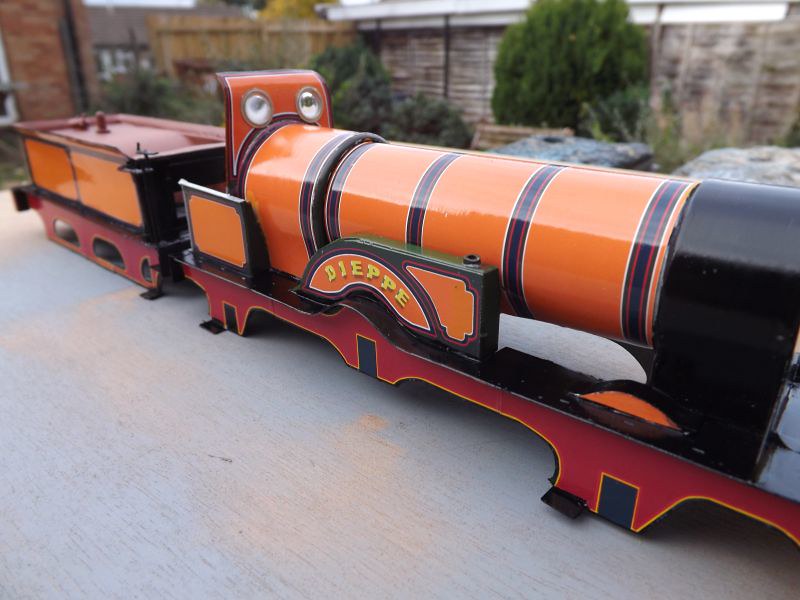
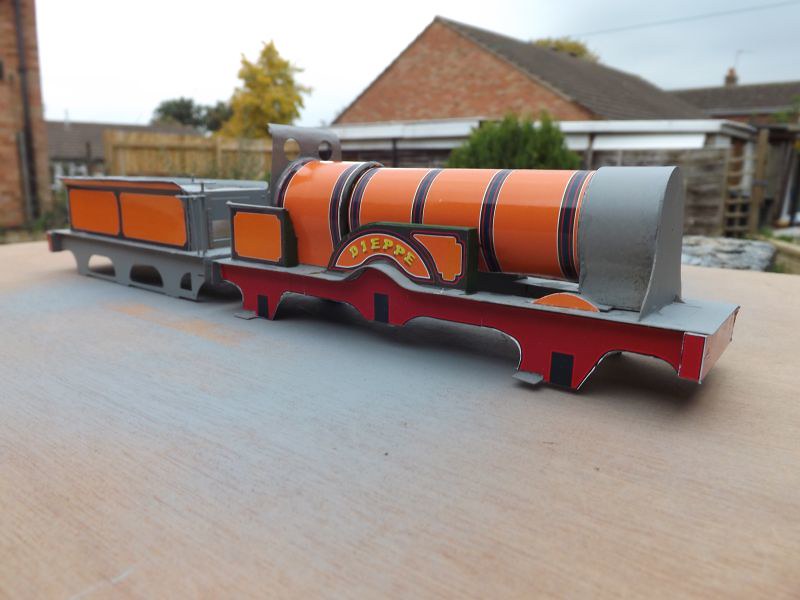
A couple of pictures of Dieppe now it has a chimney and looks like an engine!
Peter
Peter
-
 9
9
-
-
Good idea - I don't think any two were alike after a few years in service.
Peter
-
I won't keep you waiting much longer!
Peter -
I hesitate to let anyone see what goes on inside my loco's Ian, but here goes!
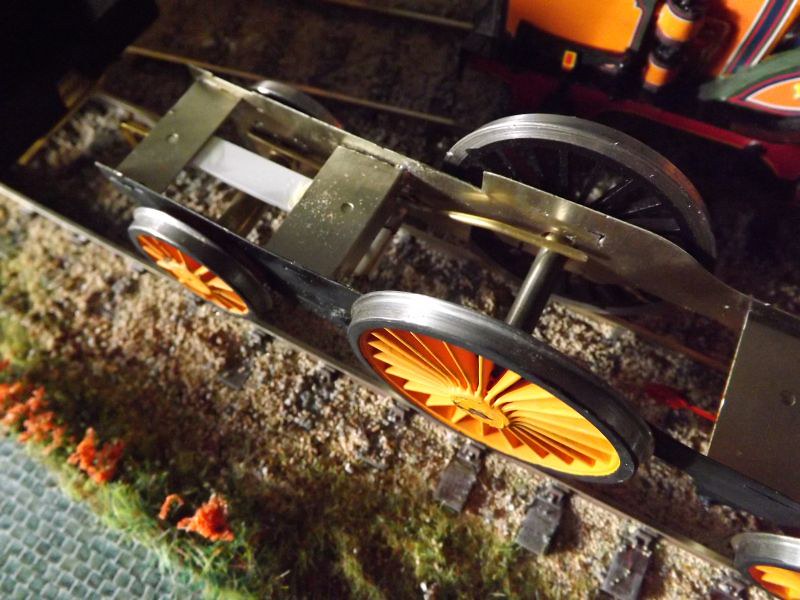
This is the driving axle and the rear one; as you can see I have yet to fit the motor. You can just see the 2mm brass wire compensating beam resting on top of the wheel bearings; there is one on each side of the chassis.
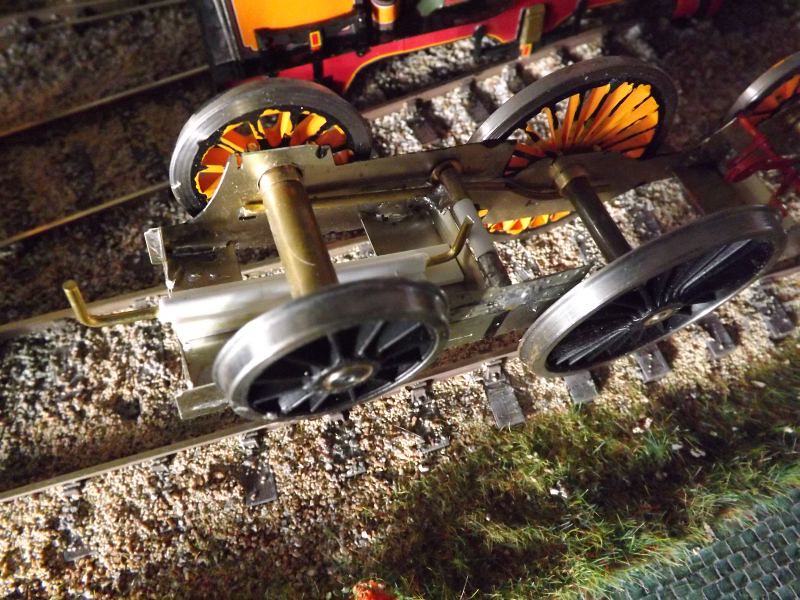
This is the view from below:
It pivots on a beam at the half way point, the compensating beams are soldered to a piece of brass tube which slides onto the crosspiece, with the length of white plastic tube keeping them in place. It's not highly technical by any means but it should work; I'll know once the motor is in and I can see how much room there is for adding weight.
The wire on the left running along the plastic tube is the connection to the tender and has to be isolated from the chassis; one wire to the decoder will be soldered to the end of it.
The front axle is pivoted in the centre so hopefully all the wheels should stay on the track:
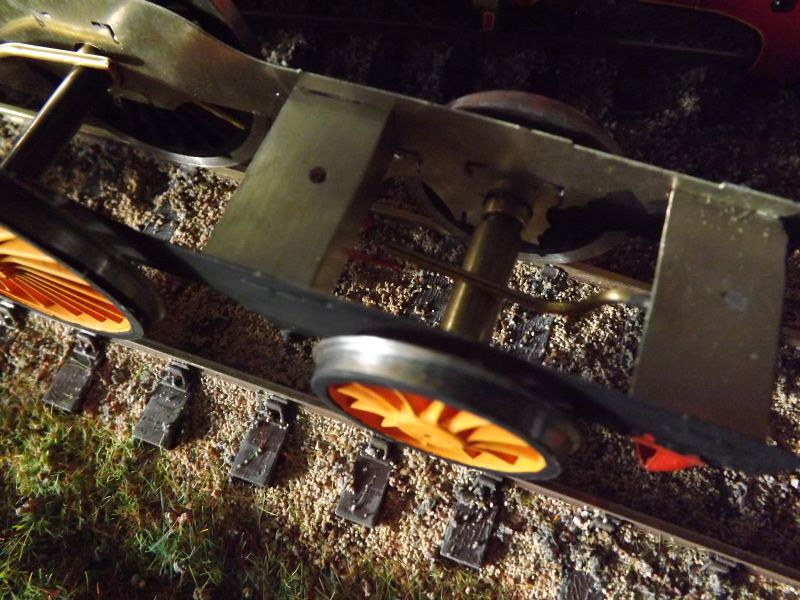
The pivot rests on a length of brass tube through which the axle runs.
I haven't use any hornblocks, just a length of 2mm brass wire soldered to the outside of the chassis either side of the axle hole, after which the hole was lengethened top and bottom by filing. The bushes had the edges ground off on either side so when they are in place they are kept between the wires and cannot turn round, but can slide up and down. Like a hornblock, but simpler and cheaper.
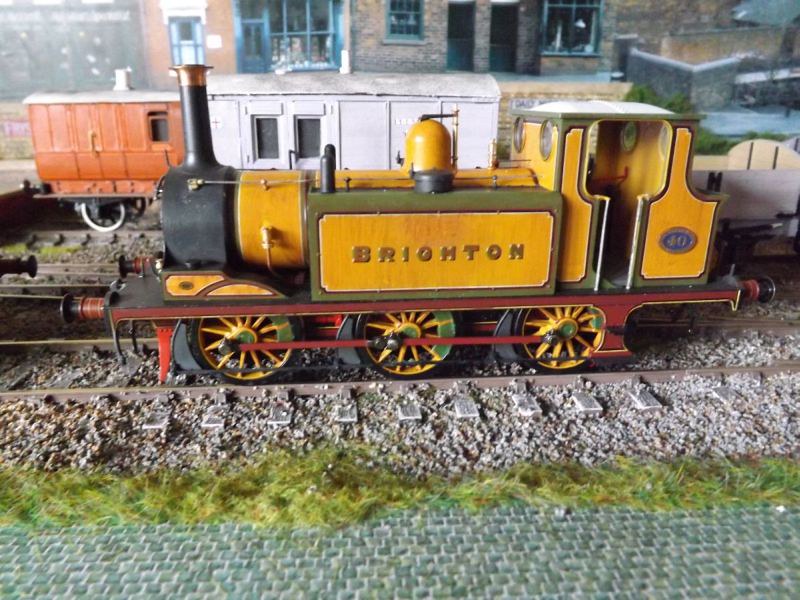
The loco's mave made some progress...
She looks a bit odd without a chimney! The dome is from an LNWR Coal tank and the safety valve is Midland - you do have to use some imagination. I scatchbuilt the axleboxes and springs in plastic.
The 0-4-2T is looking more complete but a lot is still missing. I'm aiming to have both engines finished by next weekend if I can.
Finally, I may as well take this chance to say that I am writing a book (following the suggestion on this thread) which goes into a lot more detail about the technique; it should be available in a month or so.
Peter
-
5
-
-
John just used a fibreglass pen and rubbed it off; I know various liquids are recommended by people but the worry was about disturbing the underlying paint layer. He did have to use a little paint to cover the area but it barely shows. I think removing the condensing pipes really alters the look of the engine.
Peter
-
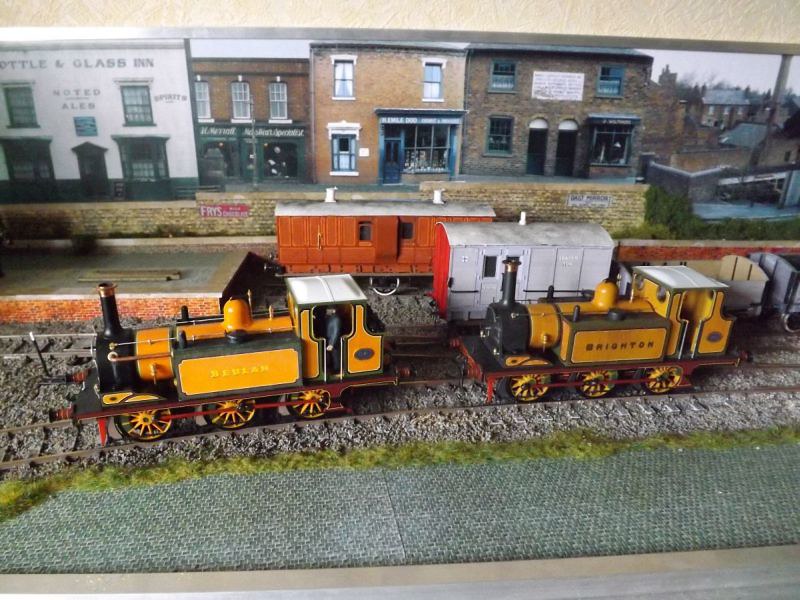
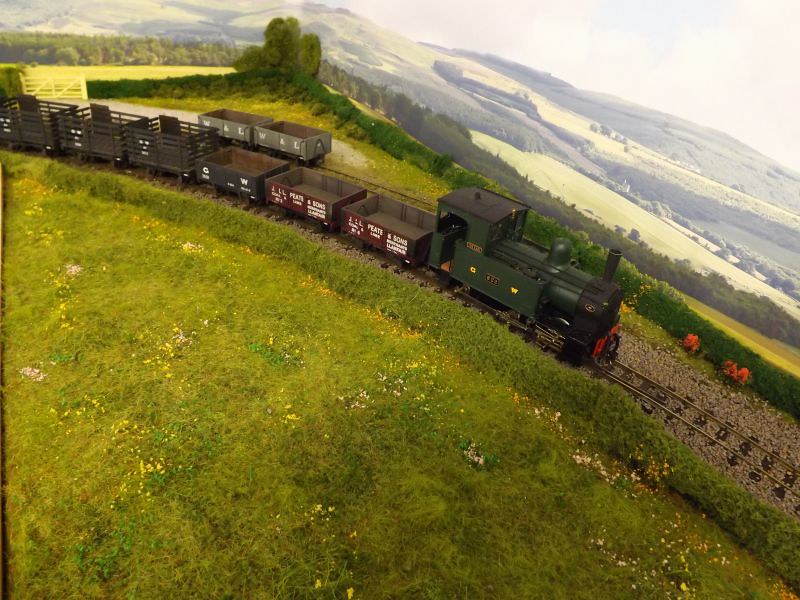
John Dale brought his Terrier 'Brighton' across to my house this morning so we could pose it alongside 'Beulah'.
Peter
-
5
-
-
Yes, it's two thirds finished and coming on nicely. That's why the layout hasn't progressed lately, I've been busy building engines for it.
Peter
-
2
-
-
The single has moved on, and I've also made progress with the 0-4-2T No. 467.
Everything with lining or lettering on is printed on paper and glued in place. I experimented by using gloss photo paper rather than matt and it's given a very high gloss finish, even after a coat of satin varnish. It will need toning down once the engine is finished. Interestingly it has also changed the colour, it is a redder shade than before which is no bad thing because colour varied a lot in those days once weathering began to take hold.

She has a compensating beam connecting the centre and rear axles on each side, and the front axle has vertical movement with a central pivot which should hopefully keep all the wheels on the track and give some traction. There are no pickups, she collects current from one side on the tender and the other on the loco by shorting out the Slater's wheels on that side with wire and conductive paint. The drawbar is a design by John Smith, with a sprung plate to keep the hook touching the live wire loop - on the loco the brass wire runs through a plastic tube and a wire to the decoder will be soldered to the other end.

Next week I'll get the fittings ordered, and perhaps a motor might be a good idea!
The 0-4-2T is one of a pair which were the first loco's built by Stroudley after he took over...the real 467 was scrapped in 1888 and never went anywhere near Saltdean, but what the heck, I like it!
She was allocated a name but never carried it, just the numberplate in the middle of the sidetank.
I made a right pigs ear of the top of the firebox; I'm hoping it will look better with the fittings in place and I can always scatter some fire irons about. The dome will cover the join in the papers half way along the boiler.
Once these loco's are complete I'll feel better about having enough to run Saldean at York next year, with no doubt another Terrier as insurance.
Peter
-
9
-
-
- Popular Post
- Popular Post
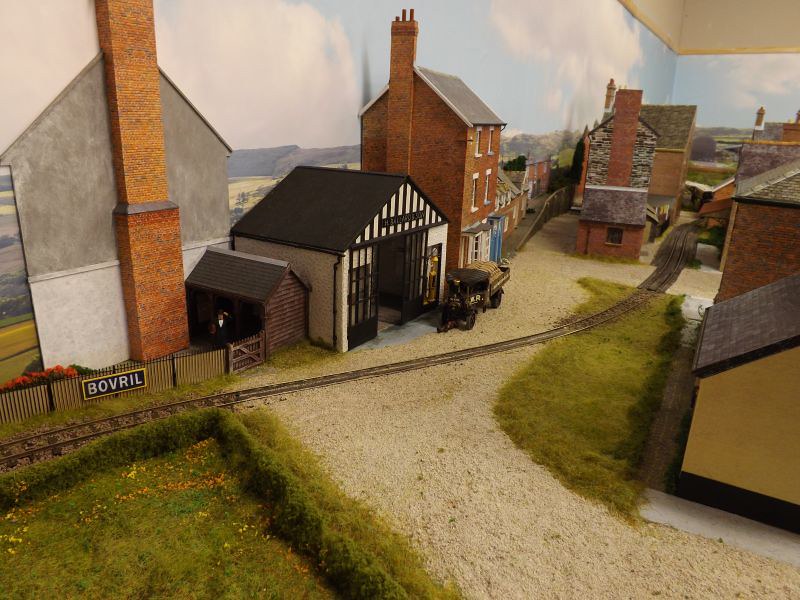
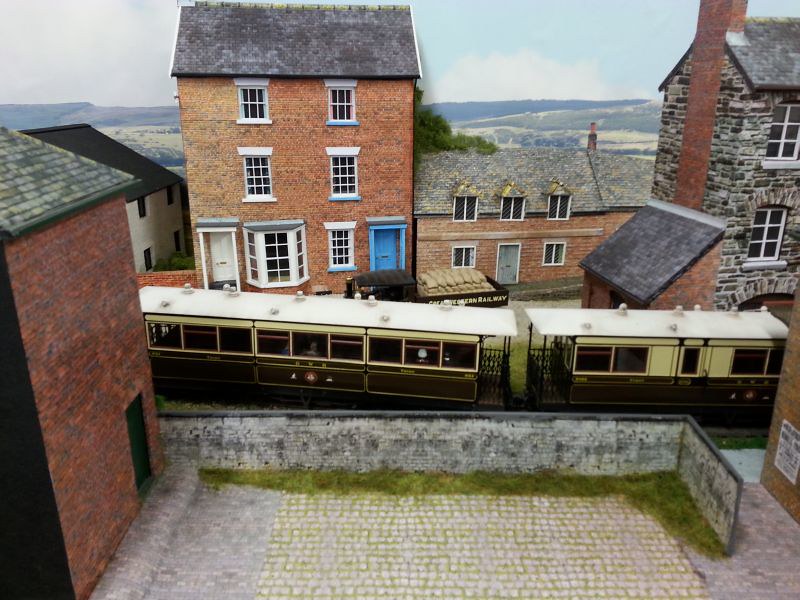
Here are some more pictures of the narrow gauge section, taken this morning.
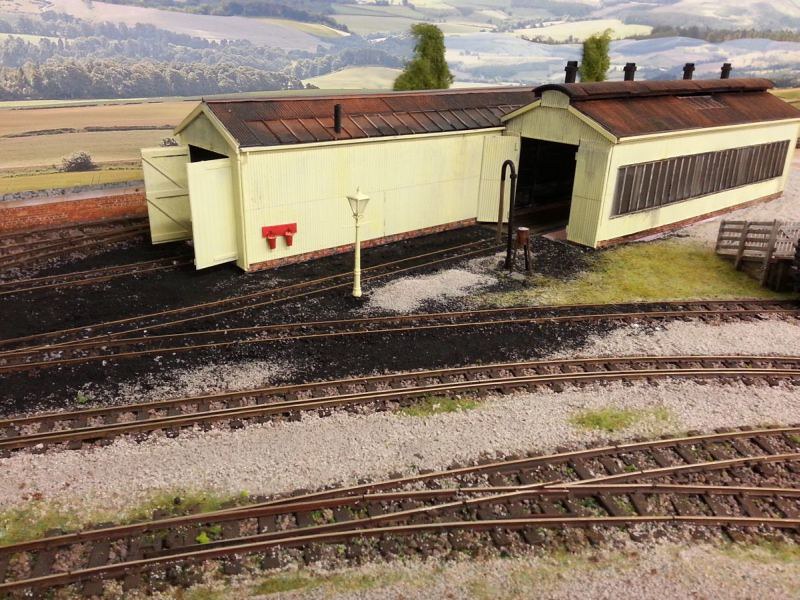
This is the narrow gauge engine shed and carriage shed at Welshpool, with the cattle loading ramp on the right.
The only early picture I have shows the shed painted a light colour, probably cream, but in later years it was black which would look far less attractive. The ballast was still wet - when it is dry it will be dry brushed to give variation in the tone.

The shed is all plastic, clad in 4mm scale Wills corrugated asbestos.

Close to the shed was a small wooden coaling stage between the narrow gauge and a standard gauge siding. Beyond the brick wall should be the cattle market but useable pictures are proving elusive.

The line crossed the canal on a girder bridge before crossing Church Street, but the distances have had to be greatly compressed.


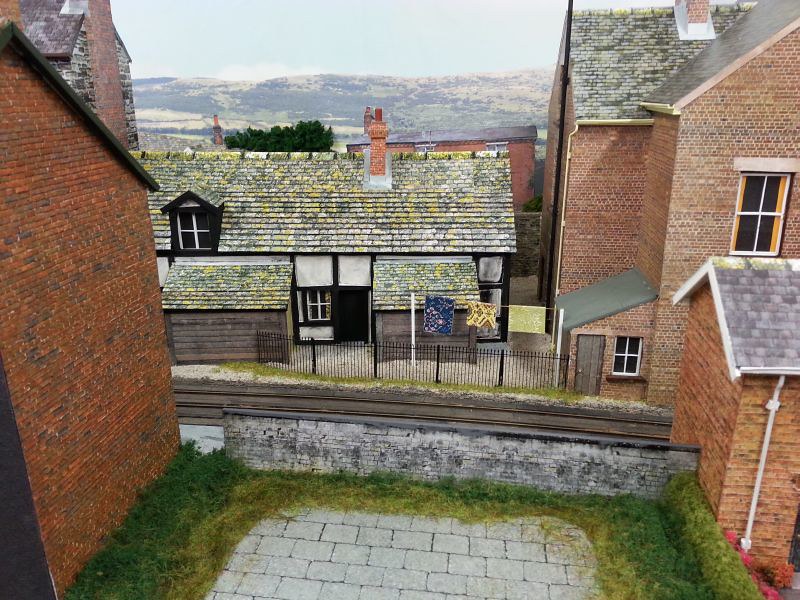
Church Street crossing - this would have been the wonderful view from upstairs in the clothes shop.


Seven Stars halt was still in the town but on the model it is where the countryside begins. It was named after a pub that had to be demolished when the line was built.
Peter
-
21
-
The wheels arrive this afternoon, I'll have more idea of what to do once they are fitted.
Peter
-
Thanks Eric, I'd missed that.....I'm just trying to source castings which is an interesting excercise, espcially that wonderful dome! Don't tell anyone, but a Dean Goods might be closest............
Peter
-
You're right Nick, I'd missed that. I'm not changing it now!
Peter
-
1
-
-
She's moved on quite well today - I was hoping the wheels would arrive but no such luck.

Everything with lining on is printed on paper (gloss photo paper this time) and then glued to the engine with Evostick. I've got the name a bit big but there comes a point when you have to say that will have to do.
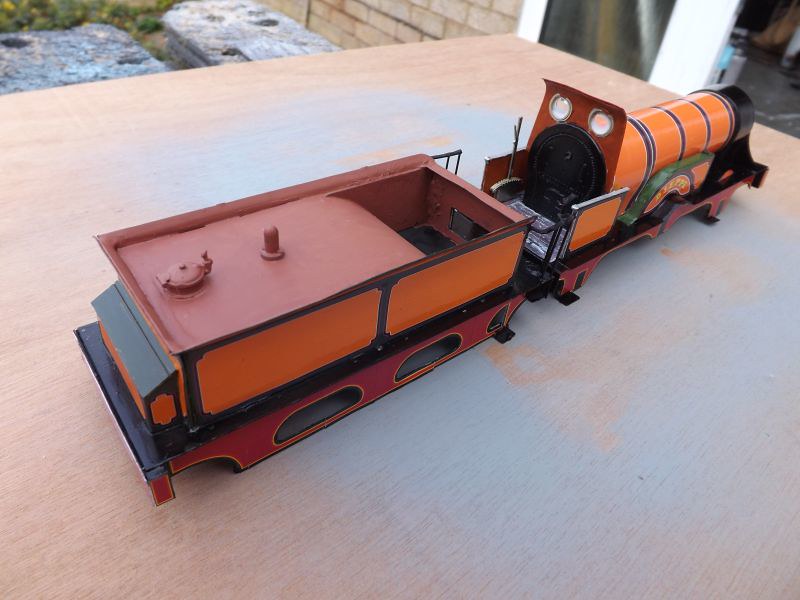
Stroudley tenders were painted red oxide on top as this was hard wearing; in my case it's Railmatch dark rust.
The claret parts have been done in sections and you can just see the joins but doing it as one piece would have been much more difficult. The cab spectacles were glazed with Microscale Krystal Kleer.
I really need the wheels now before I do any more, as well as all those fittings of course.
Pete
-
9
-
-
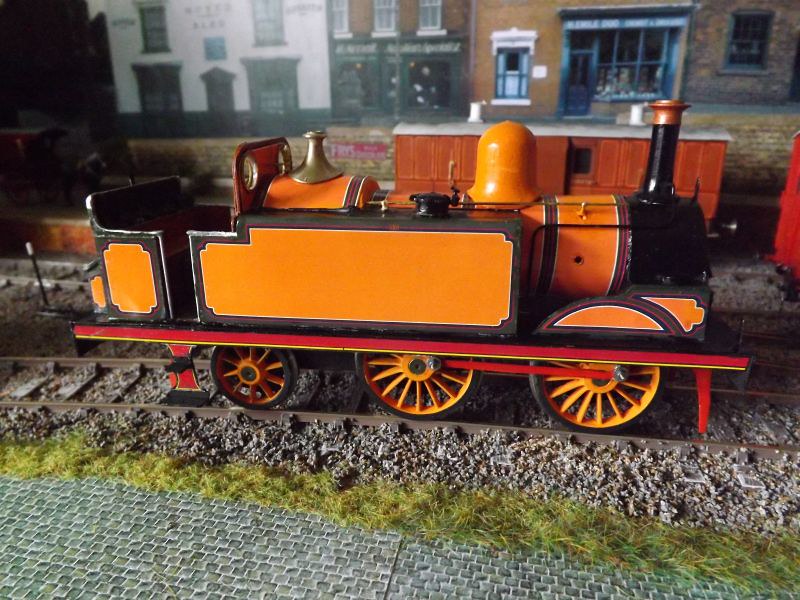
I've begun painting/decorating 'Dieppe' built from a kit by Mike Waldron. Here's the real loco:
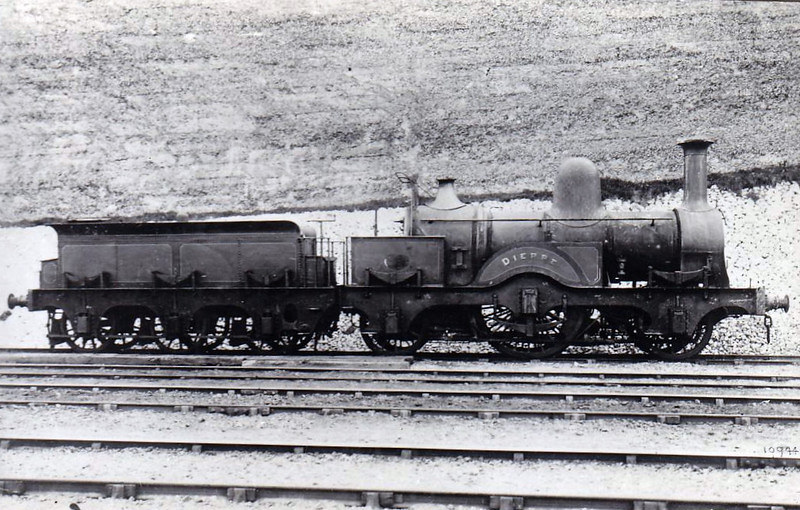
She's a beauty!
My model is pretty bare because all the fittings have to be added later, including the rows of rivets which I'll do using Archer's transfers. Mike's 7mm kits don't have castings so they'll have to be sourced from wherever I can find them.
Here is the loco in primer:
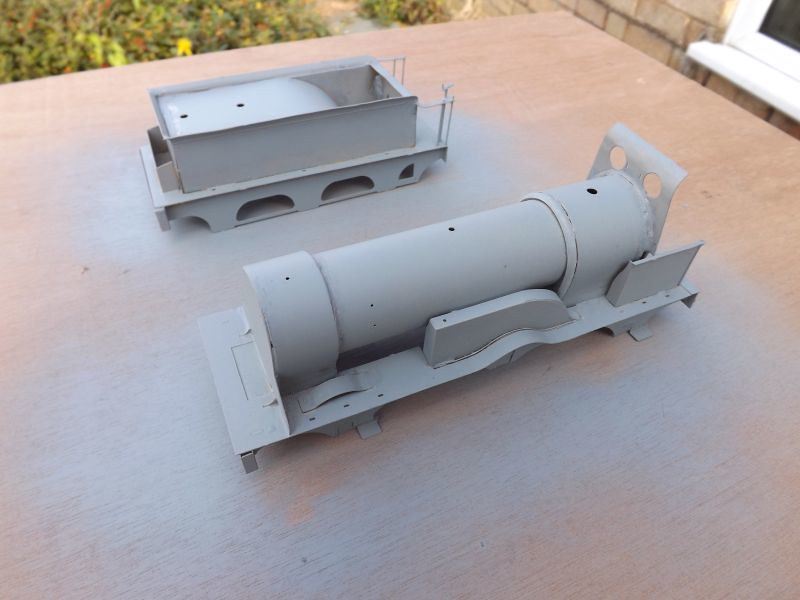
On this one, rather than spraying the whole thing black I'm going to brush paint the black areas.
I began adding the printed papers one at a time.....
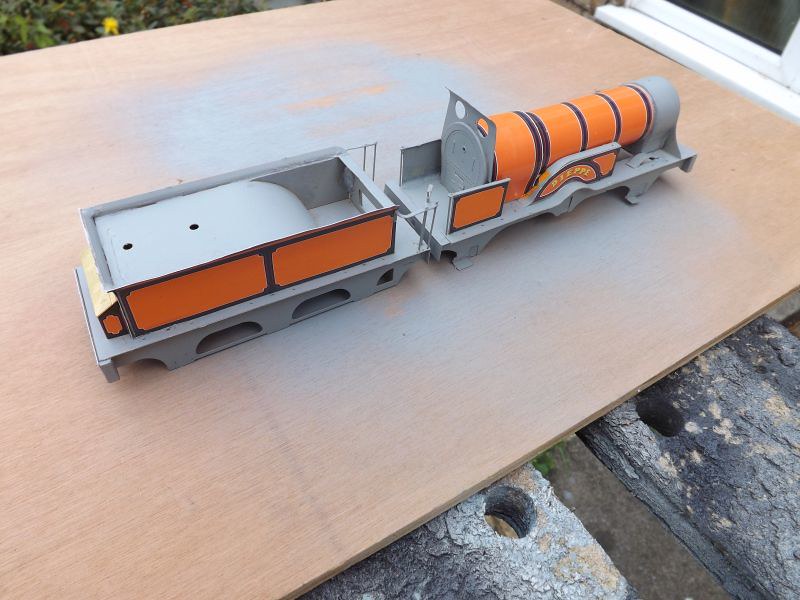
That splasher took a lot of tries before it was useable.
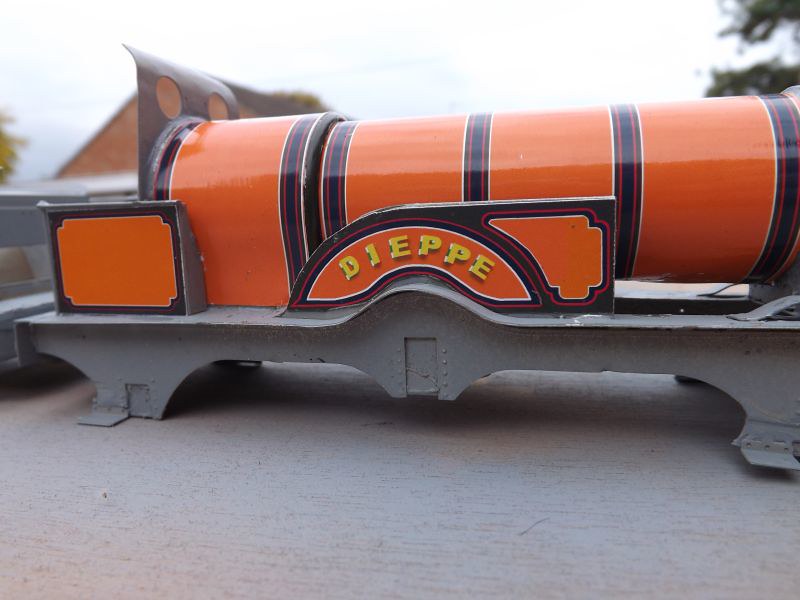
I added the claret pieces to the loco before I realised I'd missed off the yellow lines so they'll have to be done again. I thought they looked a bit dull!
Hopefully the wheels will arrive tomorrow so she should finally look like an engine.
Peter
-
11
-
-
The problem I've got with the LBSC loco is that the leading and trailing wheels are different sizes so I can't drive off them; I think I do need to add compensation as you suggest. Watch this space!
Peter -
No, there isn't room and I don't like tender drives. It will drive on the centre axle and I'll hope for the best! If the worst happens I can always double head it with a Terrier..............
Peter
-
1
-
-
I did a series of four articles about it Jim, sent it to all the mainstream modelling magazines and none were interested. The RM said it was 'too much for our readers' which I think is a pretty patronising attirtude.
I hadn't thought of doing a book but it's worth thinking about. I've got more than two by the way, it's more like twenty four at the moment. When I get more stock finished it might be something to do then; I've 2-2-2 and 0-4-2T loco's half built and the 2-2-2 is going to be a real challenge. If I can finish that well I'll be happy to tackle anything.
Peter
-
Thanks for the kind comments; it's built into a double garage, but that's all I'm going to say because it's not my layout. I will post more pictures as it progresses; i'll be doing more work on it this coming week,
Peter
-
3
-
-
- Popular Post
- Popular Post
I have been working on a layout based on the Welshpool & Llanfair for a customer and parts of it are now finished enough to photograph. This is the Welshpool section which runs along a wall with the line climbing from right to left towards Llanfair, which has yet to be modelled. Although everything is very compressed hopefully it is still recognisable. The layout is 0 scale using Peco 16.5mm track.

This is the left hand corner of the room where the line curves round past a single siding and begins to descend.The backscenes are by ID Backscenes and are superb.
This is the same scene looking the other way. The period is loosely the early 1920's.
The line begins to descend, following the wall, towards Seven Stars halt which was in Welshpool town beyond the present Raven Square station.
The railway waiting shelter is the brown wooden building behind the fence backing onto Ballard's garage. Trains crossed the road here and then ran between buildings towards the famous crossing over Church Street. I have assumed that in the early 1920's the roads would not have been given a tarmac surface so I used fine Woodland Scenics light grey ballast. It was impossible to model the scene exactly as it should be, but all the important features are there. It still needs figures and vehicles to bring it to life.

The wooden planks enclosing the track are where the line ran over a stream. My customer built the garage model, and made a very nice job of it.
The buildings are all scratchbuilt models of the actual prototypes, as far as available information will allow.
Sadly the half timbered cottages look more attractive on the side you can't see! Called Armada Cottages presumably they dated from 1588 but they have gone now.

This is the level crossing over Church Street - there should be a man with a red flag standing guard as the train crosses. The red brick shops are just a flat picture on the backscene, as is the church. The house on the right is the vicarage; we searched everywhere for a picture of the real one but came up empty handed so this is another house from Welshpool. That loco needs a crew!

The backscene looks less effective from this angle, but it does show the narrow gap between the two shops that the line passed through. The bakery on the right was actually built after the railway had opened, the pervious building on the site having been demolished. It has now also gone to make way for a main road but the shop on the left is still there.

This is the view from further back showing the canal bridge and how the stream was made to pass under the canal. There is more work to do here, I was waiting for the water to dry. The house on the right is going to be covered up, it should be open countryside there.
I hope I have managed to capture something of the atmosphere of Welshpool in the 1920's, and the W&L before it was cut back to the present terminus. I'll post more pictures next week following my next visit.
Peter
-
35
-
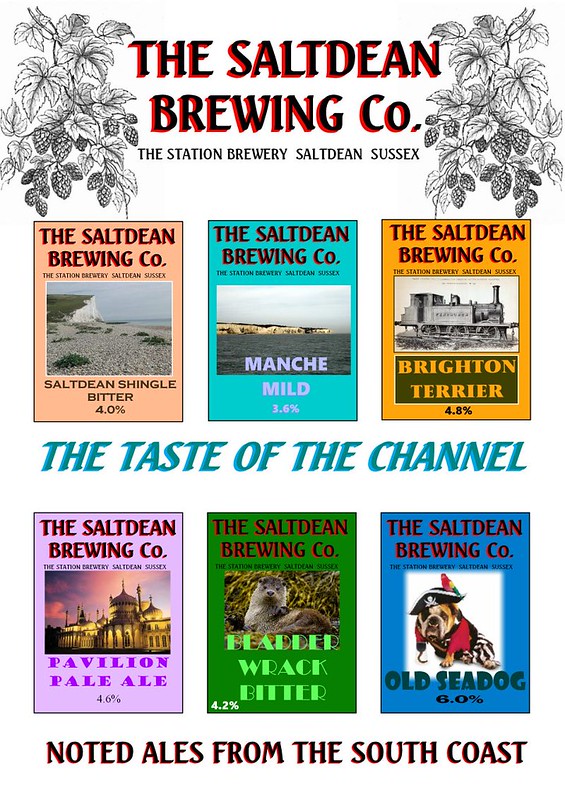
My brewery is going to be working overtime!!
Peter-
1
-
-
I haven't been able to do anything more on Saltdean recently, but here's a bit of fun....
Peter
-
3
-
-
There can't be much of the original Terrier left!
Peter
-
Digitrains and DCC supplies do a suitable sound decoder with a 21 pin plug so it's easy to install; Digitrains use Zimo decoders which have a stay alive capacitor built in which is useful. The DCC Supplies decoder is designed specifically for the Terrier and the speaker clips into the black plastic item that comes in the box with the engine and slides into the smokebox.
Peter
-
Nicely done! I used to model the SECR in the 1990's and did all the lining with a Bob Moore lining pen - it wasn't my idea of fun.
I'll add more to this thread when I do my next loco, which should be a Stroudley single with lots of horrible curves.....
Peter
-
2
-

Saltdean - LBSCR in 0 gauge
in Layout topics
Posted
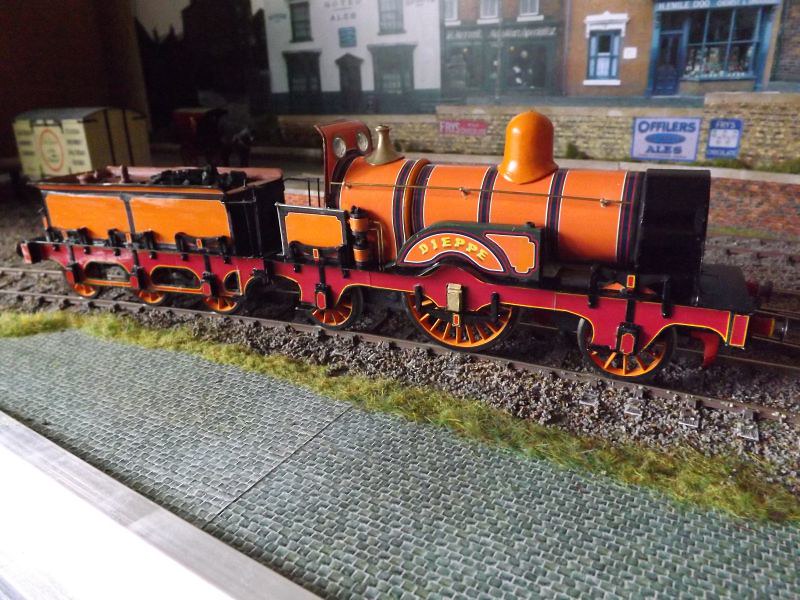
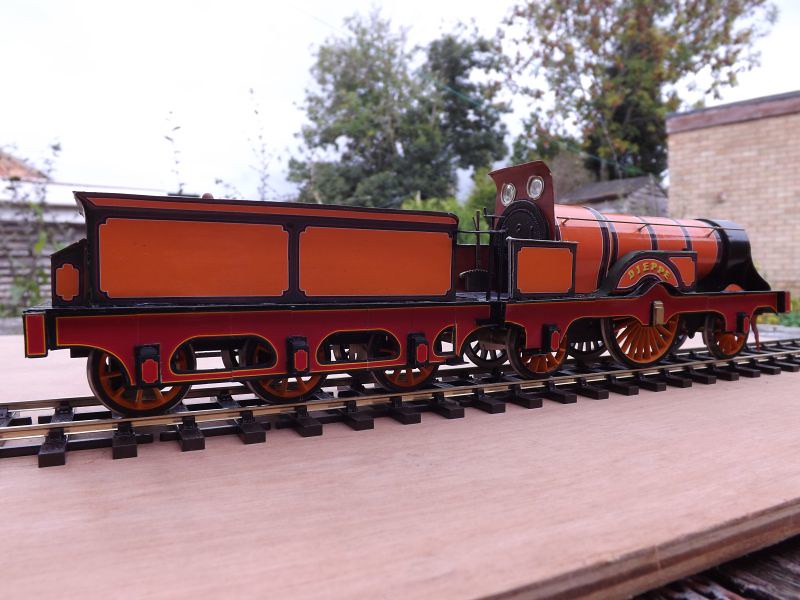
I've got the new single 'Dieppe' far enough along now to post a couple of pictures...there's still some detailing to be finished off.
She's built from a kit by Mike Waldron of EB Models, blown up from 4mm scale.
Peter