


2996 Victor
-
Posts
678 -
Joined
-
Last visited
Content Type
Profiles
Forums
Blogs
Gallery
Events
Exhibition Layout Details
Store
Posts posted by 2996 Victor
-
-
35 minutes ago, KeithMacdonald said:
Is there anything here that helps?
http://www.cornwallrailwaysociety.org.uk/ticket-to-ride---wenford-branch.html
Admittedly not directly relevant, but I've seen a couple of pics somewhere on RMWeb of old freight at Fowey Station that included china clay in big barrels.
Thanks Keith! The link is great, fab photos although later than I'm looking at. Great atmosphere and details, though.
Interesting about Fowey, that's the sort of info I need. The GWR carried "ordinary" clay loose in its special wagons; as I understand it, the casked clay was top quality that couldn't be stained during carriage. I'm wondering what the LSWR/SR did for carrying the ordinary clay, or was Wenford clay top notch only?
Cheers,
Mark
-
52 minutes ago, BR traction instructor said:
…I’ve seen casks used. This book has several useful pre war images…
BeRTIe

Thanks, BeRTIe, that's great to know. I've got a copy in my Ebay watch list, so that'll be a purchase come payday!
Cheers,
Mark
-
Dear All,
Can anyone advise how China Clay was transported from the Wenford Bridge clay dries in pre-War days?
Did the Southern Railway (and LSWR before it) have specialist wagons like the GWR? I can find no reference in Bixley et al. Or was the clay carried in casks or just sacks in standard open wagons?
Thanks for any help or advice with references.
Cheers,
Mark
-
13 hours ago, Howl03 said:
Hello All,
I have now restored all the photos to this topic. It was good to go back over how City Goods and Rural Goods have evolved over time. And to see the other two layouts on here that I no longer have, Urban goods 1 & 2.
Still need to upload a few of the missing videos though.
Regards Paul.
Brilliant, Paul, thank you! I for one am looking forward to going through the thread again from the start.
Cheers,
Mark
-
 1
1
-
-
On 26/08/2022 at 20:17, Jim Martin said:
I've been given a set of old photographs which are allegedly of my ancestors. One of them clearly shows a car and I was hoping that it might be possible to date the photos from the car. Is there any way of identifying an old car from its registration? I was wondering if there's a database of such things.
It's a saloon, registration NOH975 or possibly NUH975.
Jim
Perhaps if you posted a copy of the photograph with the car, the make and model could be identified and could narrow the search period?
Cheers,
Mark
-
 1
1
-
-
17 hours ago, Mikkel said:
Three layouts? I've lost track then, I'm off to find the others 🙂
Ah, confession time 😊
The 009 layout is on Britmodeller here: Yeoman's Wharf and the EM ones are on Western Thunder here: Newton Lane and here: Great Bunbury
I'm embarrassed to say I've never got around to putting threads on RMWeb.
All the best,
Mark
-
1
-
-
On 04/09/2022 at 18:40, Mikkel said:
Sorry to hear that Mark, I hope the clouds pass quickly.
Does that mean new layout building is on pause too, or do you have enough stashed away to keep something going?
Hi Mikkel,
Thanks :) I'm sure it's just a temporary glitch!
I've got three micros on the go at the moment, one 009, two EM. I should have sufficient materials for landscape and buildings and also track to keep me busy for a while :)
And there are always the new ideas that keep popping up that can be refined on paper :)
All the best,
Mark
-
 1
1
-
-
4 minutes ago, hayfield said:
Mark
Sorry to hear your news, a similar thing happened to me back in 2009, at the time it was worrying but ended up being for the good and ended up in the home and especially the village we now live in. Lets hope it has a silver lining
When you are ready email him again, or even phone.
Peter apologised to me for a late reply due to him having an illness, I think sometimes we expect these small suppliers to be as good as the big boys. I may be wrong but I assume Peter is winding down, but he stated he is getting some more etching done
At the moment I am having a bit of a sort out in my work/railway room. Making space for an 0 gauge test track/micro layout
Many thanks - I'm sure it'll only be a short hiatus! It is what it is, and I'm sure there'll be a silver lining just as you say!
I think you're absolutely right - it's very easy to expect big outfit service from a one-man-band. I too was in business by myself for some years, but it became overwhelming without being rewarding, so it was back to the desk job.
I do hope Peter will be able to continue, and as you suggest as soon as I can I'll contact him again.
Looking forward to seeing your O Gauge build!
All the best,
Mark
-
1
-
 1
1
-
-
Two fab layouts, great to see a bit of operational action on them - thank you for sharing!
All the best,
Mark
-
1
-
1
-
-
Hi @hayfield,
thanks for the update - that's very good news indeed! The etchings do look very nice - hope there'll be build threads in due course!?
I'll keep hoping for a reply to my email but I won't be following up, at least not yet, as I've since been made redundant. Them's the breaks!
Thanks again and best regards,
Mark
-
2
-
-
3 hours ago, NHY 581 said:
Plus one for DAS.....
On my "to try" list! 😊
-
3 hours ago, JustinDean said:
No need to apologize! Those setts look great. I expect folk find a medium they like to work with and for me it’s DAS. I’ve always found filler too messy and hard to control but that may be down to me not getting the mix right.
In terms of ease- that’s why I’m scribing at this stage before anything else is added such as the roof and steps for instance.
Jay
I've got some DAS recently as I want to try out Chris Nevard's cinder ballast method, but I do want to give it ago on buildings, too. I only started using filler/PVA as that's what I had to hand: it worked pretty well and it's nice and cheap, too 😆
The windows in the engine house look fantastic, it's shaping up to be a stunning building and I'm looking forward to seeing it finished!
All the best,
Mark
-
1
-
-
7 hours ago, Rowsley17D said:
Quite remarkable and makes me think I should dig up my Metcalfe stuff and start again. Did you use any embossing tools, the different sized setts look so regular. Some I know use an old paintbrush with the bristles removed and the ferule shaped.
I used the same method as Jay - steel rule (or setsquare) and a scriber. The "courses" were scribed in first, then the individual stones scribed off, staggering joints as per the real thing.
I used a stiff toothbrush to scrub the setts which helped round them off a bit, and painted with acrylics. They still need a bit of blending and toning down!
Cheers,
Mark
-
1
-
1
-
1
-
-
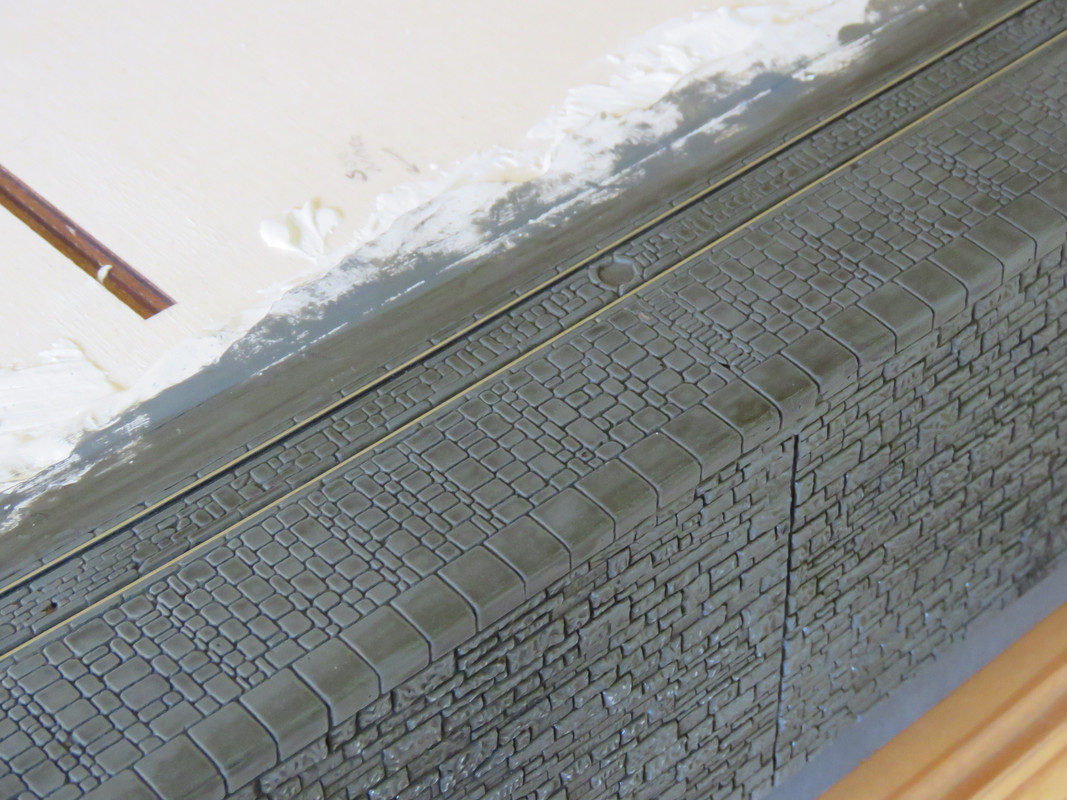
Fantastic work! I've never tried scribing DAS clay, although I use a household DIY filler/PVA mix which works well.
2 hours ago, Rowsley17D said:Those blocks in the first photo do look like the real thing, must take some hours though?
Its laborious, but actually very satisfying (at least, I think so!) although I imagine a flat surface is relatively easy compared with a building:
The vertical wall is Wills sheet, of course, but the cap stones and setts are scribed filler/PVA. Apologies @JustinDean for the thread hijack!
All the best,
Mark
-
5
-
 6
6
-
-
An absolutely stunning locomotive, and the multi-media construction is an inspiration.
Thank you for sharing!
Cheers,
Mark
-
1
-
-
Me again - sorry!
I'm sure I saw the word "kip" mentioned in connection with the incline gradient, but cannot now find the post in question.
Could you possibly explain what a "kip" is, please?
Many thanks!
Mark
-
Ah, work! The curse of the modelling (and drinking) classes! Seriously, though, family time comes first by a country mile, and I hope the new job is going well, too!
Glad to hear the layout is alive and well and that you're hoping to move on to the scenery. Don't worry about the photos, it happens, and hopefully they will be restored anyway..... And don't be pressured by your club chairman 😁
Looking forward to following your progress in due course.
All the best,
Mark
-
1
-
1
-
-
Hi @Zunnan,
I've been following this thread on-and-off for a while, and just had another skim through. Have you made any more progress? Also, and I know this will a royal PITA, but is there any chance of the photos being restored? I seem to recall they were fairly spectacular!
All the best,Mark
-
2
-
-
Just caught up with this thread. How wonderful to see this classic layout saved and being given a new lease of life.
I'm very interested in the interlaced sleepering on the new points - was that something that the Shropshire & Montgomeryshire did? I presume that it's remaining part of the S&MLR?
Thanks for the updates and great pictures, please keep them coming!
All the best,
Mark
-
I also meant to add that my wagons are usually spray painted with Tamiya rattle cans. In this case, for pre-1899 I settled on AS-10 Ocean Grey (RAF) and for post-1899 on AS-2 Light Gray (IJN), with ironwork picked out by hand in XF-84 Dark Iron.
-
1
-
 1
1
-
-
25 minutes ago, Compound2632 said:
Thanks - for 1902, I feel one in each style will be the way to go.
Looking back through my notes, I think it was Alan @Quarryscapes that sent me his spreadsheet on Cambrian wagon numbers/build details - he's definitely the guru.
All the best,
Mark
-
1
-
1
-
-
On 07/07/2022 at 20:39, Compound2632 said:
Once you've got Vol. 2 you'll start to get the itch to have the other three.
Volume 2 has arrived, and bizarrely, Volume 3 as well..... 🤣 now to find 1 and 4!
Looking at Volume 2, I'm all the more determined to have a model Small Well Tank, but the Large Well Tanks look rather attractive, too.....oh dear
Cheers,
Mark
-
1
-
1
-
-
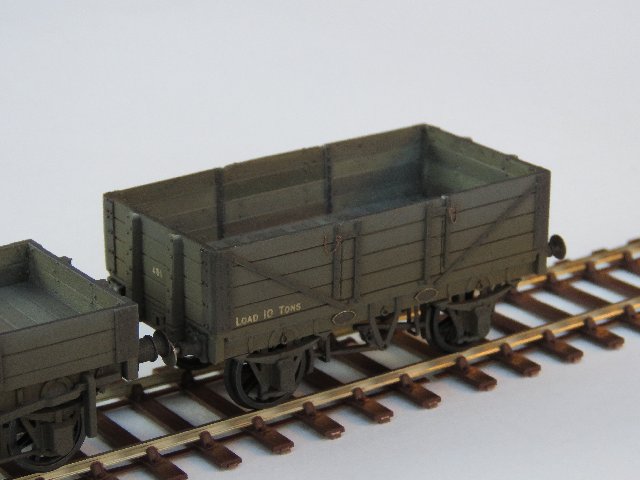
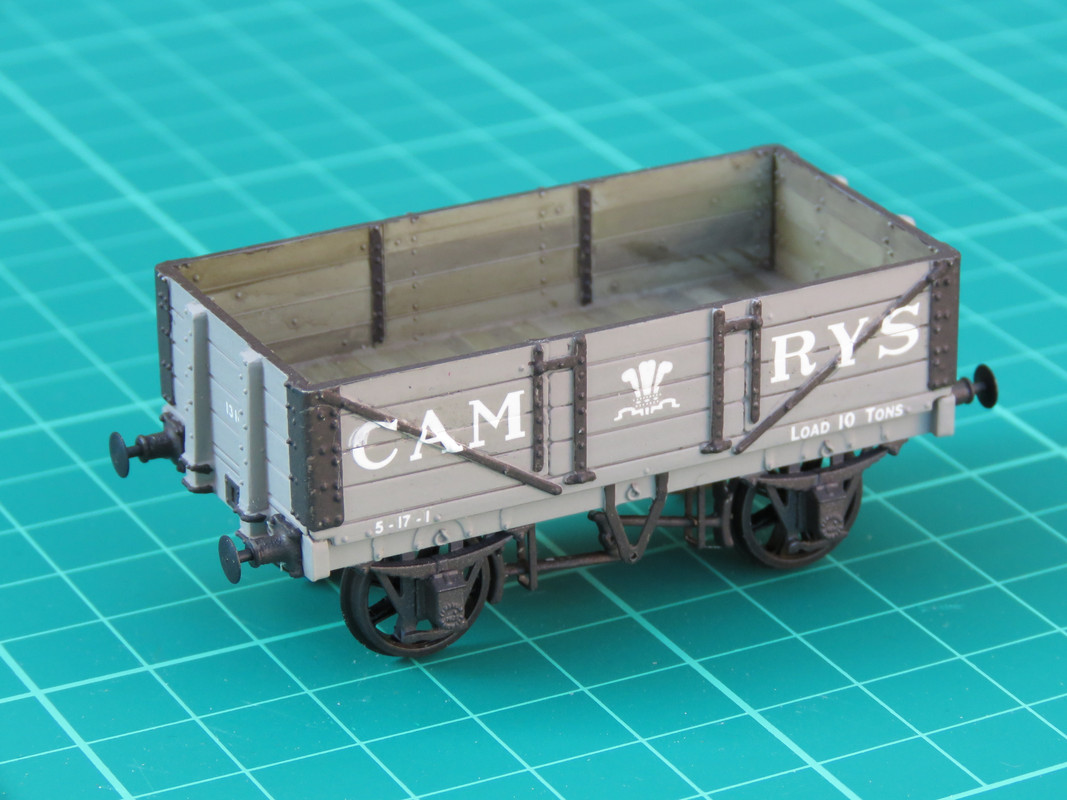
For what its worth, here is my take on the pre- and post-1899 liveries.
Pre-1899
Post-1899
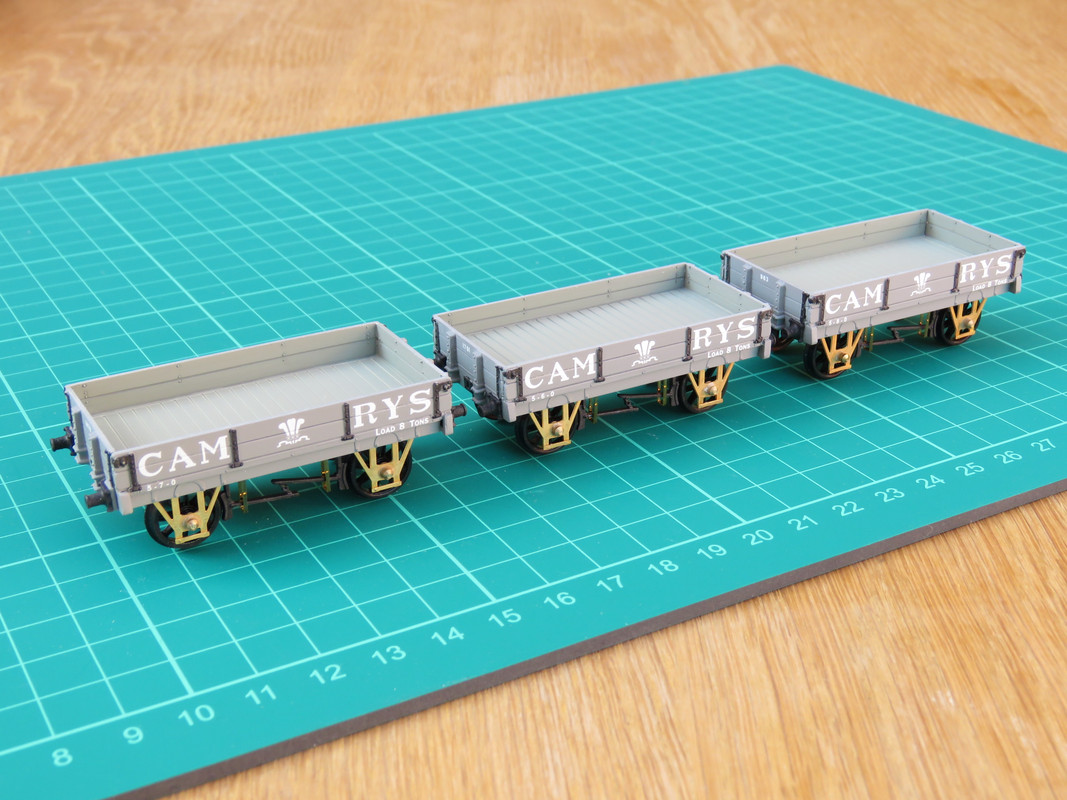
Both are Cambrian Models sides and ends on scratch built underframes. As you can see, both still need their brake levers! Brake gear is slightly simplified in the interests of retaining some sanity, and use etched brass vee hangers and safety loops with refined moulded brake shoes and rods. Buffers and axlebox/spring assemblies are 3D prints from Coastline models, sprung buffers are MJT, as are the W-irons. Transfers are from the Welsh Railways Research Circle (Camkits, I think).
I've also built some CM 2-plank dropsides in the same way, but they're even less advanced!
Hope that's of interest.
Cheers,
Mark
-
4
-
1
-
4
-
-
Hi @Schooner,
just finished catching up with your thread: excellent progress so far, if I may say so! The buildings and inset trackwork look very convincing.
For your little MW H (sincerest commiserations on the first two, btw), could I suggest a thinner spectacle plate? Maybe from brass or NS? The real thing is obviously sheet iron/steel, so I think the model would benefit from something thinner. Just my two penn'orth :)
Looking forward to seeing your next instalment.
All the best,
Mark
-
1
-
1
-


Bodmin & Wadebridge China Clay Traffic
in The Railways of Cornwall
Posted · Edited by 2996 Victor
Thanks again, BeRTIe, that's brilliant!
I'm most embarrassed - I've got the Southern Wagons books, but I obviously missed the entry on clay wagons when I looked through it 🤦♂️ I need to look again. Properly!
I'll search out the Irwell book as well: that sounds very interesting.
Thanks again! 😃
Mark