

Penrhos1920
-
Posts
1,289 -
Joined
-
Last visited
Content Type
Profiles
Forums
Blogs
Gallery
Events
Exhibition Layout Details
Store
Posts posted by Penrhos1920
-
-
Looks very much like your forum name, Penrhos!
Almost, well spotted. Blackbrook Rd is the road that crosses Penrhos. But to truly be Penrhos the viaduct should be straight and almost tangential to the lower lines.
-
-
I'm looking for an alternative to Shapeways FUD. This is spurred on by the lack of print quality consistency, but also worries about the potential for crystallization of the model in years to come. I've had some really good prints in FUD of small parts like a smokebox handle and lever, but I've had large tank sides and bunkers that have needed hours of filling and sanding.
What I'm looking for is a printing process that produces smooth flat surfaces and fine details similar to injection molded polystyrene kits. One problem I've encountered is that some require thick walls and I've got used to the thin walls that FUD can produce. So far I think the best I've found is printed on the Form 2 machine using there Standard Resin. Are there any other options I ought to consider?
-
I've also been working on Templot. This is the track plan.

On the left are road bridges over the 3 double track lines which are all in cuttings. The lower line crosses the other lines on a bridge and forms the backscene. Viewing will be from the left. Viewers will be asked to lean on the bridge and look over the edge to watch the trains. There will not be a black curtain, but instead 5 tons of stone, brick and mortar of the parapet. The tracks to the hidden fiddle yard will turn under the parapet.
-
 4
4
-
-
I've been working on the baseboards by reusing some from an abandoned project. As it turns out, by remodelling the old baseboards I've solved the problem that caused the project to be abandoned.

-
Be carefull.
I checked mine as the FUD E2's have become cheaper (other loco's seem the same)
I checked the print orientation, literally just looked at it and it wiped out my mark-up.
I had to scrabble and set it back quickly.
I've had a look at a sample of 4 of my models -
a) Open wagon body with underframe in situ, printed 'right way up' - 16% cheaper
b) Tank loco body, printed 'right way up' - 37% more expensive
c) Carriage body without roof or floor, printed 'right way up' - 67% cheaper
d) Van body without roof or floor, printed on it's side - 37% cheaper
How do you see / change the orientation in FUD. I can only see the WSF orientation setting.
-
So I've been on the Shapeways site this morning and the FUD prices haven't changed.
-
Is the new cost printed bath tub or upright or as viewed?For an example:
https://www.shapeways.com/product/A4ZLVB9JG/plan-t1-t3-1-160
From:$88.35
To: $70.27
note: that's excl VAT and Markup
-
Well for some unknown reason I've decided to put Penrhos on hold and build a cameo layout. Blackbrook Rd is a typical non-station train spotting location looking over a road bridge to watch trains go by. Set in 1920, just like Penrhos, it features trains from several companies. The scenic width about 4’6” with a fiddle yard to one side and short engine and van fiddle yard on the other side. I haven’t finalized the depth yet but it will be bigger than most. Not only will the scenic area be framed by a proscenium arch, but there will be scenery in front for spotter to rest against.
-
7
-
-
In case you wonder about my previous post:
https://www.shapeways.com/forum/t/road-to-major-fud-improvements-starts-with-repricing.80212
The cost of FUD will drop for 70% of models. Well I've tried working out how much my latest model will be after the new pricing structure. It has 8 parts. It all appears to depend upon how much support is used. If it only uses a small amount of support the cost could be 60% of todays cost, but using a lot of support will lead to a price increase. So do I buy now or wait?
-
Update time, rather than edit my previous post.
I should have spent longer doing my research! It turns out that a C4 is my best option for a short
coach, so I've started on that. Whilst I'm cutting, I always keep checking to see if the offcuts can
be used elsewhere, on another diagram, to make sure that I make the best use of as much of the
donor as possible, [so far the only real wasted sections are the look-outs (duckets)].
I decided on an E17/18 (internal differences only) for my composite, and just to really stretch my
abilities, I'm going to do a F12 as well!
All the left-over bits will be used up to make as many C10 units as possible, as they were the most
common of these diagrams (over 300 built!)
Now I know why the price of these coaches has rocketed on eBay. Don't forget that C4 and E17/8 have arc roof for the clerestory. It makes a nice change. Looking forward to seeing them all
-
It appears that Shapeways haven't had any special offers recently? Or have I missed something?
-
. Both were drawn and cut on the Silhouette cutter so I can run off as many as I need/like and although its not clear on this picture the near complete one on the right is in the pre Drummond style with out side W irons and recessed end panels
That sounds like an offer to go into business!
-
The arriva Wales bubblecar needs an extra window in the brake area. I pointed this out when the project was first aired and was assured that it would appear, but it's missing from this sample.Hi all,
As some of you have spotted, we included a few of the Class 121 colour samples in today's newsletter. Here's the rest
 . We've identified a small number of amendments needed to a number of the vehicles however overall we're very happy with the quality of printing and detail on what is a highly detailed model.
As ever, click the images for larger versions. Full details and ordering options are available at https://www.hattons.co.uk/hattonsbubble
Cheers,
Dave
4D-009-HAT02 - Class 121 single car DMU 'Bubblecar' 121032 in Arriva Trains Wales livery
-
I've built a couple of panels using DCCconcepts Alpha kit. This was the first for my own layout - it will be used in full exhibition mode in six weeks time.
Not quite fully finished off, but fully functional
And the internals - including a SNX sniffer to power a completely independent accessory bus (very suitable for DC/analog track but wanting a DCC accessory system)
The SNX could easily be removed and the encoder boards plugged directly into a NCE system.
There are only four soldered joints - two power supply wires in, two DCC accessory bus out.
It took 15 minutes to commission the panel with a previously tested points system via Lenz handset. I had a couple of points that went the wrong way - easily cured by swapping two plugs over on the Switch-D panels.
Here's another panel I've built using Alpha components. There are only two soldered joints, but that was only a minor "bodge" to piggyback the power supply to the Switch-D panels from the NCE system that it is connected to.
Cheers,
Mick
That looks brilliant Mick. I've spent ages reading through the DCCConcepts website but I can't work out what each board is doing and if Alpha can work with servos?
-
Nigel, the prototype frames were narrower behind the rear driving wheels so that the radial truck could swing around tight curves. Given that most layouts have even tighter curves than real life don't you need to do the same?
PS. I wish I was as brave as you getting a loco etched. I think I'm be brave drawing a 3D loco for printing.
-
Then there was a class 67 pushing a kettle down the ECML at 100mph
-
Tomorrow I am heading to South Wales to work on 247's New HQ Nadine will be home to get the phone
Where abouts in South Wales?
-
Post deleted
-
If they had steel solebars they would have lasted a long time, probably into BR days . Wooden solebars and they would have been short lived. The GWR didn't like wooden solebars.
-
Rivet transfers applied in areas that required detail but also in some areas to 'touch up' details that has been accidently removed when filing or cutting, the transfers are in black. Wow they are more time consuming and can at times be much more of a fiddle to apply.....
Worth it though.
Are they Archers? If so which packet? UK sourced?
-
The TowerPro SG92R 9g digital servo with carbon fibre gears is typically a similar price to the very popular analogue SG90 so cost is not an issue with going digital. Digital servos have signal processing so a single spike will not send them off wildly - they will just ignore it. Most voltage induced spikes will just be a single pulse.
I am sure that most people will not notice the difference, it is only when you have a lot of electrical noise or need to track a fast moving small change (like signal bounce) that you will notice the difference.
Where?
I can get SG90 for £1 each. SG92r are £3.88 to £17.47 each
-
To get a Kadee coupling on a Bachmann Mk1 coach, it is best to use two 1mm thick cardboard pieces and to mount a #5 on it. The height matches up perfectly then.
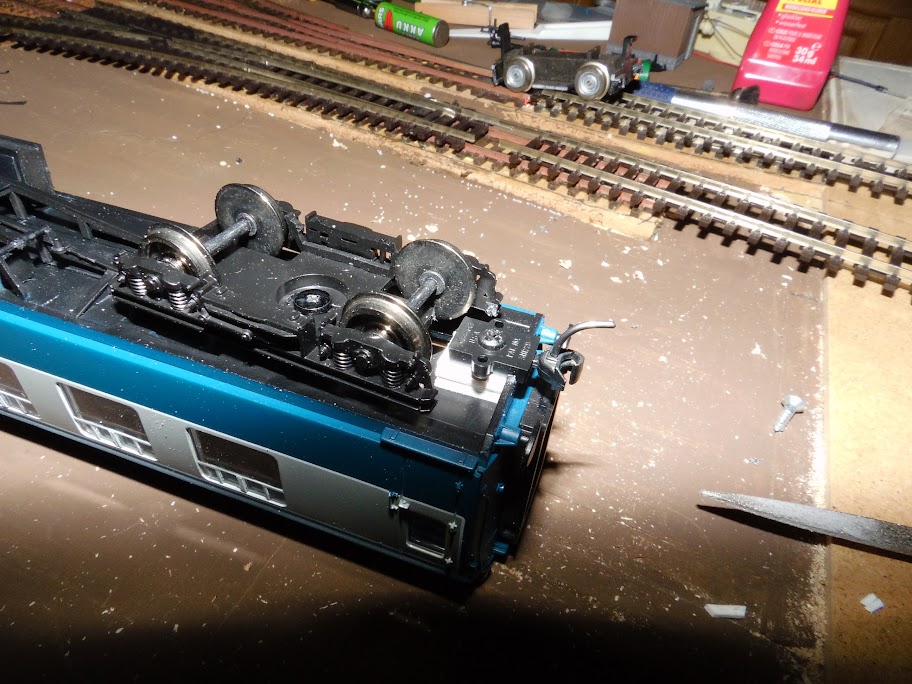
White in this instance, but black is preferred by me. Picture courtesy by my friend McRuss who is on here too.
What's your minimum radius? With your couplings fixed to the body don't they restrict you around curves?
-
so 93 pages in, how is this track going down with folk here? who has put their hand in their pockets and shelled out and are you glad you did?
it would be great to see FB track on concrete at some point.
Well I've tried, but I've been to several shows and the local model shop and not been able to buy any. So who's got some to sell? I initially only want a couple of lengths so I don't want to fork out a lot on postage.


Blackbrook Rd
in Creating Cameo Layouts - The Challenge
Posted
Where is the green envious emoji??