


M Graff
-
Posts
1,001 -
Joined
-
Last visited
Content Type
Profiles
Forums
Blogs
Gallery
Events
Exhibition Layout Details
Store
Posts posted by M Graff
-
-

Abandoned track #2
Acrylic on canvas 50 x 70 cm.-
 5
5
-
-


My latest paintings, one watercolour and one acrylic. The acrylic is in progress.
-
8
-
 1
1
-
-
I had an answer back from Roco in this and it is that the POM option only works for Zimo chips and that for all others you need to use the manual option to read/write CVs on main

I do have a Zimo chipped loco and I find that the POM option allows you to set a custom speed curve very easily - even more easily than DecoderPro and that is pretty easy

So, they made the POM proprietary after all.....
ZIMO is Roco after all as they use ZIMO decoders.
-
1
-
-
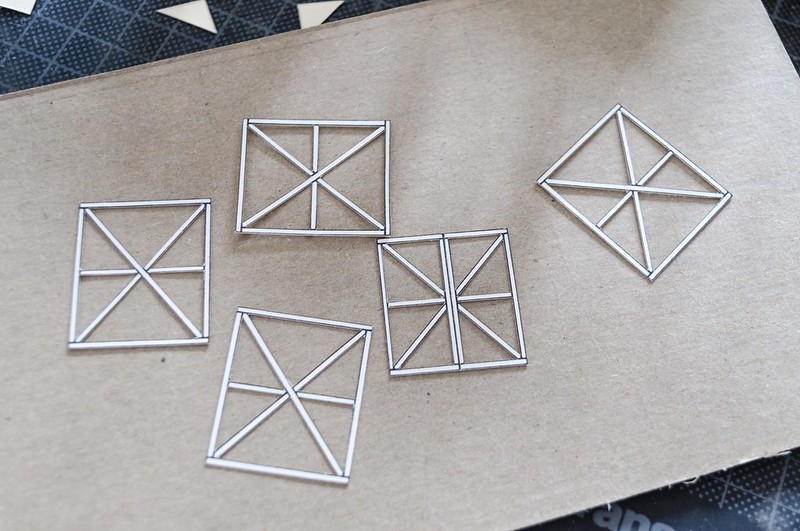
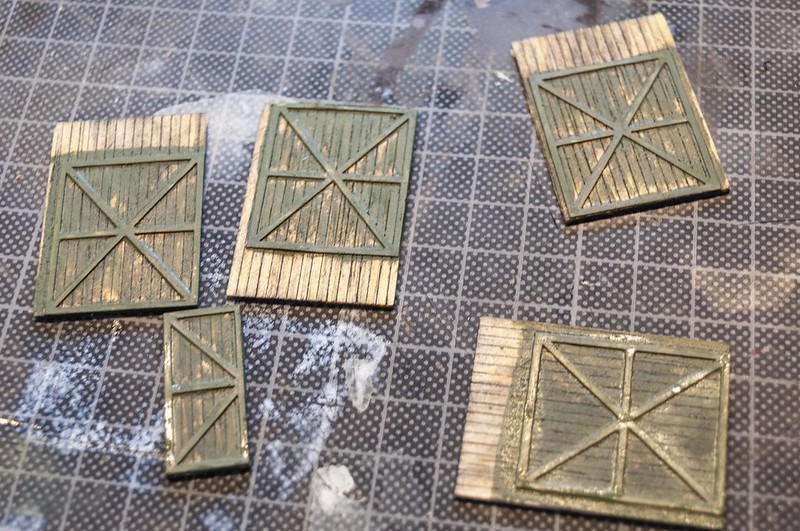
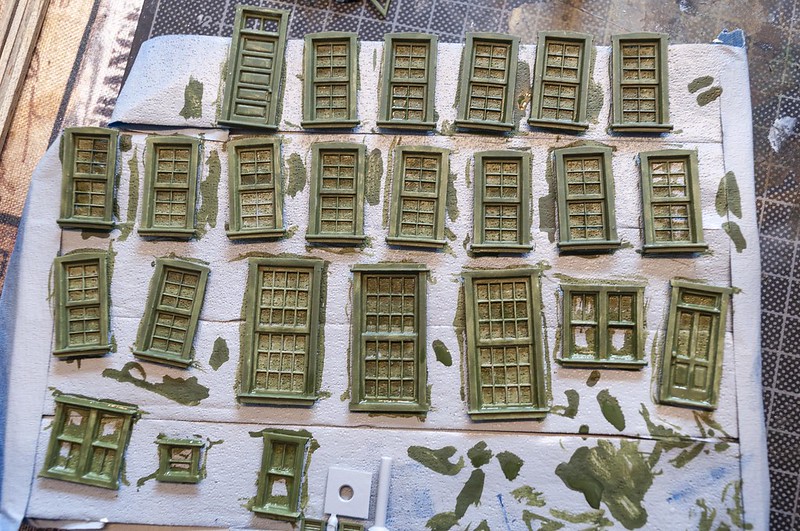
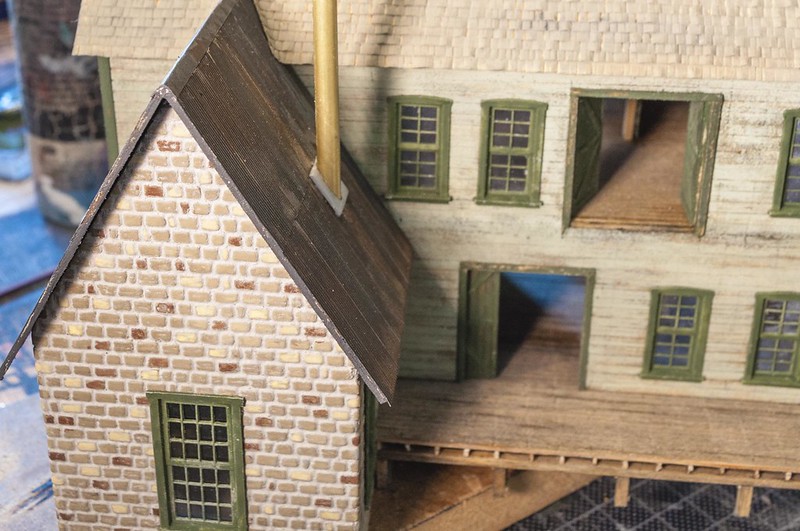
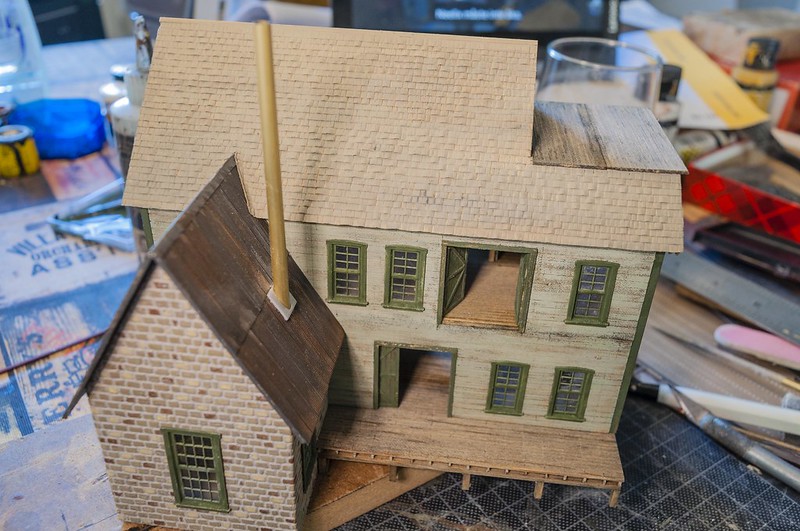
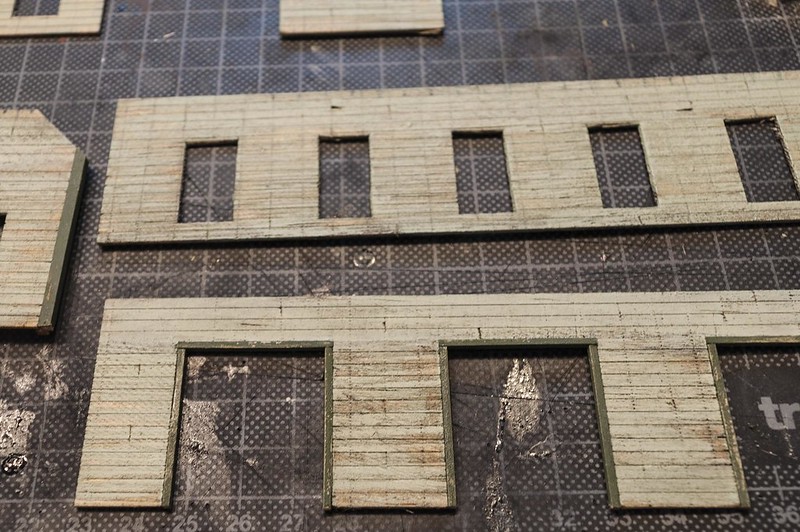
Some more construction pics of the brewery.
The door frames cut out from cardboard:
The painted doors:
Primed windows:

Painted windows with green acrylics:
Real glass cut to size with a diamond scribe:

The buildings foundation:
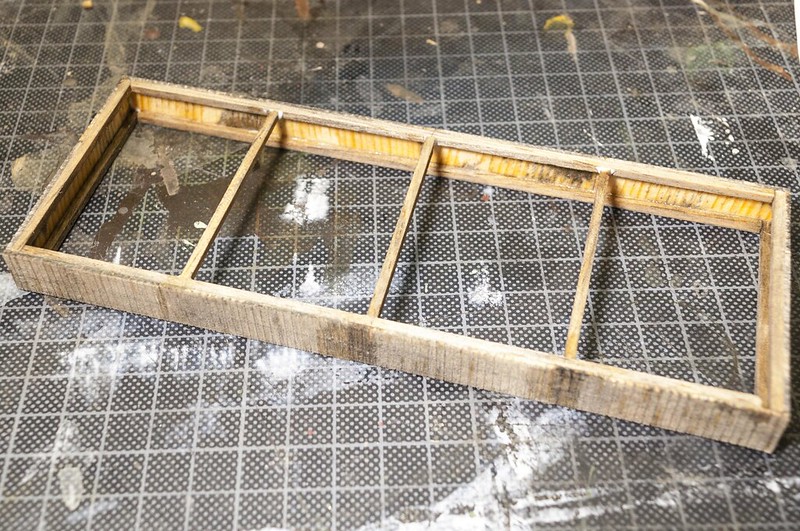
Loading docks:
The water tank:
The boiler house with the PVC stone sheet that is glued with contact cement:
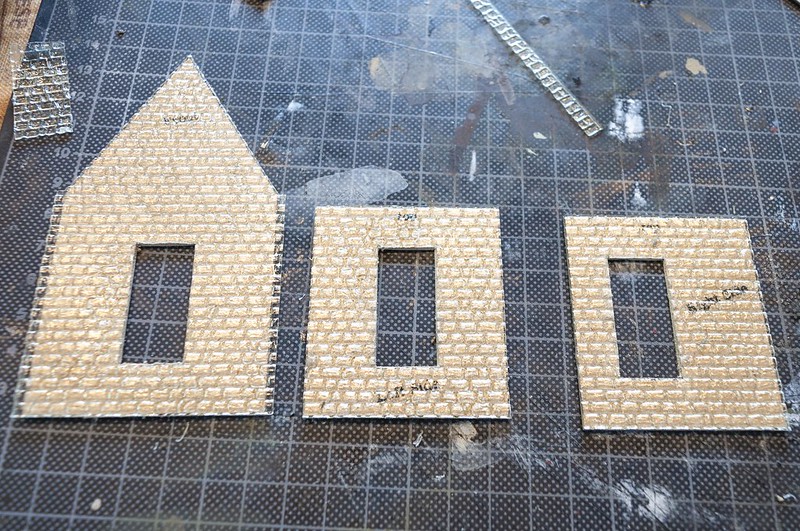
I used Tamiya putty on the corners:
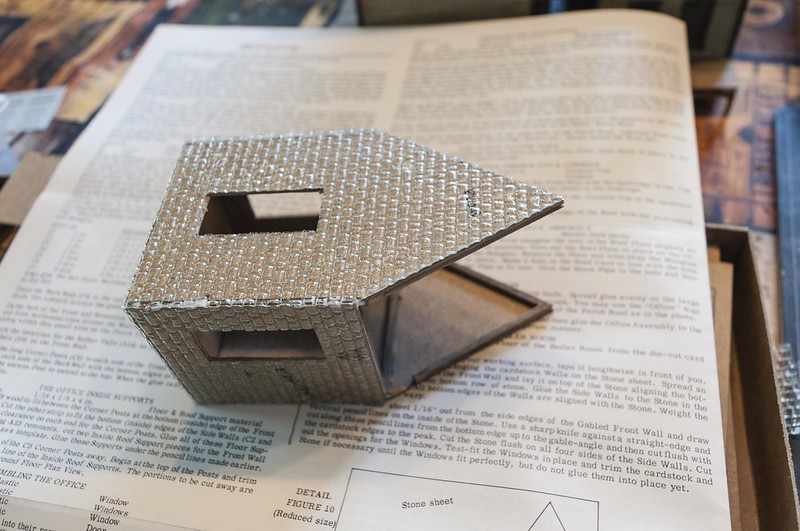
Painted:
Roof with cardboard frames to make it removable:
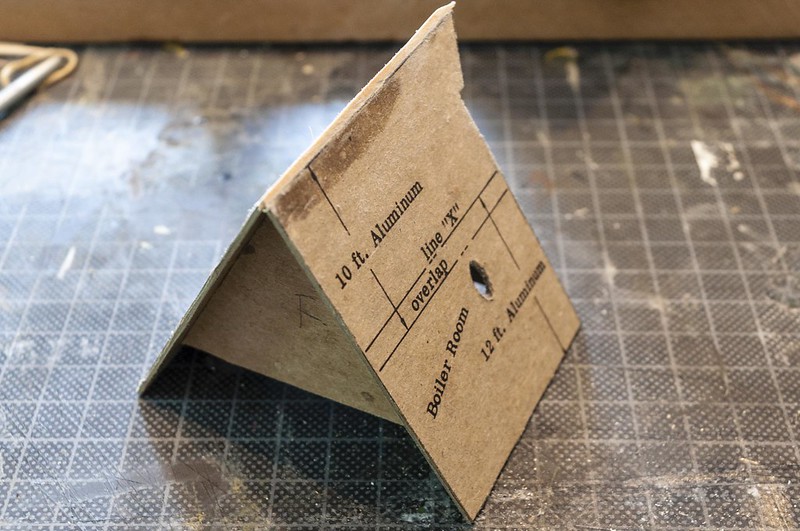
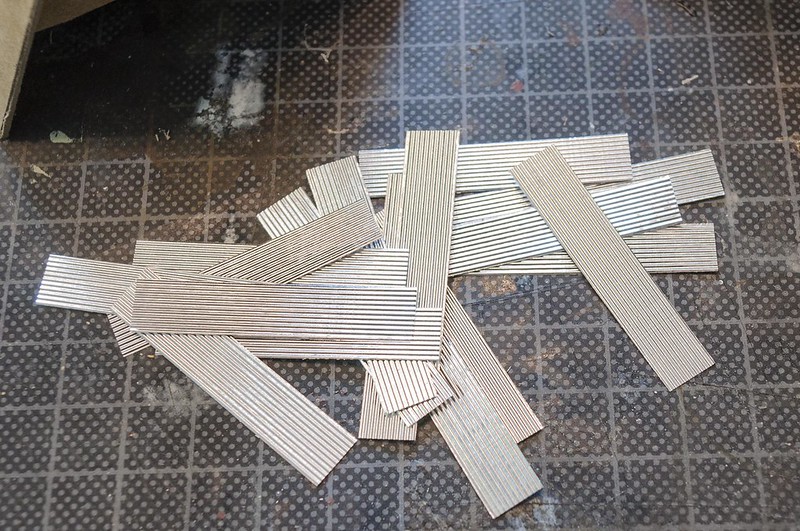
Corrugated sheet cut to size:
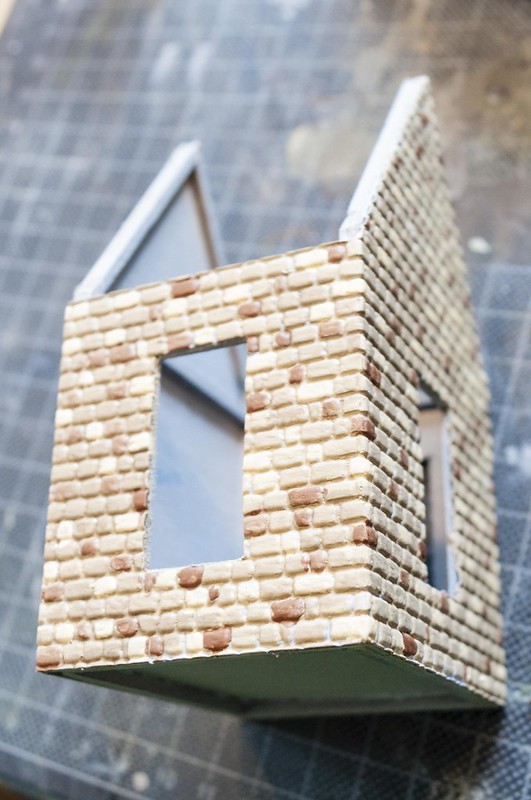
Mortar made with pulverized clay mixed with PVA and water and then wiped away from the top of the stones:
Getting there:
-
3
-
-
Thanks, the stain is India ink with a bit of burnt sienna ink. Mixed with alcohol.
-
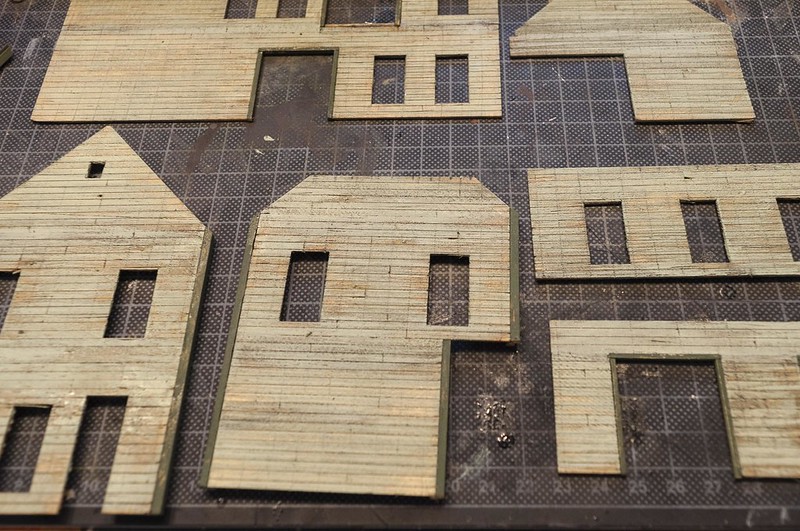
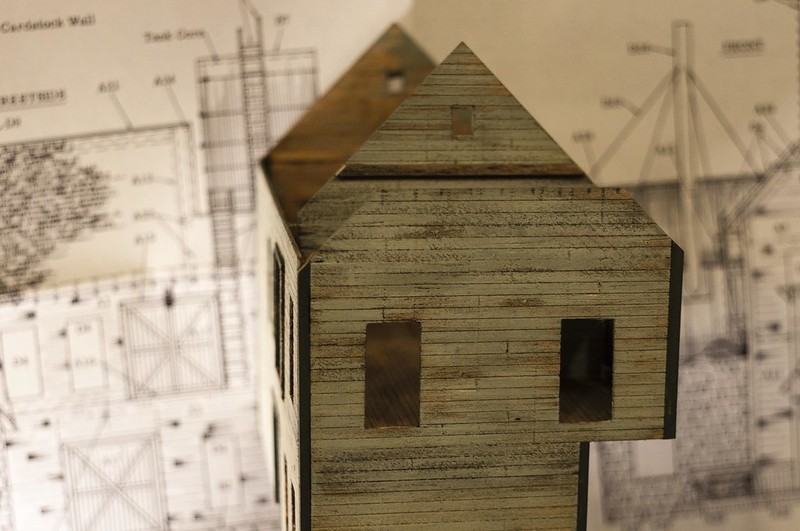
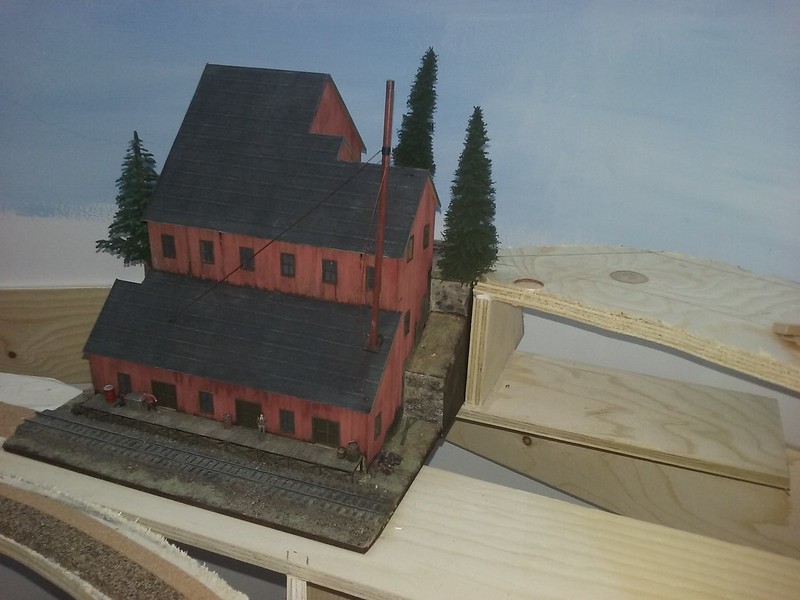
There has been some progress on the brewery.
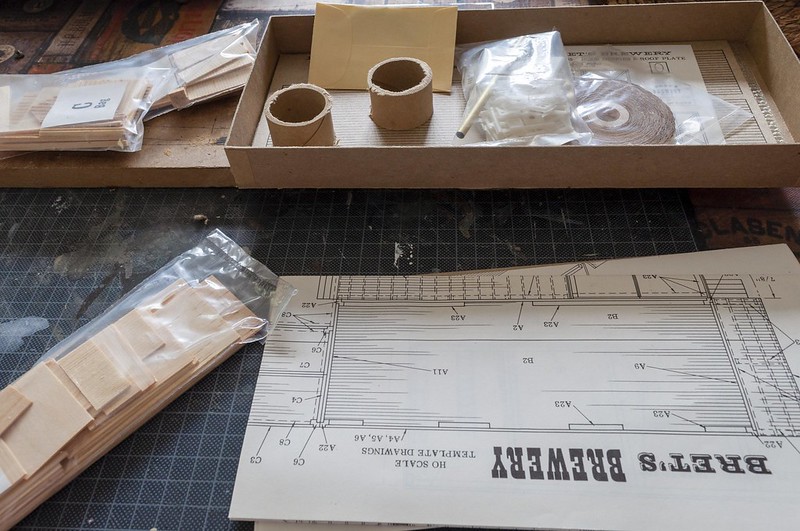
Content of the kit.
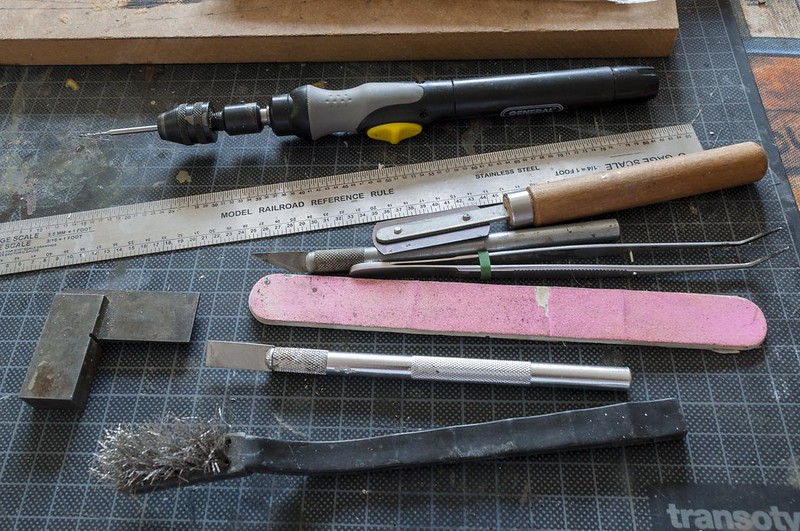
Some of the tools I use.
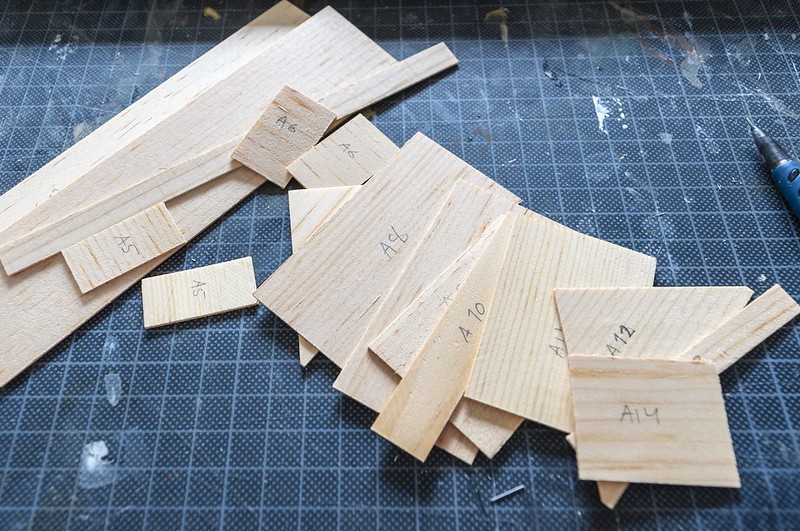
I started by measuring the parts and identifying them with the numbers from the manual.
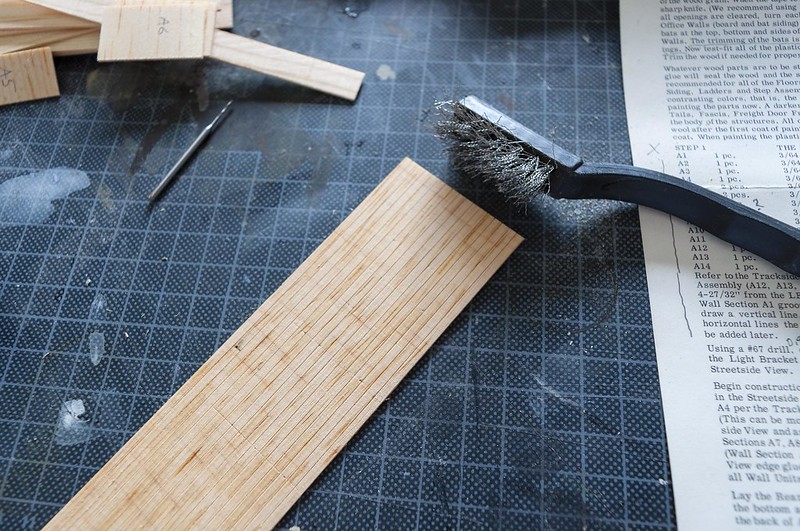
I add woodgrain with a wire brush.
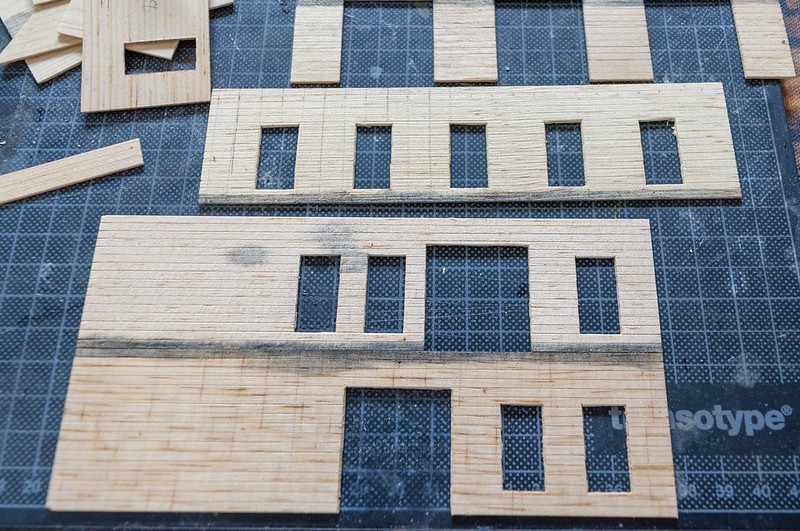
I cut out the windows with a xacto chisel blade, then I stained the areas which were to be glued together.
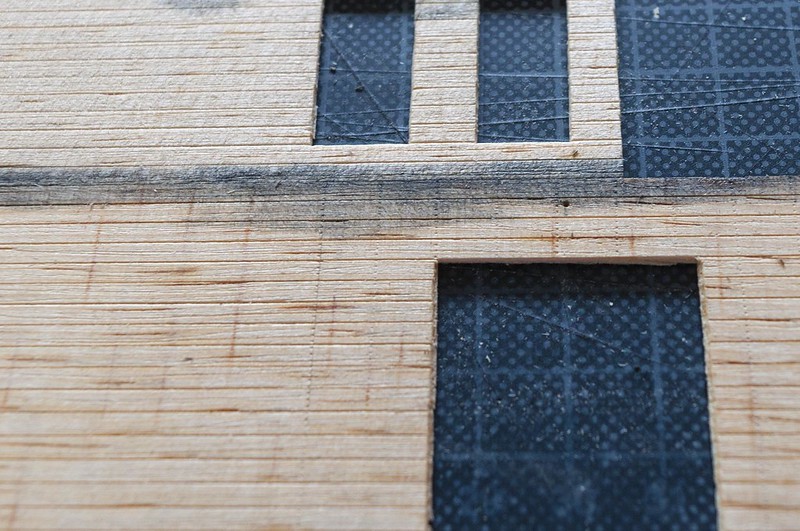
I add nail holes with a Trumpeter rivet wheel.
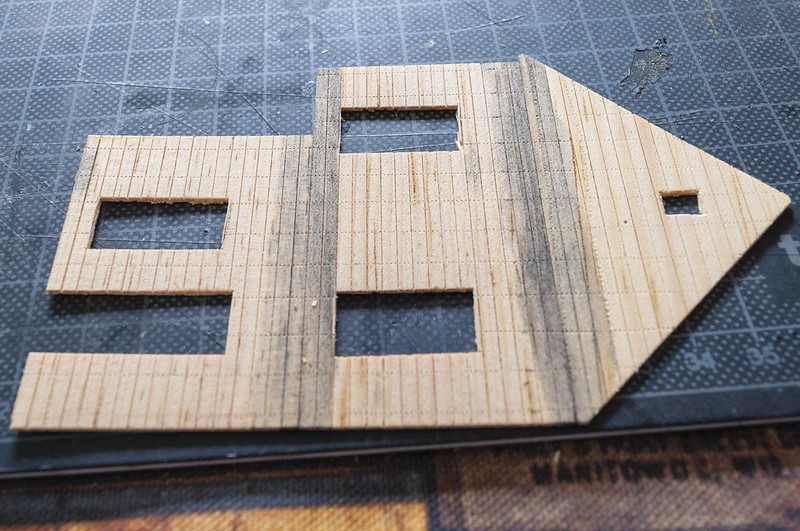
As you see, the wall lines up on the right side and the left is offset.

After staining the walls with india ink and alcohol, I paint the peeled off paint.
I use turps on a brush and while the surface is wet, I apply the acrylic paint which then pearls up in places to look like peeled off paint when dry.
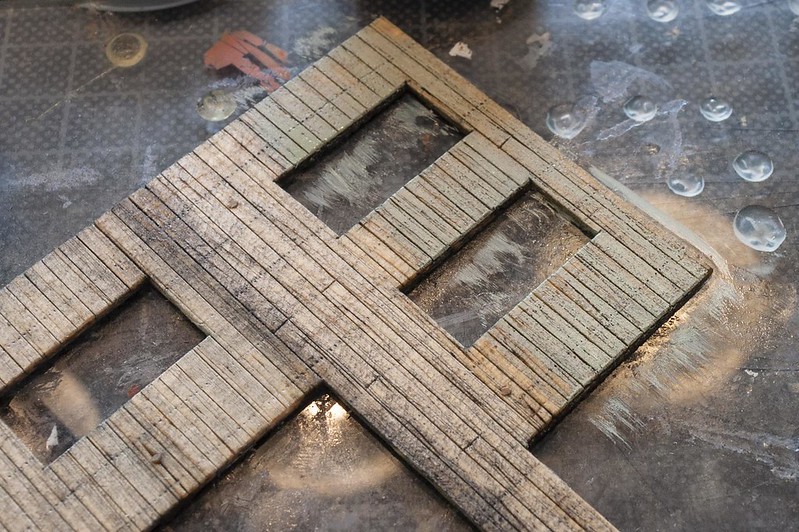
I used a light grey green paint.
Painted walls.
The trim was painted green.
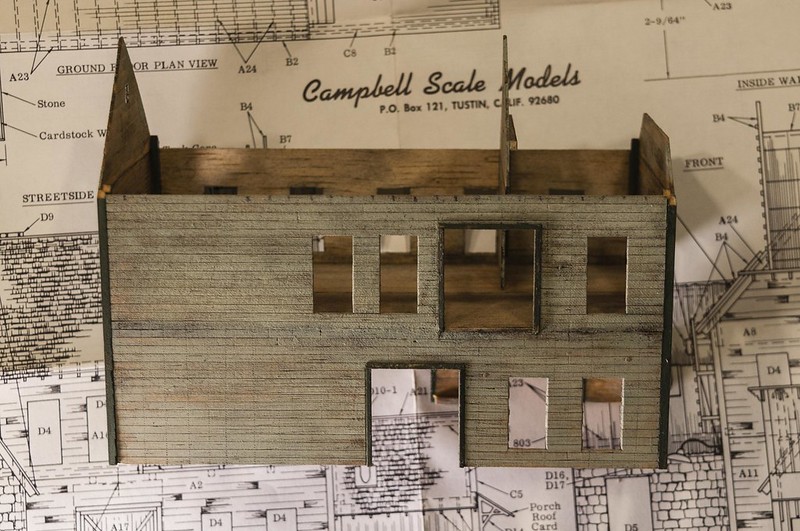
I glued the walls together.
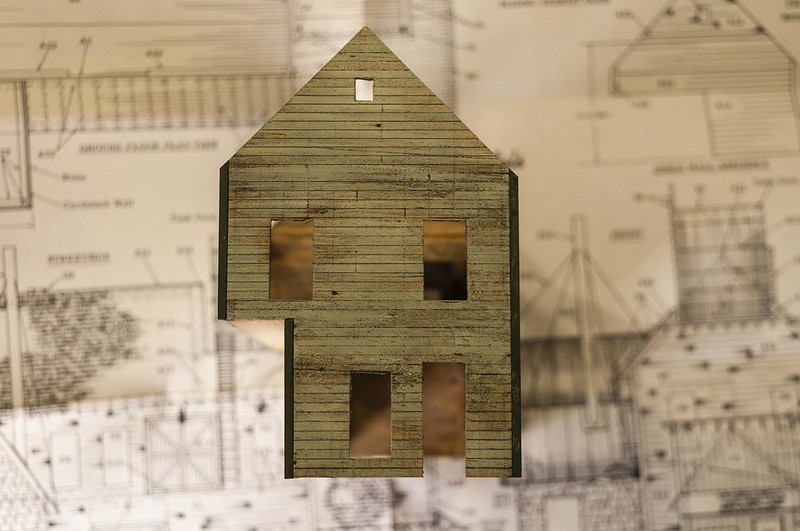
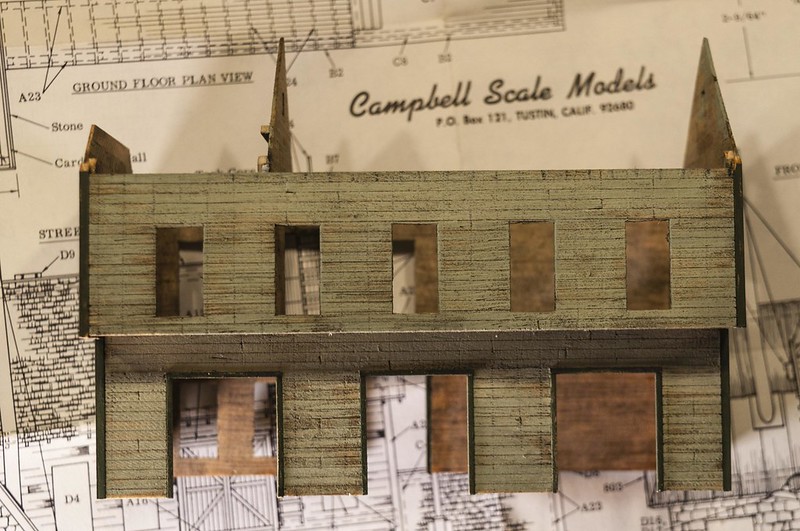
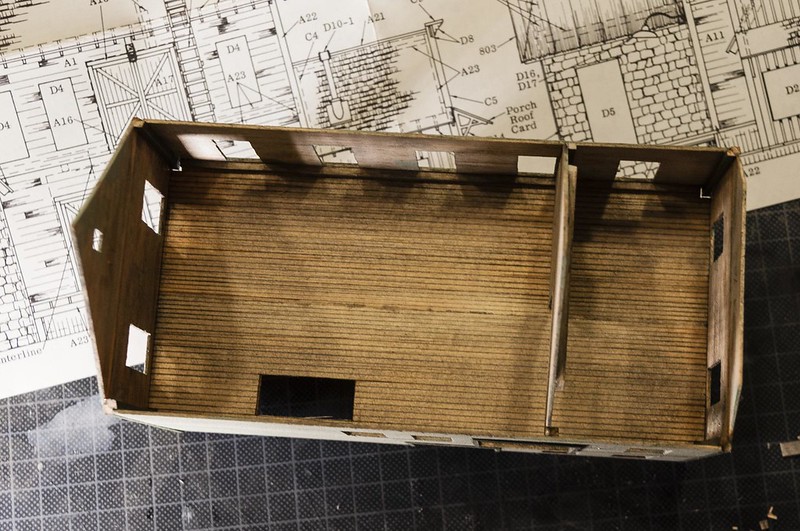
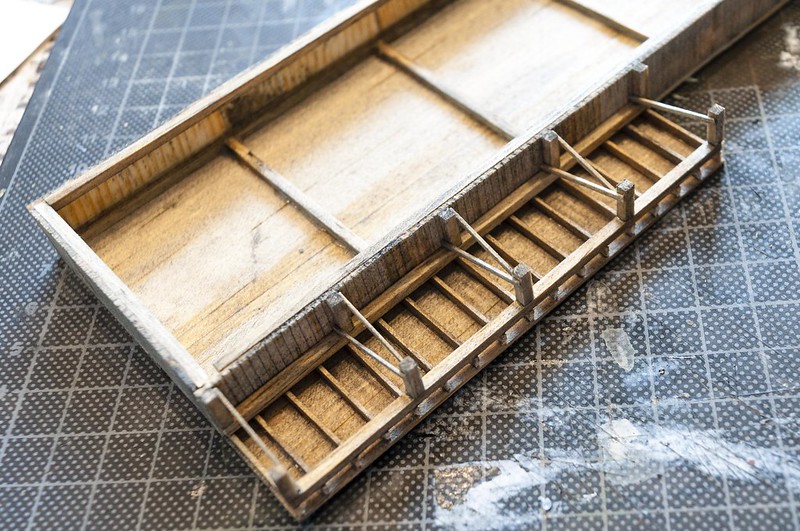
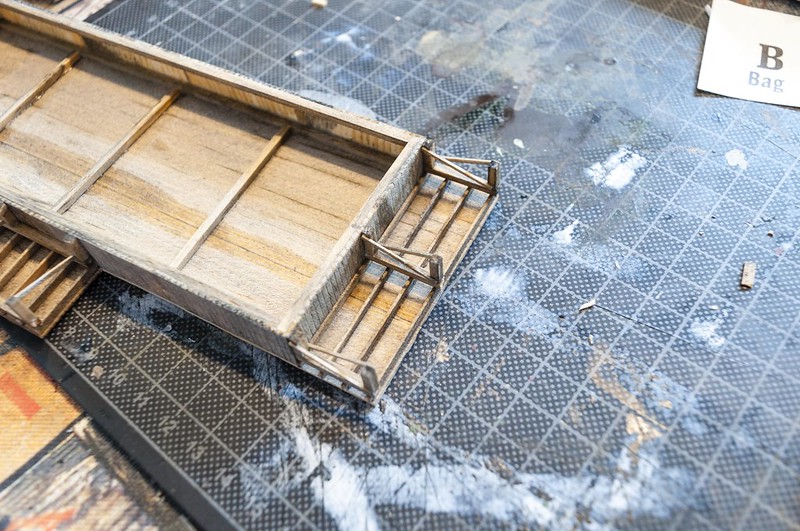
The floor is glued in place. I added a hole for the stairwell.
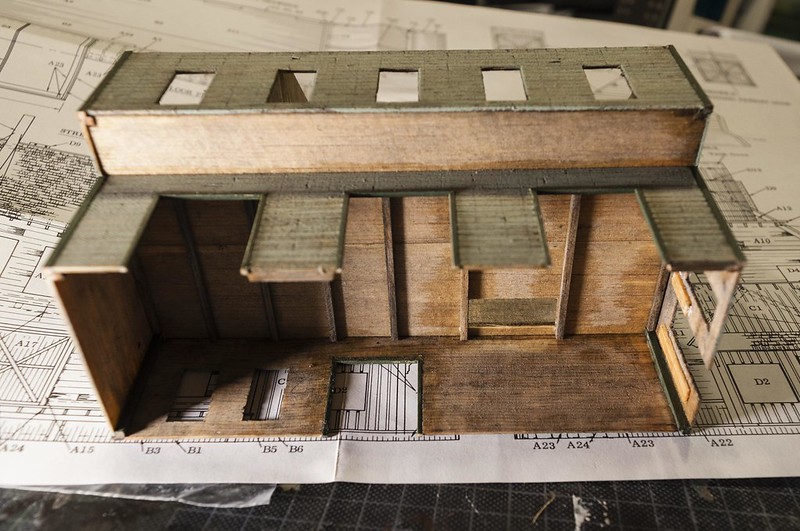
Support beams under the floor.
This is as far as I have gotten now.
-
4
-
-
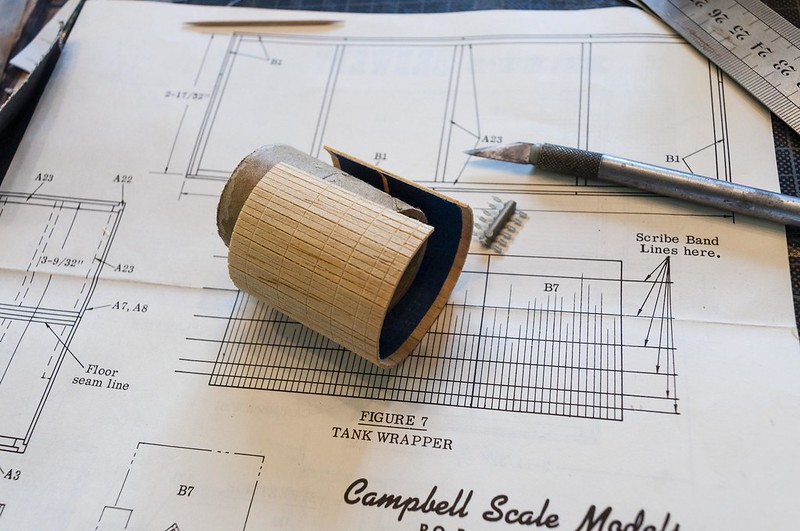
Latest project to be started.
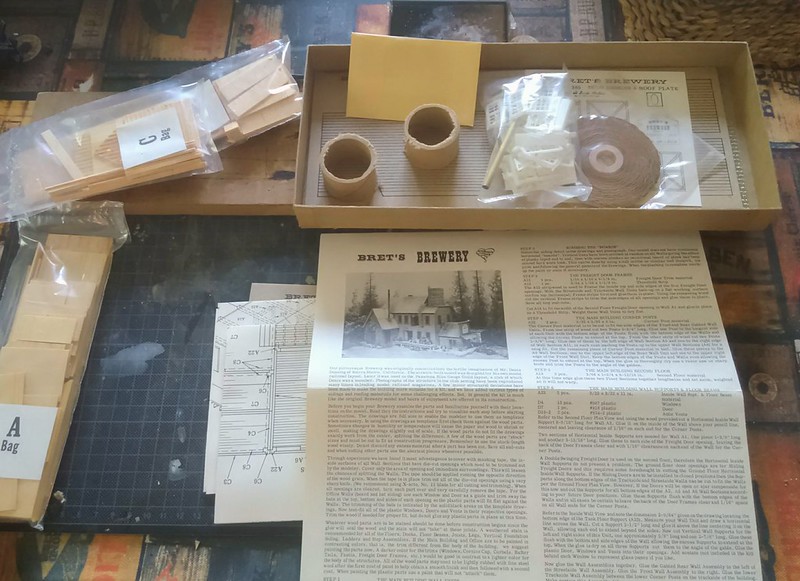
Bret's Brewery from Campbell.
This will be a nice addition to the layout.
-
Recent build.

Sorry, no construction images. My memory card did not want to find them....
Wood structure kit from Scale Structures limited.
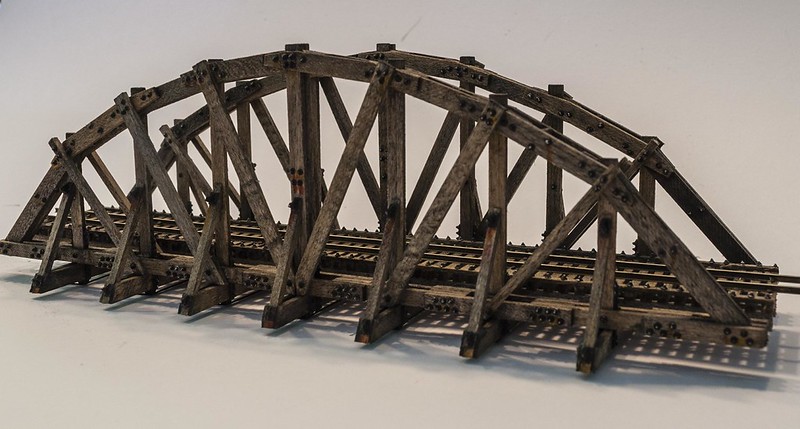
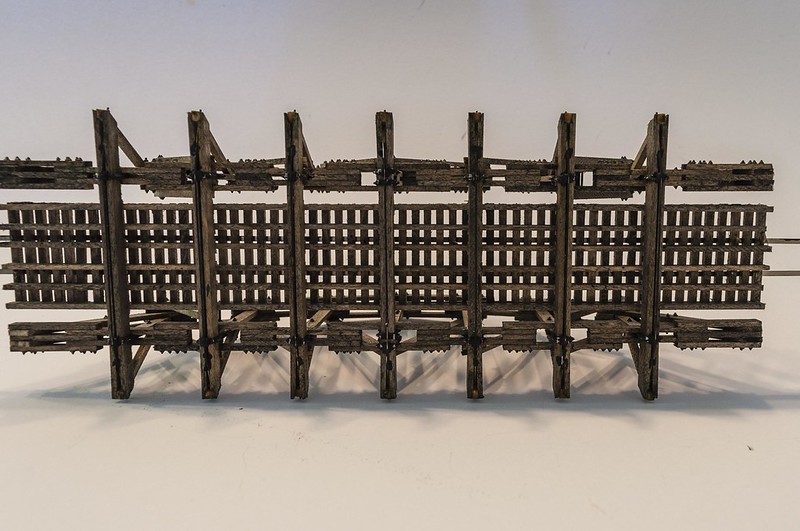
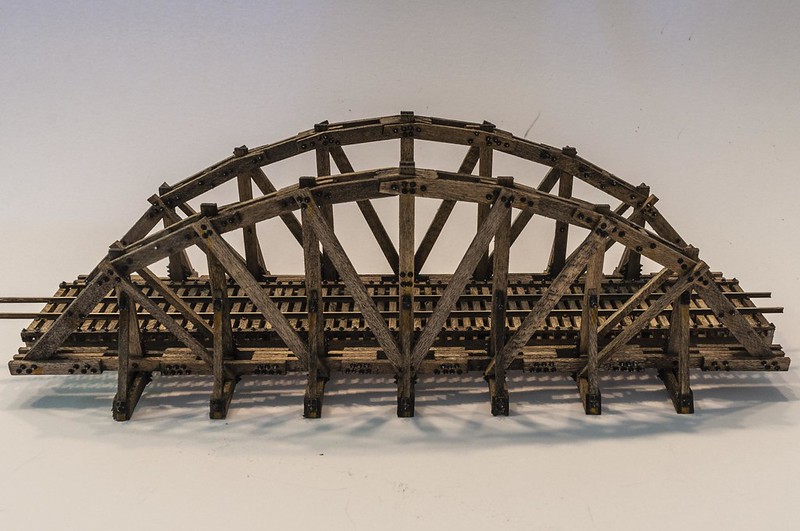
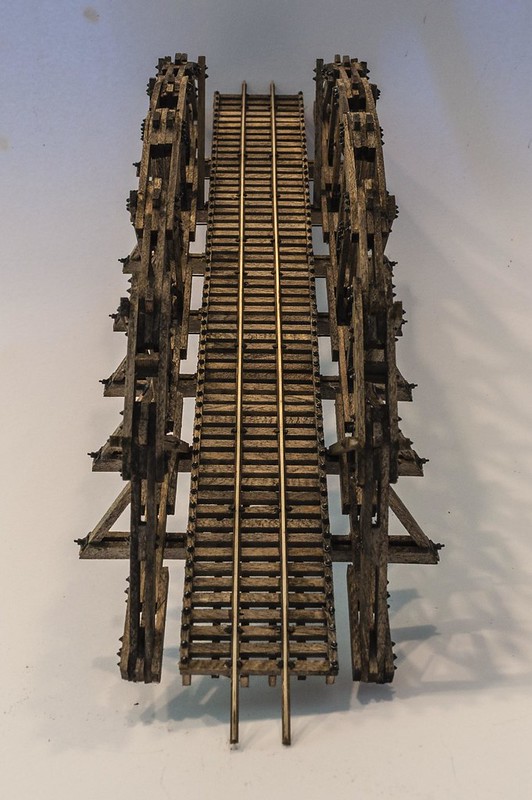
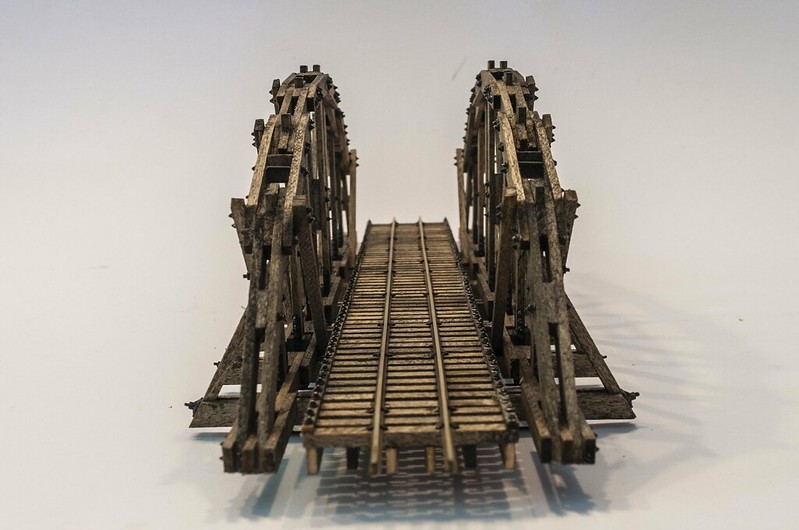
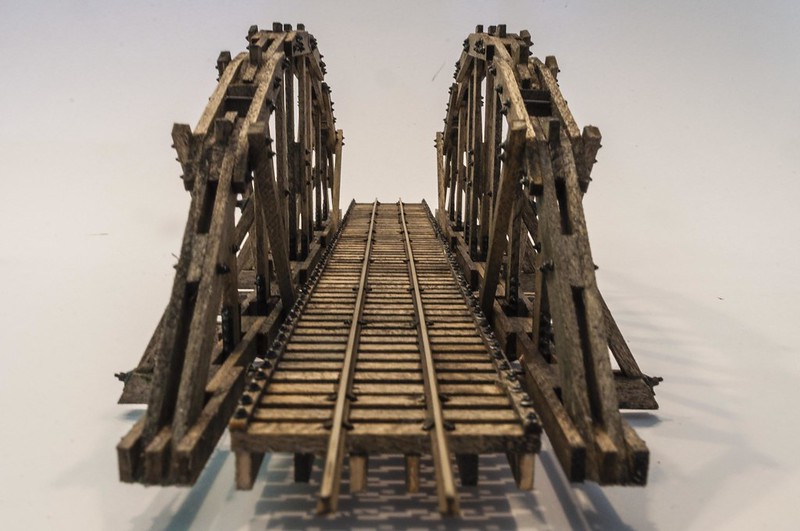
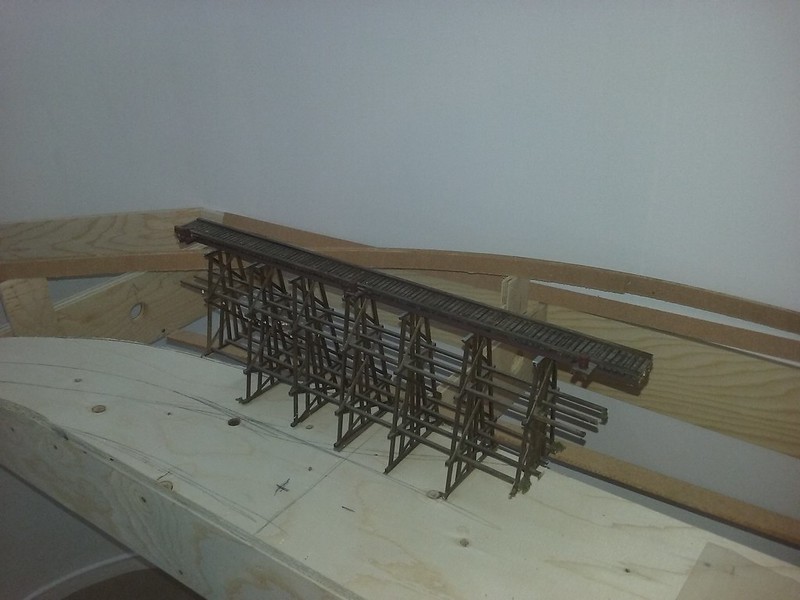
The Dinky Creek bridge in HOn3.
All rivets and fittings are in metal .... Painting all the metal parts and drilling holes for 600+ NBWs is a bit of therapy.

-
4
-
-
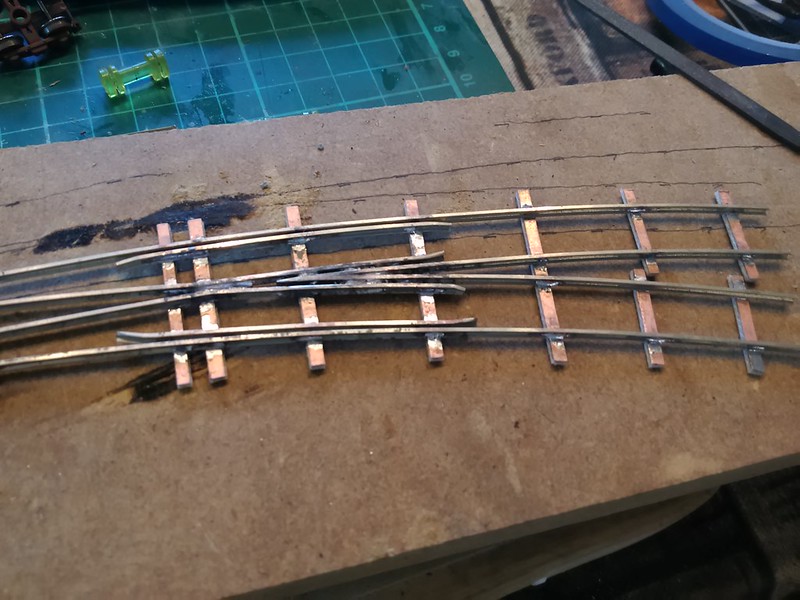
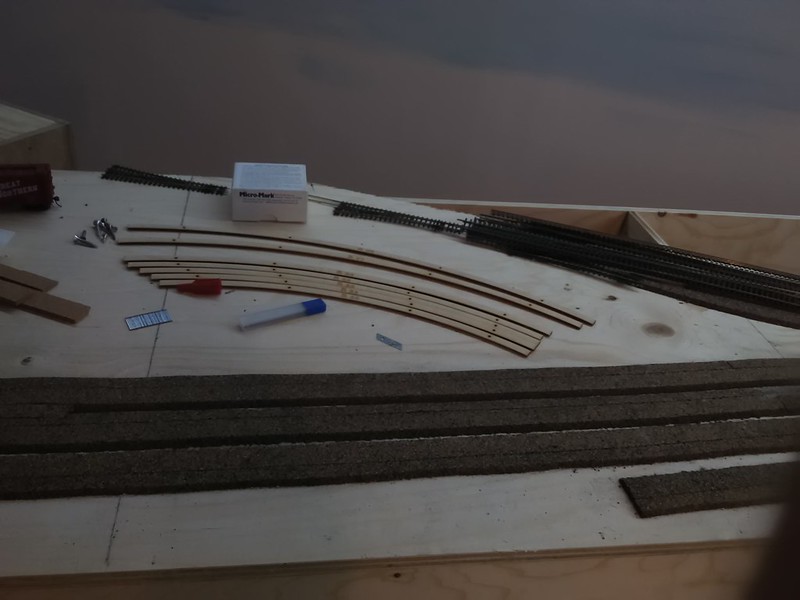
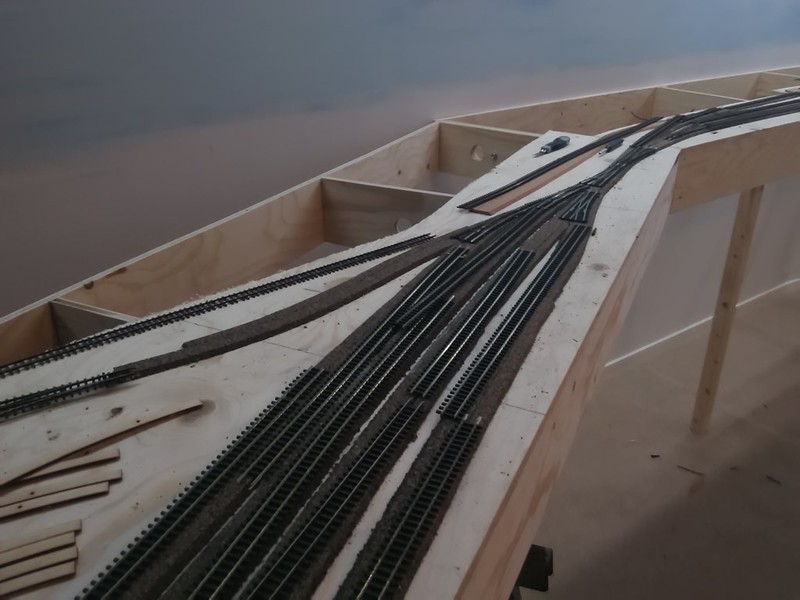
Built a # 6 left-hand turnout in HOn3 with 26" radius.
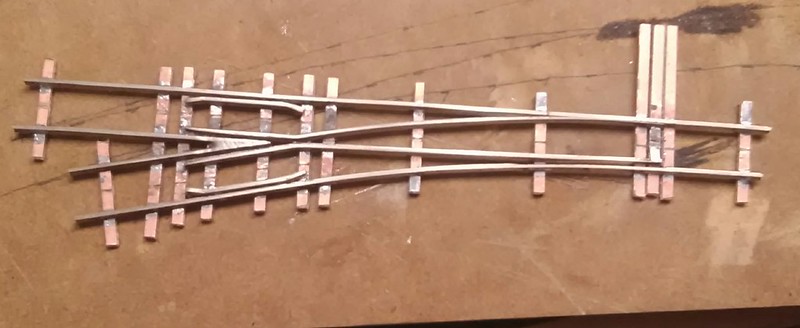
They are starting to go together easy now. This one took not more than an hour to make.
I use a drawn template to get the radius right. Otherwise it's just a matter of using the NMRA gauge and Railway Engineering roller gauges.
The frog area has a narrower gauge to make the rolling stock roll better through the frog.
I use the flangeway gauge to get it right.
-
3
-
-
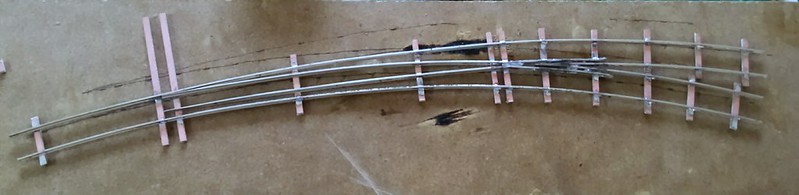
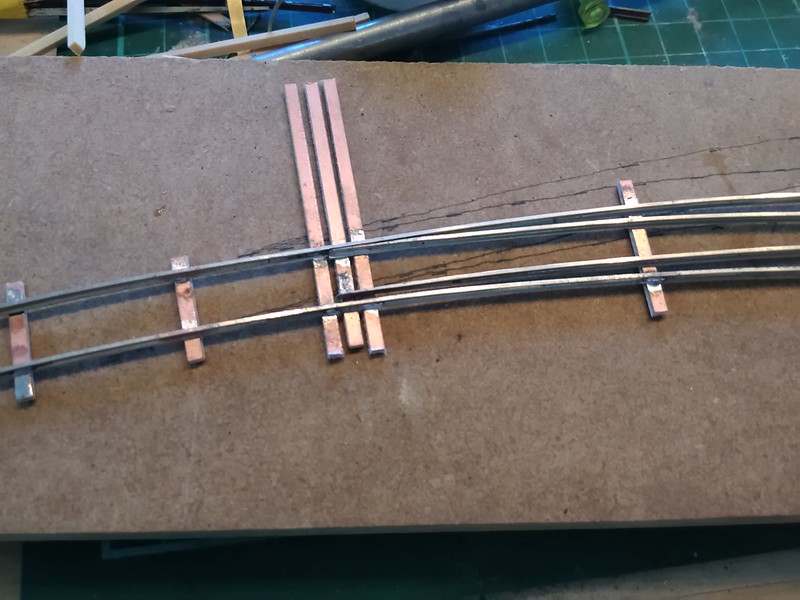
I built a curved turnout today.
HOn3 with Code 70 rails. 28" and 22" radiuses.
What's left to do is to make the cuts for the live frog and to clean the flangeways from solder.I build my turnouts to the narrow specs that Railway engineering promotes. I use their roller gauges and to check with the NMRA gauge, you use the flange end instead of the track end.
-
2
-
-
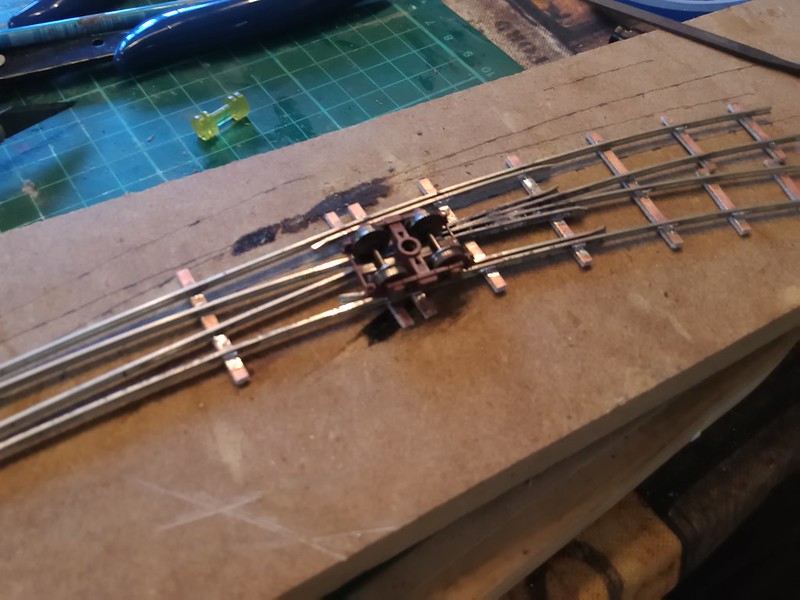
Made a bit more on my three-way stub turnout in HOn3. One drawbar is made, now it's two more to hold the track gauge to make as well. It's a little tricky to make them because the rails must be able to move individually. I soldered micro track spikes to hold the rails in place.
-
1
-
-
Hi, I use 60 cm as my minimum radius on the spline.Hello,
what is the minimum radius for your spline roadbed?
Markus
There's no problems at all to make it smaller.
-
I built a switch to fit my layout, a three-way stub switch in HOn3.
It is a #6 with 26" radius.
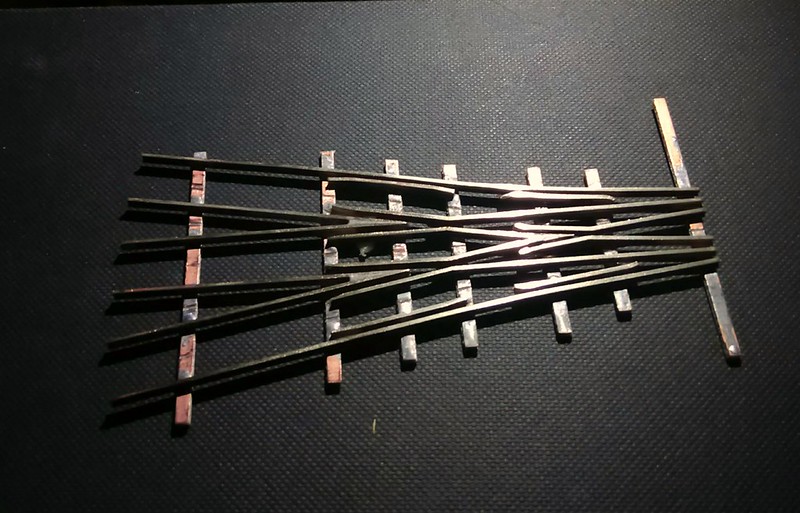
I will probably use a Tam Valley servo controller for it.
It's really fun to build these.
-
1
-
 1
1
-
-
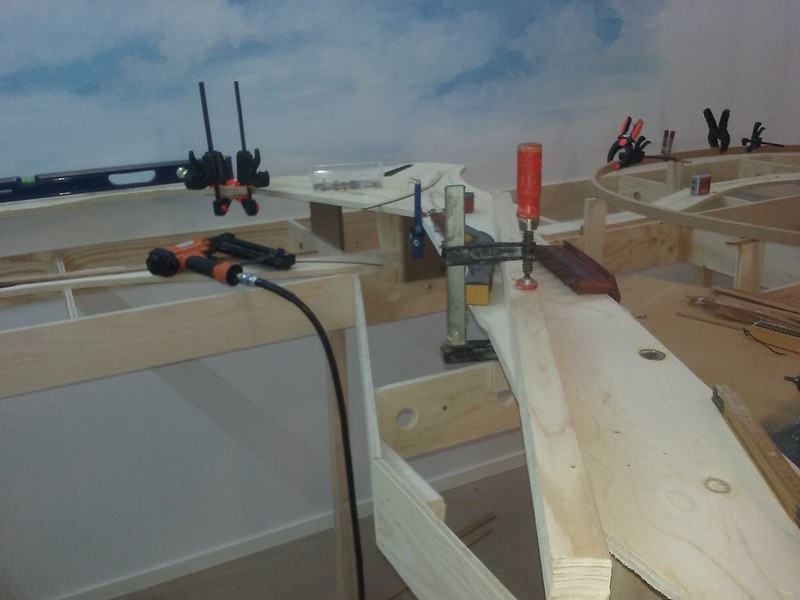
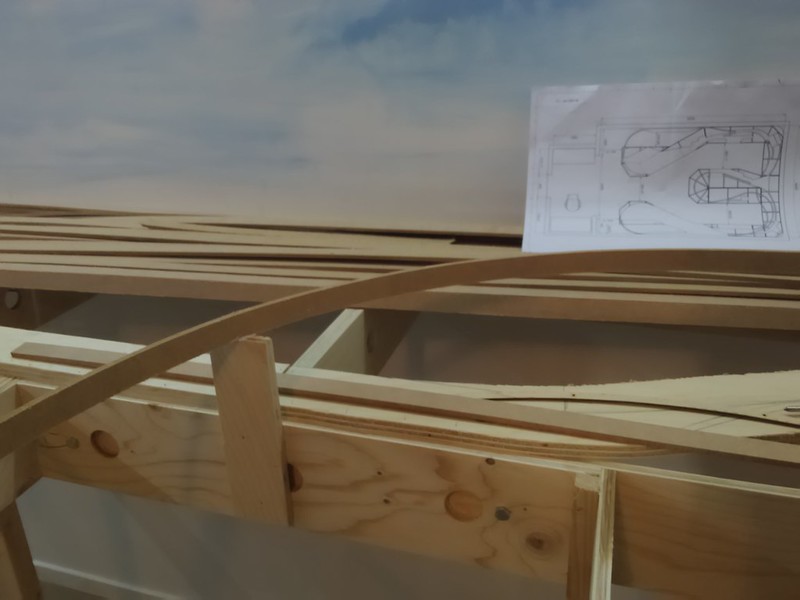
The Spline is turning out really good.
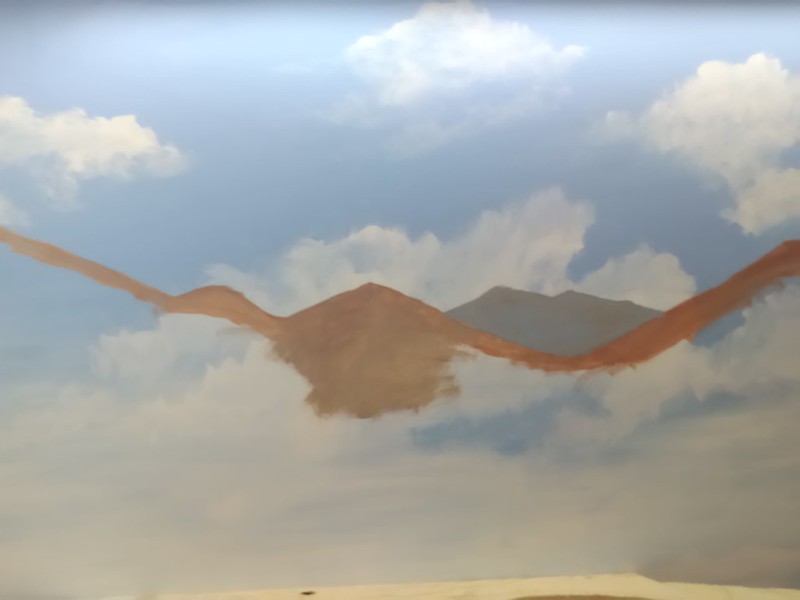
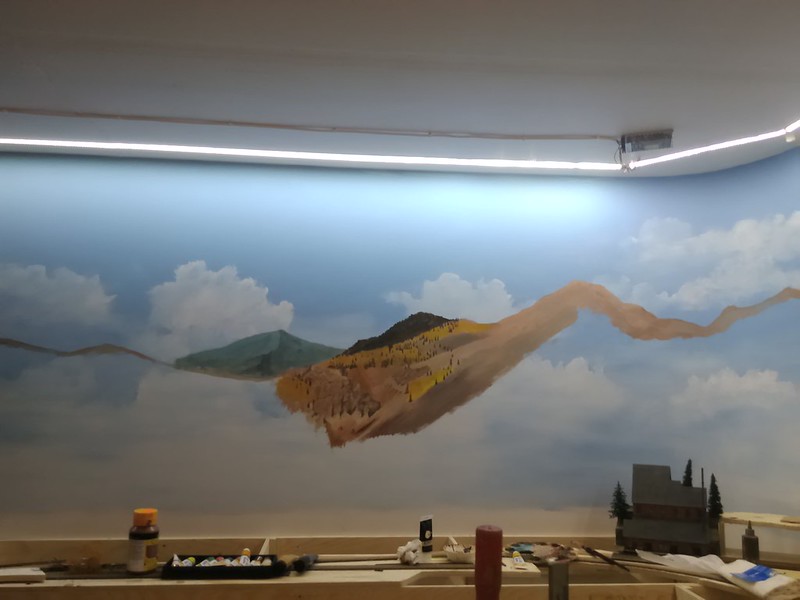
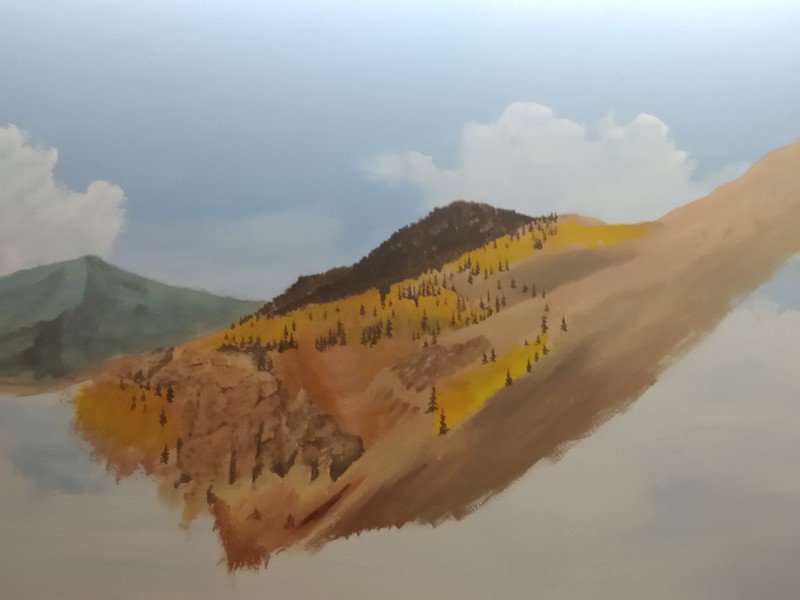
I've started the work on the landscape painting on the backdrop.
To make a representation of the Colorado rockies isn't as easy as it sounds....
You want them to be tall and imposing, and have the color variations of the real thing.
On top of that I have to find a level of detail that I'm satisfied with.
I use regular artist acrylics for it.
-
3
-
-
-
More progress. I've finished about 2/3s of the subroadbeds.
I had to check my inclines to keep them under 2%.
-
2
-
-
Some more progress today.
I've glued the cork. It's standard HO cork that I cut off a 6 mm (1/4") wide strip to make it fit HOn3 (16.5mm - 10.5mm = 6mm).
Now I have to order more cork .... I need about 40-50 yards.
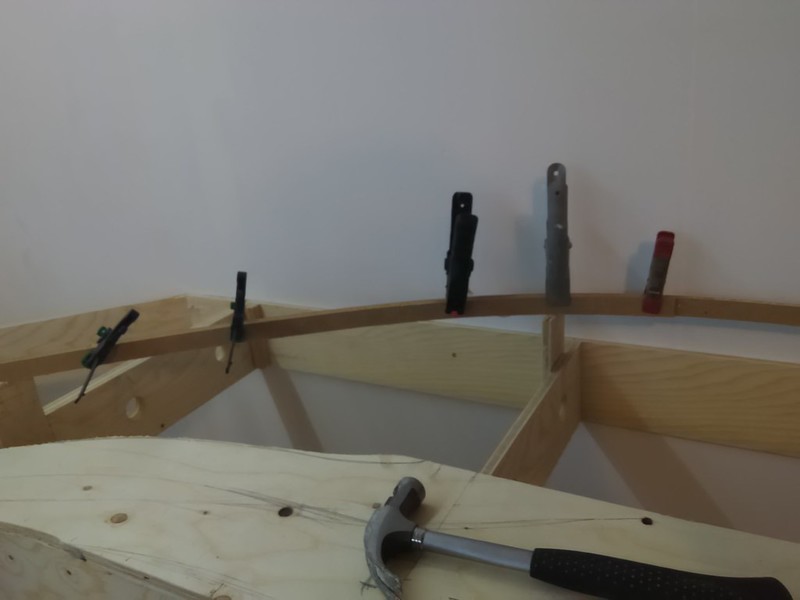
I've begun on the Spline roadbed.
I'm gluing it with "No more nails" from Pattex on cartridge (I guess it's like liquid nails?).
The splines are 6 mm (1/4") MDF, which is cut in 25 mm (1") wide strips.
There is a need for huge amount of clamps though. Have to find some more, I know I have some...
Time to make all the curved and Y-turnouts as well.


-
1
-
-
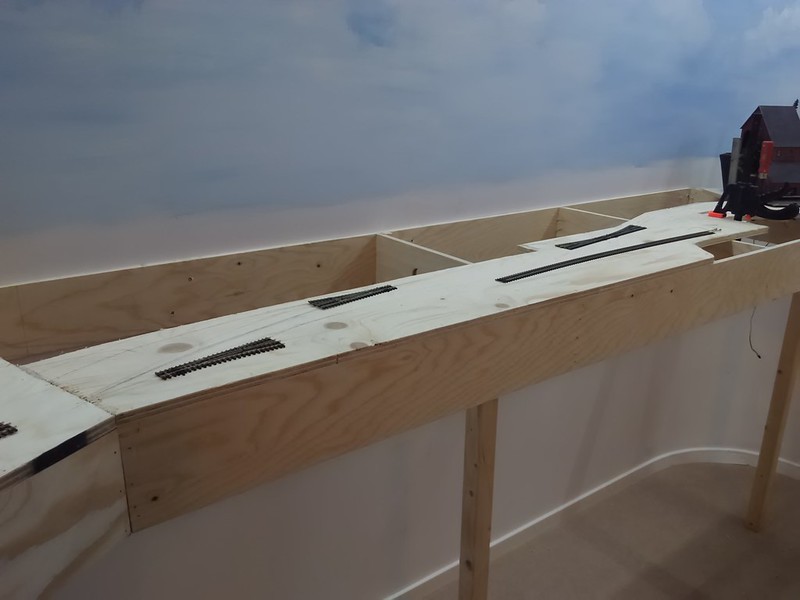
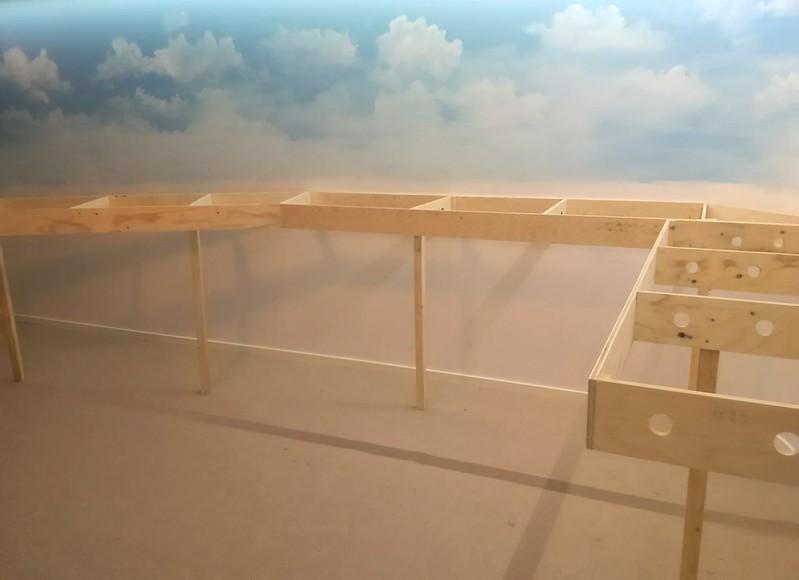
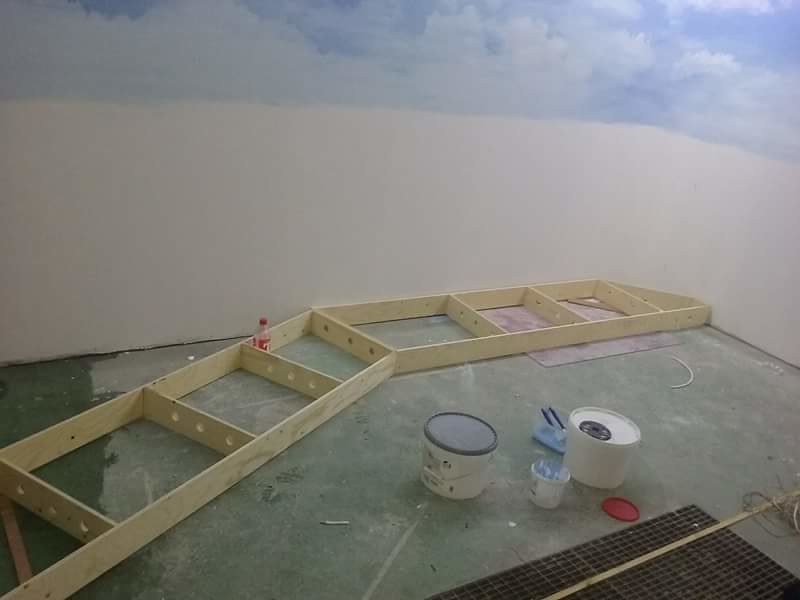
Some more progress on the layout.
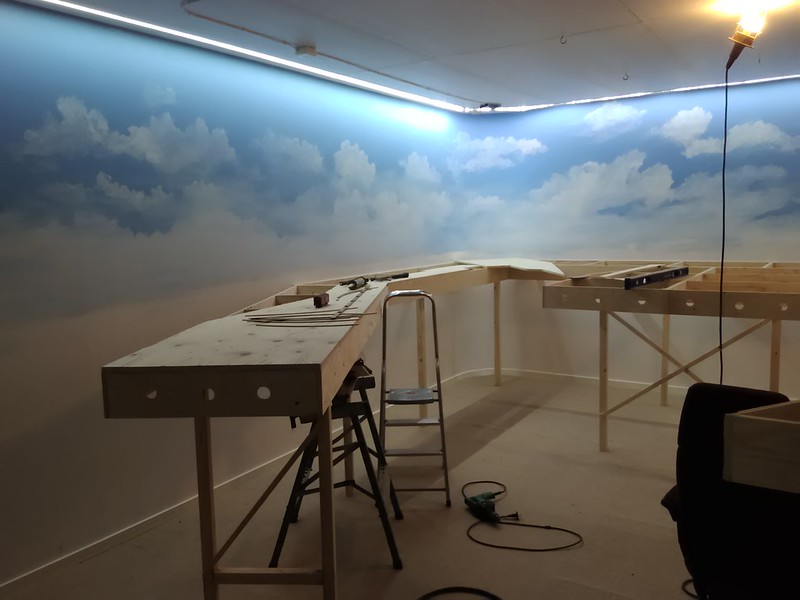
Almost 80% of the benchwork is ready. The ones left to do are the curve sections.
I've also added the first 5/8" plywood roadbed.
I will use plywood roadbed on the stations and yards. The inclines and upper tracks will be spline roadbed.
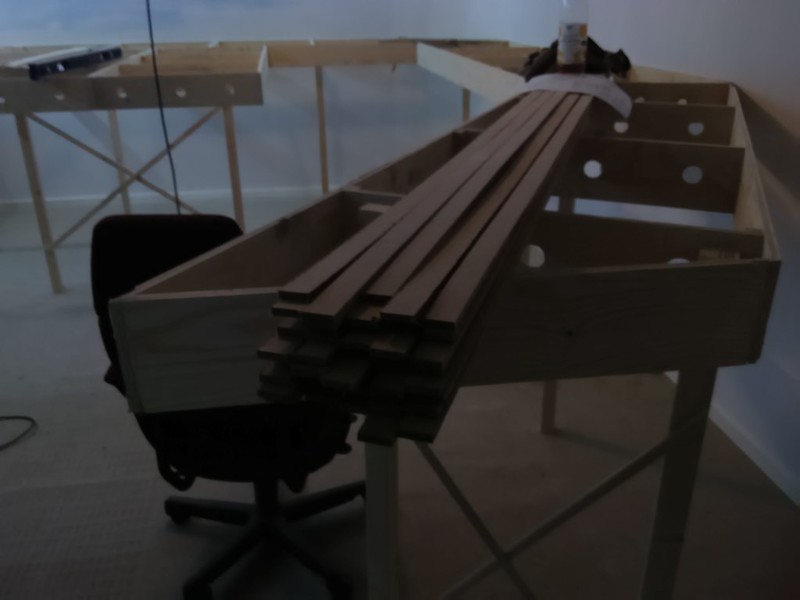
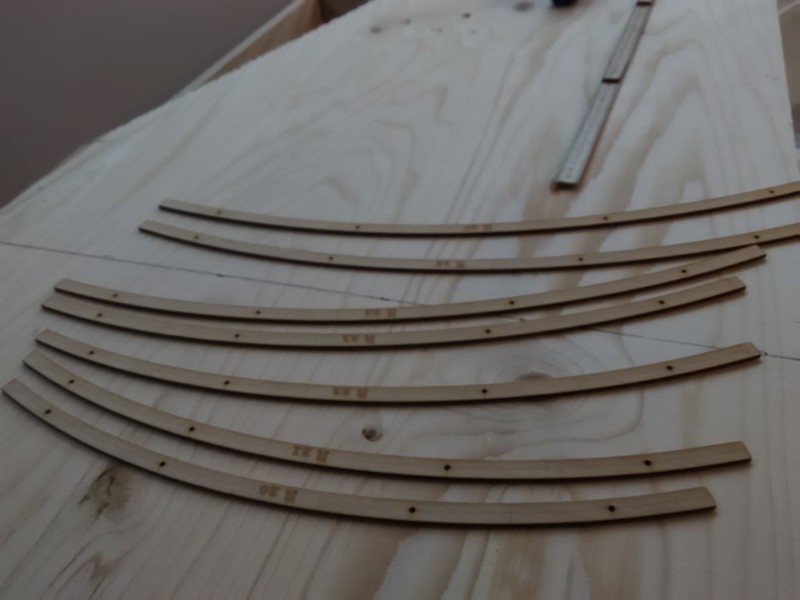
Spline raw material made from1/4" MDF that I sawed into 1" strips.
Tracks and turnouts. I laid out some Peco turnouts to make sure the roadbed will fit the plan.
Laser cut sweep sticks for HOn3. These are invaluable!
I got these made by a friend in the US.
It might be possible to lay the first tracks this weekend.
-
1
-
-
Progress!
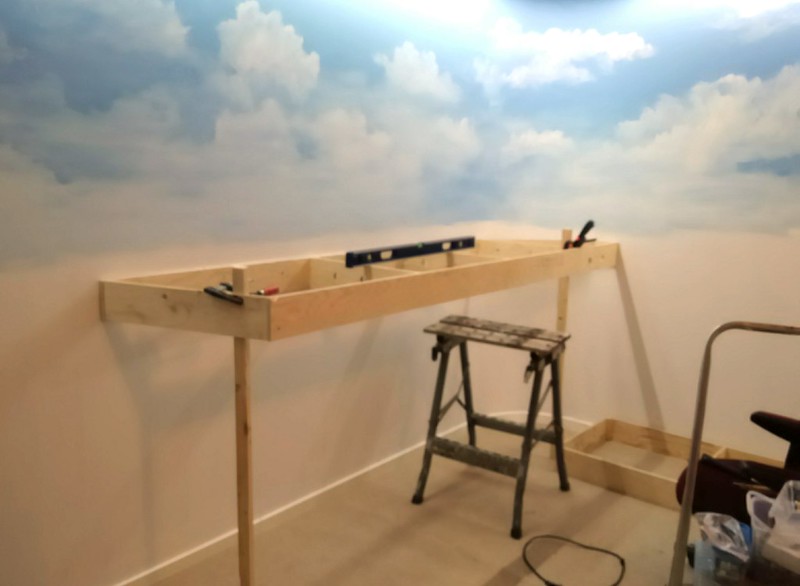
The first benchwork is up. The plywood construction makes it both light and strong.
And here is about a third of the benchwork up:
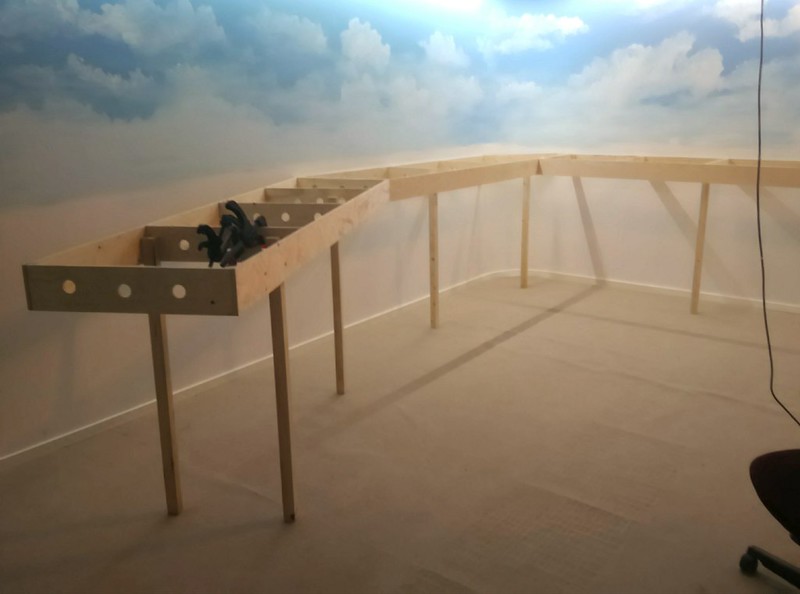
I selected to use 2x2 standing legs because if I'd used wall mounted brackets, it would have been difficult to match the wall studs.
In any case it's very sturdy.
-
1
-
-
Finally some creature comforts.
[
 ]
]Carpet laid and trim installed.
It made the room much more comfortable.
-
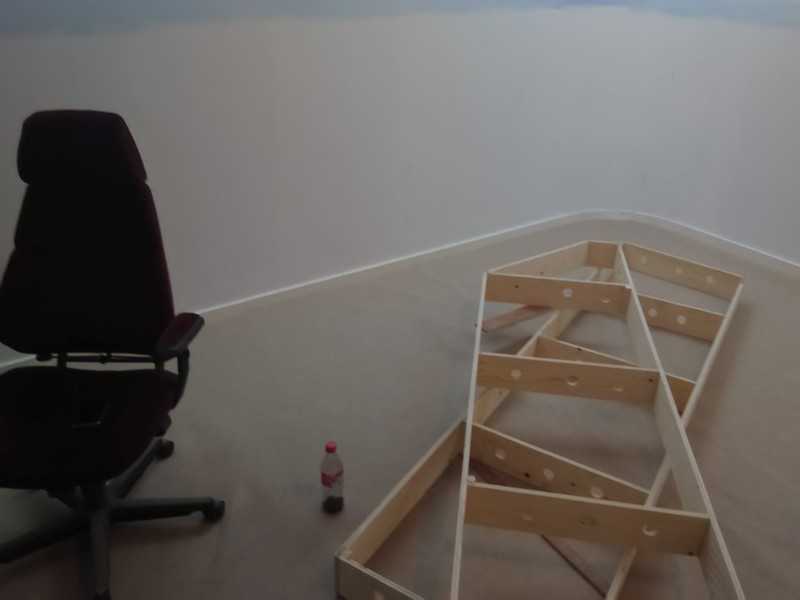
I have started the benchwork.
It's 1/2" construction Plywood that I had the lumber yard rip for me in 5" widths.
I have glued and nailed the modules together.
The longest sections will be 8' and no one wider than 2'.
That will make it easier to move if needed.
This is the first two sections:
-
This one is the old CMM/HSM kit.
http://www.narrowgaugecolorado.com/?name=Catalog&mode=i&item=000681
I'll see if I still have the drawings.
-
The latest update only fixed the locomotive image function, nothing new with the POM issue...
-
I've updated the app, and apart from the above and some cosmetic changes, i.e. the light orange theme and stop in writing, there's not much else...
The POM is still inoperable, even with Railcom plus equipped locomotives.
Strange.


Railway art, show us your work :-)
in Modelling musings & miscellany
Posted
Thanks. Yes, they're all brush painted.