


M Graff
-
Posts
1,001 -
Joined
-
Last visited
Content Type
Profiles
Forums
Blogs
Gallery
Events
Exhibition Layout Details
Store
Posts posted by M Graff
-
-
Yes, I received the same mail:
Thank you for your e-mail and your feedback to our new Z21-App.
We have forwarded your suggestions to our developers. The new Z21-App is constantly evolving and also the database of our models is continuously extended.
For the POM-Programming there will be another update soon.
We hope to have helped you with our answer and wish you much pleasure with your hobby, the model railway.
But no timeframe for the update?
-
I reported both the POM and the lack of a turntable symbol in the control station. That was a couple of days ago, and still no automated reply though?
Edit, it arrived, I had mailed it from my Gmail account which I don't look at so very often....
-
Yup, same problem. No way to program on the main.
I guess you'll need railcom equipped decoders for it to work now.
If ROCO has gone proprietary, I'll dump it and buy the new ESU instead.
-
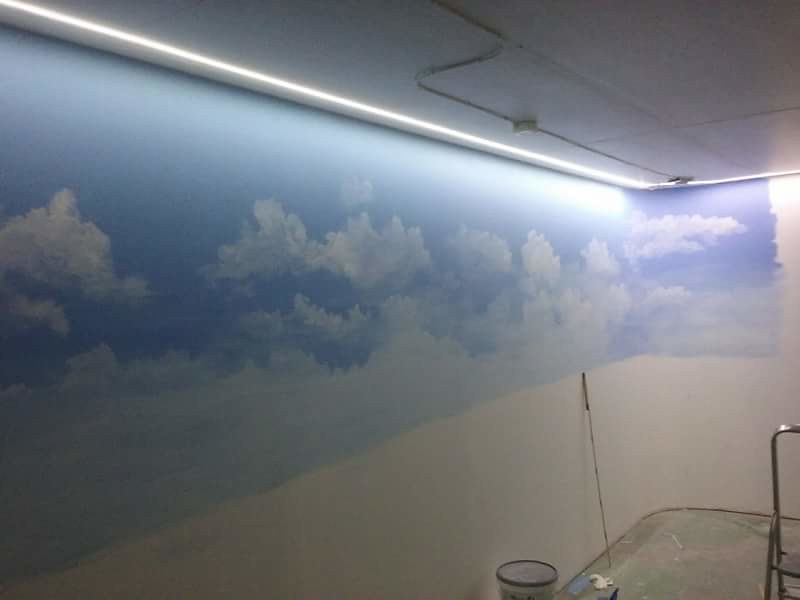
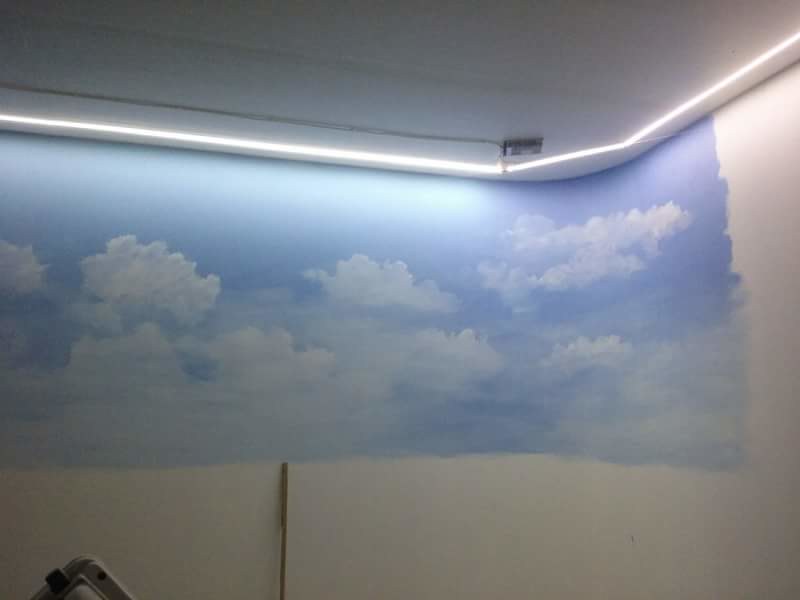
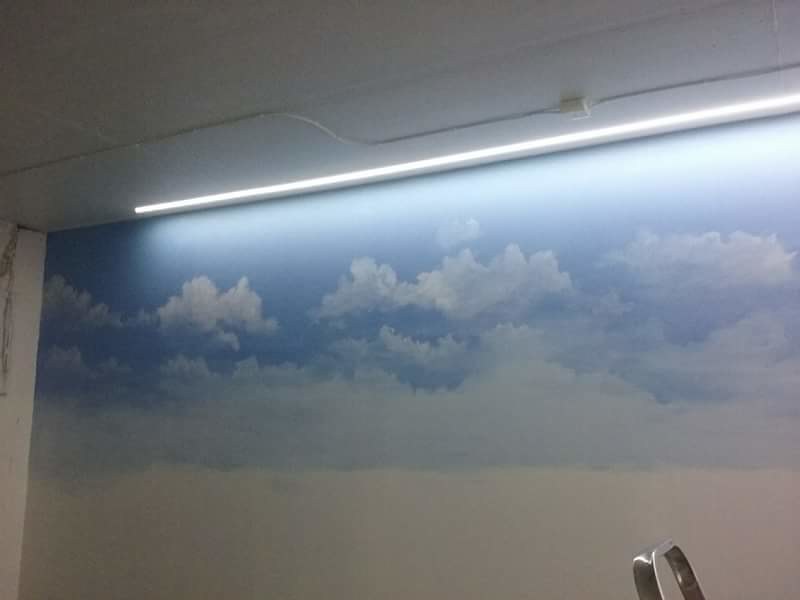
Started the backdrop painting. One wall is sky painted with clouds.
The backdrop is 60' long and 4'6" tall. I use regular wall paints.
I will wait a bit to paint the landscape until after I've started the benchwork.
-
 5
5
-
-
Well, I don't care if they Photoshop a bit of smoke on the pictures.
What REALLY irks me is the bad habit of photoshopping real backgrounds in every picture!
If the builder hasn't managed to build a complete railroad environment, then it is to be shot as is.
-
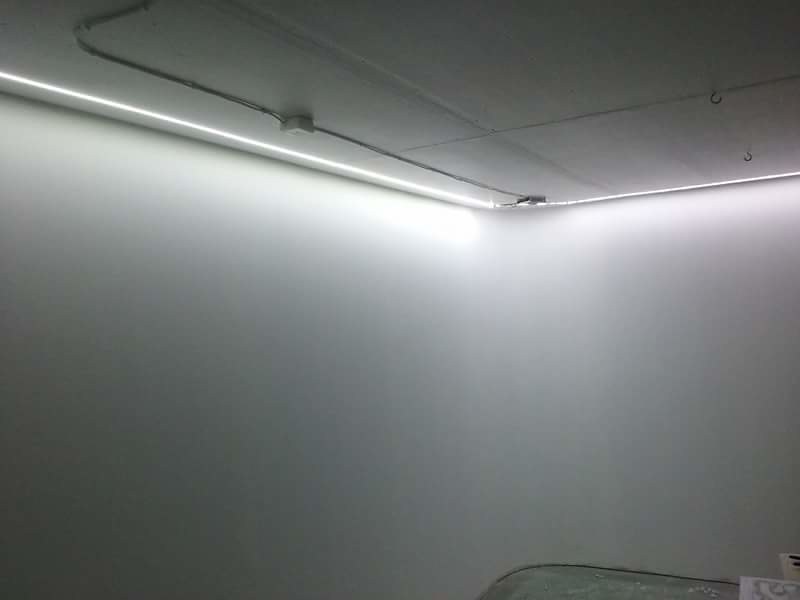
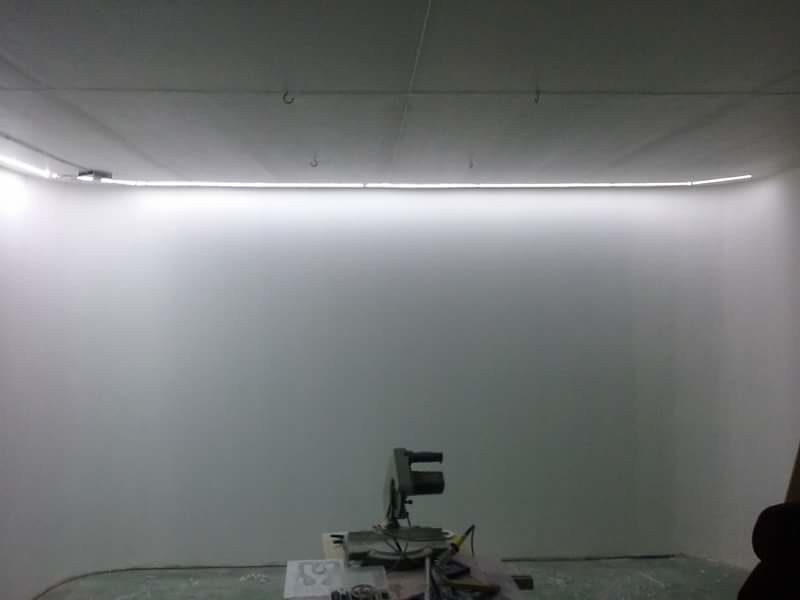
Installed the second LED strip today.
The light level will probably be okay when I can install the outer LED strips as well.
I have to build the valance first, so it'll be in the right places.
My plan is to have the valance about 2-3" outside of the layouts edge.
The LED strips has a 40° light angle and will be mounted 20° inward so it will light straight down at the front, and towards the backdrop.
-
1
-
-
Lots of time has passed....
The train room is almost finished.
So....
Let there be light!
First LED strip in place in the train room.
There'll be double rows, the other angled 20 degrees to the wall.
Fill lighting will be with LED spotlights.
Can be okay in the end.
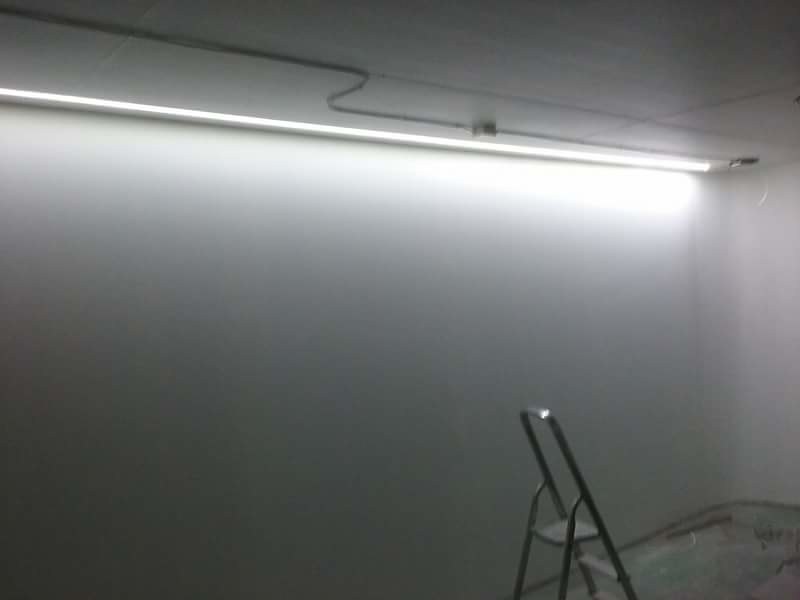
The switched power supplies I use are from Mean well, 12 V and 18 Amps.
They are adjustable between 11.4 V and 12.2 V.

The LED strips are rated at 12 Watt per metre and are 5 metres in length.
4800 K in temperature.
-
4
-
-
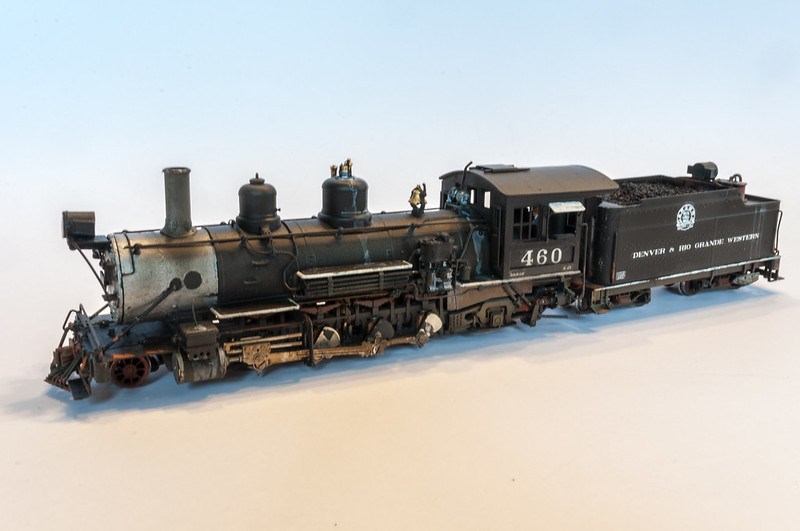
Weathered the Blackstone C-19.
I used it to try some new paints and techniques.

-
5
-
-
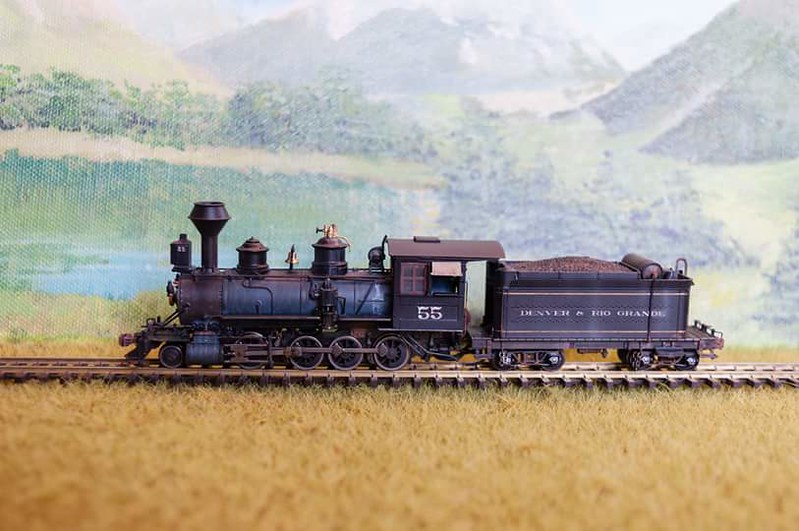
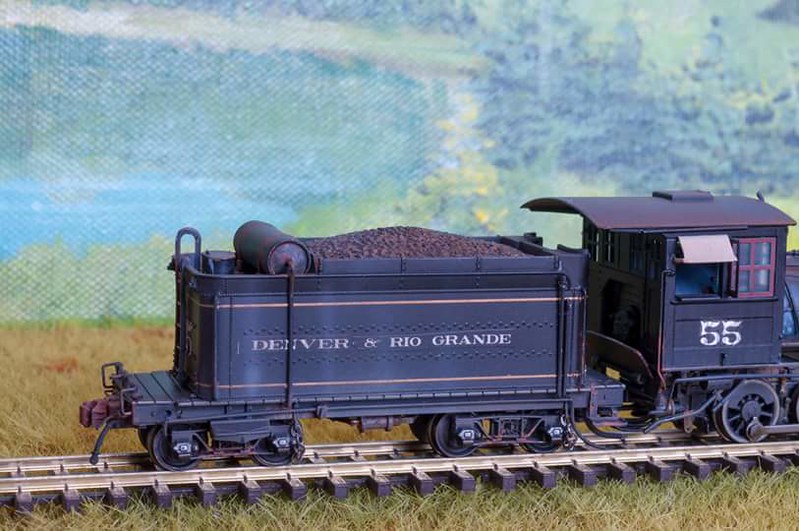
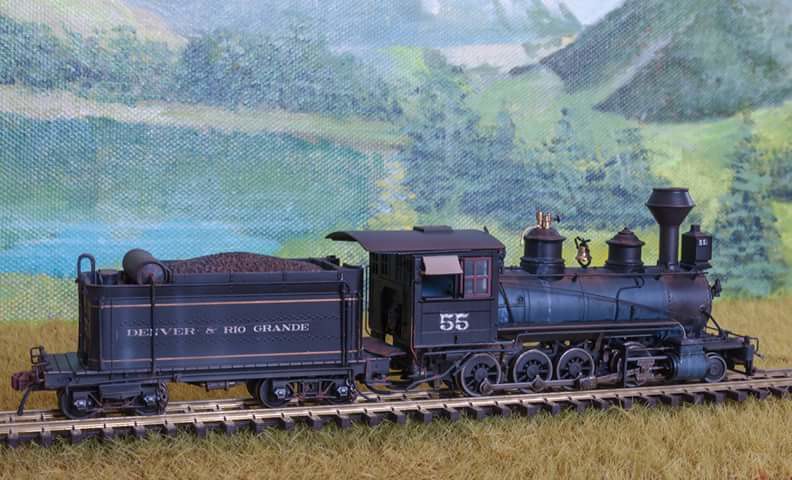
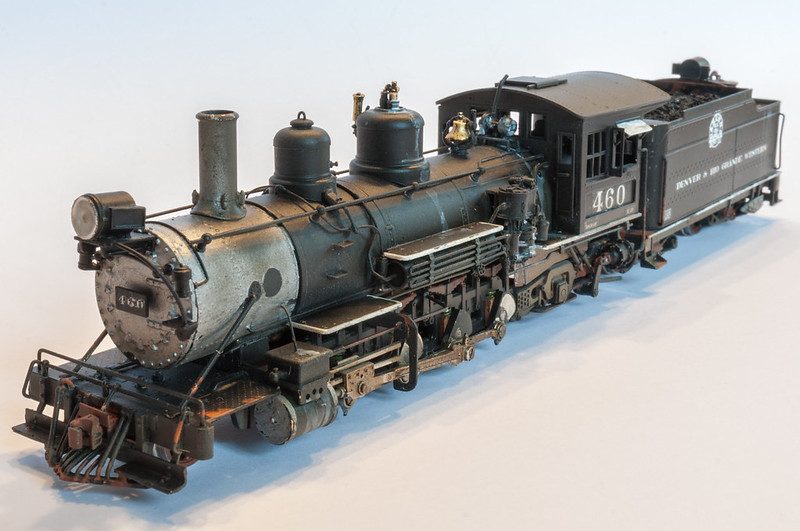
I've finished the Sunset models HOn3 K-27 as number 461.
It has a Tsunami decoder installed.
I painted it with a green boiler just because....
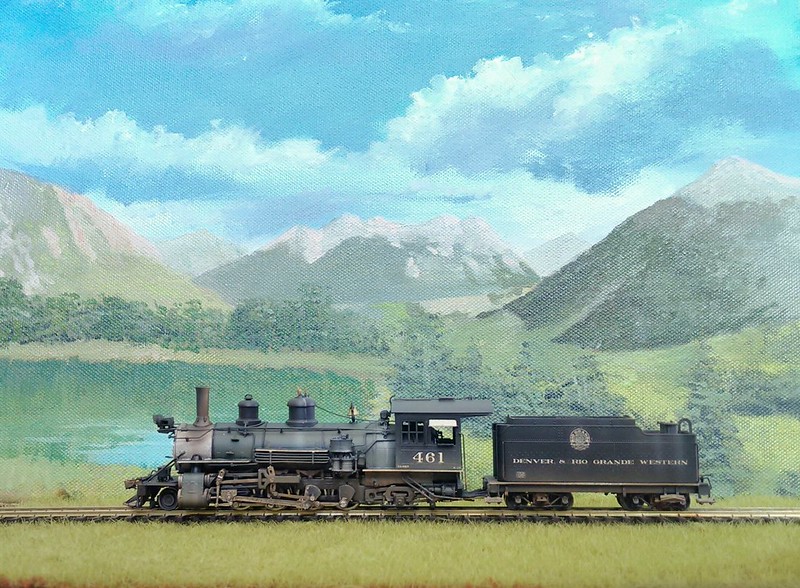
Here's my collection of K-27's:
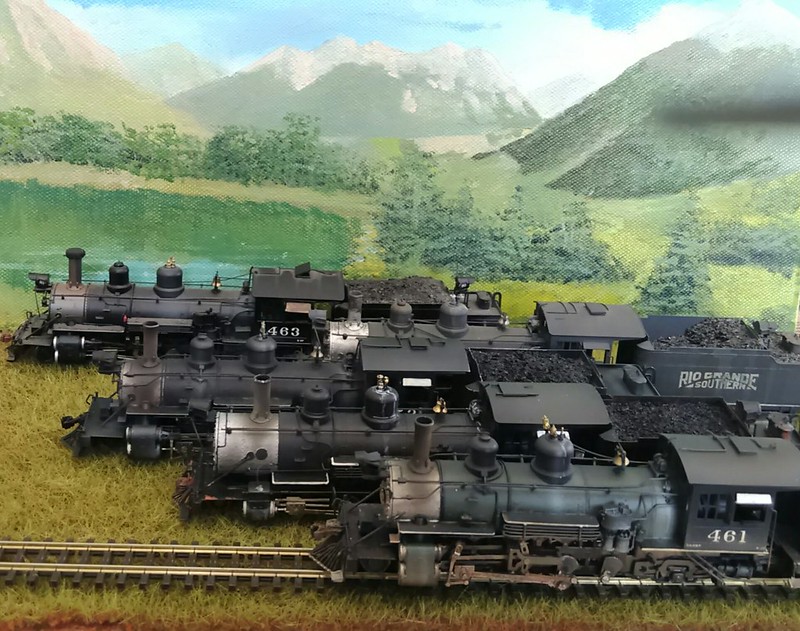
#452, 455, 460, 461 and 463.
One of these are not like the others though. As one isn't a brass engine.
Which one?
-
8
-
-
I've installed the new Android app, and I'm very happy with it.
Sure, it will take a while to get used to it.
But, at the control panel editor there's no turntable function. That's a big flaw.
-
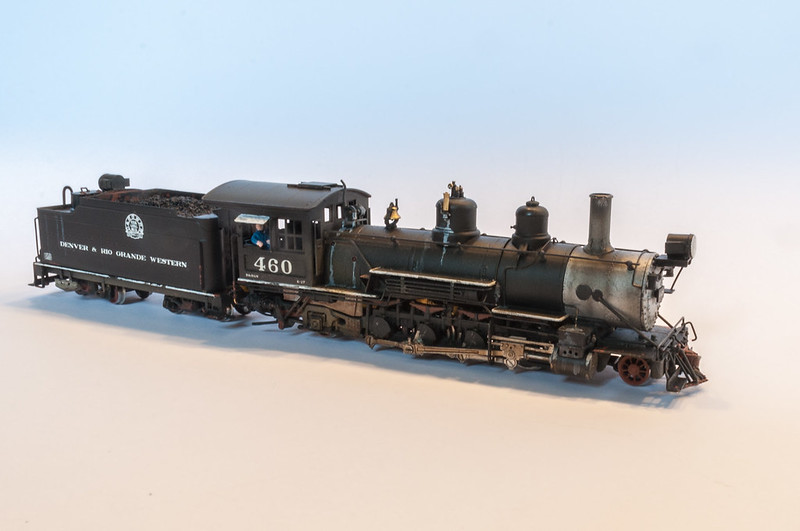
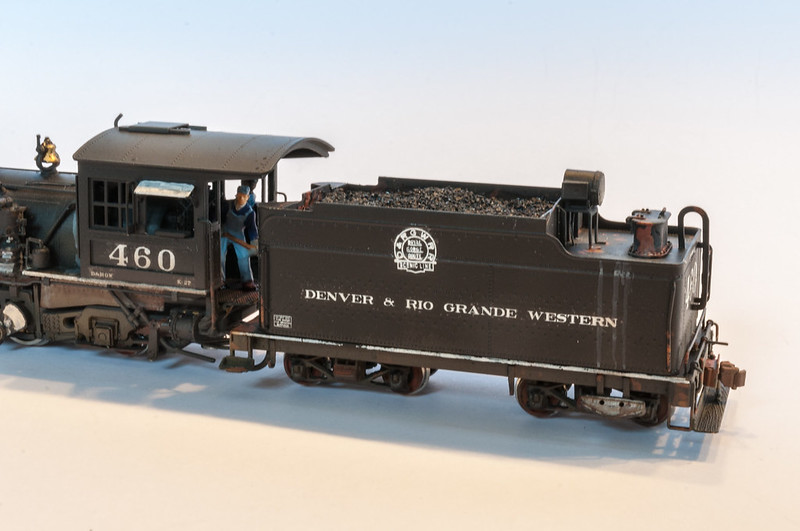
Hi all, this is some pics I took of my newly finished K-27 #460.
-
1
-
-
Westside models K-27 #460 in HOn3 dismantled in preparation for painting.

These engines are like Swiss watches in their build quality and is a pure joy to work with.
I have prepared it for LED lights in both the front and rear headlights.
It will get a sound decoder with a oval speaker.
The D&RGW #460 is a very odd engine. It was never modernized to piston valves, neither did it get a shortened smokebox.
The version I'm building will represent how it looked in the mid -30's.
The paint is Scalecote 1 engine black that is baked in the oven for an hour or so at 85° C.
The #460 is an odd individual.
And as such, there were no correct number stickers on my decal sheet ...
I found an old decal sheet with numbers, it was unfortunately so brittle that the first decal I tested was disintegrated when I put it in the water ...
I sprayed dullcote on the sheet, and then there was no problem with that anymore.
The locomotive was test run in analogue and works as well as it did before painting.

Test drive of the K27. I've weathered it as well as installed the sound decoder. The decoder is a Loksound V4. Some adjustments remain to be done, but after the auto tuning, the motor works well.
-
3
-
-
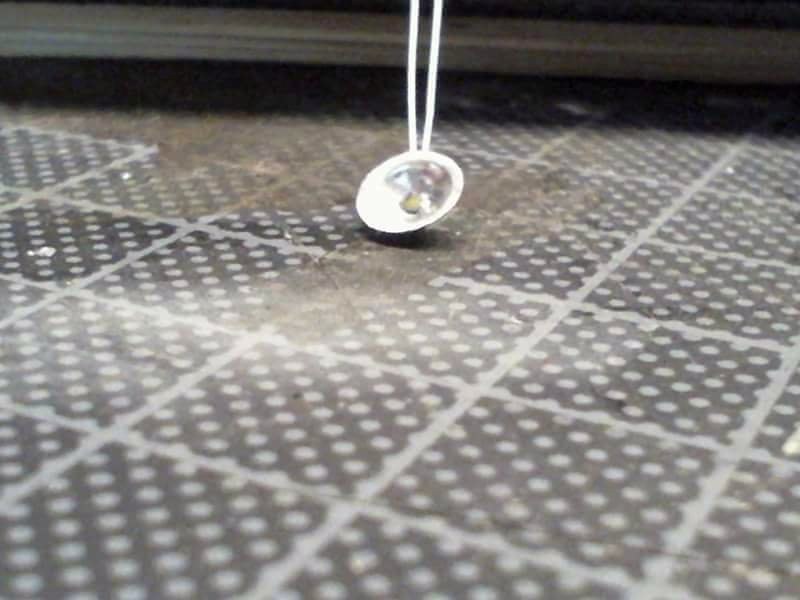
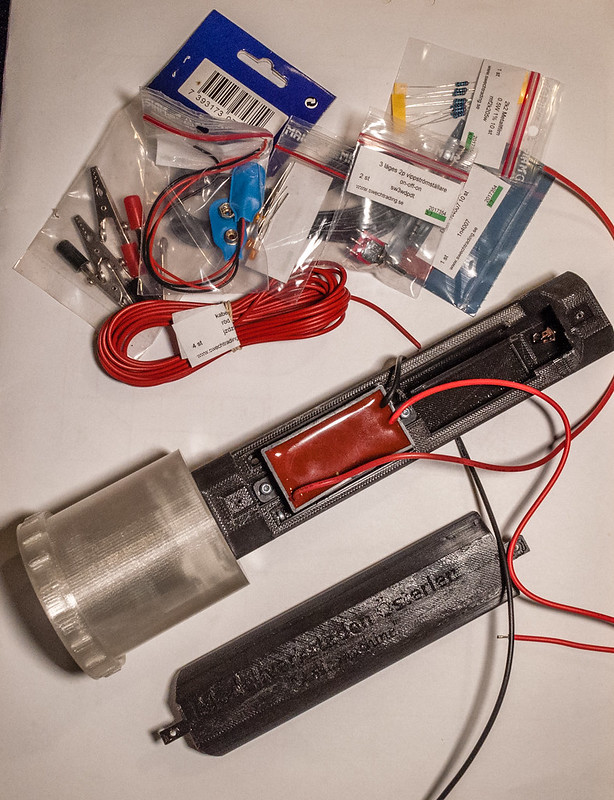
Latest project ....
A reflector with light for my narrow-gauge locomotives.
The diameter of the reflector is 4 mm.
The LED is 0.5 x 1 mm!
The reflector is made out of aluminum from oven trays.
I took a nut of the right diameter and slowly pushed the aluminum with the rounded top of the hat from a ballpoint pen.
Then I rough cut the edges and filed it to shape with a needle file.
I then drilled a 0.8 mm hole in the center of the reflector.
I glued the LED to the backside of the reflector with epoxy.
The LED is a bit too white, so it'll get a drop of Tamiya transparent orange.
Then I'll take Microscale Crystal Clear and fill the reflector so it gets a lens.
-
1
-
-
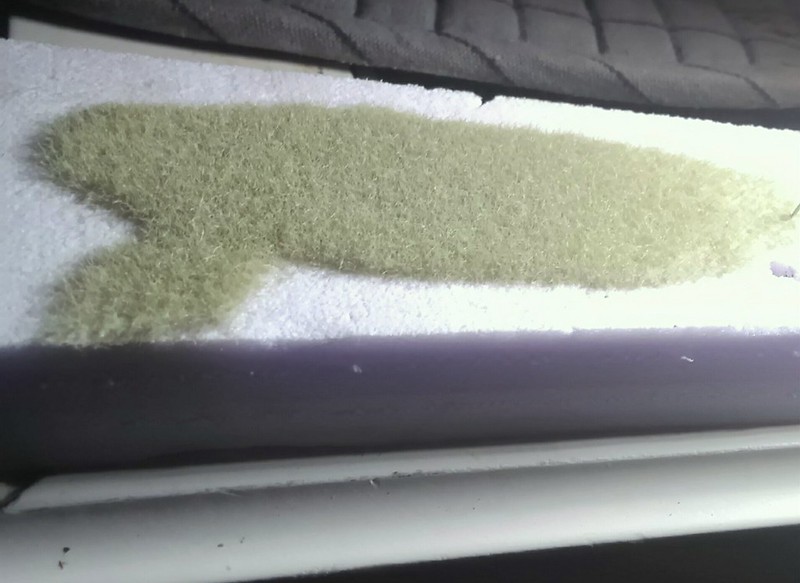
Update! The metal mesh gives a better static field!
I solved that by applying plumbers aluminium tape on the backside of the printed mesh!
Sure, it was a bit tedious to cut out the holes, but it works perfectly!
One added bonus is that I don't risk any arcing between the earth and the mesh as the metal is on the inside.
-
The alteration I did with the metal plate on the bottom of the canister and the prong that contacts the grass made the metal mesh unnecessary.
I printed a lid with a 4x4 mm grid for longer strands, and it works perfectly good!
I really didn't like the strainer mesh that had to be glued in place...
-
I followed Luke's article (beside from the handle then... )
http://www.bouldercreekrailroad.com/static-grass-applicator.html
-
Hi all!
I borrowed a Noch Grassmaster, it was great, but a tad expensive ...
I saw that Luke Towan had an article and a video showing how to build one.
My friend and I decided to build one each.
We didn't like the material that he had used for the handle and cup though...
I therefore designed a handle and cup in CAD (Fusion 360).
I liked the idea of an easy to handle tool.
I 3D printed the parts myself on my Wanhao duplicator 4S.
It's assembled from quite a bit of parts..
I found all the electronics online.
First test of the home-built grassmaster with a 9 volt battery for power and Woodland scenics short grass.
Tomorrow I will test with the 12 volt transformer and longer grass.
I was surprised how strong the static field is. The hair on my hand stands straight up when I get close ...
The grass gets really dense and stands up really nice.
This project gives a good result.
The cost was really affordable. When summarizing every component and the material for the 3D print, it cost me roughly £35!
Under half of what equal products on the market costs with the same specs.
-
4
-
-
Hi all!
This is my latest build that only took me two days to finish. No need for despair though, as anyone can do it after a few builds under their command.
I had this HSM Silver plume store kit. (Same MFG as the fire station I built)
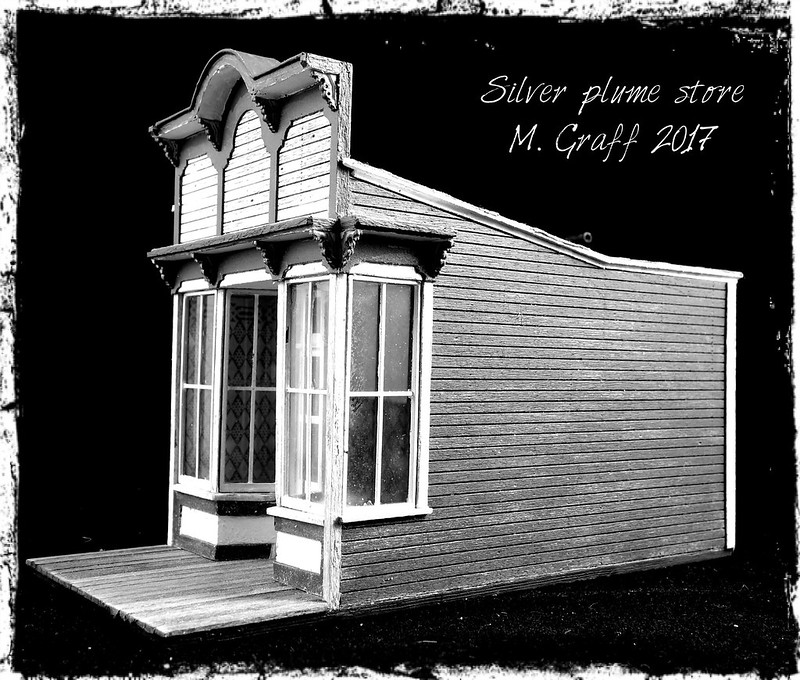
Really nice old craftsman kit with mostly printed cardboard and wood parts. Moulded plastic windows and corbels.
The walls had to be cut from sheet wood.
Roof material is surgical tape.
Real glass in the windows (which needs to be cleaned...)
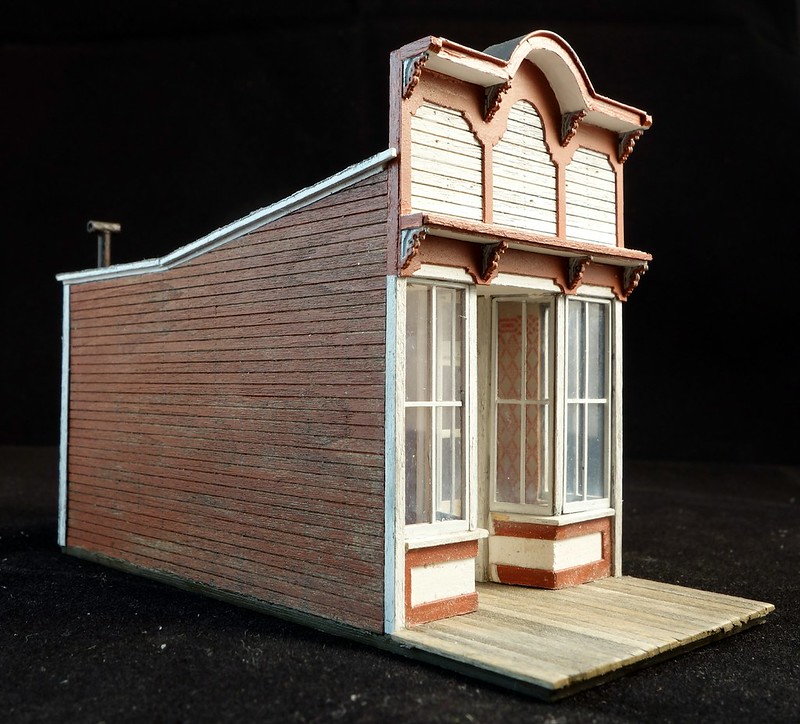
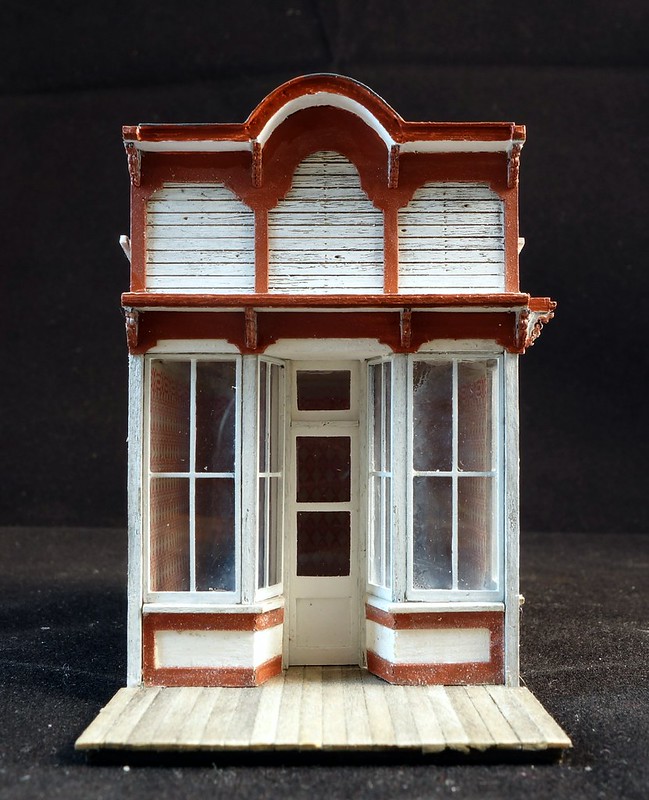
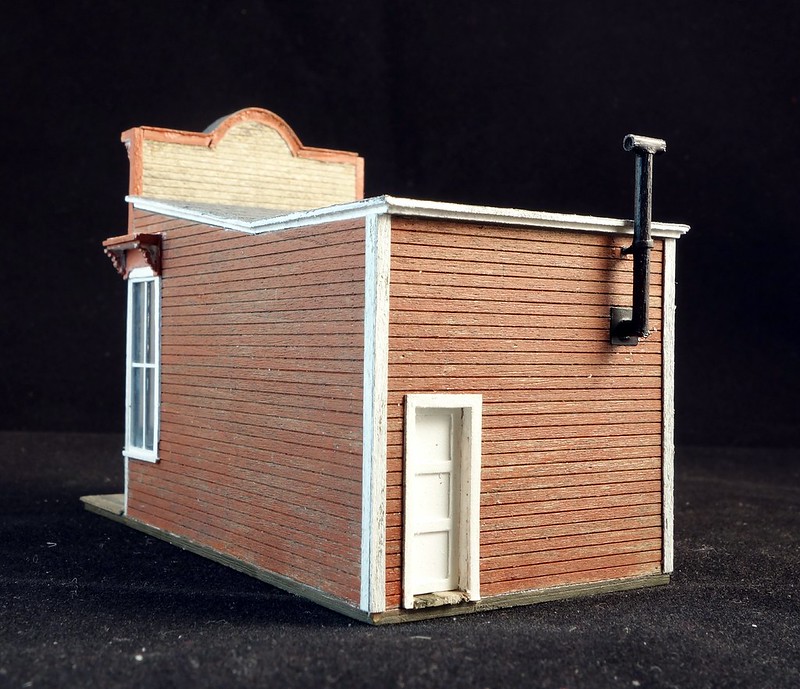
The smoke stack is made from a wood dowel.
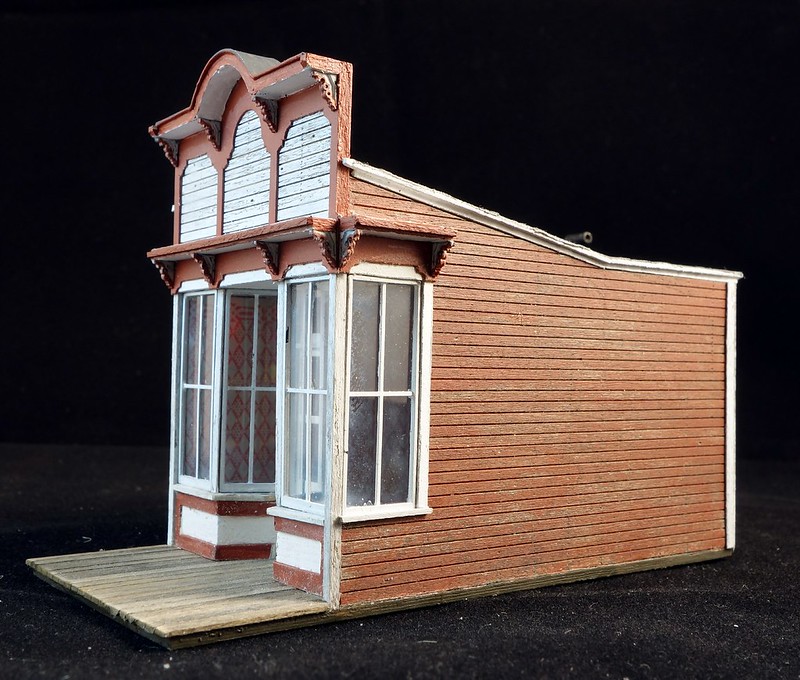
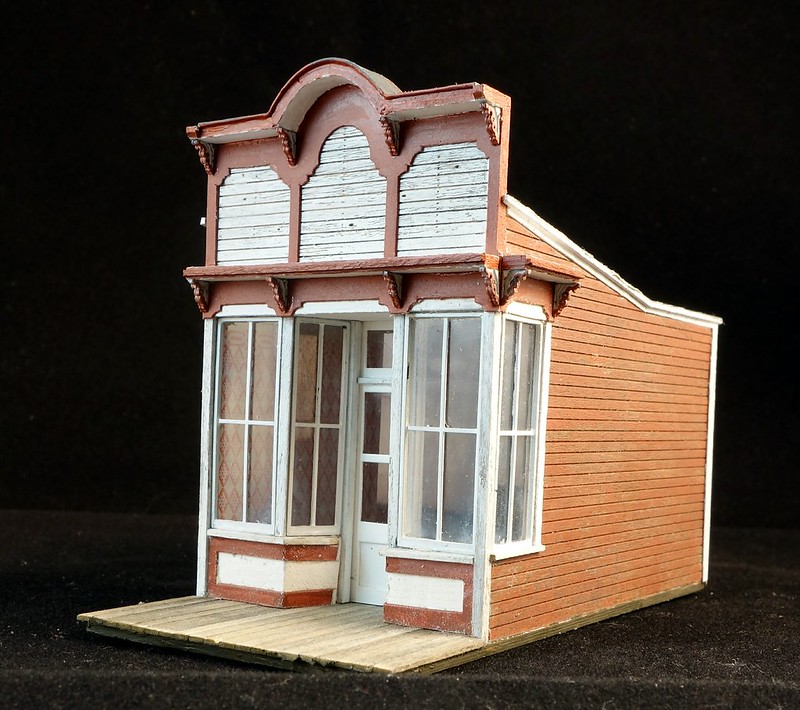
Now some interior to make.
-
6
-
-
The stamp mill in the afternoon.

-
16
-
-
Considering the available space, wouldn't it be worth milling the frame and get rid of the flywheels?
A longer and a bit wider motor would be very powerful.
We have a CNC mill that could be put to good use. Maybe someone has a cheap dead Garratt I could be experimenting with?
-
Is that a Pillstrom snake tong?My mates son is doing a bit of traveling round South Africa .
Posted this on Facebook .
Proper wildlife .

:-)
-
1
-
-
Well, comparing supermarket quality tablets with iPads are not an equal match.
You need a quadcore processor and at least Android kitkat or lollipop.
At least 2 Gb RAM as well.
Then you will not experience the lag and unstable performance stated in this thread.
Anyone tried it on a iphone 2? I guess it would be quite a drag....
-
1
-
-
I would like to know the specs on the Android tablets that you are using.
If you have problems with the app, I guess that the hardware isn't up to the task...
I did try it on a cheap tablet, and it was a very big difference from the real ones I use daily.
-
The Android app was updated yesterday, and it is now much smoother than before.
I can't say how, but the route control is better, and even the occupancy sensor are "crisper".


New Roco Z21 app
in DCC Discussion Topics (not questions)
Posted
I really don't know what it did...