Jump to content
 
  • entries
    134
  • comments
    483
  • views
    99,831

Moving to P4 (Post 4)


Knuckles

781 views

Exactoscale P4 C10-LH Turnout Kit (They didn't have a smaller one for the starter pack at Warley)


Started by taping the template above the work area so I can refer to it. No need to build the track on this as there are pips to locate chairs.

PIC_2651.jpg

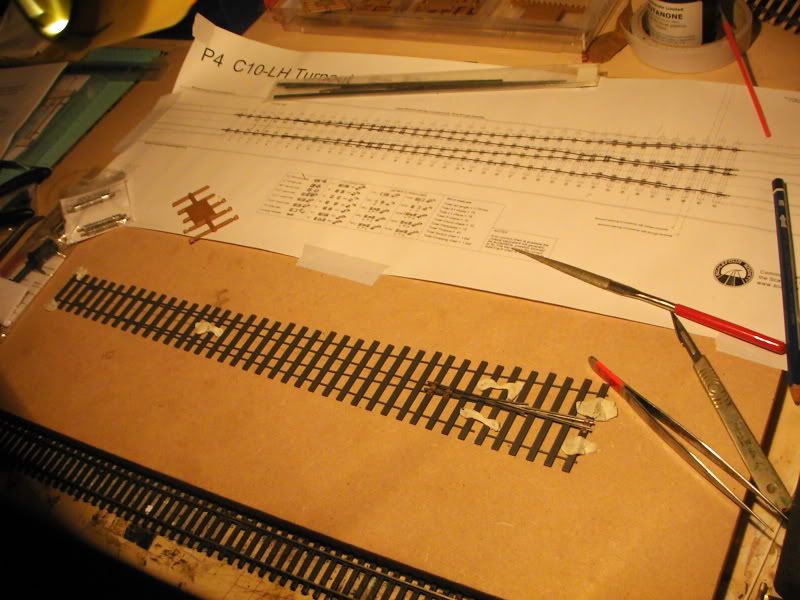
Instructions reccomened blue-tack to hold the 3 sections of timbering down, so once I de-flashed them I did so with White Teck. Same thing really.

PIC_2656.jpg

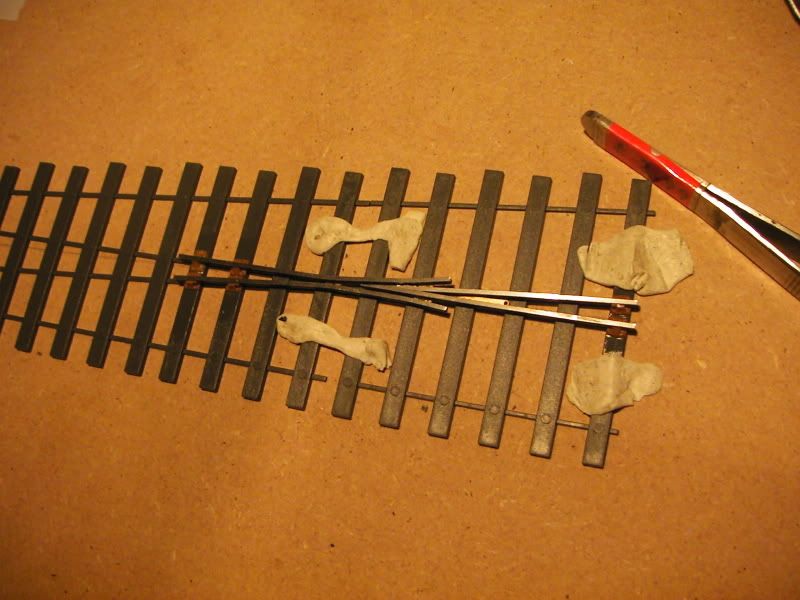
The crossing V or frog comes in one section so that was a relief, however, at one angle it looks slightly bent and I am unsure if this is the case or not. Being a n00b I'm just going for it anyway, if I come to a problem I'll have to deal with it then. (Something else happened instead, see below)

PIC_2661.jpg

I decided to do this as best as the instructions say. I know with experience you find better ways but as it's a first I'm doing my best to copy them sheep style.

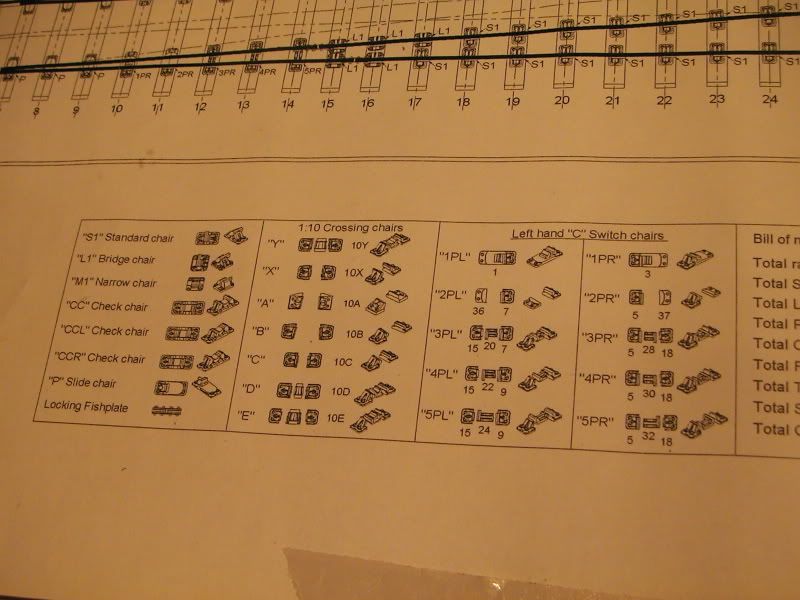
One thing that's hard is the different chair types. They arn't that learly labled in my opinion and it took me ages identifying them.

PIC_2657.jpg

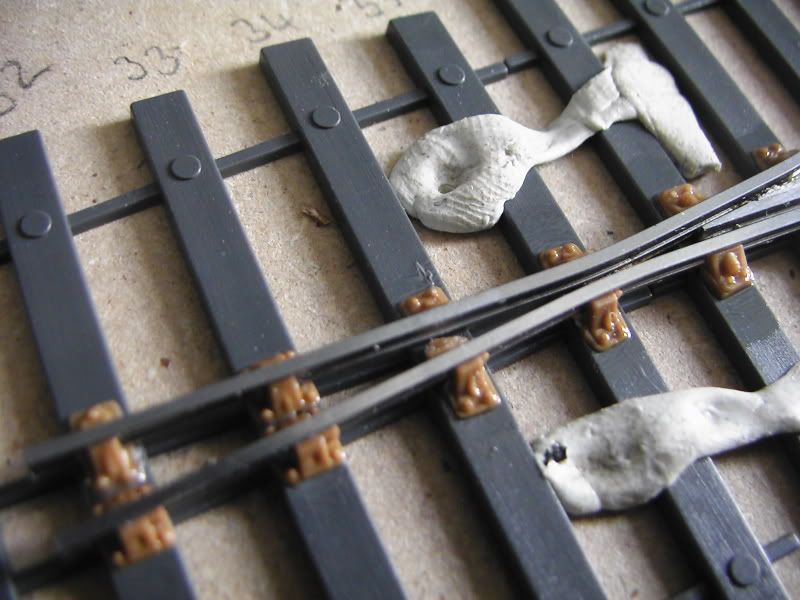
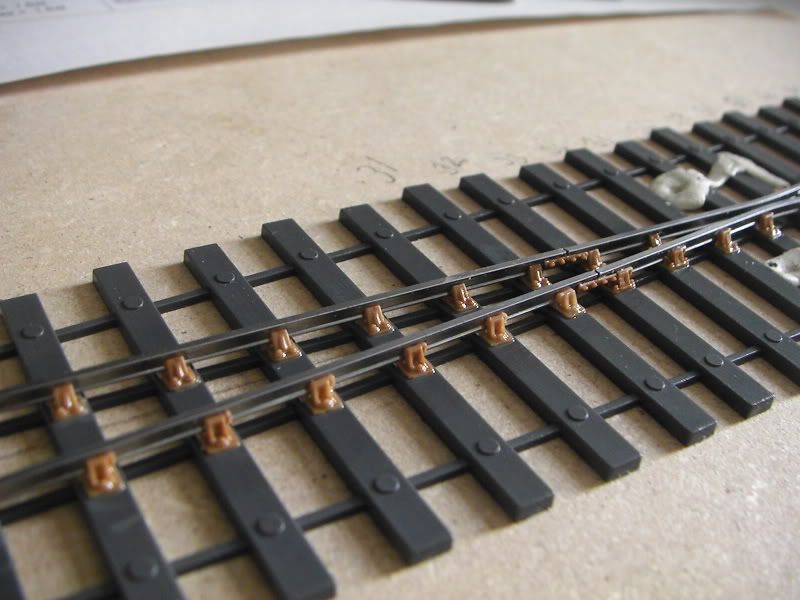
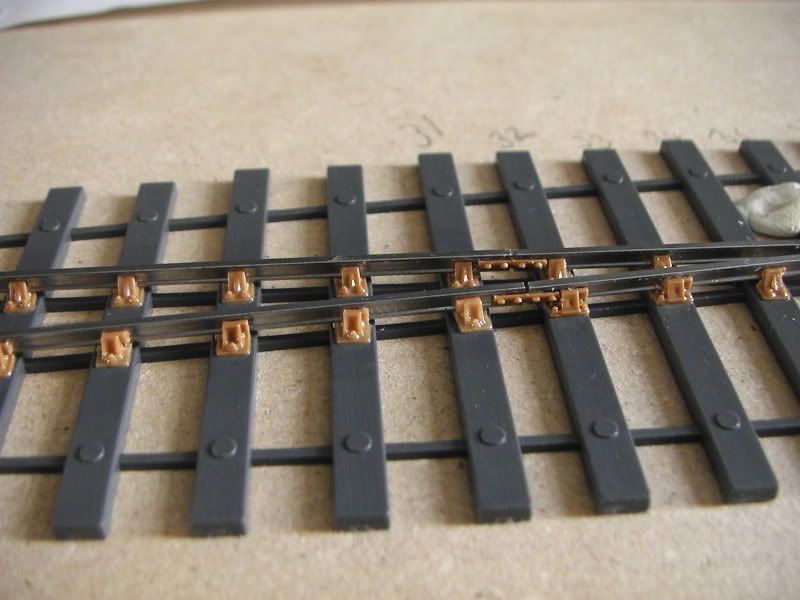
Crossing V finished with chairs. One problem is I needed to get a chair in the middle of the left bit and ended up just making a 'lump' of plastic to fit in. There was no way I was able to get it to just 'drop in' as I think the instructions were saying.

PIC_2662.jpg

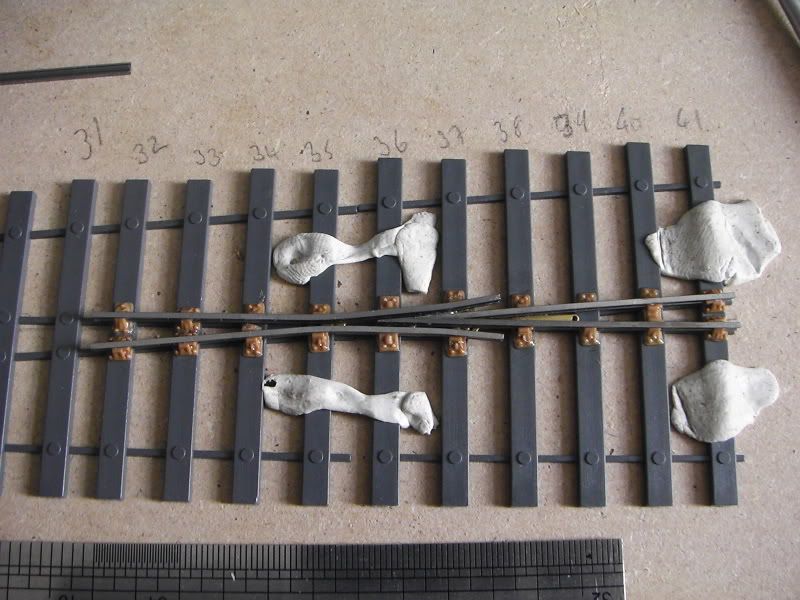
Middle sleeper shows the 'lump' substitute.

PIC_2666.jpg

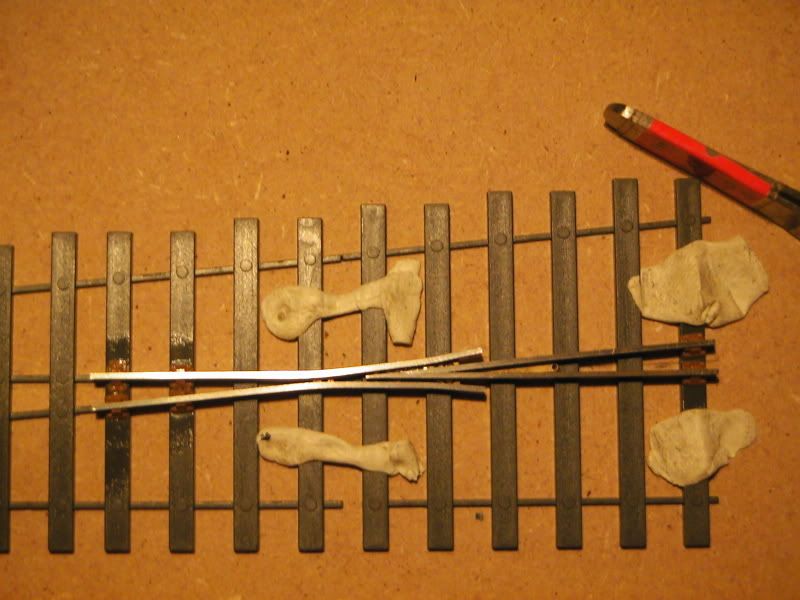
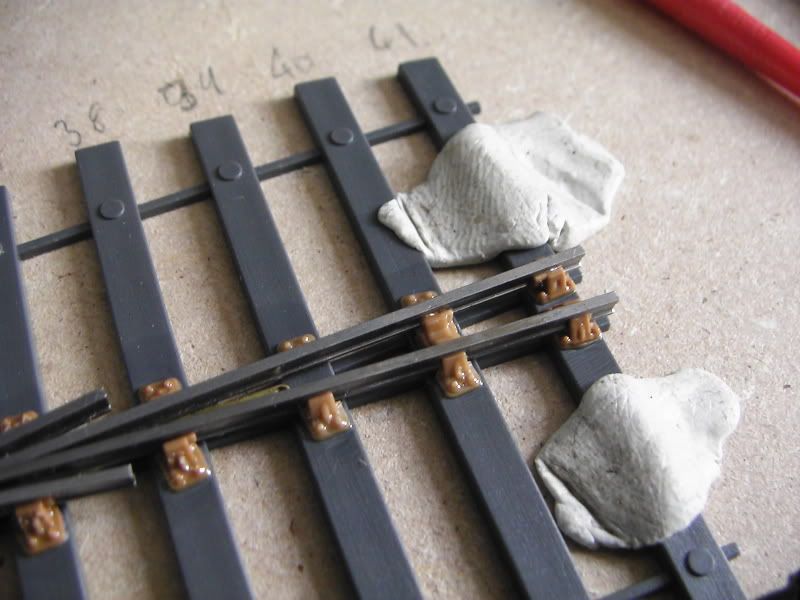
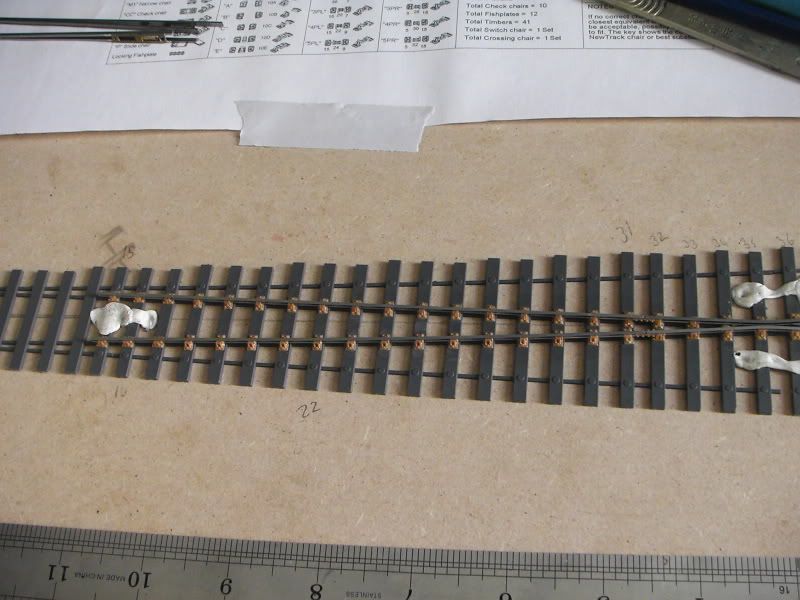
Timber 40, (1 before the end) shows how the previus picture should look with the chair in the middle of the two rails. Quite a difference but I wasn't prepared to unglue the whole assembly just for that. Interestingly the two outer chairs here are the wrong type, I used C chairs instead of E chairs becasue I could not find them for toffee. Visually there is hardly any difference and you get a few spares in the pack.

PIC_2668.jpg

Chairing the straight closure rail, making sure to put past mistakes into practice. Make sure the rail is the correct way up, make sure the keys are facing the correct way with correct bolt configuration, and make sure the one closest the fishplate points the other way. Also make sure the 3 different chairs are the right way too. A bit of faffing needed to be sure.

PIC_2669.jpg

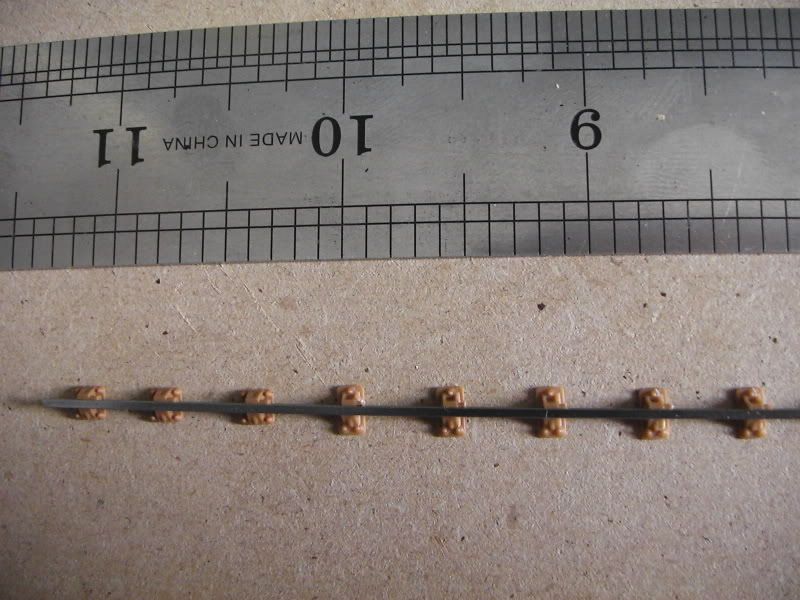
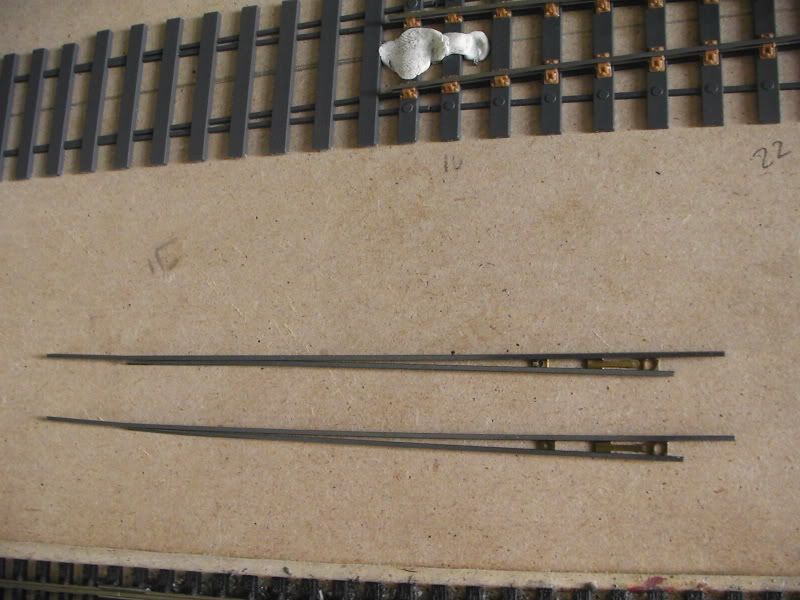
Finished both straight and curved, the curved was slightly bent by hand and eye before putting chairs on, and I also haven't glued all the chairs in position on the curved one because instructions said not to; I'm guessing it's for accurate gauging later but don't know.

PIC_2673.jpg

PIC_2674.jpg

PIC_2671.jpg

The inside of one of the fishplates snapped off so I just glued it in poition, hopefully it won't be a problem.

PIC_2675.jpg


And now we have the mother of all cock ups, a cock up with which progress is most definently halted until Exactoscale sort me out. Will have to send an email with photographic proof soon.

Must have been a friday kit this, "Hurry up Larry I want to go home"

Chocolate tea pot this...

PIC_2677.jpg

What am I supposed to do with those? I'm not explaining the mistake, it's quite obvious. :P

  • Like 1

6 Comments


Recommended Comments

  • RMweb Gold

Oops - bit of a co*k-up on the packing front by Exactoscale. Not what you want to find when you're champing at the bit to get on with the point kit. I've always found Len Newman at Exactoscale to be very helpful indeed - a quick phone call should be all you need to explain it to him and get a replacement part in the post to you.


Otherwise, it seems to be going well. Don't worry that it's a faff, I found it a faff to get the correct chairs in the correct places, and I doubt that I got it 100% right myself. I also found that there are times when you need to trip the outer edges of some chairs, when they butt up to a very close adjacent chair.


One thing I can say is that all these minor 'issues' will blend happily into the background when the point is painted, weathered and ballasted. Unless you are really searching it out, you just won't notice it, and I can't always find my co*k ups, even if I look for them!


I found that the pip locating system results in a point that is pretty much to gauge anyway, I've certainly built some of these with minimal recourse to a gauge, only to find that the finished article was more or less spot-on anyway!

Link to comment

As with what Tim said above, give Len a call and he'll sort you out. I wouldn't bother today though, he's at Watford; I was talking with him just 3 hours ago... oddly enough about these kits. I recently made my first one too, a C10-R (similar as all they had left at S4M).... he had bundles of them all today ! I'd mentioned that he'd had to send me out check rails as mine were mising - which he did when I'd phoned... he explained that the metalwork is packaged by one organsation and the plastics by another... and there have been a few slip ups. He's a great chap and very very helpful... I'm sure he'll put it right in no time.


The chairs.... fun aren't they! I had the same problem... there was at least one rail that I had to remove them all from when I realised I'd been looking at the keys the wrong way around. The small pieces are a bit of a fiddle - where they got too difficult I just left them out. When I did add these, the butanone wouldn't hold them so I dropped a little superglue in carefully.

On your assembly, you're making the mistake I made.... although it didn't hurt - it just made some instructions a little confusing. I think they say to stick the timbers down, but not the ones at the switch end... this part we're supposed to make seperately and join up later. I did them as you're doing and had no problem... just meant that I was able to better judge the gauge I think... although I found myself adding the fishplates before they were called for in the instructions.

You'll be happy once it's done. It's well worth the effort. Today I bought another C10R to complete a crossing (gotta start somewhere)... so I'll be back on track (please excuse the pun) before long.

My fun with these was added here if that's any help.


Oh, and rather than glue the fishplate, I'm sure you'd find you have some spare.


Best regards


Jon

Link to comment

I have not seen one of these kits expolded before.

The ready made vee and switch rail certainly make life easier.

Just as I learnt a method of doing this from scratch too.


Keep posting knuckles.

Link to comment

Got nothing interesting to say, I phoned Len as Andrew Dukes suggested and He said to post the switch unit an he will swap it, so I'll do that then once I get it I can continue. But until then there is nothing to post really.

Link to comment

Finally recieved the replacement point blade yesterday. But...

Len told me on the 'phone I needed to make it perfectly clear which part I needed so I explained in the letter that I have the C10-LH point kit and that (as Andrew J') told me on the above post I needed the Right Hand switch assembly. I also drew a diagram of the turnout in the letter and circled the one I have two of and the one I needed with notes and arrows, plus the one I had a duplicate was wrapped up with the letter as a swap so it should be easy to identify the one correct one.

What I recieved in the post was the exact same switch, a swap of componont X for component X.

I'll send it off again, this time I'll print everything on the computor but in all honesty I can not make it any clearer, I thought the information I had given was solid.

Link to comment

....What I received in the post was the exact same switch, a swap of component X for component X......


D'oh!

Link to comment

Create an account or sign in to comment

You need to be a member in order to leave a comment

Create an account

Sign up for a new account in our community. It's easy!

Register a new account

Sign in

Already have an account? Sign in here.

Sign In Now
×
×
  • Create New...