


AdeMoore
-
Posts
1,183 -
Joined
-
Last visited
2 Followers


Recent Profile Visitors


AdeMoore's Achievements
1.7k
Reputation
Bookmarks
-
3D Photo conversion
Anycubic Photon and Mono X 3D DLP Printers1 hour ago, Ian Morgan said:Looking forward to more about your experiances and learning curve.
When I first started dabbling with 3D printing, the price and quality of home setups was not what I was comfortable with, where Shapeways quality and price was more attractive. Now, however, things have changed. I don't like the price of Shapeways and I do like the quality of this machine. My only reservation is the time and effort that will be involved before I start getting the quality results I would like. My hobby is model making, not 3D printing.
Good Luck.
I might be adding one to my birthday present list :-)
It really does change model making remarkably, especially when teamed with other new technologies.
For example, here is a Turkish howitzer in my local park.

I walked around it taking 23 photos of it, about 3 minutes work, Then imported those into 3dFlow, which is a photogrammetry package with about a 20 minute learning curve. The free version is all thats needed here.
After about 20 minutes of processing time the file was ready to convert to an .stl, then sent off to the photon slicer and printer so now I can have as many as a like, at any scale and the whole process I didn't touch any tool other than a camera, laptop and 3Dprinter...

-
Lightweight baseboard
Atlantic Dock in 7mmOn 25/05/2019 at 22:11, Stephenwolsten said:I have recently been looking at lightweight baseboard designs, including the ply-edged foam beams used by Gordon Gravitt on Arun Quay (MRJ 235) and the use of dense insulation foam boards.
Here is a video showing the properties of 1/16 or 1.5mm birch ply, as used to edge the foam beams on Arun Quay.
-
Churminster & Stowe Magna, Southern Railway
Churminster & Stowe Magna, Southern RailwayHi Tony,
If you own the model may I make a suggestion? Like you I am not a fan of Shapeways and your not happy with what you have.
Have a look at 3d hubs.
This is a site where people have their home printers listed, and usually these guys are really good.
As it shows you people in the UK it's cheaper and quicker and usually better quality than Shapeways.
Look for SLA, DLP resin printers... And and it will give you a rough price, and you can look at what each person offers and what resolution you want... Very handy and very good quality and also quick.
Hope this helps.
-
Scenery
New Mills (90's Railfreight / Speedlink)21 minutes ago, Ray H said:Andy
Scenery isn't my thing so please excuse this probably silly questions. Are your hedges just plain an simple clump foliage, possible of different colours?
Thanks.
Hi Ray and Thanks for the question, I have used Woodlands Scenics Fine Green Flock onto the neat PVA, and then added Medium and Light Clump Foliage, you buy it as a large sponge like mass, then just break / tear off as requited. I then also used W/S Dark and light Underbush which comes in small bits as you will see lying on the ground in the fore ground.
-
Stu47
The Circle and the Stores (T-CATS)Y'know, sometimes it's easy to overthink / overdesign something.
I had intended to use a simple on/off switch on the control panel, to operate the MERG servo board, which would operate the servo to both move the point tie-bar and activate a micro-switch which would change the frog polarity.
I have the servos, I have the MERG servo mounts and microswitches.
However, instead I will use a 2-pole On/On switch on the panel instead. Again, this will indicate the direction of the traffic flow, but the 2nd pole will be used to directly switch the frog polarity. Much, much simpler.
So, wiring-wise, I'll need one feed from each of the two point's frogs, plus a +'ve and -'ve feed to the track. And an extra feed to the isolating section at the end of the longest siding.
The power will come from a Gaugemaster Walkabout, needing a 16v ac feed in.
The servos' power will be fed from either a 9v dc battery, or a 12v dc regulated supply.
Keeping it all very simple.
")
I'm not even sure I'll need a control 'panel' - just a row of 3 switches should be adequate.
-
Painting
Rustons Sidings.That looks a nice prototype to aim for.
At first glance, it looks impossible to match all the colours, but most of the different tones are achieved by slowly building up layers of pigment, so you will see colours that you never actually used, if that makes sense.
If I was going to paint that bridge, this is what I would do:
I always use Humbrol matt acrylics - they dry quickly to a proper matt finish, and can be diluted with water, and don't stink the place out.
So I would start with an all over solid base coat of matt Tan 237, and let that dry thoroughly. This gives you the base colour of the stone.
Then I would pick out some individual stones in matt Leather 62, and matt Sand 63, and maybe Dark Earth 29. These are orange and brown colours. Then a few in Medium Grey 145, and perhaps a few in Light Grey 64 it depends how much grey you want.
On their own they will look wrong, but we haven't finished yet.
Now I would make up a dilute wash of Medium Grey 145 - one full brush of paint to a saucer of water - roughly 10:1 mix
Apply that all over sparingly in diagonal strokes, and leave to dry.
Then a dilute wash of Matt Black Green 91, also using diagonal strokes and leave that to dry as well.
The idea is not to blanket the whole thing, but to end up with different shades in different places.
Then add further more targeted washes of the black green in certain areas - on the coping stones particularly - and anywhere else you want to make darker.
If it looks too uniform, make up a wash of the Matt Sand, and apply that in some patches to give you warmer tones in certain areas.
If you want the green staining, make up a wash of Dark Green 30 and apply to the areas you want.
Finally, after it has all dried, make up a wash of the Matt Tan 237 and apply all over, then wipe off the surface, this should highlight the mortar courses and lighten the overall feel.
Hope this gives you some ideas.
Al.
-
Longditudinal track
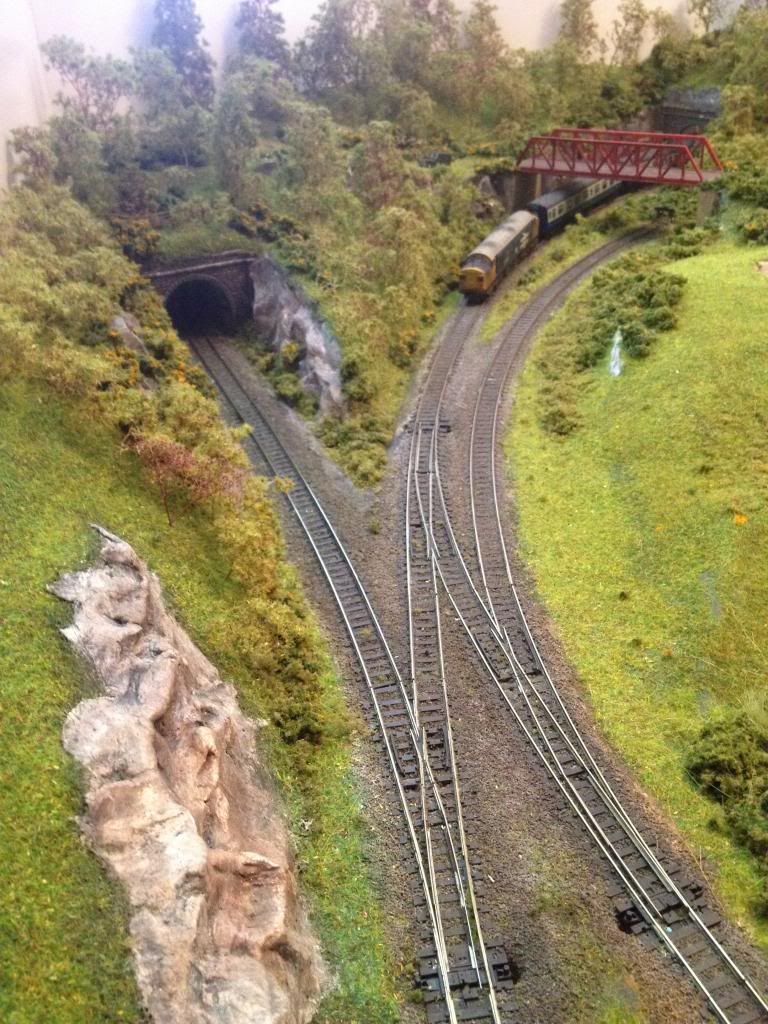
Eastwood Town - A tribute to Gordon's modelling.The last couple of weeks have seen an exchange of track plans/drawings with Pete Harvey who has been incredibly helpful with the design of the overbridge for ET. He has very kindly produced some CAD drawings showing the width and size of the support pillars plus a quite complex deck which will allow straight sections of steelwork. Thanks Pete, I really appreciate your help.
So having mapped out the track layout again and sharpened the angle of the bridge track across the main lines, I was pleased that I could substitute a B8 turnout for a C10 and get back to my self imposed minimum 36" radius. The turnout has been built and awaits painting, but sits very well onto the existing curved track layout. The wall will have to be removed and a new support pillar added, so I attacked it today with a saw. A bit like two steps forward and one back, but it had to be done.
Next stage was the production of the bridge deck itself. I'm quite a fan of bridges that support the track on wooden beams and having built one before for ET, this one followed the same process. I cut a 60mm wide template to suit the curved track and glue balsa strip along the edges of the track bed and under the rails. Cross beams are added every 10 sleepers and then the track glued in position. Once completely set, the excess sleepers are cut away with a new scalpel blade and then the whole lot sprayed with red oxide primer and track colour. Having established the sunken bed, additional side pieces can be added to suit the straight edges needed for the steel spans and thin ply strips stuck down to simulate wooden flooring.
The next task will be to build the support pillars and then place the overbridge in position and complete the inner retaining walls.


-
Diamond code 100
Life in a Northern Town2 hours ago, sb67 said:Great work on the crossing Neil, how will you deal with the electrics, I'm guessing the polarity will need changing during operation?
Steve.
You're quite right Steve, the polarity will need changing. Fortunately I've a tried and tested method for doing this nicked from Iain Rice's book on building track. Here's an explanation I prepared some time ago ...

The simplest way of explaining what is going on is to say that all the same coloured rails are electrically bonded with jumper wires. The red and blue sets of rails are positive and negative and do not change. The green and purple rails will change depending on the setting of the points (like normal live frogs. If you hold a piece of paper over the diamond and just look at the pair of points all seems normal, logical and unthreatening. All that happens is that the frogs of the diamond are linked to their companion point frogs to enable through running. The only restriction on a formation wired thus is that both routes cannot be set across the diamond at the same time; one of the points must be set for the avoiding route. There is no problem with both points being set to avoid the diamond.
-
Wagon planks
Little MuddleWooden deck planking.
This how I paint mine and I will say no one comes out the same, which in a way makes it look more realistic I suppose.
A lot of my techniques involve the 'what if' principle and that is I start with an idea and perhaps it doesn't look right so I will try something else instead - the 'what if' principle.
Now this is fine but many times I start out with great intentions of noting what I do for future reference but in most cases the enthusiasm takes over and when finished with the result I was looking for end up saying - how did I do that!!!
That luckily isn't the case with timber as it has taken me many a year to get the results I was after so here they are:
Paint: Lifecolor Wood Weathering
: Vallejo Black Grey, Old Wood
1.Basic model with deck painted Cold Base Colour and using a pin vice with a needle in the plank joints are scribed both to highlight and clear out joint.
2. Now don't panic as this looks very odd but random individual planks are painted in Warm Base Colour, Warm Base Shade and Cold Base Shade - paint along the plank length and don't worry about getting the covering to even.

3. A wash of Cold Base Shade - about 50/50 mix with water over all areas.
4. Black grey wash (same mix) painted on over all areas but finished off with a cotton wool bud to work the paint in.
5. At this point there was a few areas I was not happy with so I went over each plank in question with either a Cold Base Shade or Black Grey wash applied along the plank.
6. Then using a propelling pencil with the lead sharpen to a point this was dragged along the plank joints to both clean and to add depth
7. This was the end result of the previous tasks but still not looking right.
8. At this point the 'what if' principle was applied and the whole area was given a stiff brushing which tended to pull the effect together plus I started to add Dark Earth powders to the perimeter of the areas using the brush in a circular motion to drive the powder into the corners/edges.
9. Additional coats where added of the powder, some of the plank joints redone with the pencil.
10. At point I turned my attention to the bulks of timber supporting the load
They where painted in Old Wood with Black Grey washes applied with a final one applied at about 75/25 water mix lengthways.
Metalwork painted in a suitable metalwork type colour in this case Steel and Black grey mix...
Bit more Dark Earth powder worked in edges and on some of the planks to give tonal variation
The end result is as I envisioned it and I suspect when the load gets added most of it will be hidden.
Hope this is of help.
-
Scenics
Lower Rose GoodsFinally some finished pictures of Lower Rose Goods, for more detail refer to the June issue of Hornby Magazine to whom my thanks for these images.
All photos by Trevor Jones

The motley collection of lock-up sheds that comprise the goods storage facilities

Yard clerk George Worrel discusses the state of the world with the goods guard as 2721 places a couple of wagons

Bulldog class 'Blasius' (presumably on a running-in turn)

The appearance of an unusual locomotive attracts the attention of the local Spotter

The end of the loading bank, horseboxes would not have been a regular sight at Lower Rose.

General view down the yard. The middle line continues to Wheal Hope mine further up the valley

4545, the regular branch engine, propels the morning train into the loop.


"The ploughman homeward plods his weary way..." 4545 heads off with the afternoon train for Truro via Shepherds Station and Chacewater.
Lower Rose Goods will be at Railwells in August.
-
The Sheep Chronicles : These are the adventures of a Sheep, the Works Forecat and Naughty George,
The Sheep Chronicles : These are the adventures of a Sheep, the Works Forecat and Naughty George,All the powders I use are from the Humbrol range.
Firstly, I apply some Iron Oxide. This is done just to get a 'feel' for where I might want it. There may be more but its applied early so I can tone it down later.
Next , I add a bit of shading using black.
Then Smoke is applied over the top of the saddle tank.
These are really 'base layers' and much blending will follow.
I then add a bit of dark earth on the lower edges. Again this will be blended in later.
Next, I daubed a bit of Sand here and there. I wanted to suggest faded paint work..
-
The Sheep Chronicles : These are the adventures of a Sheep, the Works Forecat and Naughty George,
The Sheep Chronicles : These are the adventures of a Sheep, the Works Forecat and Naughty George,Last one for tonight.
The sand is worked in and it's starting to come together.........but is far from finished.
Rob.
-
The Sheep Chronicles : These are the adventures of a Sheep, the Works Forecat and Naughty George,
The Sheep Chronicles : These are the adventures of a Sheep, the Works Forecat and Naughty George,Morning all.
Last night's photos were taken at the dining table where the light is perhaps not the best.
Here's a photo taken at Sheep Dip under layout light. Still a bit to do but perhaps a more accurate rendition of the colouring is seen here.
The rust will be toned down.
A work in progress then. .
Rob.
-
The Sheep Chronicles : These are the adventures of a Sheep, the Works Forecat and Naughty George,
The Sheep Chronicles : These are the adventures of a Sheep, the Works Forecat and Naughty George,Oops.......
-
The Sheep Chronicles : These are the adventures of a Sheep, the Works Forecat and Naughty George,
The Sheep Chronicles : These are the adventures of a Sheep, the Works Forecat and Naughty George,26 minutes ago, Alister_G said:Excellent, thanks very much for that Rob, a really useful "how-to" which I will be copying in the future.
Al.
Thanks Al.
Theres quite a bit still to do yet. The chassis remains untouched. However I couldn't resist a pause and pose on Sheep Dip.
Rob.

-
The Sheep Chronicles : These are the adventures of a Sheep, the Works Forecat and Naughty George,
The Sheep Chronicles : These are the adventures of a Sheep, the Works Forecat and Naughty George,Sorry Alan...
Heres a few more.
I'll slow down a bit tomorrow when I return to the powders v Peckett....
For now....
Rob.
-
The Sheep Chronicles : These are the adventures of a Sheep, the Works Forecat and Naughty George,
The Sheep Chronicles : These are the adventures of a Sheep, the Works Forecat and Naughty George,A final view tonight of Westminster at Bleat Wharf.
The lighting seems a tad softer on Bleat than on S.D and seems to give a warmer image...
It will also look a lot better when I weather the chassis.
Rob.
-
The Sheep Chronicles : These are the adventures of a Sheep, the Works Forecat and Naughty George,
The Sheep Chronicles : These are the adventures of a Sheep, the Works Forecat and Naughty George,A couple of images of where we are at present.
The chassis has had a bit of a seeing to. Wheels have been painted a darker green and weathered using a light dusting of dark earth, black to the wheel centres and coupling rods etc.
Returning to the body, the top of the saddle tank was given a light dusting of dark earth. Emphasis was given to the lines of rivets dropping down the saddle tank using a bit of smoke. The odd spot of rust was added using iron oxide and rust, highlighted with a spot of white here and there.
A bit more contrast is perhaps needed but time to leave it for a bit and apply fresh eyes.
The buffer beams need attention but I am quite happy with things do far.
Rob.
-
The Sheep Chronicles : These are the adventures of a Sheep, the Works Forecat and Naughty George,
The Sheep Chronicles : These are the adventures of a Sheep, the Works Forecat and Naughty George,And finally......for tonight at least.
-
The Sheep Chronicles : These are the adventures of a Sheep, the Works Forecat and Naughty George,
The Sheep Chronicles : These are the adventures of a Sheep, the Works Forecat and Naughty George,Evening all.
Today has seen an occasional revisit to Westminster.
A slight distressing using a 2mm fibre brush has been followed by further daubs of sand and white weathering powders and we are now at a point where I think the body at least is finished.........ish. I still need to weather the buffer beams and tweak the buffers.
Further work to do on the chassis but not much more.
Heres a few of Westminster and 7754.
Rob.
-
Junction
TarbhitJust a wee aerial shot of the right hand end to give a feel for the flow of the track. I'm a bit gutted that there's a dog-leg between the main line and goods yard. Not much I can do about it now though.
-
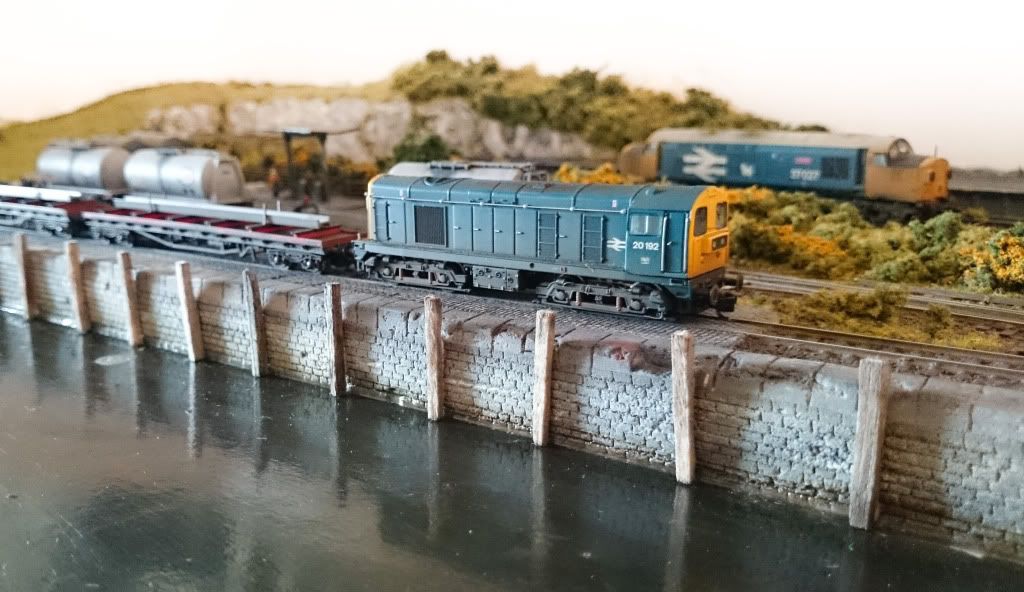
Quayside
TarbhitAfter a lengthy committee meeting (my flatmate, girlfriend and I) the decision was taken to remodel the area at the end of the dock.
In an attempt to accentuate the feeling of open space that removing the engine shed creates, I've now removed the hillside and replaced it with the ends of three sheds:

It does mean that there are going to be loads more cobbles but I think it'll be worth it, particularly as it makes a bit more room for a fuelling point and tanks without the whole thing feeling cramped and a little incoherent. The hill in the corner around the end of the passenger loop will be reduced in height to try and get away from the 'railway in a quarry' feeling that the area has.
-
Quayside rocks
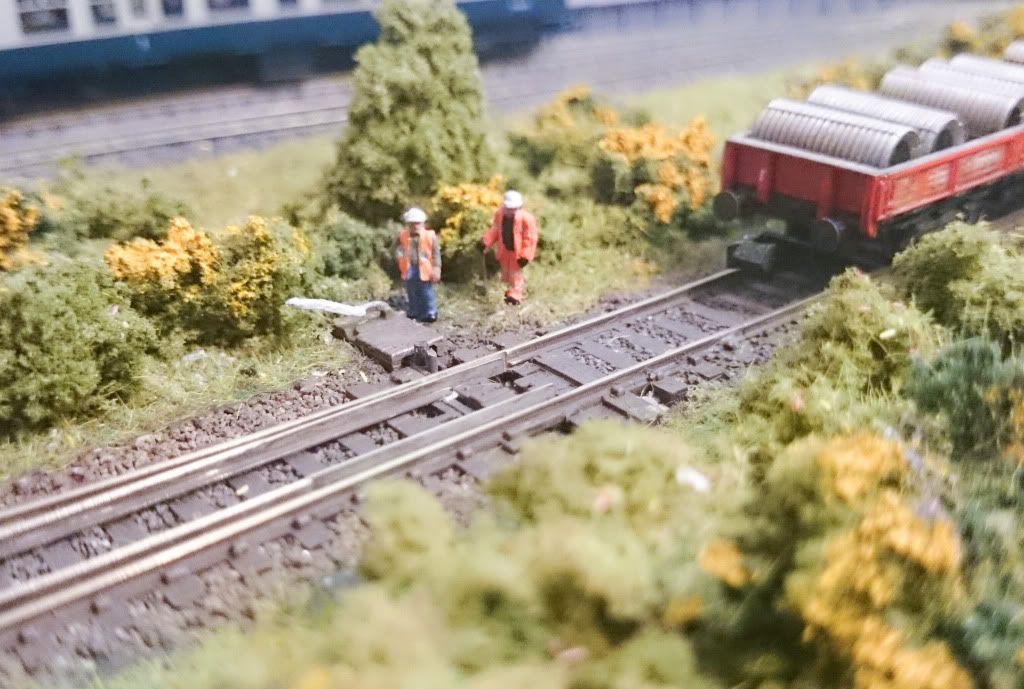
TarbhitTonight's job was to bring the sea to life a little.

Not quite done but getting close to what I'm looking for.
On the photography side of things I decided to get my old DSLR out of storage and found that the field of focus is very narrow at close range, To get around that I followed the excellent short tutorial by Andy Y.
Mike
-
Quayside
TarbhitAnyway, thanks for the kind words Jaz.
In return, here are the colour versions of the photos.

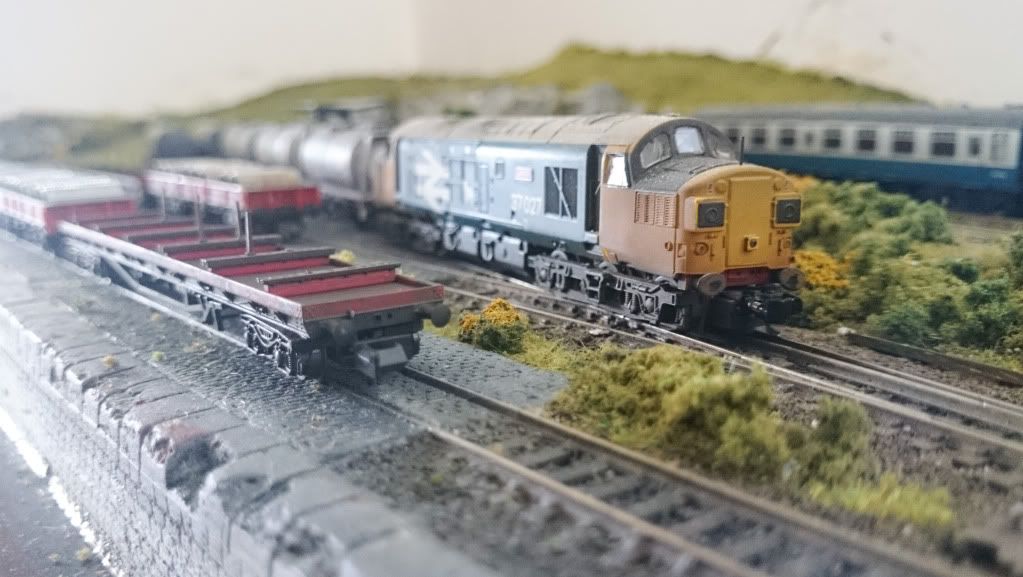


")


