

TomE
-
Posts
2,798 -
Joined
-
Last visited
-
Days Won
1
Content Type
Profiles
Forums
Blogs
Gallery
Events
Exhibition Layout Details
Store
Blog Comments posted by TomE
-
-
Thanks for posting these Ian. Like Jeremy I remember seeing this in RM and thinking it was a brilliant layout. Does it still exist?
Tom.
-
Howdy Will.
That station building looks great, definitely a good use of 3D printing!
Tom.
-
Top stuff Will, an interesting way of getting weight into smaller scale models!
Is there any sign of the original 3D printed mould on the final brass models?
Tom.
-
Hi Don.
I agree, it's a very useful little device if you want DCC control, and in fact it can be used on DC also. The total cost, excluding signal but including P&P and servo was
-

Rule 5 The carpet monster is building a quite respectable collection of your favourite scale model railway components.
I'm pretty sure my carpet monster will have a finished model of Ropley long before I do!
As a personal rule, if it looks finished, it is. Leave it alone and don't fiddle with it!!
Another general rule could be 'No matter how accurate you think have made something, there will always be someone who can point out the bit you got wrong!'
Tom.
-
 2
2
-
-
Good Stuff Will, even though the T Gauge track is a little narrow, it still looks plausible to my eyes.
That Herald looks familiar too....
Tom.
-

Usually until it is more or less dry, otherwise you risk disturbing it. You can apply it After about 5-10 minutes by tapping it from a brush then blowing the excess away, which works for areas where you might want to represent a finer surface finish.
Tom.
-
As usual your ground textures look great Tom. How do you do the tarmac?
Regards, Andy
Thanks Andy. If you mean the dark grey area on top of the embankment, it's actually just the same material used for ballast but with black weathering powder applied whilst the Kleer is still slightly wet. In reality this is just a gravel pathway.
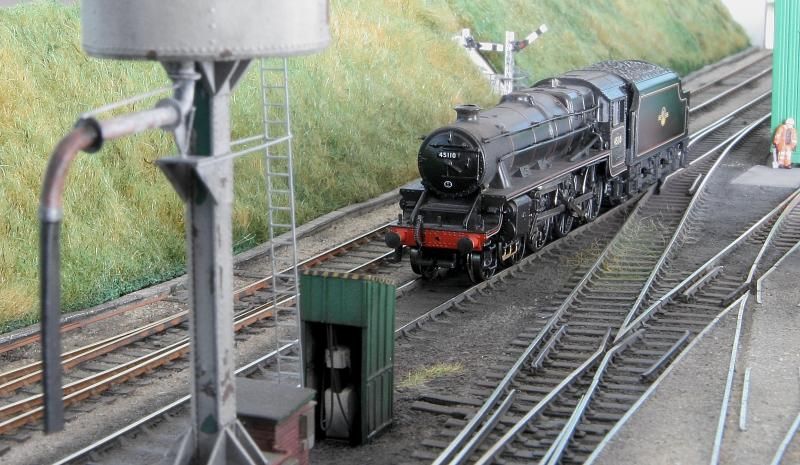
Lovely work as usual Tom. Is that the new Farish Duchess in the first photo?
Thanks Jeremy. It is the new Duchess. Somewhat out of place at Ropley, but the plan is to convert it to represent Duchess of Sutherland on the premise that it could one day visit the line!
Cheers,
Tom.
-
Thanks Pete.
The scenic break is hidden mostly by the carriage & boiler shop building (The green shed to the right in the 3rd pic down) The fascia panel also helps to hide it a little when attached.
I've made the opening as small as I could to keep it as well hidden as possible, although I did have to make a small adjustment to allow the Dapol 9F to pass through as you might be able to see in the 2nd photo!
On reflection, if I had known they were planning on installing the bridge when the project started, I would have pushed everything to the right slightly and made more of a feature of the engine shed on this board.
Tom.
-
I can imagine! Did you fix the sleapers in place and then thread the rail? I've tried that in the past and found that passing the rail along gets progressivly harder, and you then run the risk of bending the rail or damaging the chairs.
Tom.
-
Hi Jeremy.
Looking good so far!
Is there a reason you decided to glue down the sleapers individually, apart from insanity!
Tom.
-
That's insanely neat Pete!
I'm off on the 16th so will try and get to the show to see it in the flesh!
Tom.
-

I've just seen the floor plan and it seems St Ruth and Highbury are only separated by the 2mm SA stand, so I'm sure some cross operator exchange could be easily arranged

Tom.
-
Top work Andy, if I can escape Highbury i'll stop by at Warley for a look!
Tom,
-
The station building is really coming along well! Curious to see how this turns out as I can see this method of producing buildings having it's uses.
Tom.
-
Thanks Alex.
I have dusted the top of the boiler with black weathering powder, although that was more to represent ash/soot deposited over time. It's not immediately obvious in the photos as its quite a subtle effect, maybe too subtle!!
Its a little more obvious in this photo hopefully:
Tom.
-
Yes, that is a problem with the black 5. Removing the metal "coal" does make it even lighter on its feet, and it's not exactly heavy to begin with!
My current line of thinking is a thin sheet of lead for weight cut to the size of the opening, with some coal superglued to the top, however I haven't tried this approach yet.
I would be interested in peoples recommendations for N Gauge coal though, particularly something to match the more rounded lumps you tend to find these days. A lot of the stuff marketed as coal is more like small splinters of the stuff rather than lumps.
Tom.
-
Ah, yes indeed Andy! The latest GF models have improved in that respect, many having a representation of the full coal space now the motor is located where it should be, but the Black 5 & Std4 will always look like they are fully loaded as a result of the tender drive.
Tom.
-
Thanks Andy(Y)!
Andy (D869) - The ladder is from the Ratio etch, and so far I've just been very very careful! I'm still undecided whether to permanently fix the tower in place once the scenery at the rear of the board is complete, or leave it separate from the layout with its own storage. The latter would at least allow track cleaning to take place without risk of catching it. I'm sure one day the ladder will take a hit though!
Cheers all,
Tom.
-
Thanks Al.
Mikkel - most of the ground work uses the Treemendus earth powder, with the exception of the yard which is DAS clay. Two types of Earth powder were used, the main running lines being Normandy Earth powder and the wheel drop/ash pit line using standard Earth powder and black weathering powder for a slightly finer appearance.
For 4mm it would certainly give the appearence of very fine, ash like ballast.
Tom.
-
Looking forward to seeing the building develop, and the final printed version!
Tom.
-
Thanks all for the very kind comments, all much appreciated!
Will - I shall add something about that in the next entry!
Cheers,
Tom.
-
Thanks Andy & Douglas!
Robert, I have used Seamoss for trees in the past, and if you want a cheap, quick and easy forest then they are probably the only way to go. They do benefit from some strengthening of the trunk though, and some use a length of wire inserted into the stem, whilst others use a hardening substance applied over the stem.
The embankment in the pictures below (from a now defunct project) used seamoss with some Noch 'leaves' applied. The effect was ok, but I do feel the twisted wire method, whilst time consuming, allows a much better final representation and greater flexibility with shape especially if you are modelling a specific real tree.


Hope this helps.
Tom.
-
Thanks SJ. I did manage to get a quick look at Stokesay on Sunday morning and it is really coming along nicely!
Pete, your blog entry on presentation & height were a great help, so I have to say thanks again for that. It's a bit of a trade off in N/2mm between getting the right height to show off the layout to best effect, whilst trying not to alienate those who have difficultly viewing high up layouts.
Andy, many thanks for the invite. I had a great time! Water seems to have a been a bit of a running theme for you over the weekend!
Cheers all,
Tom.


Victoria Bridge on Tour at Highley's Engine House this Weekend
in Will J's Random Adventures in N Gauge
A blog by Will J in RMweb Blogs
Posted
Lighting looks much improved Will!
Looking forward to the weekend.
Tom.