


simon br blue
-
Posts
386 -
Joined
-
Last visited
Content Type
Profiles
Forums
Blogs
Gallery
Events
Exhibition Layout Details
Store
Posts posted by simon br blue
-
-
Hi,
As above, 7mm Heljan class 20 roof fan mesh required.
Regards
Simon.
-
I've continued with the various Polybulk wagons and below is an update on progress (copied from my 3D printing thread but hopefully OK to post here as well).
I rescaled and printed a 4mm version of the E443 slab-sided Polybulk, the body is grey PLA and printed in 2 parts on the Balco printer, the details are grey resin printed on the Form 2. The bogies are Shapeways Multi Jet Fusion Y25 bogies.
 4mm E443 Polybulk by simon br blue, on Flickr
 4mm E443 Polybulk by simon br blue, on Flickr
The other 4mm Polybulk that's nearly finished is the Malt Distillers version. Balco PLA 2 part body, Form 2 grey resin details, Shapeways WSF Y25 bogies. Etched ferry loops and brake wheels from 51L/wizard models.
 4mm Malt Distillers Polybulk by simon br blue, on Flickr
 4mm Polybulks by simon br blue, on Flickr
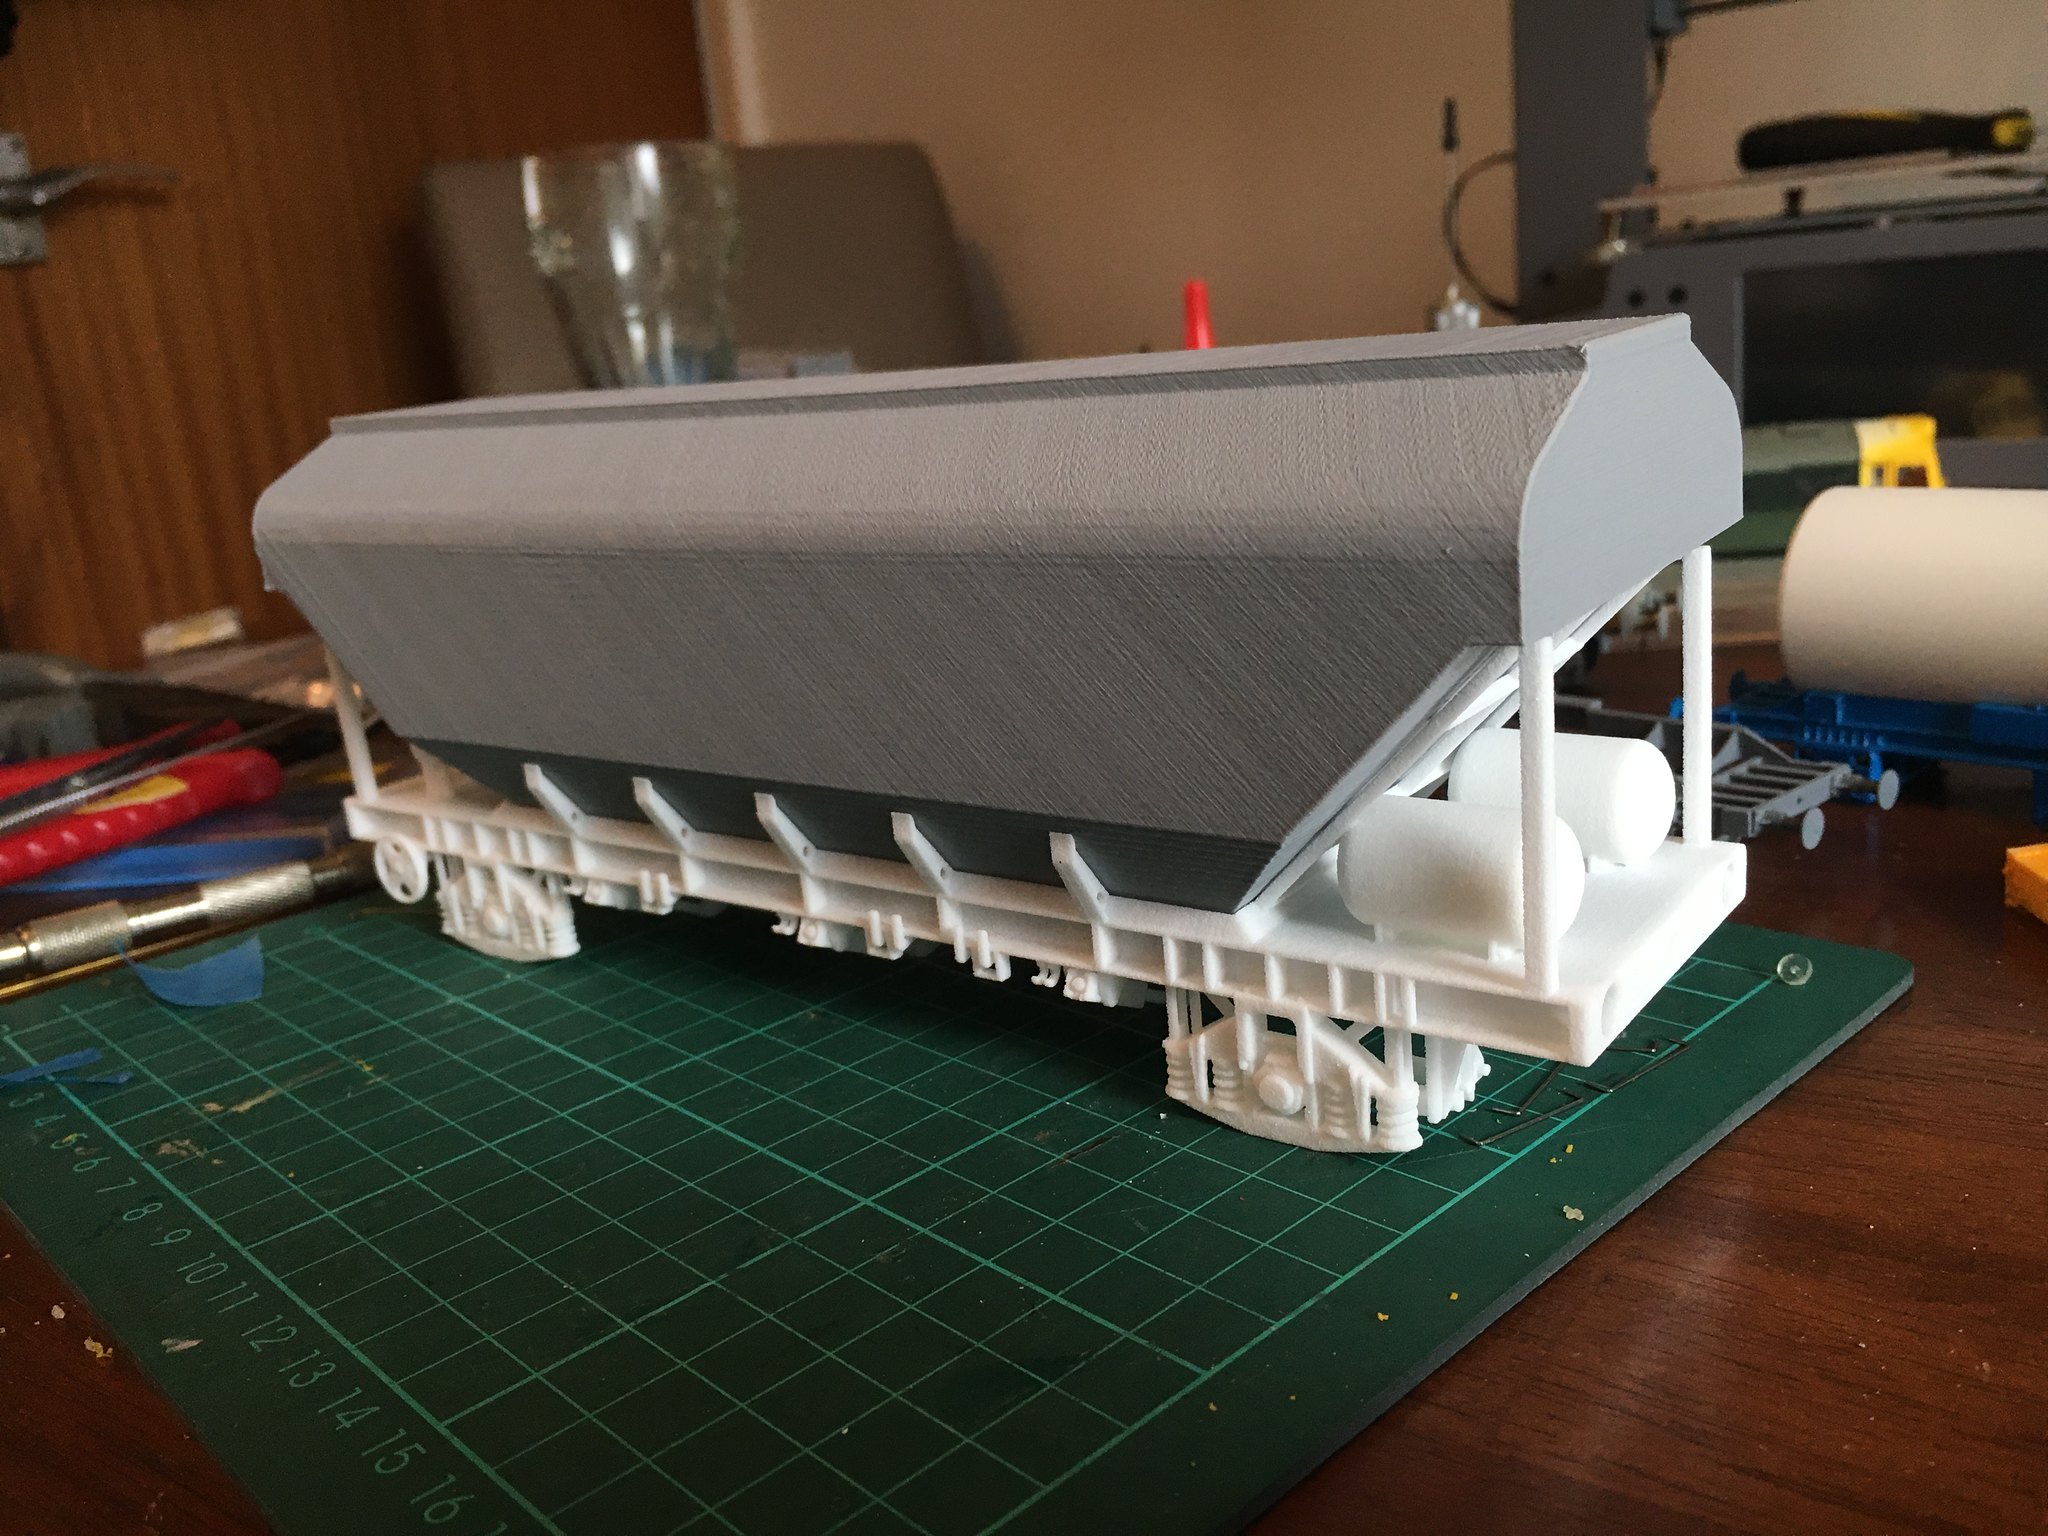
Moving up in scale the 7mm Grainflow Polybulk is nearly finished. Similar to the first Polybulk its made with a Balco PLA 3 part body, Shapeways WSF Details and Y25 bogies.
 7mm Grainflow Polybulk by simon br blue, on Flickr
 7mm Grainflow Polybulk by simon br blue, on Flickr
 7mm Grainflow Polybulk by simon br blue, on Flickr
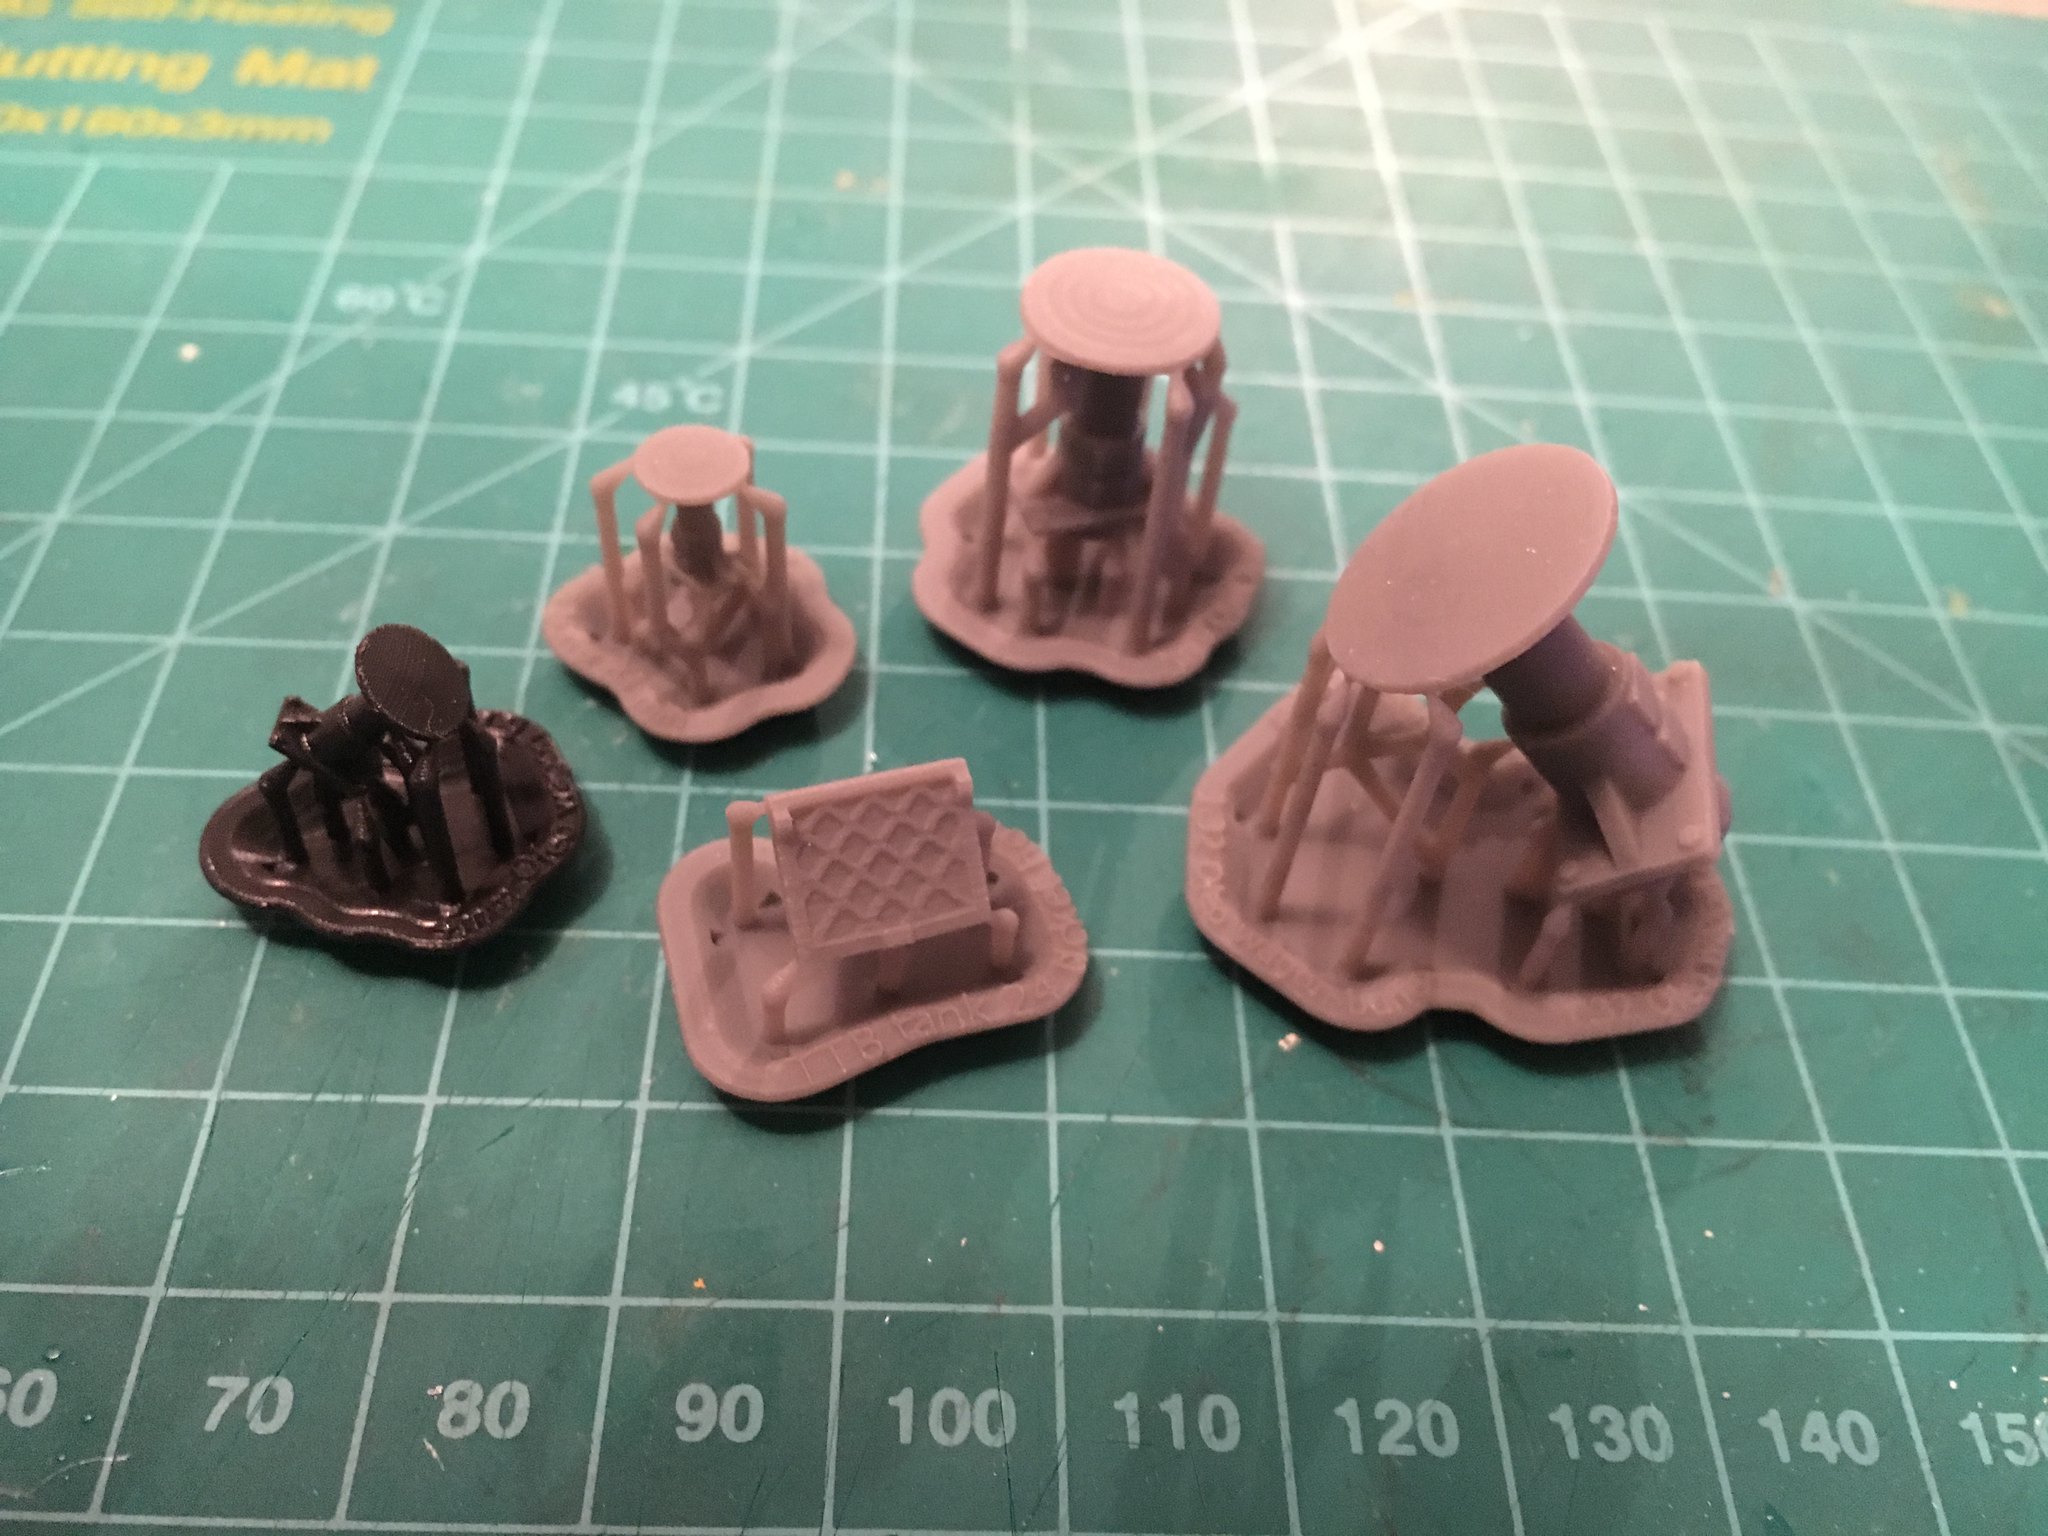
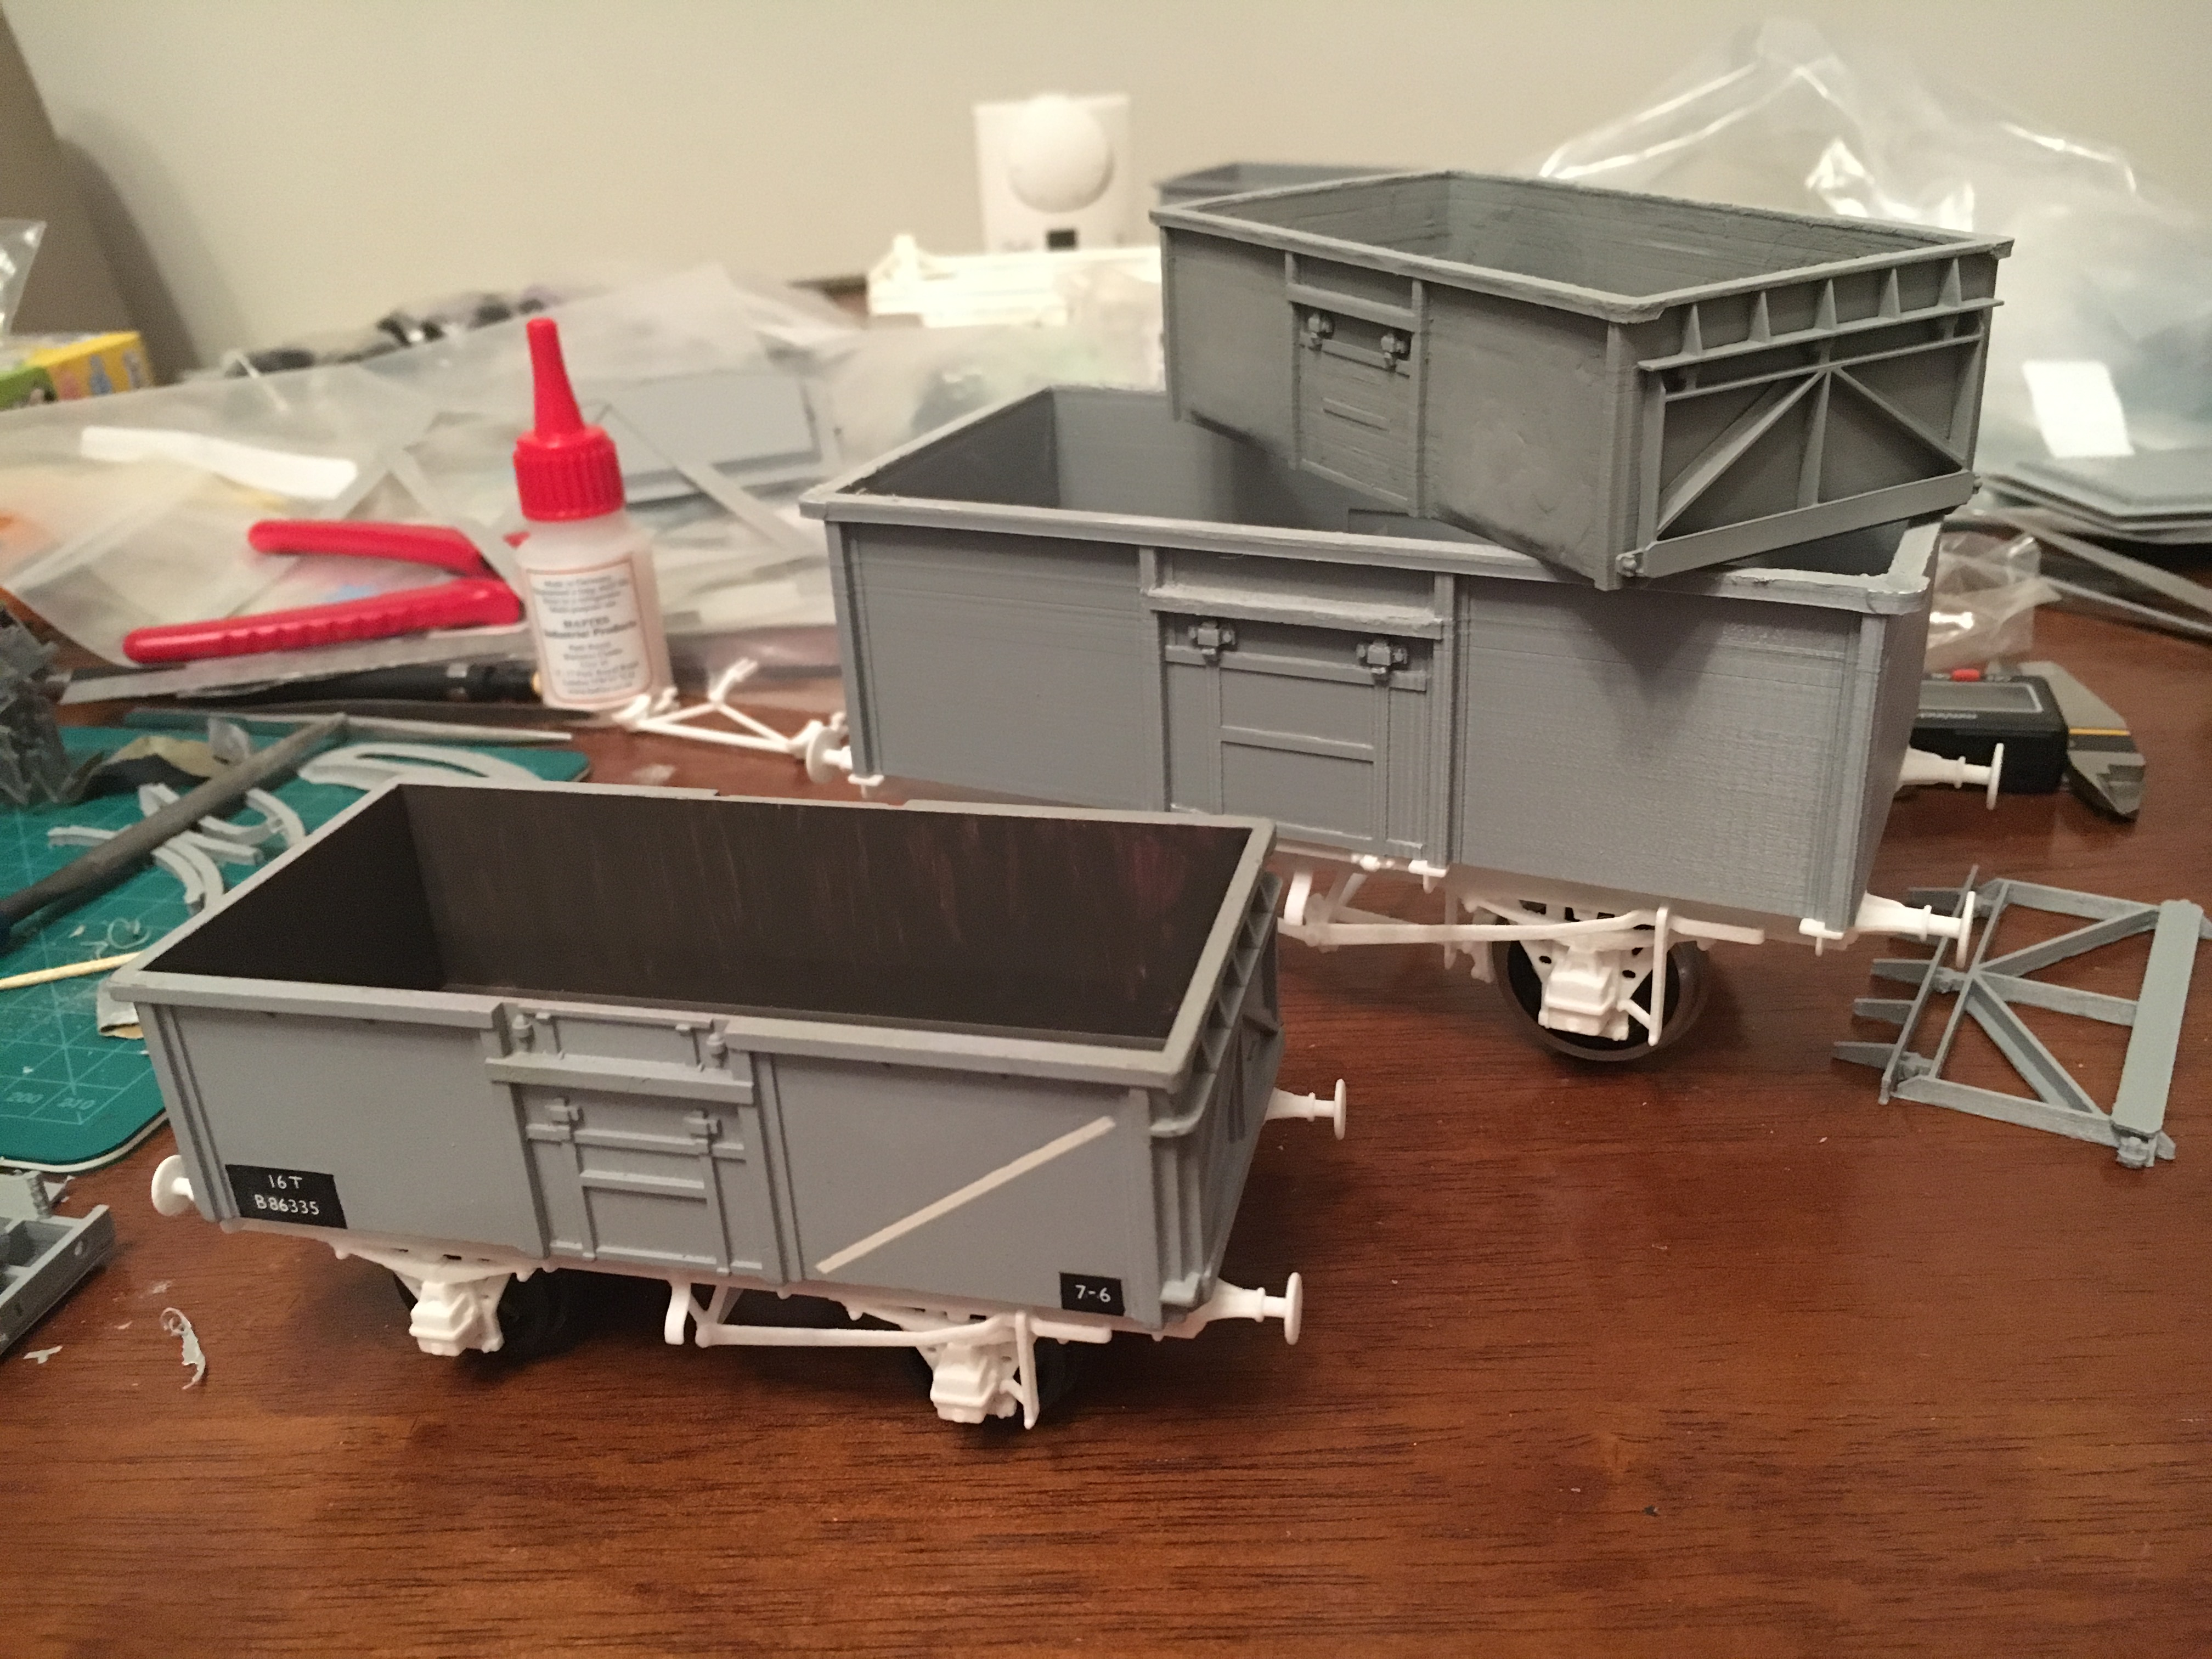
Finally for tonight is the 1/32 Grainflow polybulk pictured with the 2 smaller versions. It's made the same way as the 7mm version with Balco PLA 3 part body, Shapeways WSF Details and Y25 bogies.
 Grainflow Polybulks by simon br blue, on Flickr
 Grainflow Polybulks by simon br blue, on Flickr
-
 3
3
-
 5
5
-
-
Cheers for the tip about 51L/wizard models, I purchased some ferry fittings and various etched wheels.
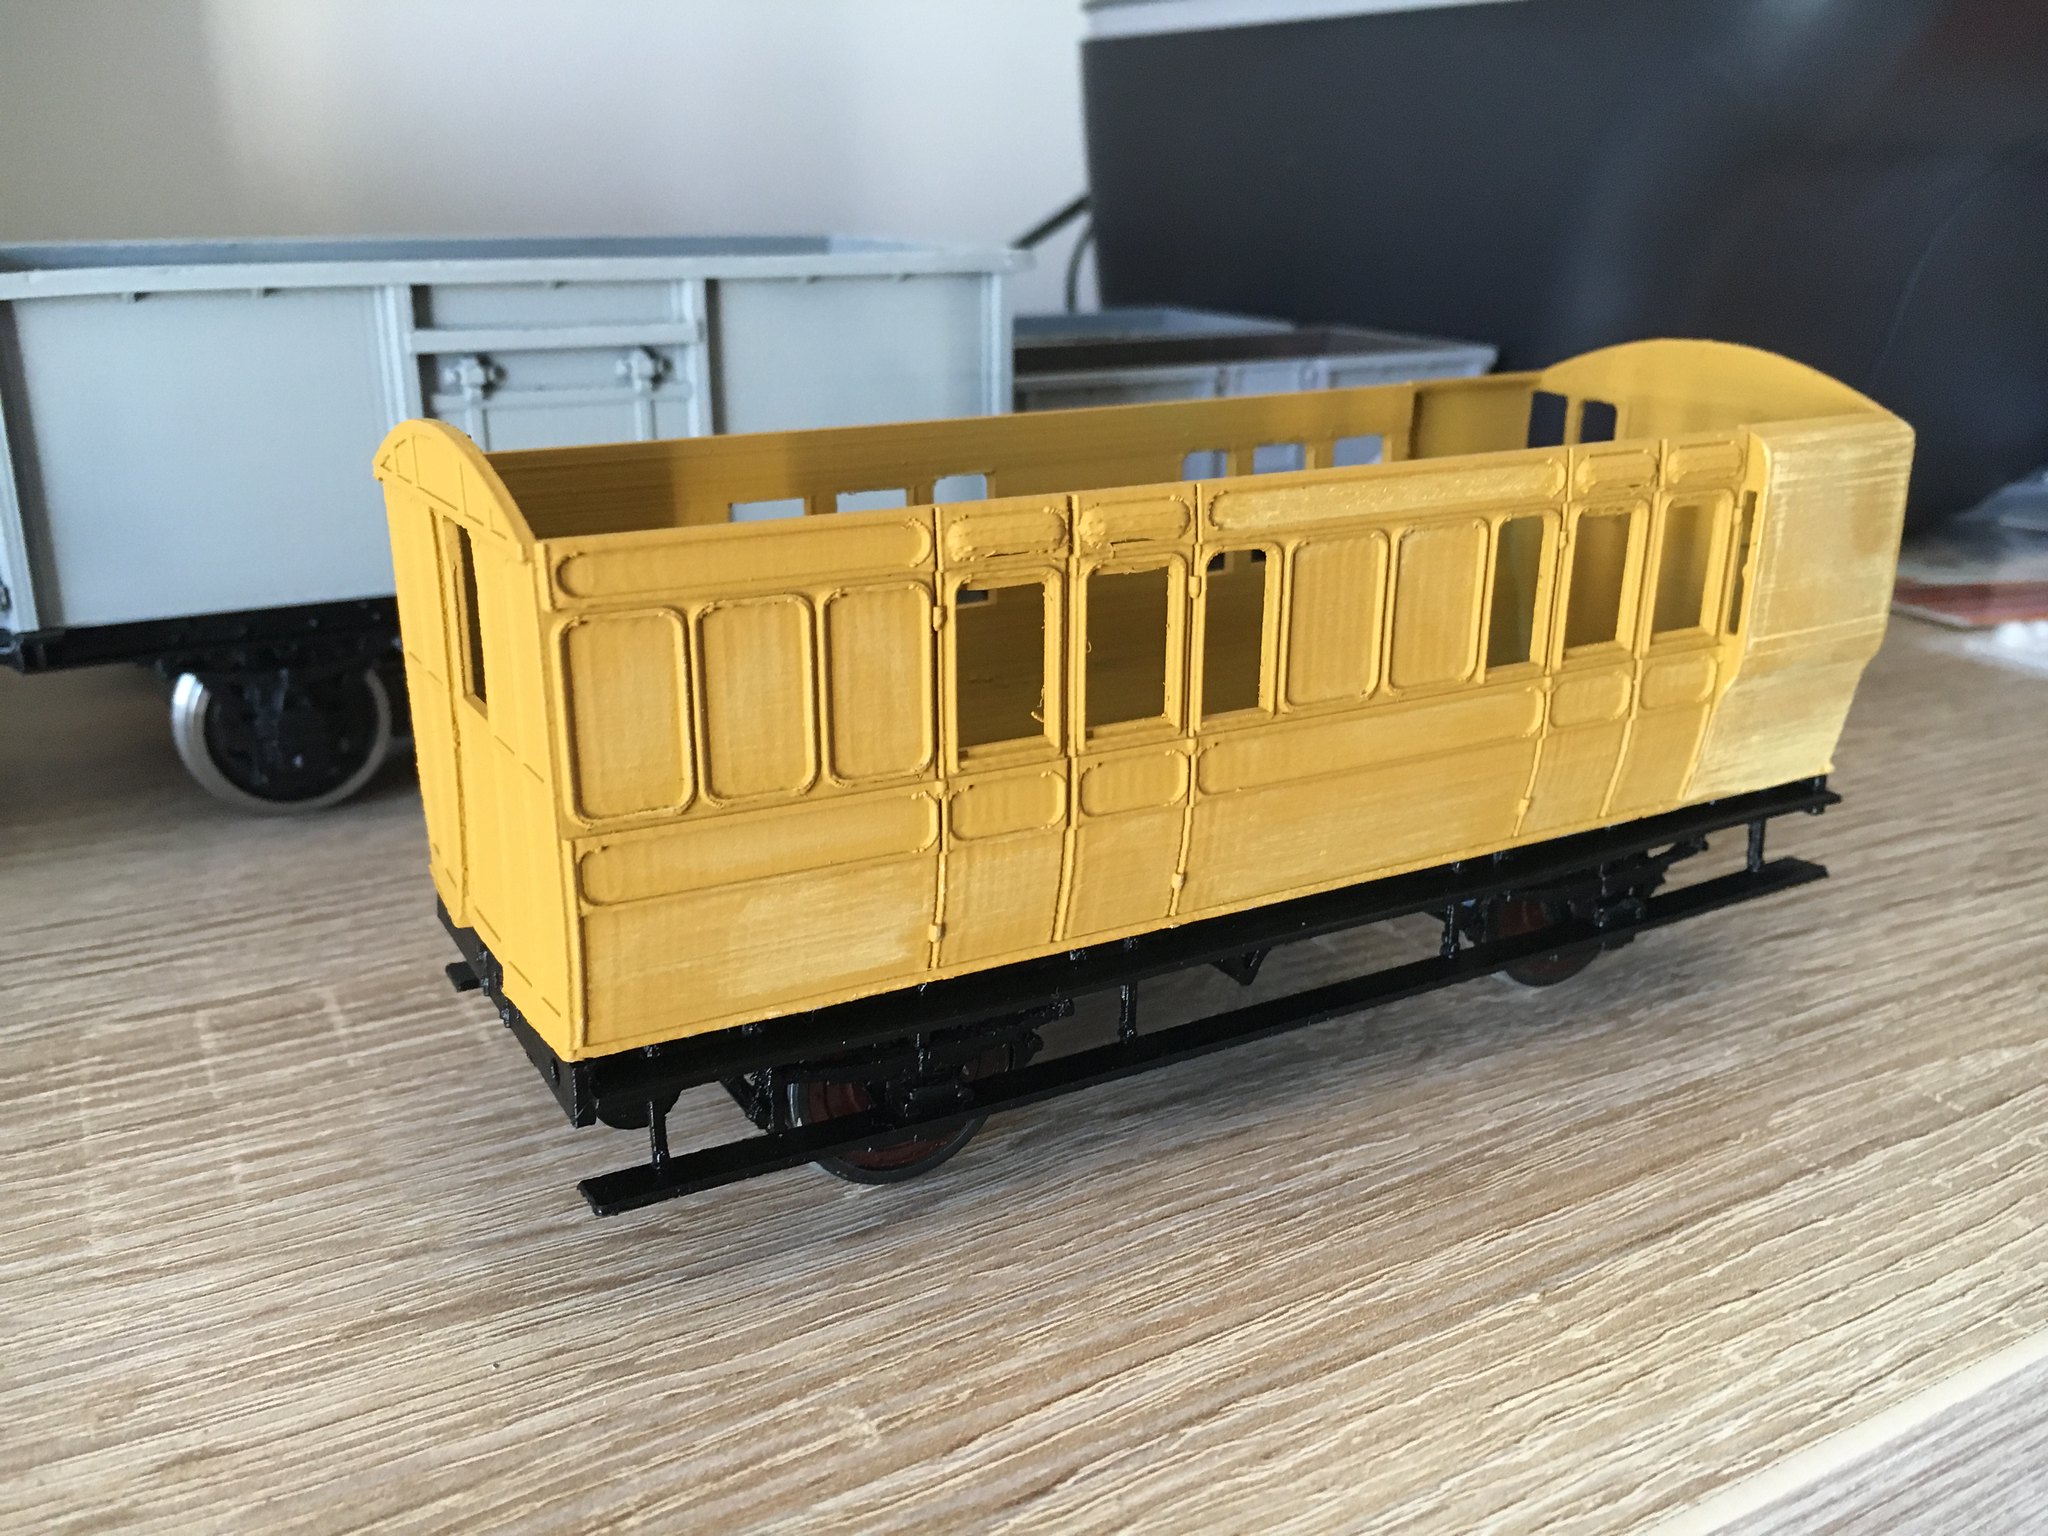
Regarding the Wisbech and Upwell models, I'm still working on them, the balcony railings are the weak point at the moment, maybe need etching or laser cutting.
Work has also continued with the various Polybulk wagons.
I rescaled and printed a 4mm version of the E443 slab-sided Polybulk, the body is grey PLA and printed in 2 parts on the Balco printer, the details are grey resin printed on the Form 2. The bogies are Shapeways Multi Jet Fusion Y25 bogies.
4mm E443 Polybulk by simon br blue, on Flickr
4mm E443 Polybulk by simon br blue, on Flickr
The other 4mm Polybulk that's nearly finished is the Malt Distillers version. Balco PLA 2 part body, Form 2 grey resin details, Shapeways WSF Y25 bogies. Etched ferry loops and brake wheels from 51L/wizard models.
4mm Malt Distillers Polybulk by simon br blue, on Flickr
4mm Polybulks by simon br blue, on Flickr
Moving up in scale the 7mm Grainflow Polybulk is nearly finished. Similar to the first Polybulk its made with a Balco PLA 3 part body, Shapeways WSF Details and Y25 bogies.
7mm Grainflow Polybulk by simon br blue, on Flickr
7mm Grainflow Polybulk by simon br blue, on Flickr
7mm Grainflow Polybulk by simon br blue, on Flickr
Finally for tonight is the 1/32 Grainflow polybulk pictured with the 2 smaller versions (which makes the 4mm version look tiny). It's made the same way as the 7mm version with Balco PLA 3 part body, Shapeways WSF Details and Y25 bogies.
Grainflow Polybulks by simon br blue, on Flickr
Grainflow Polybulks by simon br blue, on Flickr
-
3
-
3
-
-
Had a couple of requests about my Shapeways shop, link to the shop below-
https://www.shapeways.com/shops/brbluemodels
Following on from the Slab sided Polybulk I've drawn one of the Grainflow wagons, I did a test in 4mm with a Balco printed body (printed in 3 parts) with Form 2 details and bogies.
 Grainflow wagon 4mm by simon br blue, on Flickr
I also printed a test body in 7mm and 1/32 scale.
 Grainflow Wagon test prints by simon br blue, on Flickr
I painted the hopper with Humbrol grey 64 and Halfords Ford Laurel Green.
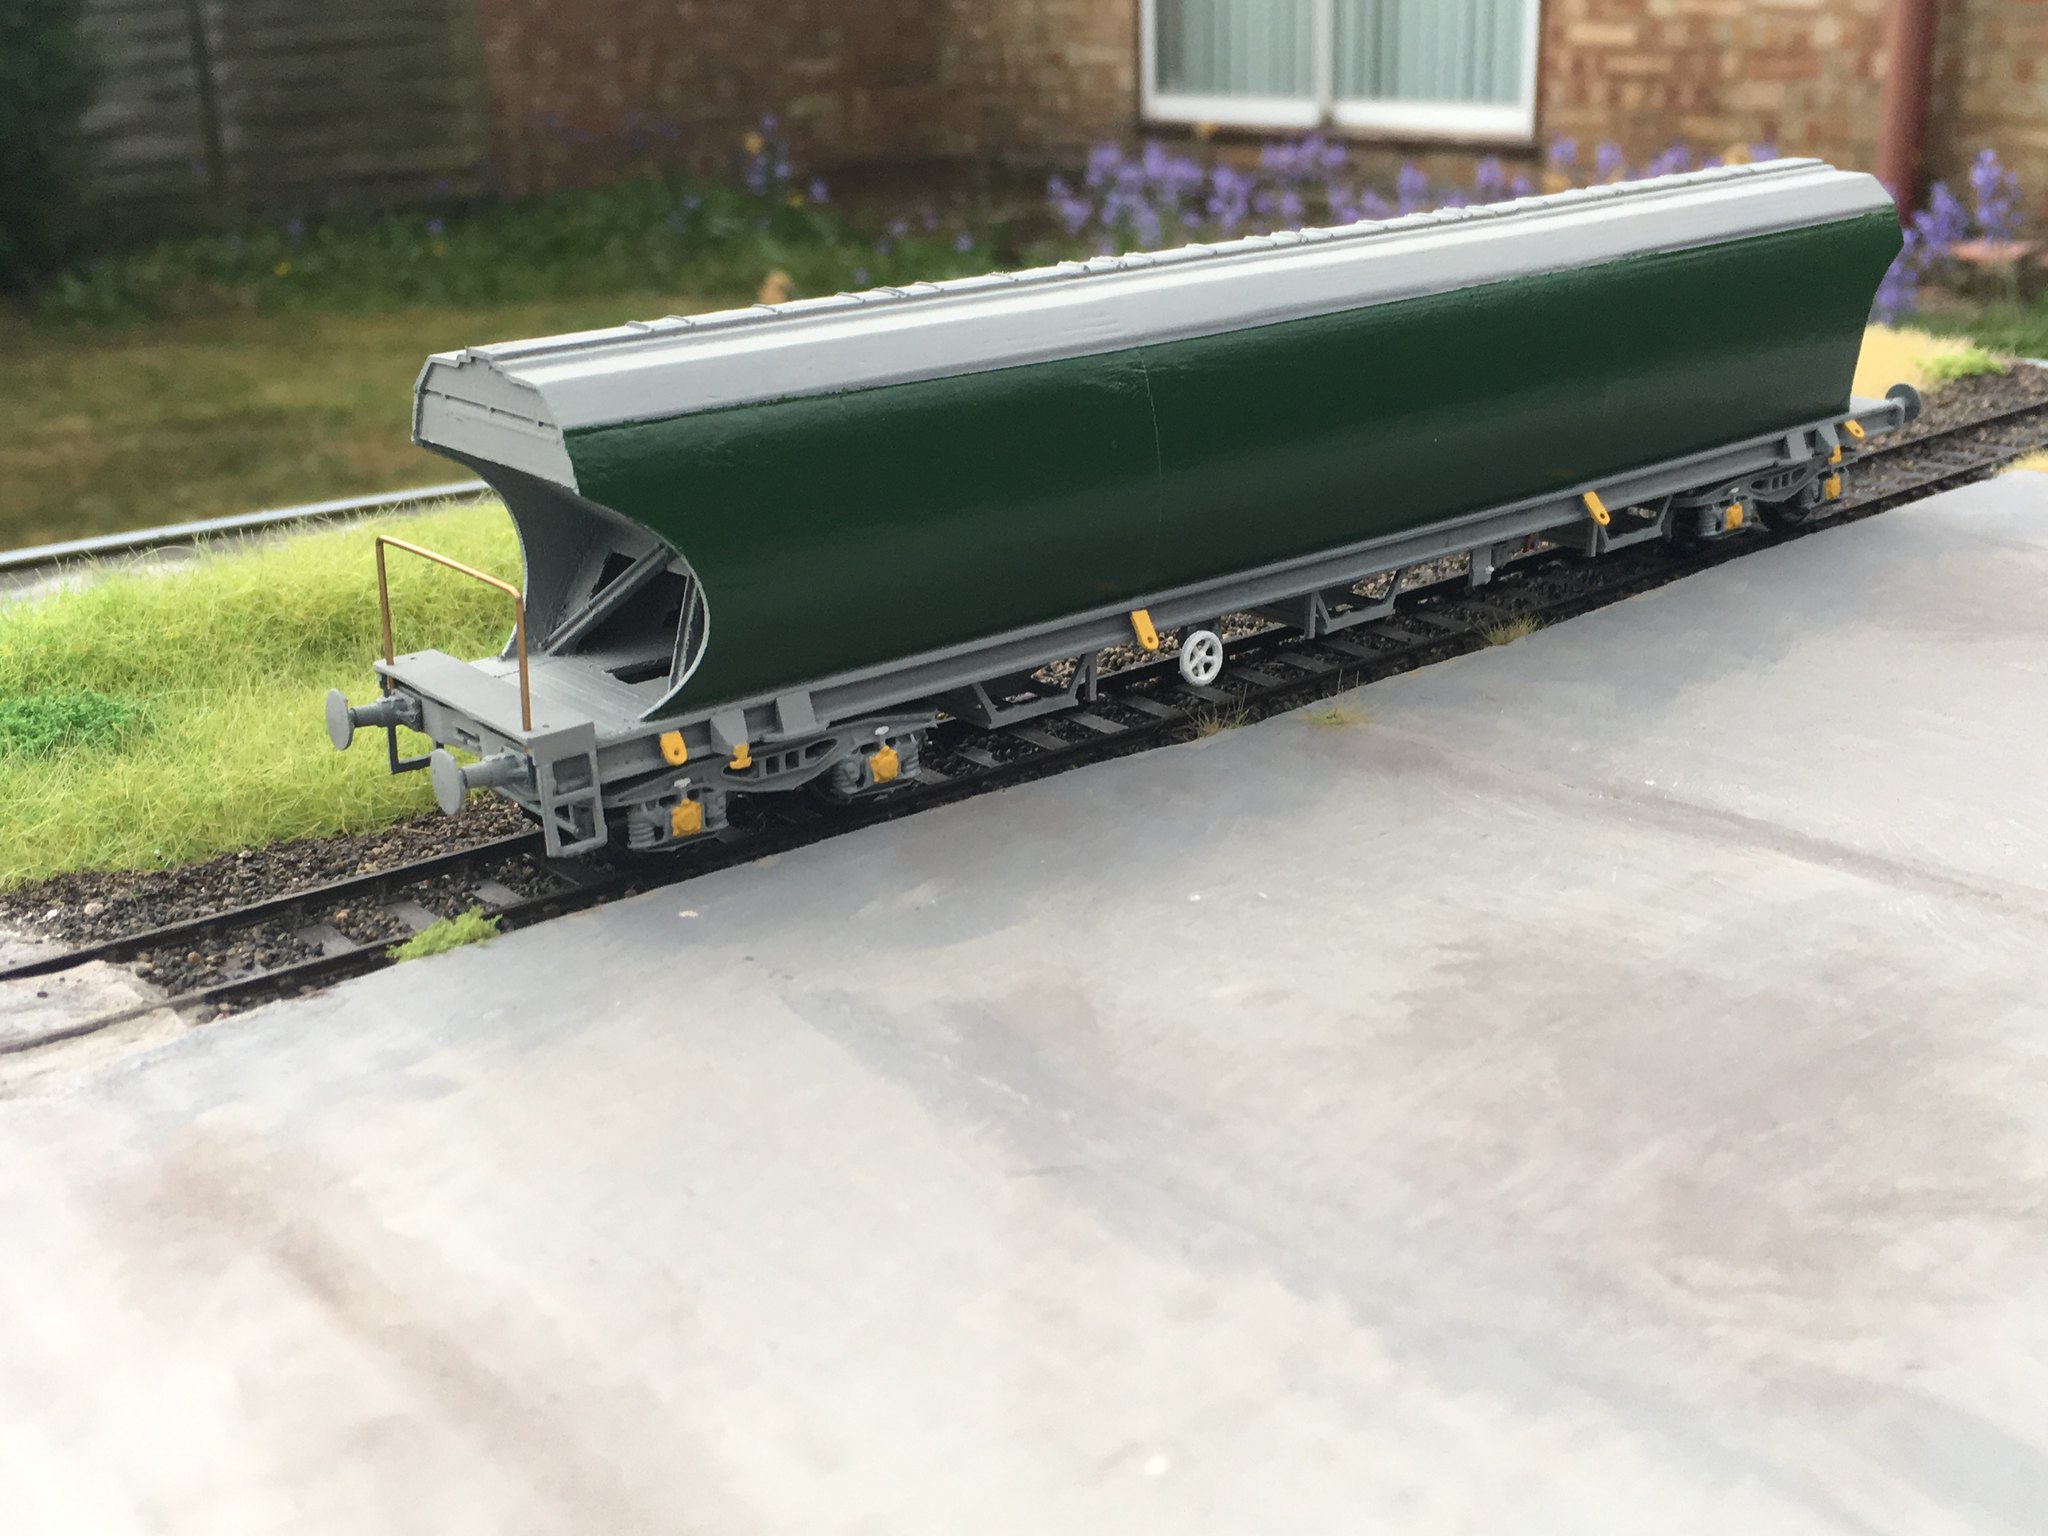 Grainflow wagon 4mm by simon br blue, on Flickr
-
6
-
3
-
-
On 26/04/2019 at 14:51, herbie2478 said:
Hi,
Is the 4mm Tullis Russell PAA available from your Shapeways site?
Regards
Hi Sadly the TR PAA chassis was designed for Shapeways HDA material which they subsequently withdrew. I can look at making it available in the fine detail material and I'll also have a go at printing it on my Form 2 now I have some more resin.
Recently Railtec scaled up the OTA transfer to 7mm which was the spark needed to finish off my own OTA. The wagon was printed in WSF and has WSF buffers and stanchions, the deck and ends were made from plasticard with planks and wood grain engraved on them. The straps were made from Tamiya masking tape and the deck was weathered using acrylic paints. The stanchions were painted white before being weathered and having rust spots added using dark mud Mig ammo Oilbrusher.
 7mm OTA wagon by simon br blue, on Flickr
 7mm OTA wagon by simon br blue, on Flickr
 7mm OTA wagon by simon br blue, on Flickr
-
9
-
-
Looks like its been 3 months since the last update, how time flies.
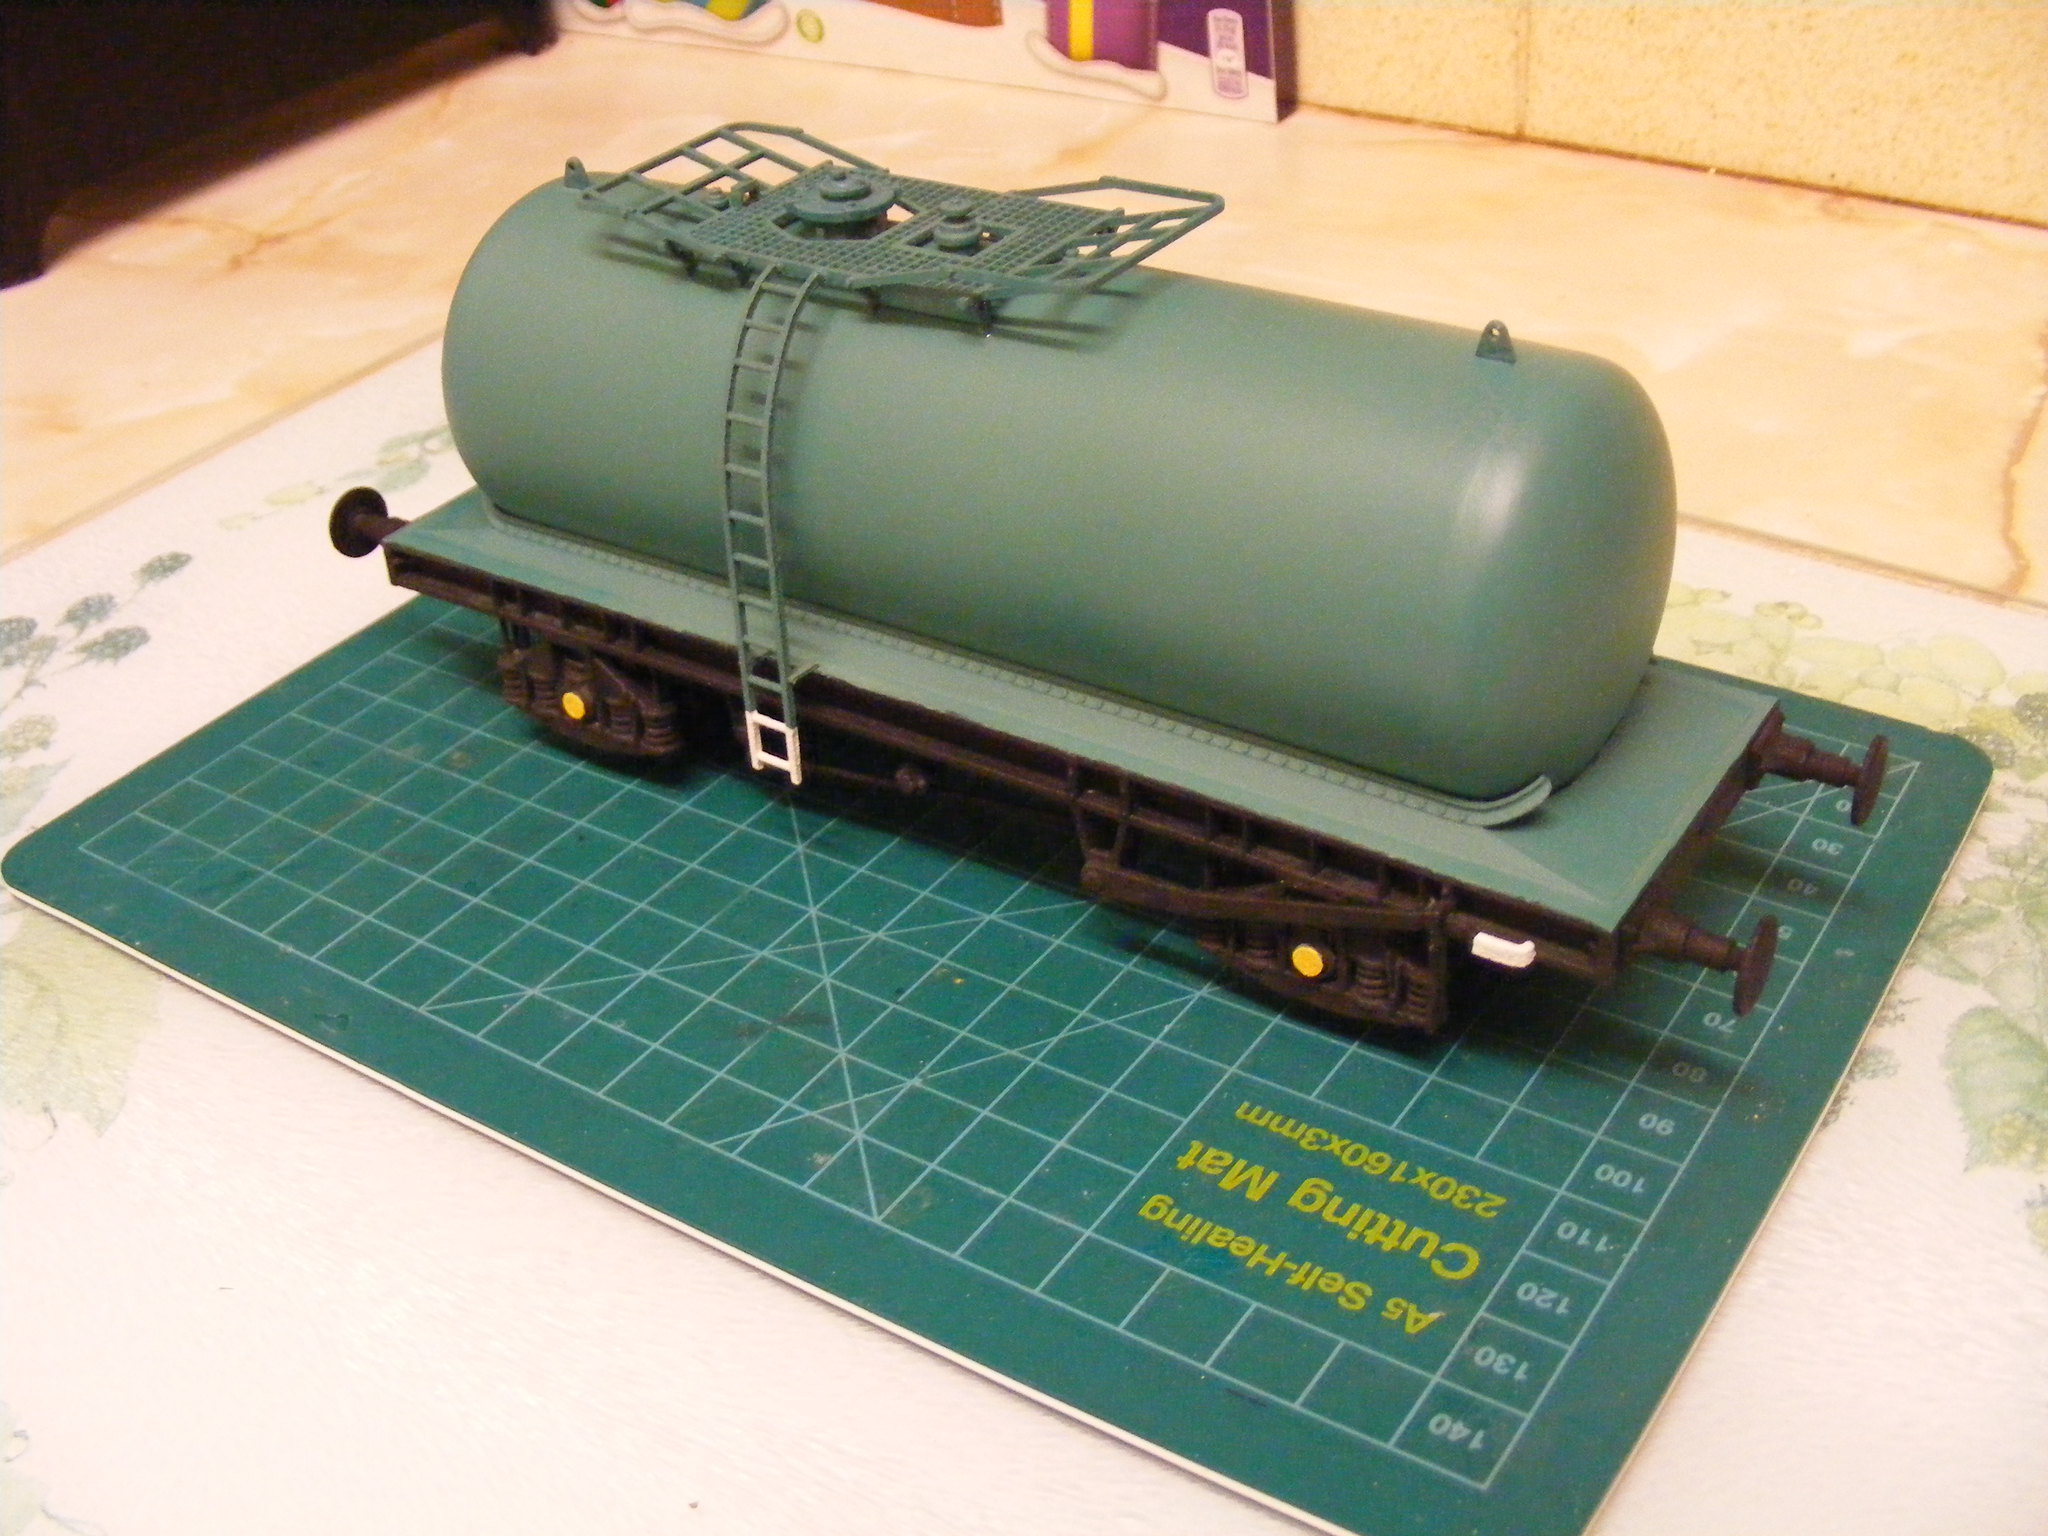
First up is a 7mm Slab sided Polybulk wagon.
I had seen a thread on about the slab sided Polybulk wagon and was looking to make a 7mm version to go with my other Polybulk wagon but struggled to find any useful drawing so put the project on hold. After seeing the transfers available on the Railtec website I asked for them to be scaled up to 7mm and set about drawing a 7mm version, I couldn't find any correct drawing so had to use some photos and guess work to draw the wagon. I printed the body on my Balco printer in PLA, with Shapeways WSF bogies and Form 2 resin printed detail parts. I painted the wagon using Halfords Ford Laurel green. The hopper had to be printed in 3 parts to fit on the printer.
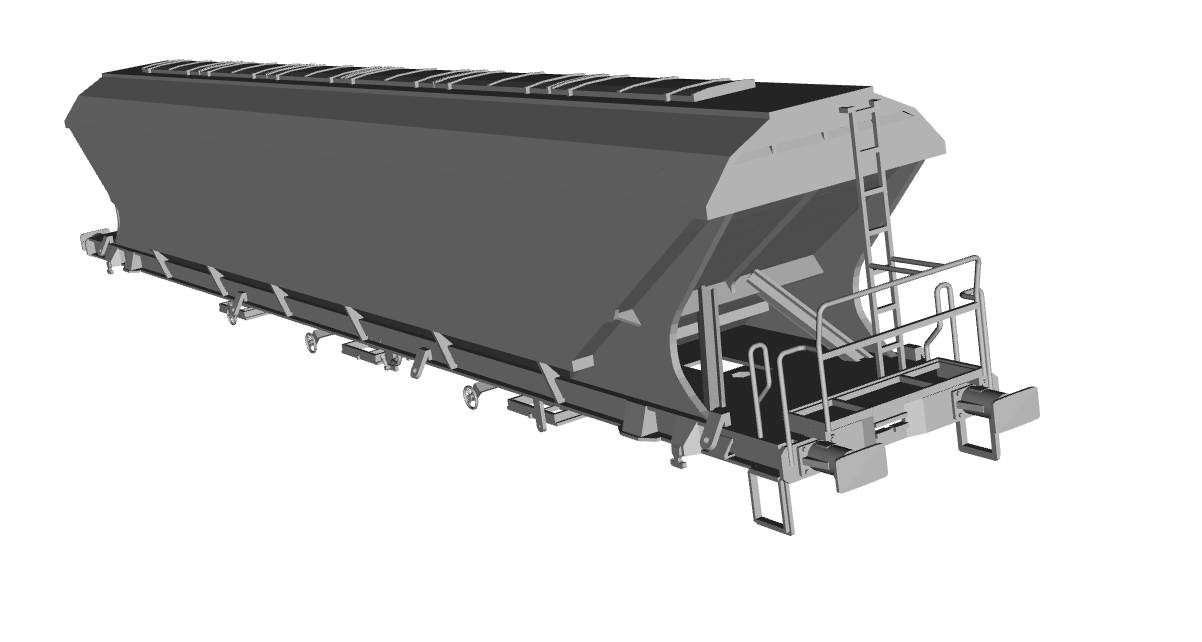 E443 Polybulk render by simon br blue, on Flickr
 E443 Polybulk test print by simon br blue, on Flickr
 E443 Polybulk 7mm primer by simon br blue, on Flickr
 E443 Polybulk wagon 7mm by simon br blue, on Flickr
 E443 Polybulk wagon 7mm by simon br blue, on Flickr
 E443 Polybulk wagon 7mm by simon br blue, on Flickr
-
7
-
8
-
-
The 2mm version looks great. I hope nobody minds me adding some details on a 7mm version I've made. I had seen this thread and was looking to make a 7mm version but struggled to find any useful drawing. After seeing the transfers available on the Railtec website I asked for them to be scaled up to 7mm and set about drawing a 7mm version. I printed the body on my printer in PLA, with Shapeways printed bogies and Form 2 resin printed detail parts. I painted the wagon using Halfords Ford Laurel green.
E443 Polybulk render by simon br blue, on Flickr
E443 Polybulk test print by simon br blue, on Flickr
E443 Polybulk 7mm primer by simon br blue, on Flickr
E443 Polybulk wagon 7mm by simon br blue, on Flickr
E443 Polybulk wagon 7mm by simon br blue, on Flickr
E443 Polybulk wagon 7mm by simon br blue, on Flickr
-
6
-
6
-
-
Colours on these tanks seem to look different in each picture. I think the one I've done is a little dark. On the subject of livery - does anyone produce transfers for these tanks?
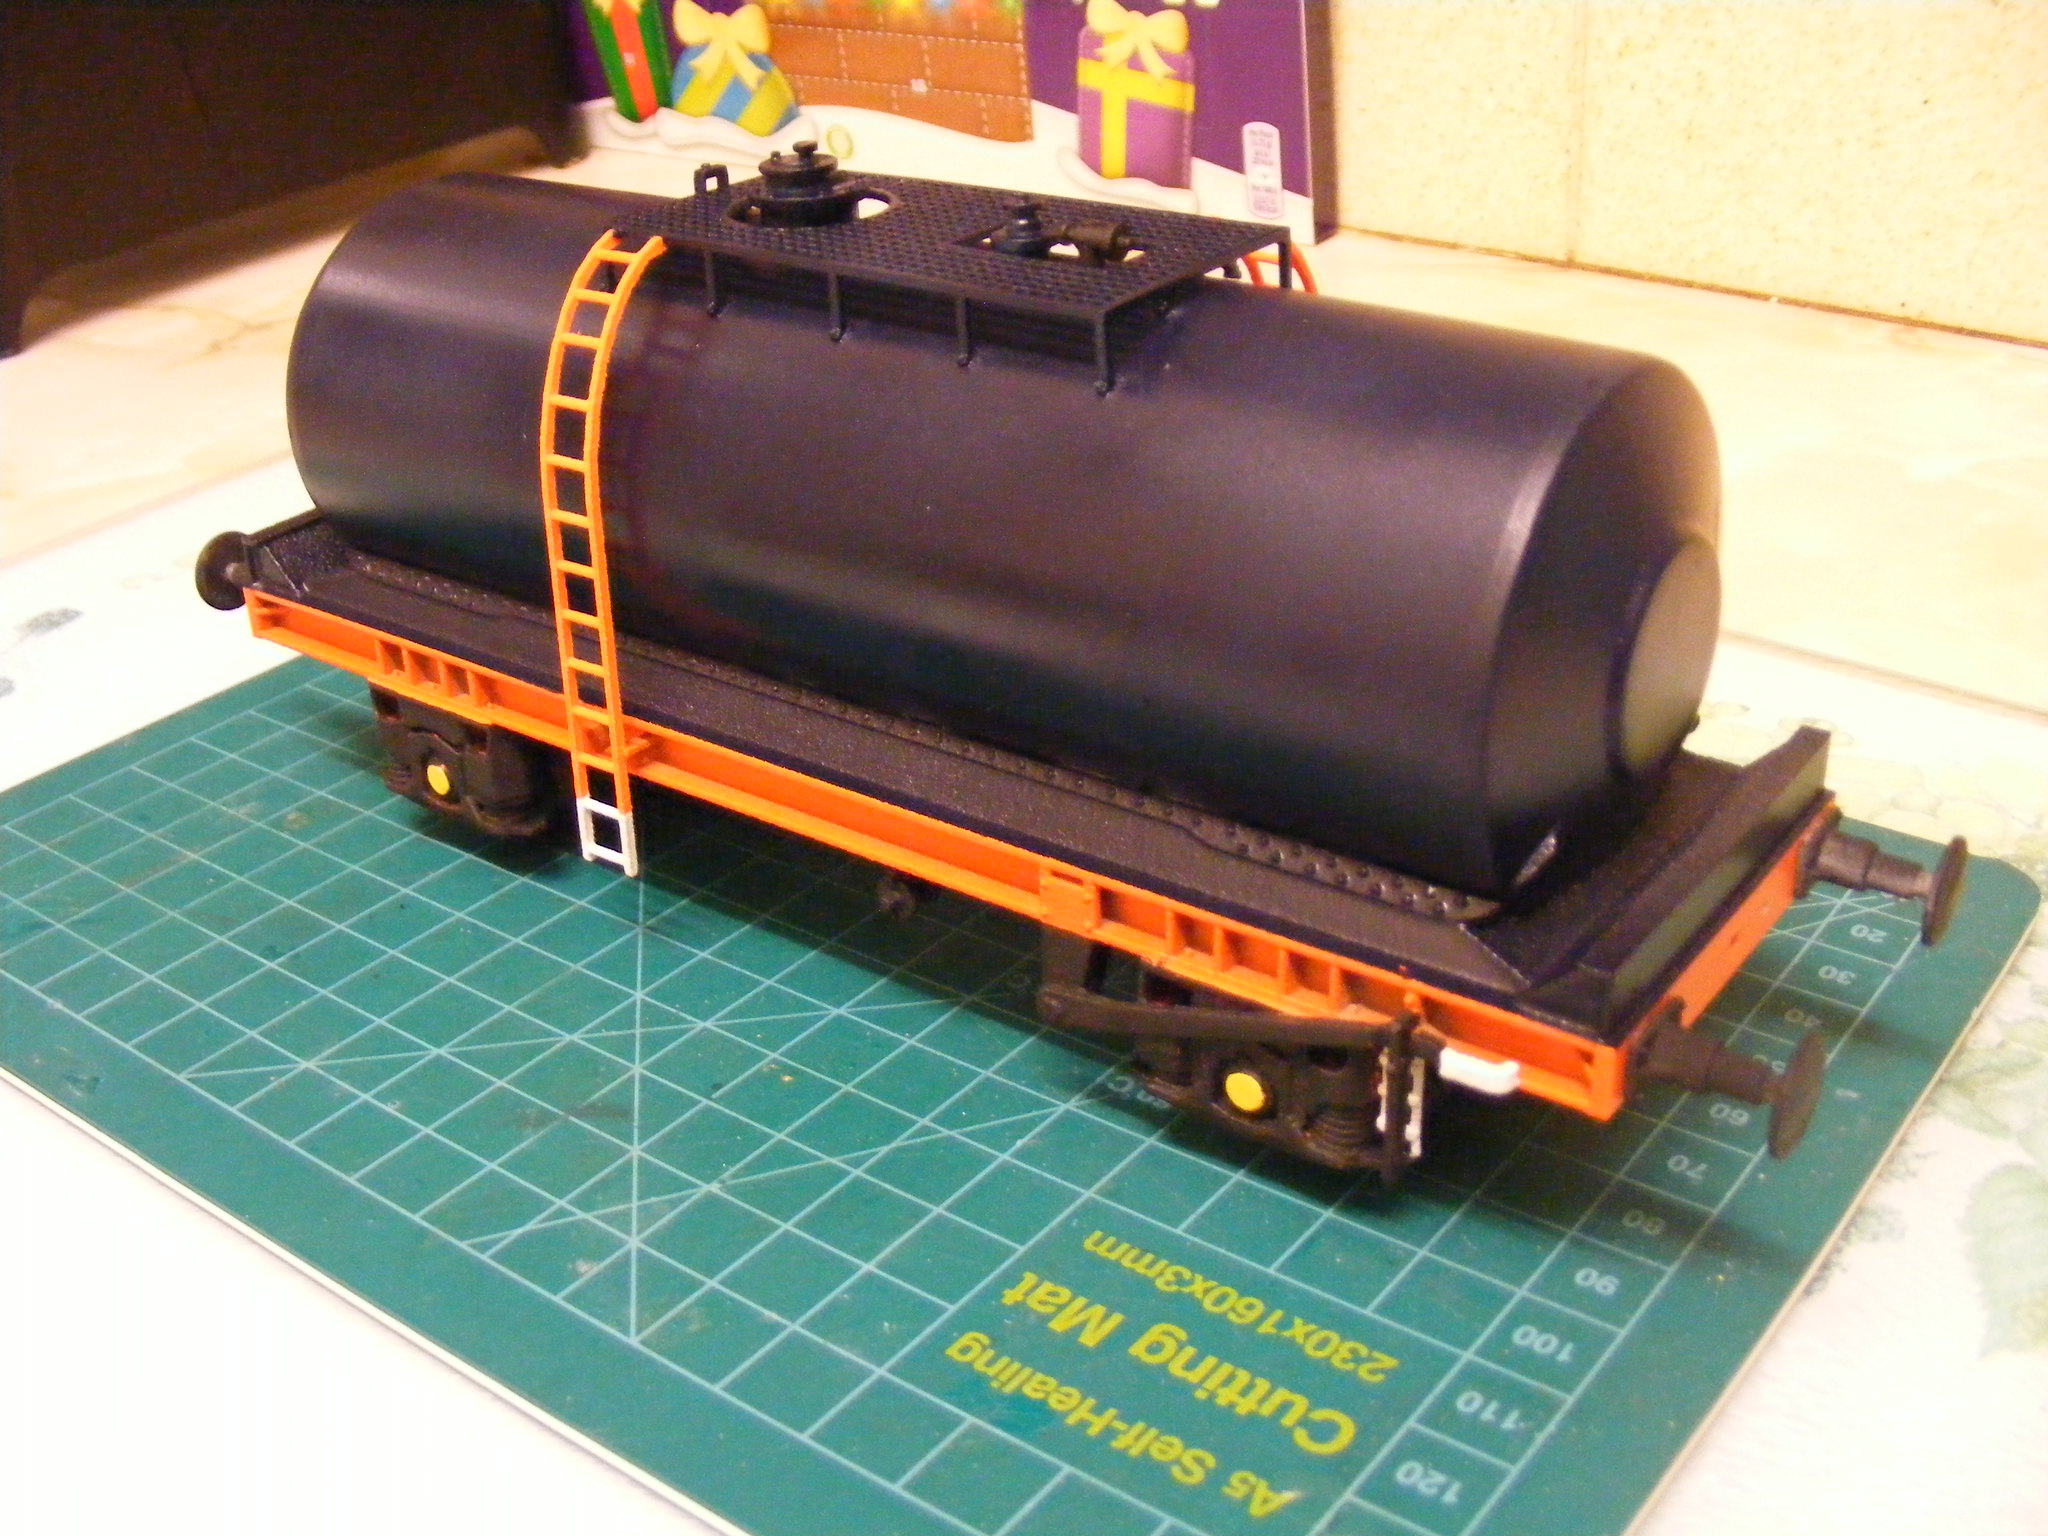 7mm Caustic soda tank wagon by simon br blue, on Flickr
Simon.
-
 1
1
-
-
A couple of wagons that I did some more work on before Christmas but didn't get round to posting on here. Both have a Kings Lynn Whitemoor theme, firstly I finished the BIS PAA wagon by adding wire for the pipe runs and Form 2 printed details for the levers and moisture traps. It was finished off with homemade transfers for the BIS livery.
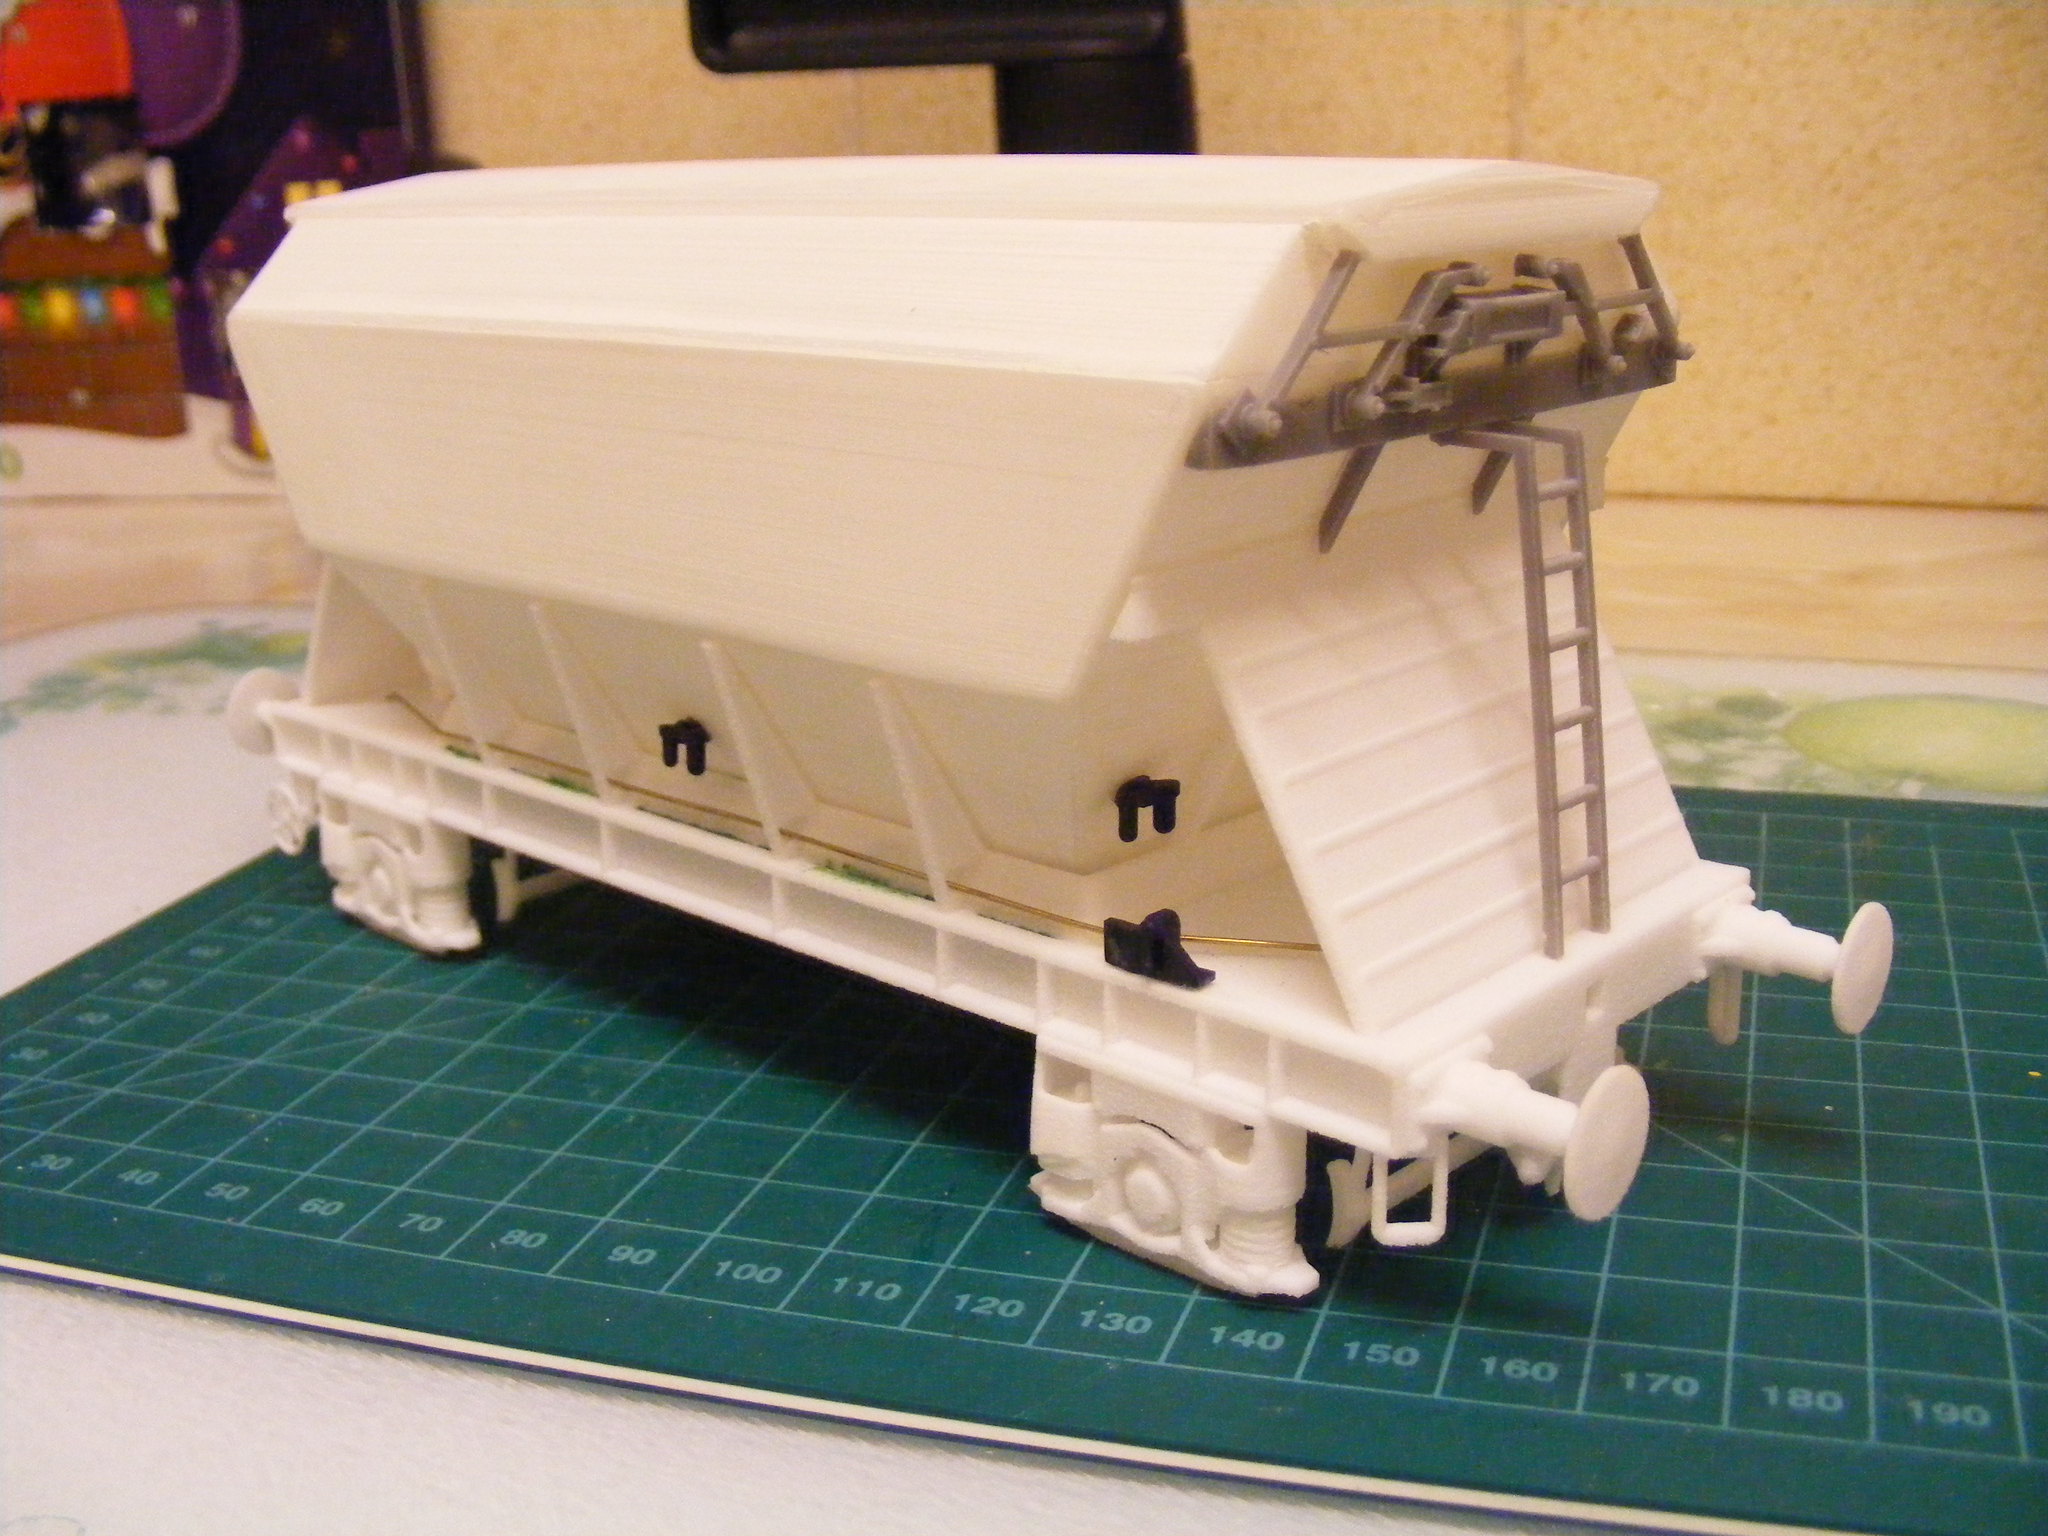 7mm BIS PAA hopper by simon br blue, on Flickr
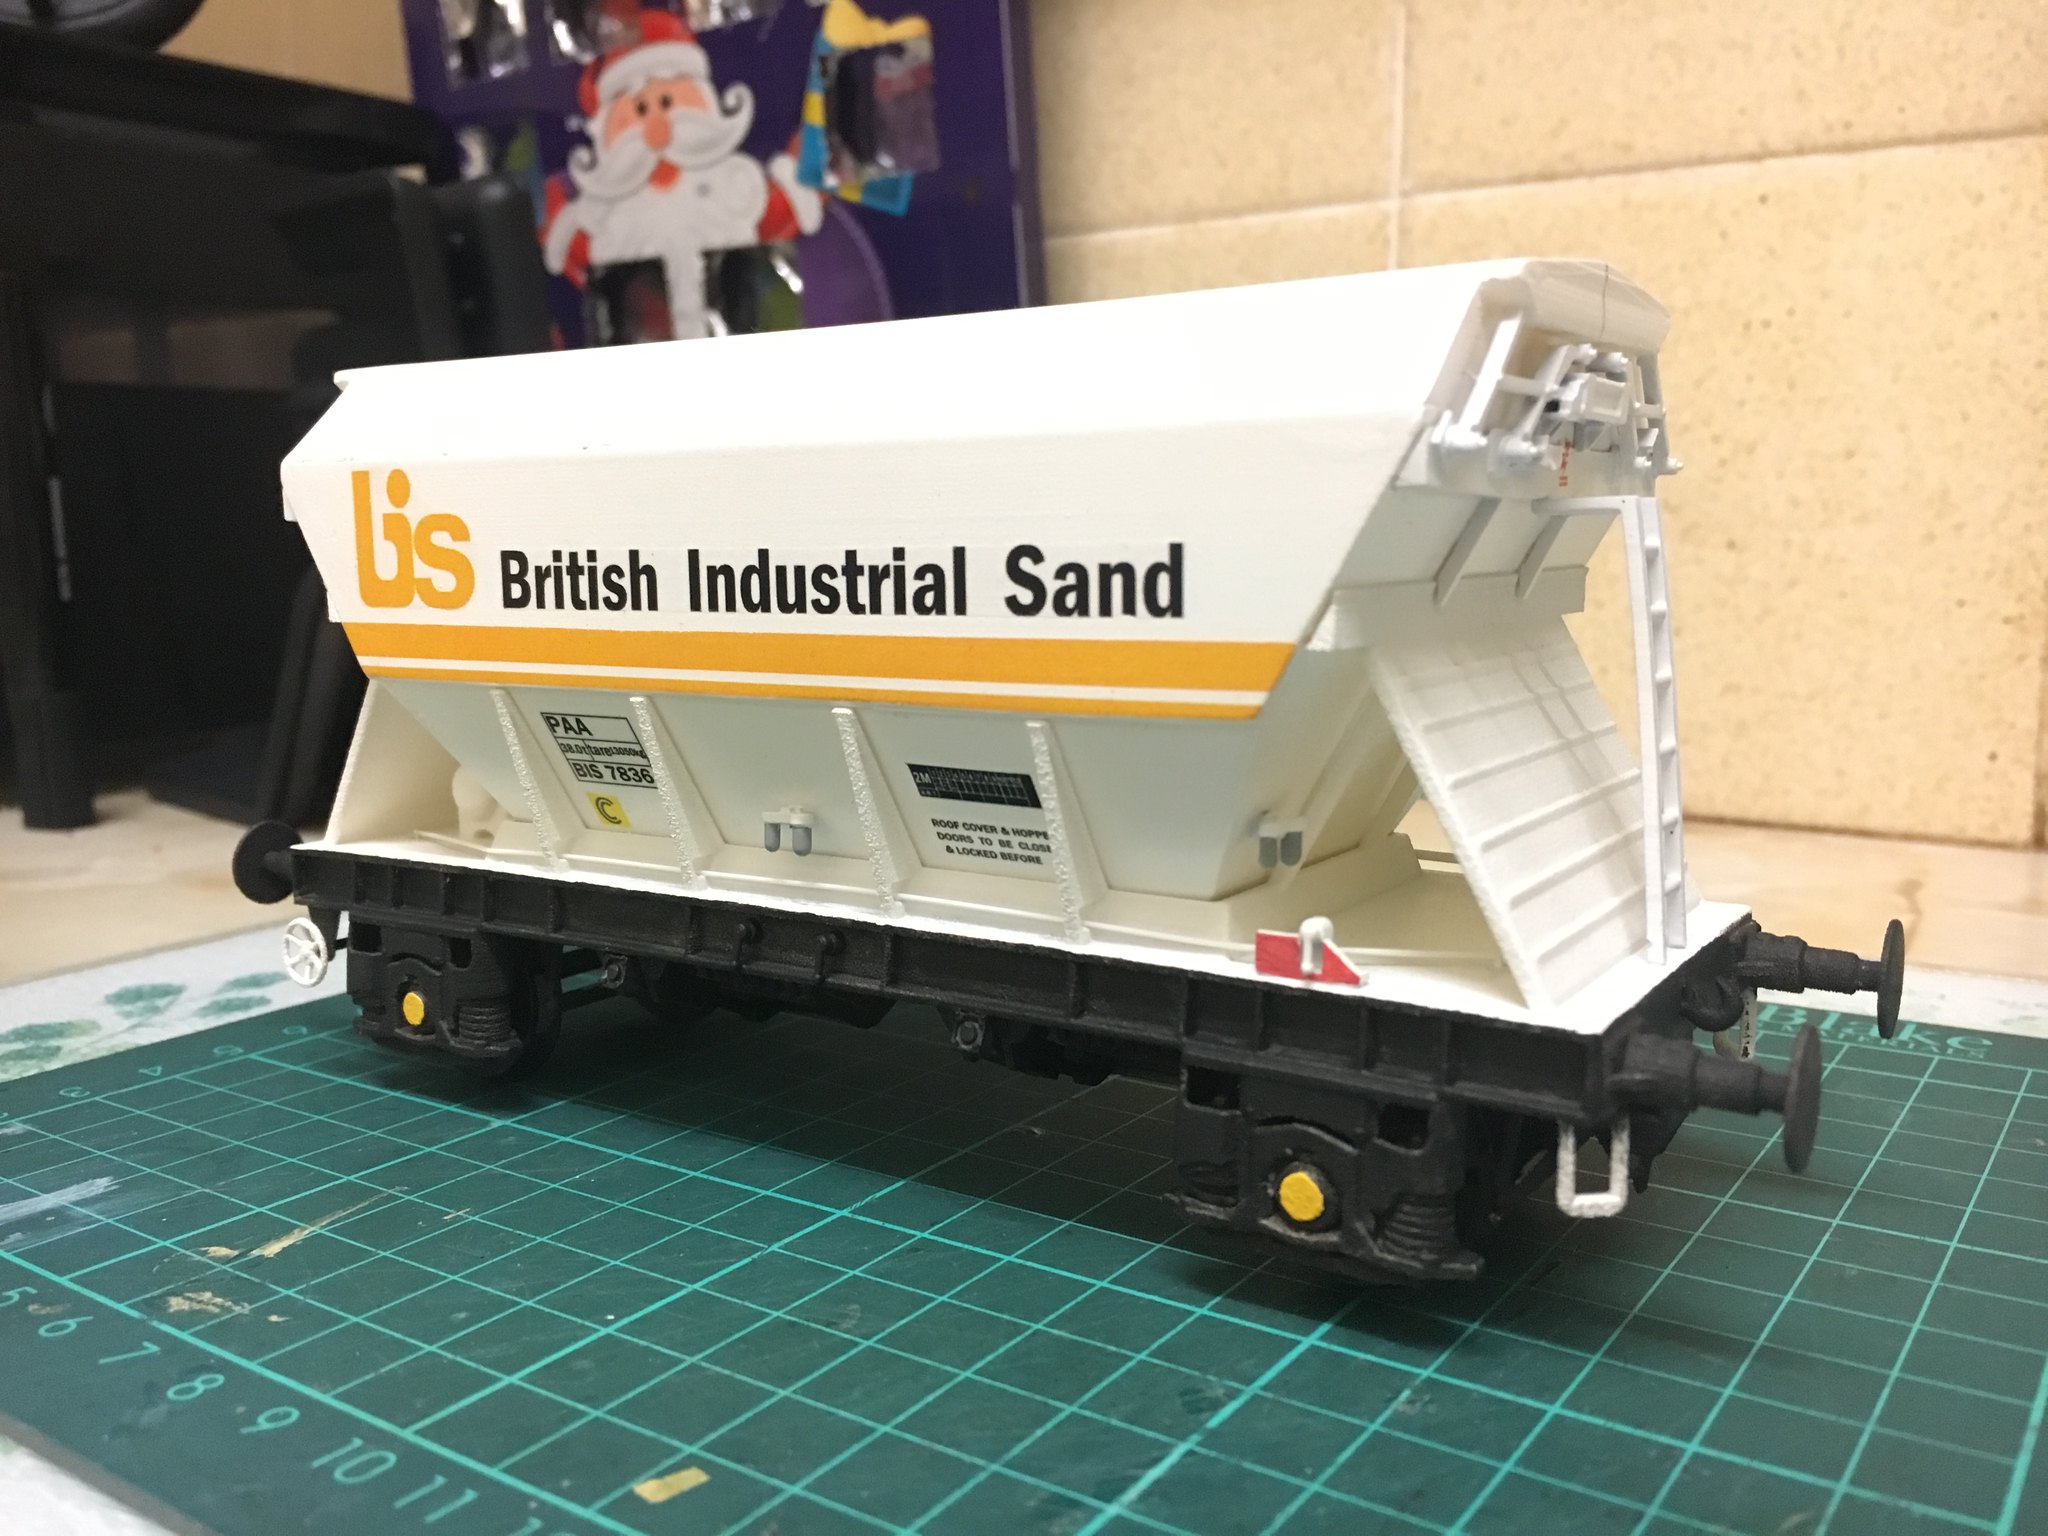 7mm BIS PAA 2 by simon br blue, on Flickr
The second wagon is the Campbells soup wagon, this was nearly finished a while ago but needed some transfers to complete and the curtain straps painting. When originally done the straps were a laborious task but recently I had the idea of finishing the straps using a permanent marker pen which was a lot easier, the silver clips were still painted on with a fine brush. I also finished the straps on the 4mm version and Railliner wagon using the same method.
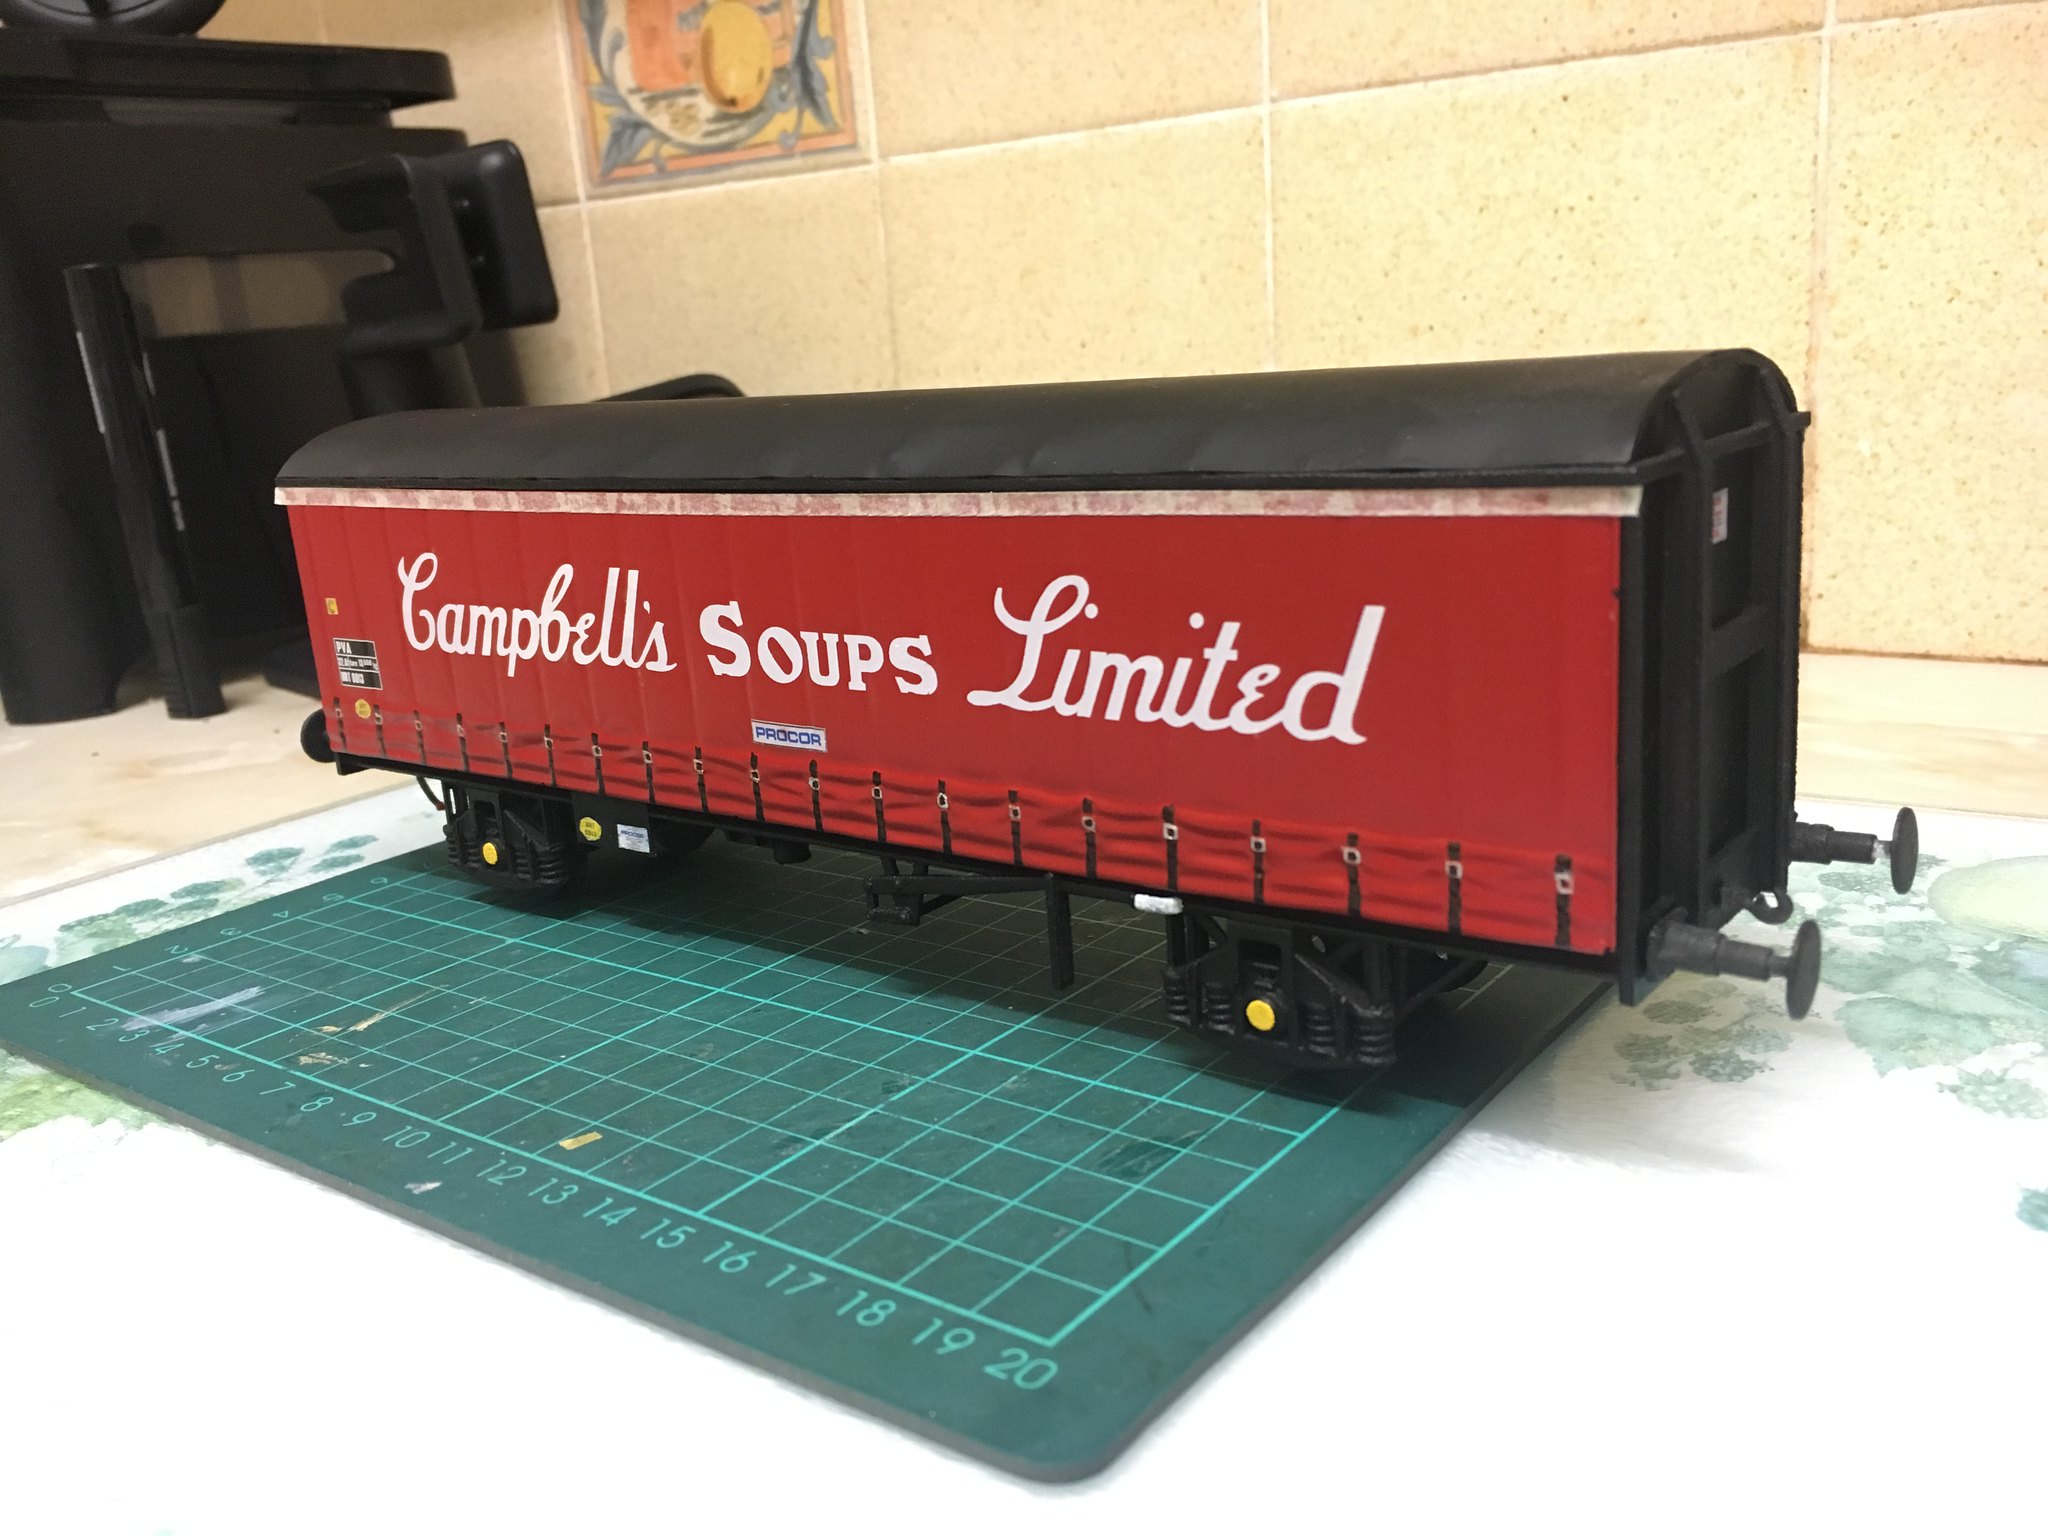 7mm Campbell's soup PVA by simon br blue, on Flickr
When I had some spare time around Christmas I worked on a couple of items that hopefully can be produced in 1/32. These have not been printed yet but there are some renders below. The first wagon is a 21t HTV hopper wagon, it was drawn so the hopper can be printed separately on my Balco PLA printer to keep the price down.
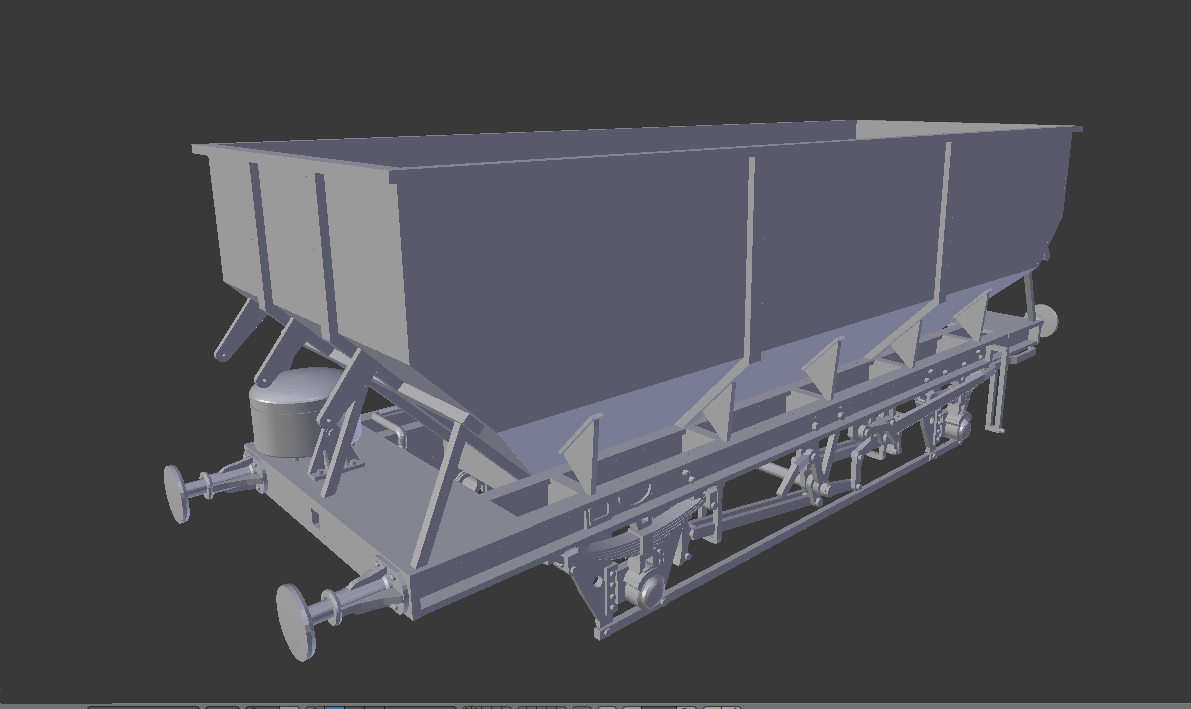 HTV hopper by simon br blue, on Flickr
The second wagon is the 20t Br grain hopper wagon. This was again designed to have a separate hopper body inserted to reduce prices for printing.
 20t grain hopper by simon br blue, on Flickr
The 3rd pic is of a 31 cab which I was working on a couple of years ago but I could never get it to look correct, recently I did a bit of reworking and hopefully it now looks more like a 31, the details and handrails were drawn to see what it would look like but would be printed separately. From this drawing I've used the recessed lights and horn grill to make parts I can use to replace and improve the Skytrex 31 resin body shell I have.
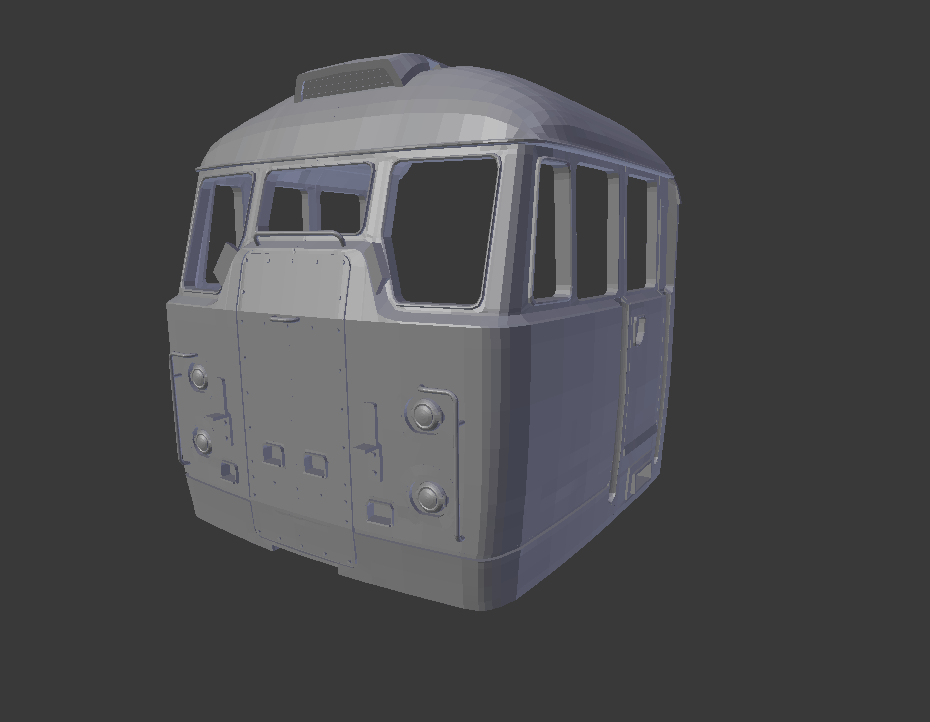 Class 31 Skinhead cab test by simon br blue, on Flickr
The final pic is of the class 08 I've been working on slowly when I have time, I struggled to find clear drawings and ended up using a couple of pictures next to each other and a detailed drawing of a LMS shunter to work out the dimensions and also a lot of detail photos I took at Dereham. I still need to finish the chassis, wheel, coupling and springing arrangements.
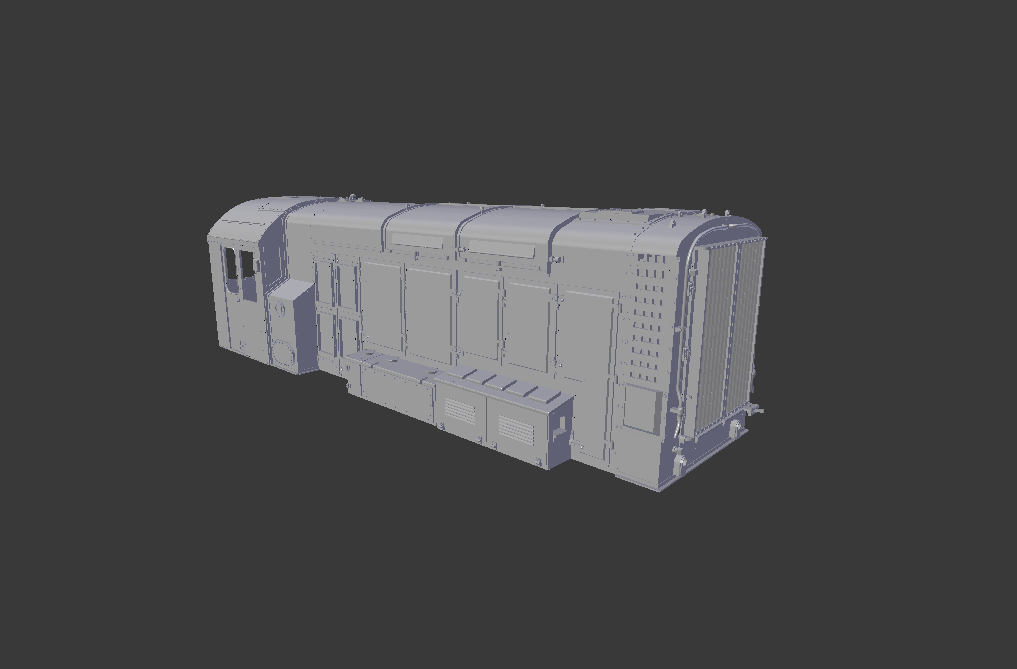 Class 08 body test by simon br blue, on Flickr
-
4
-
2
-
-
Last couple of items that worked on recently tonight.
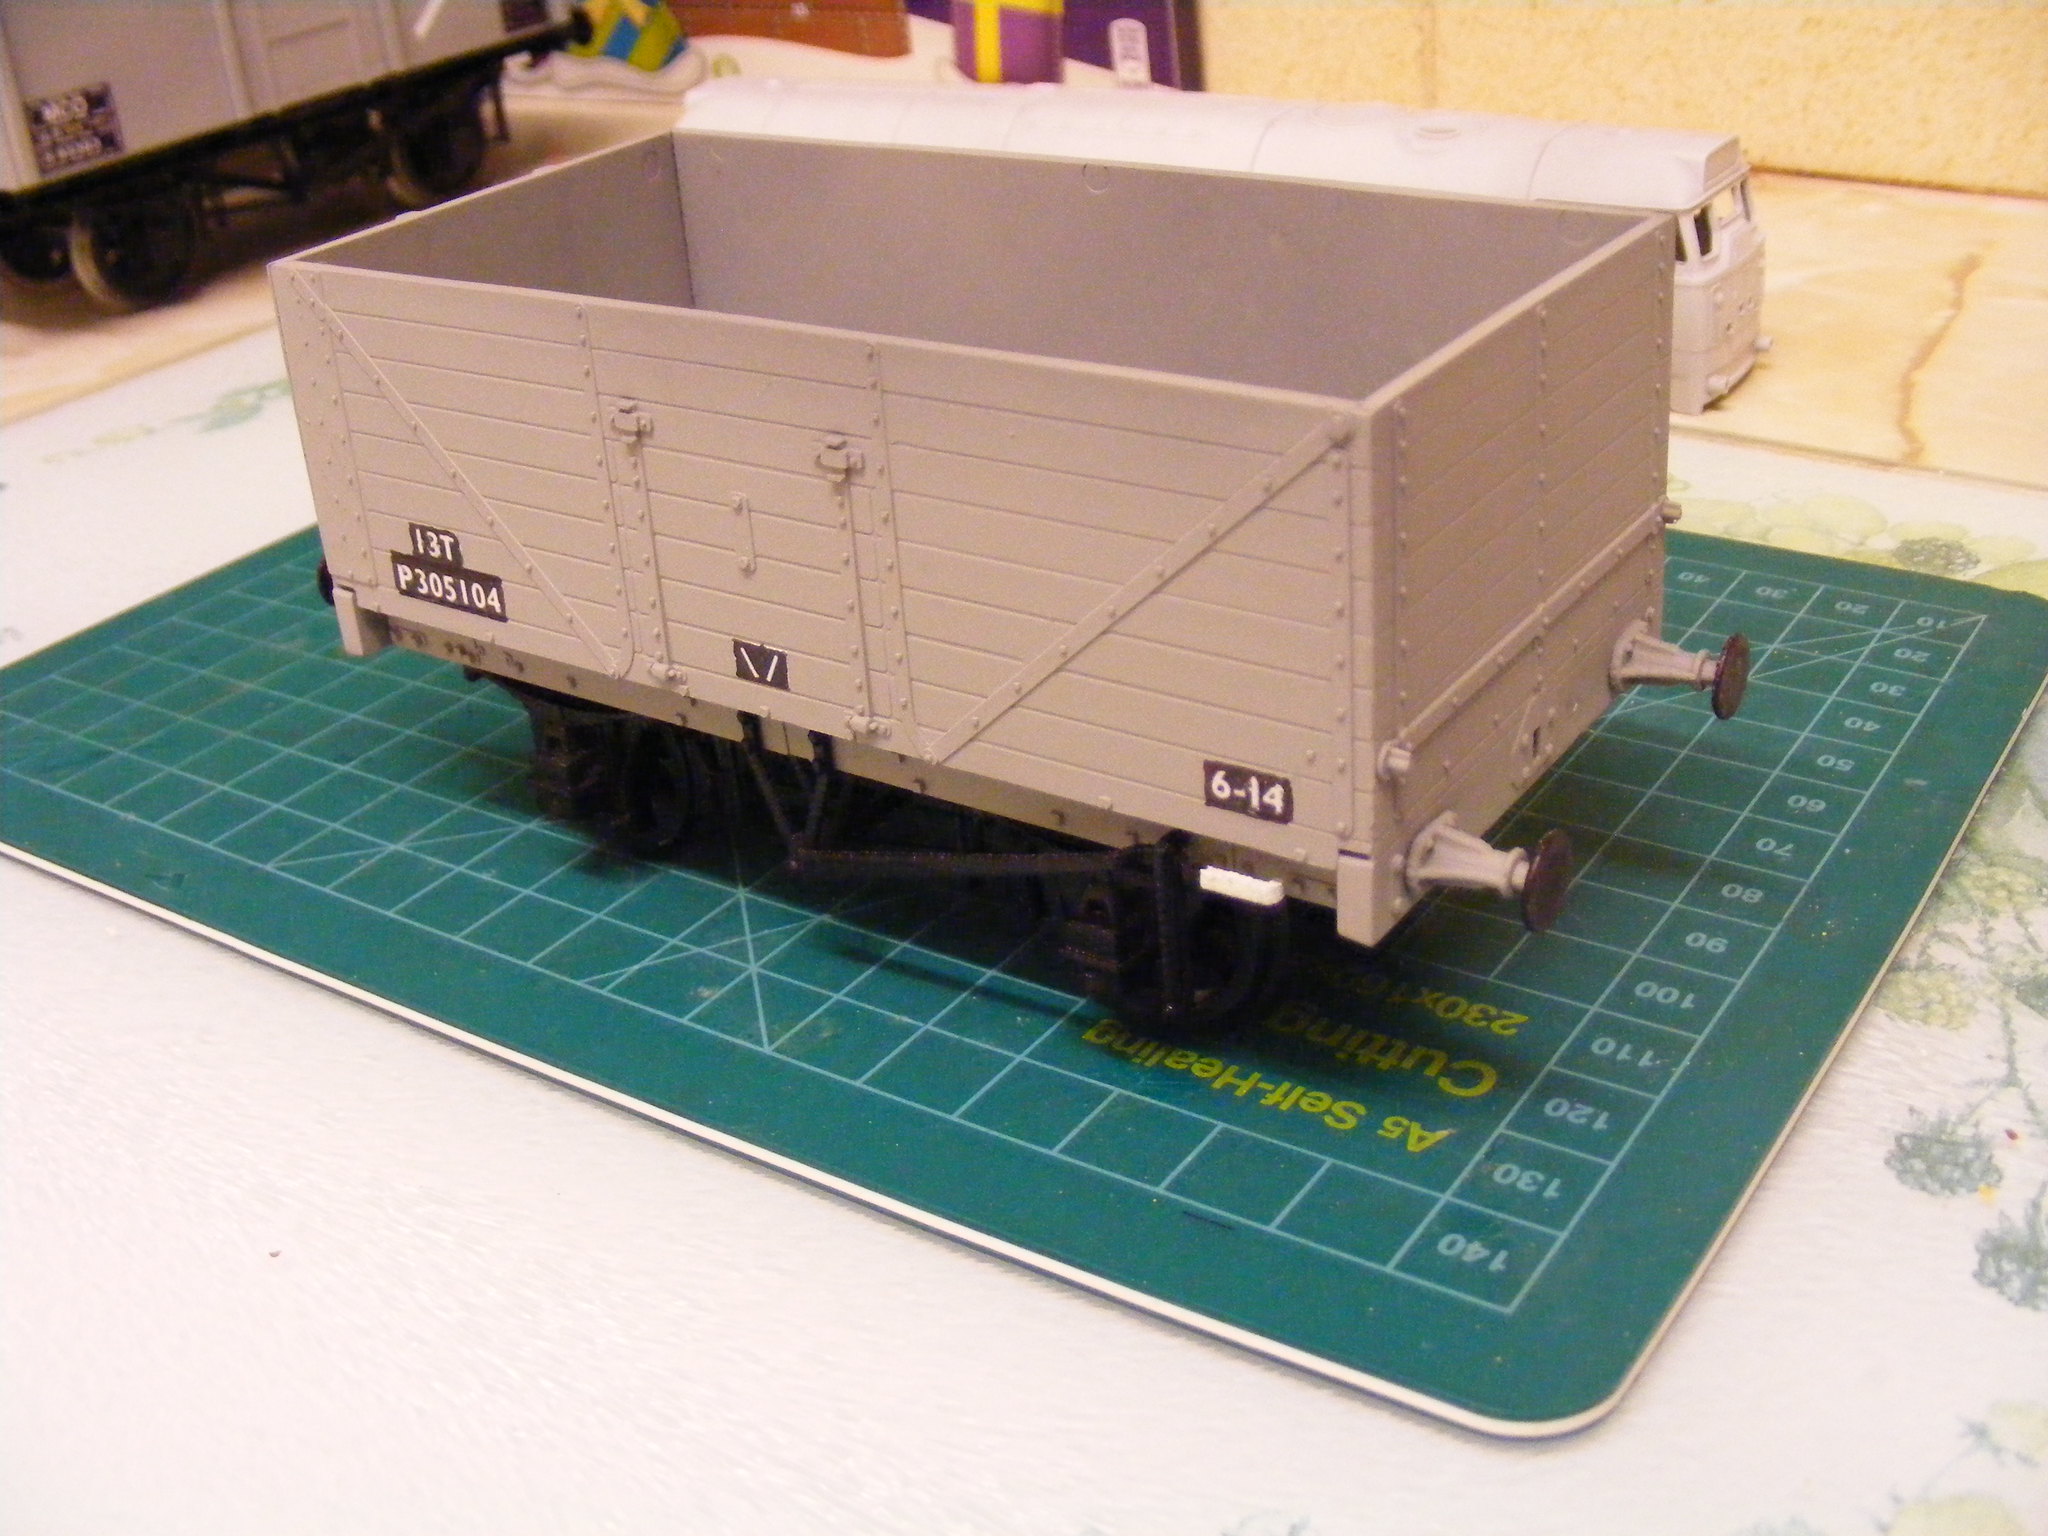
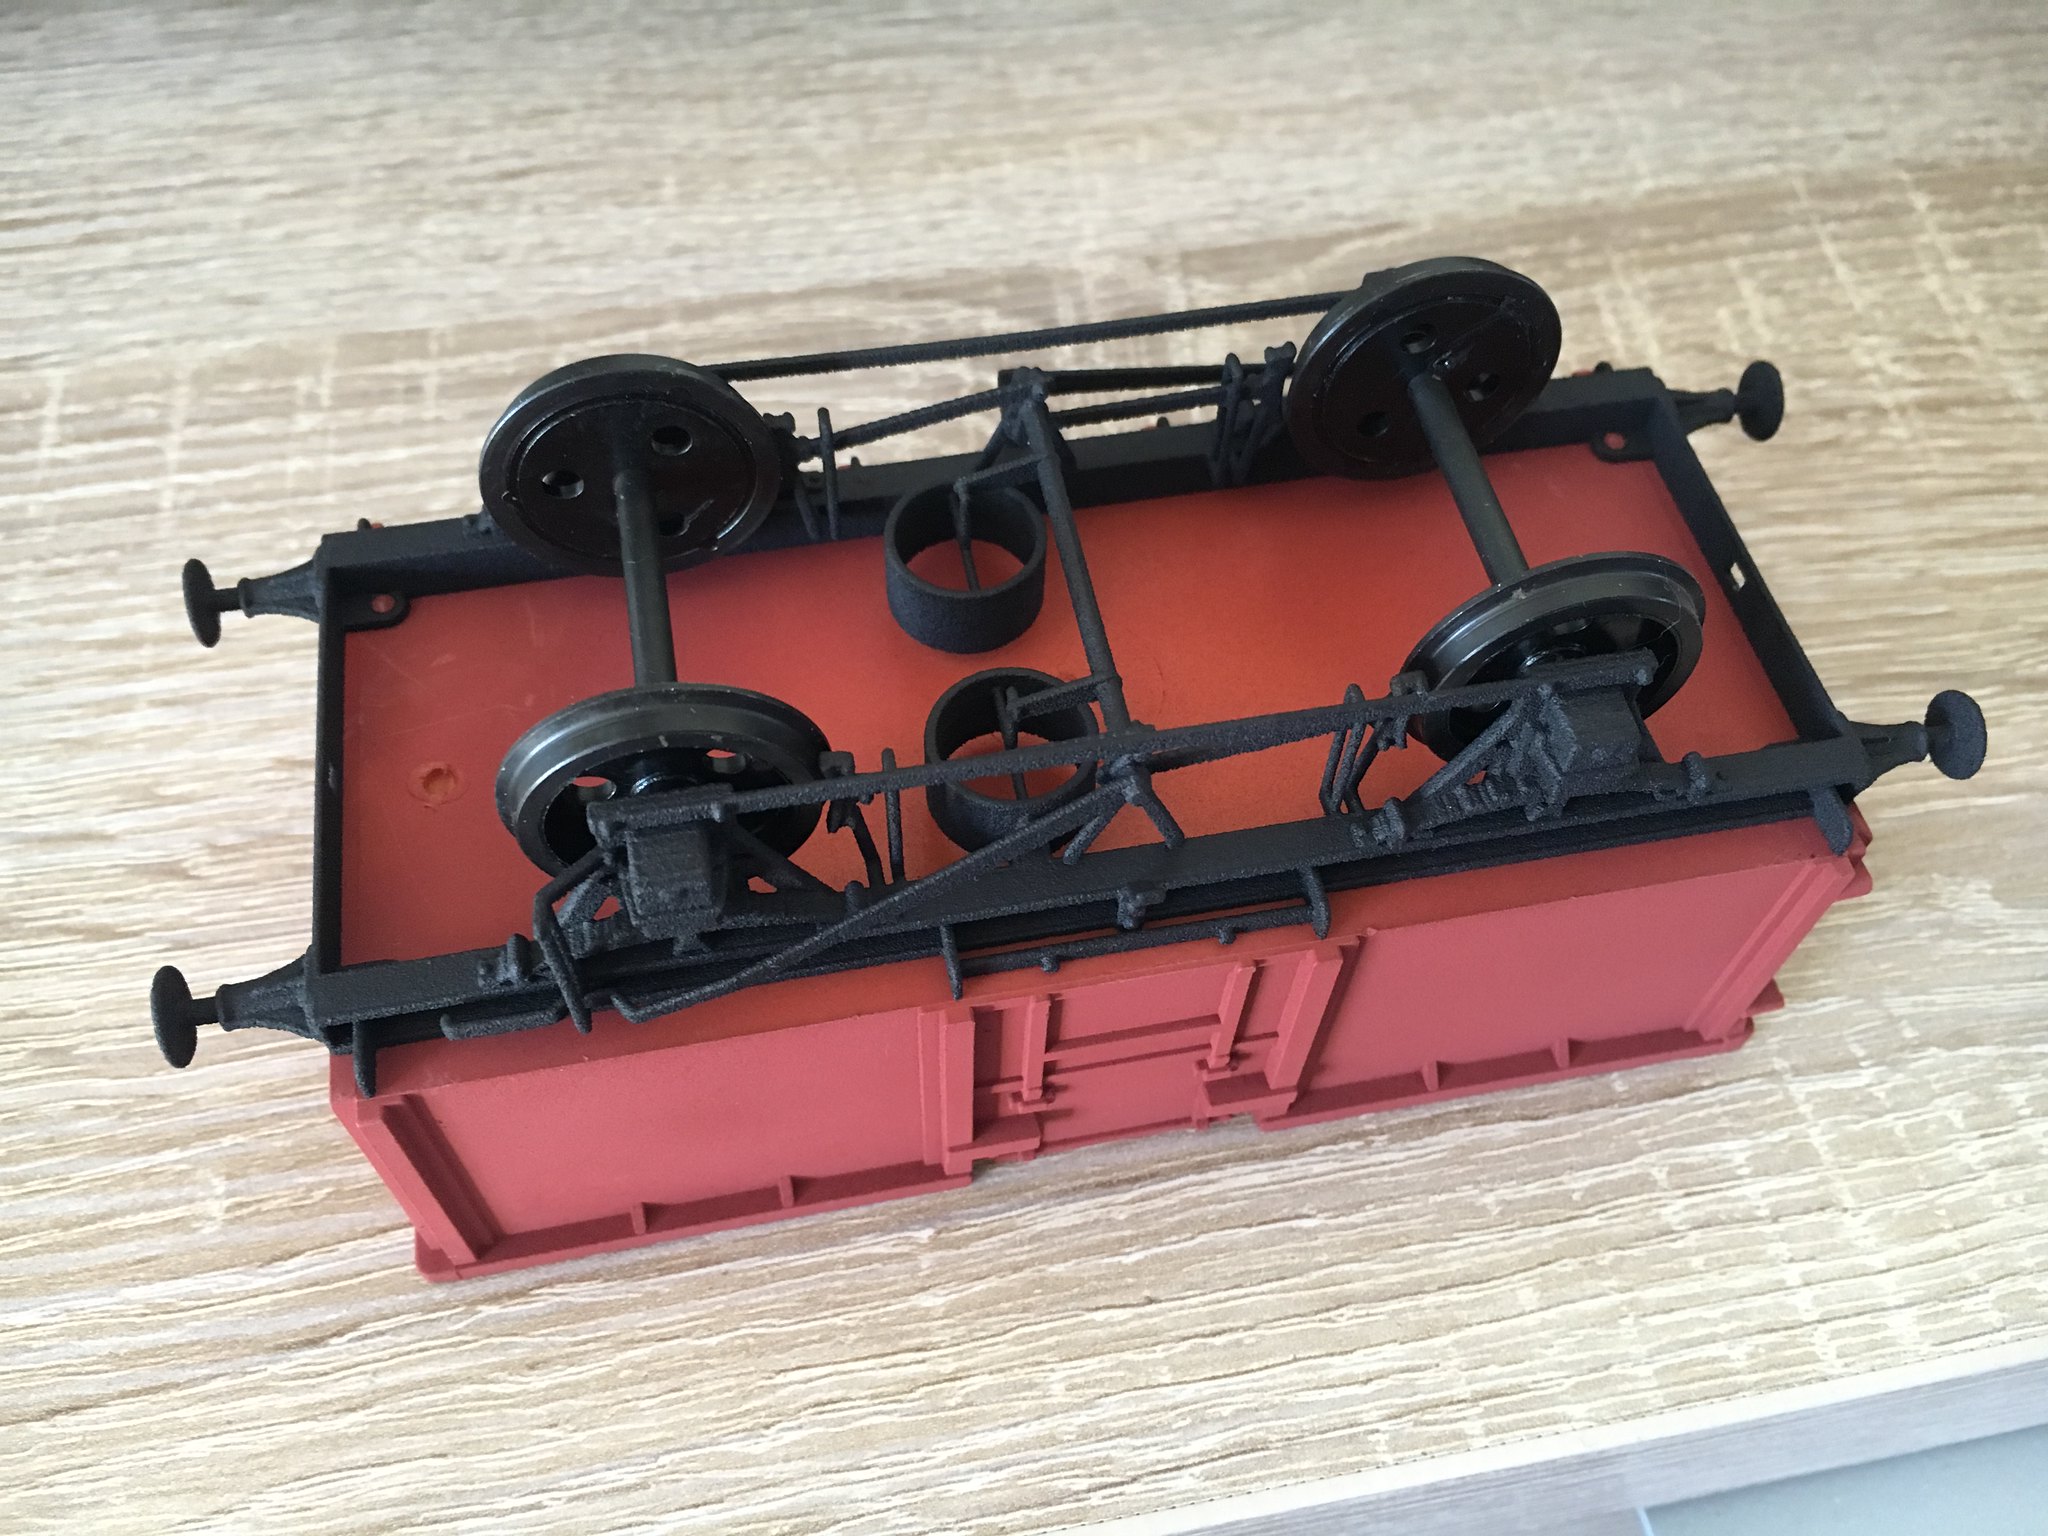
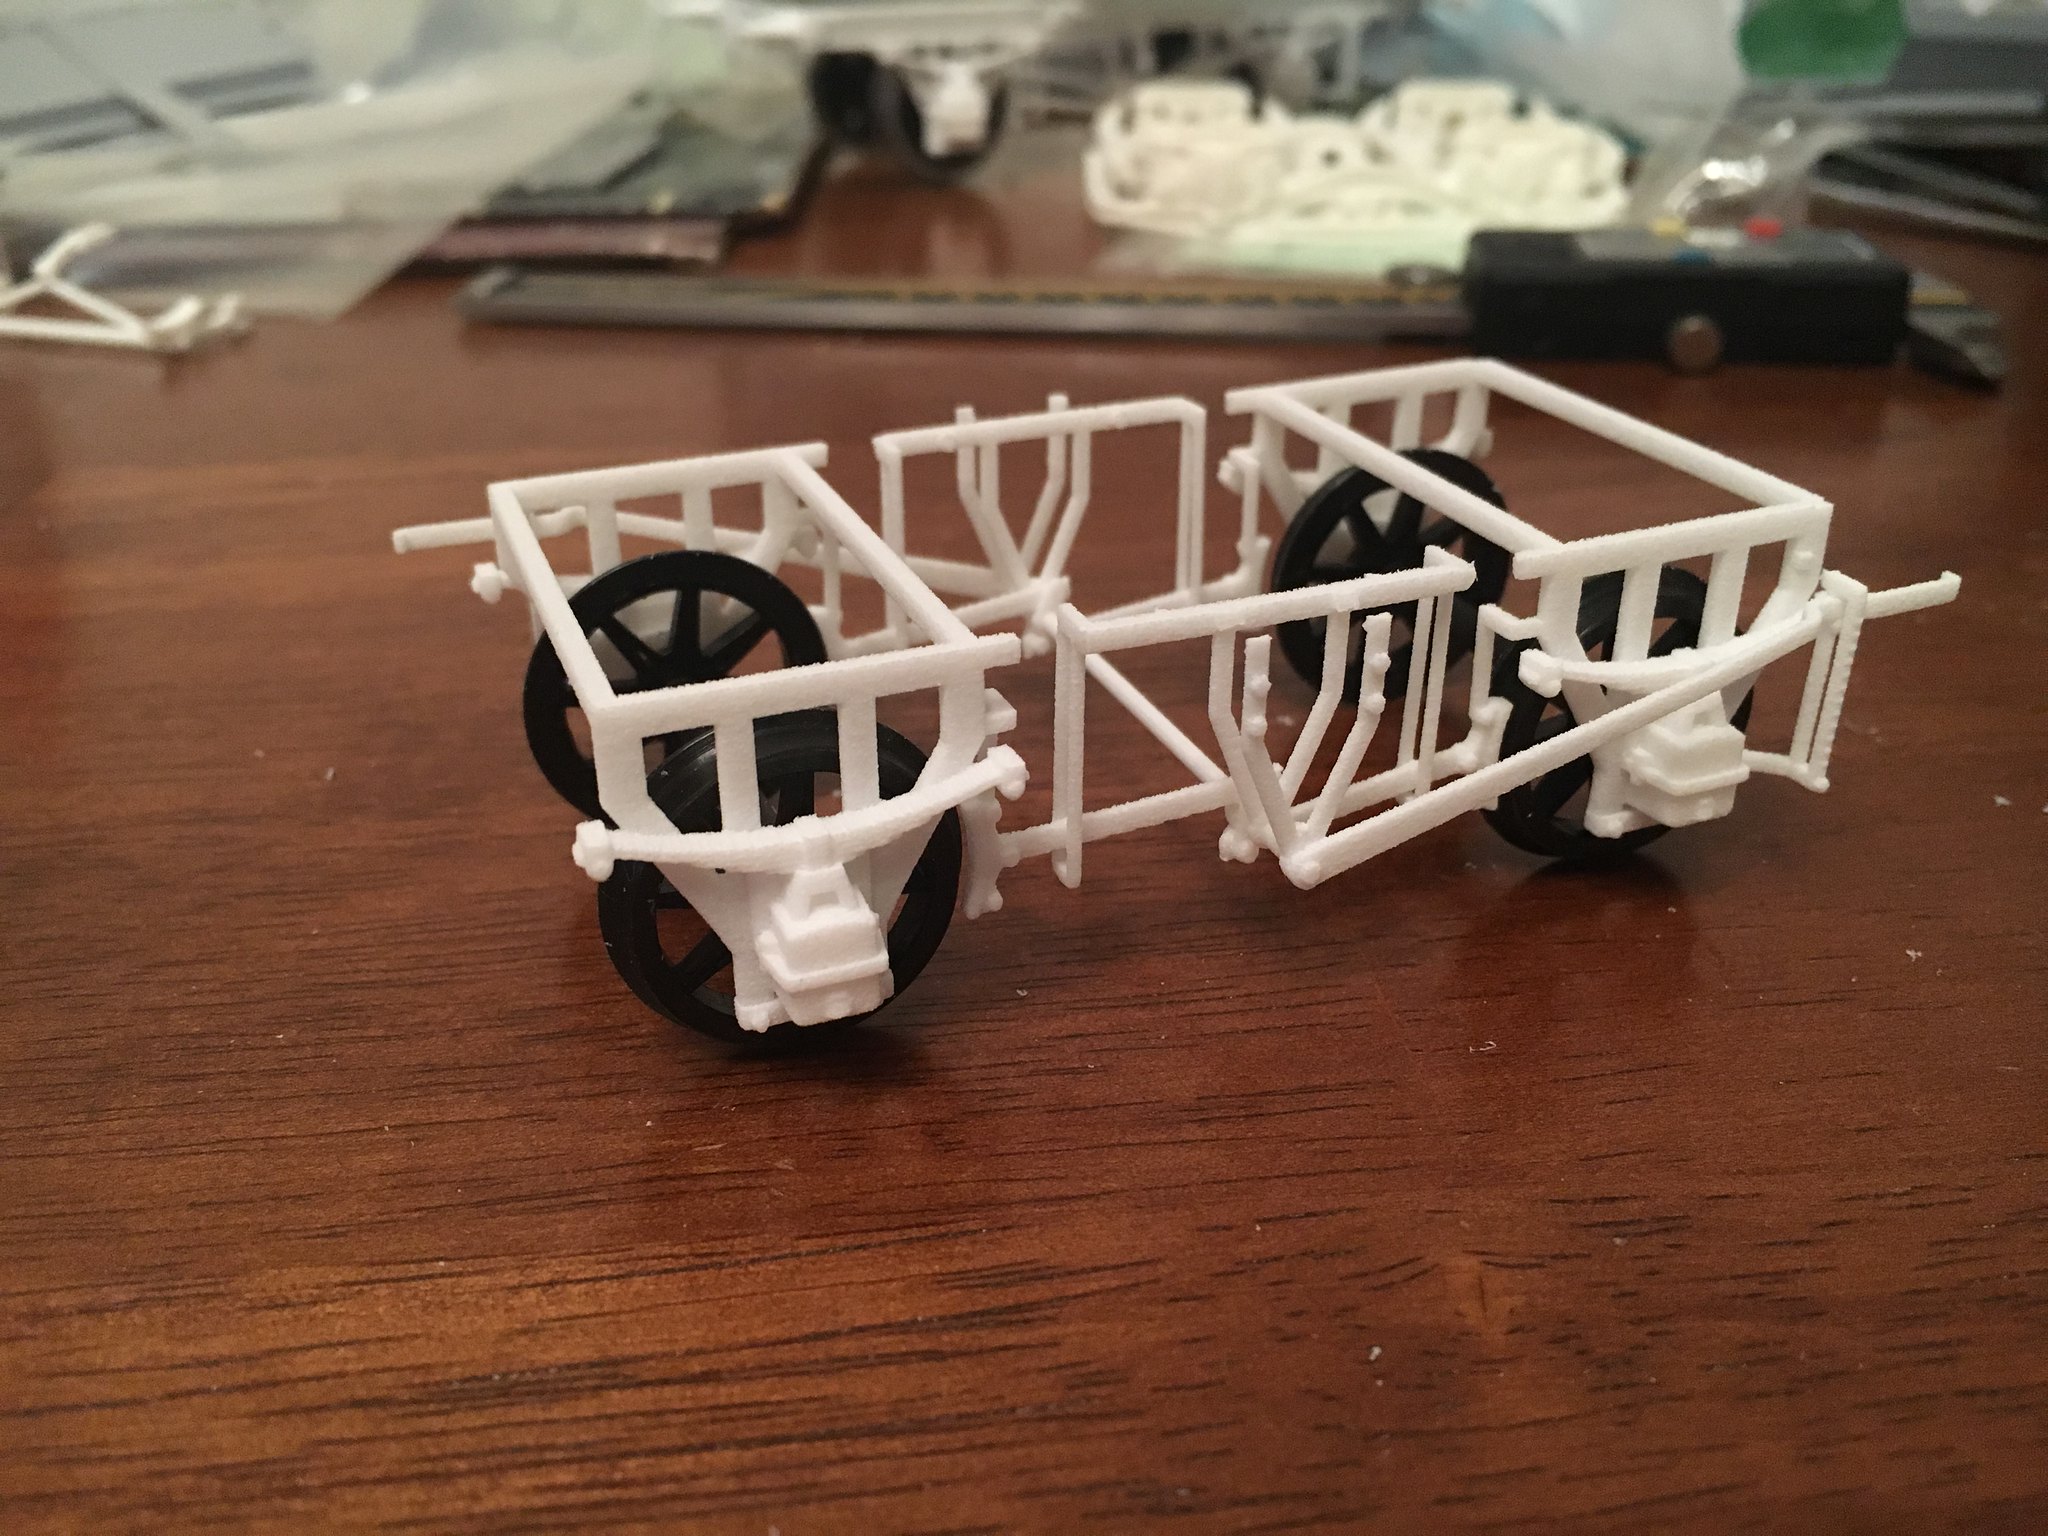
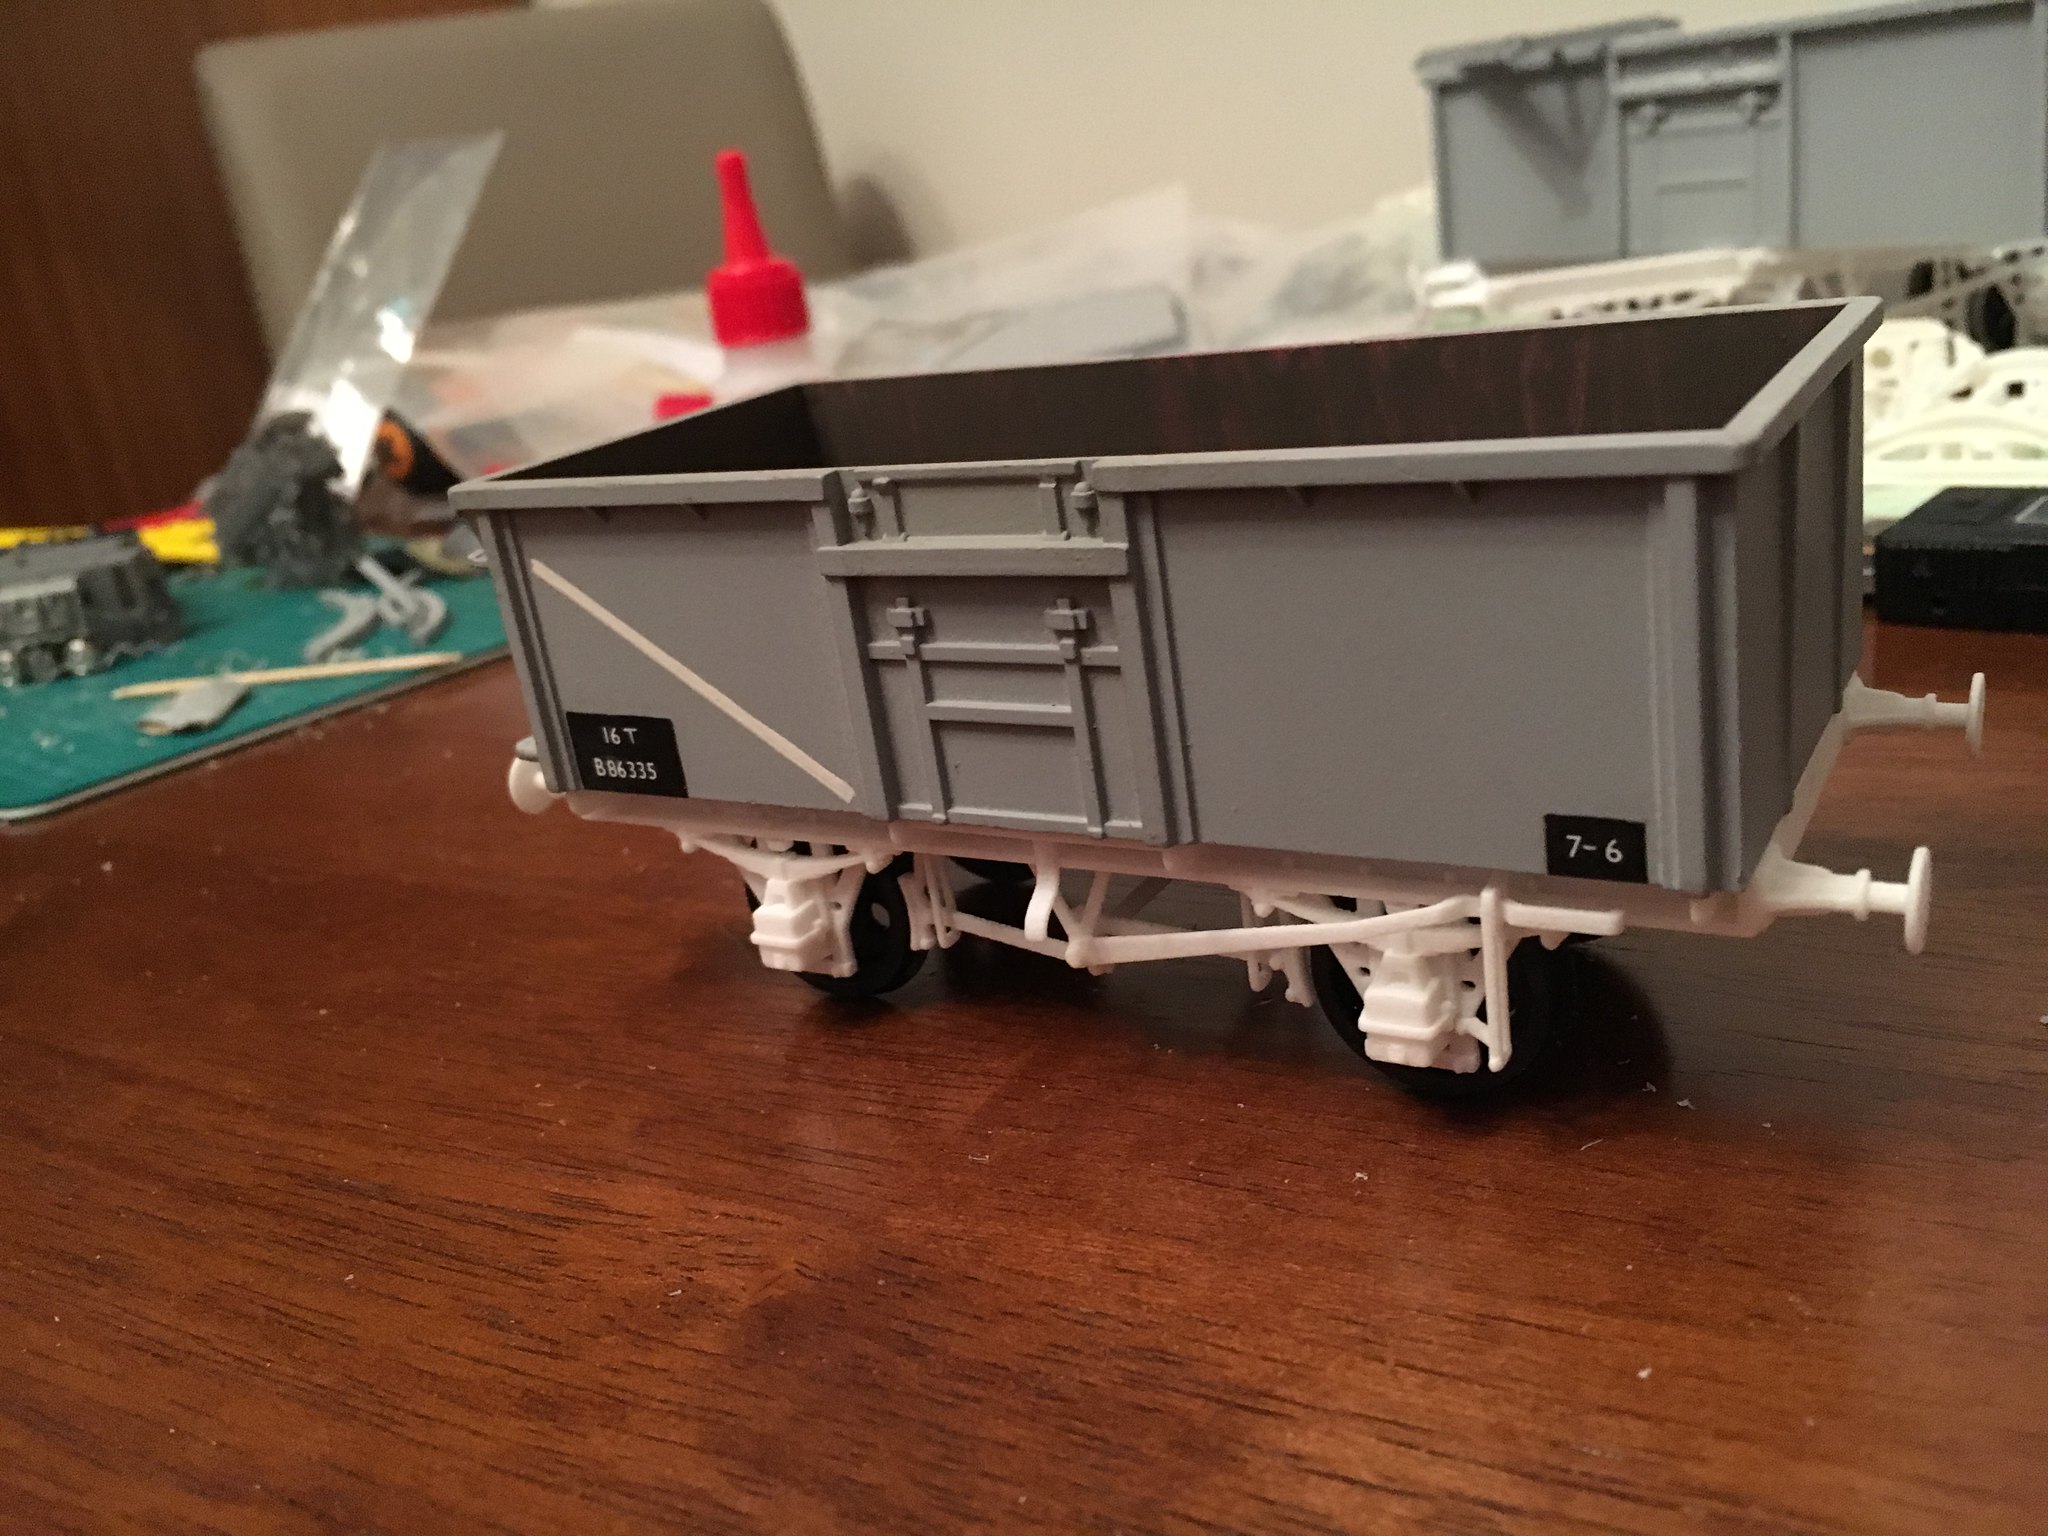
First up is the 1/32 16t mineral wagon, this has the WSF chassis with a PLA printed body which includes separately printed end door detail. The transfers like on the other wagons are homemade and printed on clear paper except for the door stripe which is just an offcut of white transfer paper. The model has a couple of inaccuracies in the picture, firstly it is fitted with an Instanter coupling not 3 link and as its a wagon that's had the top flap removed it shouldn't have the top bracing where the flap was, I'll try to remove this when I get a minute and I should have some set of 3 link coupling arriving with my next order.
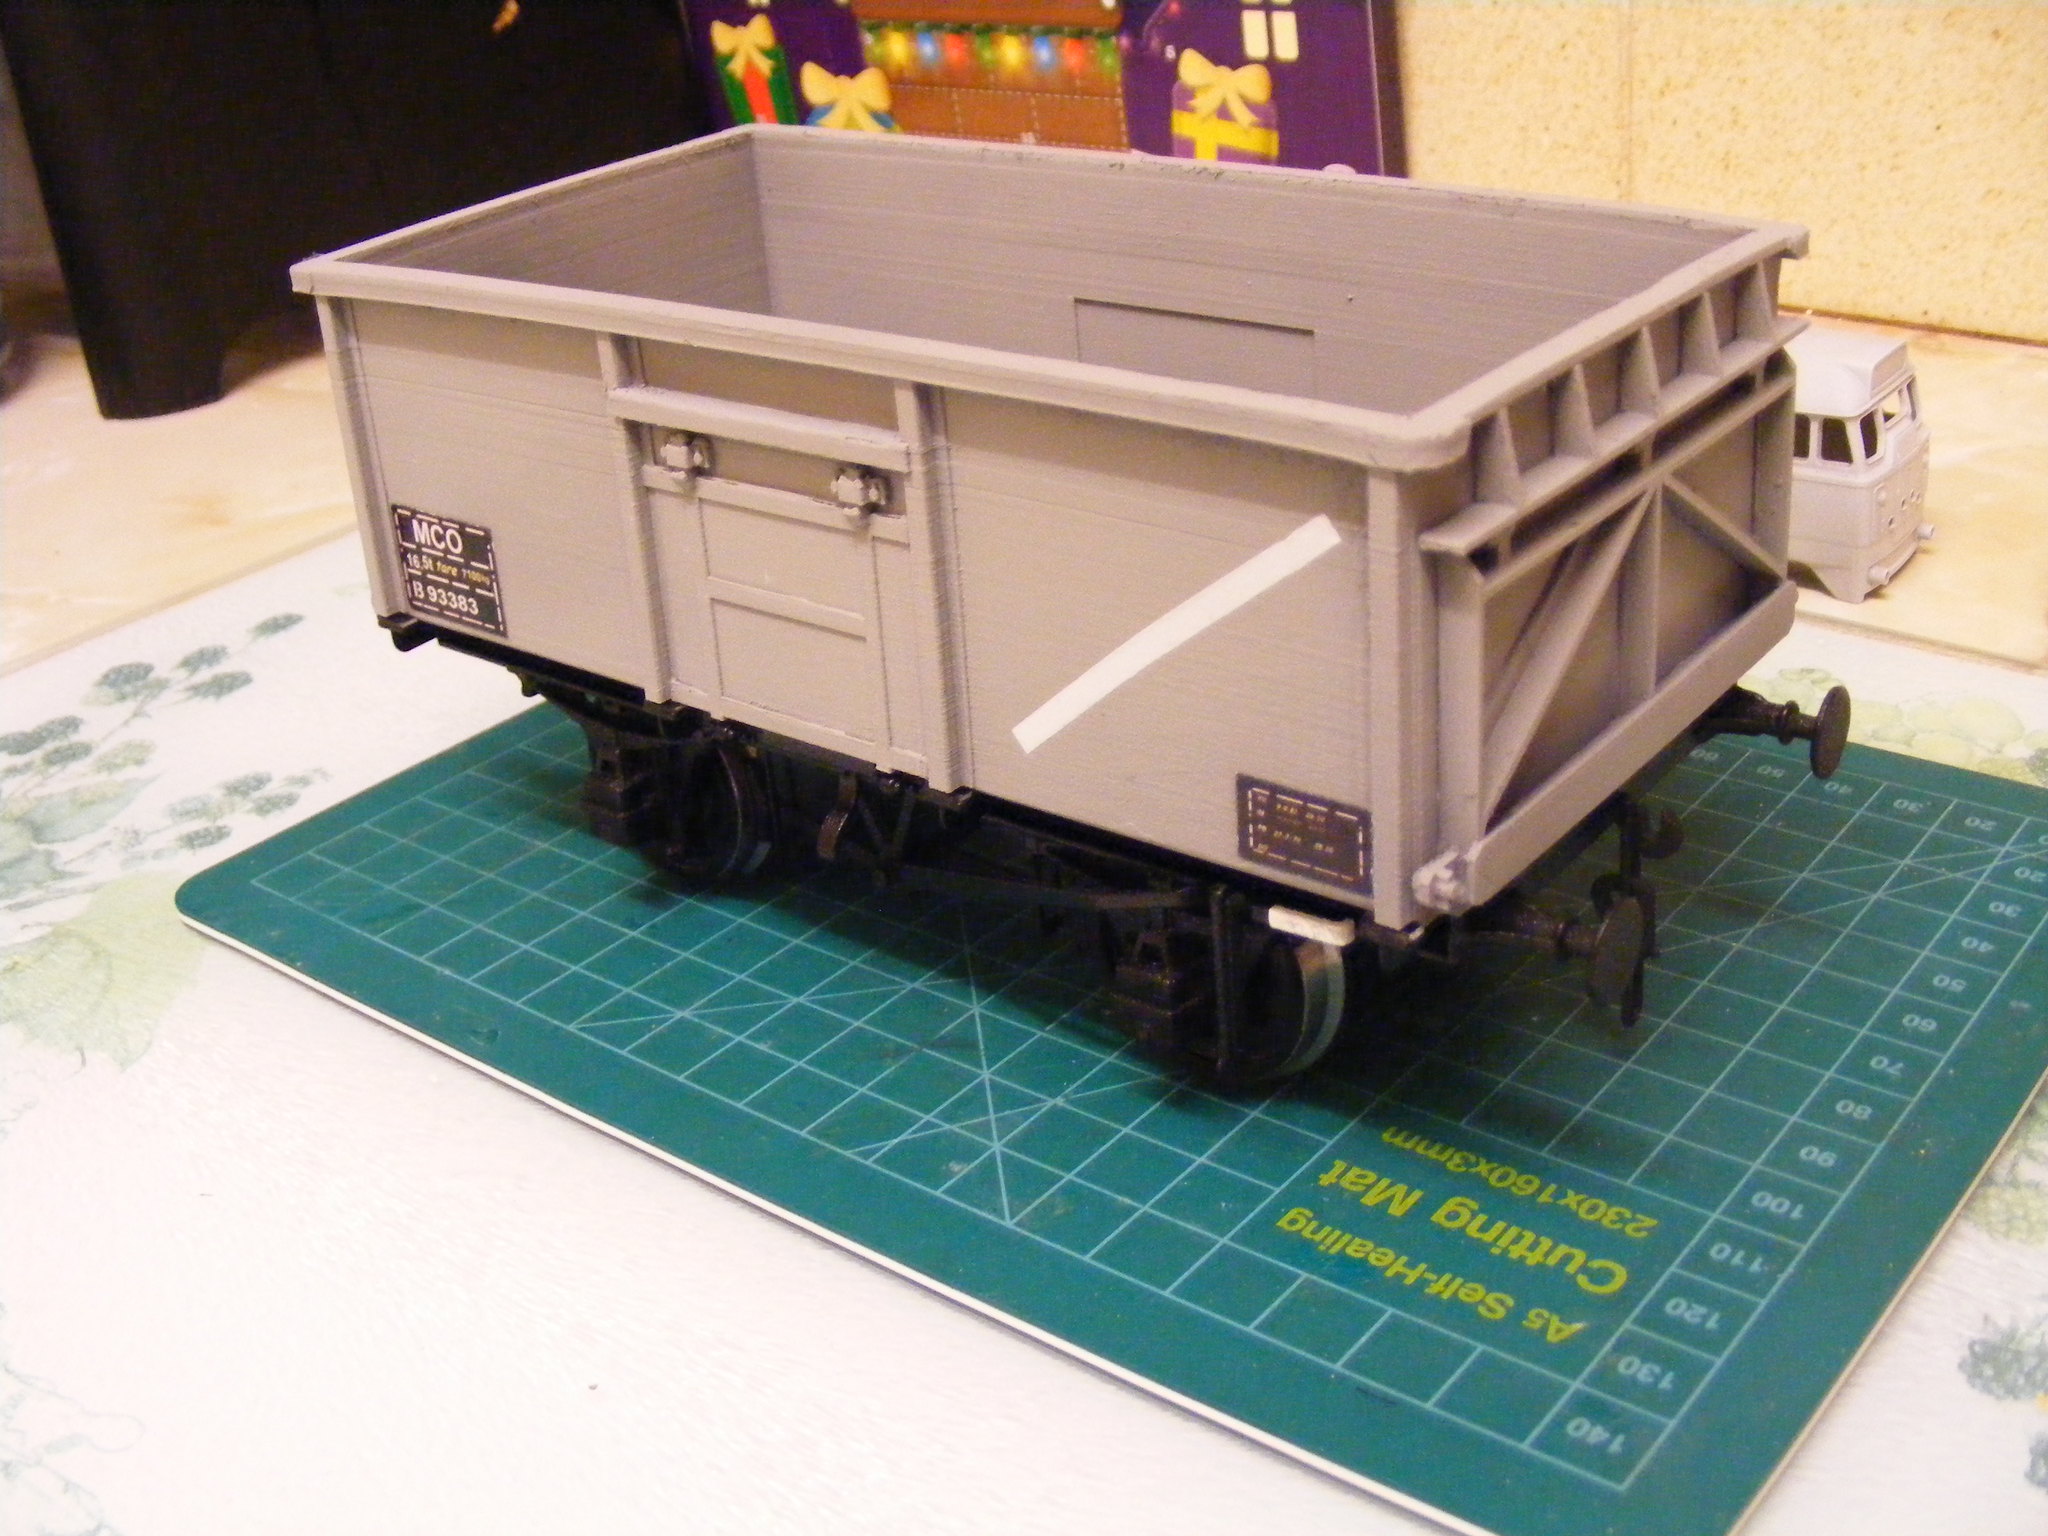 1/32 16t mineral wagon by simon br blue, on Flickr
Talking of couplings, in the last order I got some 7mm Instanter coupling printed in black professional plastic. When I get some time I will test both f the scale versions to destruction to see what force/weight they can take. Picture if the 7mm version below.
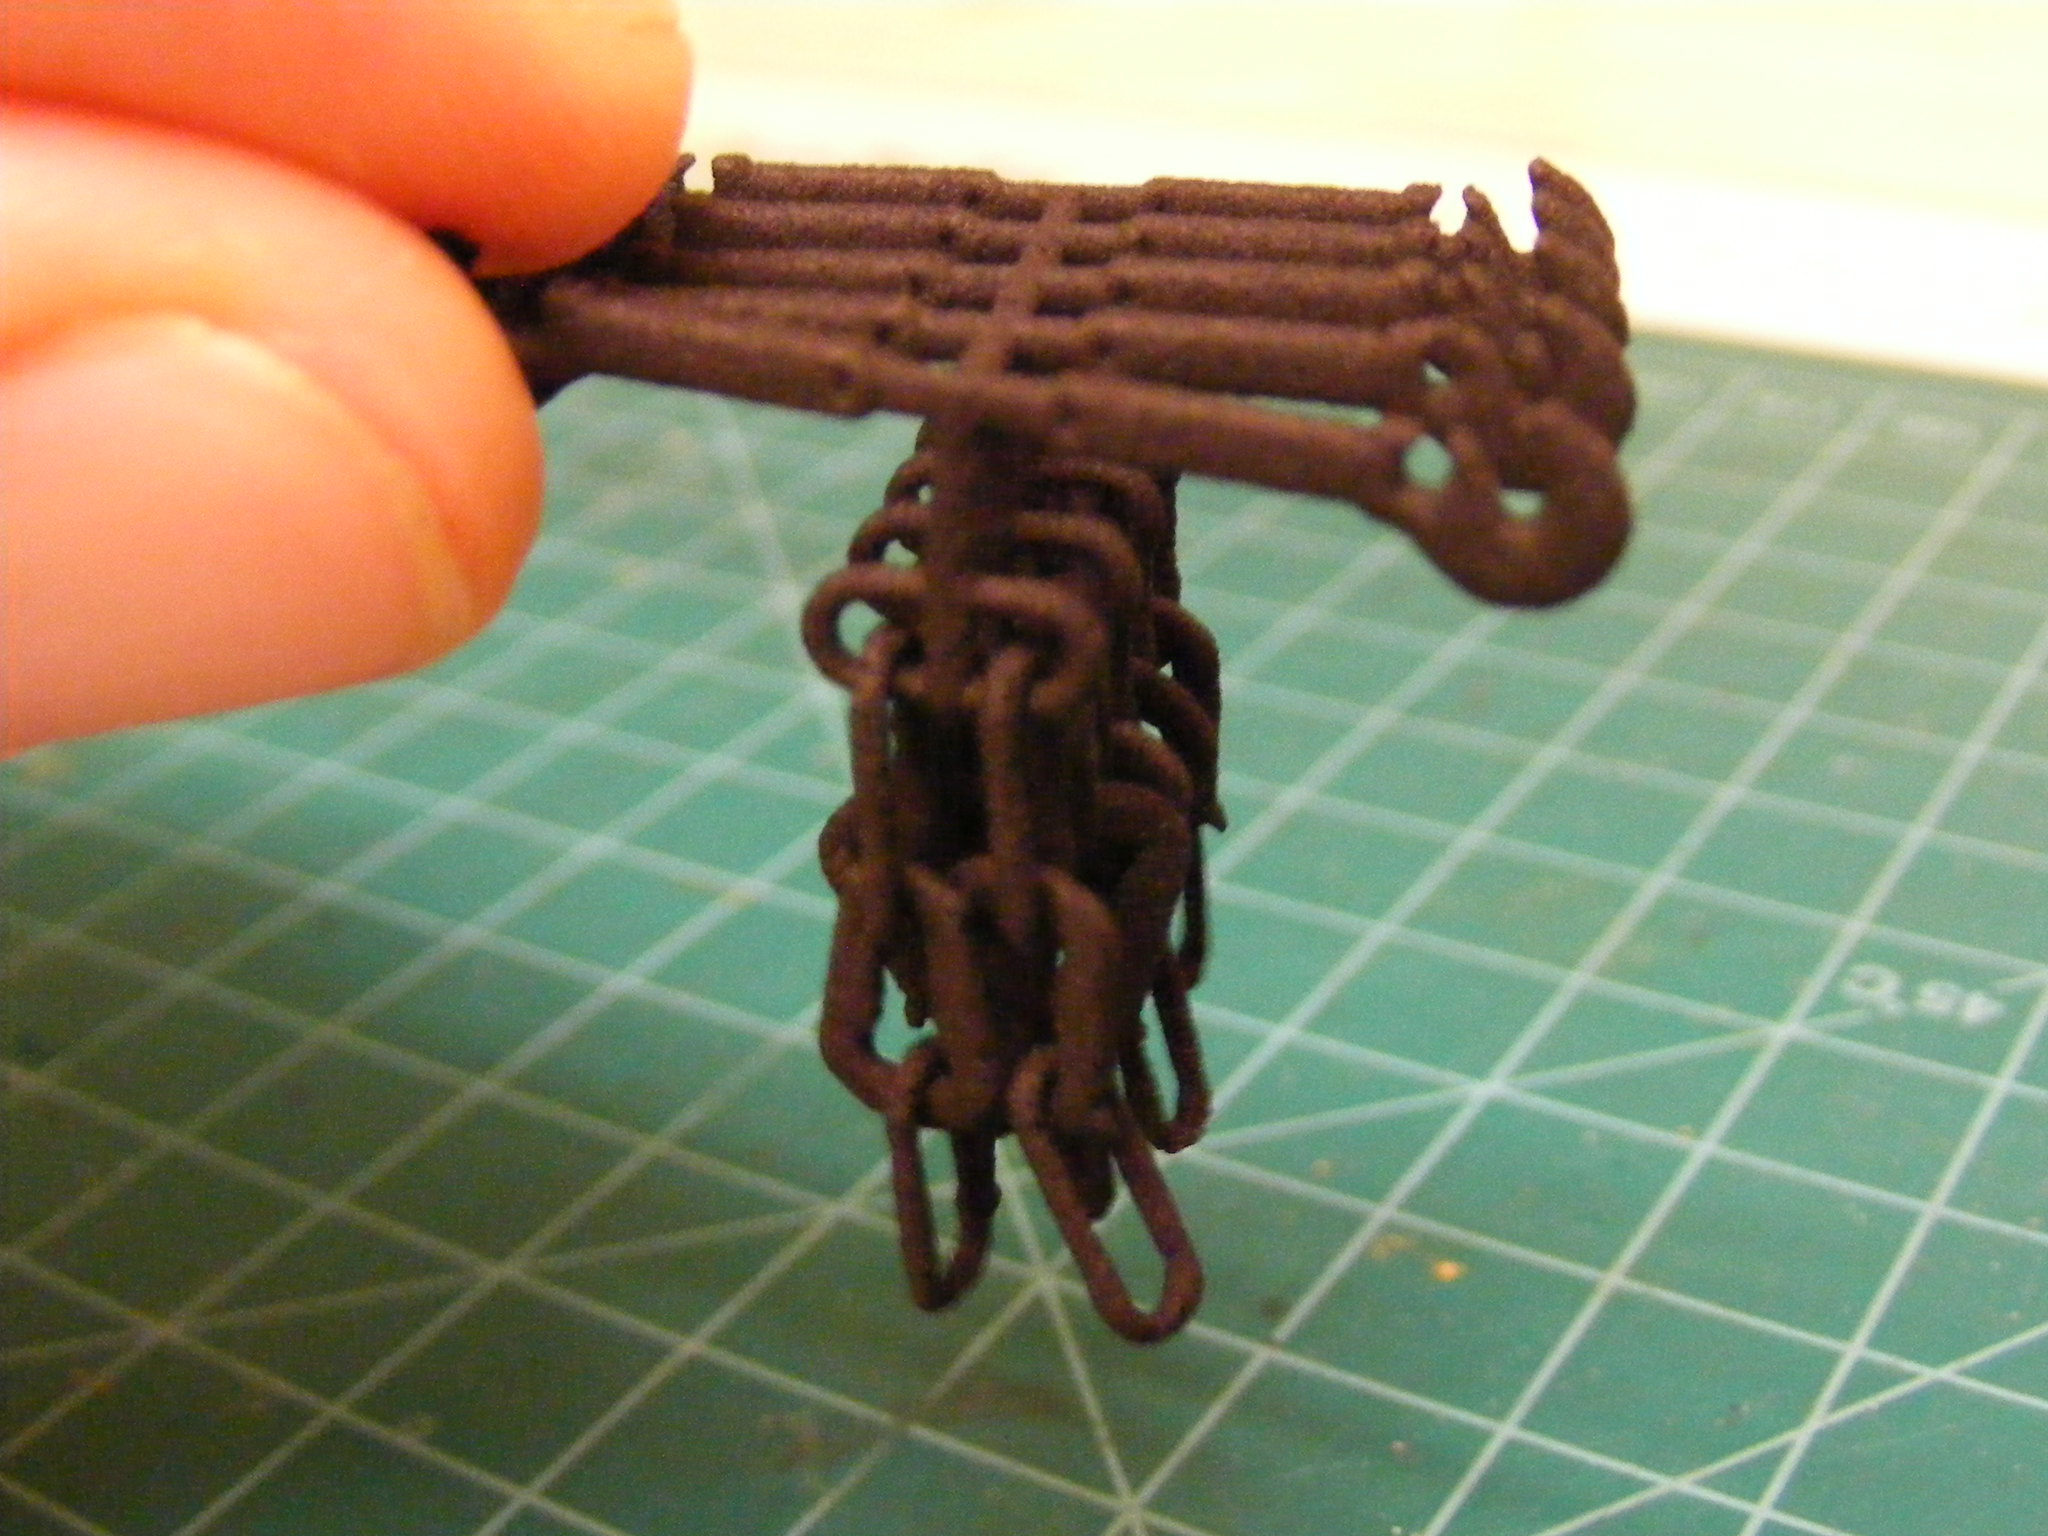 7mm Instanter couplings by simon br blue, on Flickr
Last up tonight is the 7mm shunting tractor. This was painted at the same time as the 4mm version and had scaled up transfers fitted. It was originally printed in yellow but the colour didn't look right. A couple of pictures of it and a short clip of it doing what it was made to do - shunting train wagons.
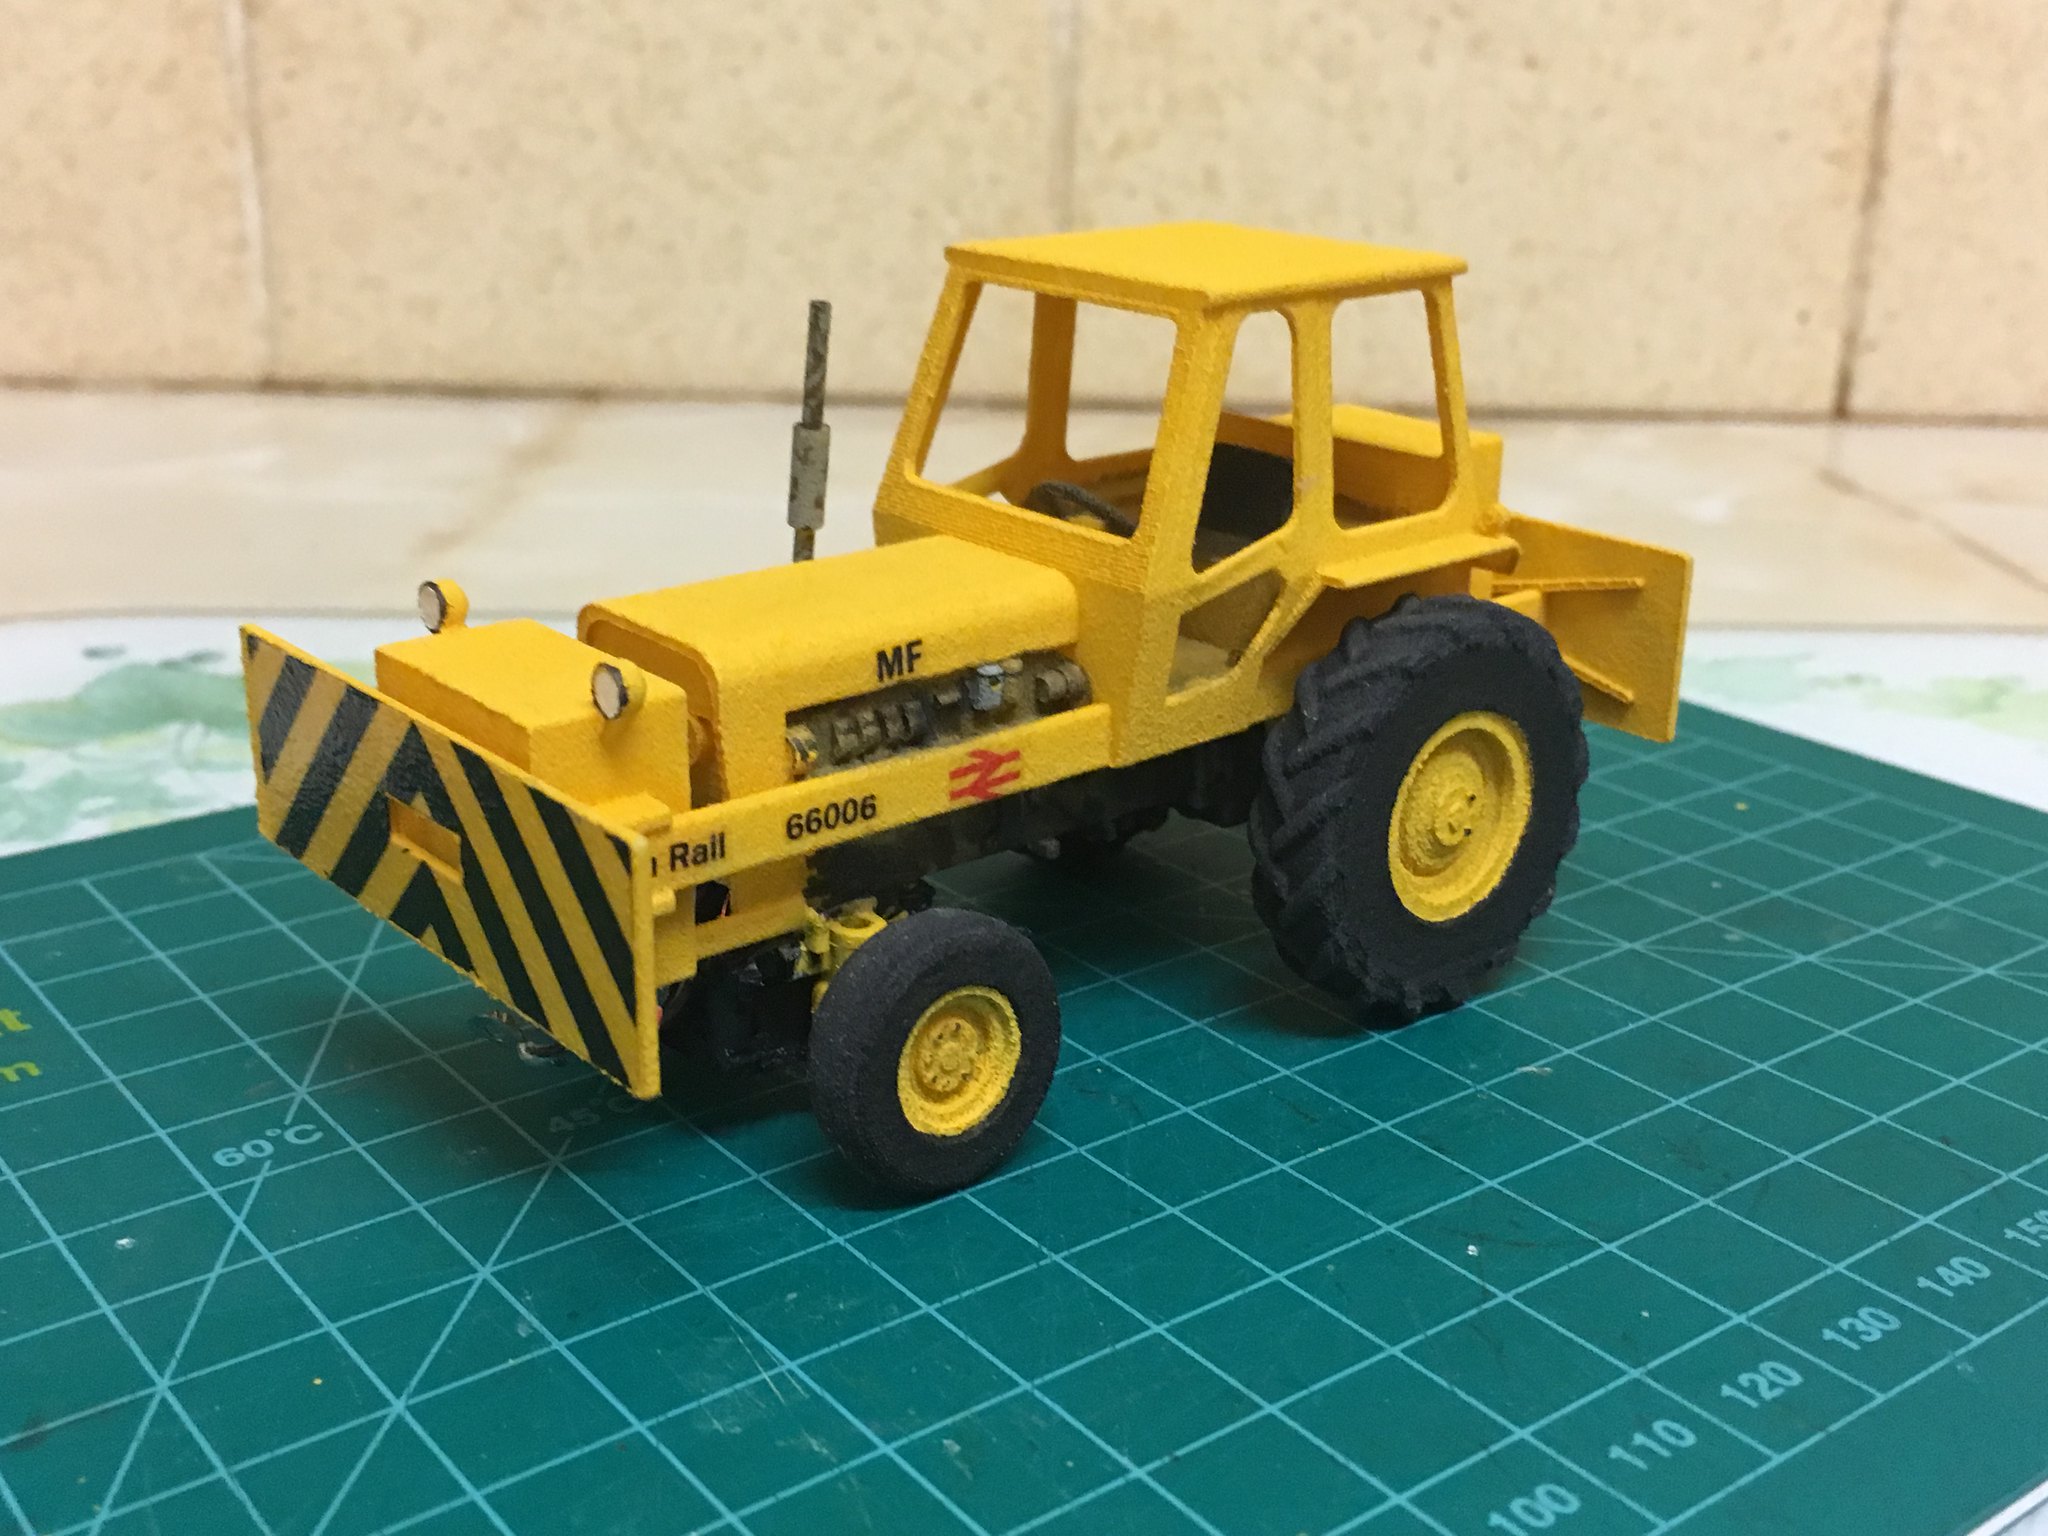 7mm Shunting tractor by simon br blue, on Flickr
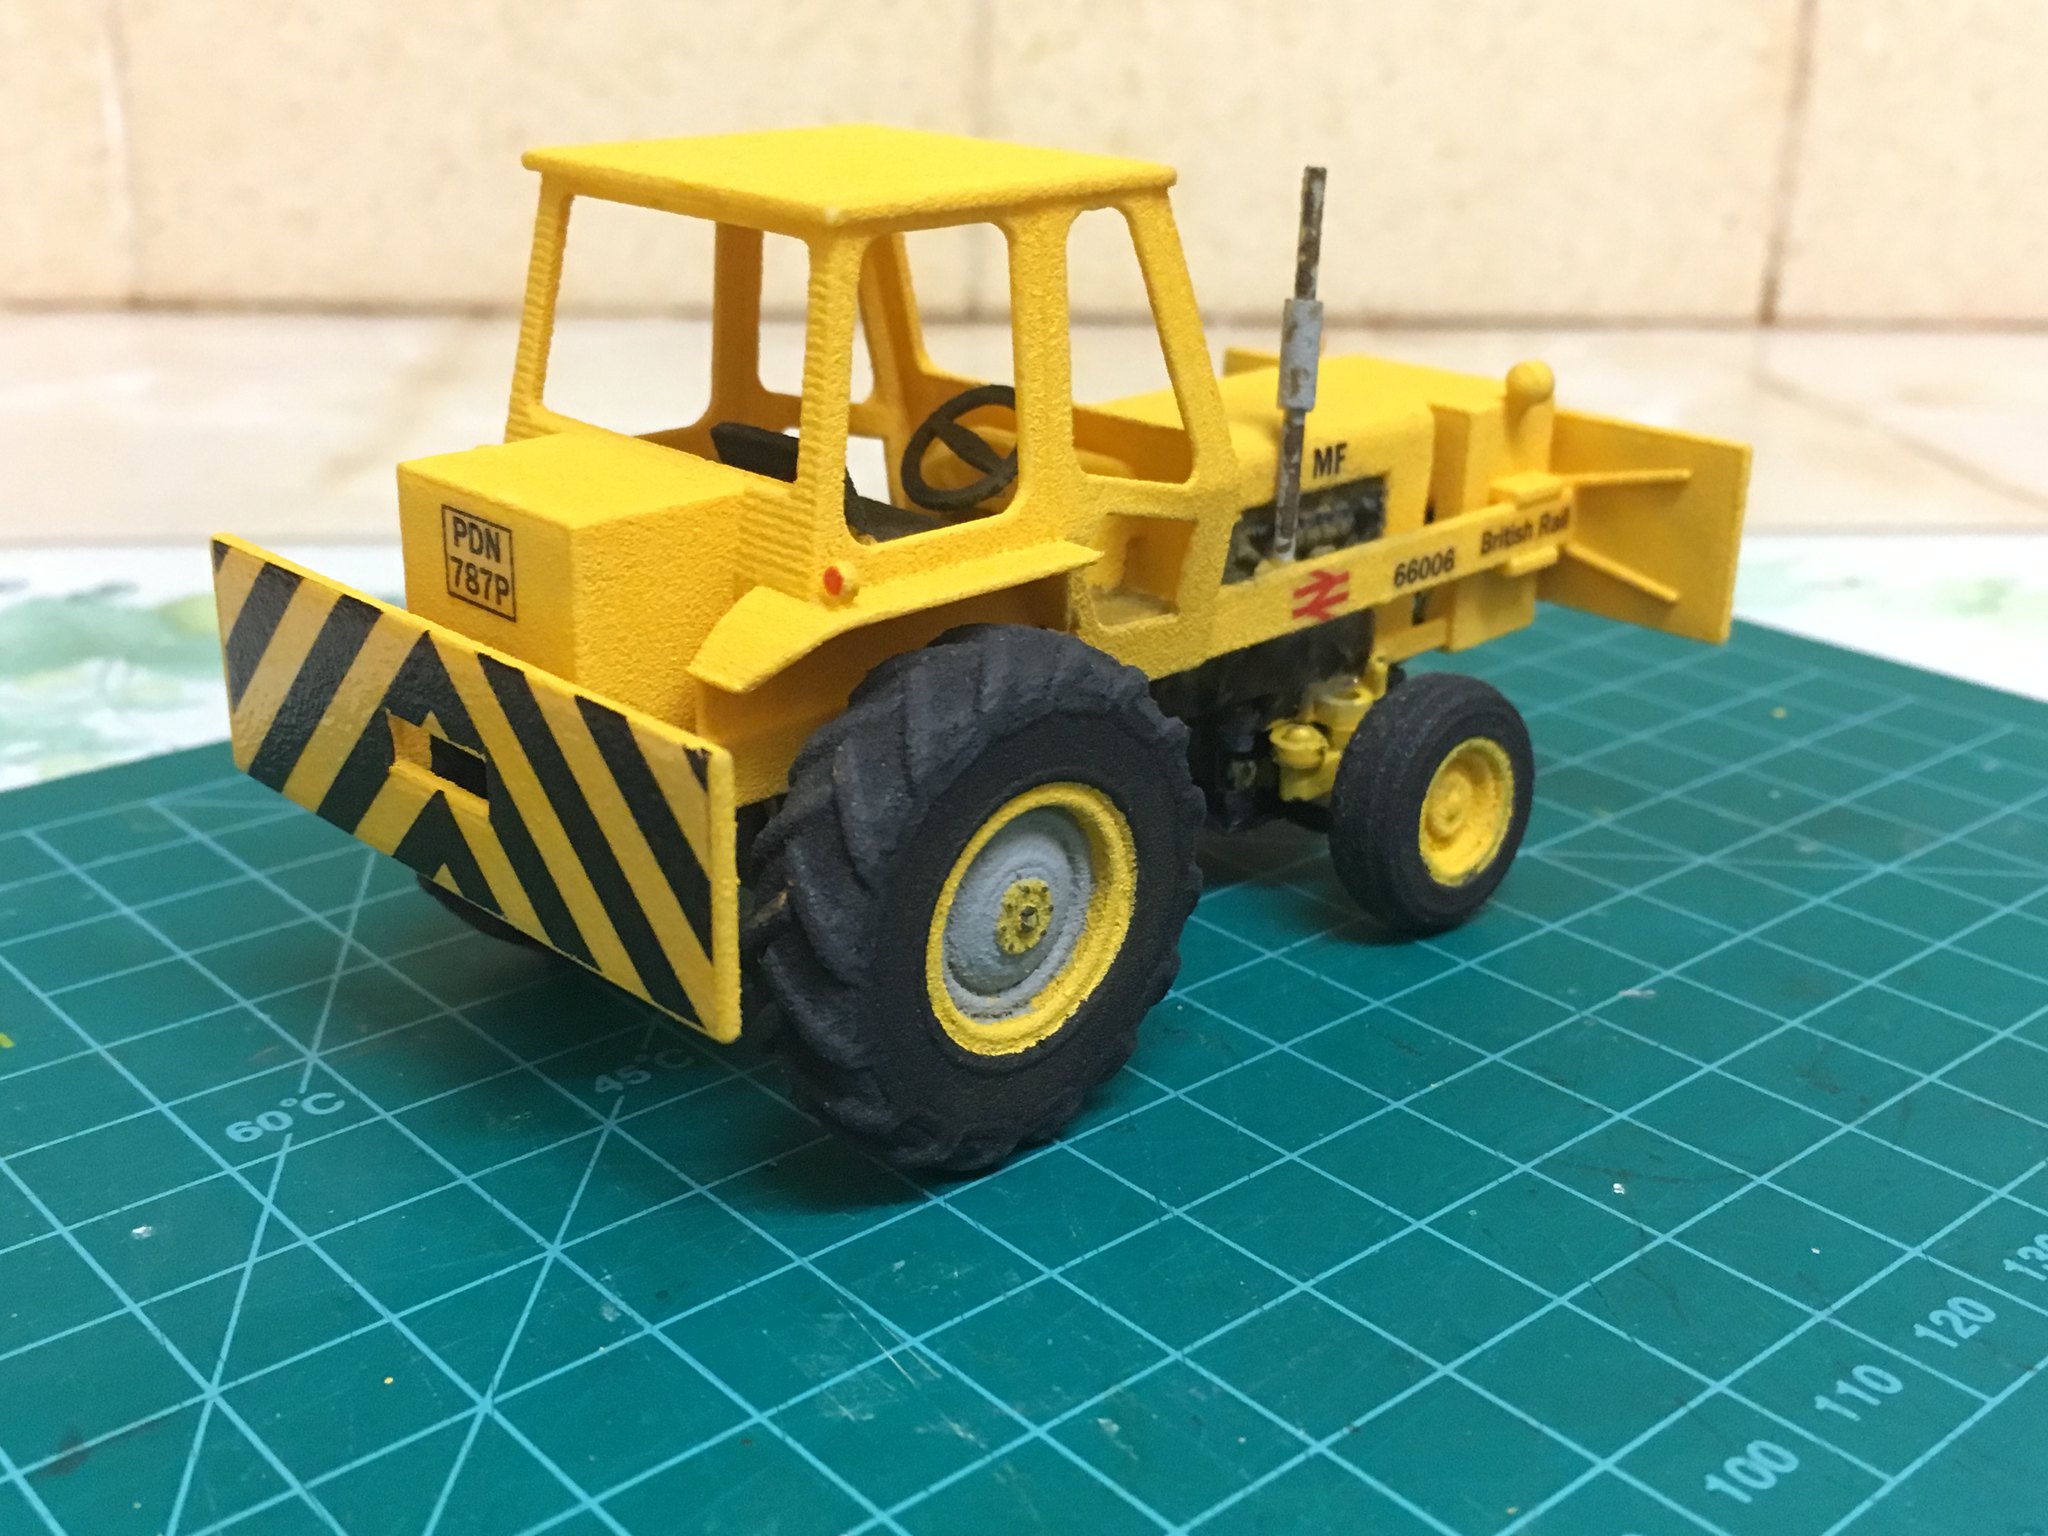 7mm Shunting tractor by simon br blue, on Flickr
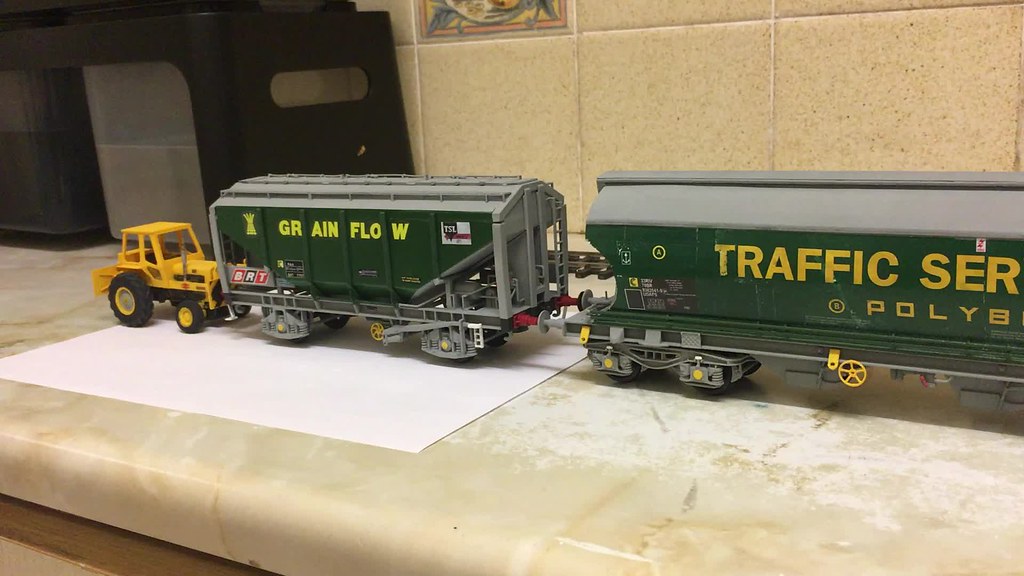 7mm shunting tractor by simon br blue, on Flickr
-
5
-
-
I did post a photo in this thread a while ago and I thought I'd post another now I've painted the vehicles. The models were printed a while ago but I didn't complete these as I was procrastinating over how to glaze them, they still not glazed but now have been painted and had transfers added. The Loadall now has a bucket (held on with Blutack in the photo) This was painted white and then brush pained yellow (Humbrol acrylic warning yellow).
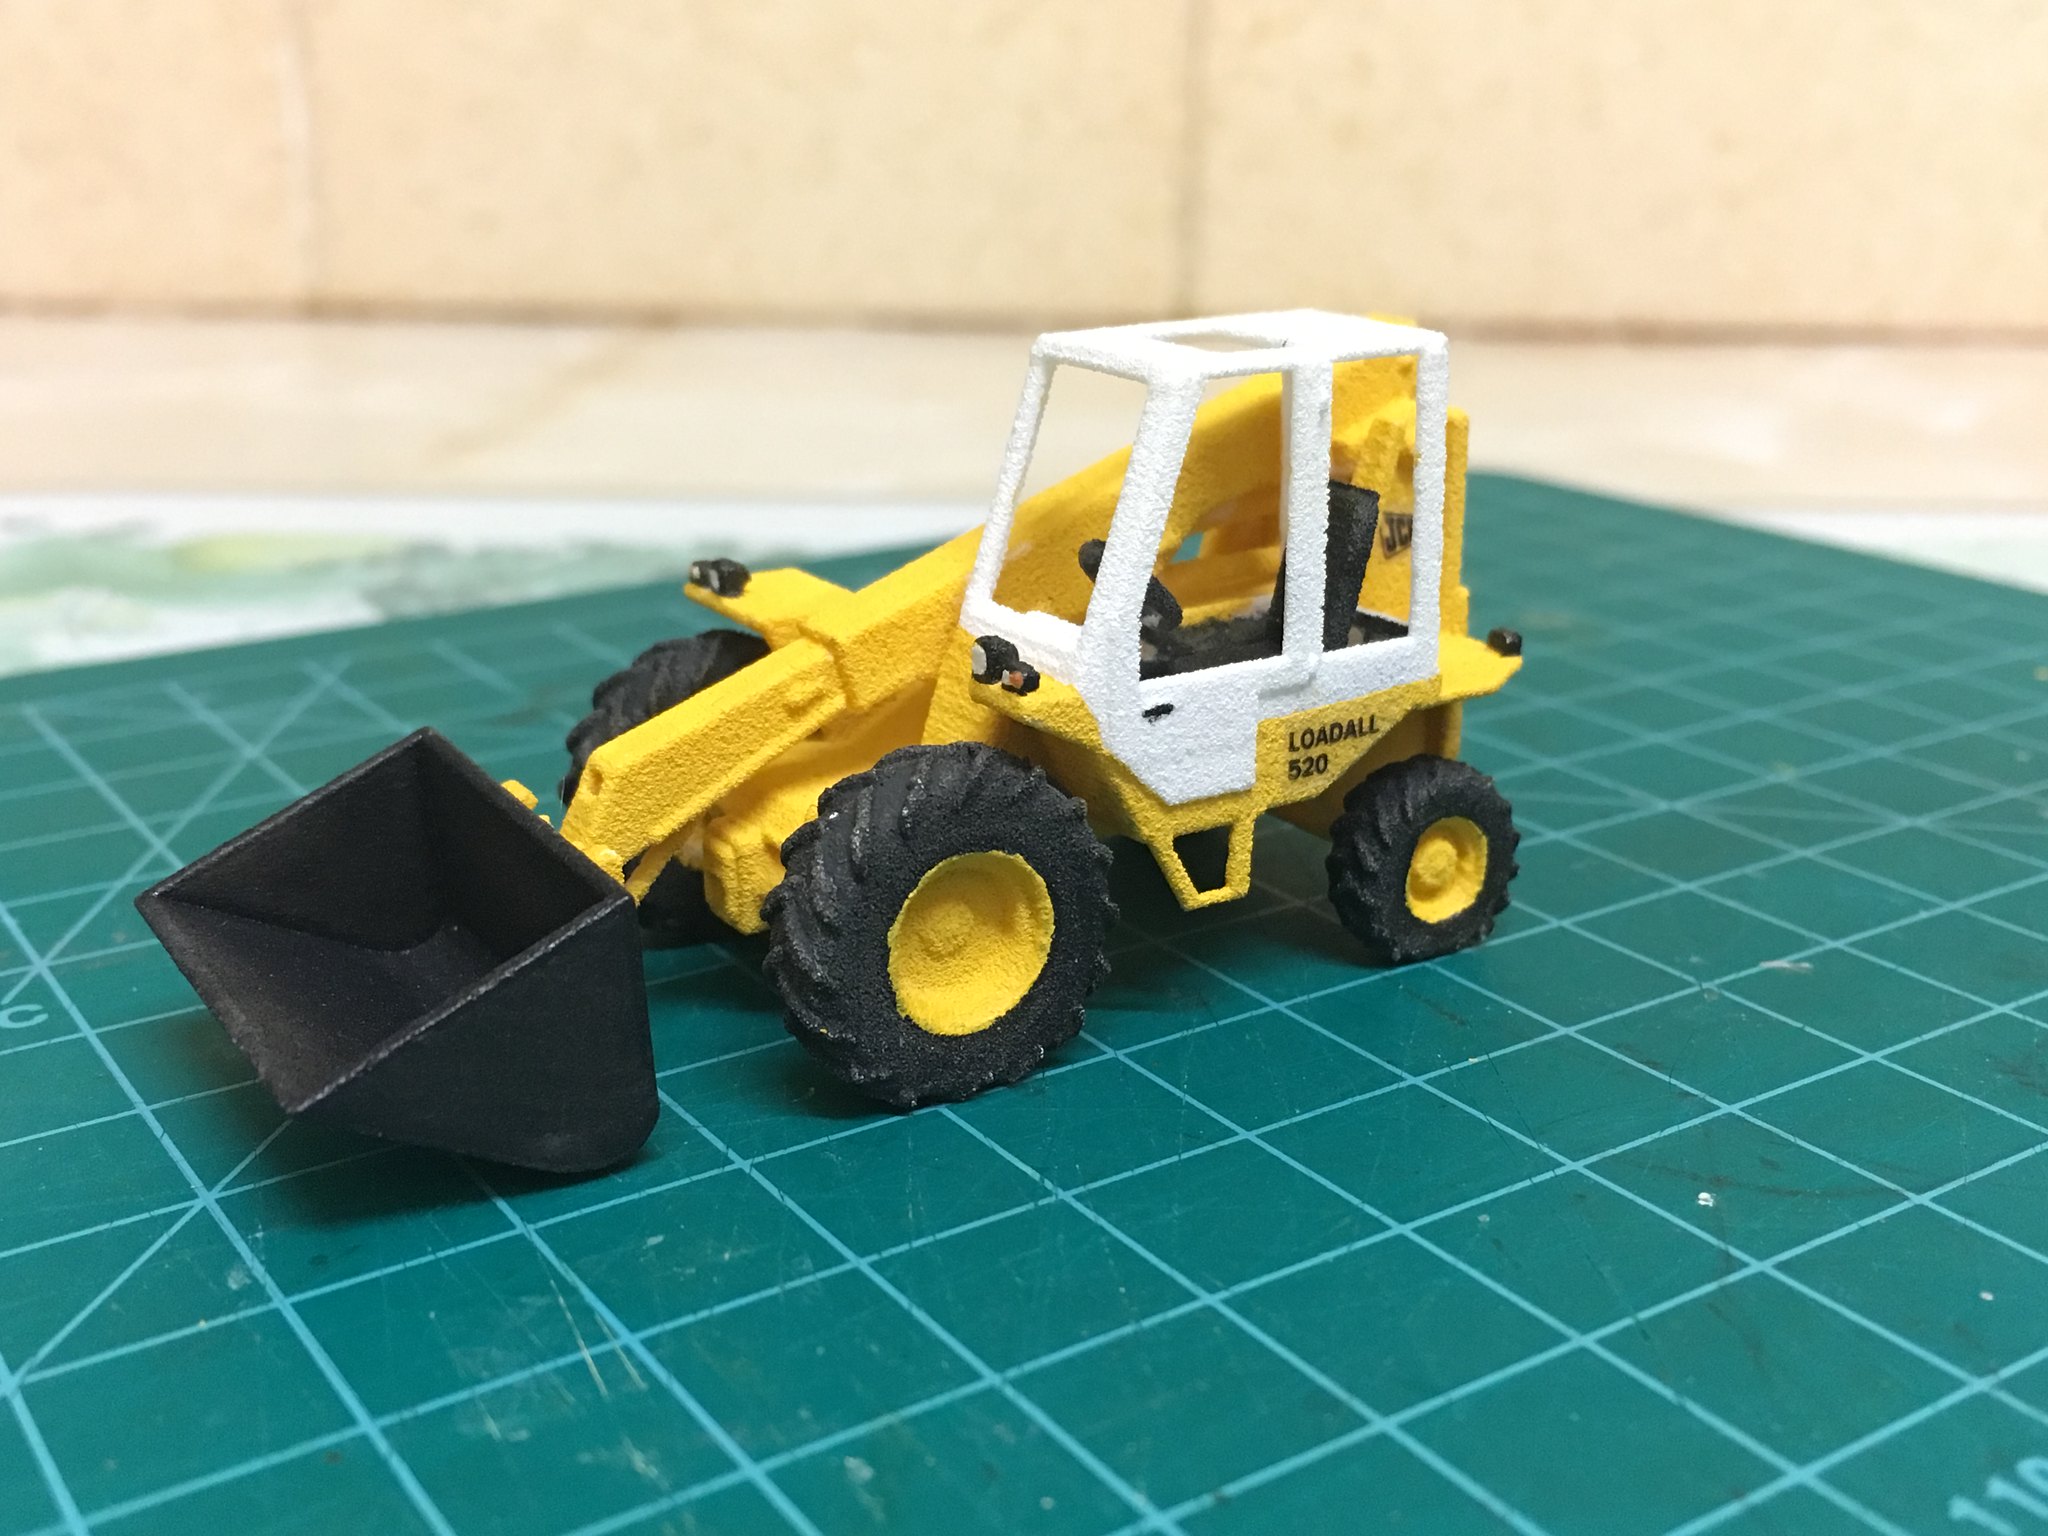 4mm JCB loadall by simon br blue, on Flickr
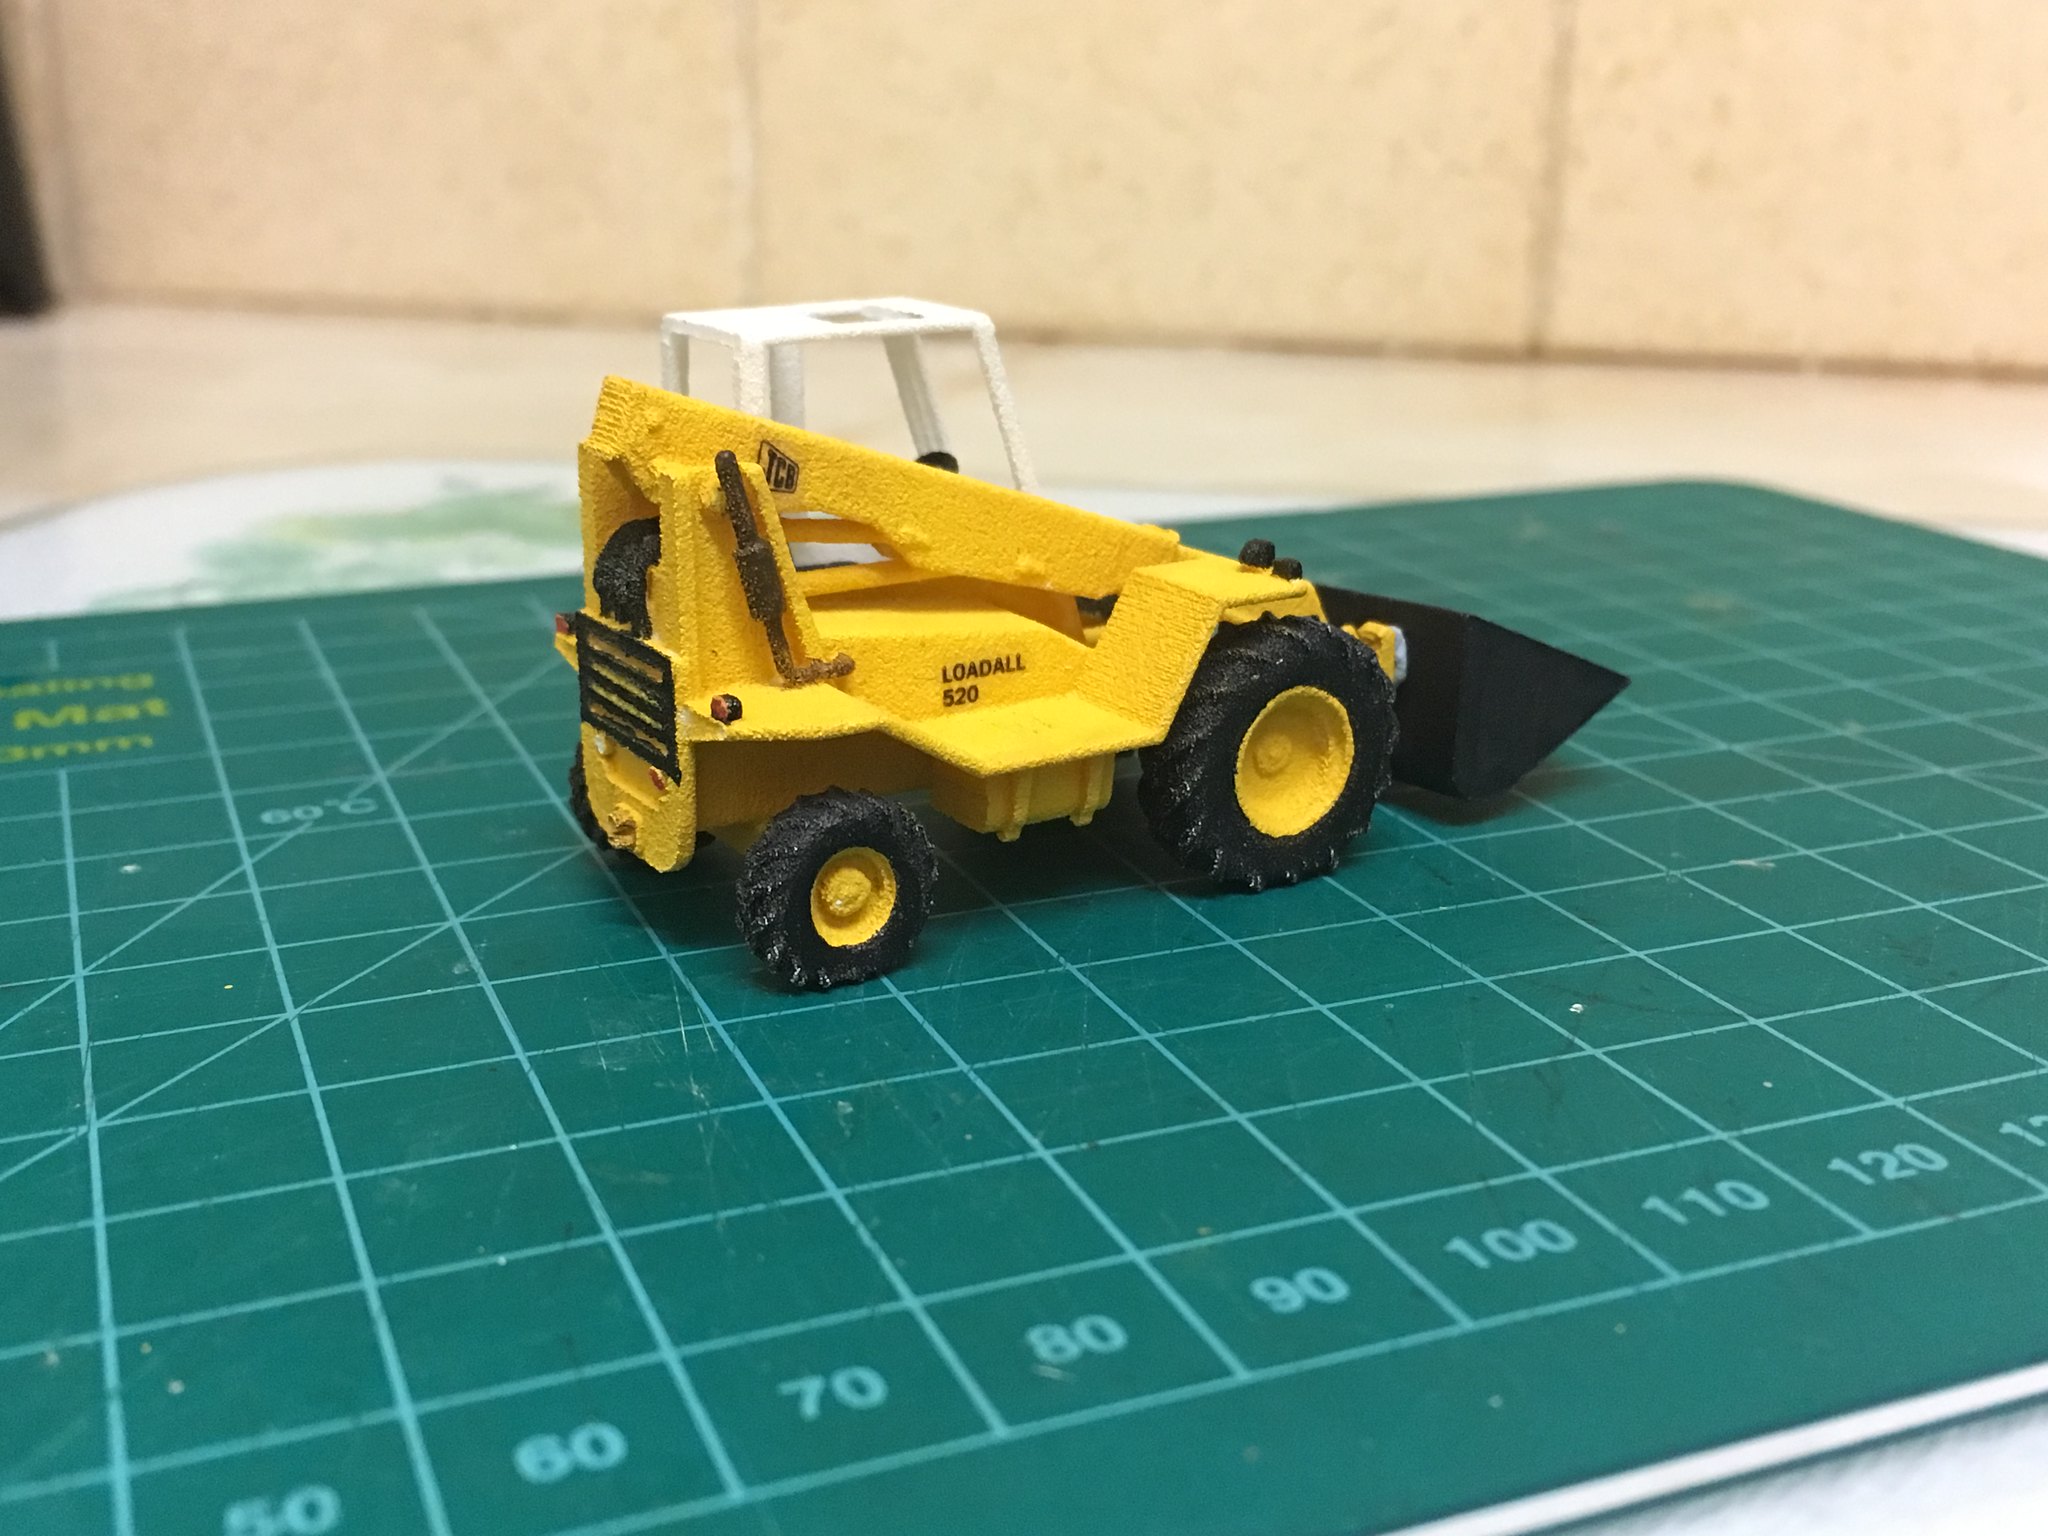 4mm JCB loadall by simon br blue, on Flickr
The shunting tractor was printed in Professional plastic (back when it was a trial material HPSF) this was primed in grey and then hand painted in the same Humbrol warning yellow to give a less bright colour. The transfer are homemade the same as the Loadall, the warning stripes shrunk slightly when applied and don't reach the sides. The tyres were painted in 2 different rubber colours and looks ok. The 3rd photo shows the tractor positioned in a common pose behind the Grain wagon purchased at Warley with extra weathering by TMC.
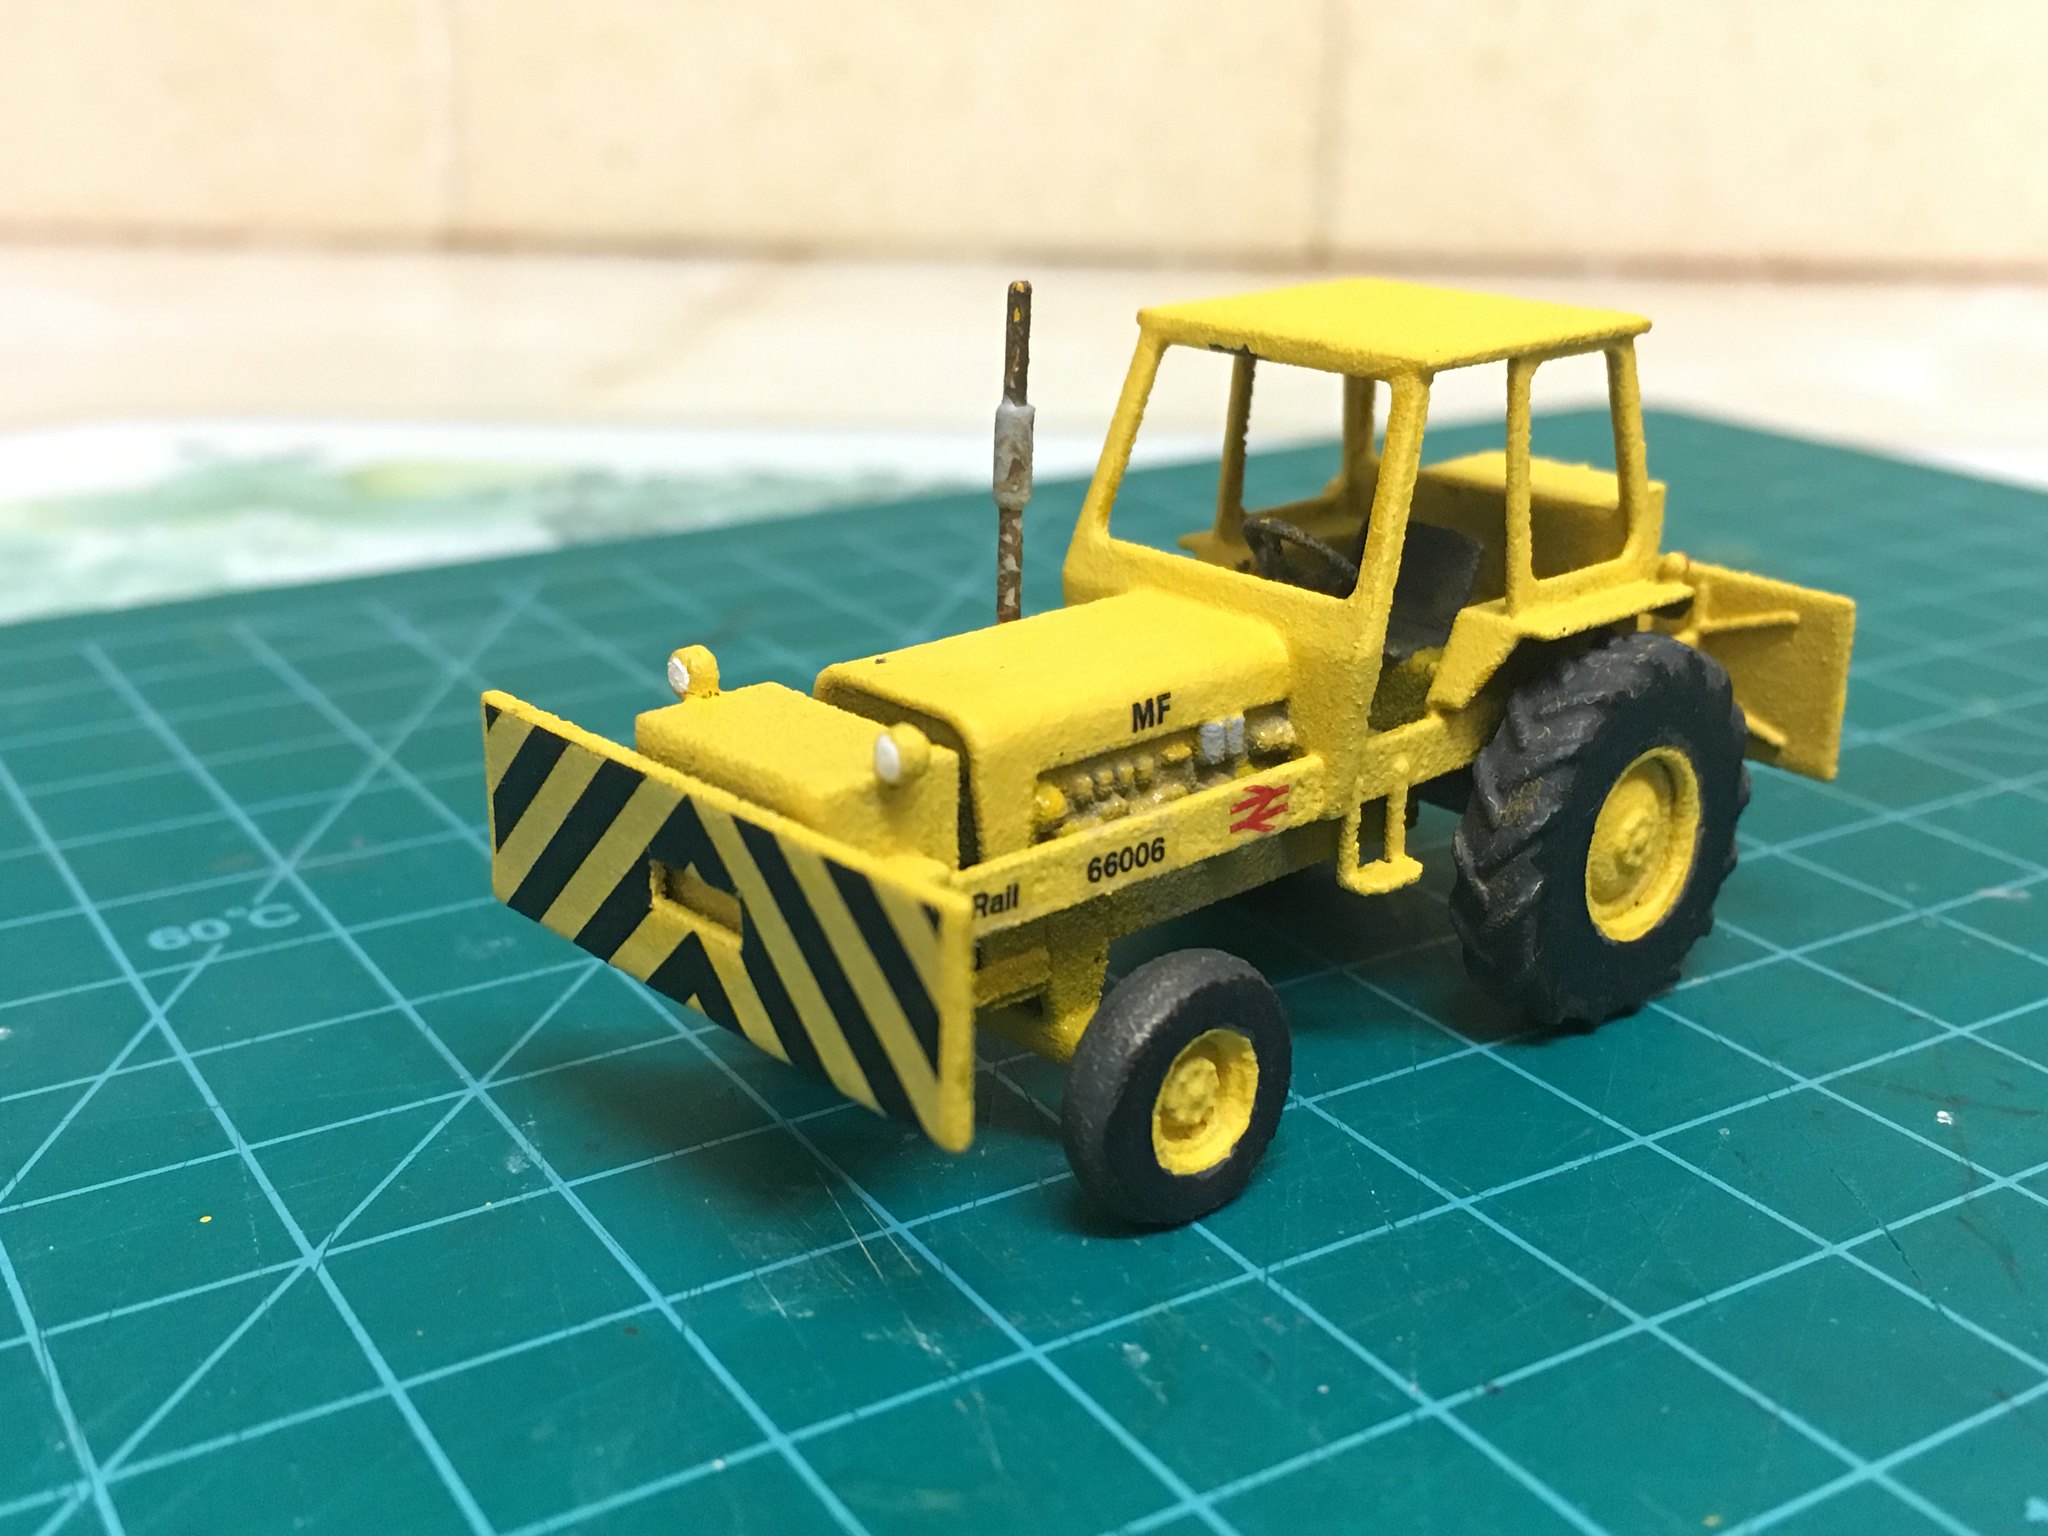 4mm Shunting tractor by simon br blue, on Flickr
 4mm Shunting tractor by simon br blue, on Flickr
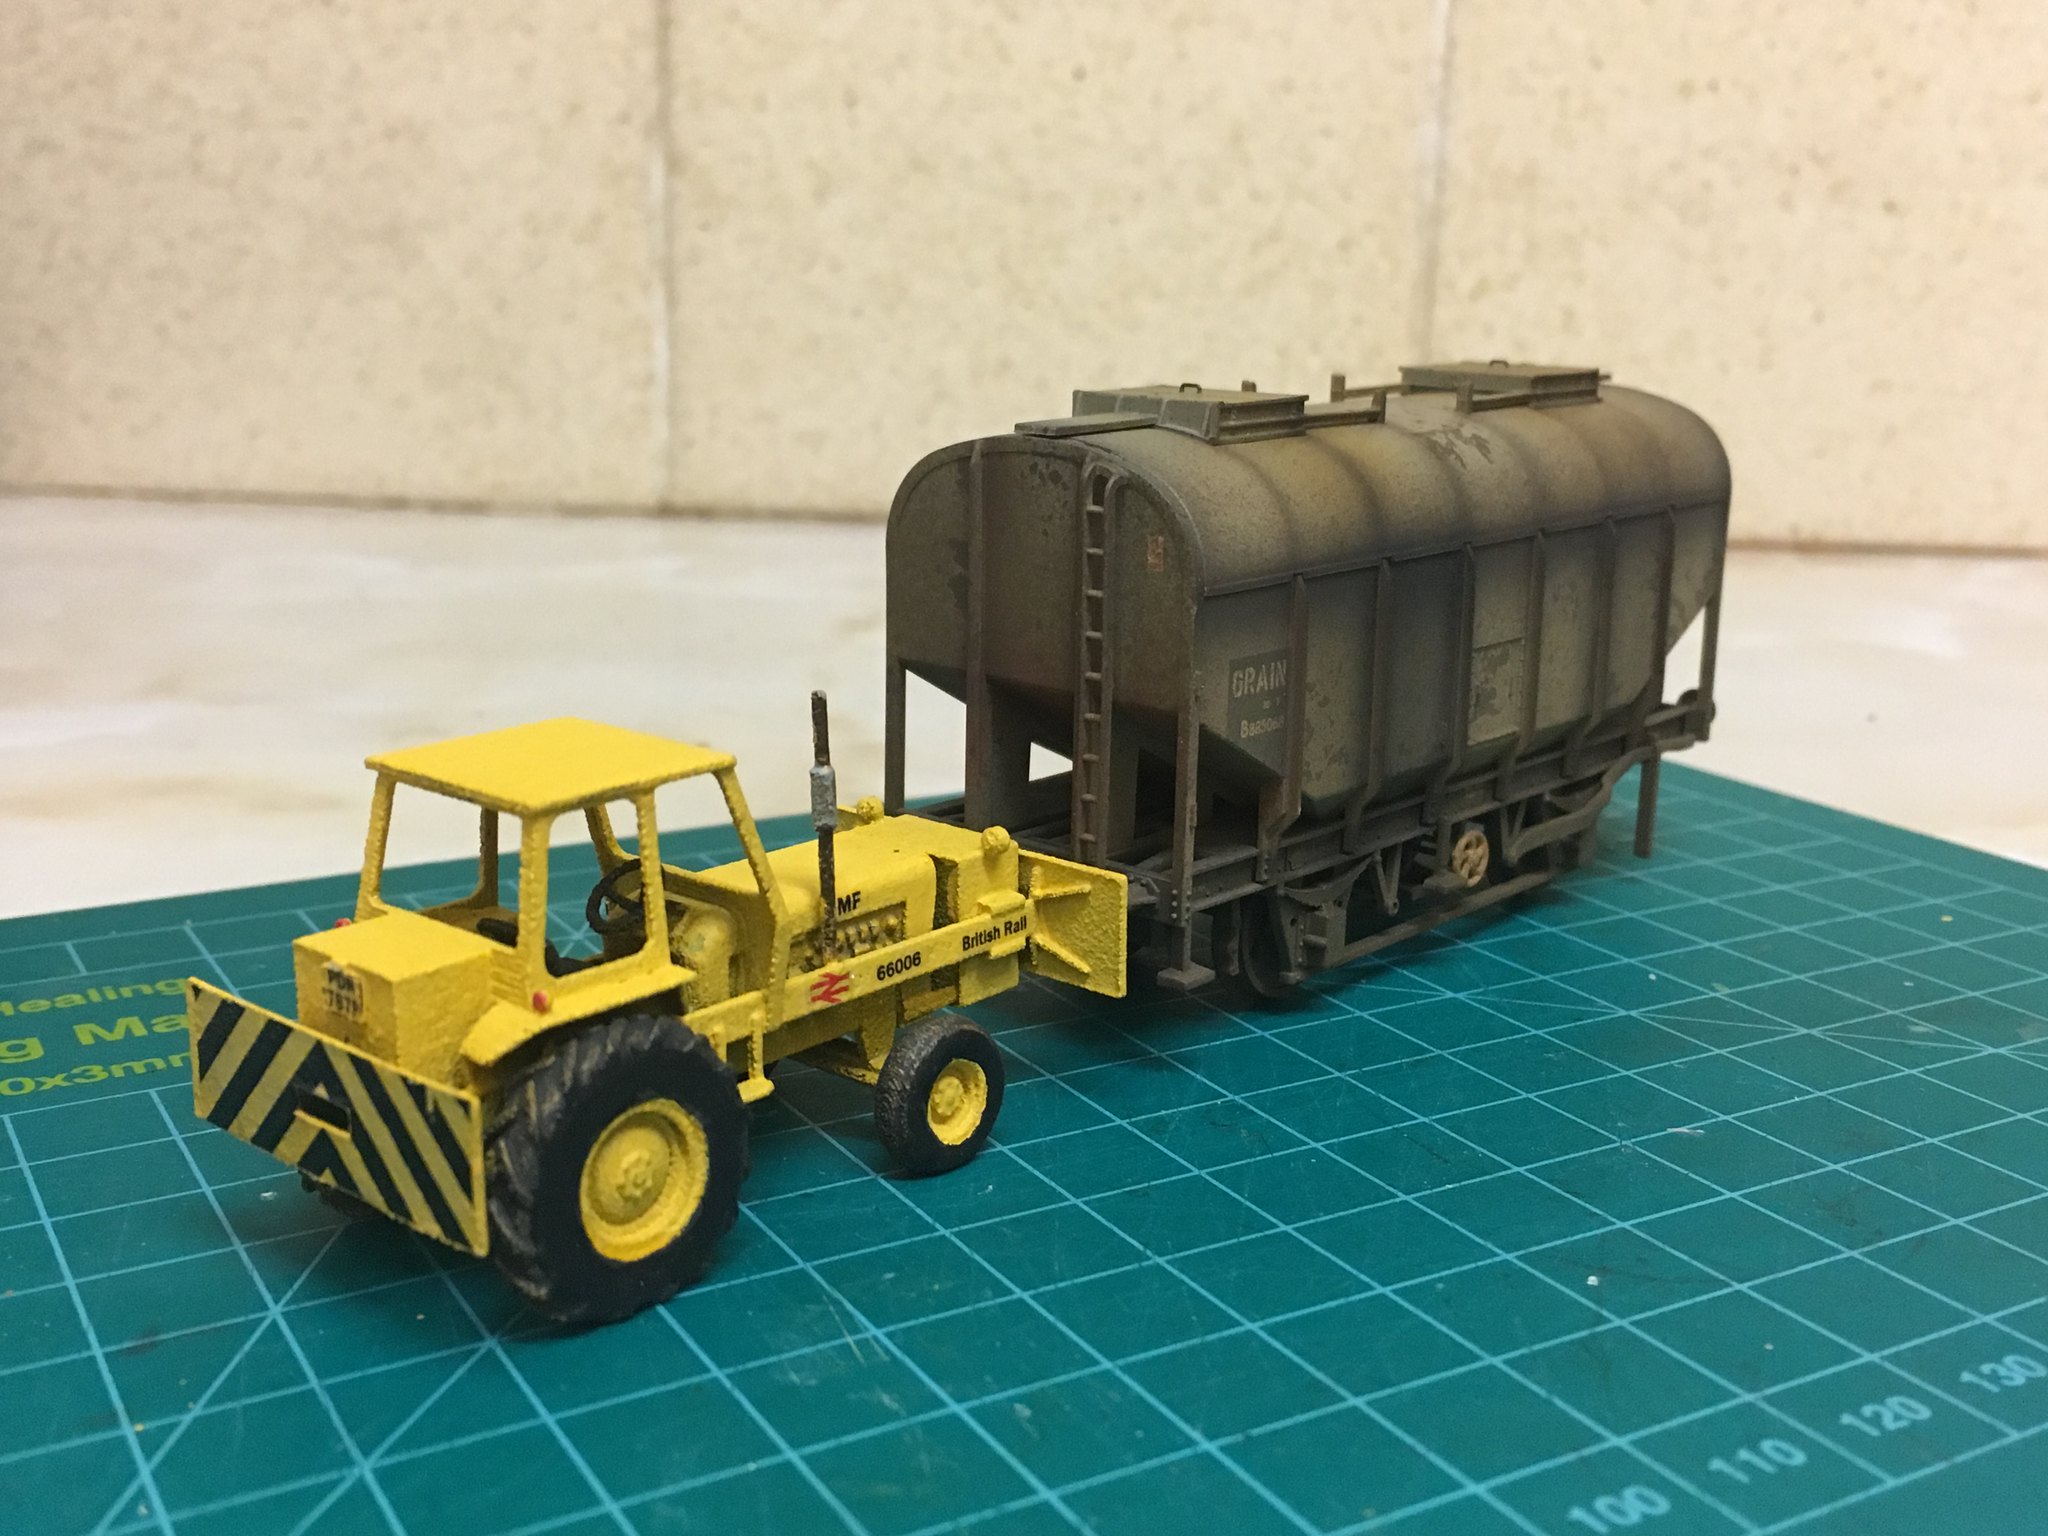 4mm Shunting tractor by simon br blue, on Flickr
-
8
-
1
-
-
Some more 7mm wagons nearing completion tonight.
First up is the PBA clay tiger, this had had a document holder fitted recently which was printed on the Form2.
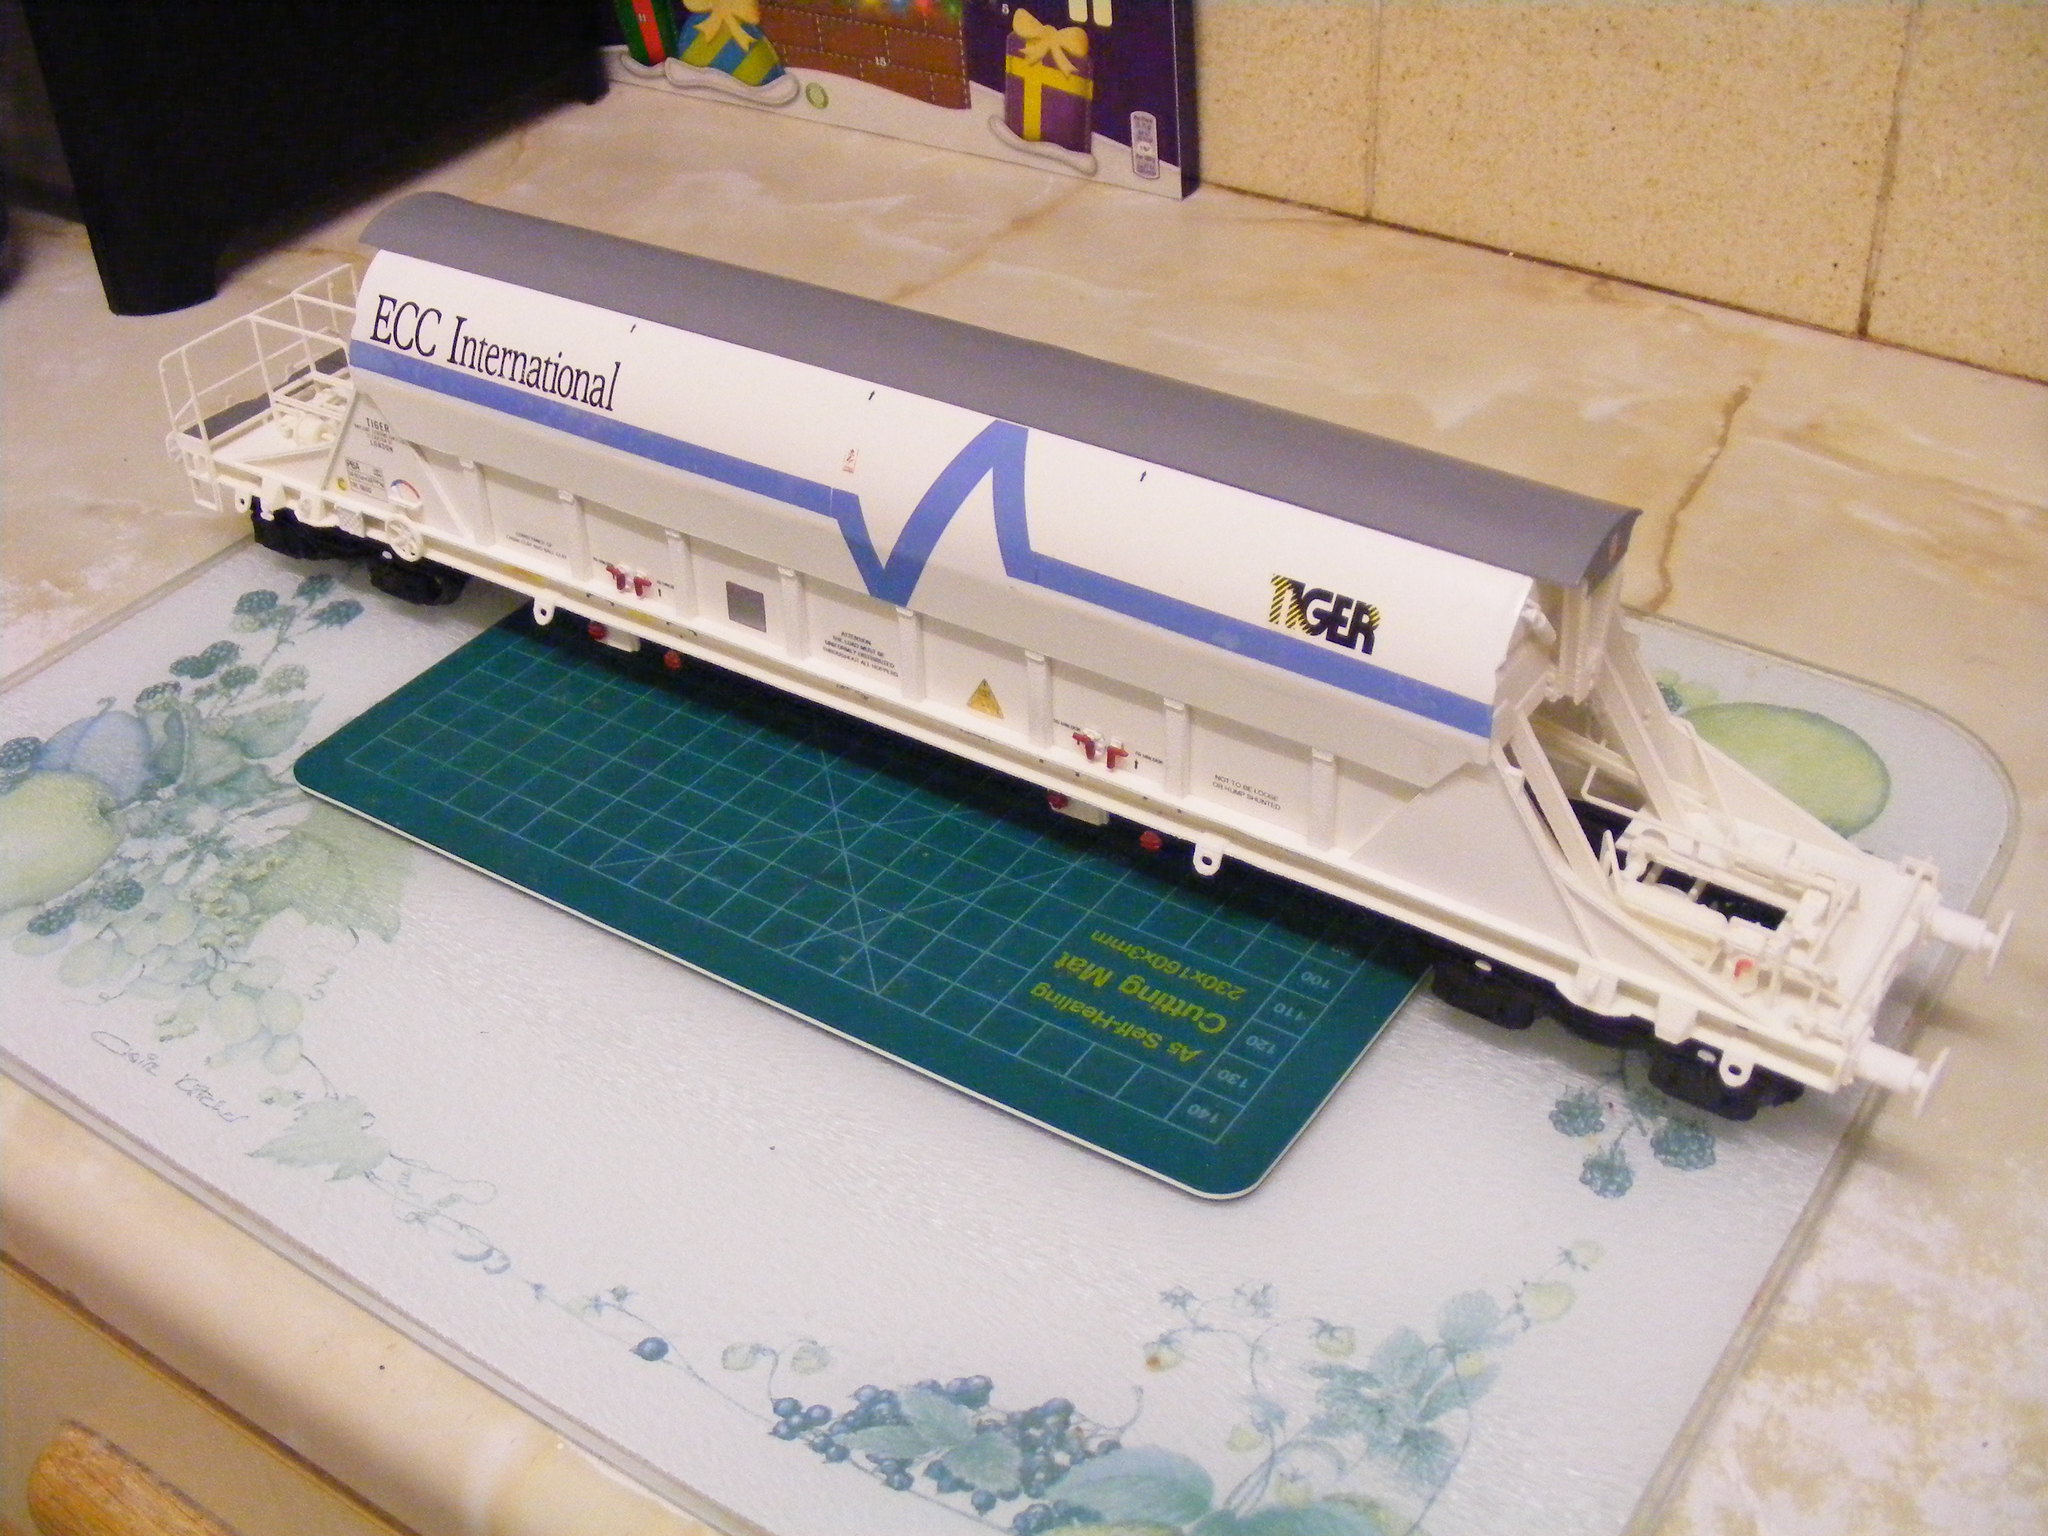 7mm PBA clay Tiger wagon by simon br blue, on Flickr
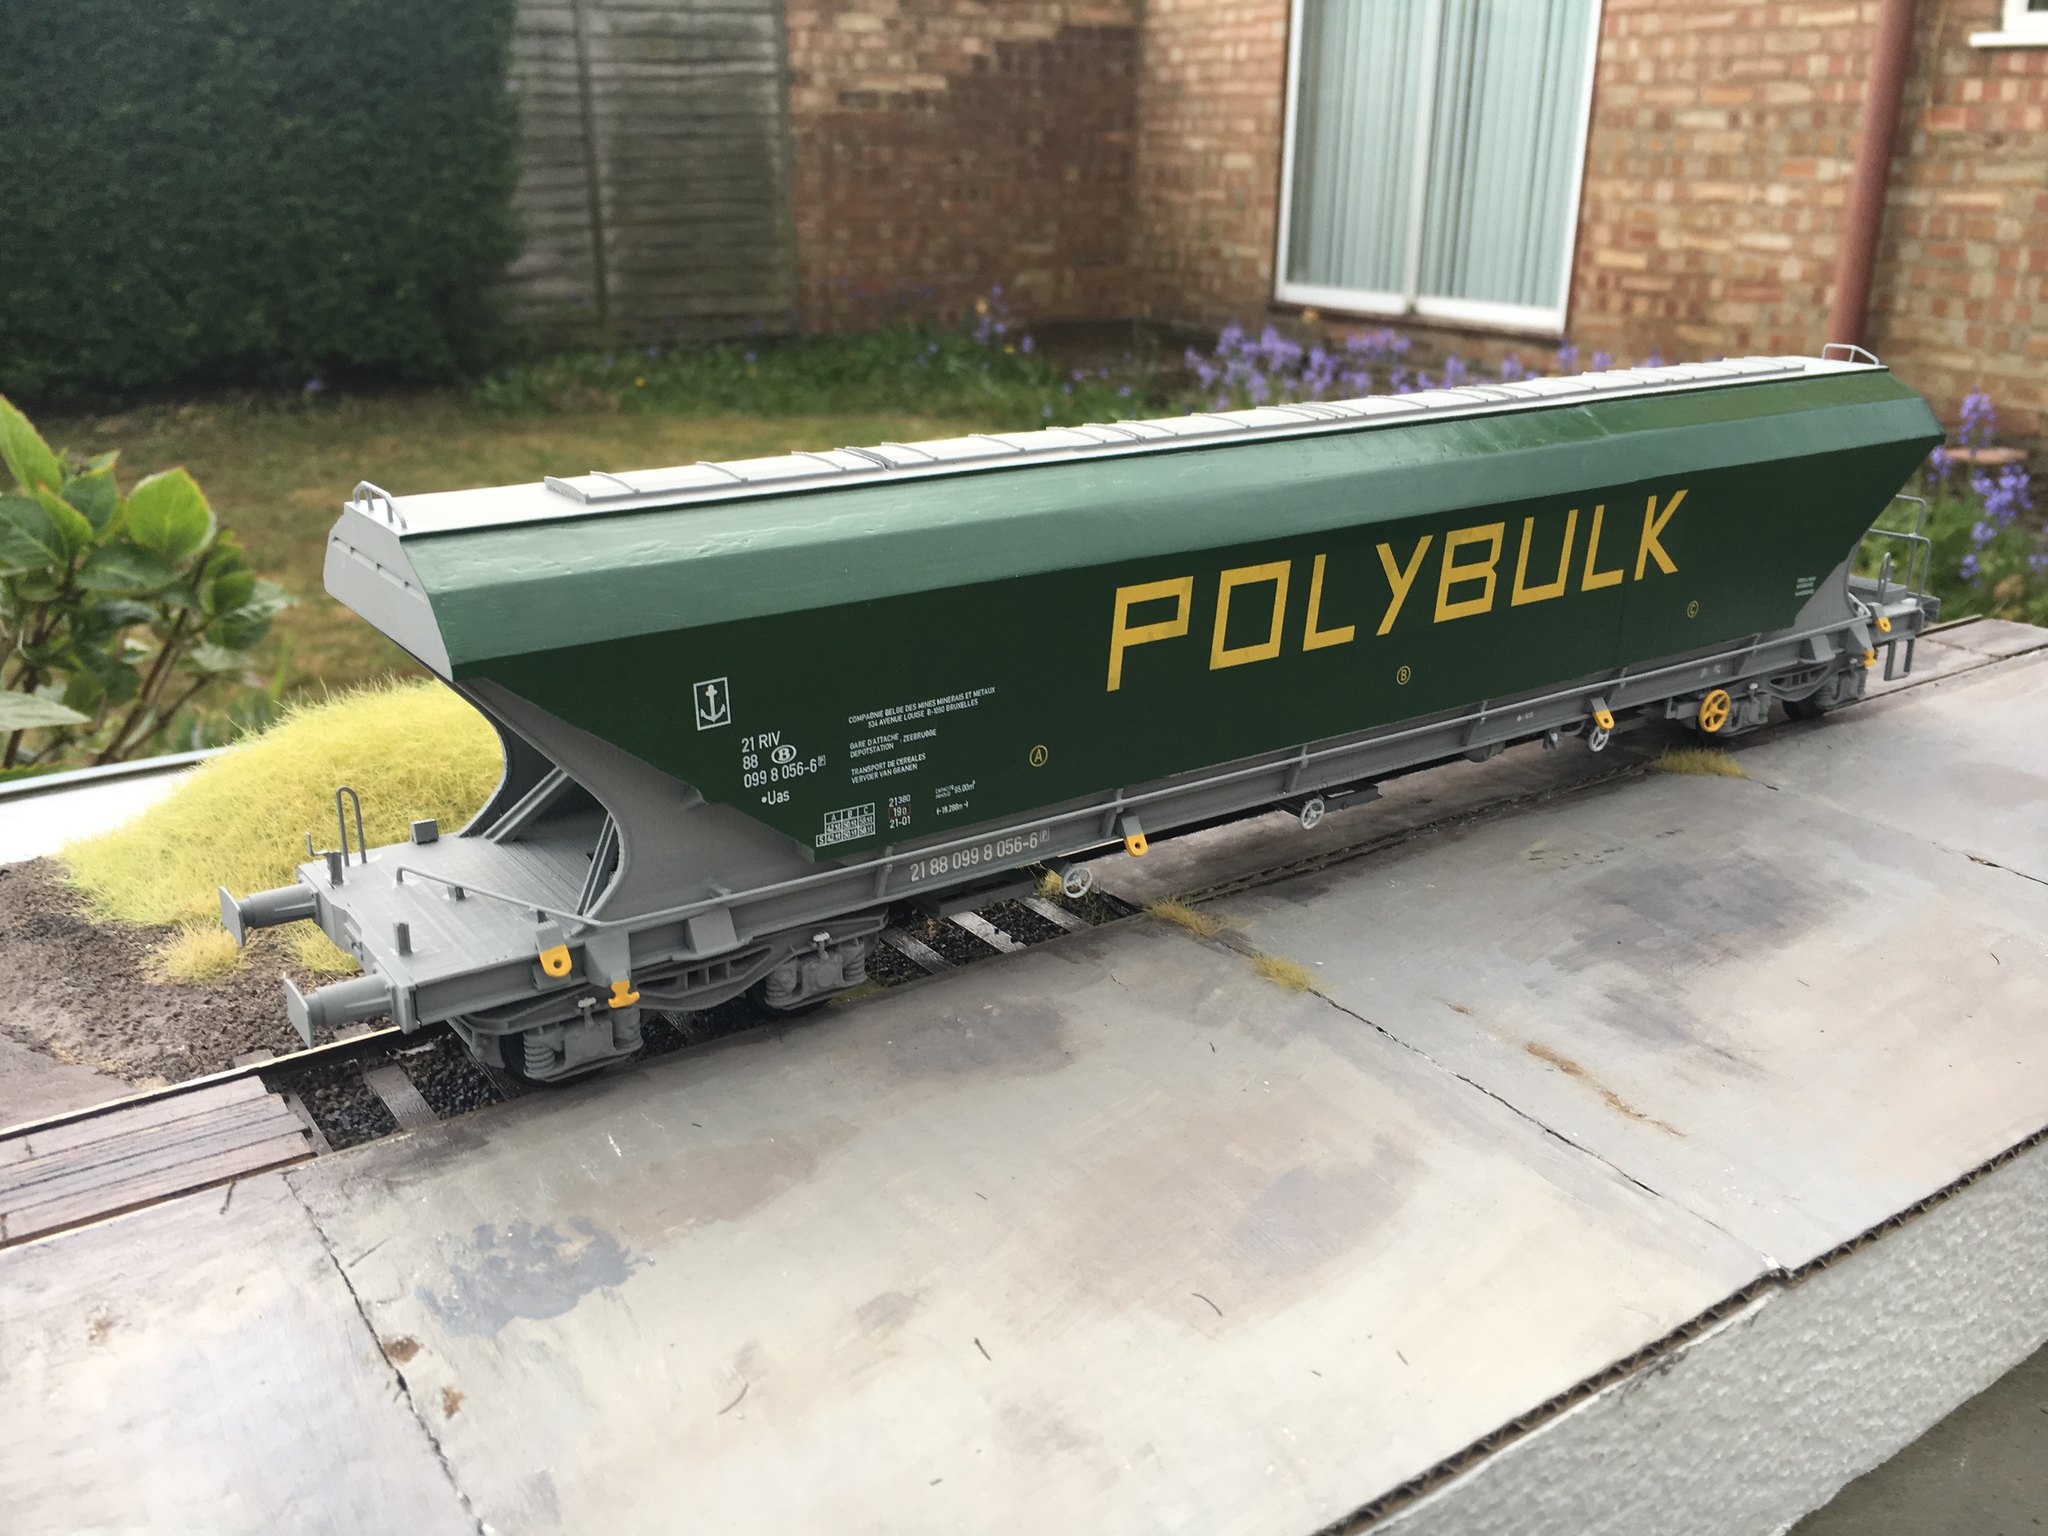
Next up is the Polybulk wagon, finished off with homemade transfers. I struggled to draw all the individual decals and to get them to look good over the green colour, in the end I went for a large transfer that has the green colour and decals on it. The chequer plate top walkway was done with a chequer plate drawing printed on clear decal paper.
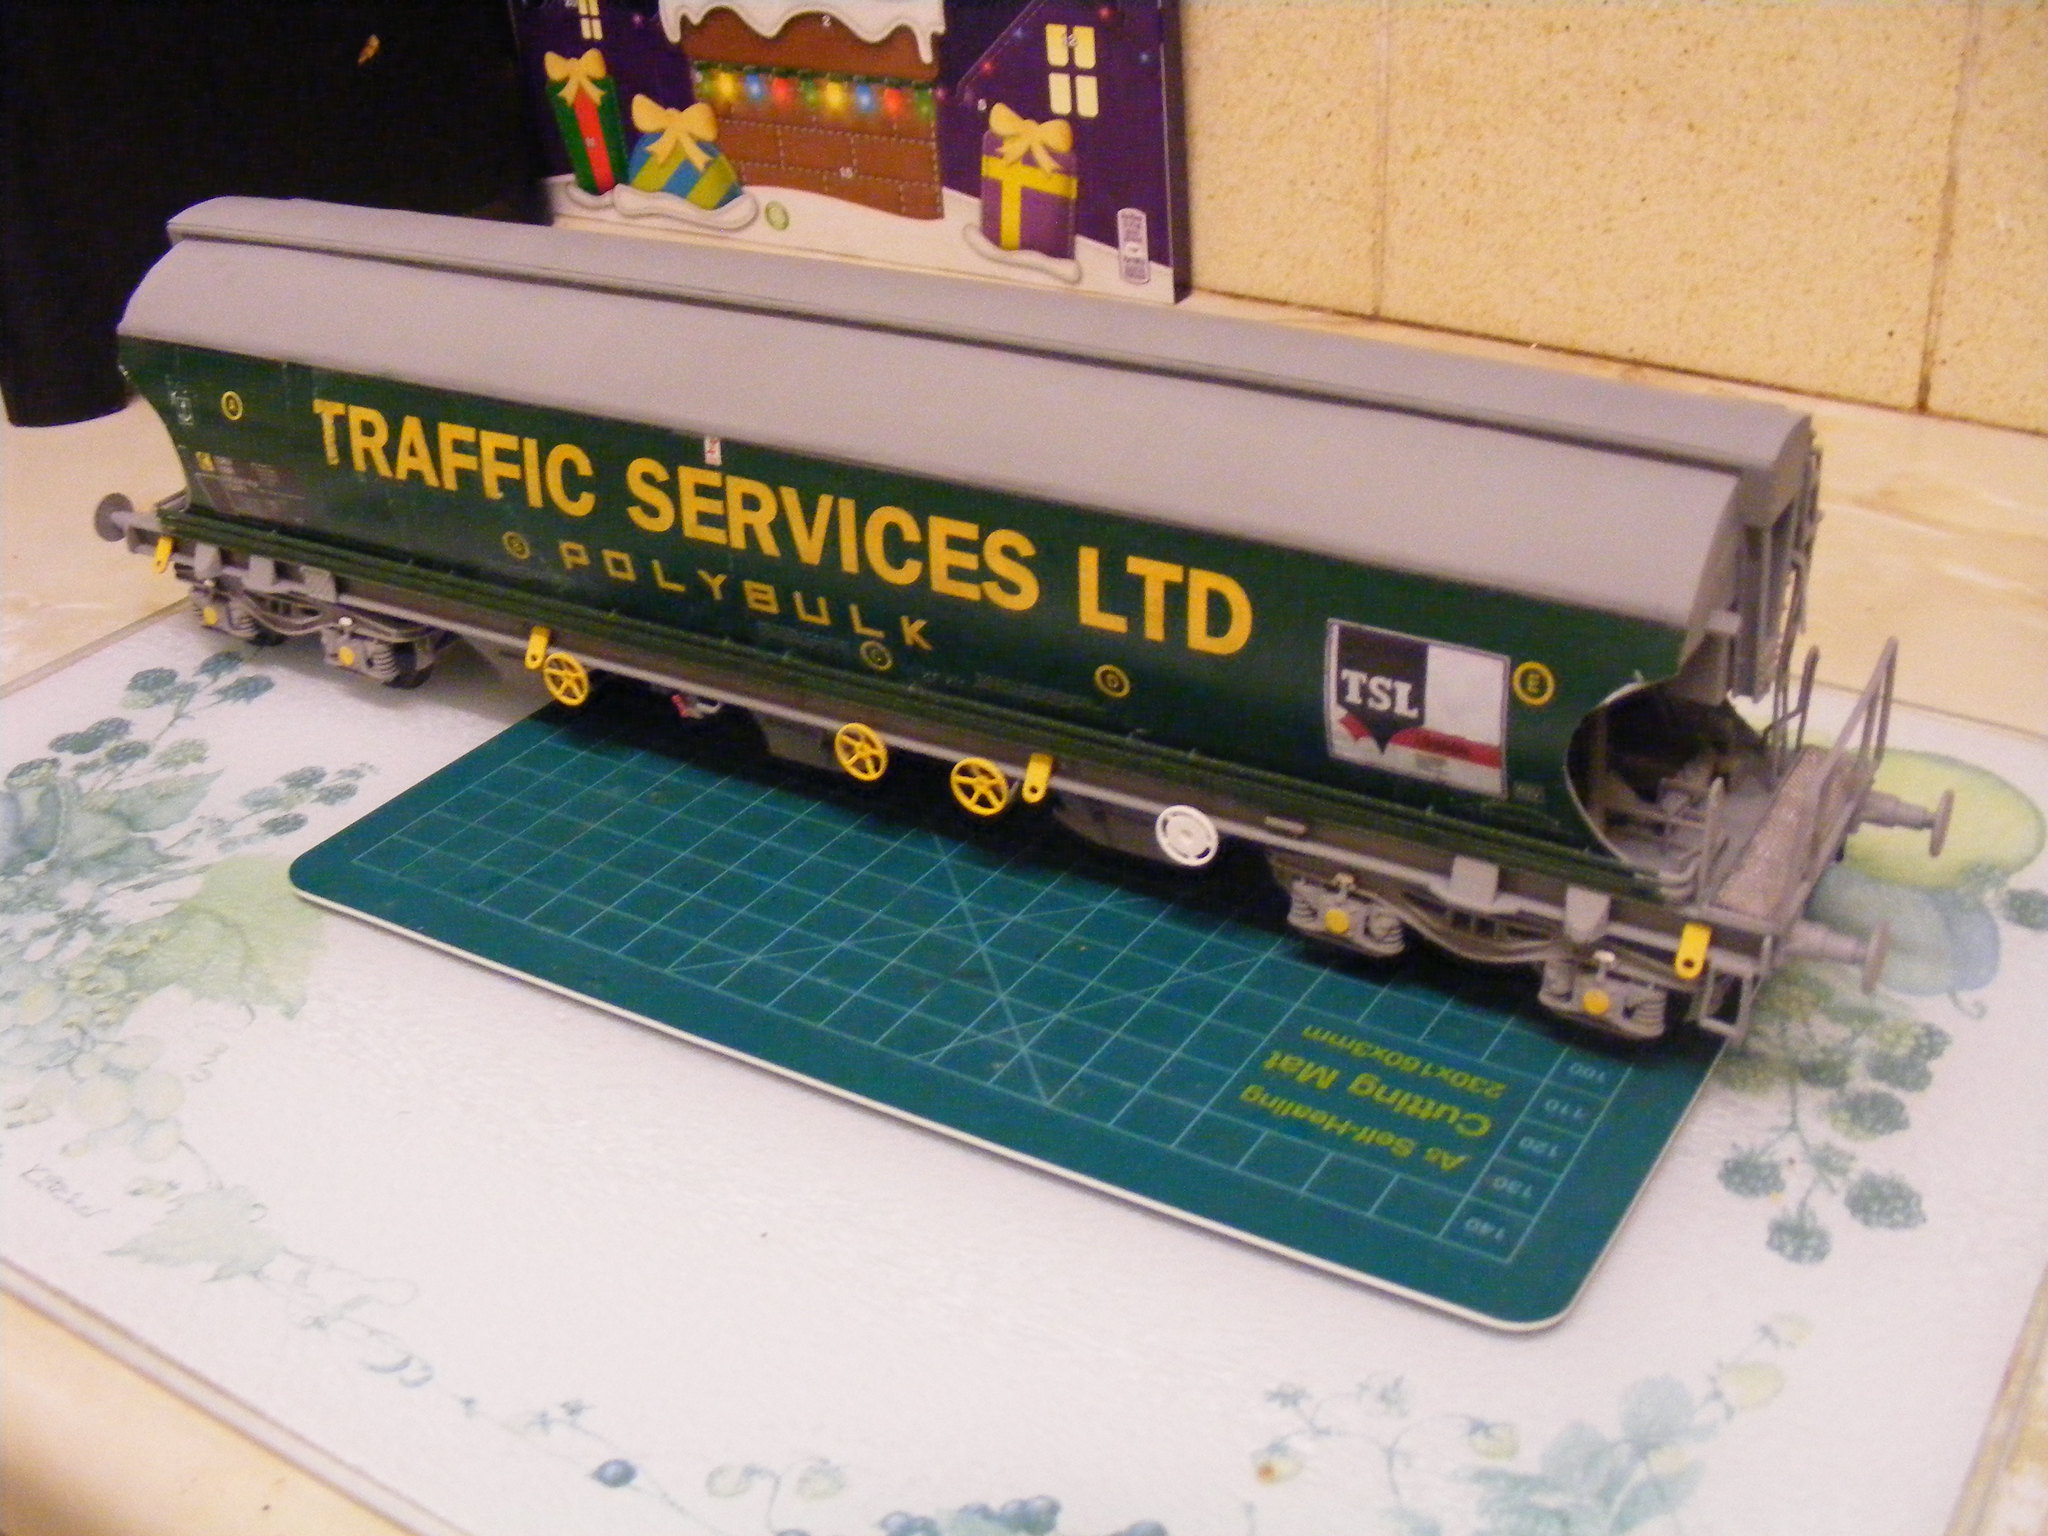 7mm Polybulk wagon by simon br blue, on Flickr
 7mm Polybulk wagon detail by simon br blue, on Flickr
Another wagon that stalled for a while but had now been completed is the PAA Grainflow hopper. This stalled as I couldn't find a good way to make the top walkway, I printed a set of walkways in Professional plastic and these looked ok. The transfers are a mix of home made and Precision labels for the Grainflow logo.
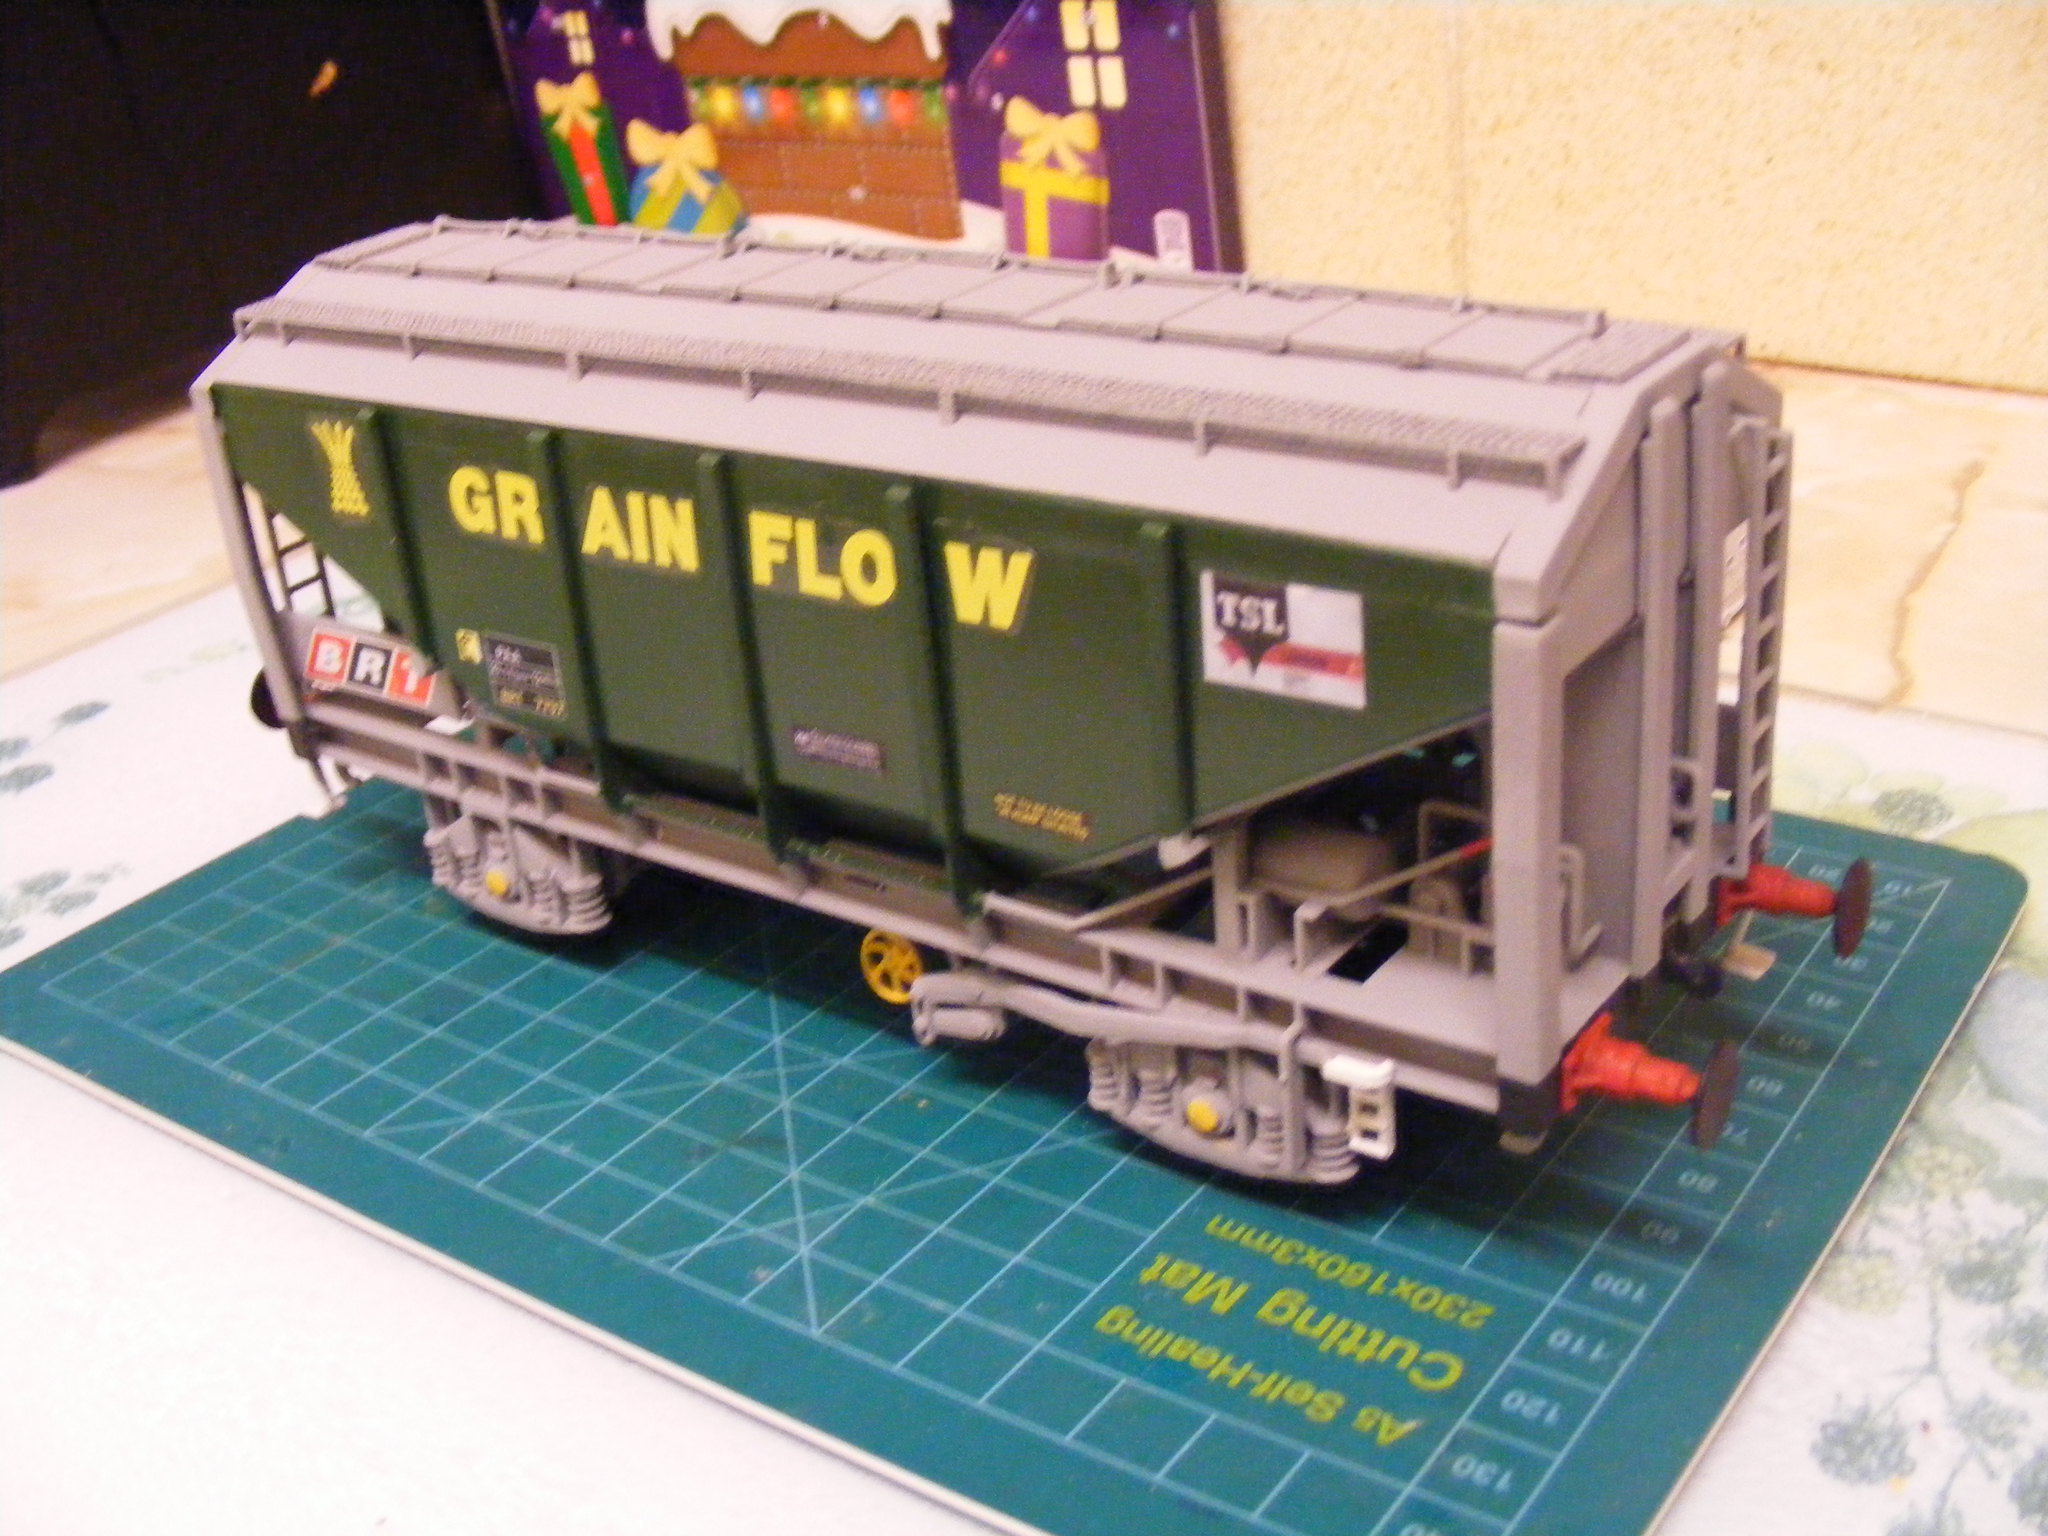 7mm PAA Grainflow wagon by simon br blue, on Flickr
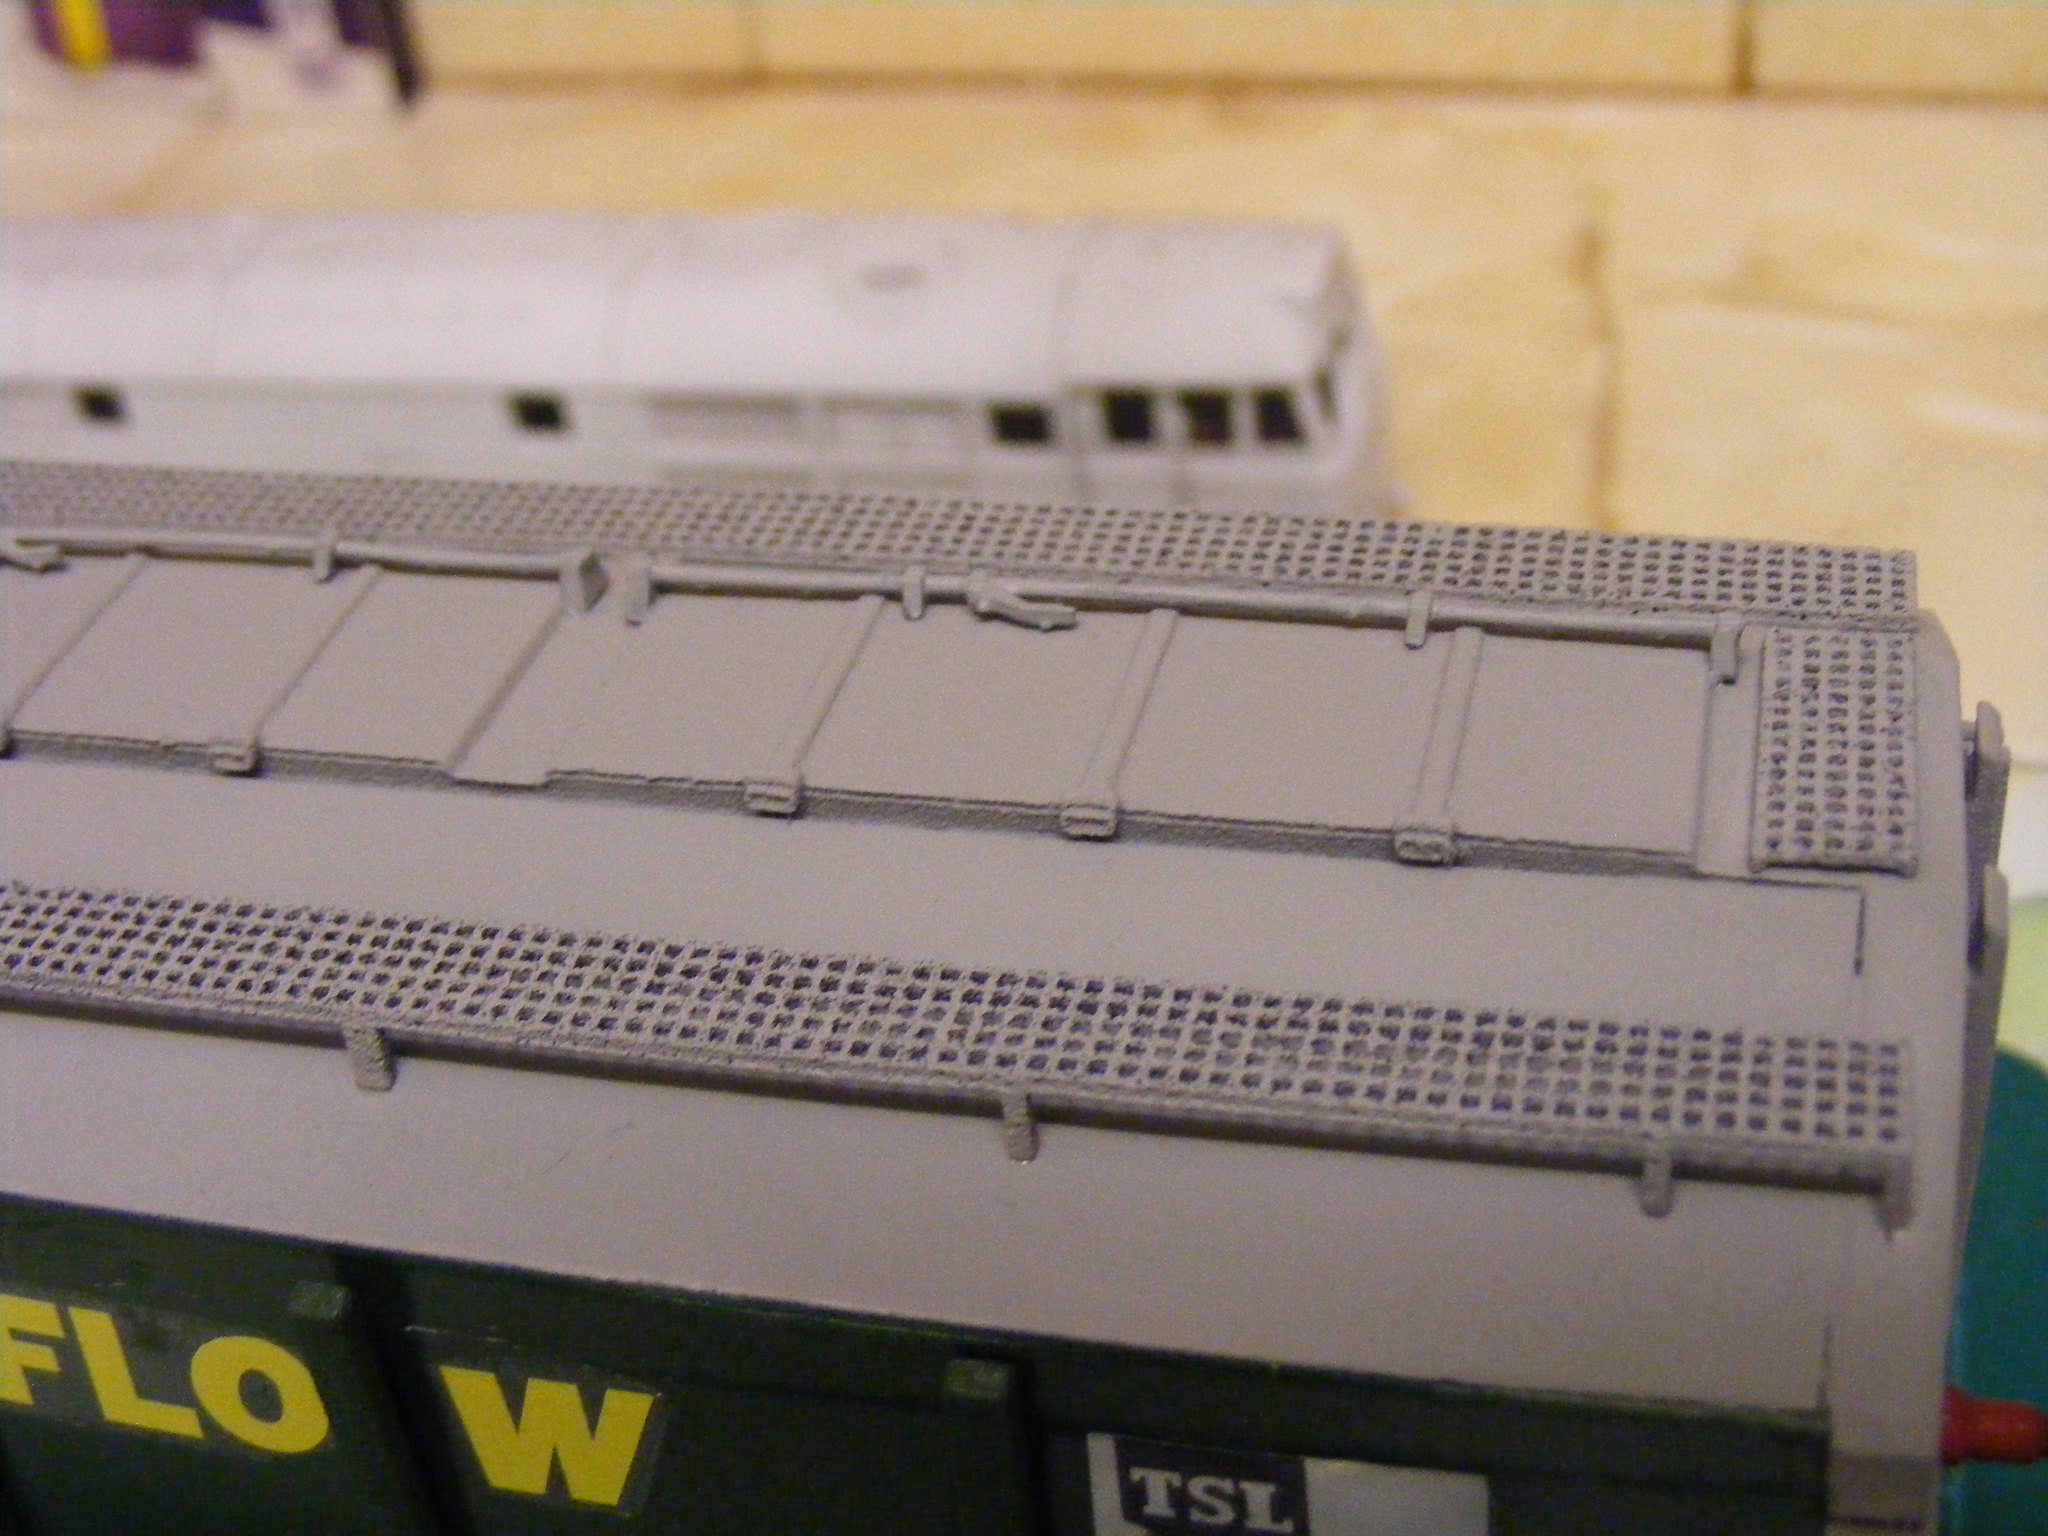 7mm Grainflow walkway by simon br blue, on Flickr
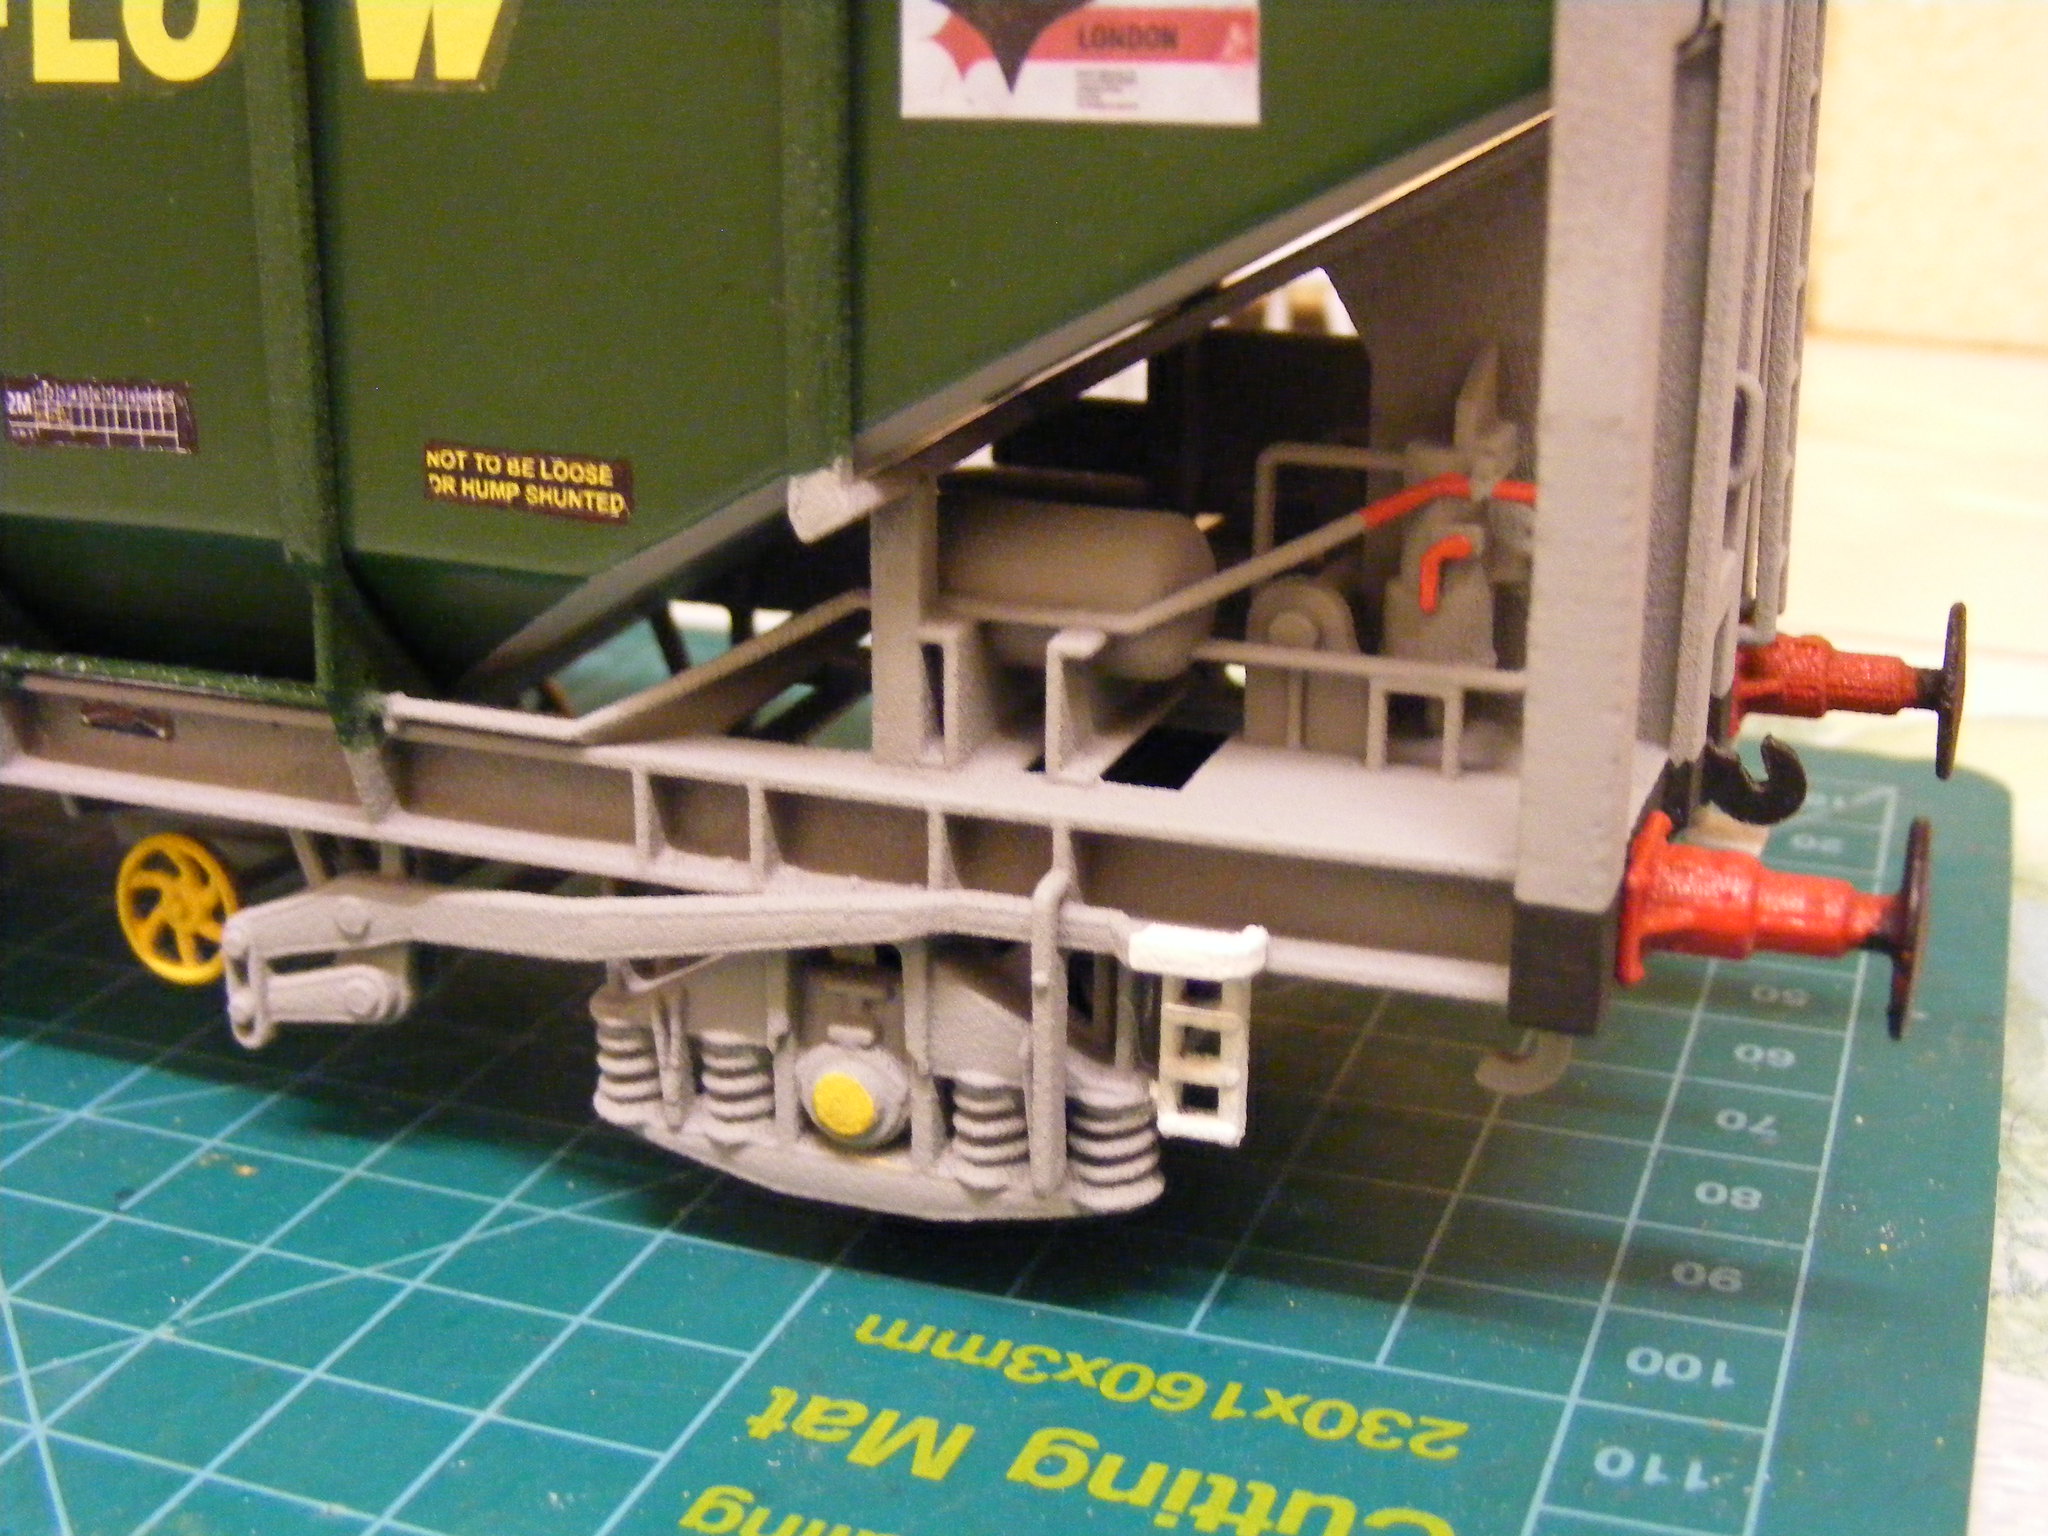 7mm PAA grainflow detail by simon br blue, on Flickr
A wagon that is nearly finished is the Railiner wagon, this just needs the end builder details/advertising board.
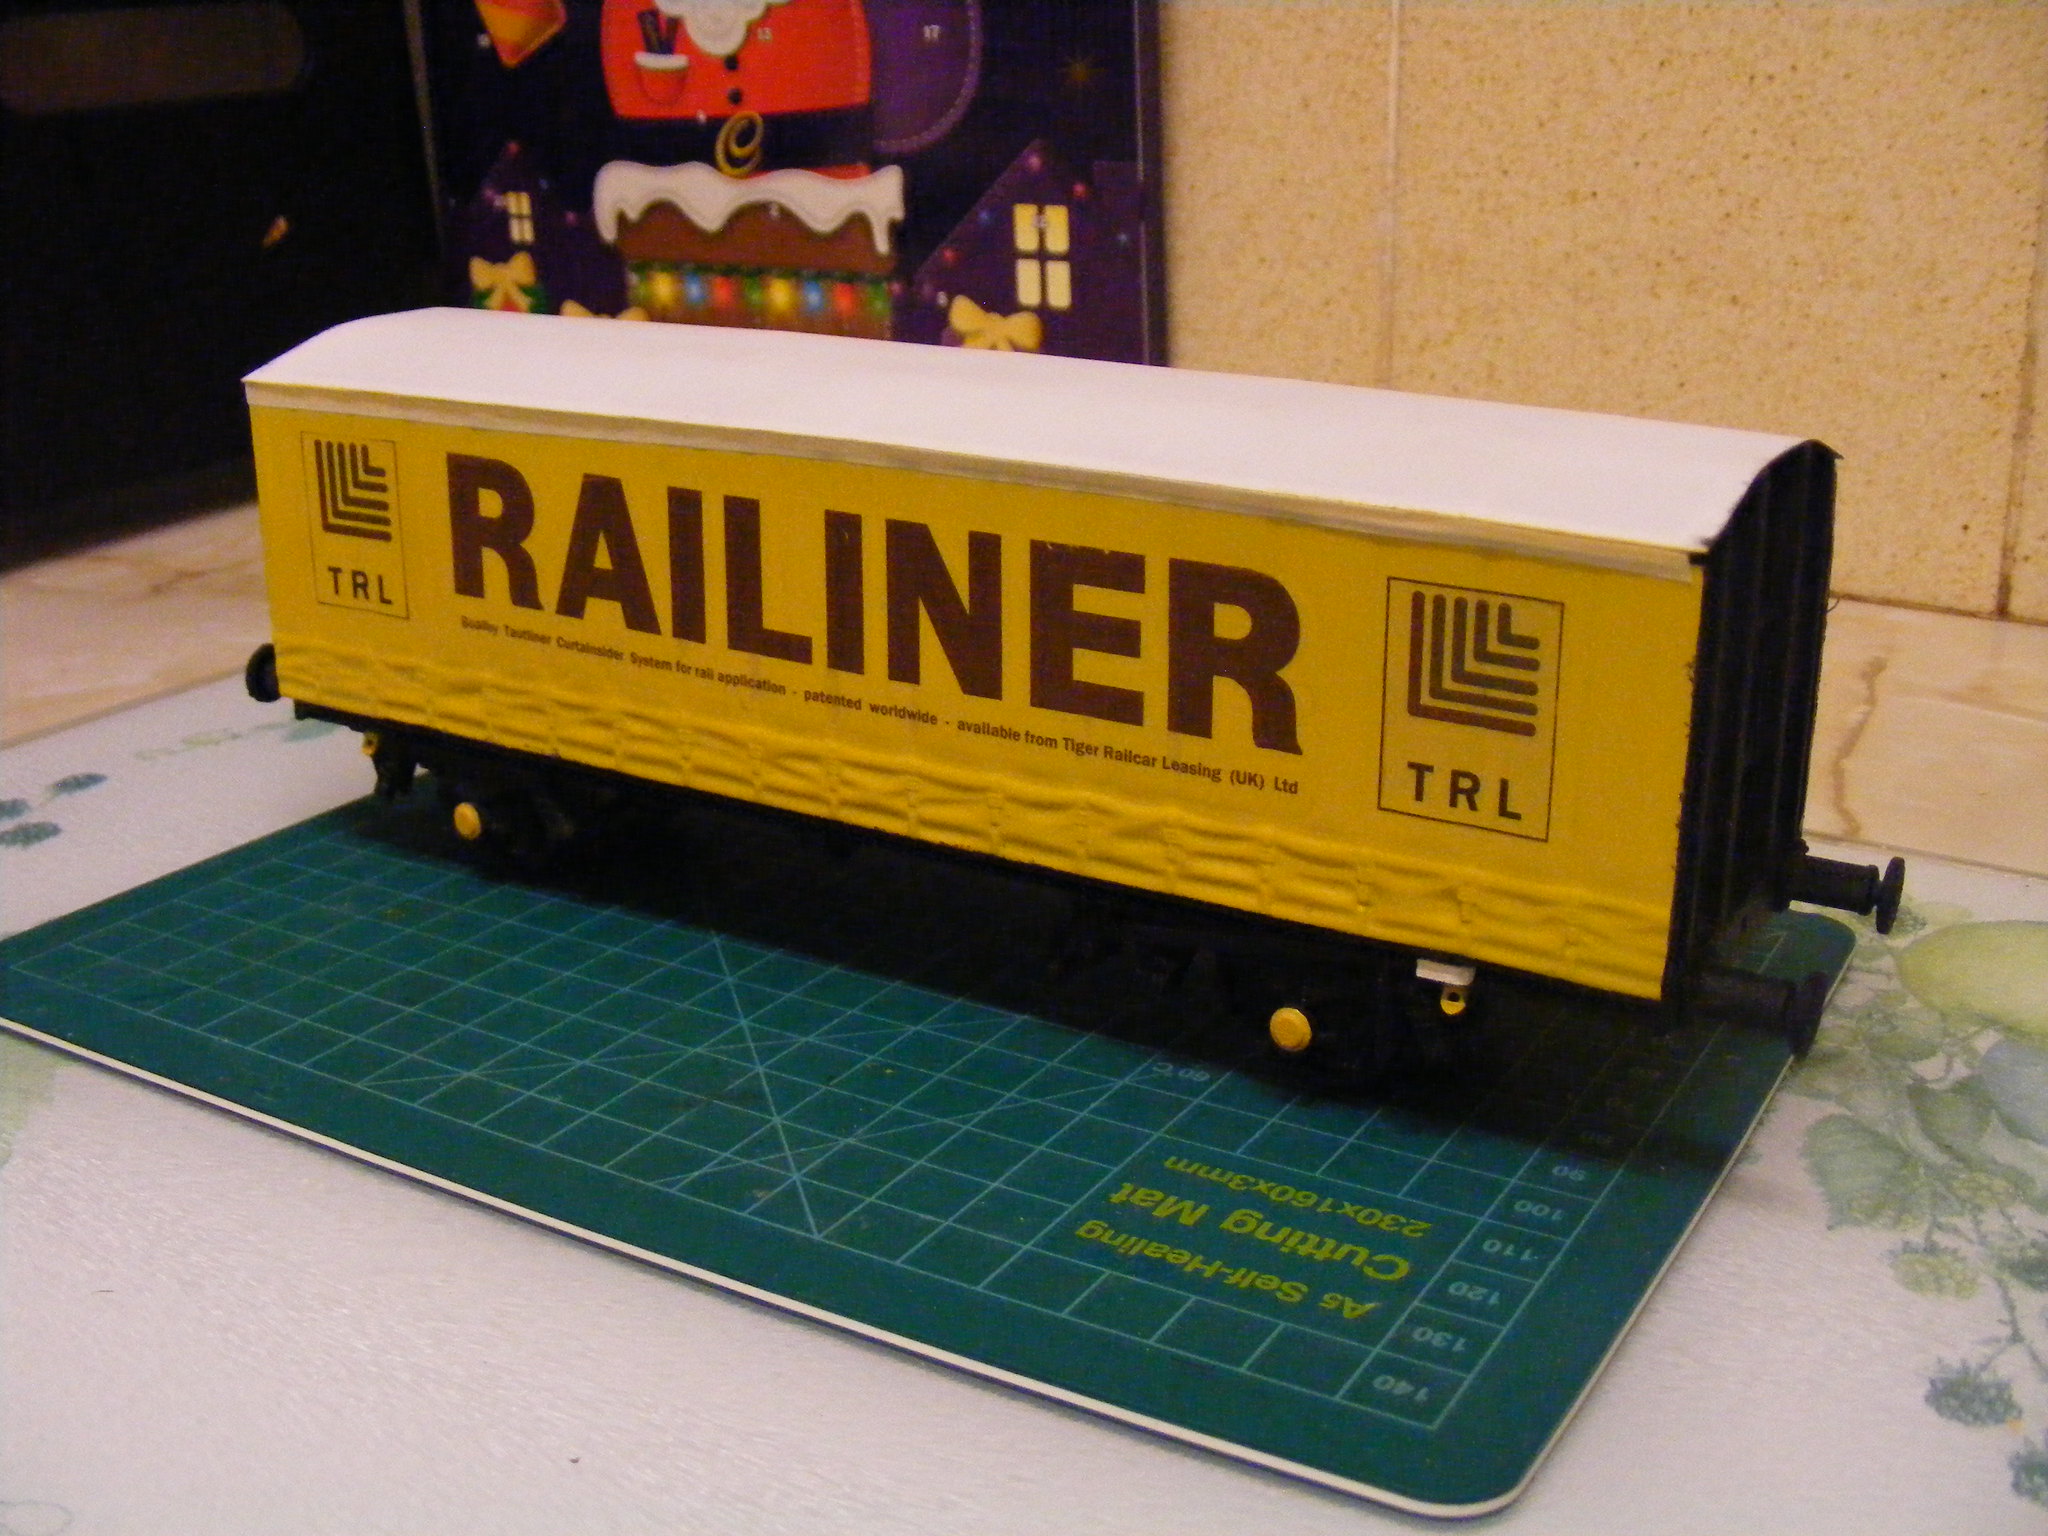 7mm Railiner Wagon by simon br blue, on Flickr
Next wagon completed recently is the ex private owner mineral wagon. This had the plastic body purchased from EBay with a WSF printed chassis and buffers fitted underneath. This has also has home made transfers added.
 7mm ex Private owner wagon by simon br blue, on Flickr
The next wagon is the BAA steel wagon. This has mesh added under the deck and is pictured with Balco PLA printed coils loaded eye to sky.
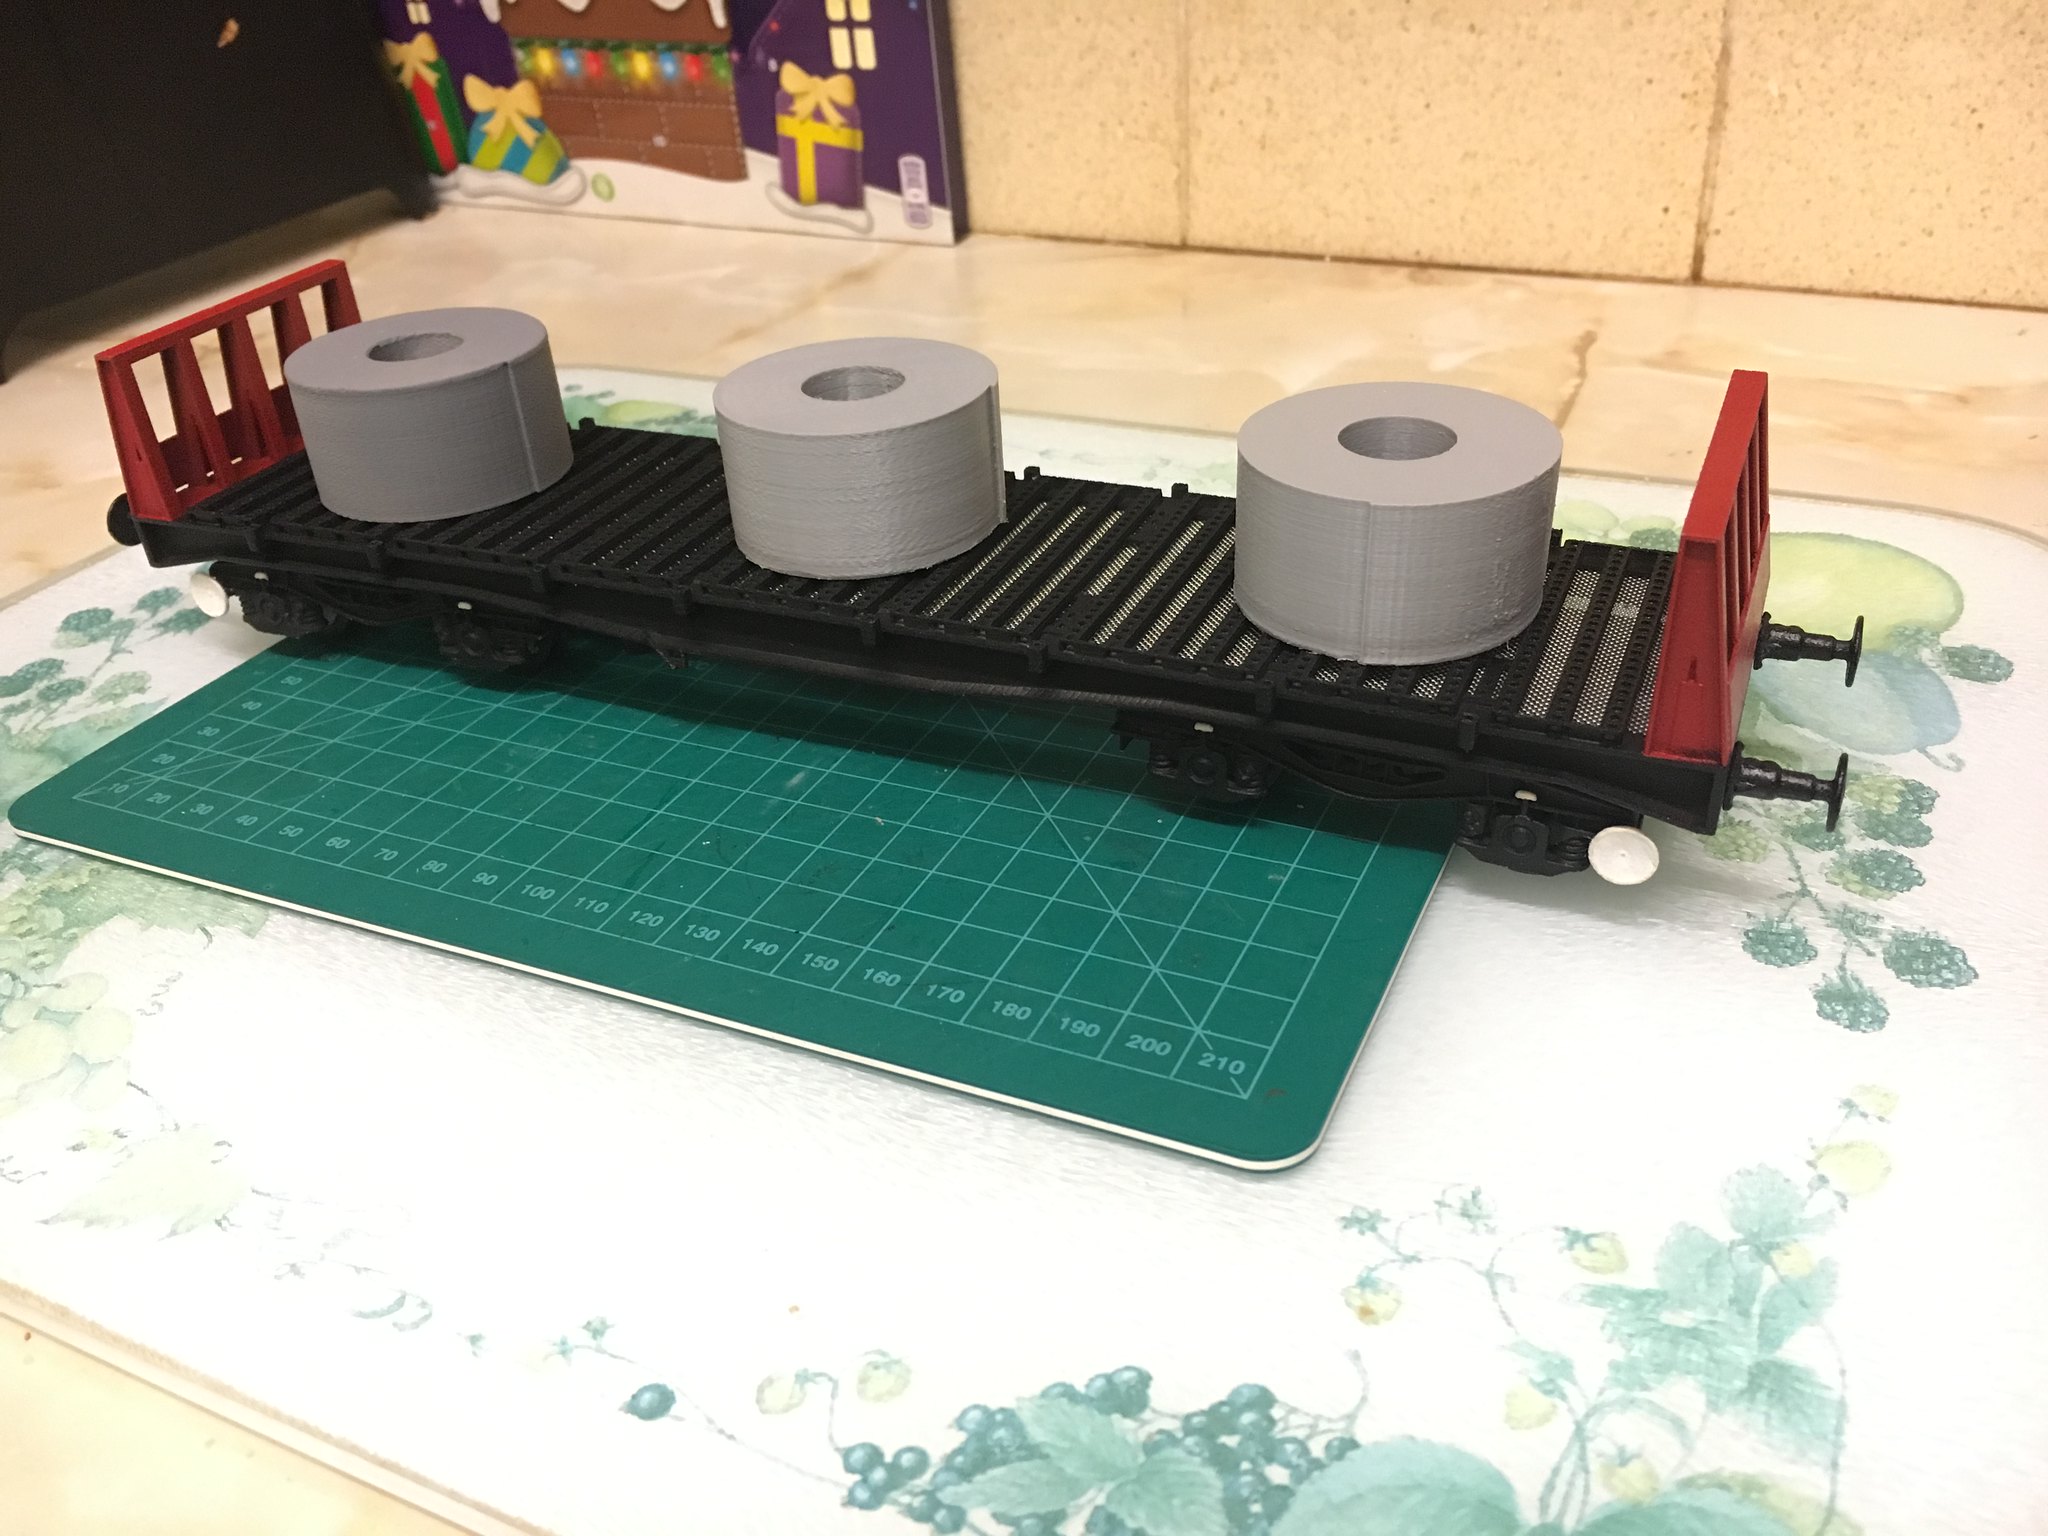 7mm BAA wagon by simon br blue, on Flickr
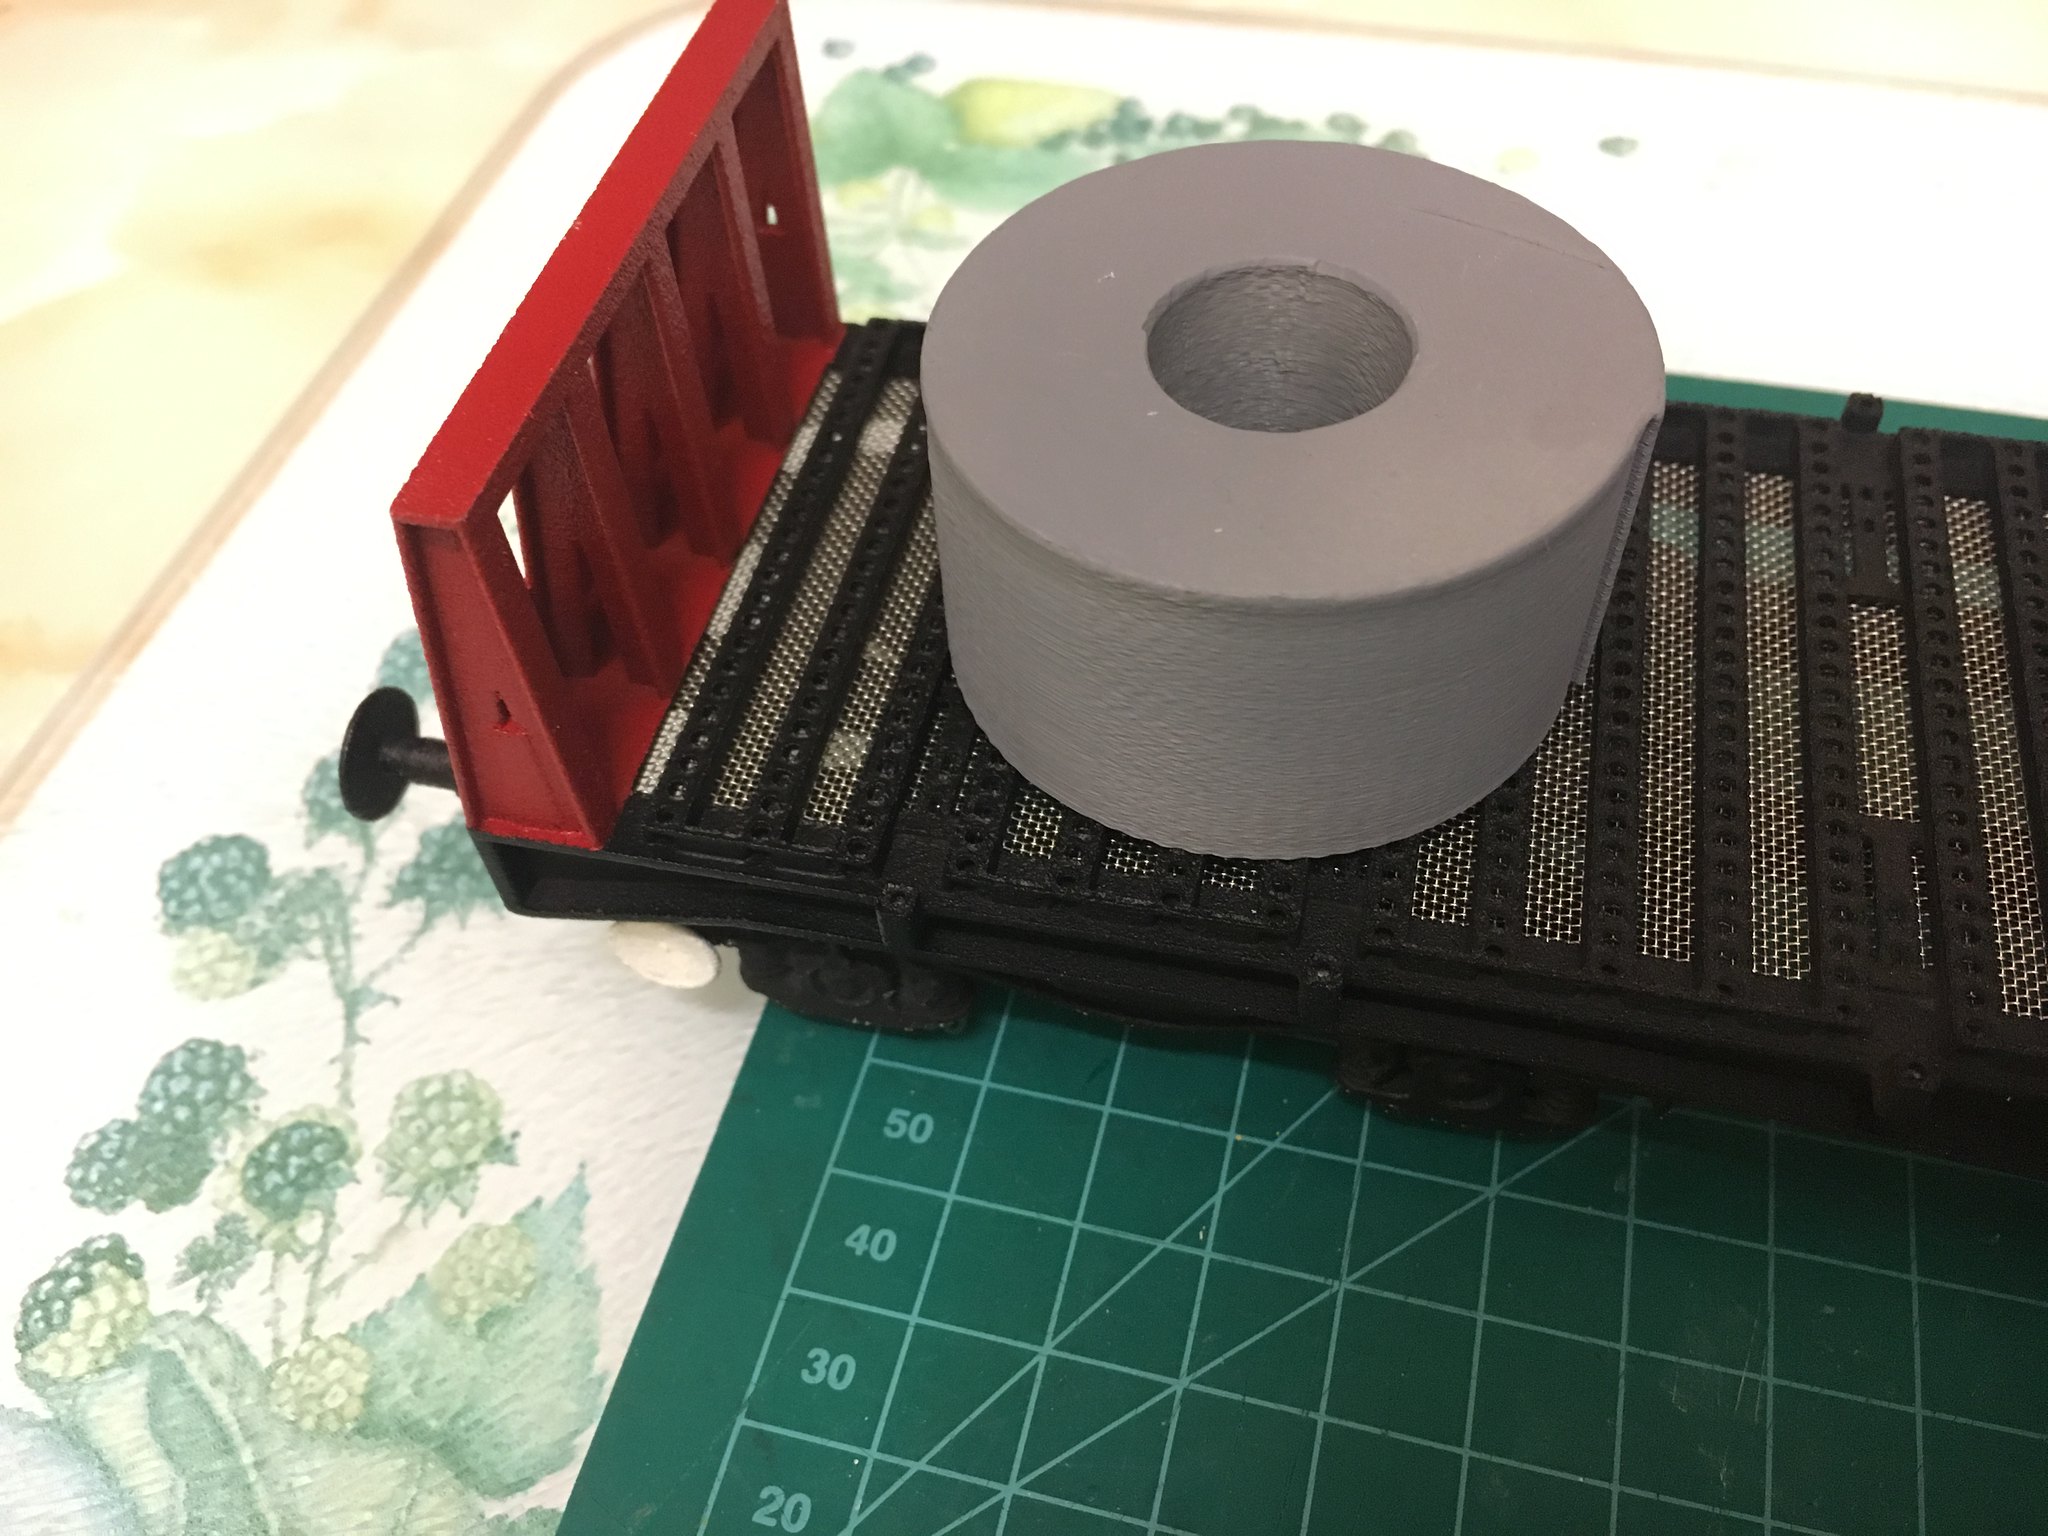 7mm BAA wagon deck by simon br blue, on Flickr
The other steel wagon I've been working on recently is the BCA cradle wagon which is based on the BAA wagon. The Chassis/deck, coils and cradles were printed on the Balco printer - the chassis was printed in 2 parts so it would fit on the printer. The bogies are WSF black from Shapeways and in the finished pictures the details and buffers are printed on the From 2 in black resin.
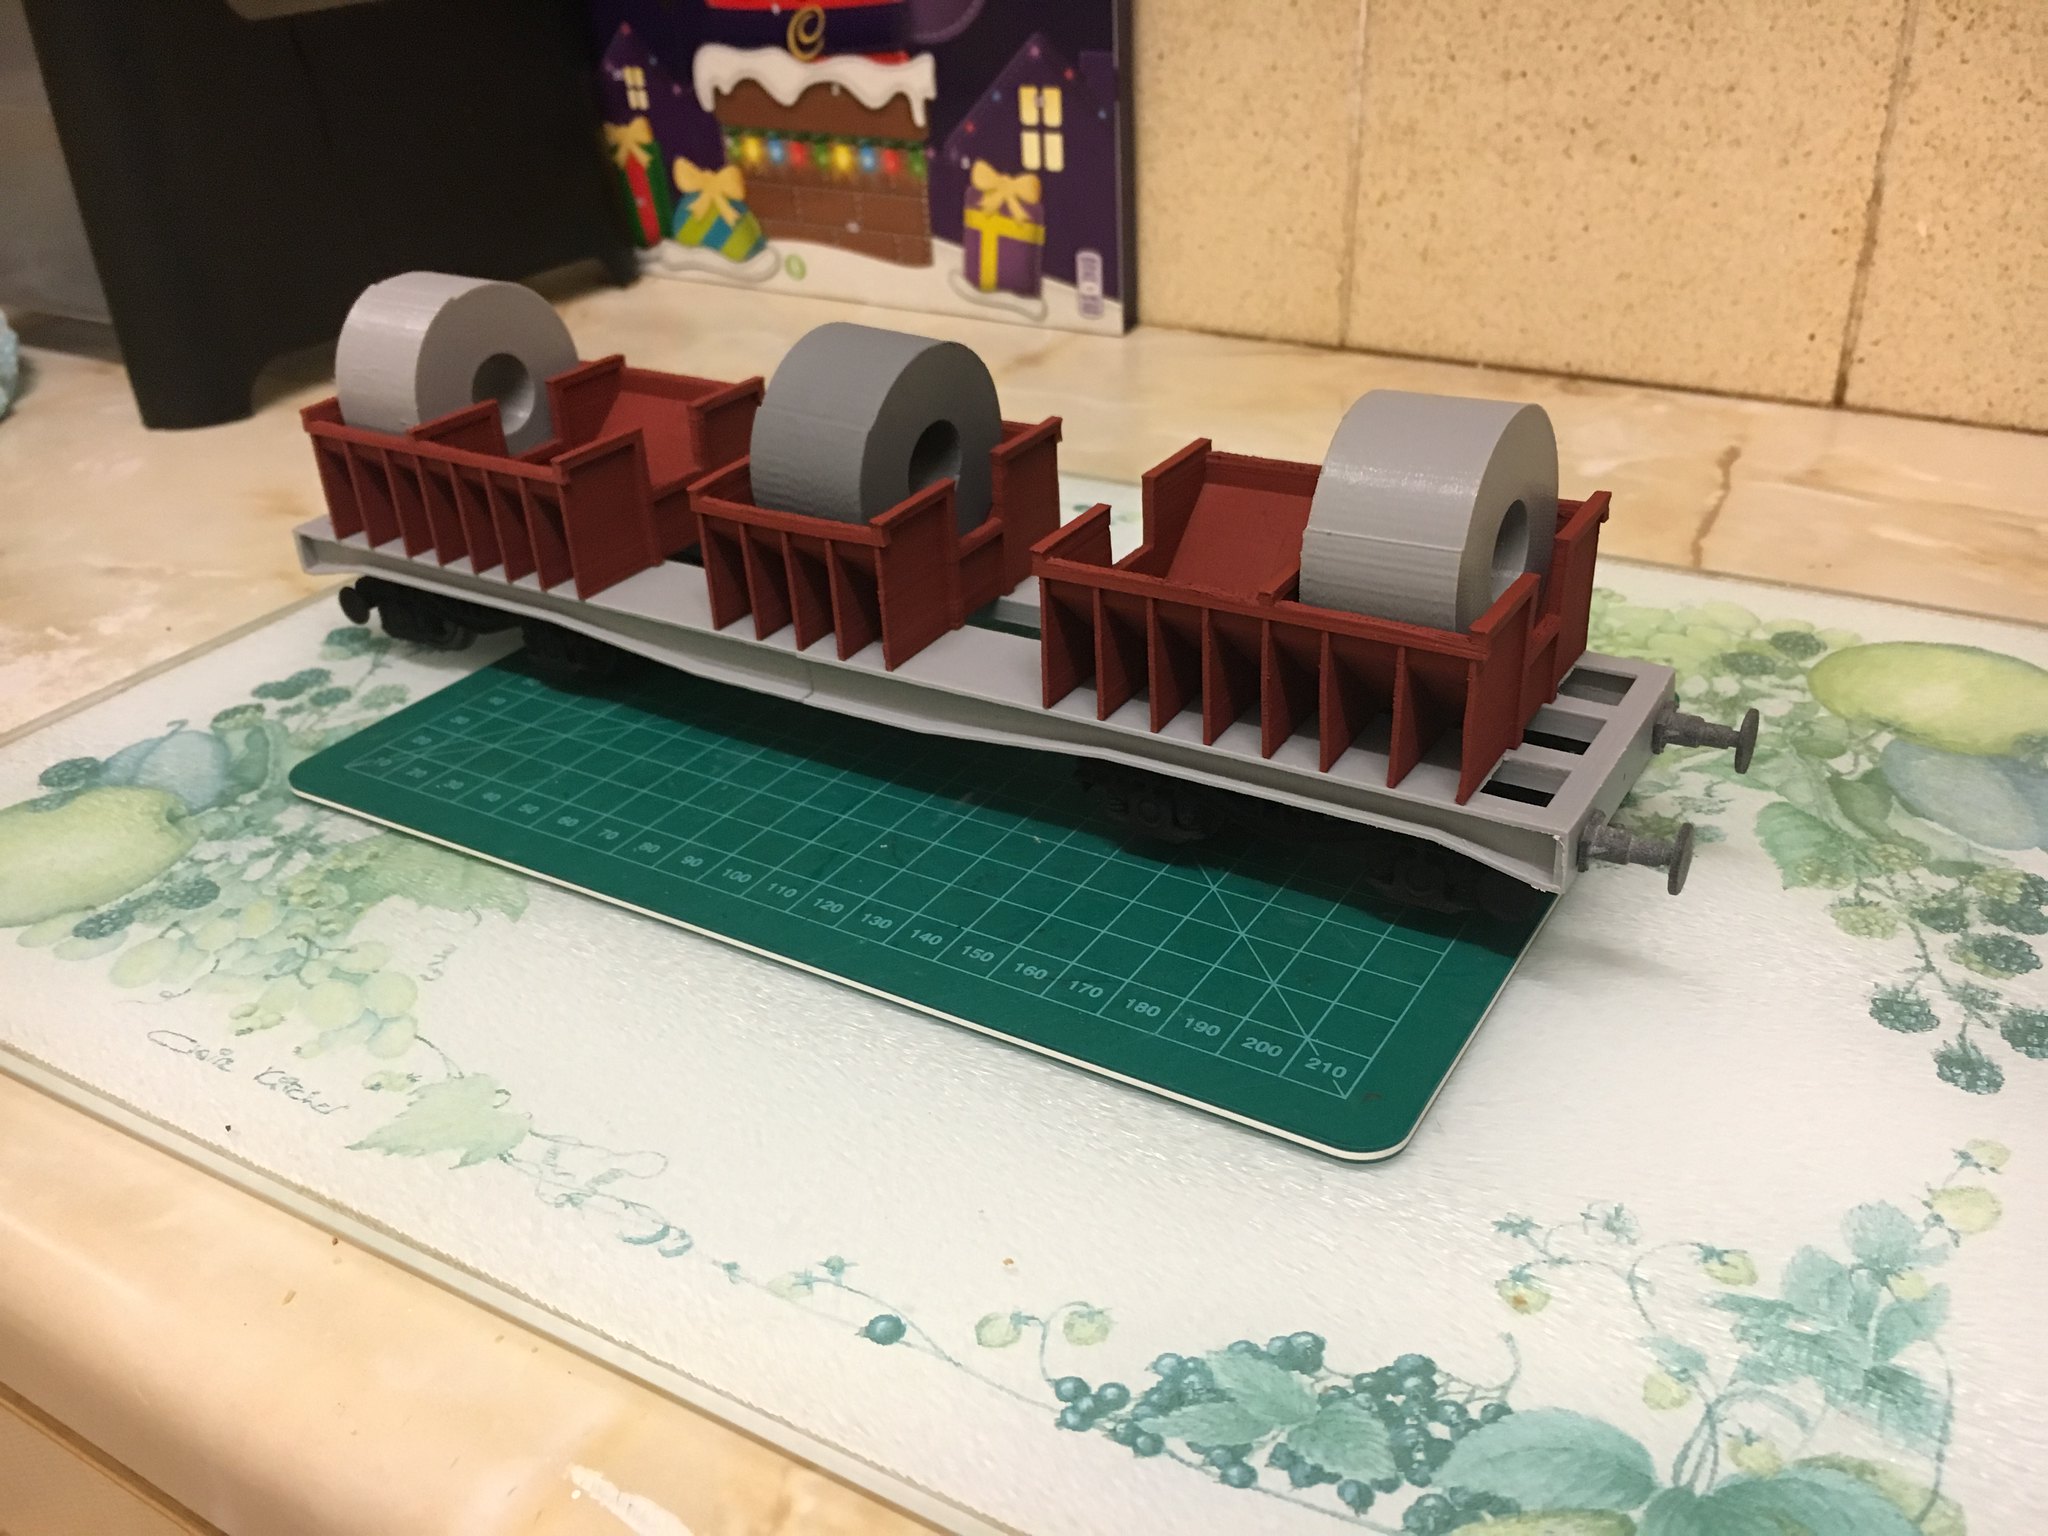 7MM BCA wagon by simon br blue, on Flickr
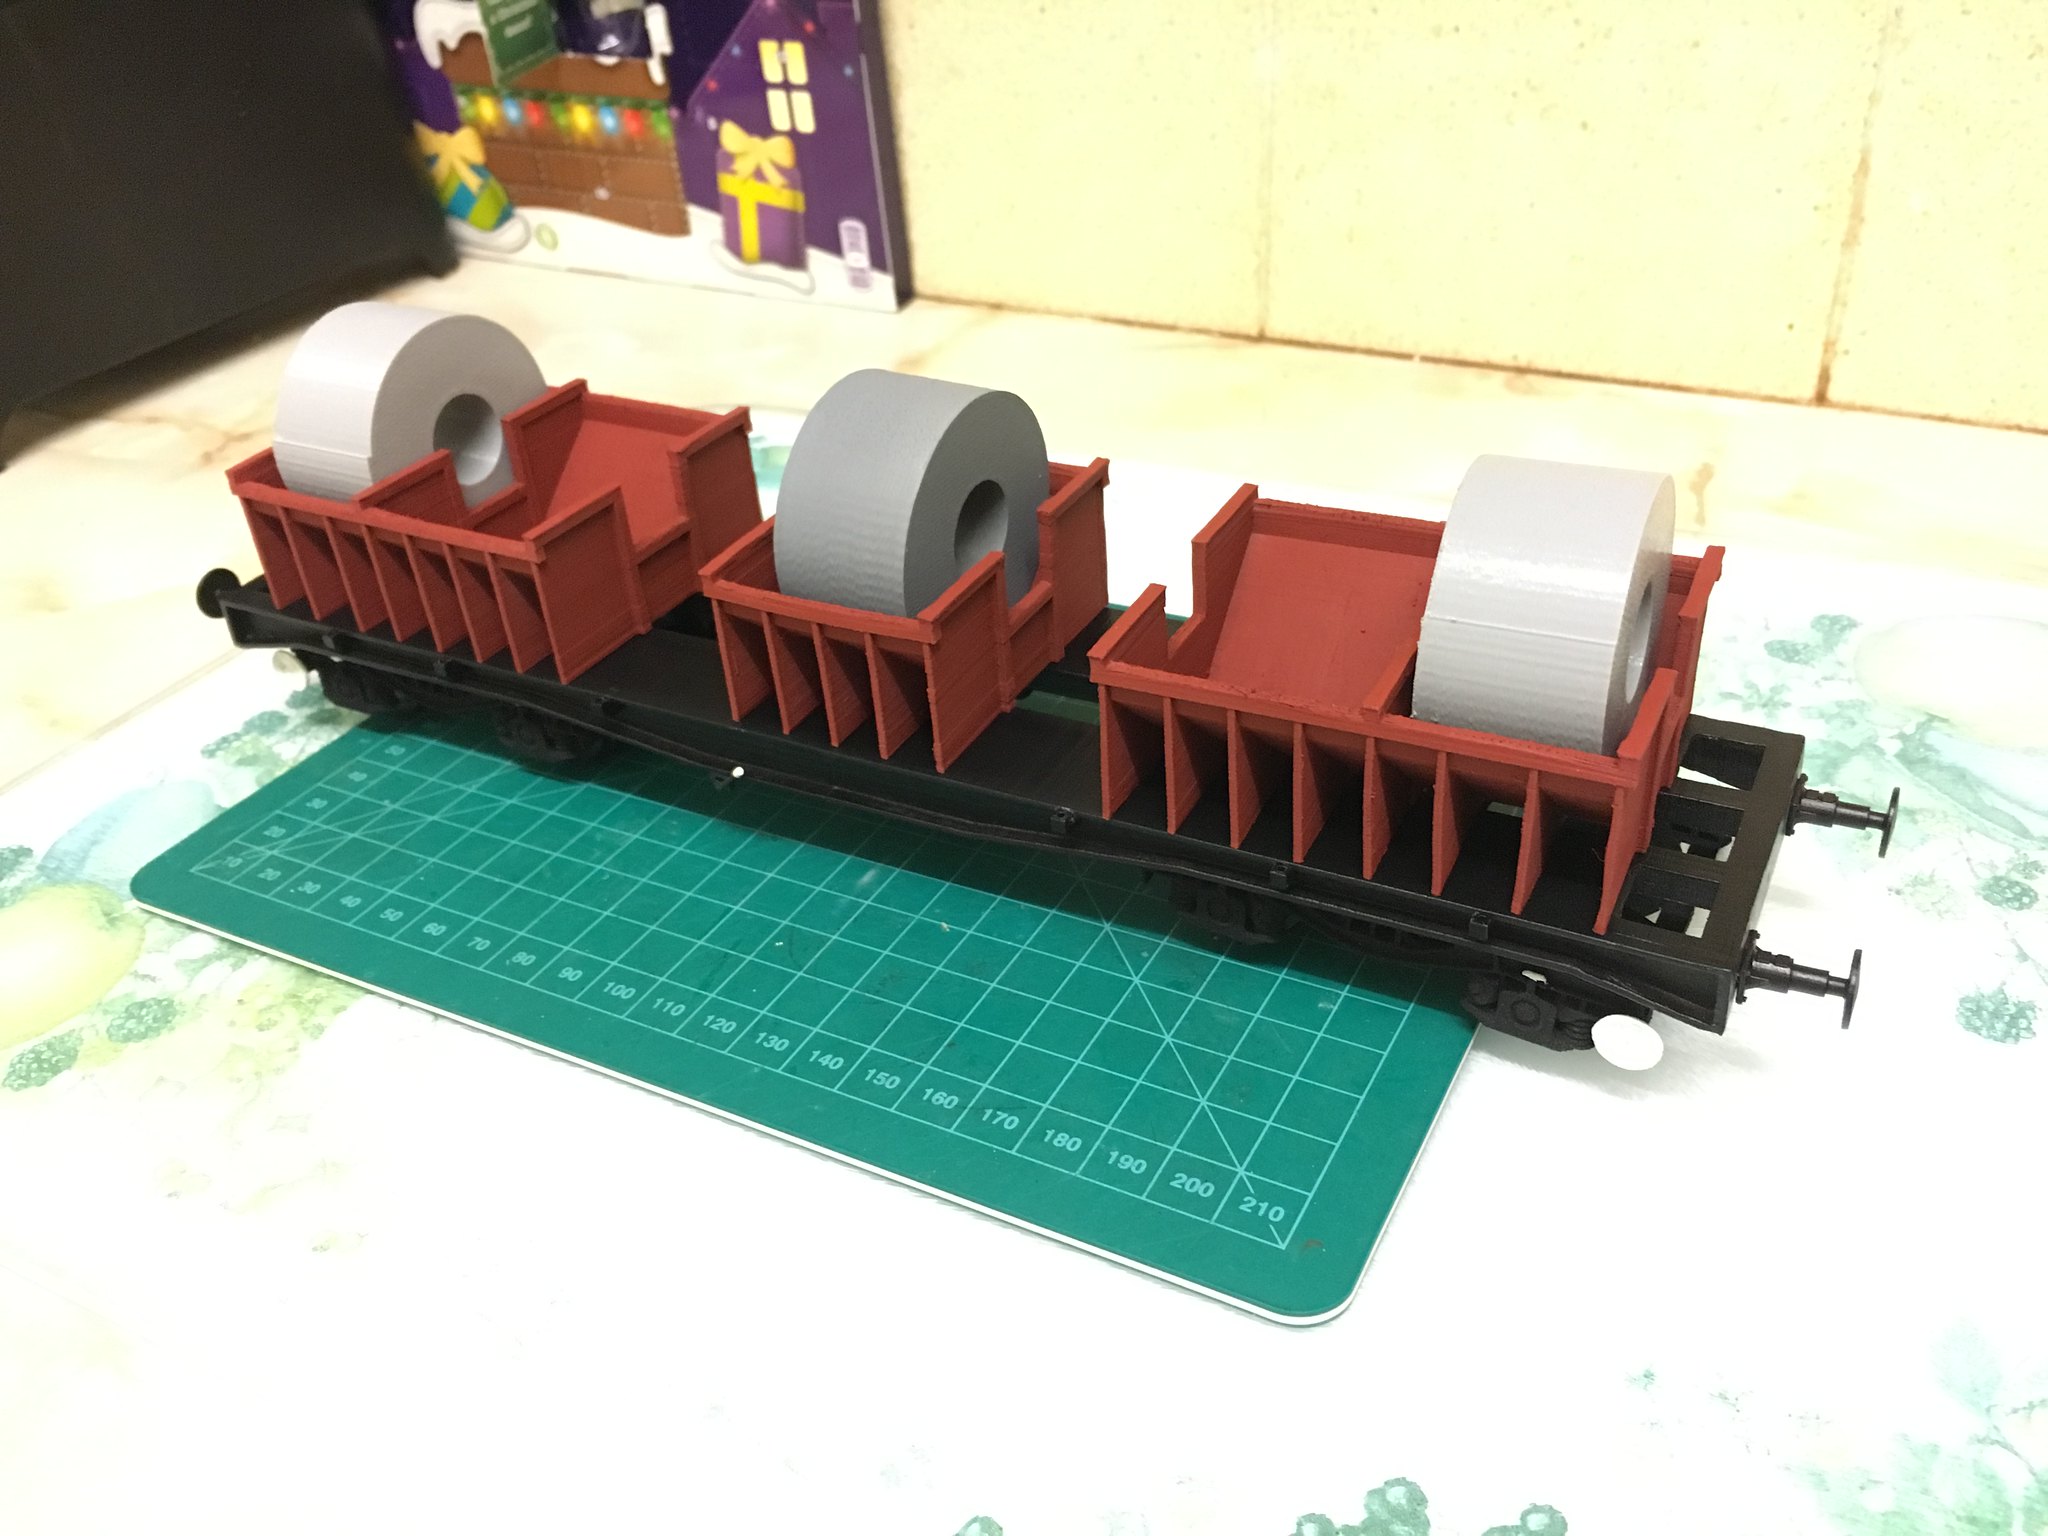 7mm BCA wagon by simon br blue, on Flickr
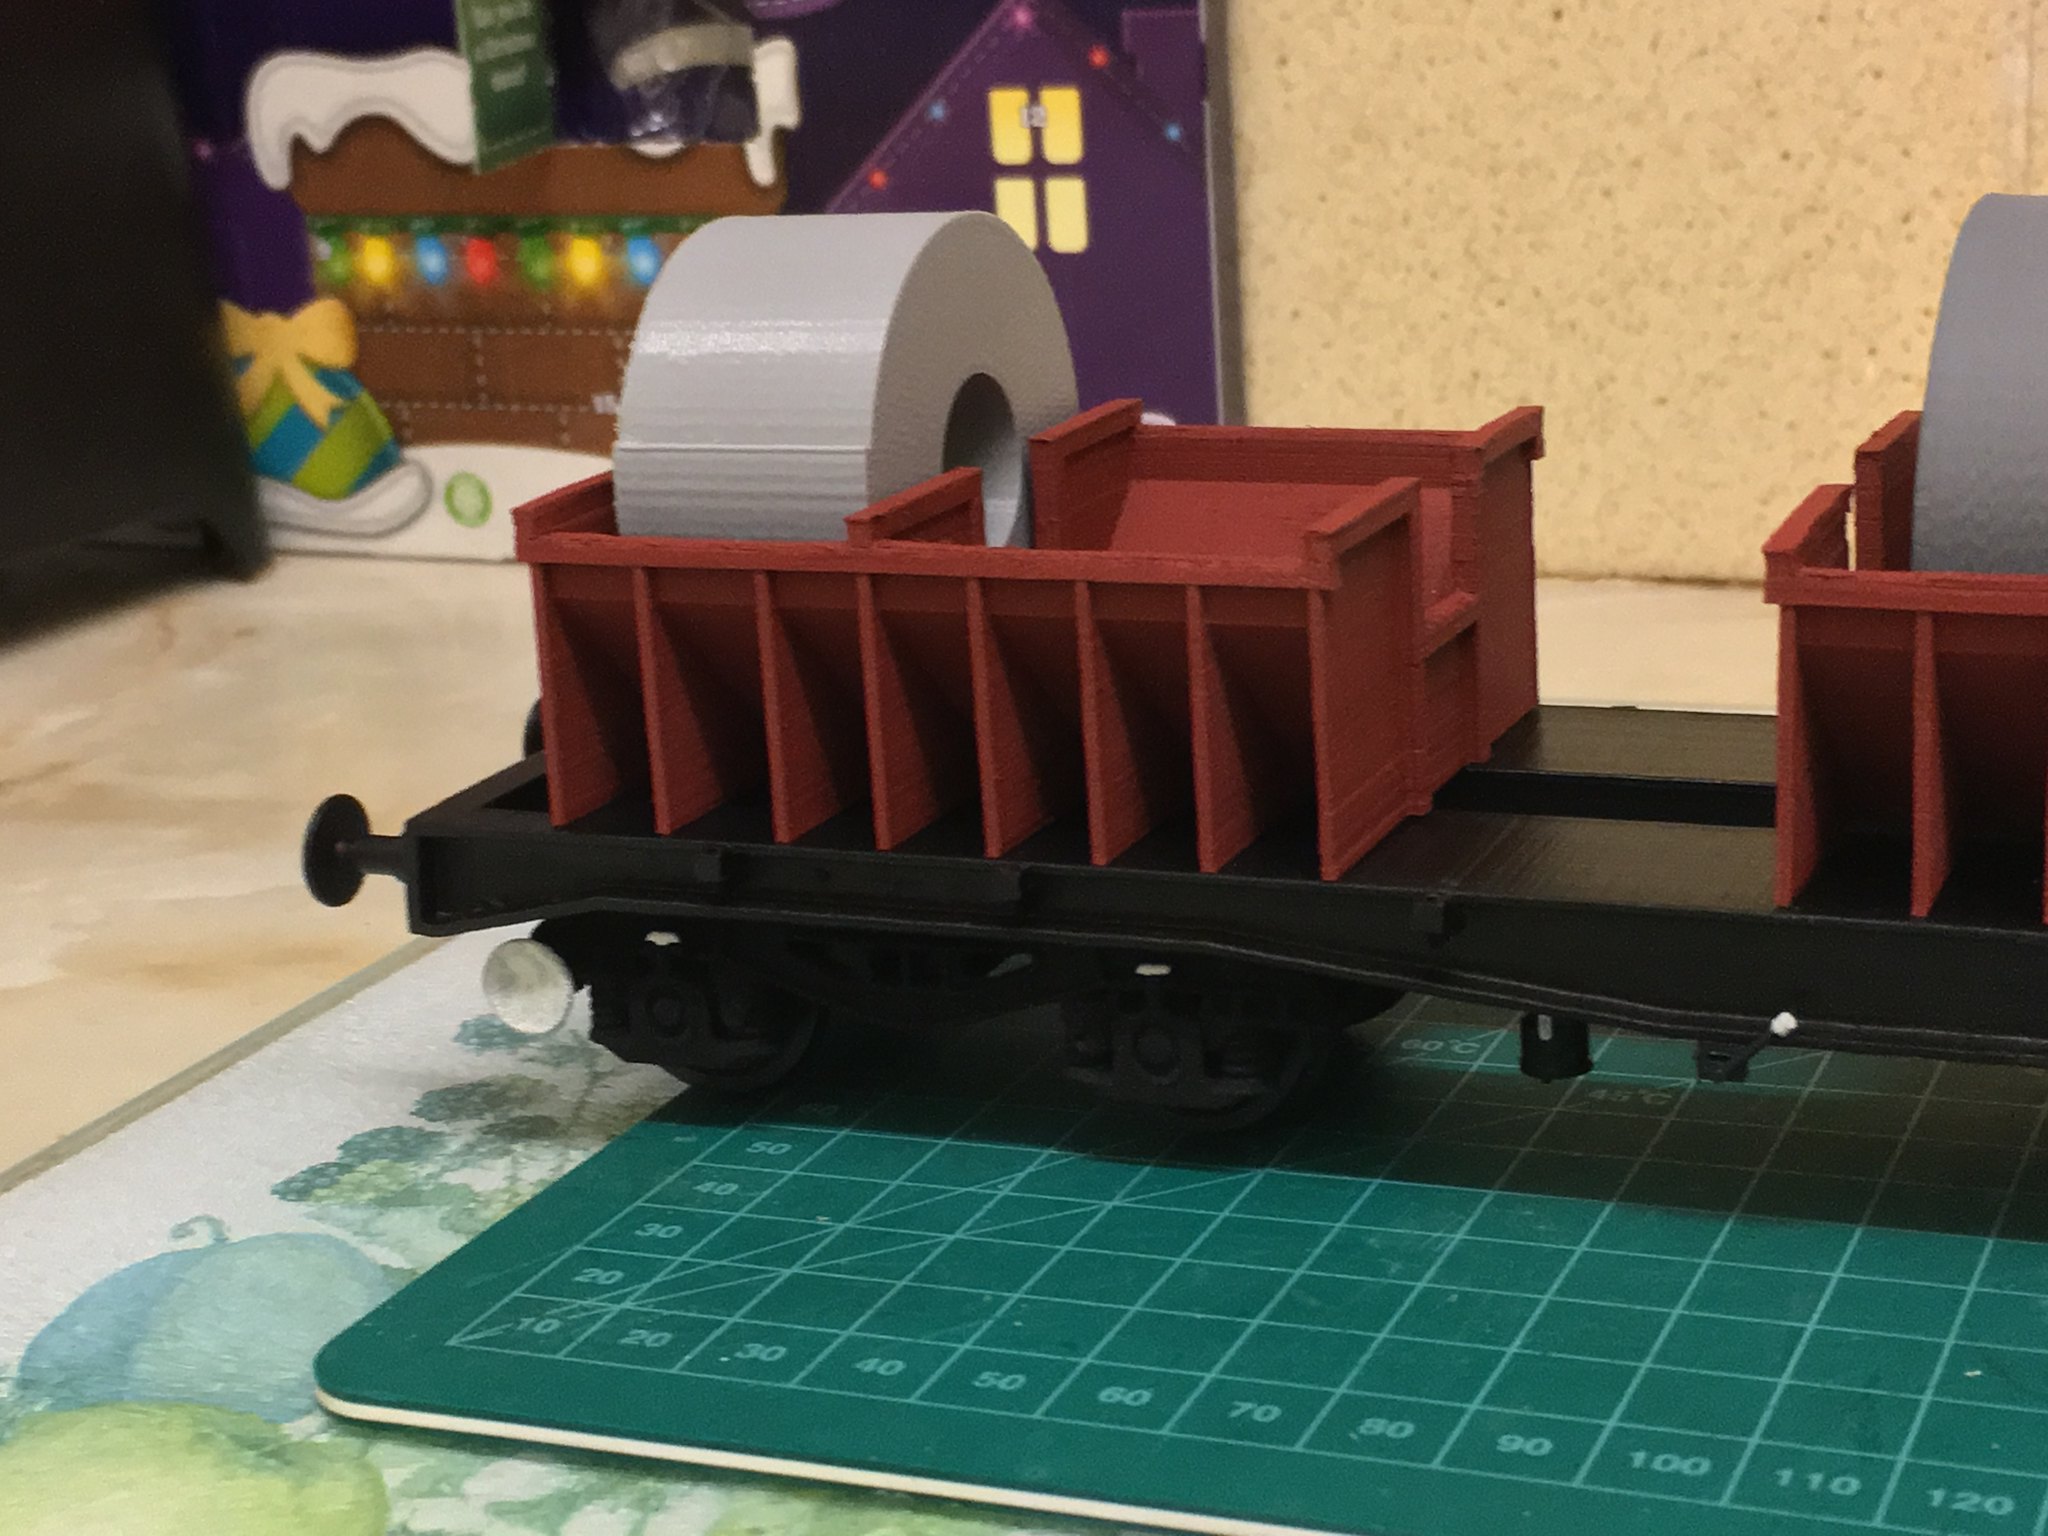 7mm BCA wagon with coils by simon br blue, on Flickr
-
3
-
-
Time for a 7mm update.
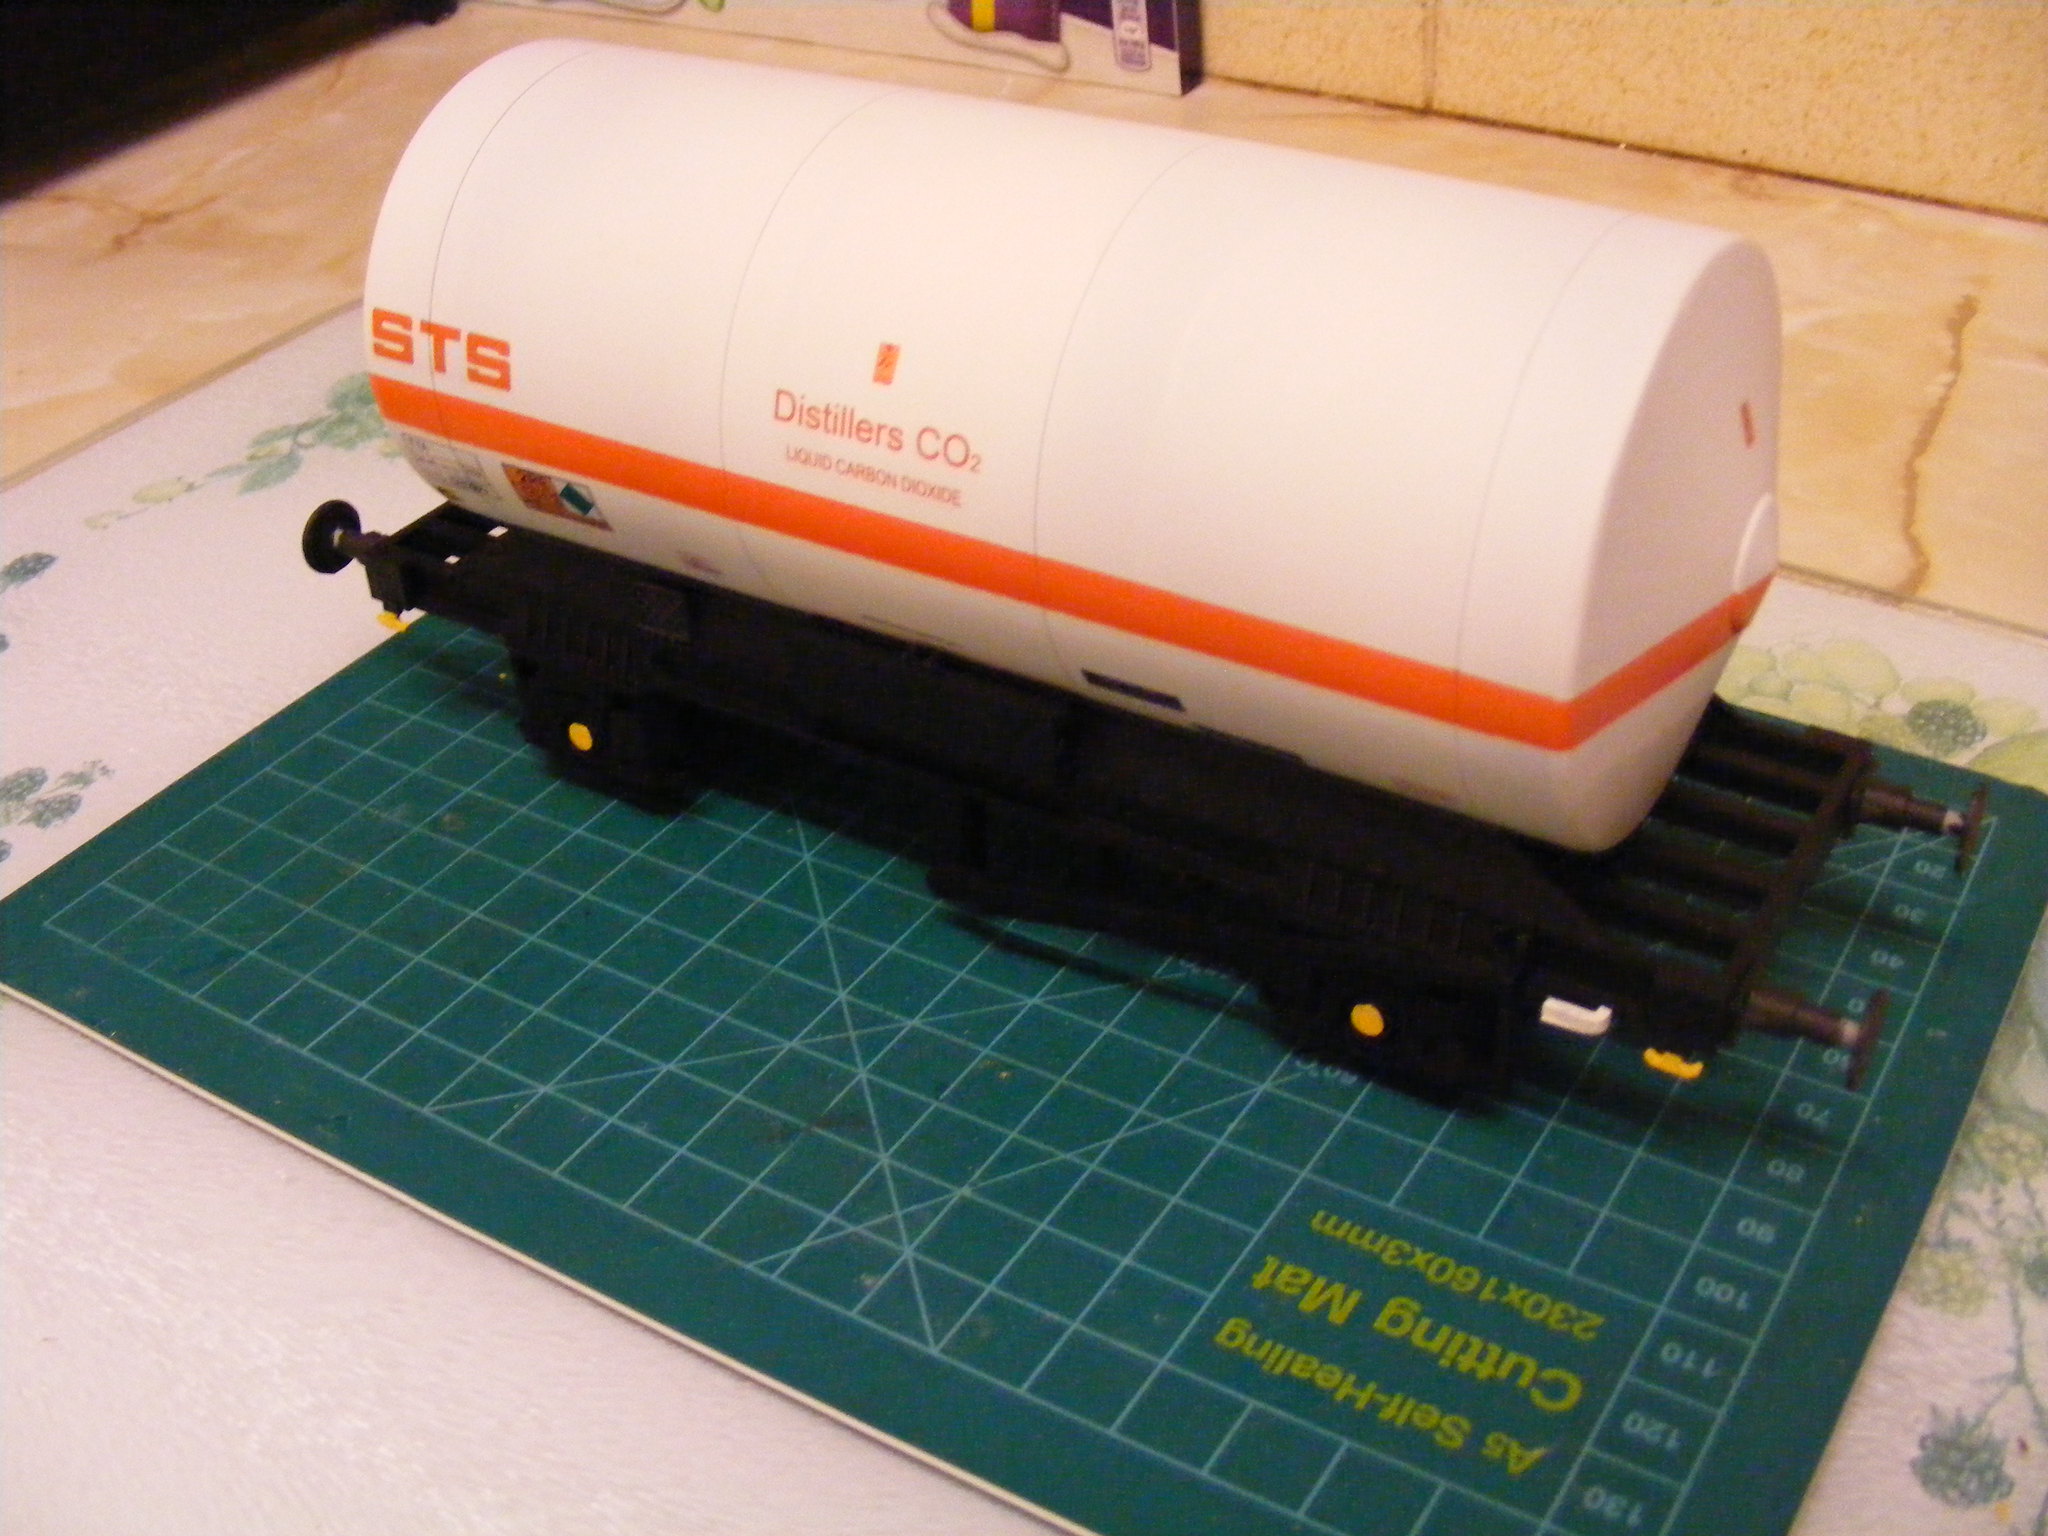
First up some tank wagons, the TRL TTA tank was printed a while ago but stalled waiting for a walkway. I was originally looking to have a etched walkway but I never got that far, instead I drew a couple of version and did a couple of test prints to see what I could get away with at Shapeways. The walkway mesh was printed in WSF and is slightly over scale but is solid enough to be usable. It was printed in two parts and the mesh looks slightly different on the top of the ladder compared to the rest of the mesh, it was drawn the same but printed in a different orientation. The transfers are home made and are a mixture of clear and white backed.
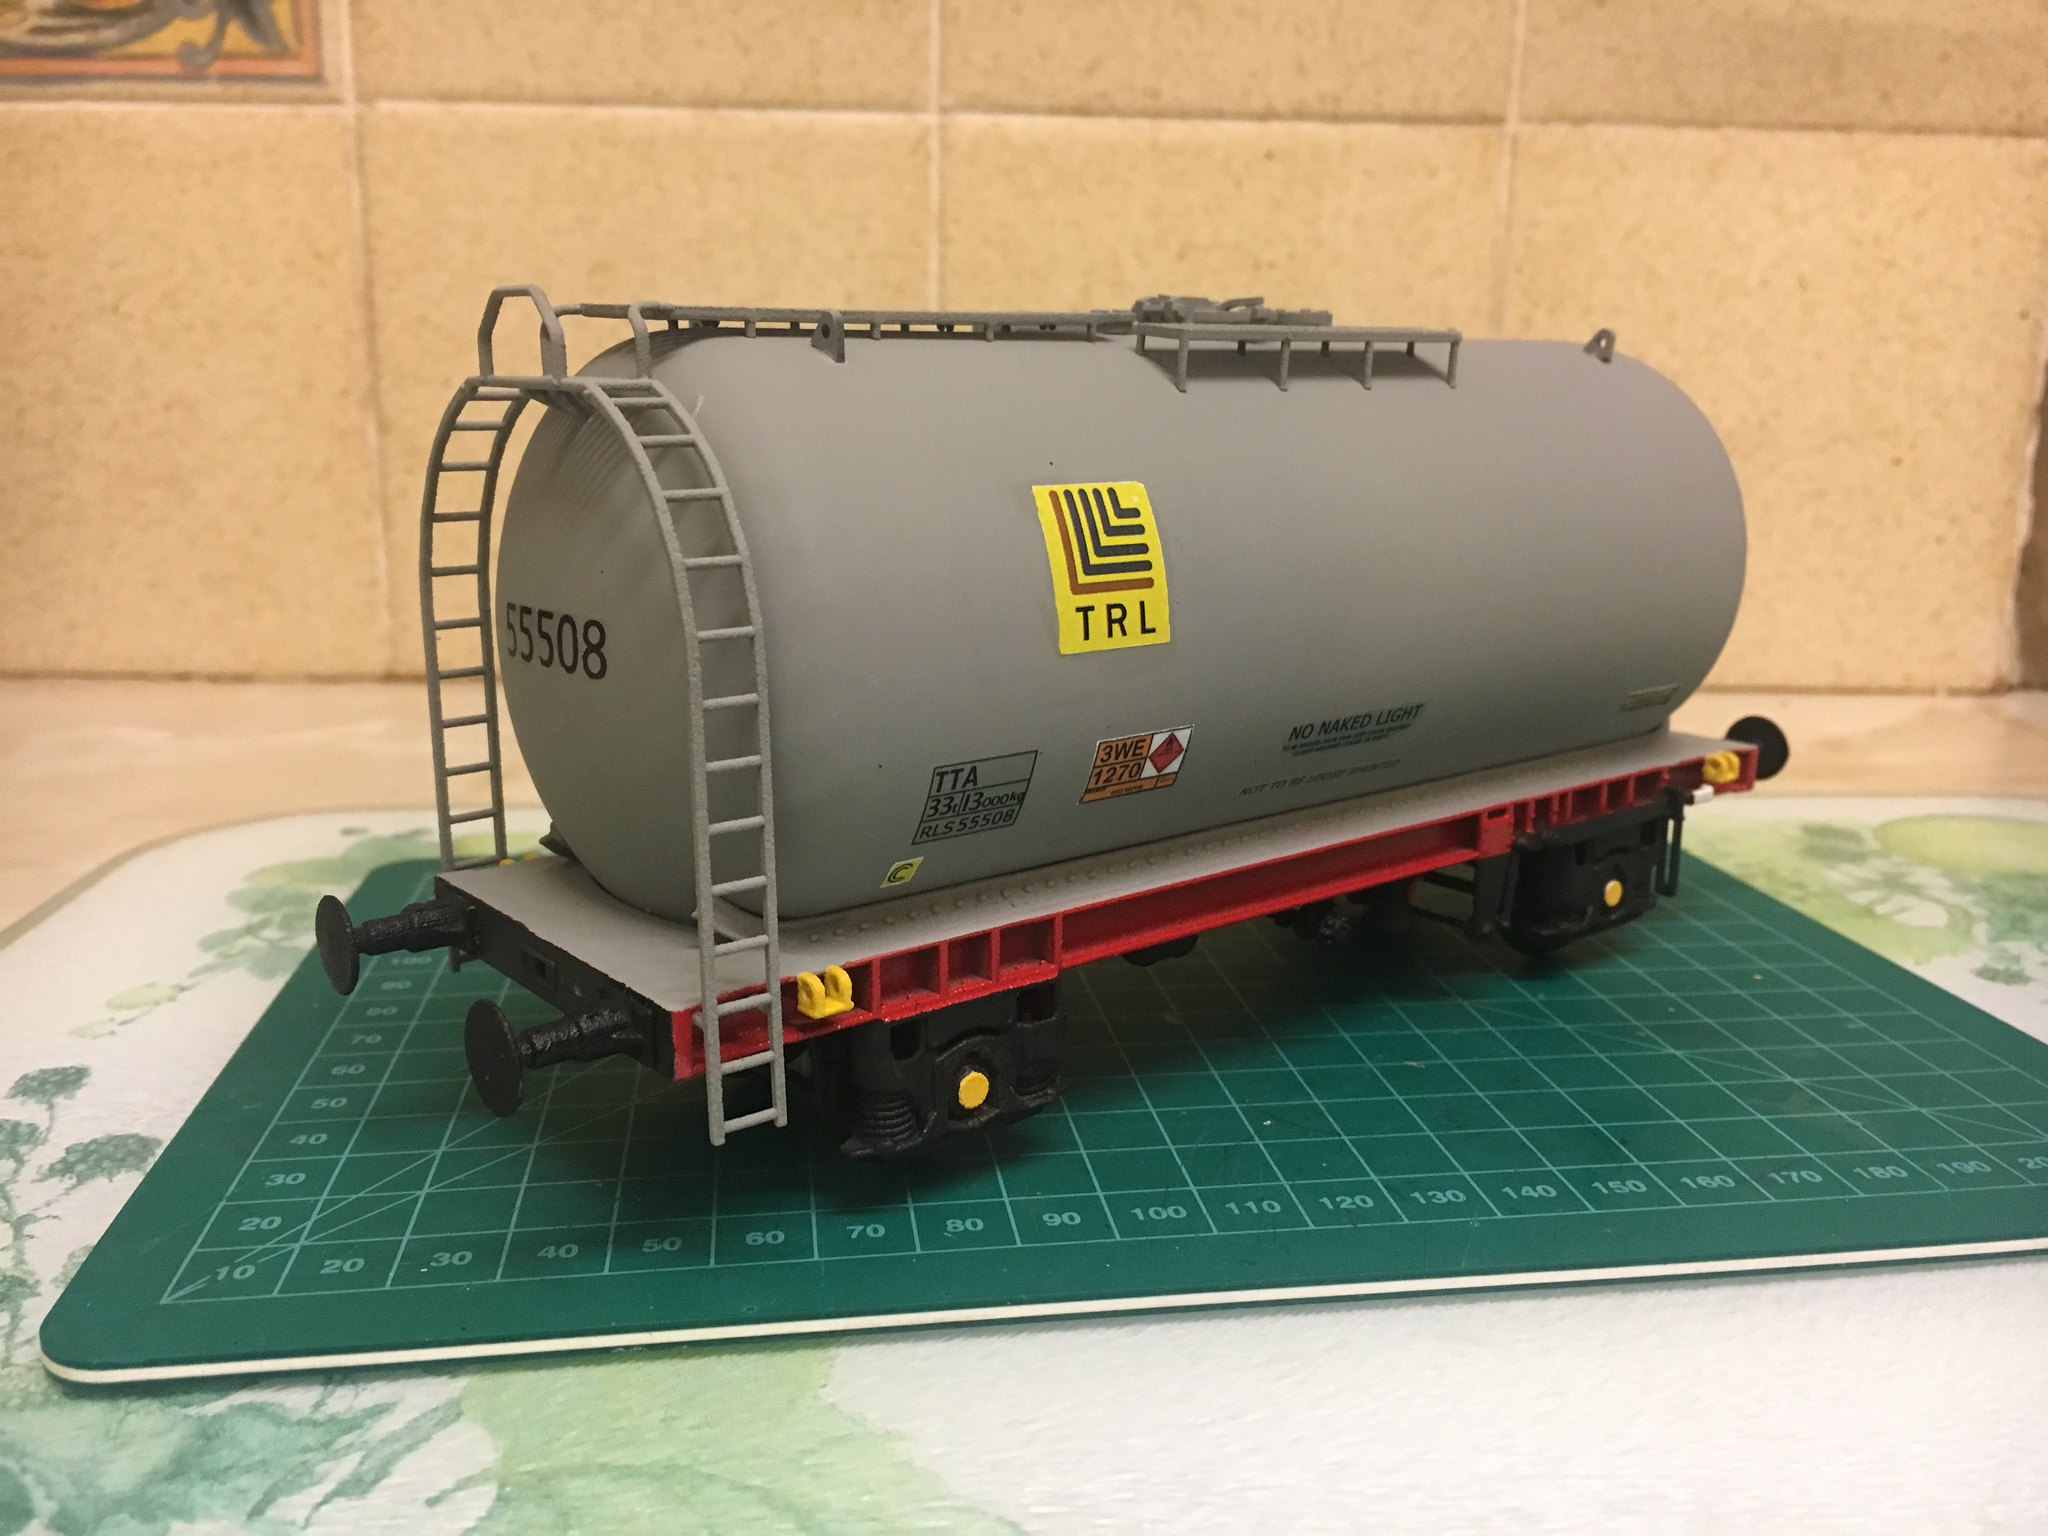 7mm TRL TTA tank wagon by simon br blue, on Flickr
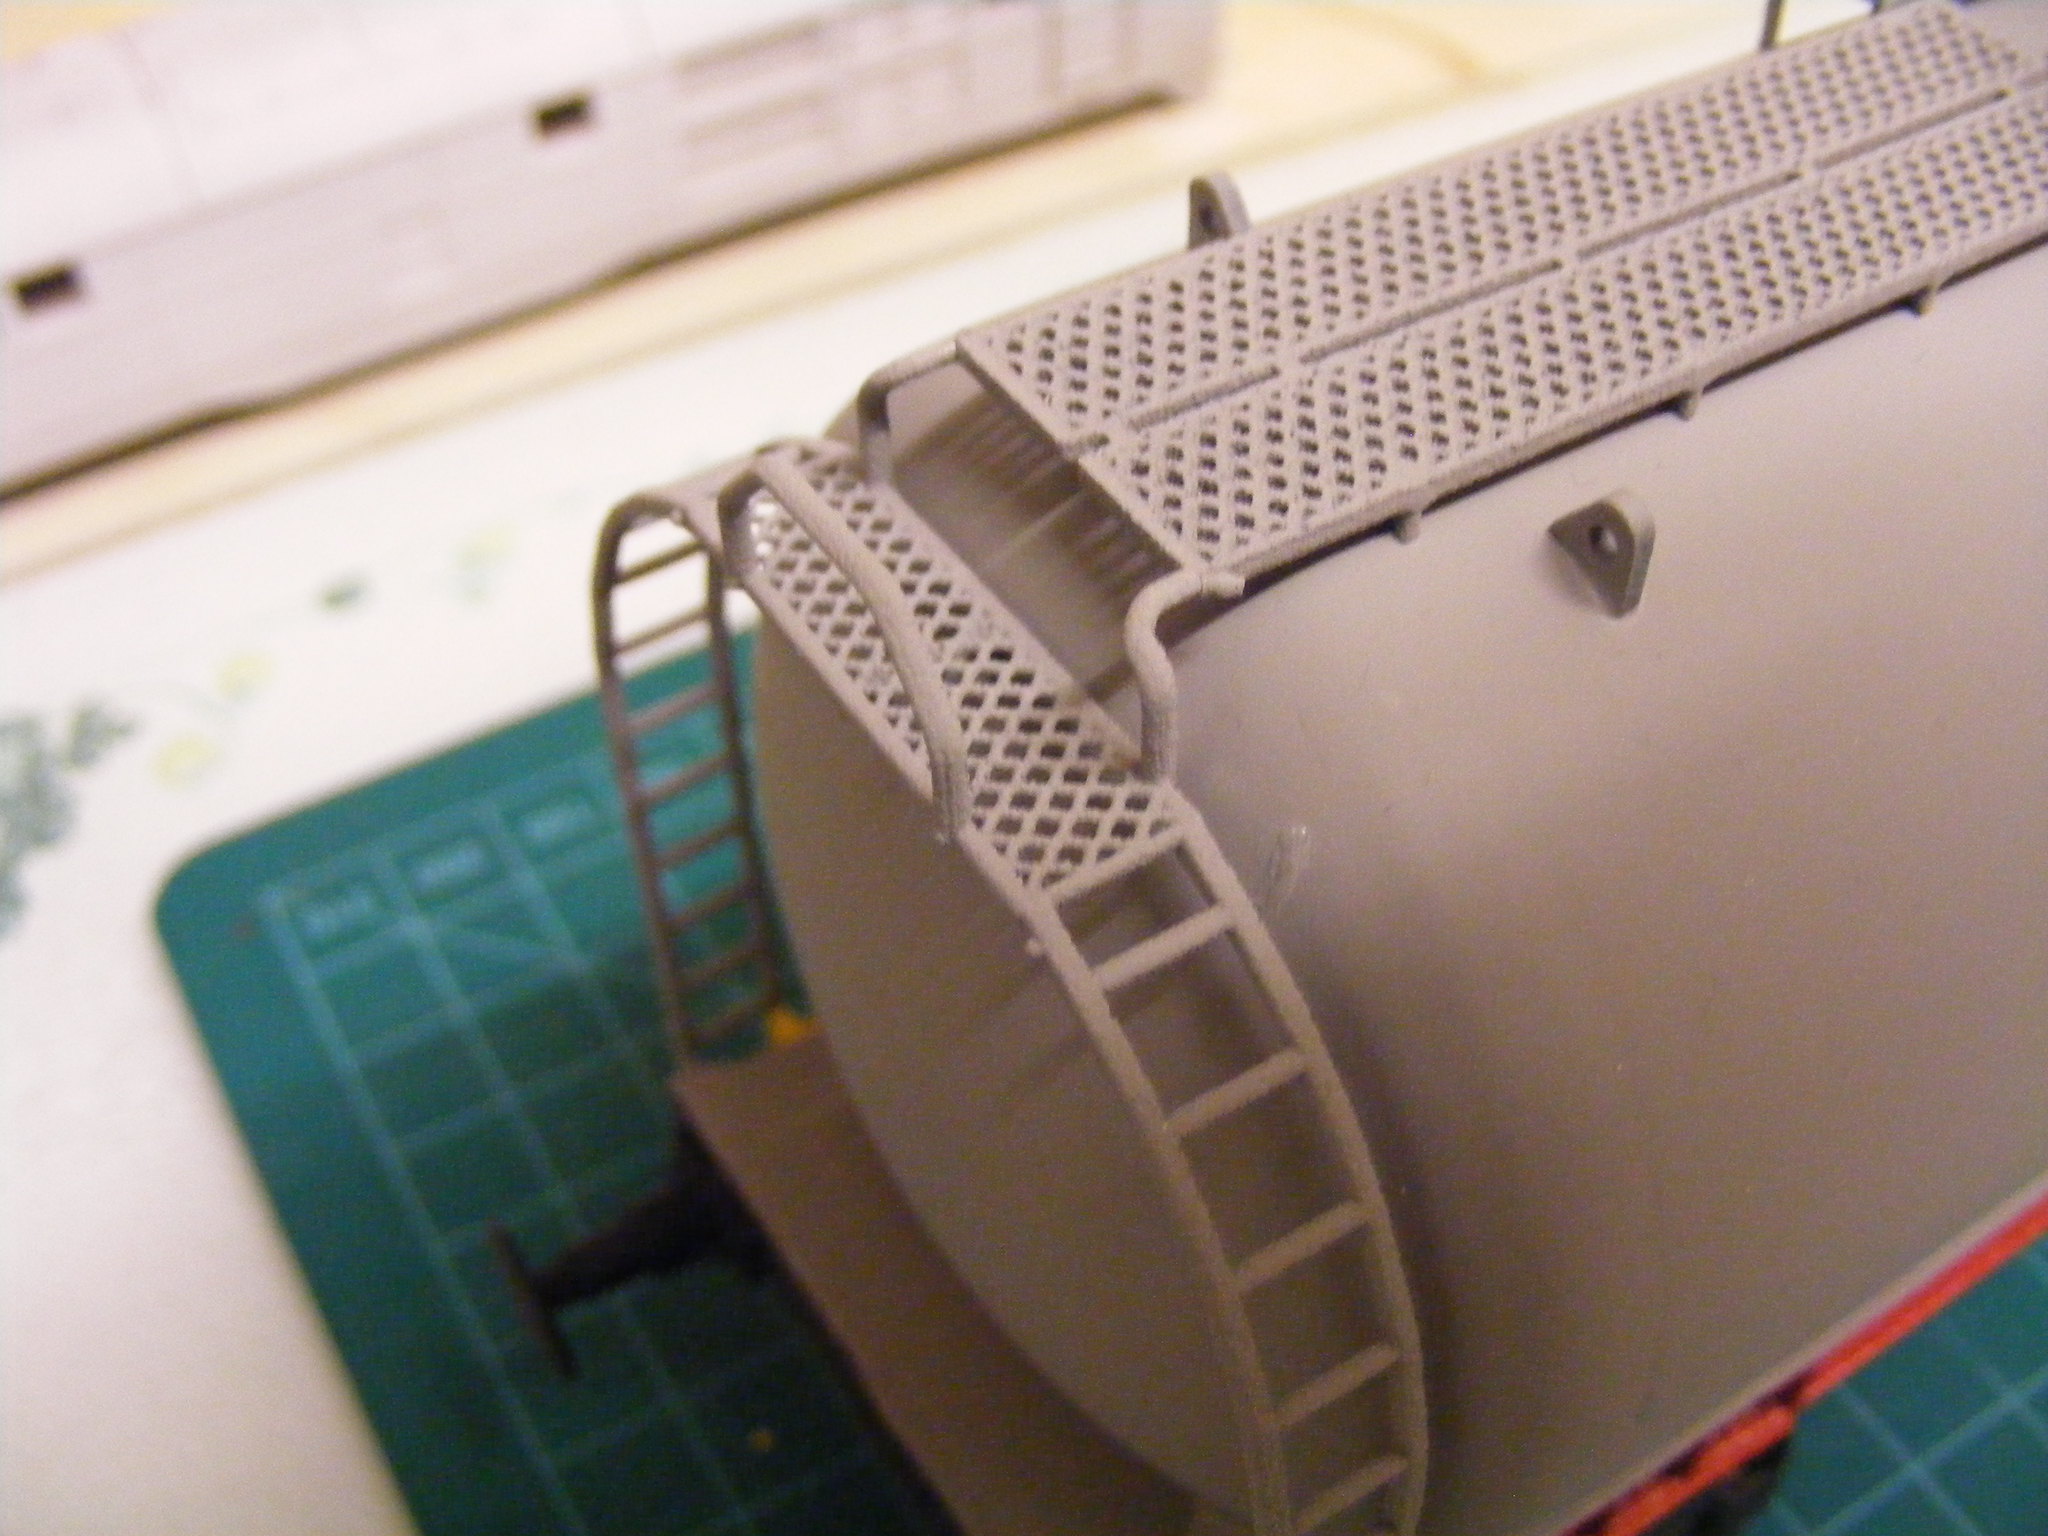 7mm TRL TTA tank wagon ladders by simon br blue, on Flickr
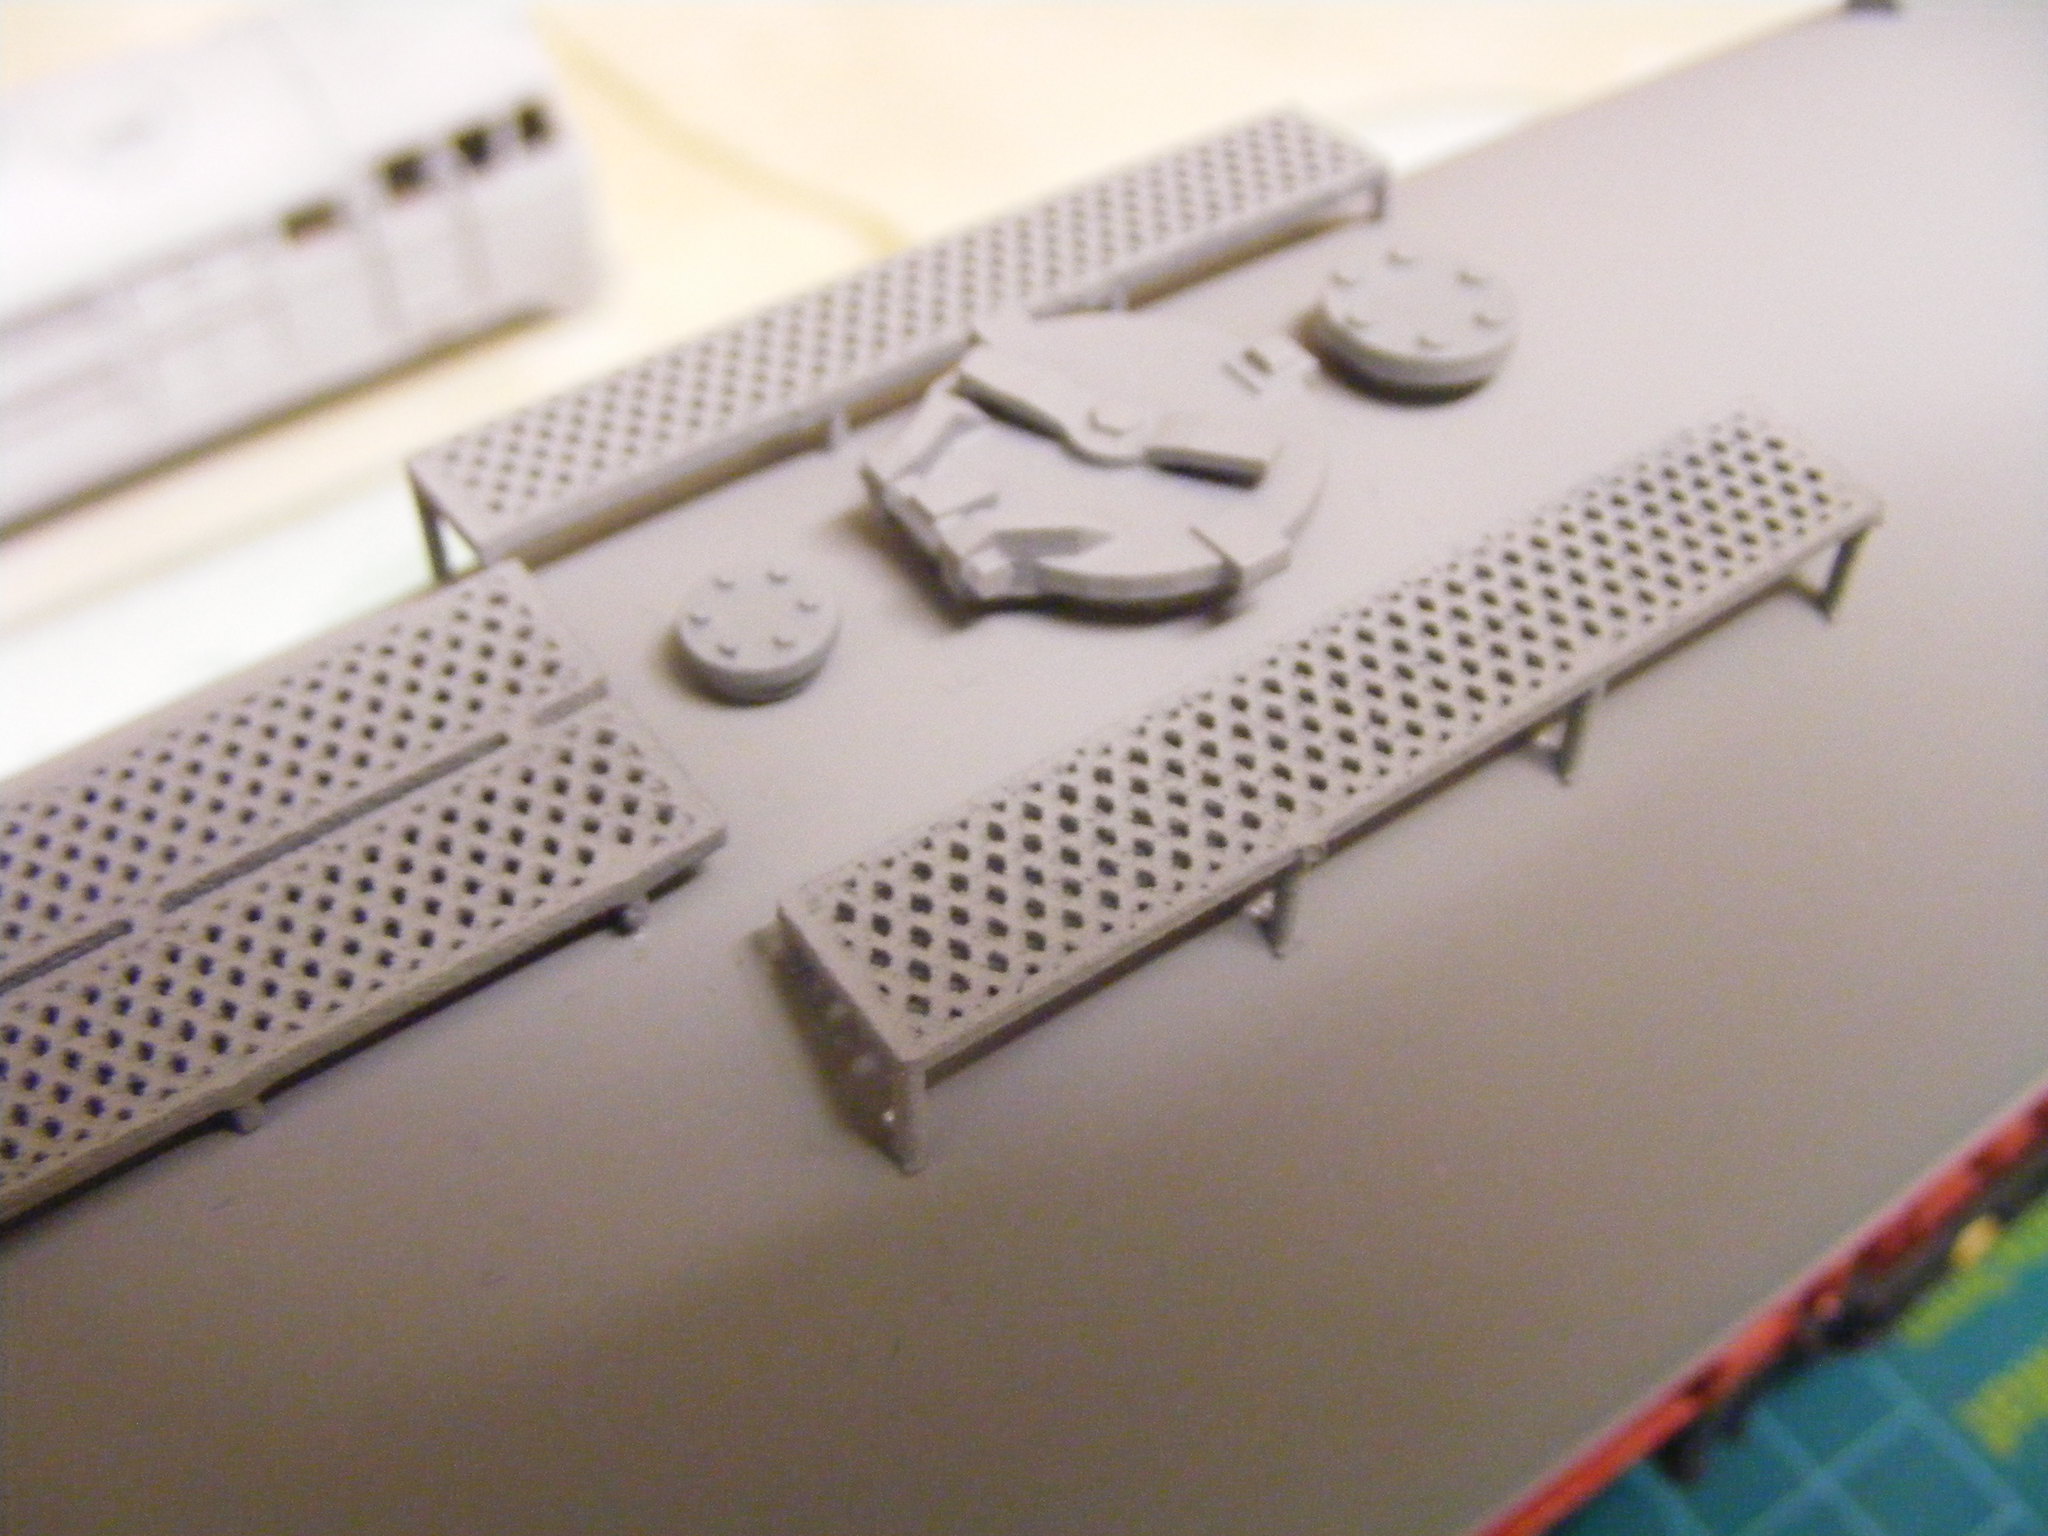 7mm TRL TTA tank wagon walkway by simon br blue, on Flickr
Next tank wagon is a TTA Molasses tank, this has a WSF chassis with a 50 pipe for the body and on this example has a top walkway printed on the Form 2 and WSF ladders. The tank end pipework was made up from plastiard and handrail wire but I have now drawn a version that can be printed in WSF. The transfers are from Railtec and went on easily. The paint used for this was Vauxhall Mustard yellow from Halfords.
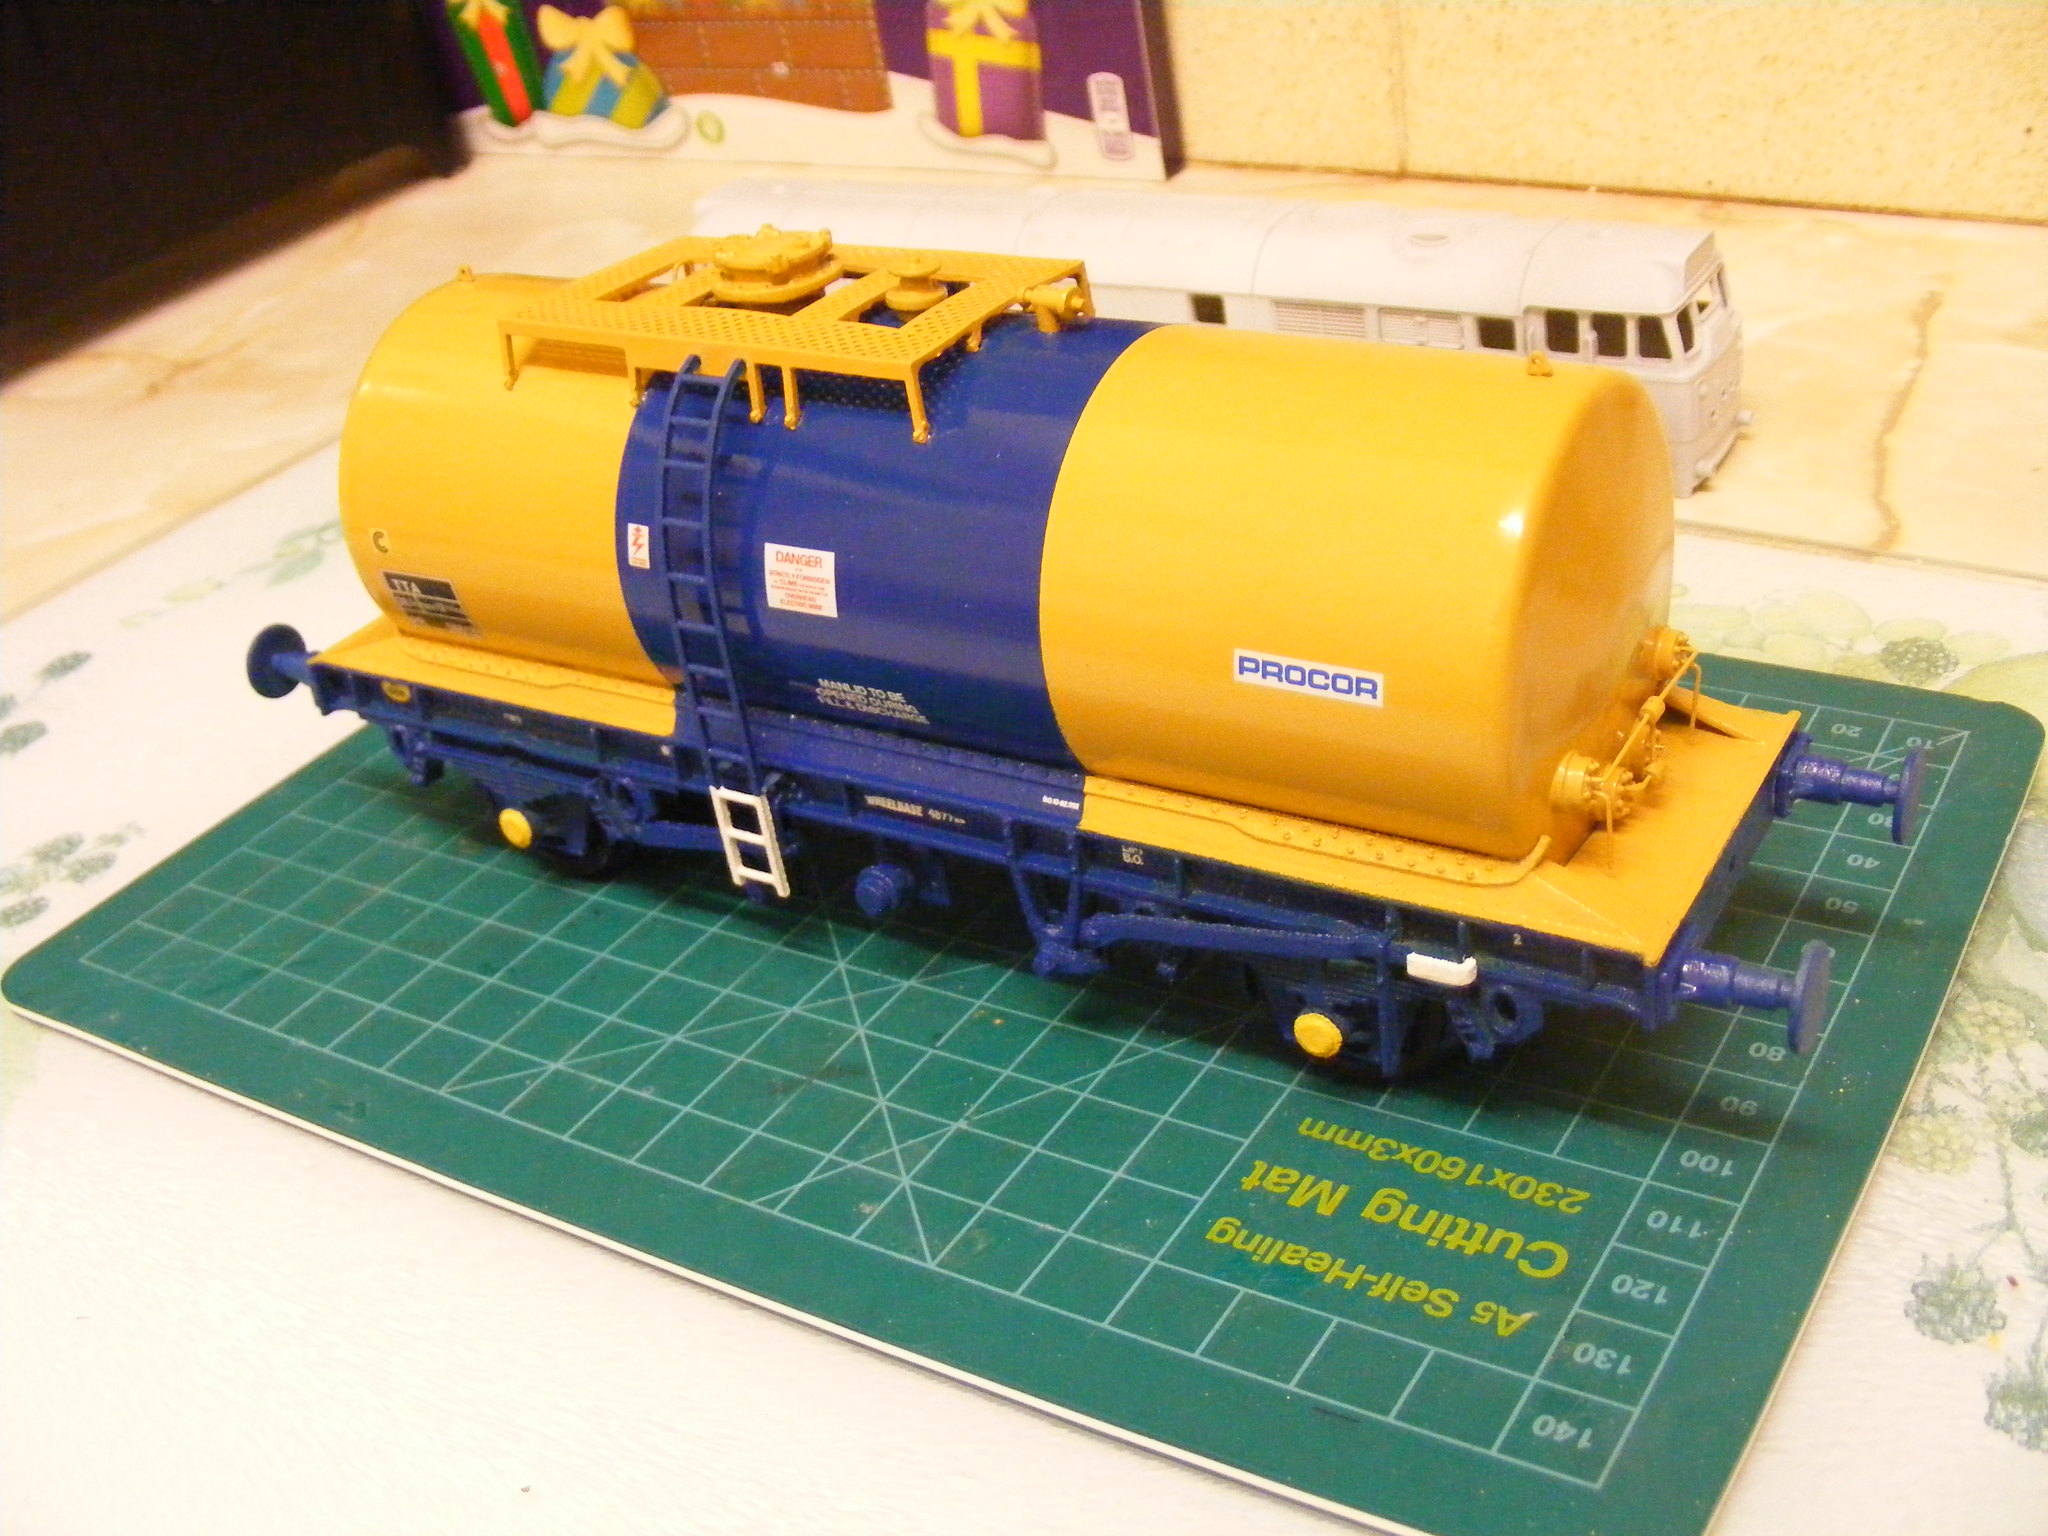 7mm Molasses tank wagon by simon br blue, on Flickr
 7mm Molasses tank top detail by simon br blue, on Flickr
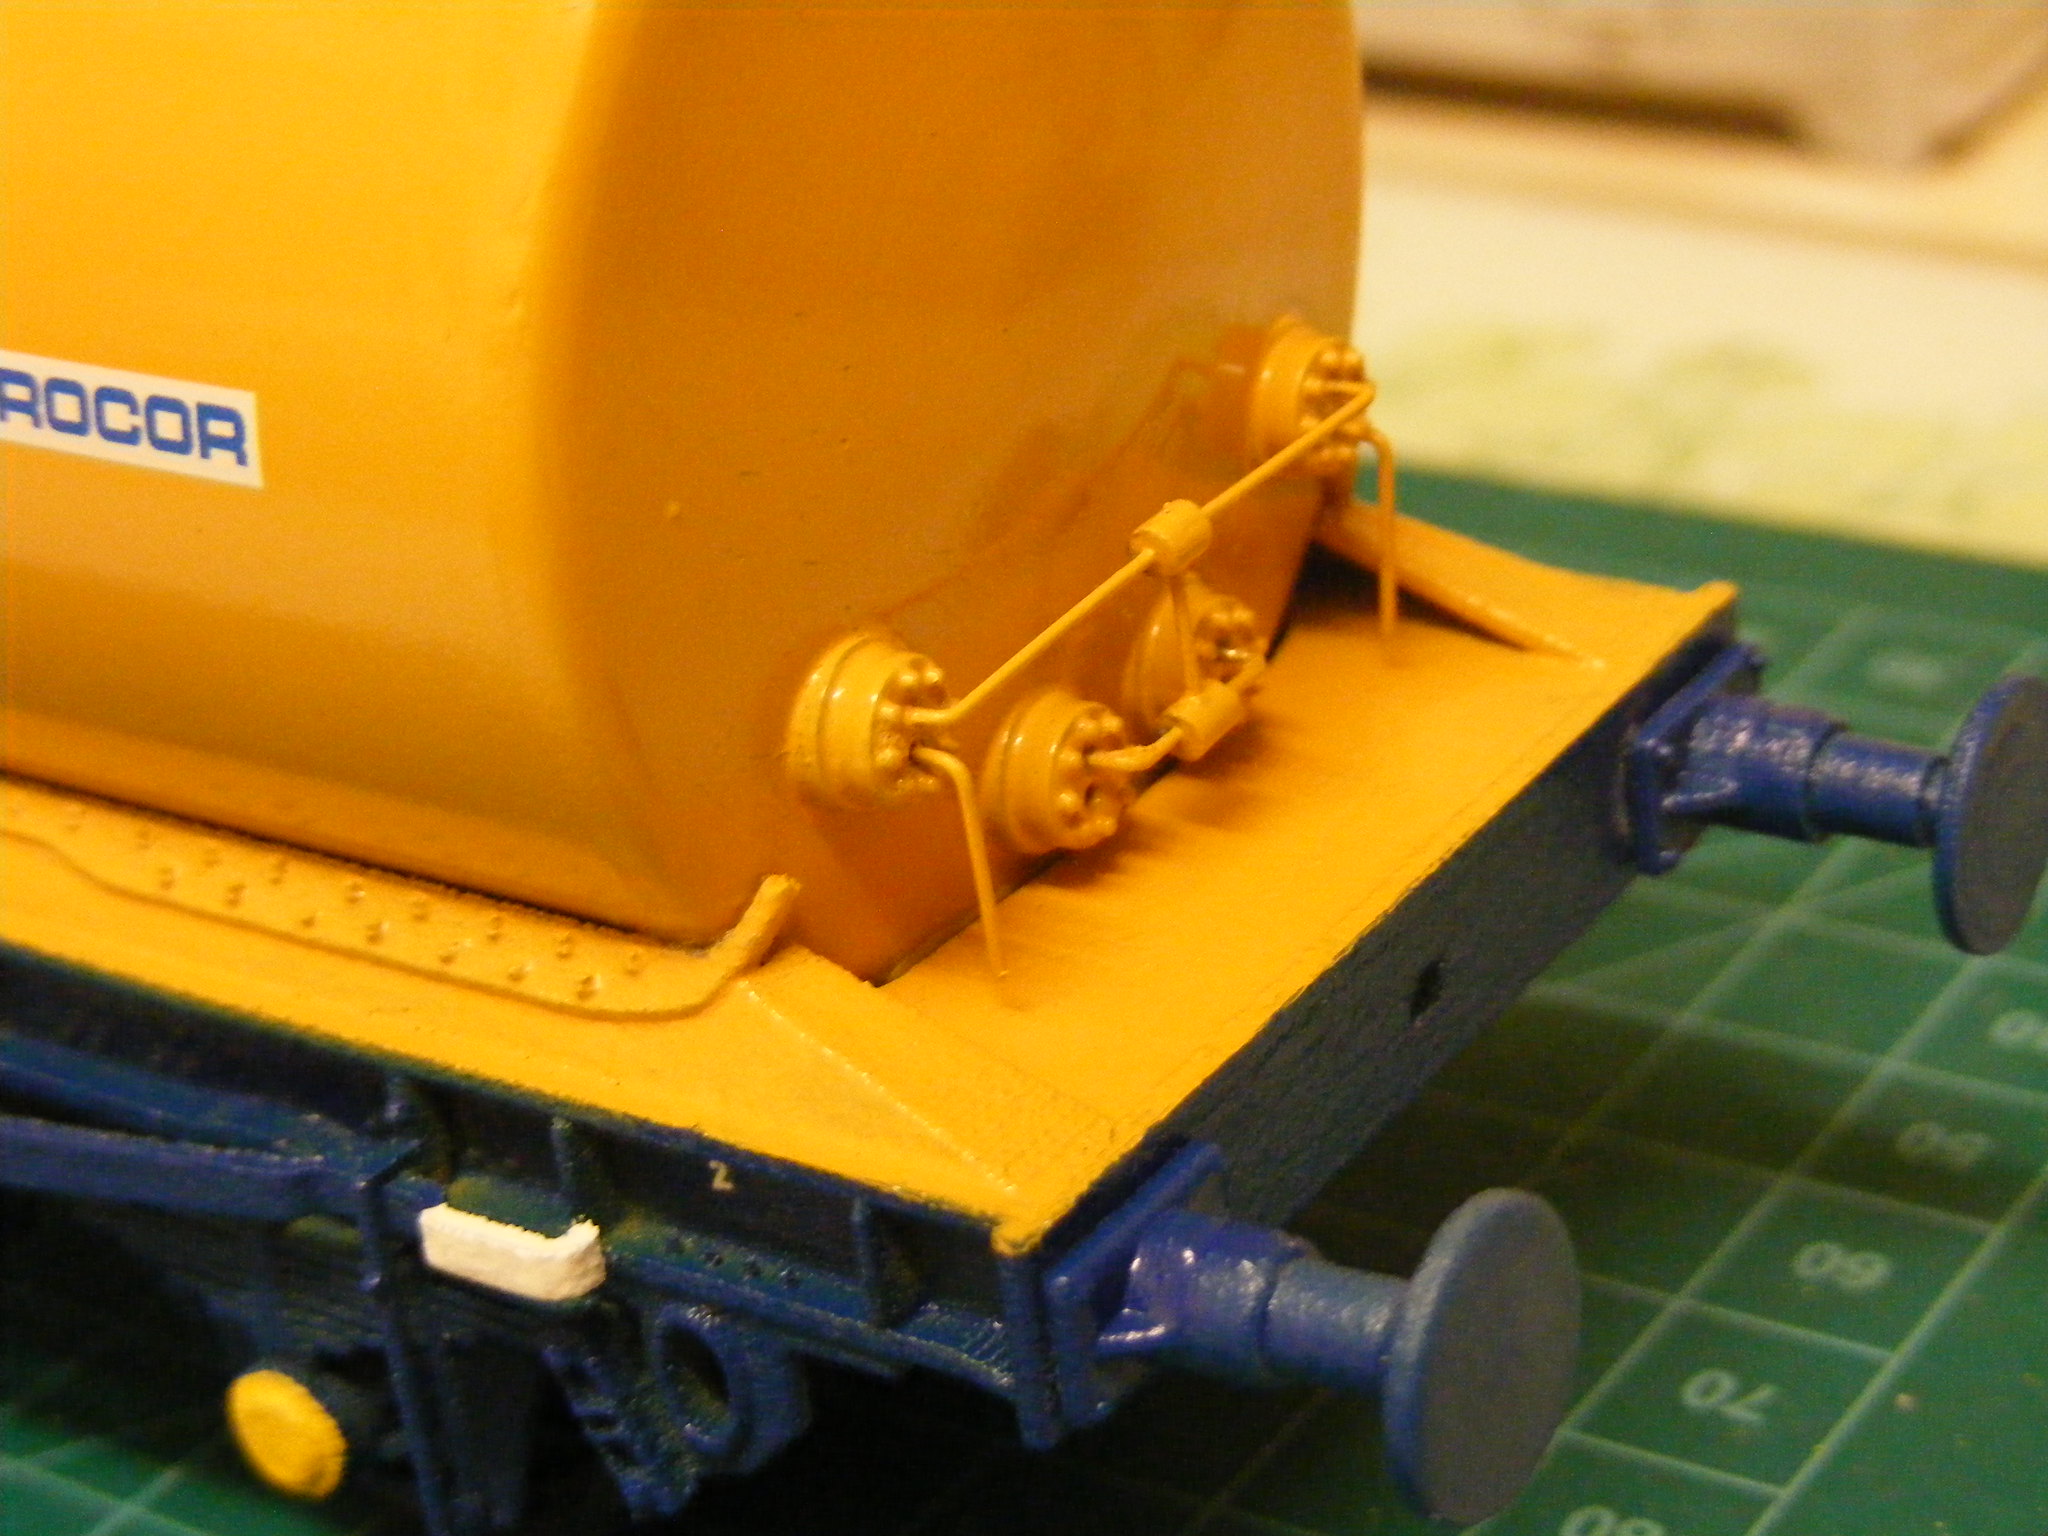 7mm Molasses tank end detail by simon br blue, on Flickr
Next wagon is a Algeco LPG tank, unlike most of the wagons I've made recently this is an older Vacuum braked wagon. This wagon uses the same tank hatches as the TCA tank and is very similar to an air braked tank which I've printed a chassis in 1/32 scale. The transfers are home made and the stripe is spray painted on.
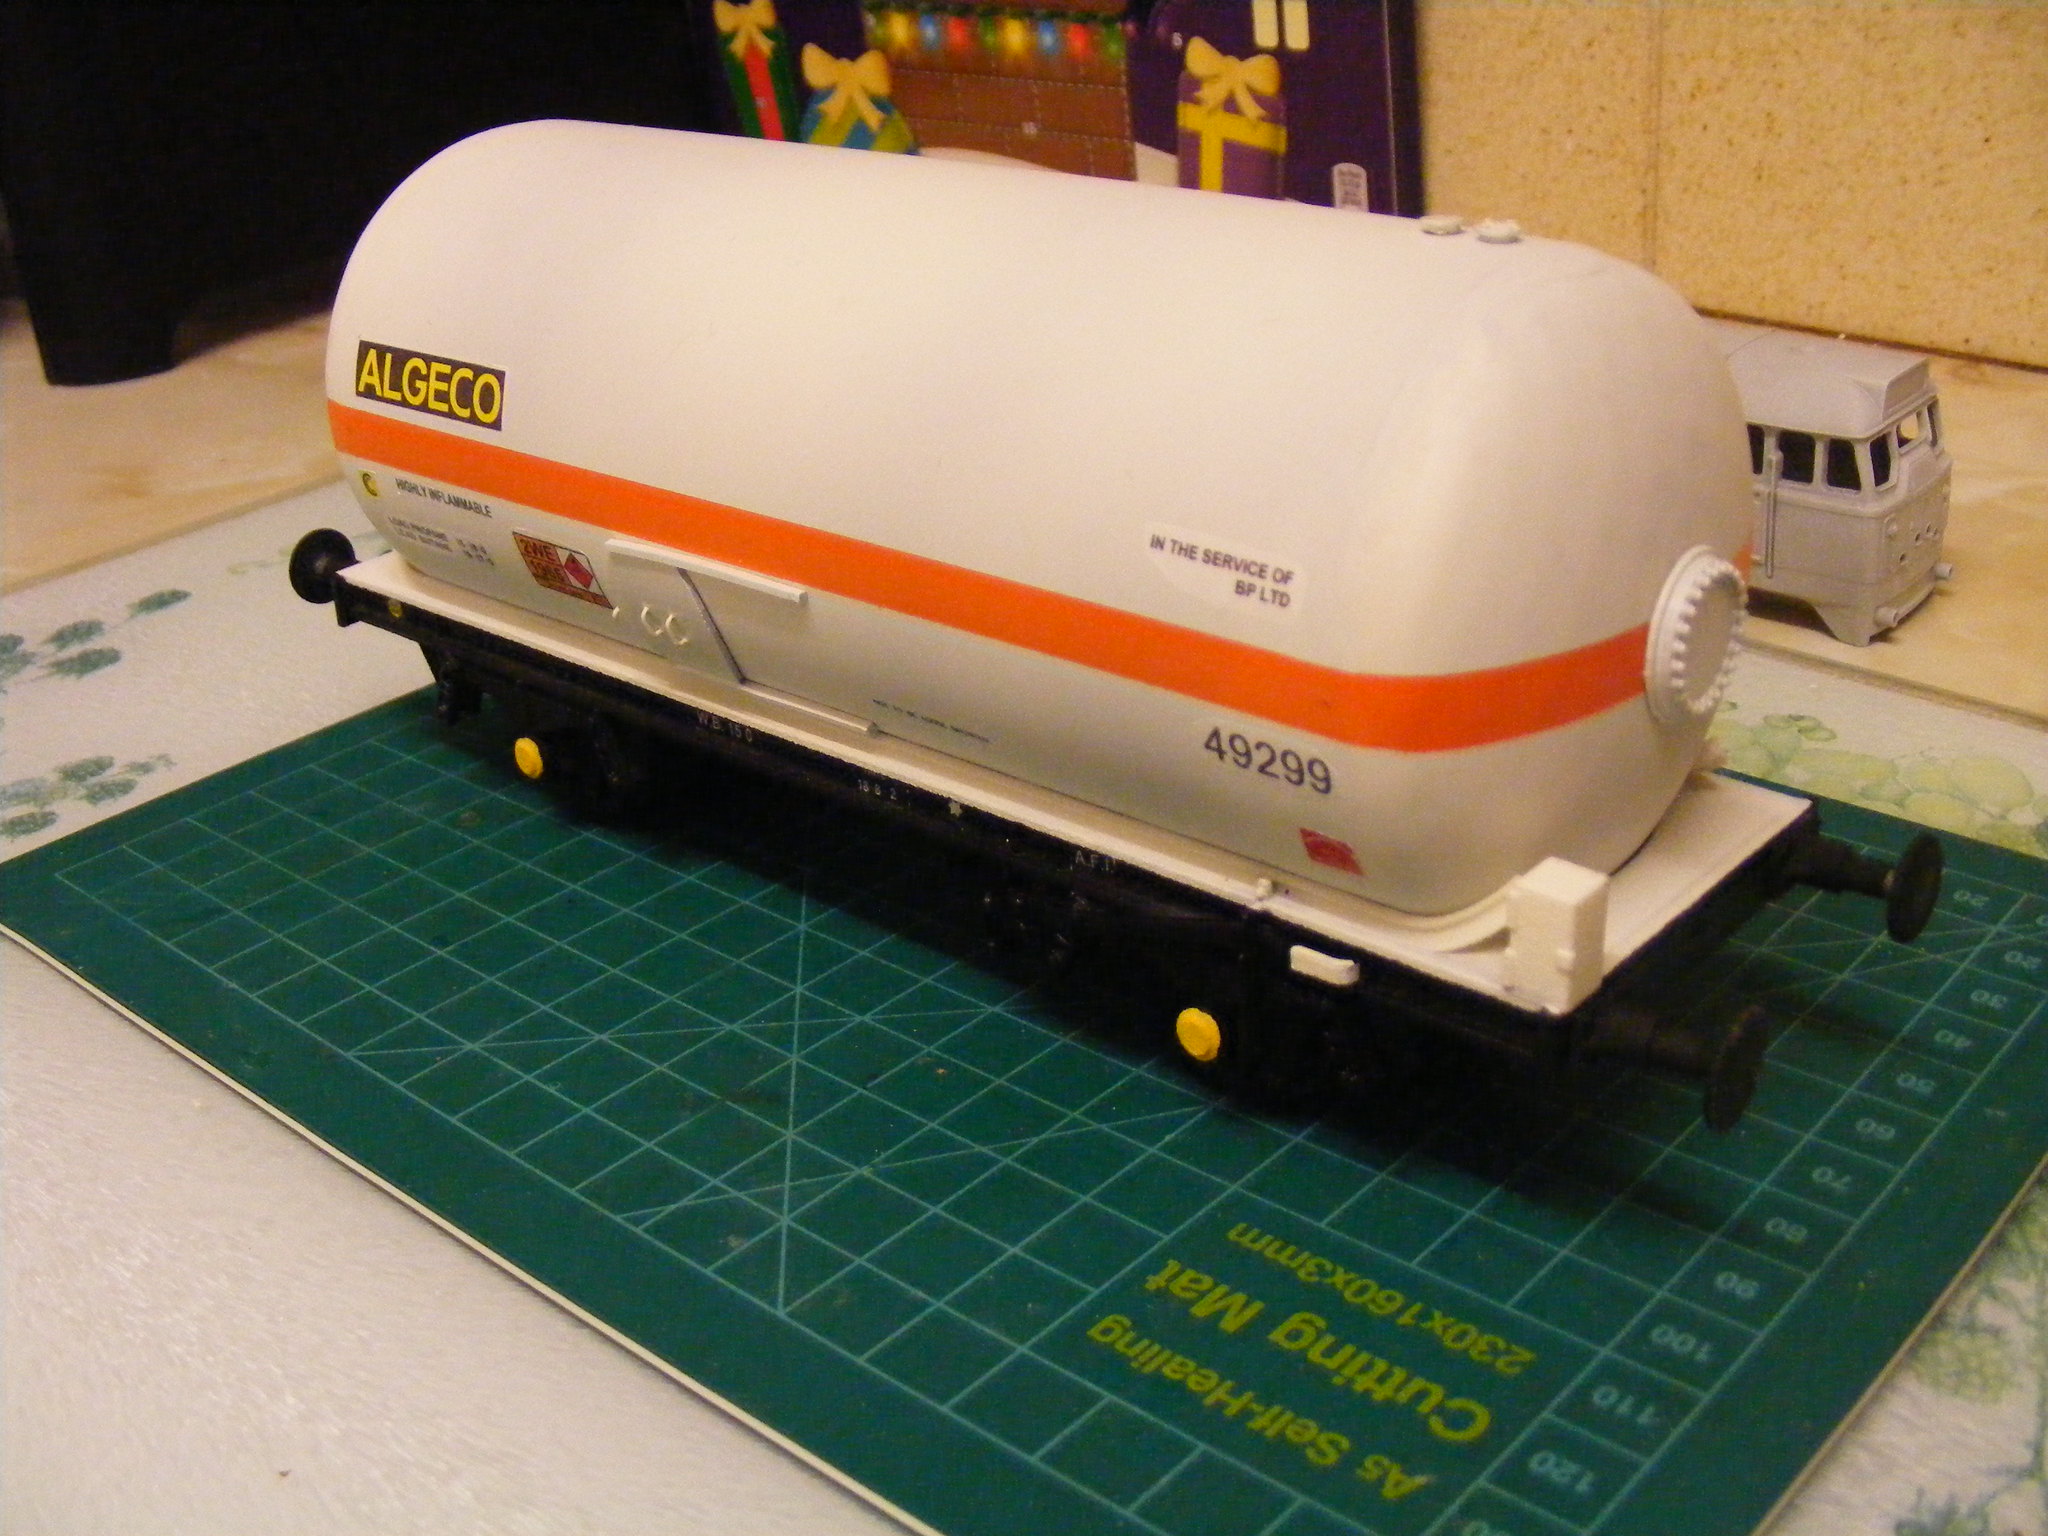 7mm Algeco tank wagon by simon br blue, on Flickr
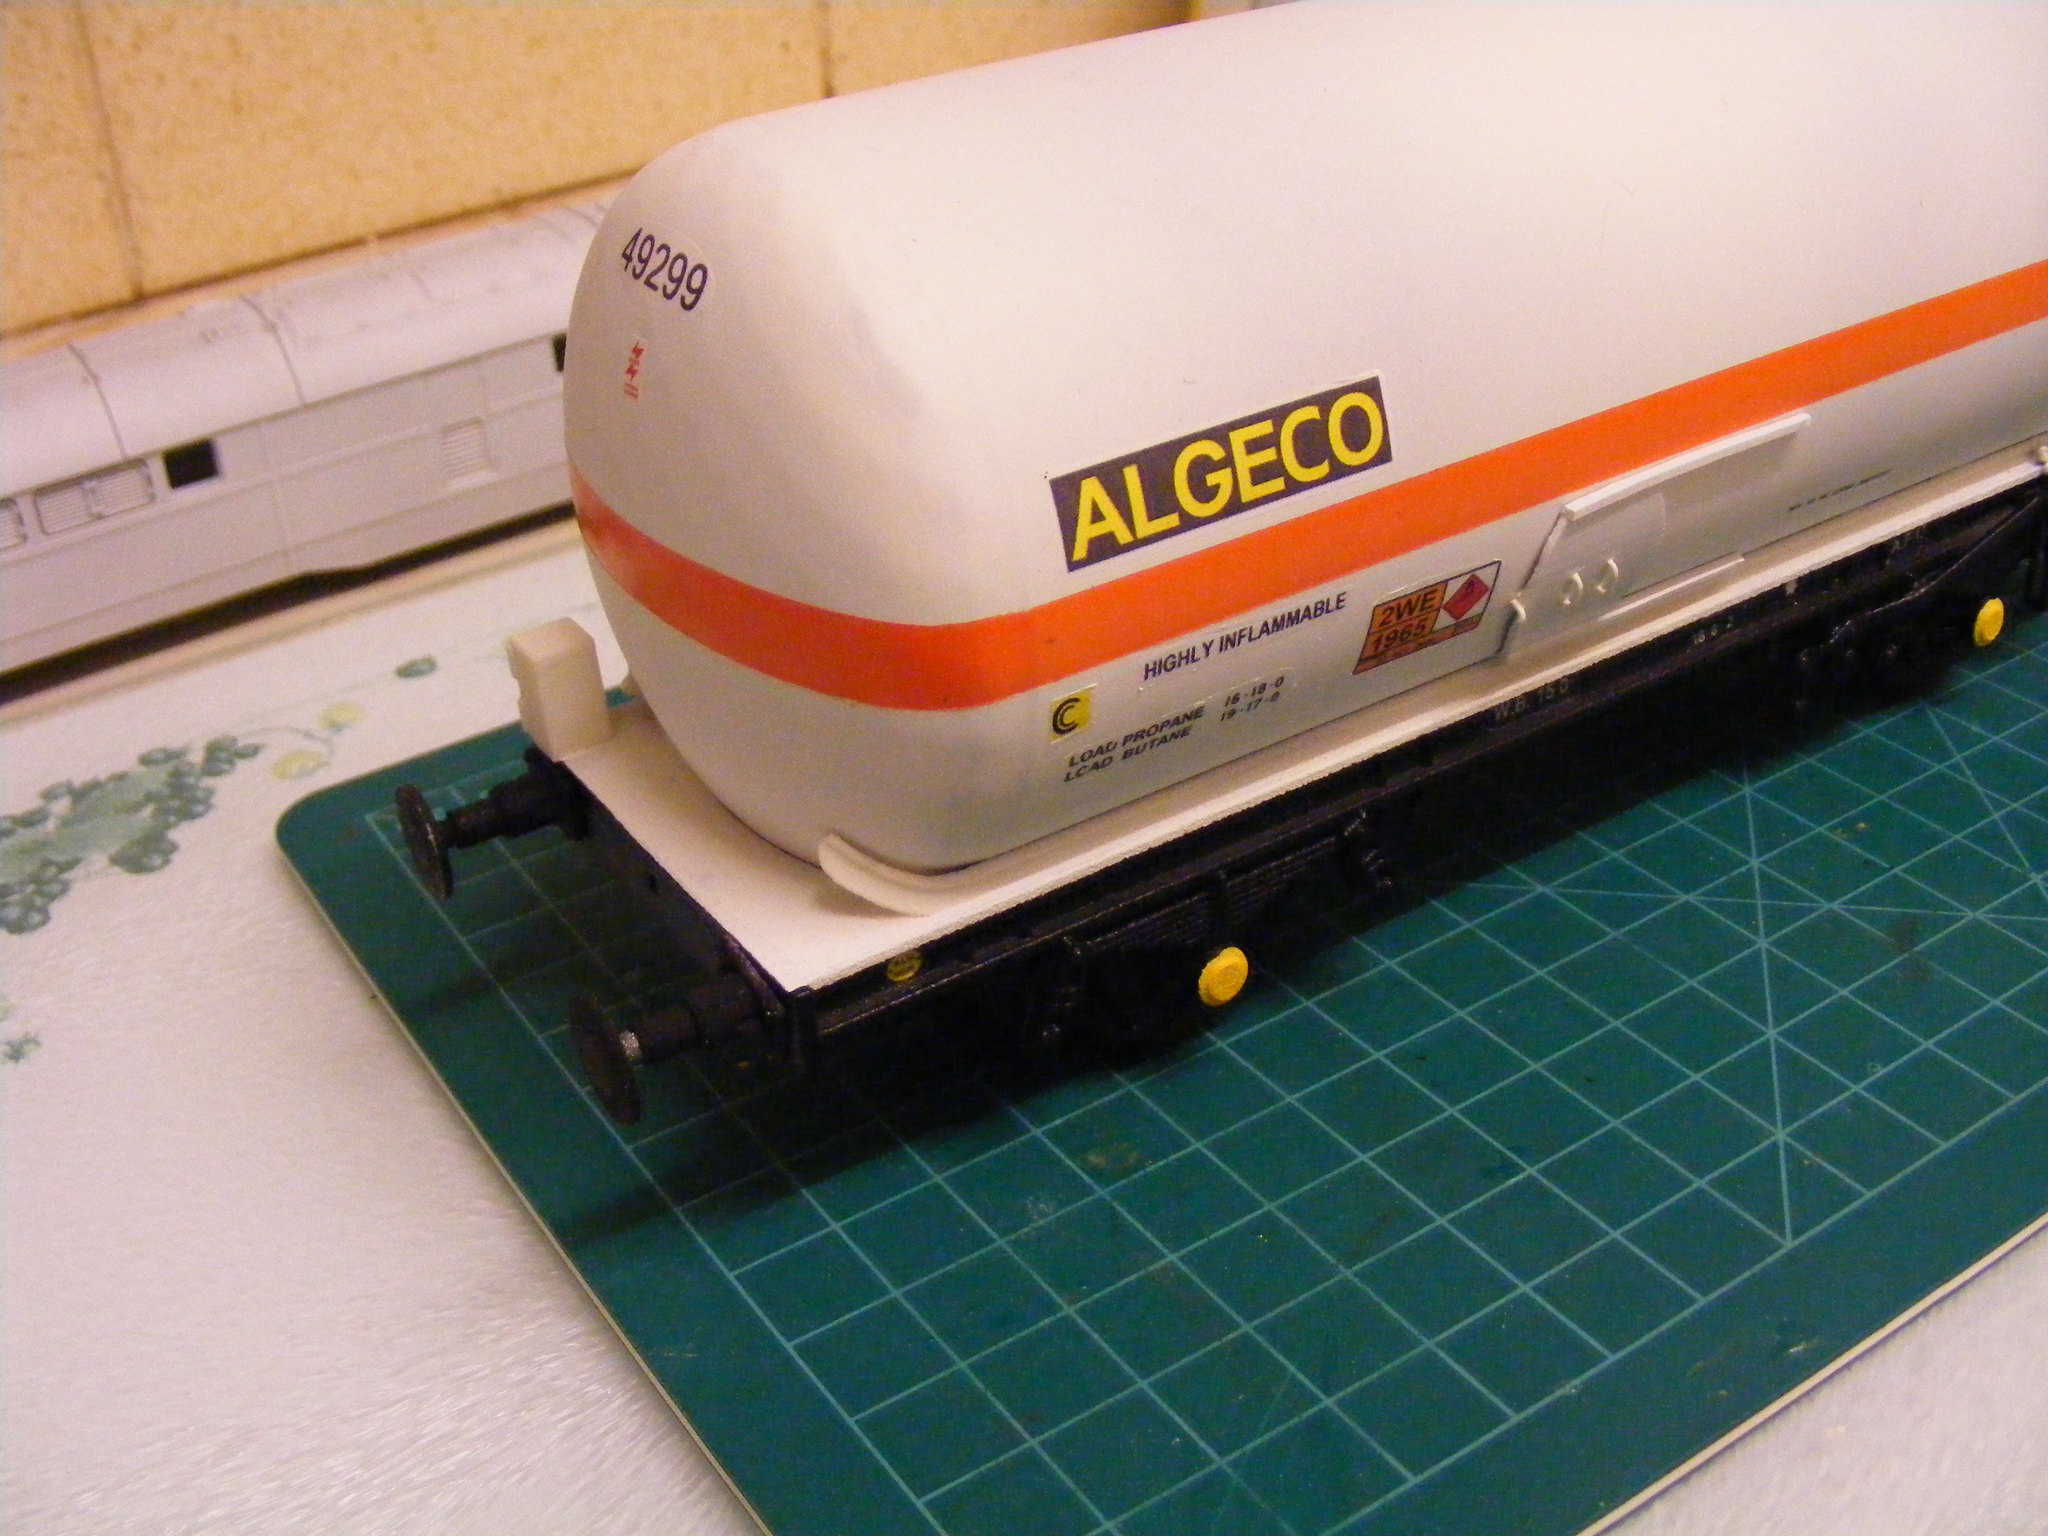 7mm Algeco tank wagon by simon br blue, on Flickr
The next wagon is a TUB Phosphoric Acid tank which is another wagon that was printed a couple of years ago, the stalling point on this wagon was the paint and transfers. I finally mixed up some paint to get it to this stage but still need some transfer for the Albright & Wilson livery. The chassis is WSF, the tank ends are resin castings, the walkway is FUD and the ladders are WSF. Most of the pictures of these wagons are show them heavily weathered with a lot of white staining from the Phosphoric acid.
 7mm TUB tank wagon by simon br blue, on Flickr
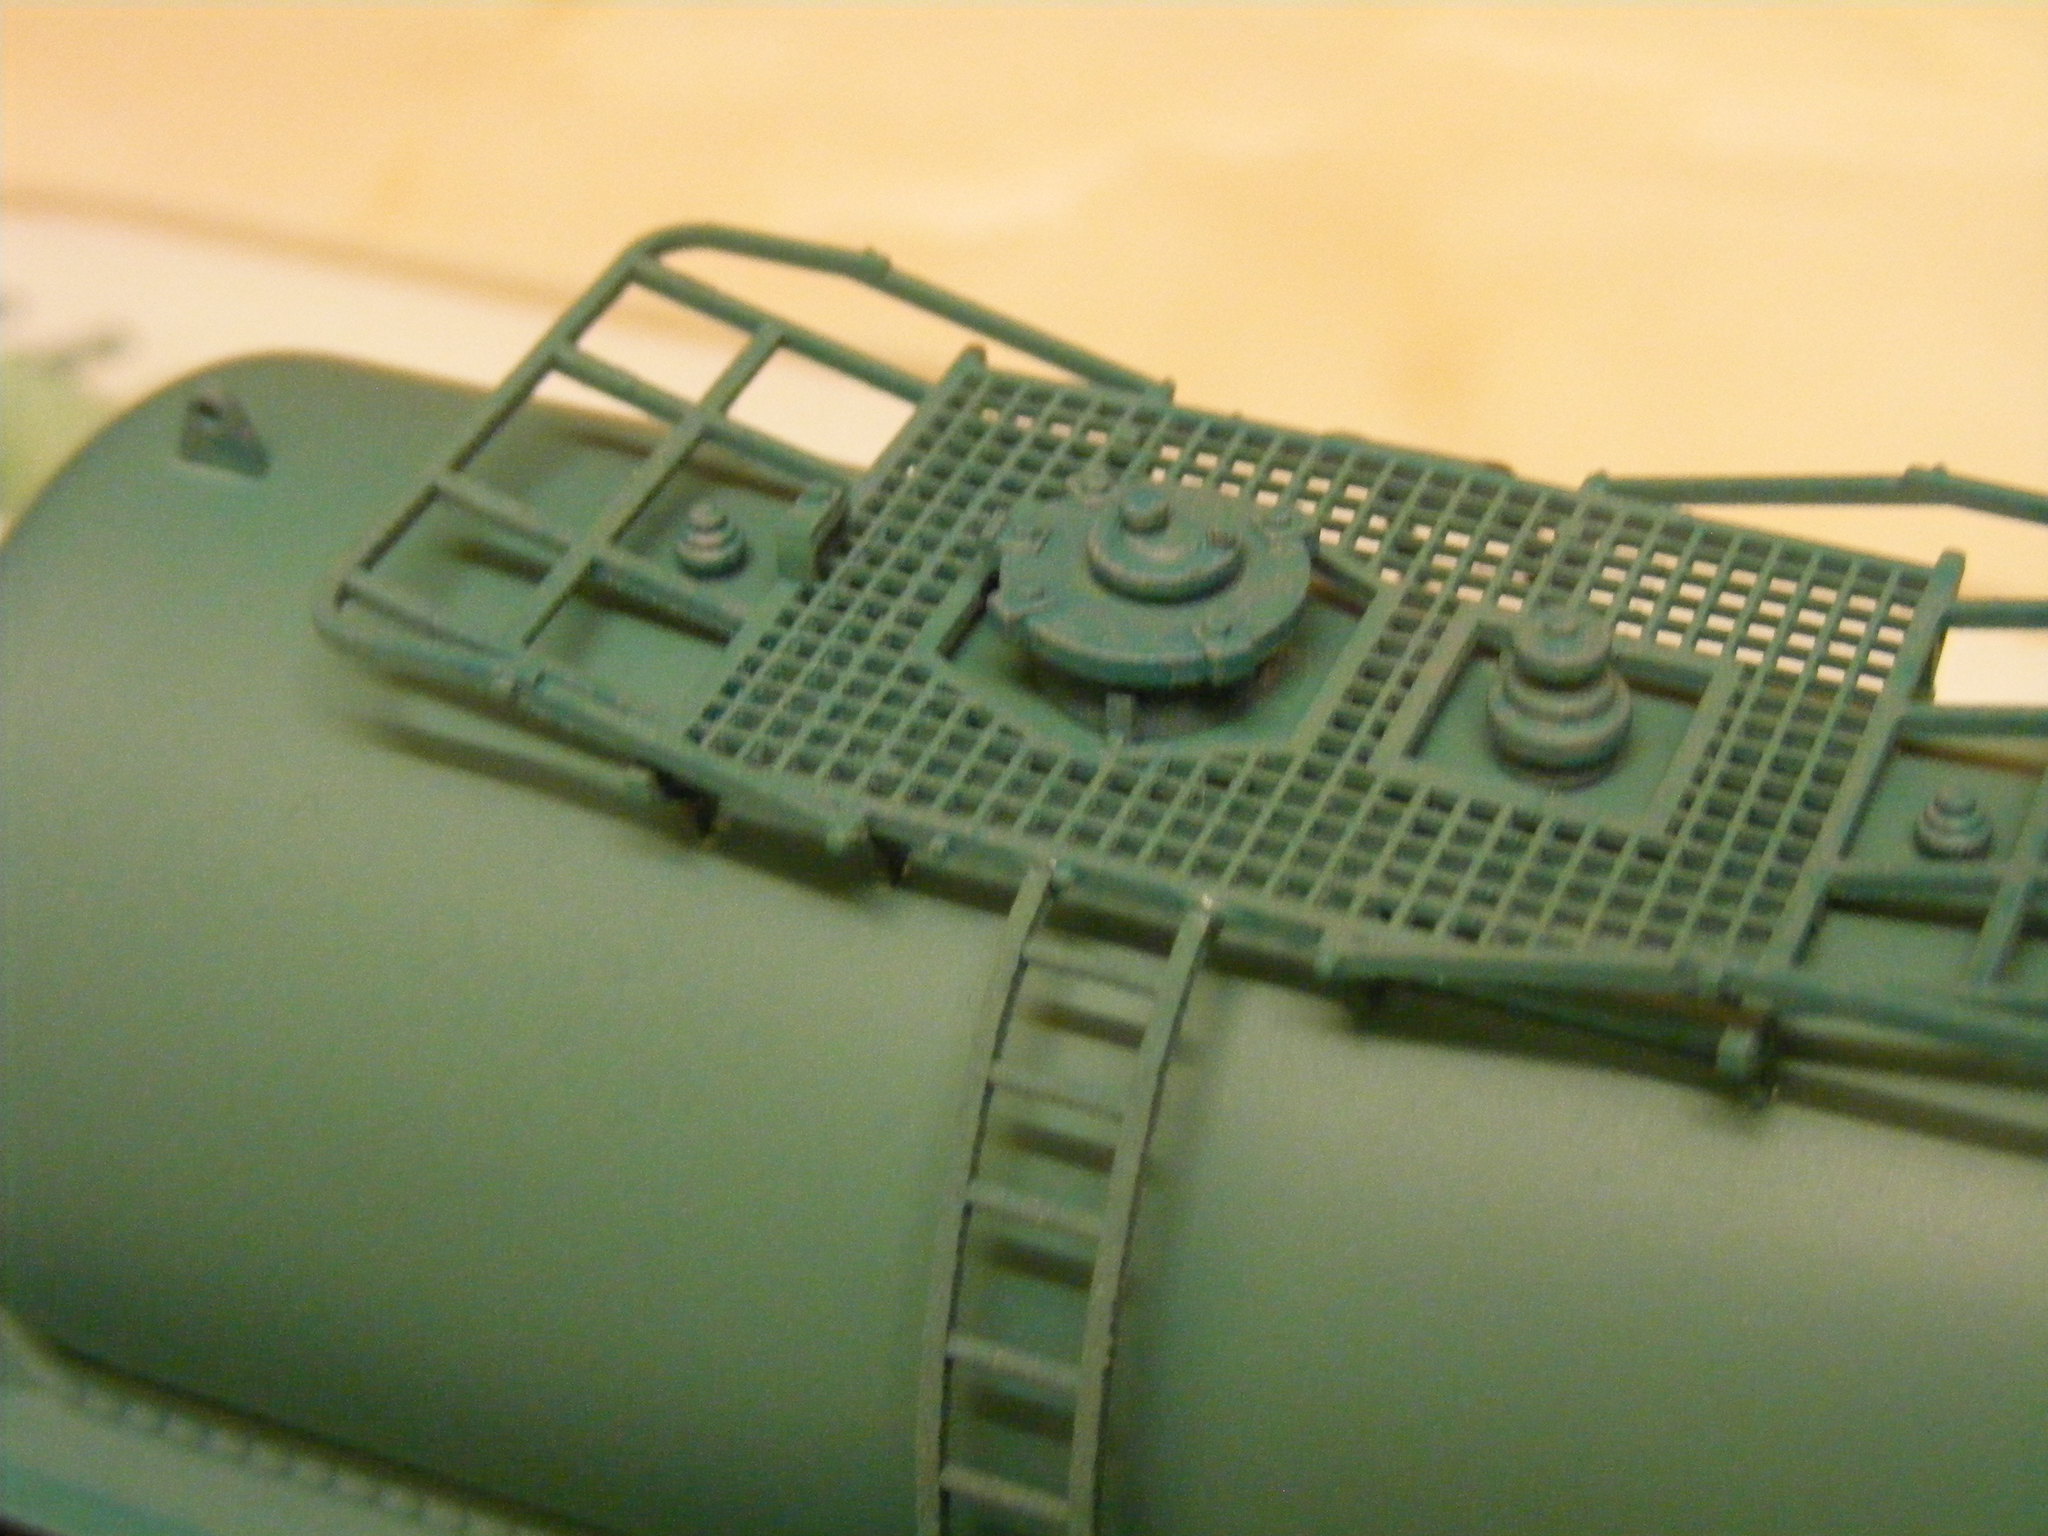 7mm TUB tank wagon by simon br blue, on Flickr
Next wagon is another tank that stalled waiting for transfers. At this stage it could still be finished in a couple of liveries but hopefully I can get some transfer for the Caustic Soda ICI tank. Like the TUB above its a WSF Chassis with a pipe barrel, cast resin ends (master printed in WSF) FUD walkway and hatches with WSF ladders.
7mm Caustic soda tank wagon by simon br blue, on Flickr 7mm Caustic soda tank wagon by simon br blue, on Flickr
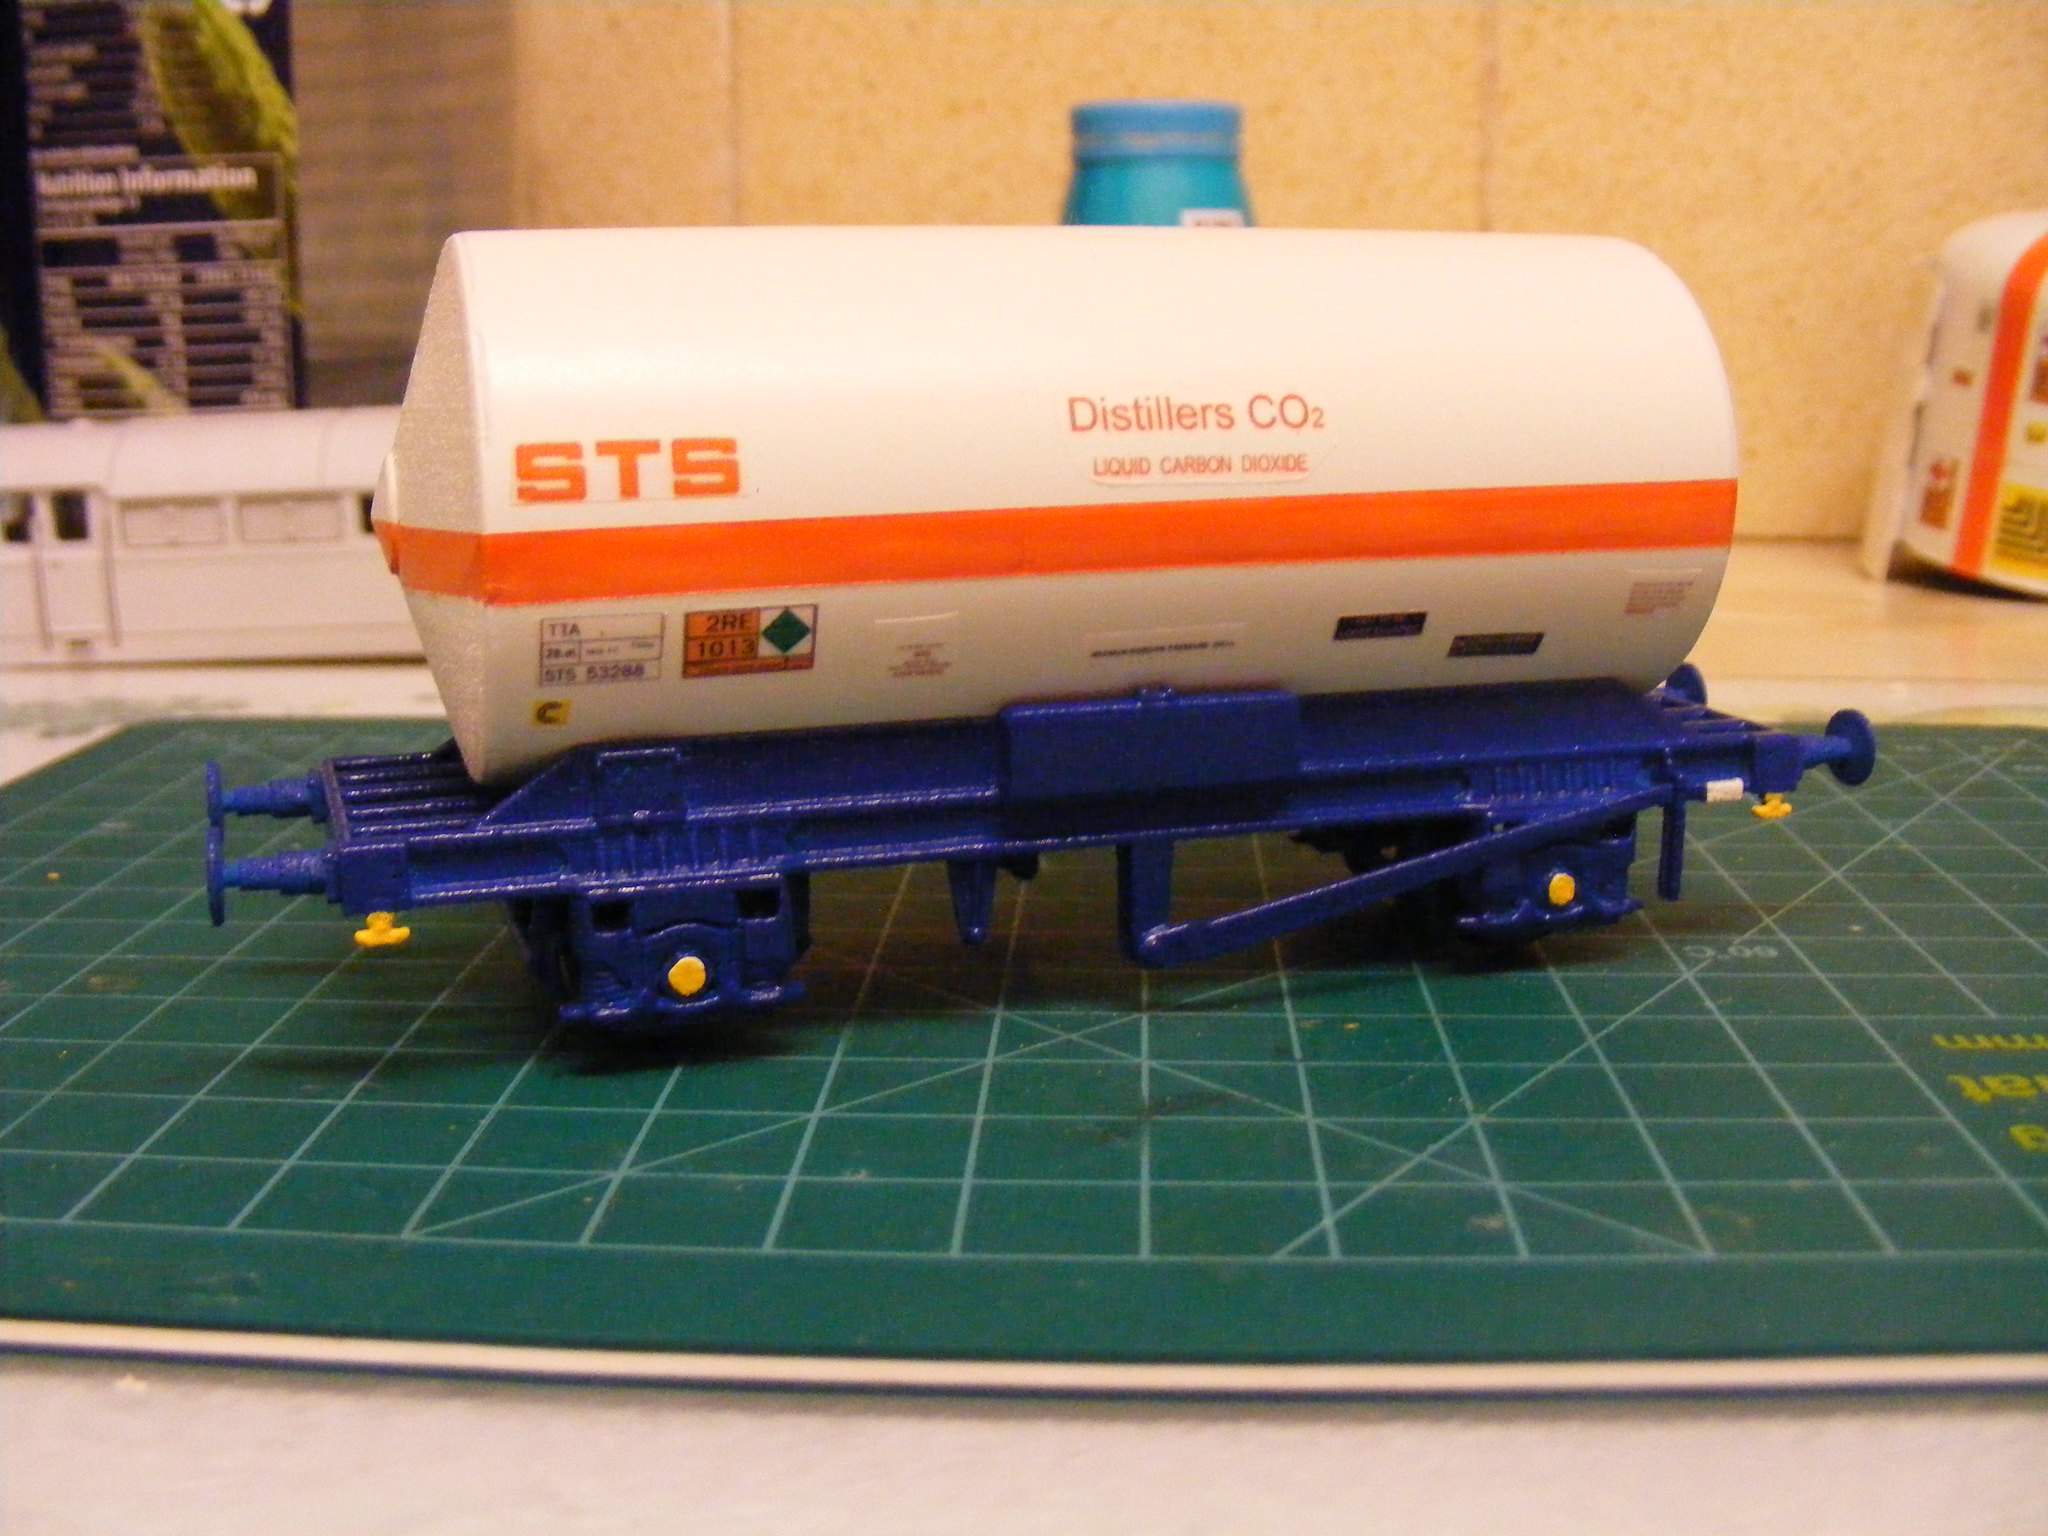
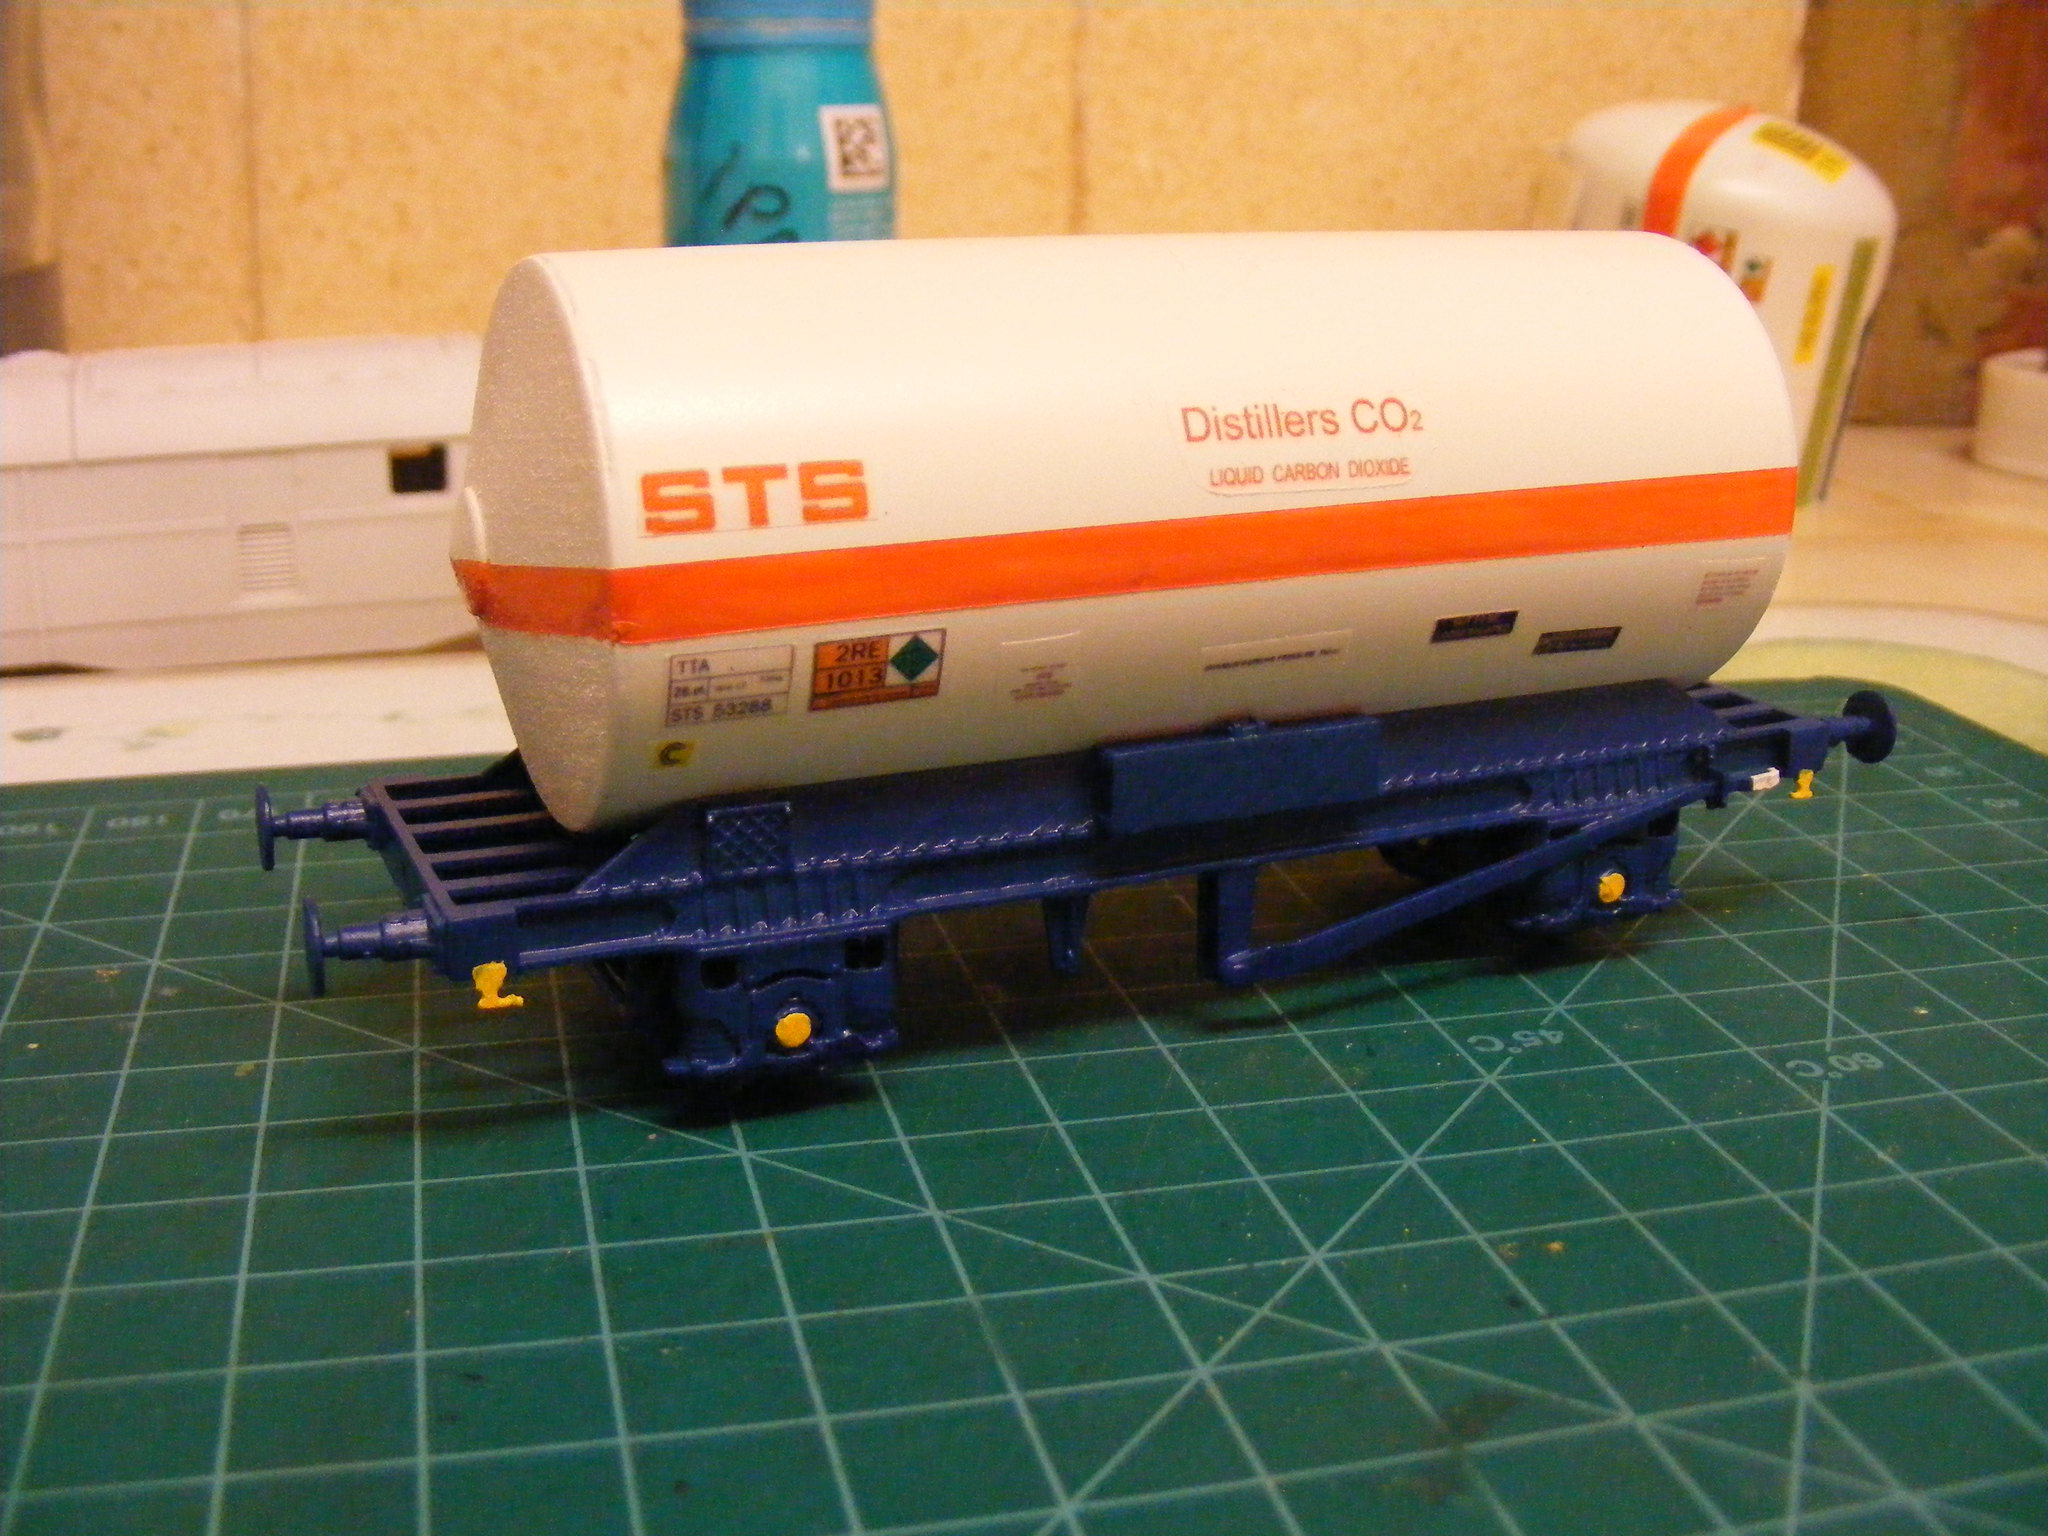
The last pictures are of the TTA Co2 tank wagon, this was completed previously but the pictures of this were lost when Photobucket changed it pricing structure. The only recent addition to this wagon is the document folder which was printed on the Form 2 in grey resin.
 7mm TTA Co2 tank wagon by simon br blue, on Flickr
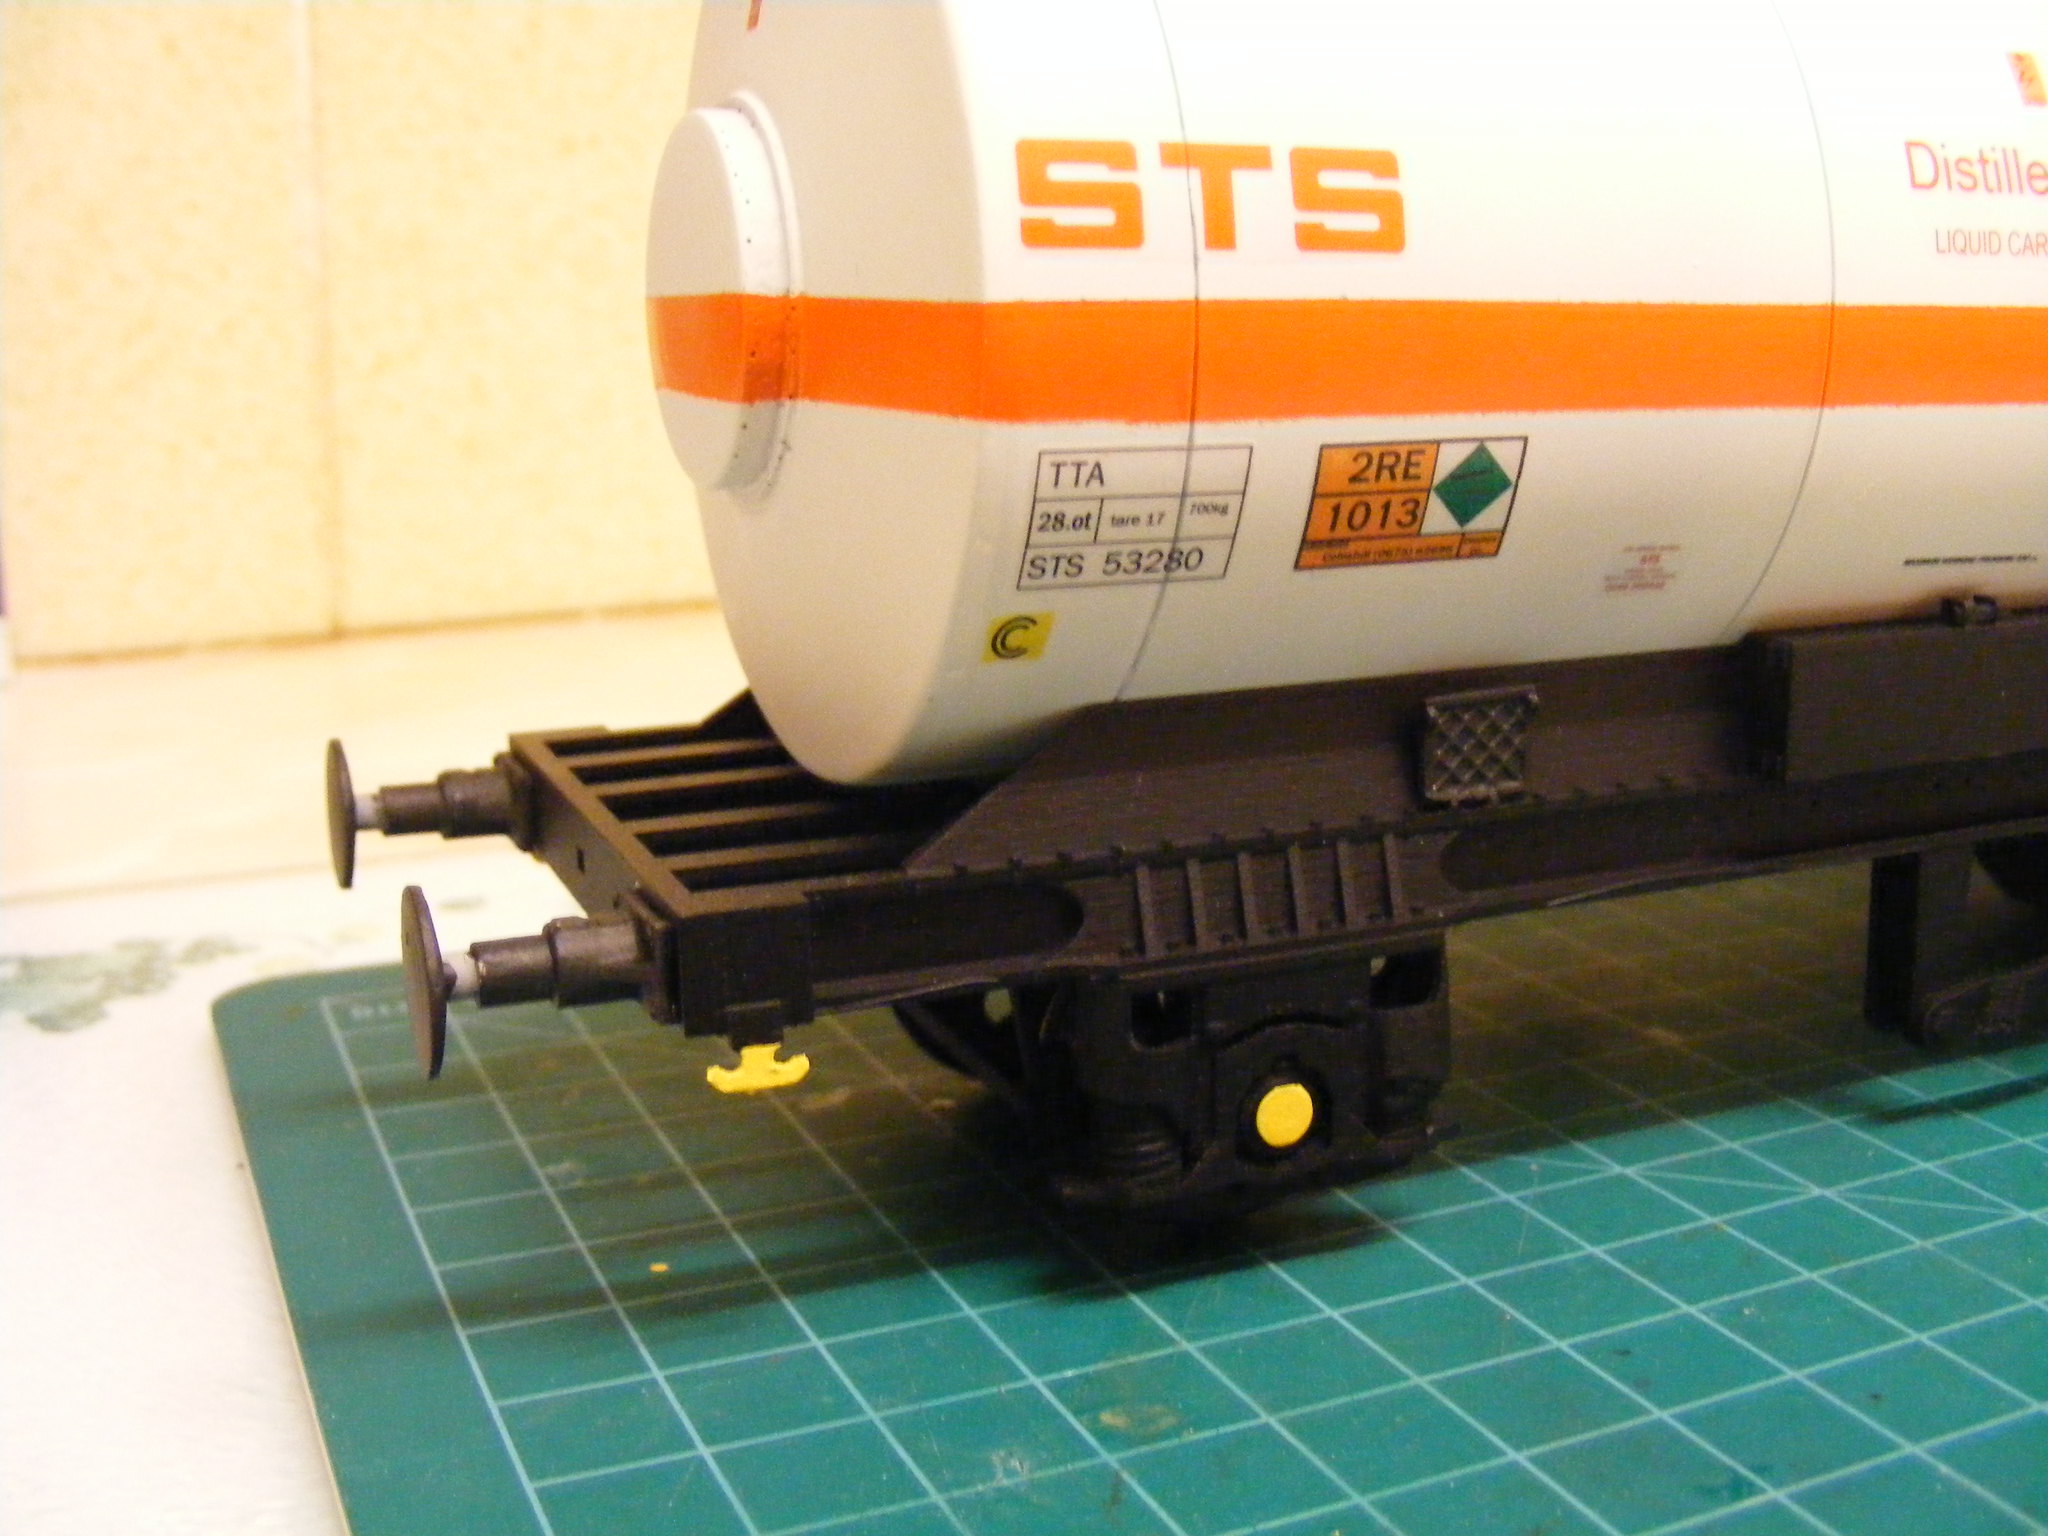 7mm TTA Co2 tank wagon by simon br blue, on Flickr
-
3
-
-
Them TTB Co2 wagons look great!
Will you be making them available to buy via shapeways ect as I'm highly interested?
Connor
Hi Connor,
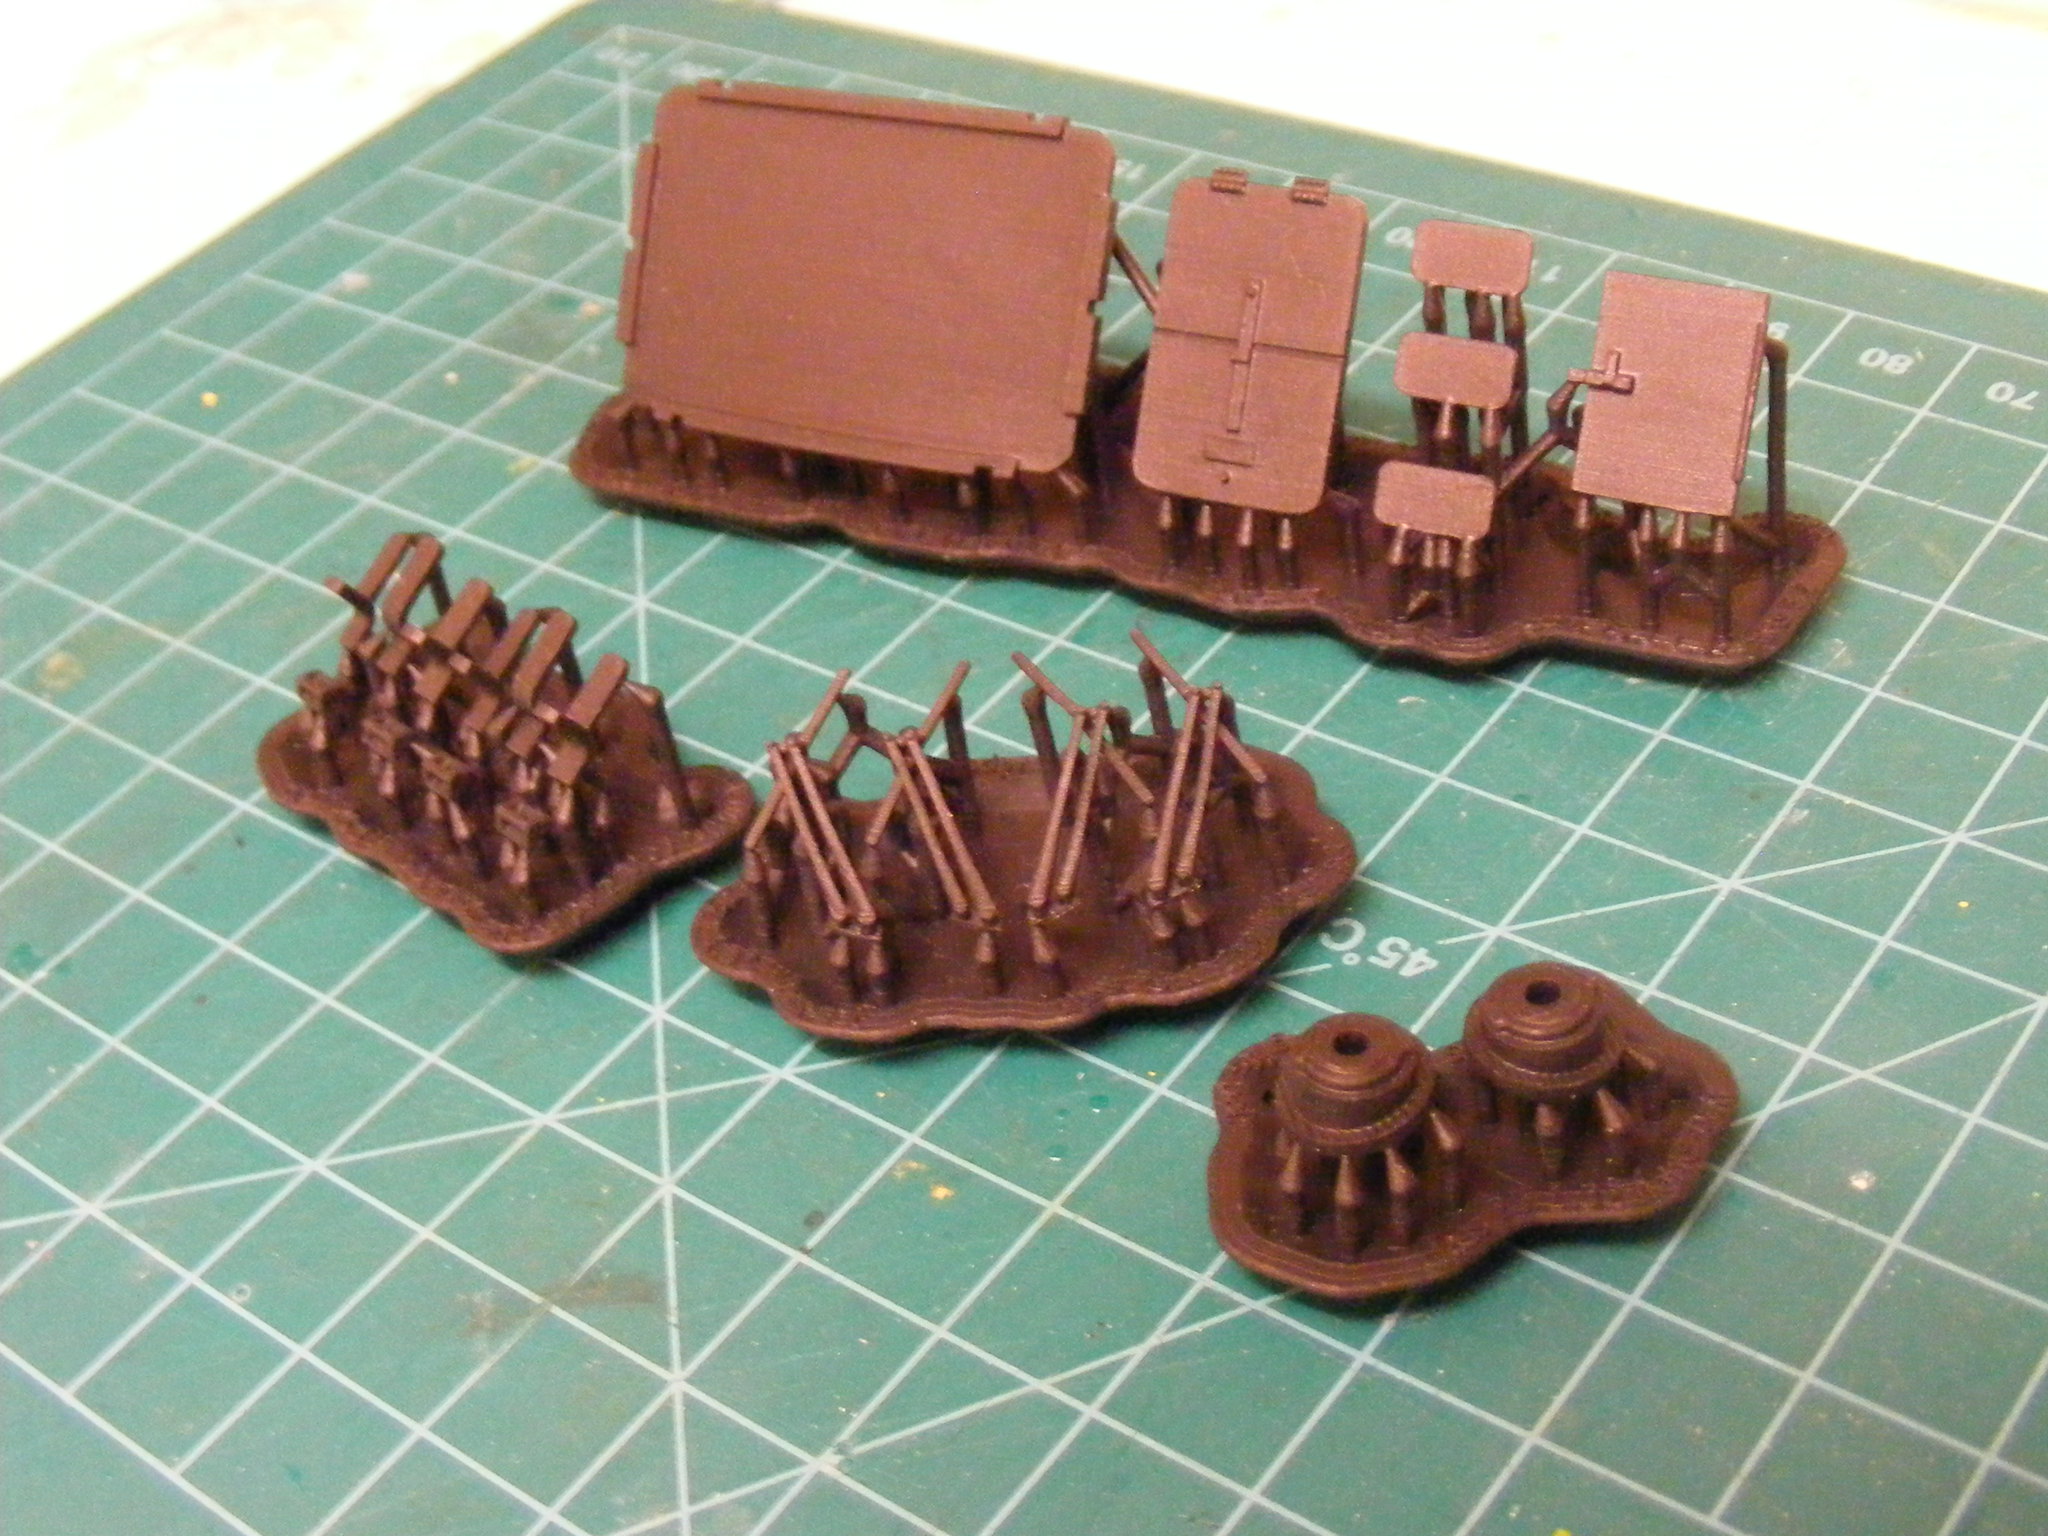
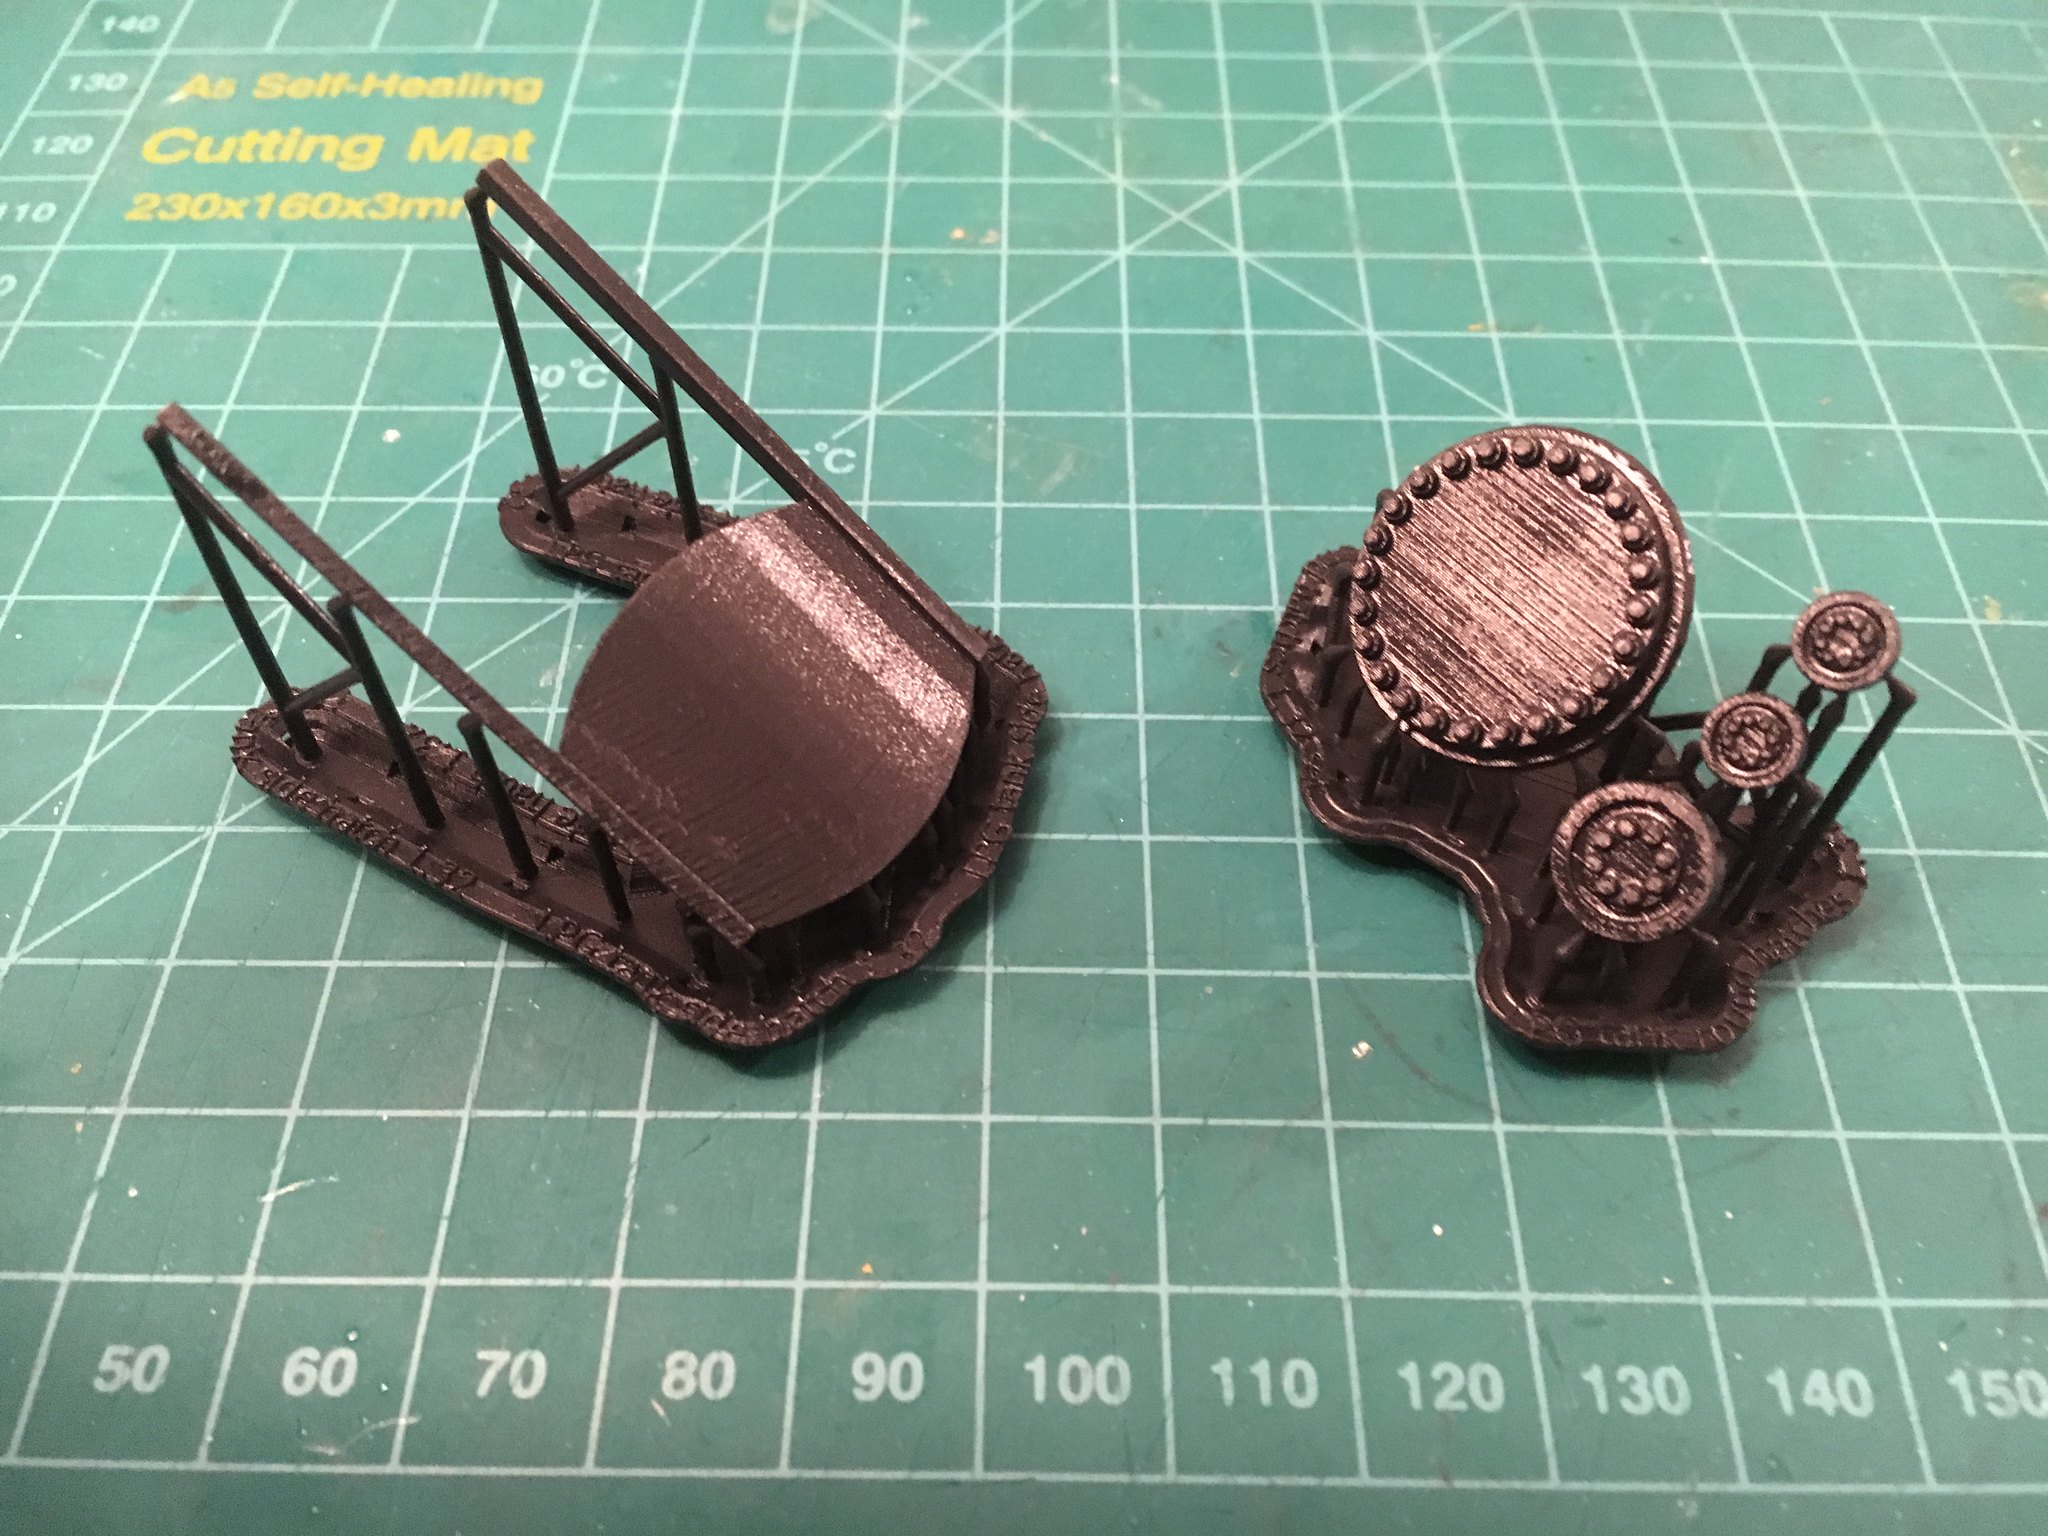
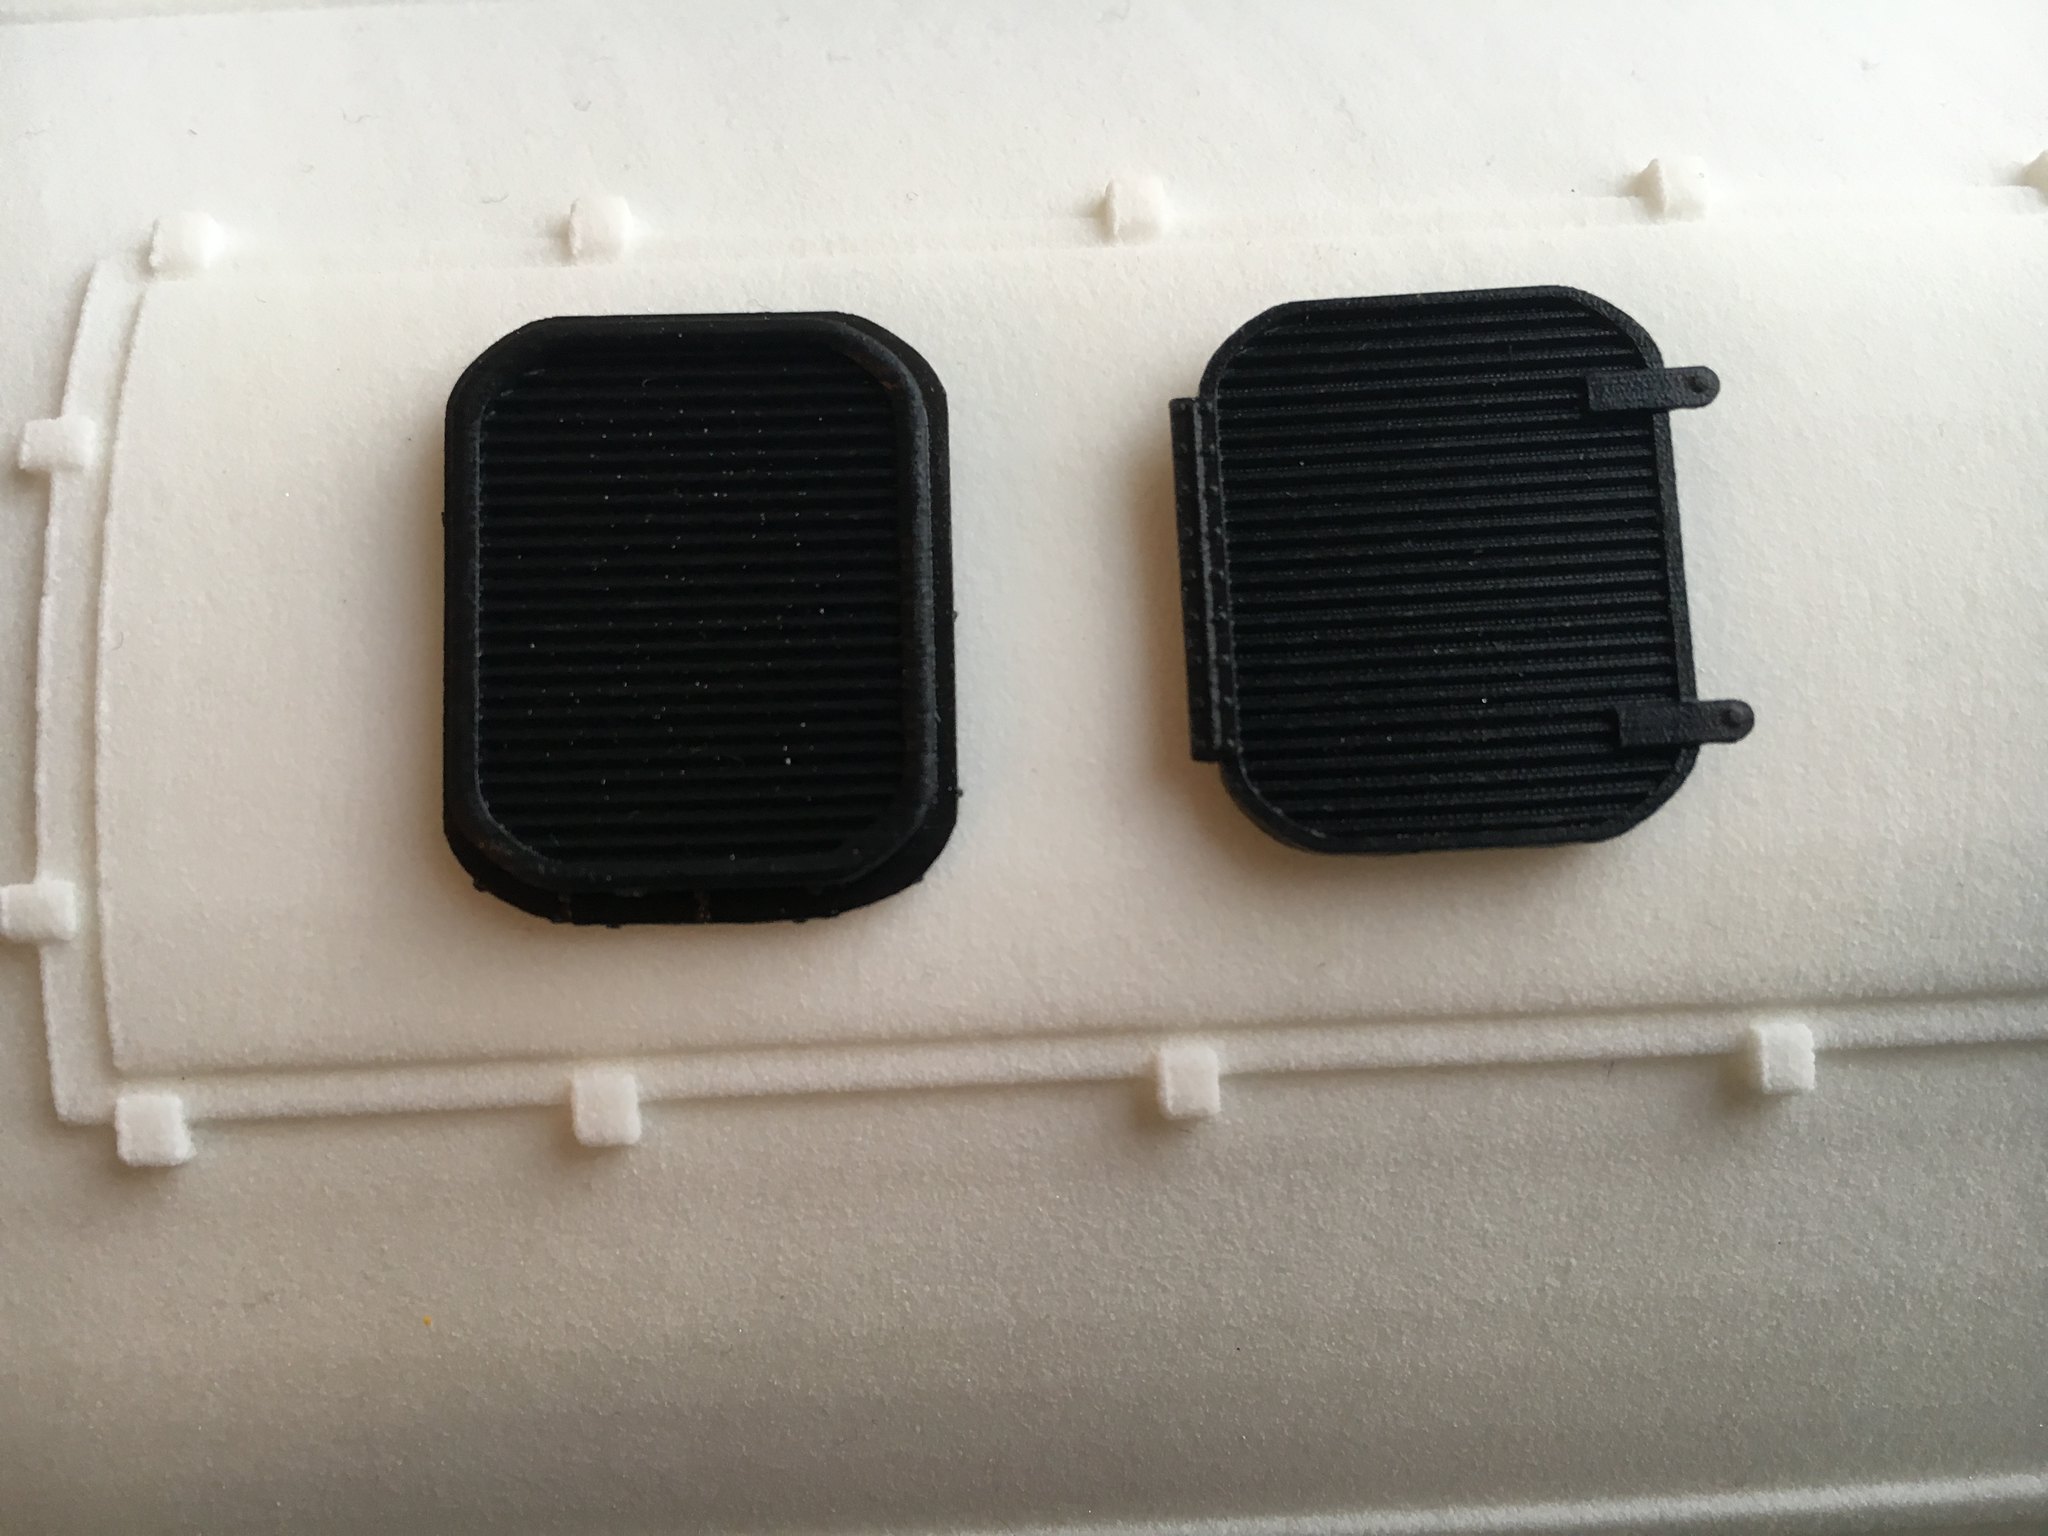
Yes I plan to make these available for sale either on Shapeways or printed on my own printer. I've attached some pictures below showing progress on the wagons, the Shapeways print is stronger but the surface finish isn't as good (as Shapeways no longer have the HDA material) and also would probably work out more expensive in the Professional plastic. The Form 2 print is smoother but requires a bit of time to remove the printing support material and is also more delicate as can be seen by the broken ferry anchor points on the model - these will either need to printed separately or done as a separate etched part. The tank ends were printed in WSF and look a bit grainy close up and would have benefitted from an extra coat of primer and sanding before applying the top coat.
The first picture shows the 2 chassis together, the front one is the Professional plastic with the Form 2 version behind.
 4mm TTA Co2 tank wagon chassis by simon br blue, on Flickr
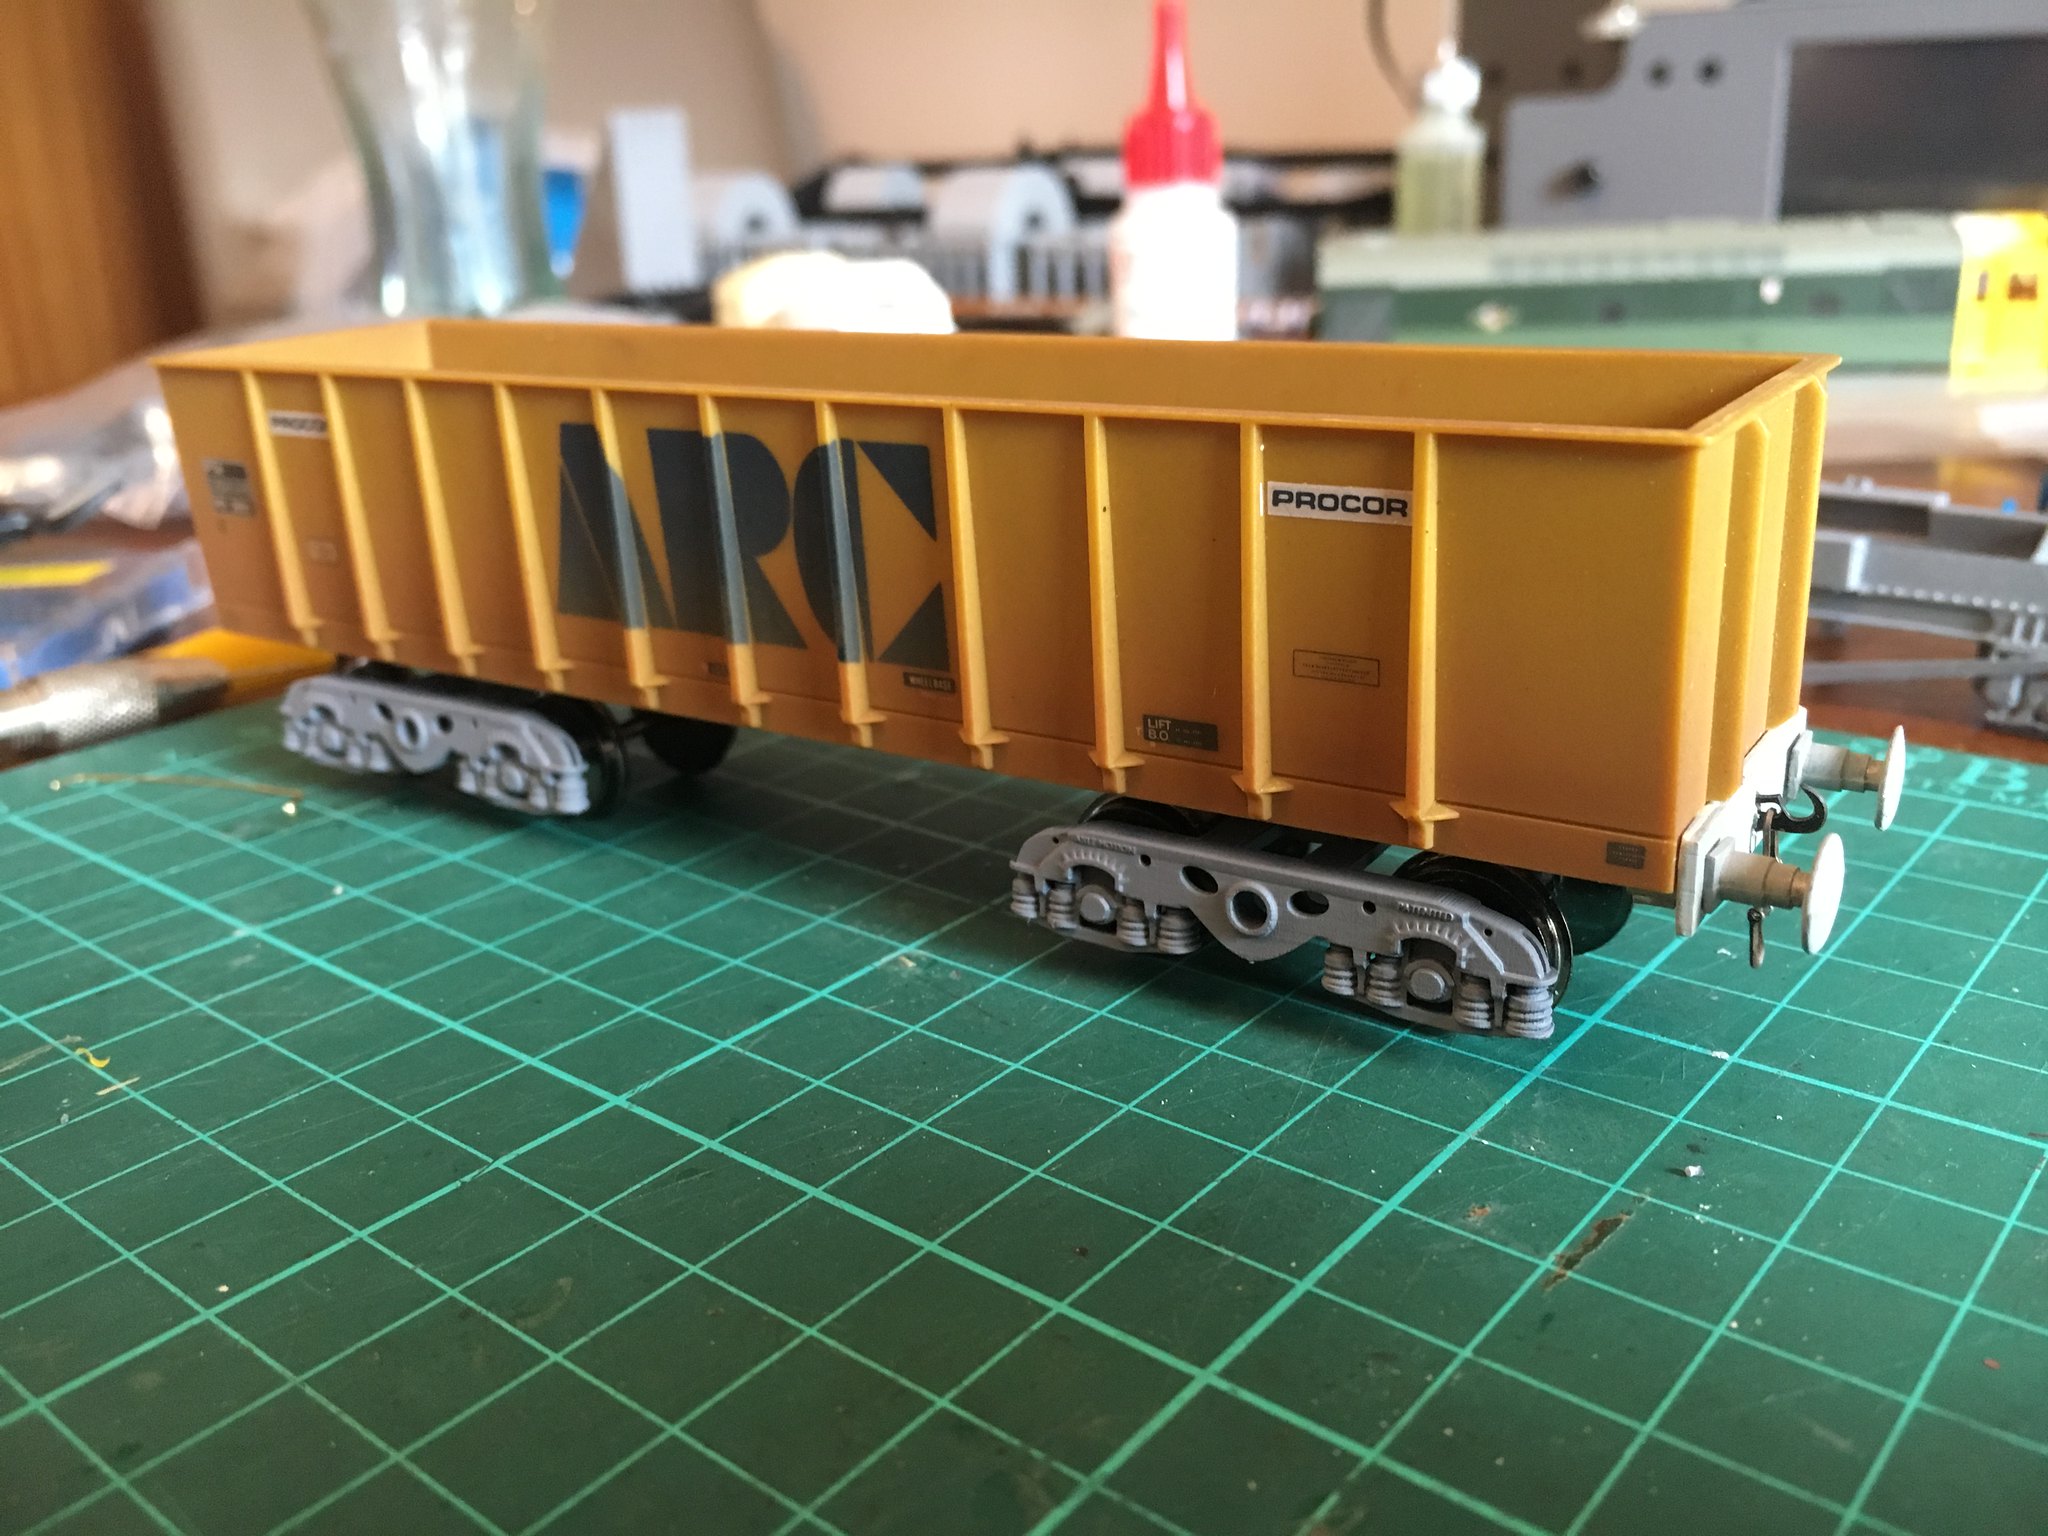
The 2nd picture shows the Professional plastic chassis with the tank positioned on top. The homemade transfers look a bit poor in this close up view but might look better after a coat of varnish and some weathering but hopefully I can get these made up by a professional printer.
 4mm TTA Co2 tank wagon by simon br blue, on Flickr
The 3rd photo shows the Form2 chassis with the same tank barrel positioned on top as a comparison.
 4mm TTA Co2 tank wagon by simon br blue, on Flickr
Might as well post some pictures of the other 4mm models that have progressed in this post. The next 2 models were printed a while ago but I didn't complete these as I was procrastinating over how to glaze them, they still not glazed but now have been painted and had transfers added. The Loadall now has a bucket (held on with Blutack in the photo) This was painted white and then brush pained yellow (Humbrol acrylic warning yellow).
4mm JCB loadall by simon br blue, on Flickr4mm JCB loadall by simon br blue, on FlickrThe shunting tractor was printed in Professional plastic (back when it was a trial material HPSF) this was primed in grey and then hand painted in the same Humbrol warning yellow to give a less bright colour. The transfer are homemade the same as the Loadall, the warning stripes shrunk slightly when applied and don't reach the sides. The tyres were painted in 2 different rubber colours and looks ok. The 3rd photo shows the tractor positioned in a common pose behind the Grain wagon purchased at Warley with extra weathering by TMC.
4mm Shunting tractor by simon br blue, on Flickr4mm Shunting tractor by simon br blue, on Flickr4mm Shunting tractor by simon br blue, on Flickr-
3
-
-
Good to see 25 making progress - any more thoughts on the 1/32 version or the class 20 ?
Robert
Hi Robert,
I'm still making progress with the 1/32 class 25 and am currently still printing the smaller details ready to start the building process (hopefully I'll get time to do this over Christmas) if this goes well I'll make it available for sale on Shapeways. Below is a picture of the most recent parts that I've drawn and printed for the 25.
 1/32 class 25.1 details by simon br blue, on Flickr
 -
A bit of a 4mm update tonight.
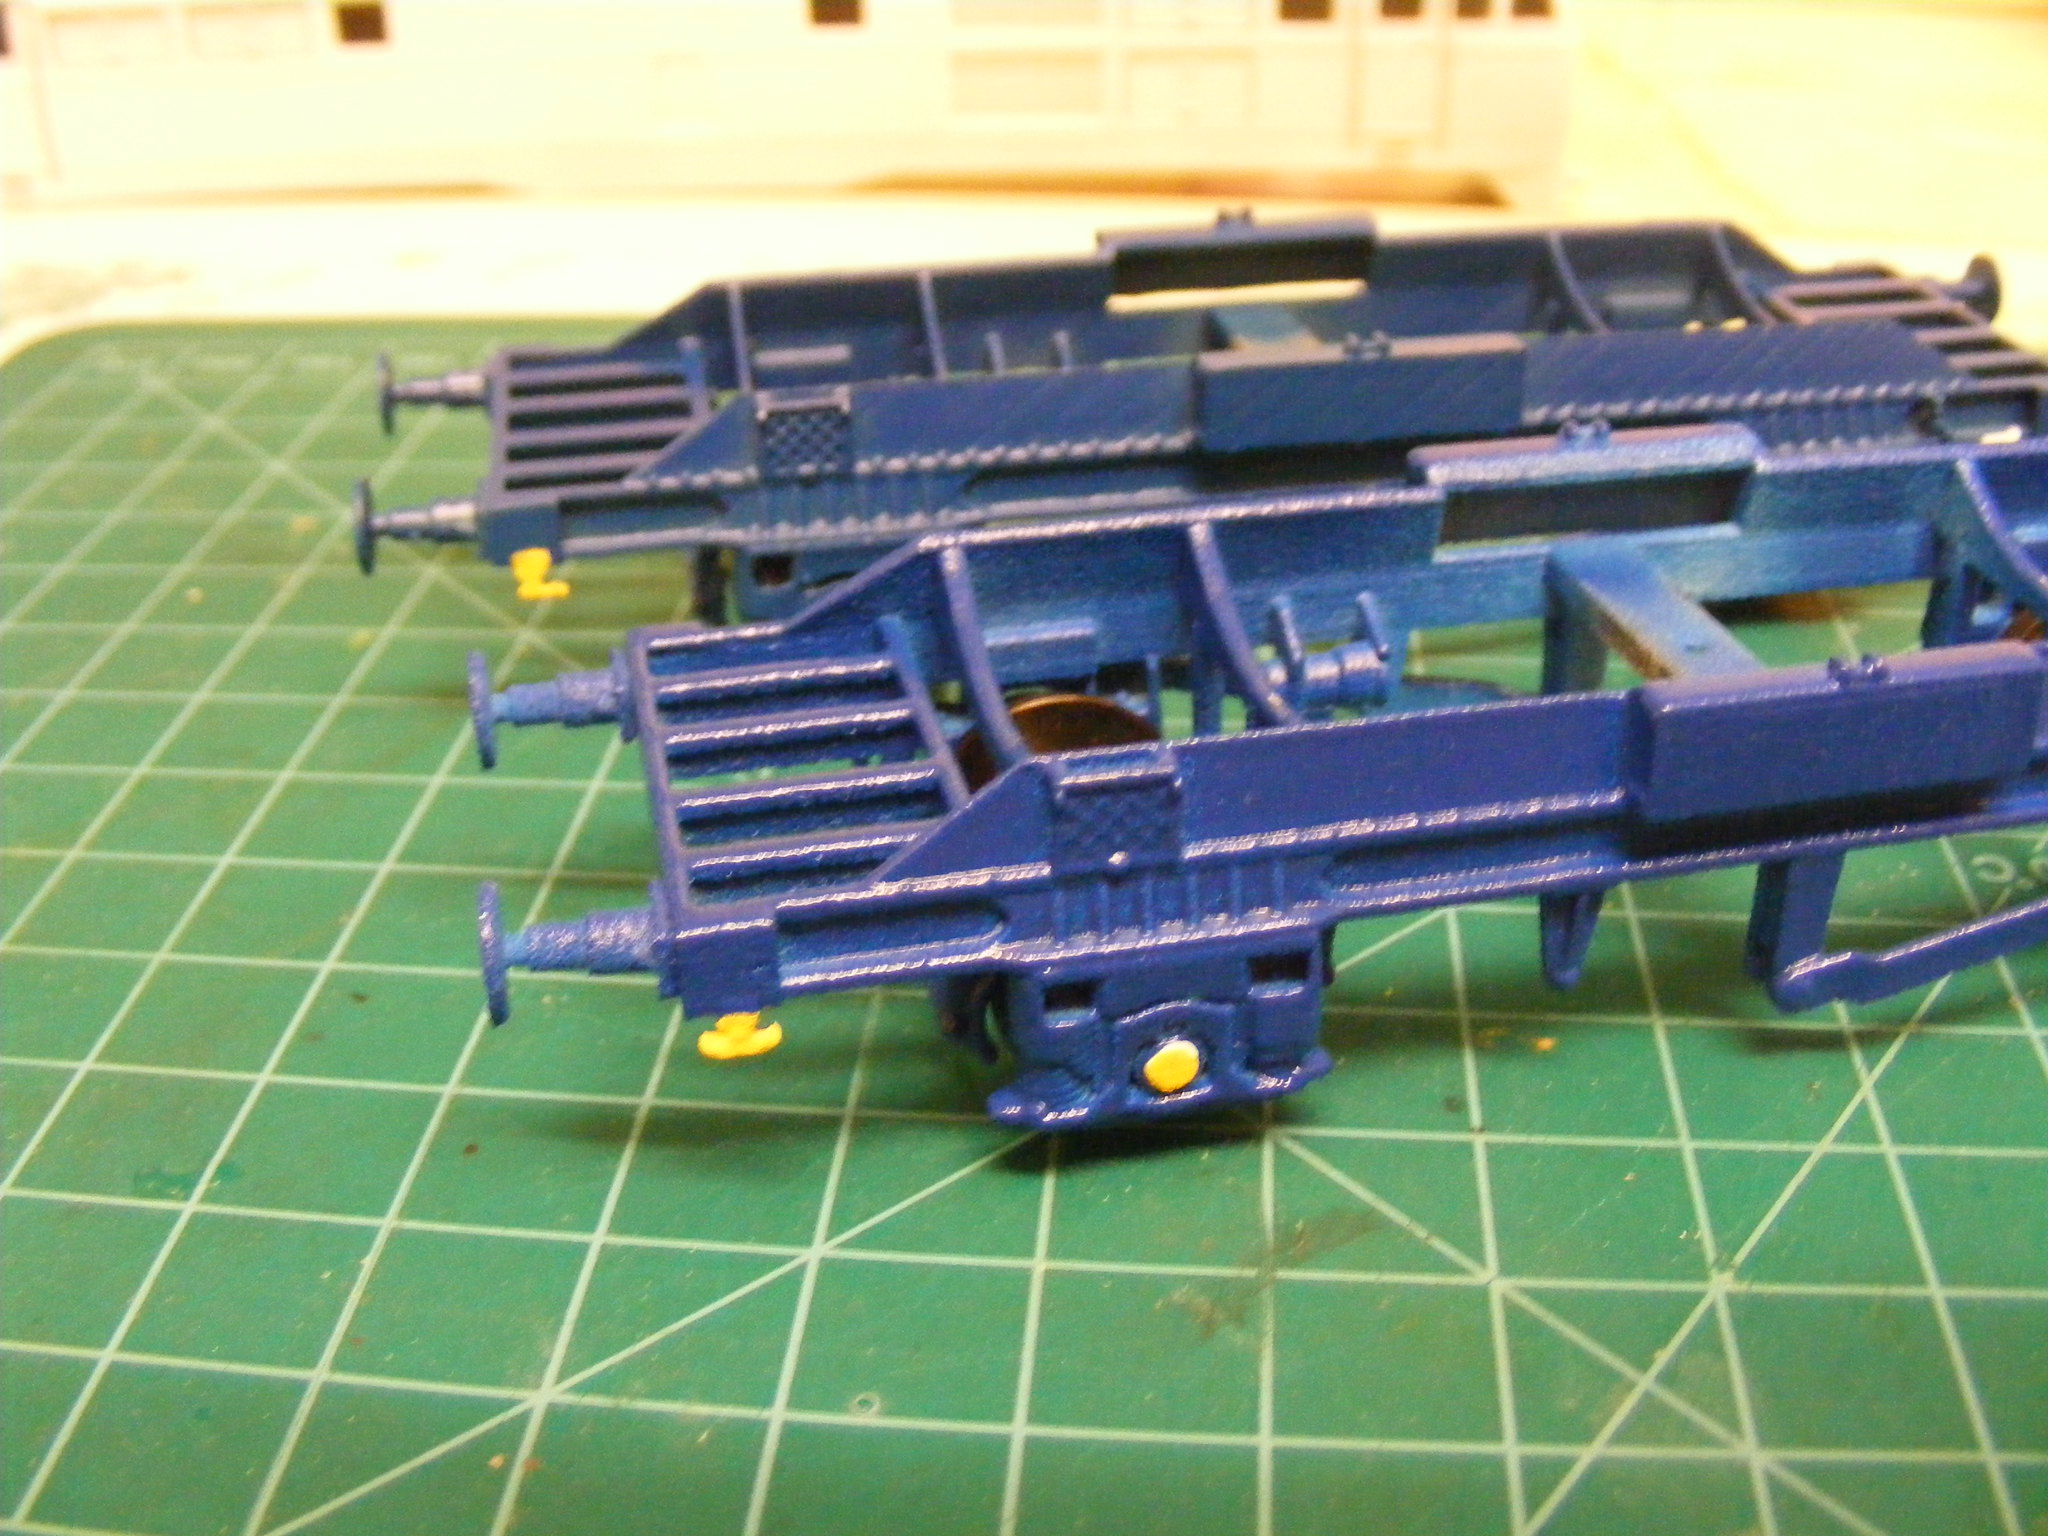
Firstly the TTB Co2 tank, the first picture shows a chassis printed on the Form 2, its been primed and the print lines can be made out showing the layering at 30 degrees. The buffers were printed in WSF. One area I need to thicken up are the ferry anchor points as some were broken off when removing the support material.
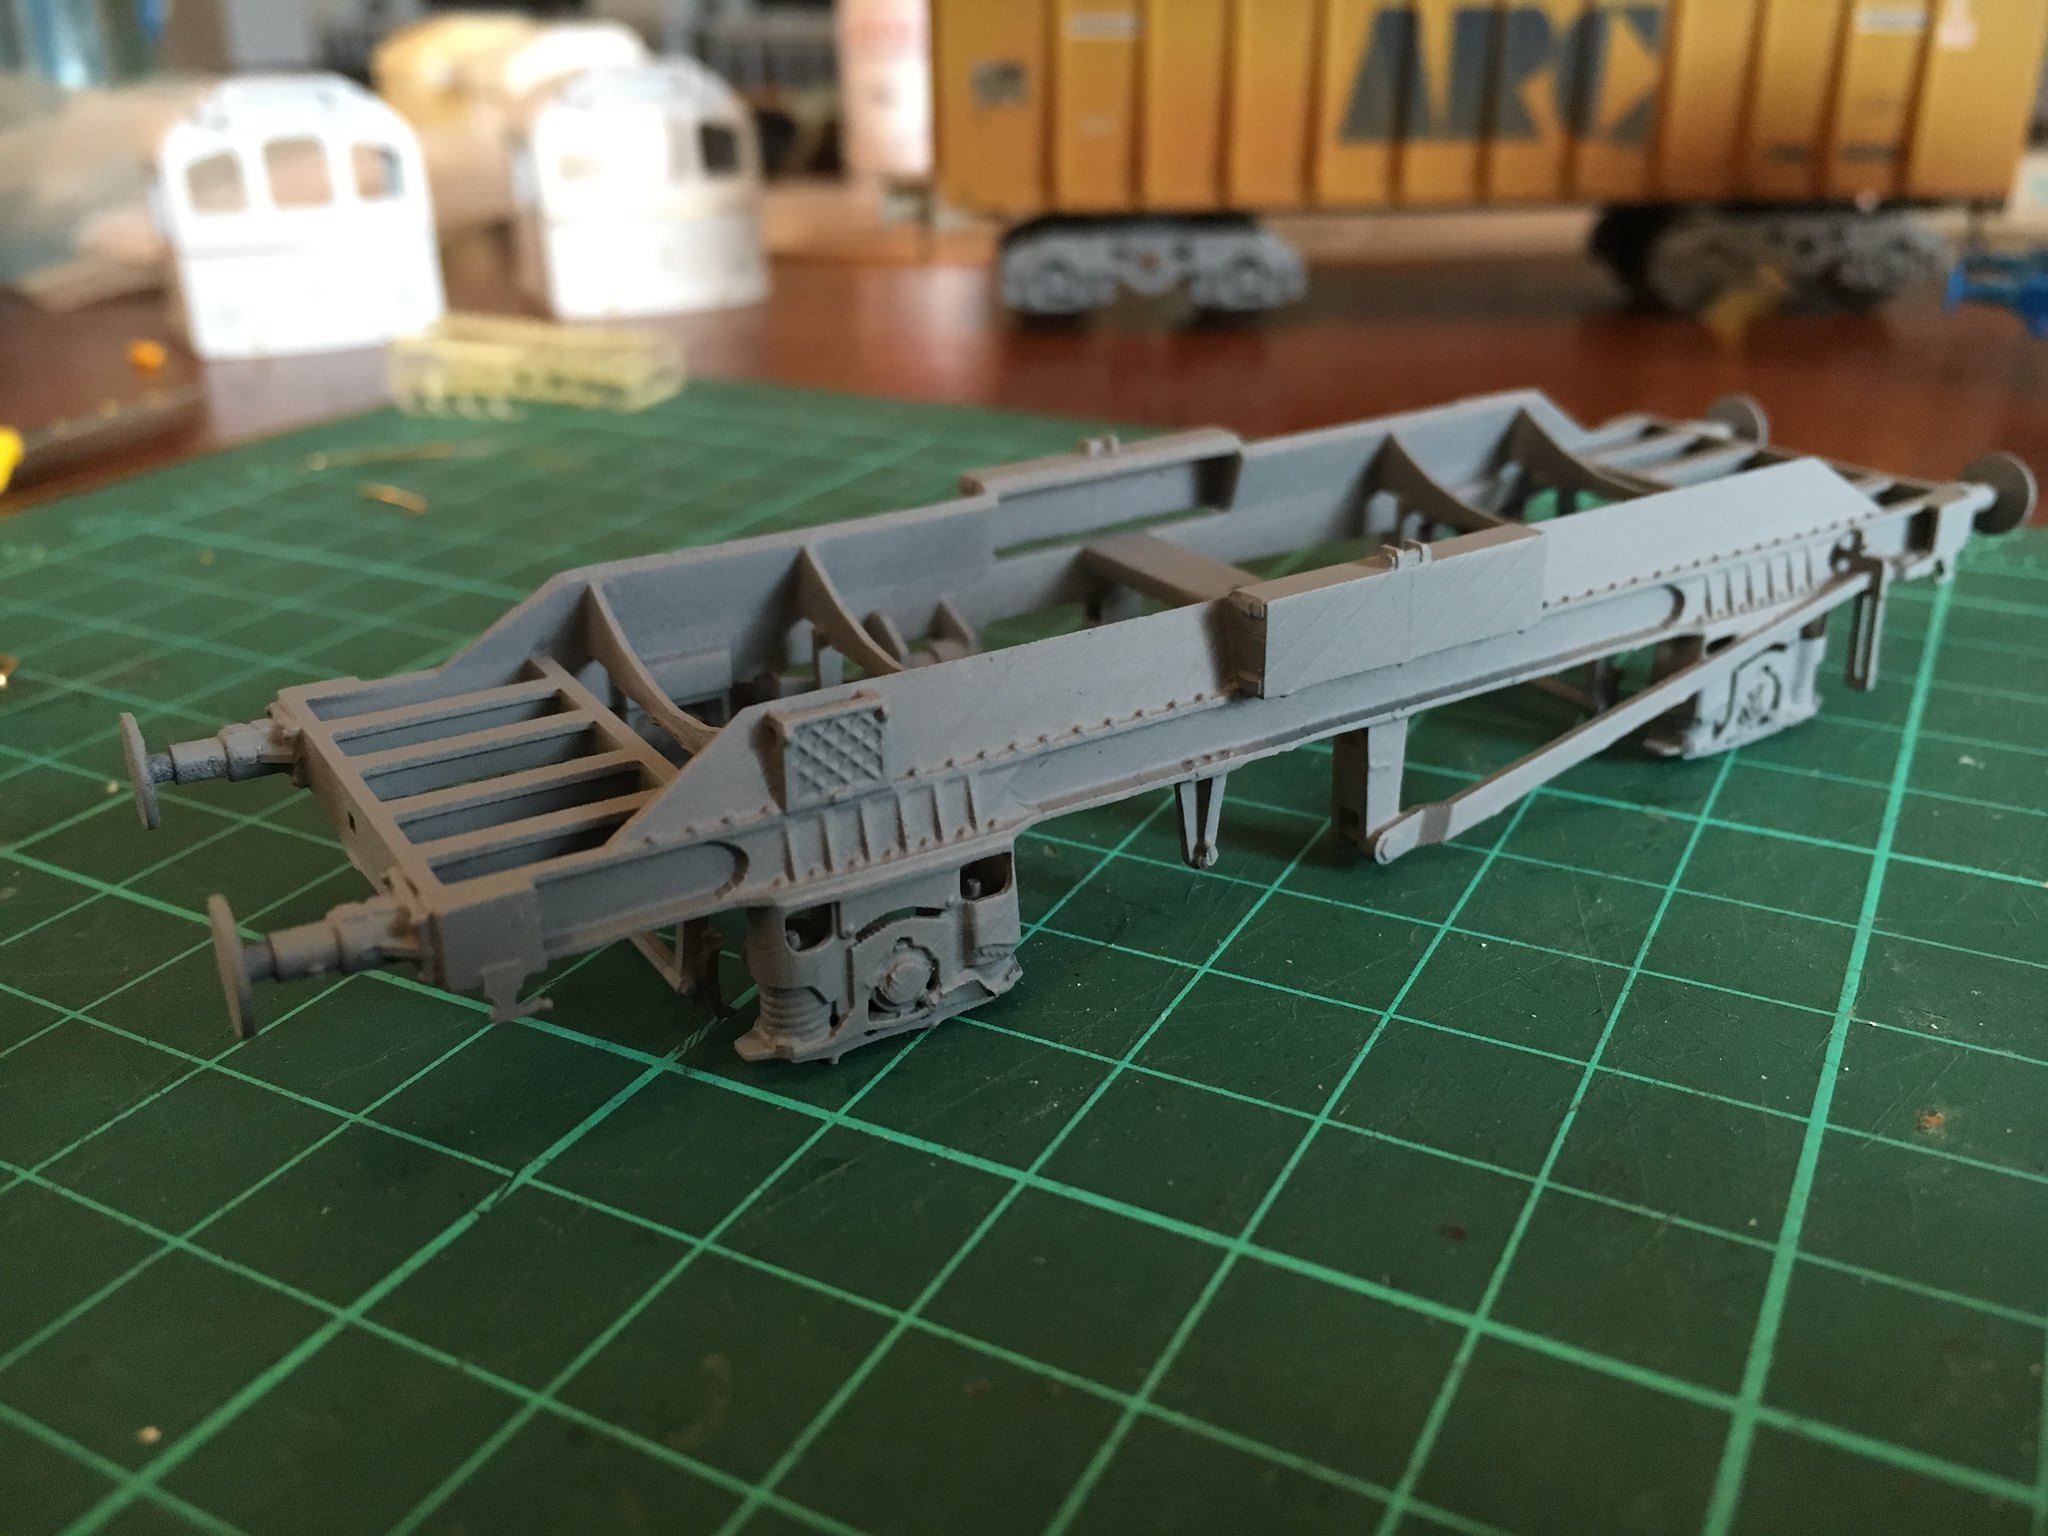 4mm TTB Co2 tank chassis by simon br blue, on Flickr
The next photo shows the same TTB Chassis printed by Shapeways in Grey professional plastic, this has been primed and then given a first coat of blue. As can been seen close up the surface is rougher than the Form 2 but better than Shapeways WSF material but sadly also about double the cost.
 4mm TTB Co2 tank by simon br blue, on Flickr
The next wagon is the Tullis Russell PAA wagon. This has also had a coat of paint (Rover Tahiti Blue on top of the white primer). Visible in this close view up are some dimples from the support material. What can also be seen behind the hopper is the lid which I broke when attempting to fit it on after painting. I'll print a slightly longer an stronger version to replace it.
 4mm Tullis Russell PAA by simon br blue, on Flickr
Last item for this update is the 4mm class 25.3 cab. This was put on the back burner waiting for the SLW 25 to make its appearance. The recent announcement of a Heljan version and updated Bachmann version has made me start work again with some actual modelling. The pictures below show painted cabs that were printed on the Form 2 in black resin. The lamp irons and headboard clips are FUD. Looking at the options I think the Form 2 will be the way forward for printing the cabs. HDA from Shapeways would have been a good option but the material is no more.
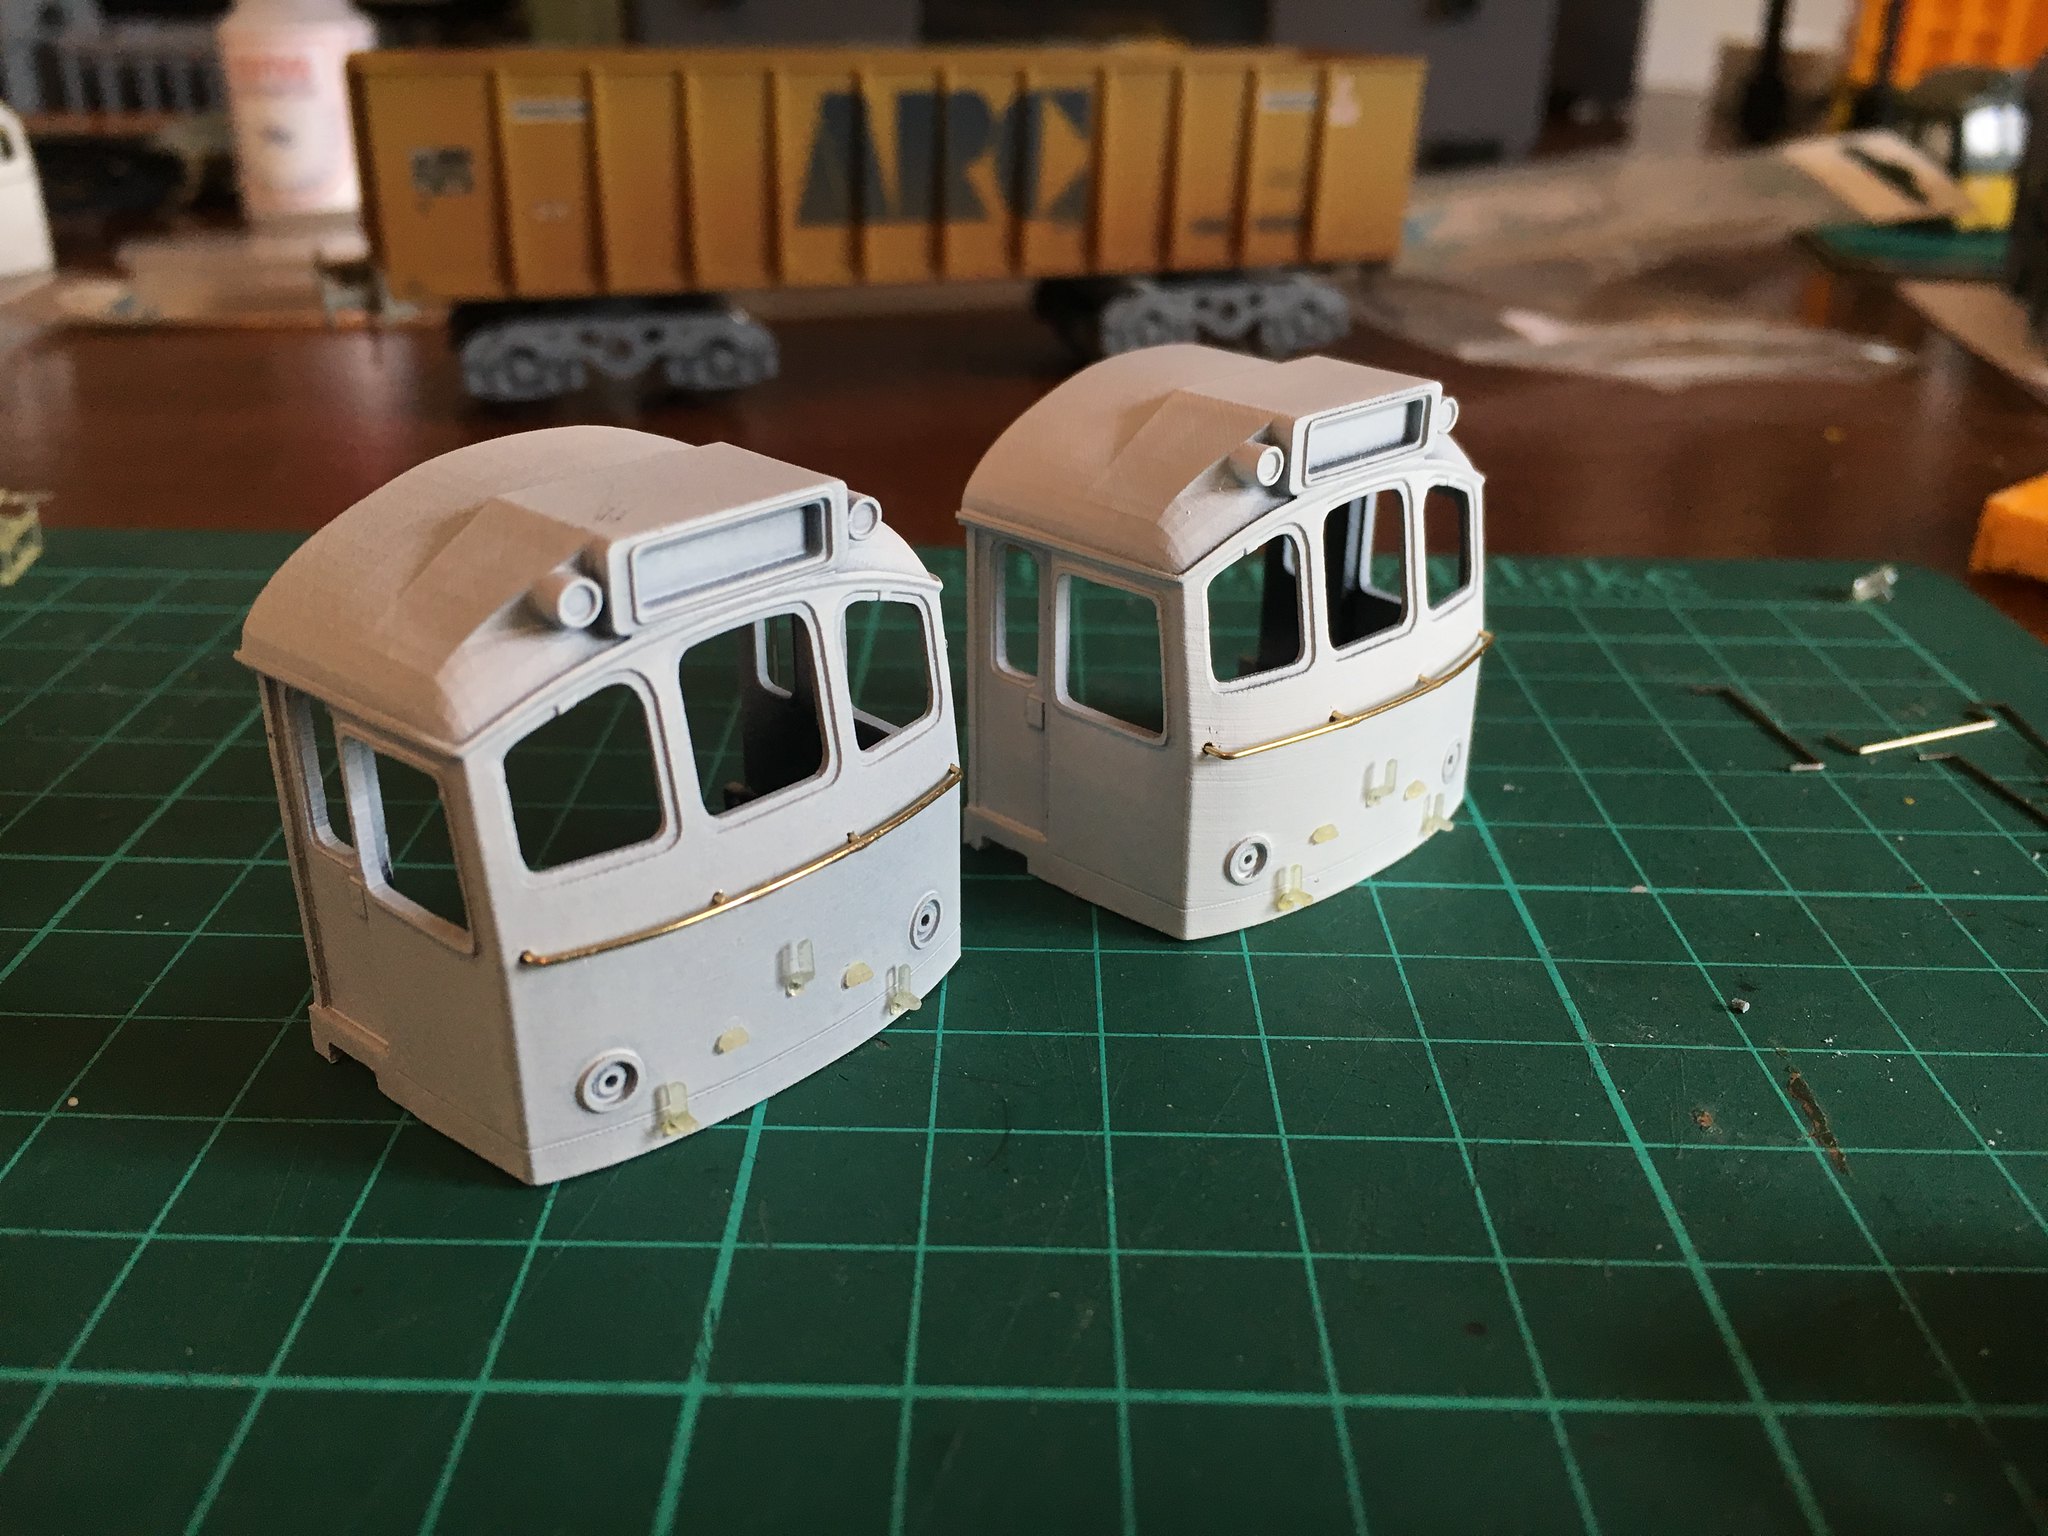 4mm 25.3 cabs by simon br blue, on Flickr
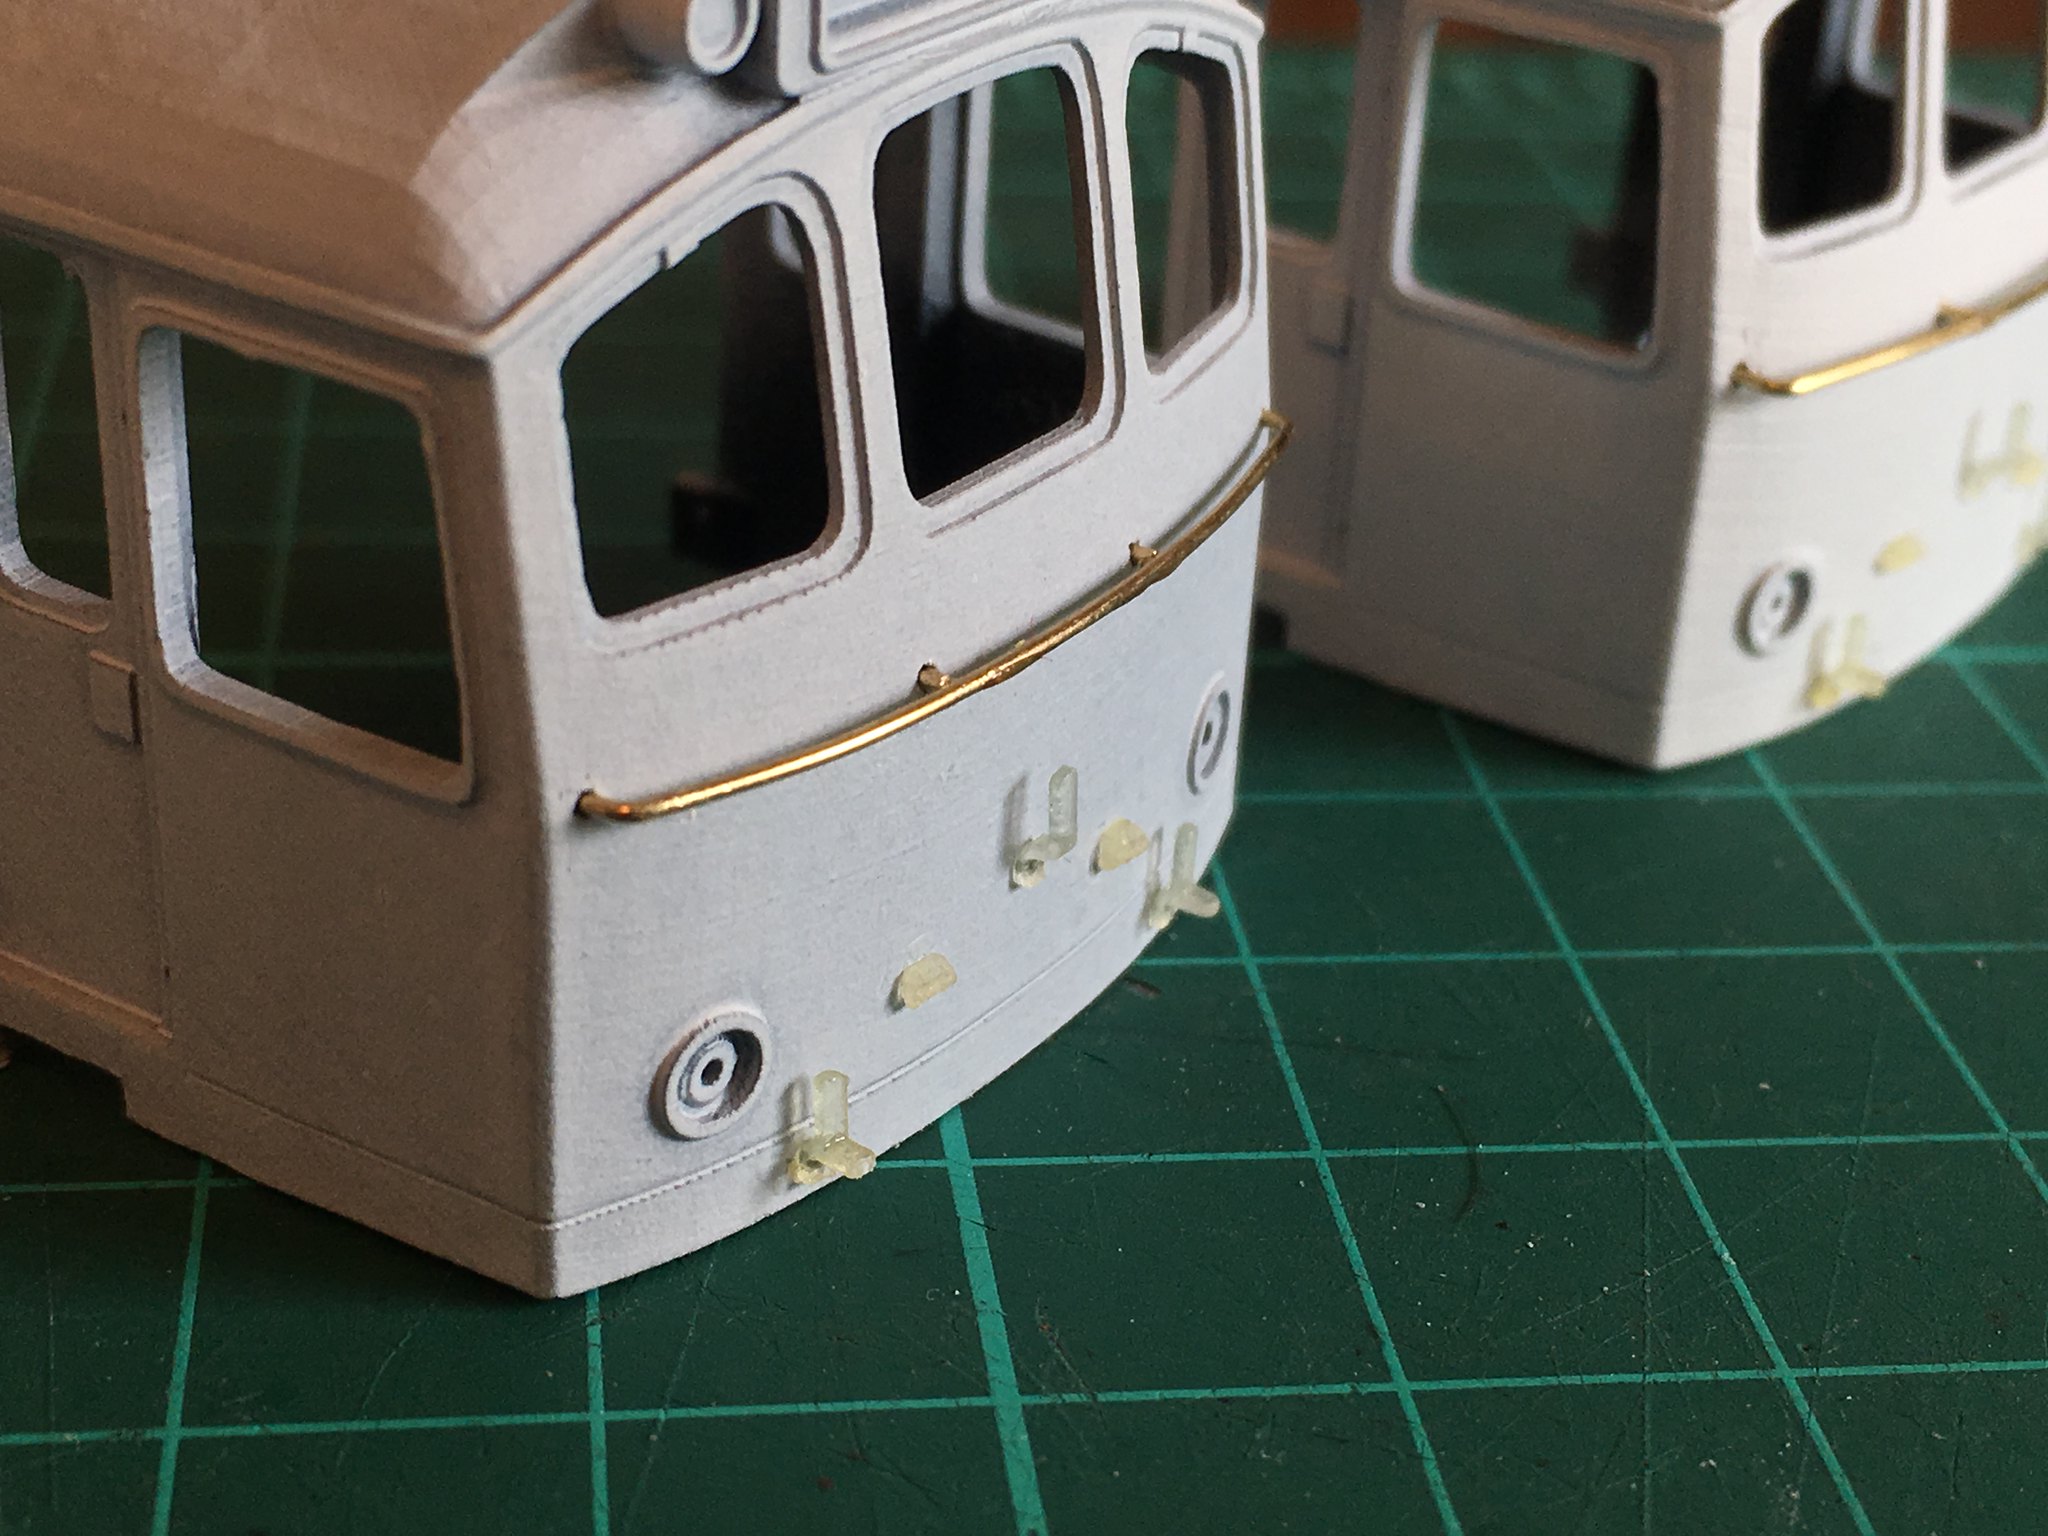 4mm 25.3 cab detail by simon br blue, on Flickr
The last photo shows the cabs attached to the Bachmann bodyshell, hopefully I'll get it painted this weekend if the weather is good. The next stage will be to get some windows made.
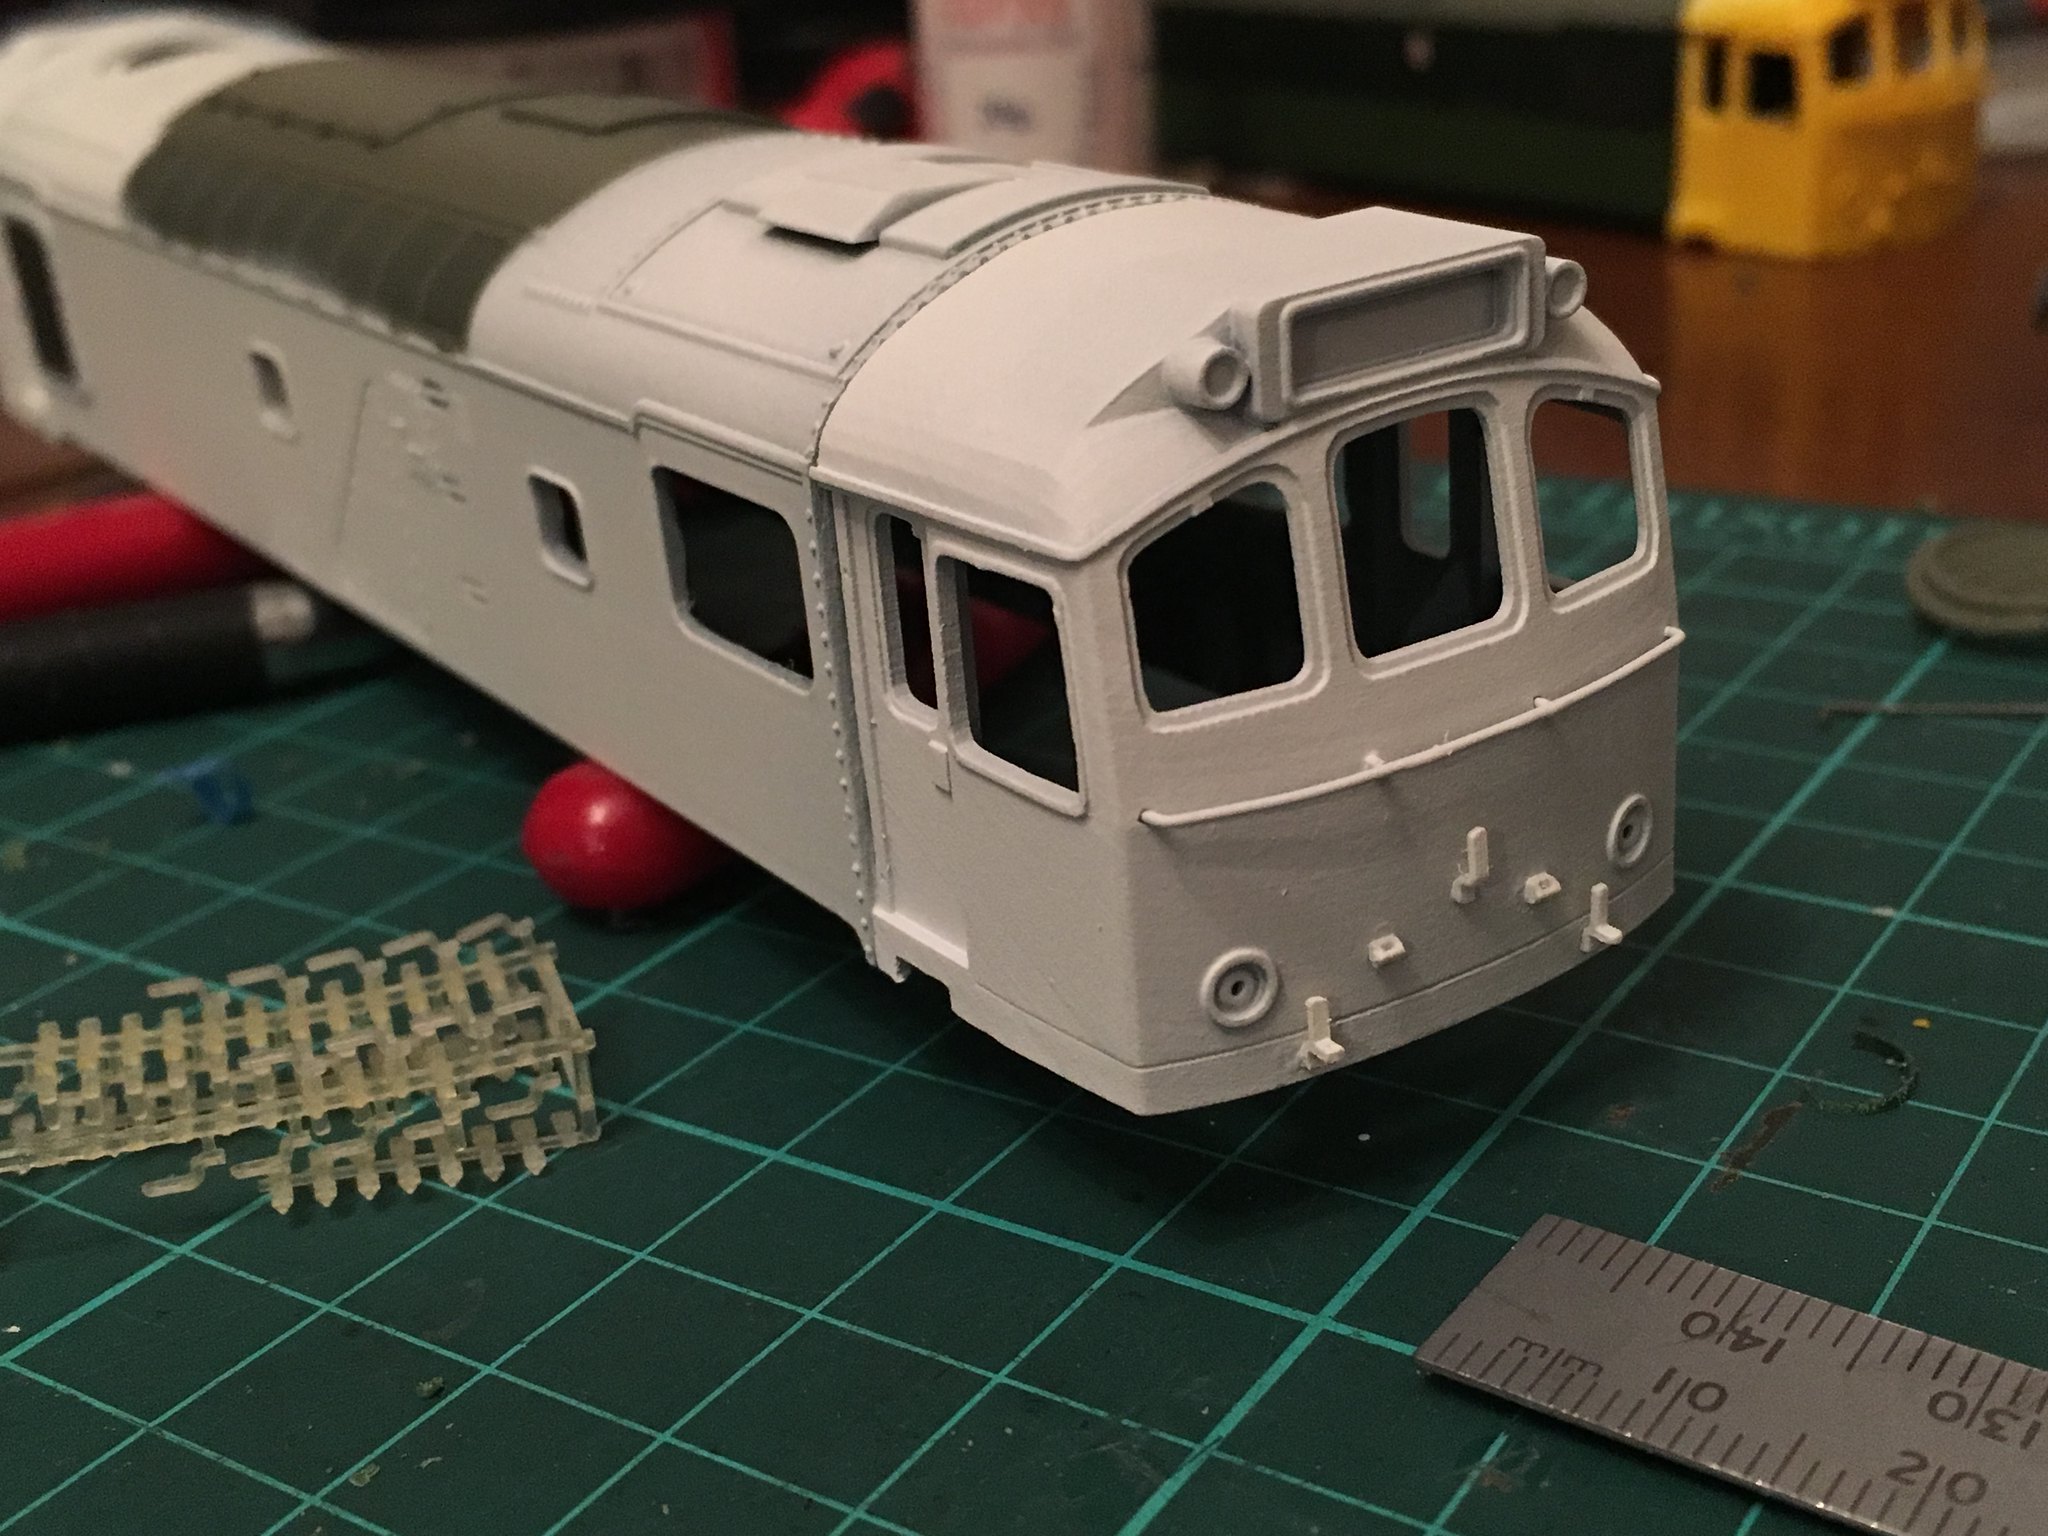 4mm 25.3 cab on Bachmann body by simon br blue, on Flickr
-
5
-
1
-
-
Time for another update.
First picture of some small parts 4mm, 7mm and 1/32 wagon buffers printed on Form2 with a 7mm wagon document holder. There is a bit of stepping visible on the 7mm buffer, I did a couple of tests to see which orientation gave the best results and vertical gives a good result with only a little bit of sanding required on the buffer head but normally 25-35 degrees gives a good finish on parts with round tops or edges.
 Printed Wagon Buffers by simon br blue, on Flickr
7mm Balco Wisbech and Upwell GER no.16 primed with Halfords filler primer to even up the surface. It still looks a bit rough but as an experiment to see what the Balco could do on a more complex shape its turned out ok, the only real filling and sanding was required in the axle boxes and springs. For the roof I'll use printed formers covered with plasticard. I did try some buffers on the Balco but they would required too much cleaning up to be usable. I've now printed some buffers and end access steps on the Form 2.
 7mm GER no.16 van by simon br blue, on Flickr
Next up a VB 10ft chassis for Lima body printed in WSF, in this view you can see how the chassis fits onto the Lima body using the original dimples. The next 16t mineral on the list to draw is the VB clasp brake version.
 7mm VB chassis by simon br blue, on Flickr
Next parts are for a 1/32 LPG tank wagon. Hatch and covers for LPG tank barrel printed on Form2.
 1/32 LPG tank details by simon br blue, on Flickr
Next 1/32 parts are for my 25.1. 1/32 class 25.1 grills printed on Form 2, designed to fit into the WSF body. Standard grill and modified duel braked version with hinge and catches.
 1/32 class 25.1 grills by simon br blue, on Flickr
4mm TTB Co2 tank ends printed on Form 2 with 0.05mm layer resolution.
 4mm TTB tank ends 2 by simon br blue, on Flickr
Lima PTA wagon with primed BSC bogie and buffers added, after priming the text shows up better.
 Lima PTA wagon with BSC bogie by simon br blue, on Flickr
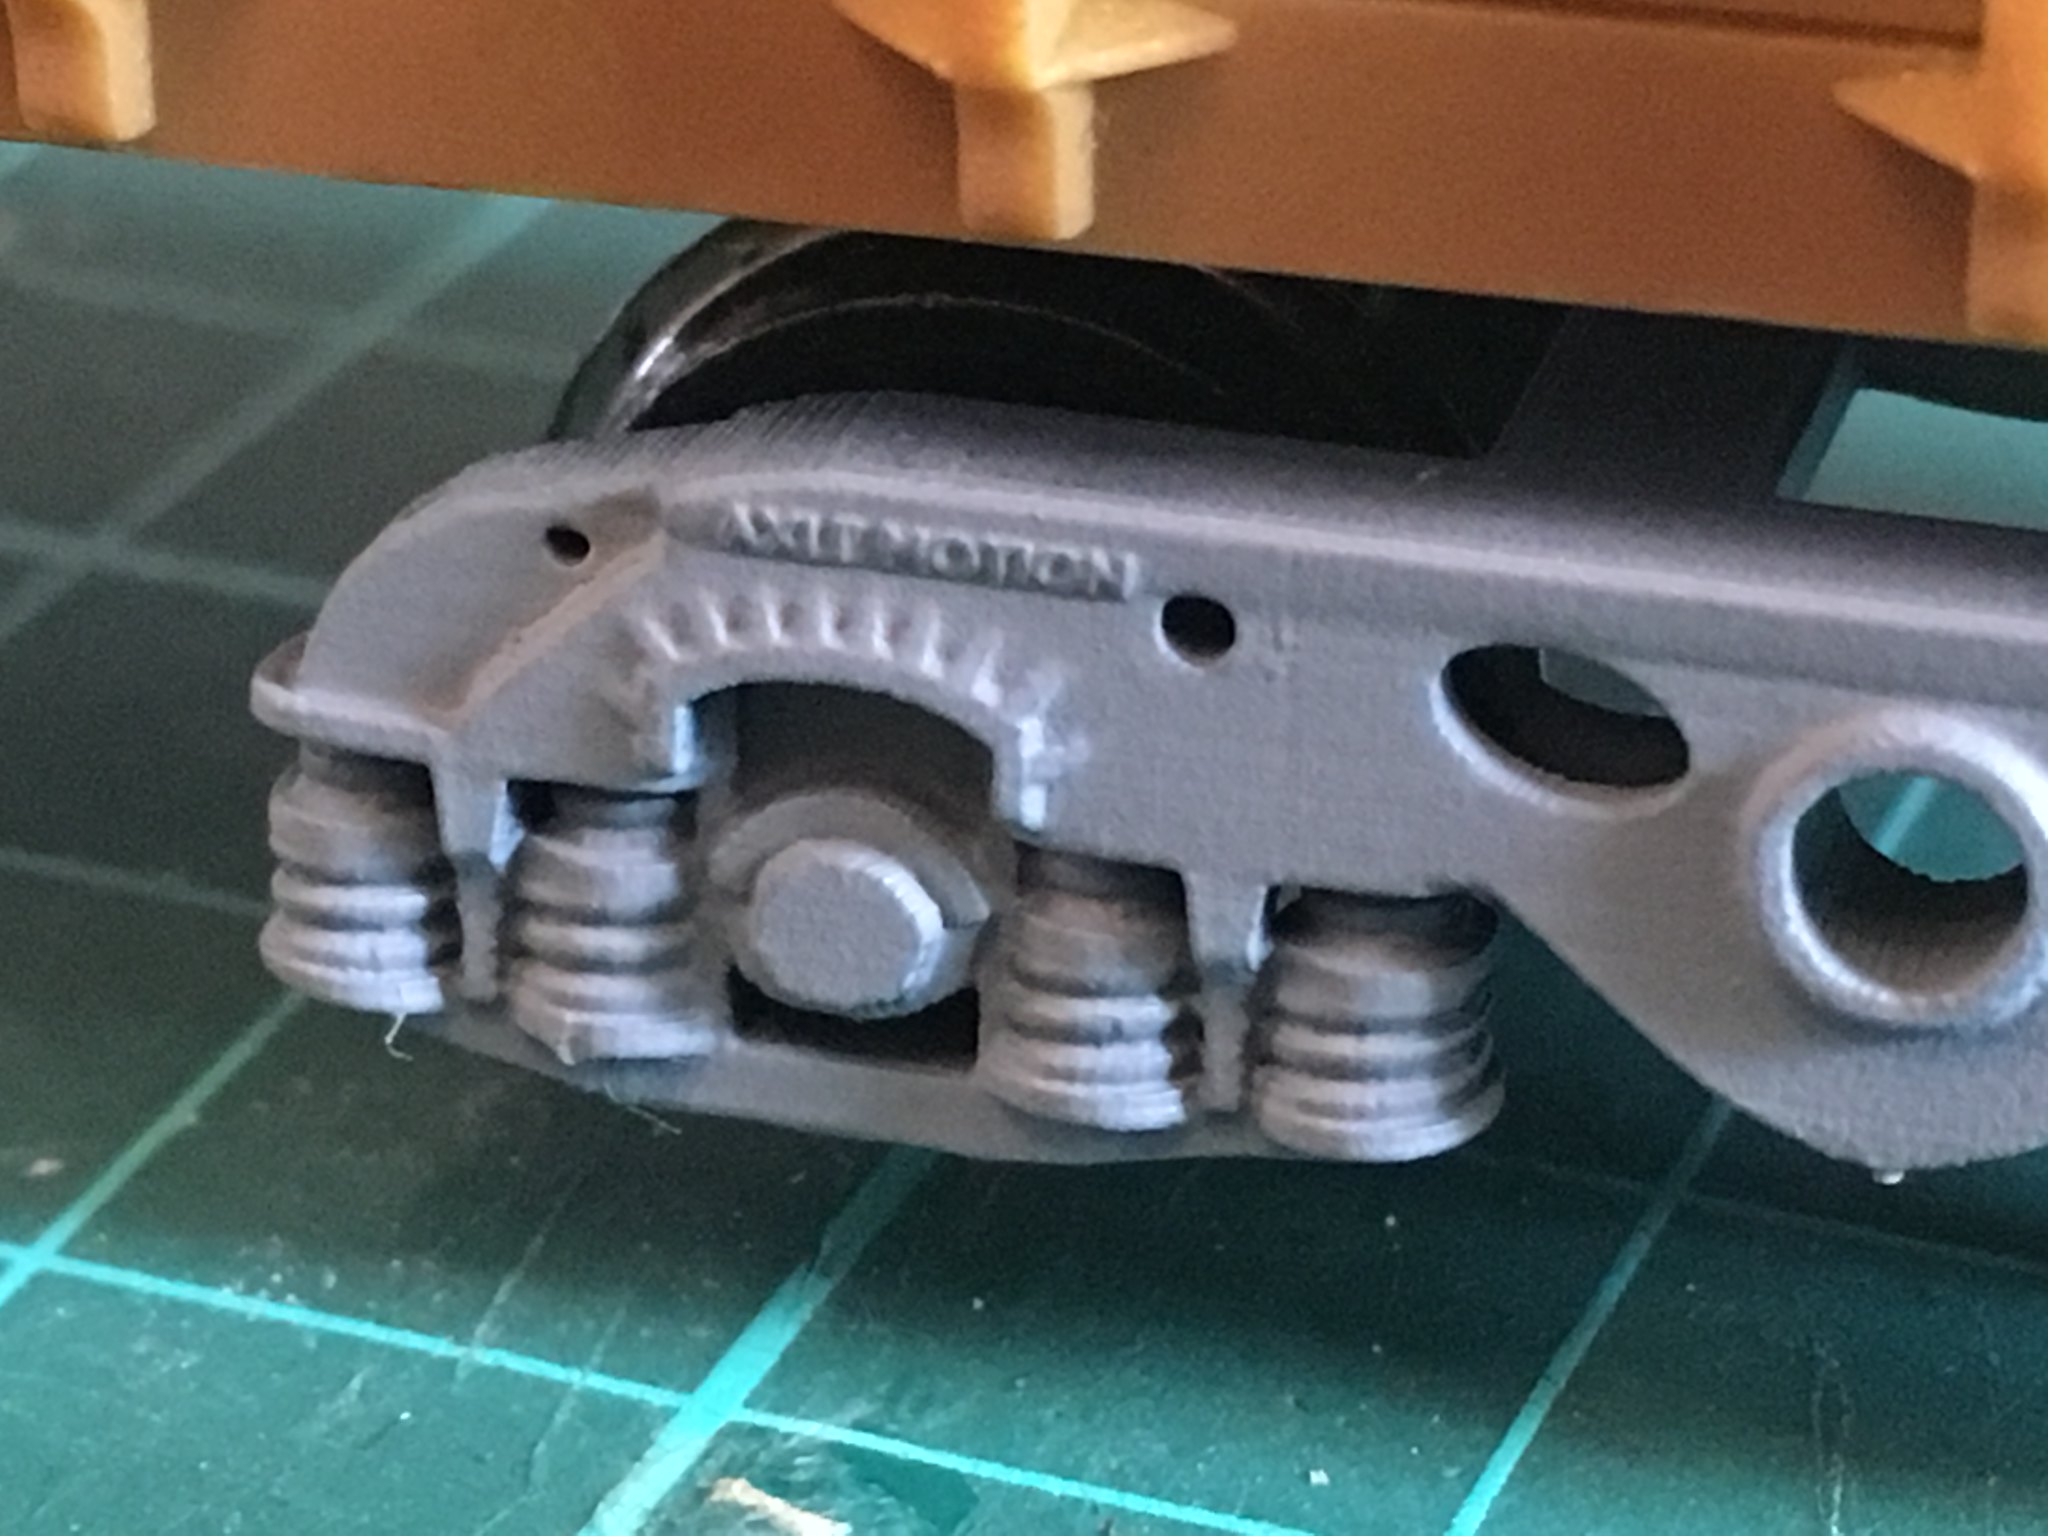 4mm BSC JUA bogie by simon br blue, on Flickr
In the most recent order from Shapeways was a 7mm ICI Urea hopper wagon printed in WSF. Whilst waiting for the delivery I printed the hopper on the Balco printer in PLA 0.08mm layer height.
 7mm PAA urea hopper by simon br blue, on Flickr
Last items for this update are some parts for the rake of 7mm steel wagons. First a pair of FBT6/ Y25 BAA / BBA / BCA bogies printed on Form 2. Next a cradle and coil for the BCA wagon printed on the Balco printer, the coil may need a bit of smoothing as the surface isn't very even because of the way the printer prints round objects. The third picture shows 2 versions of the BAA/BBA coil cradle printed on the Balco printer in grey PLA and the Form 2 in Black resin, both need the rest of the support material removing.
 7mm BCA FBT6 bogie by simon br blue, on Flickr
 7mm BCA cradle by simon br blue, on Flickr
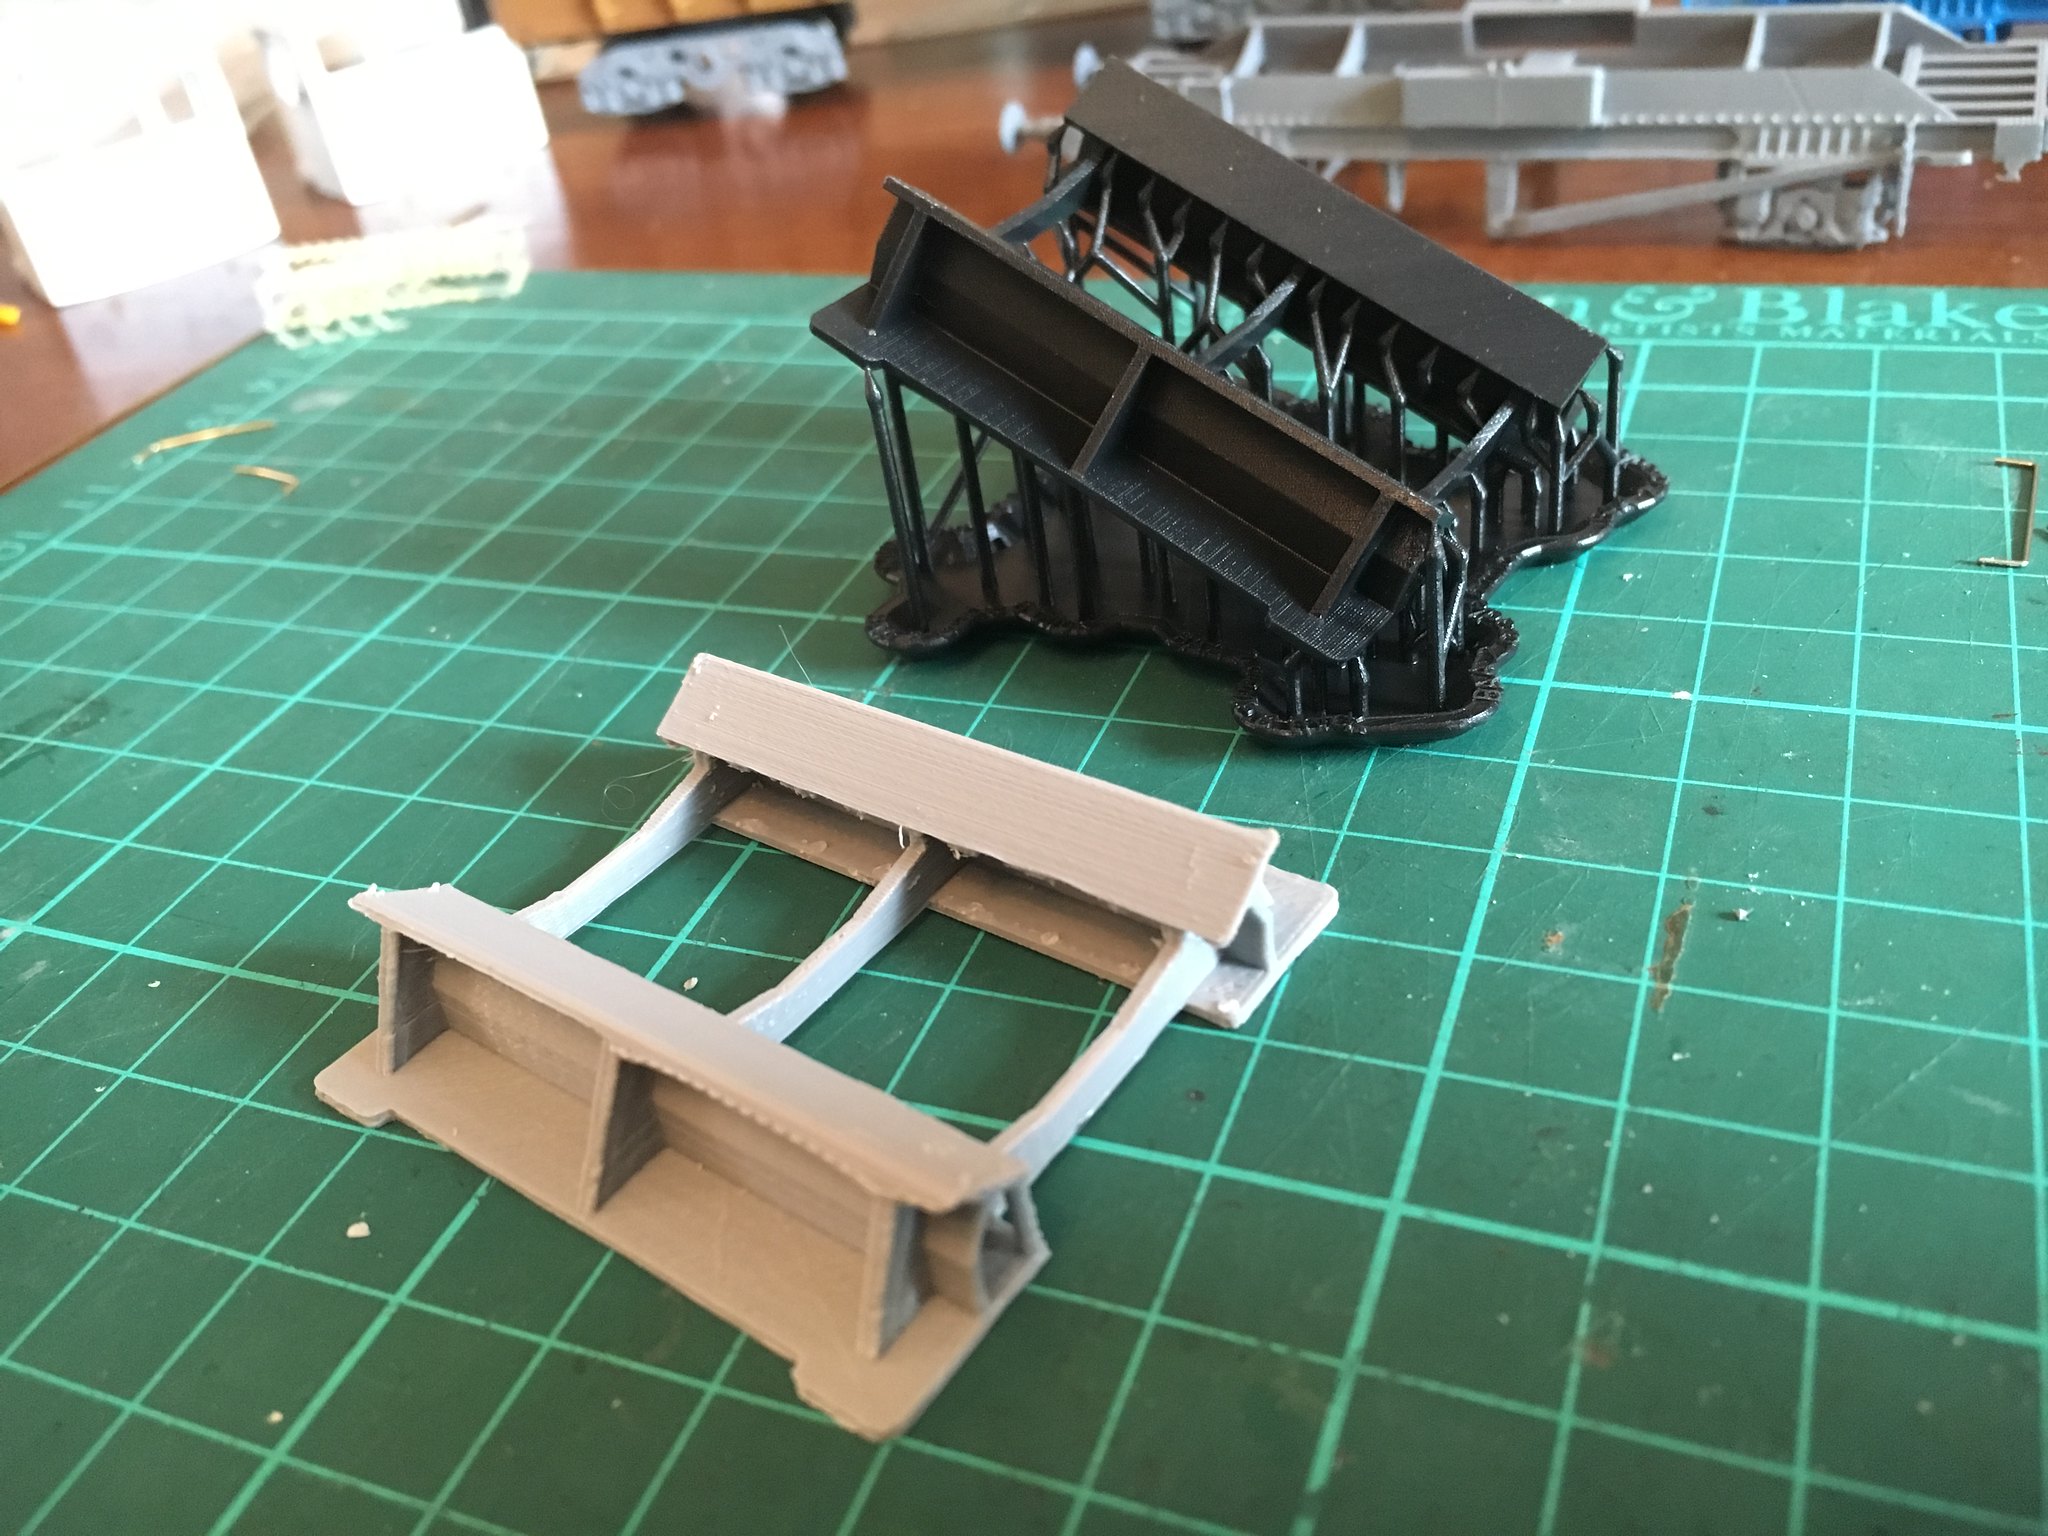 7mm BAA cradles by simon br blue, on Flickr
-
3
-
-
How do you fix the rivets on and did 40058 have this modification both ends or just one end?
-
Just noticed that my old photobucket photos from earlier in the thread have started working again.
-
Today a project I've been working on but not posted anything about recently. Sadly these models have been affected by the removal of HDA from Shapeways but I'll continue and try and print parts with my Form 2.
I've been working on and off with the 4mm version of the Redland Shelf Discharge train and have printed most parts of the PHA wagons in most materials. I've tried using the Form 2 for the chassis as its smoother than White Natural Versatile Plastic (previously WSF) and Gray professional plastic (previously HP strong and flexible) but maybe weaker and less flexible. For the hoppers I've tried several options with probably the best finish being from the form 2 but this works out more expensive. I have printed several hopper bodies on my Balco PLA printer and these have come out reasonable well but do need a little sanding before painting. I've now run out of the grey resin for the form 2 and will move onto the black resin
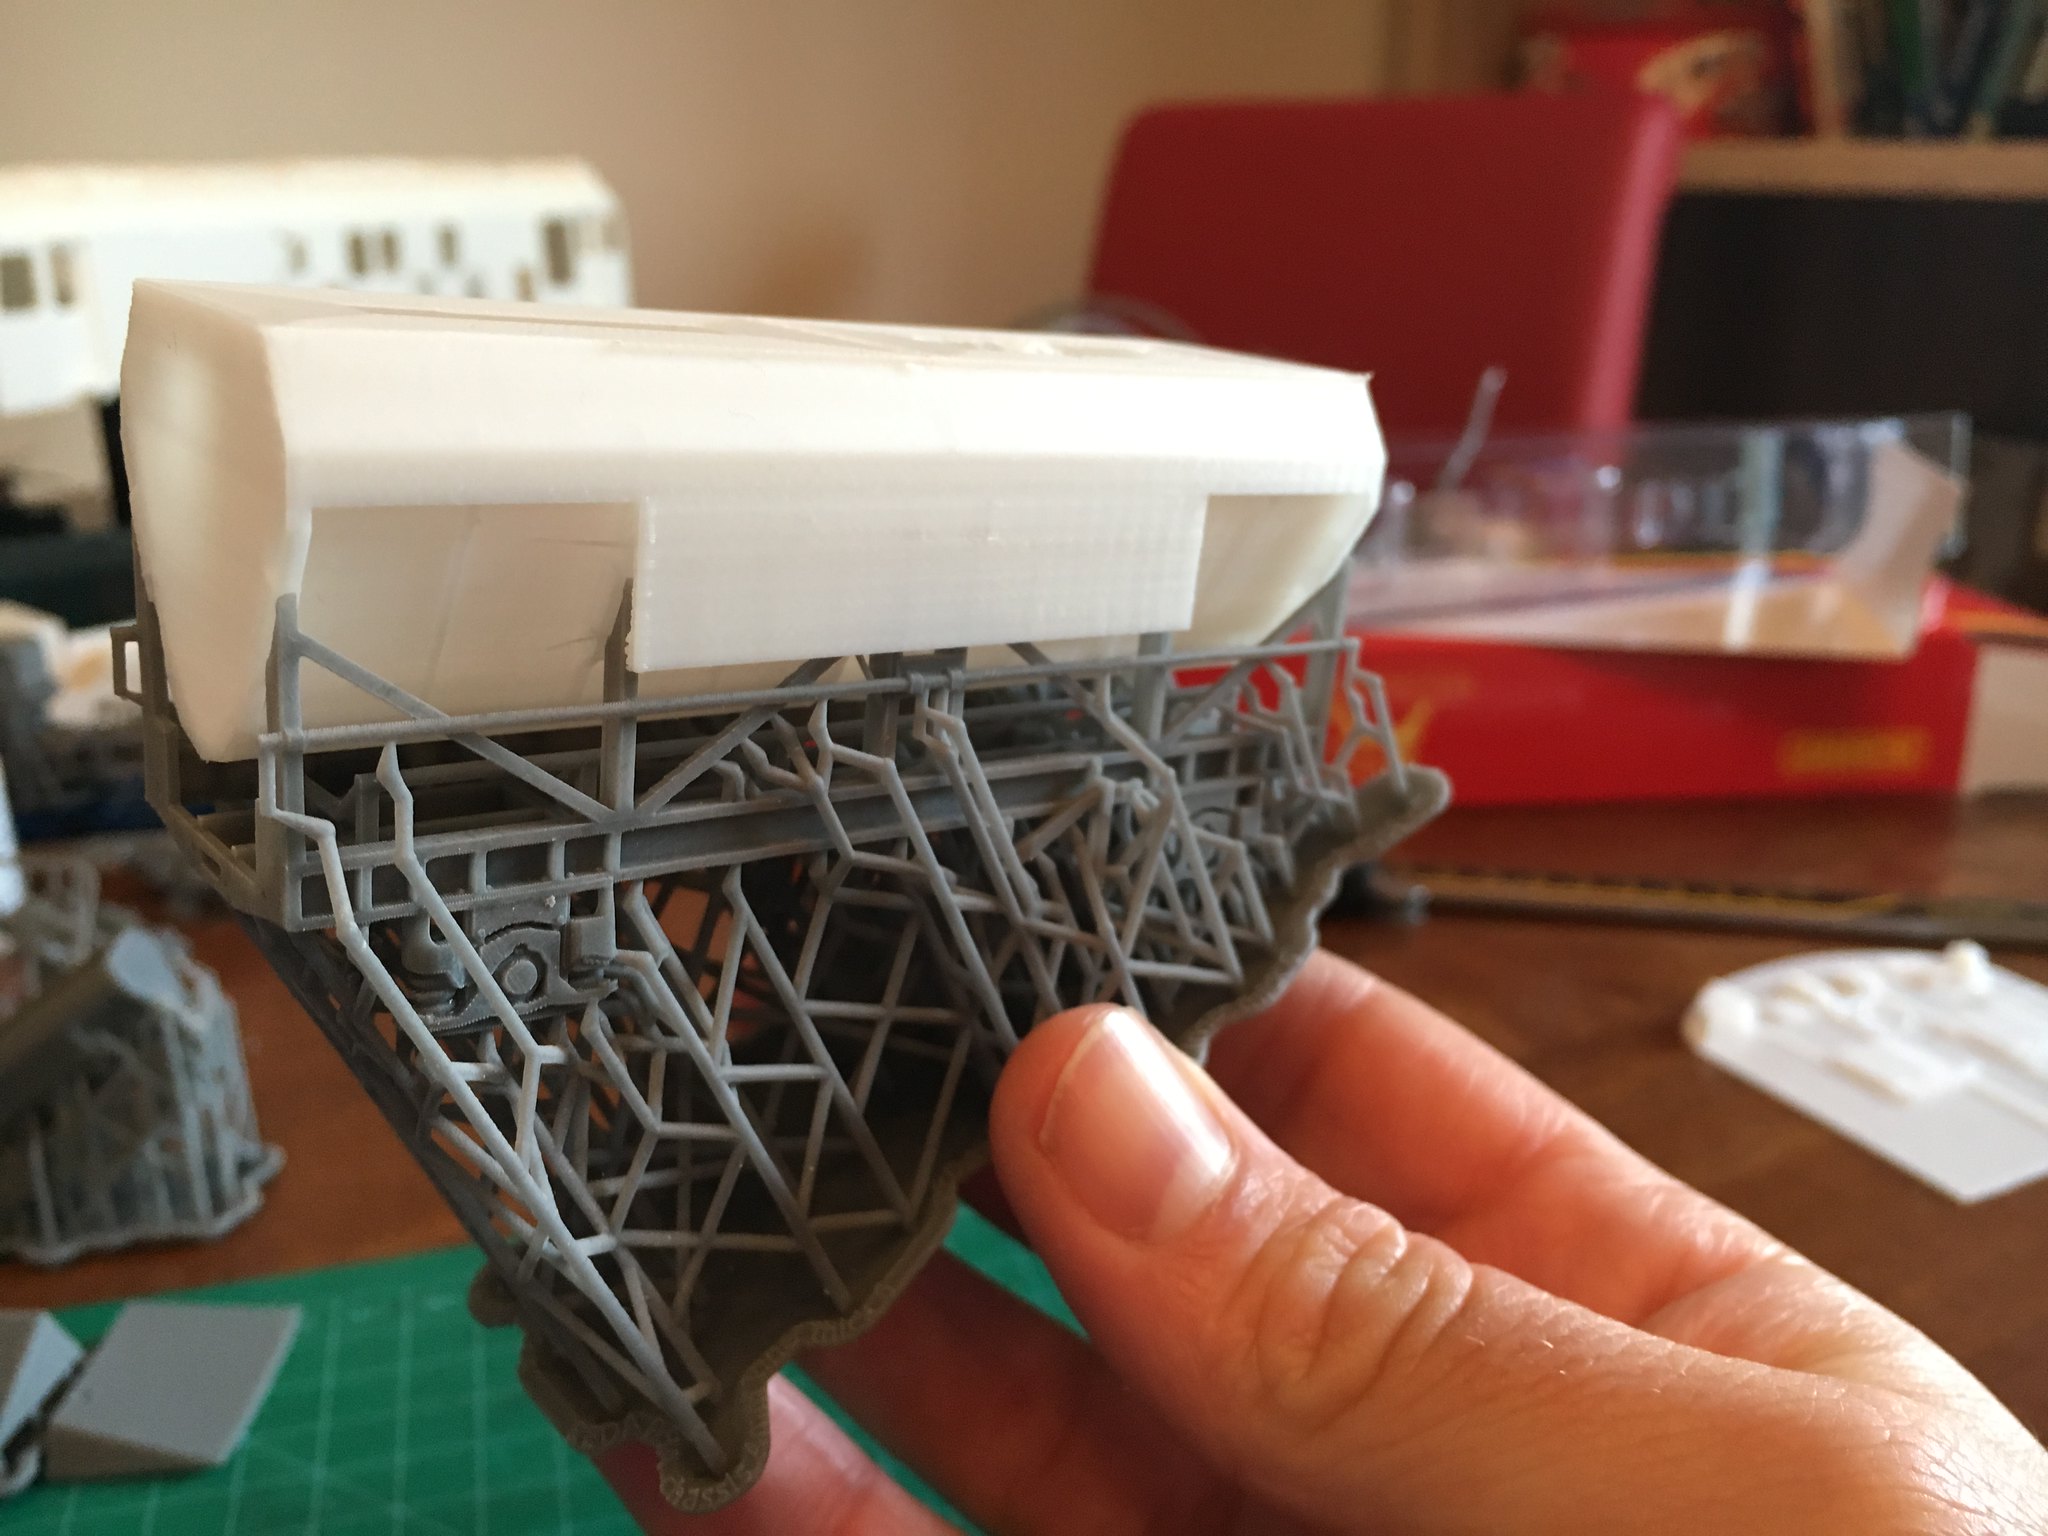
Picture below shows a 4mm PHA chassis as printed in the Form 2 with support material still attached, this is hassle to remove and easy to damage the model remove a part that looks like a support - WSF and HP strong and flexible don't require this. The angle is the same as the HDA chassis I had printed on Shapeways.
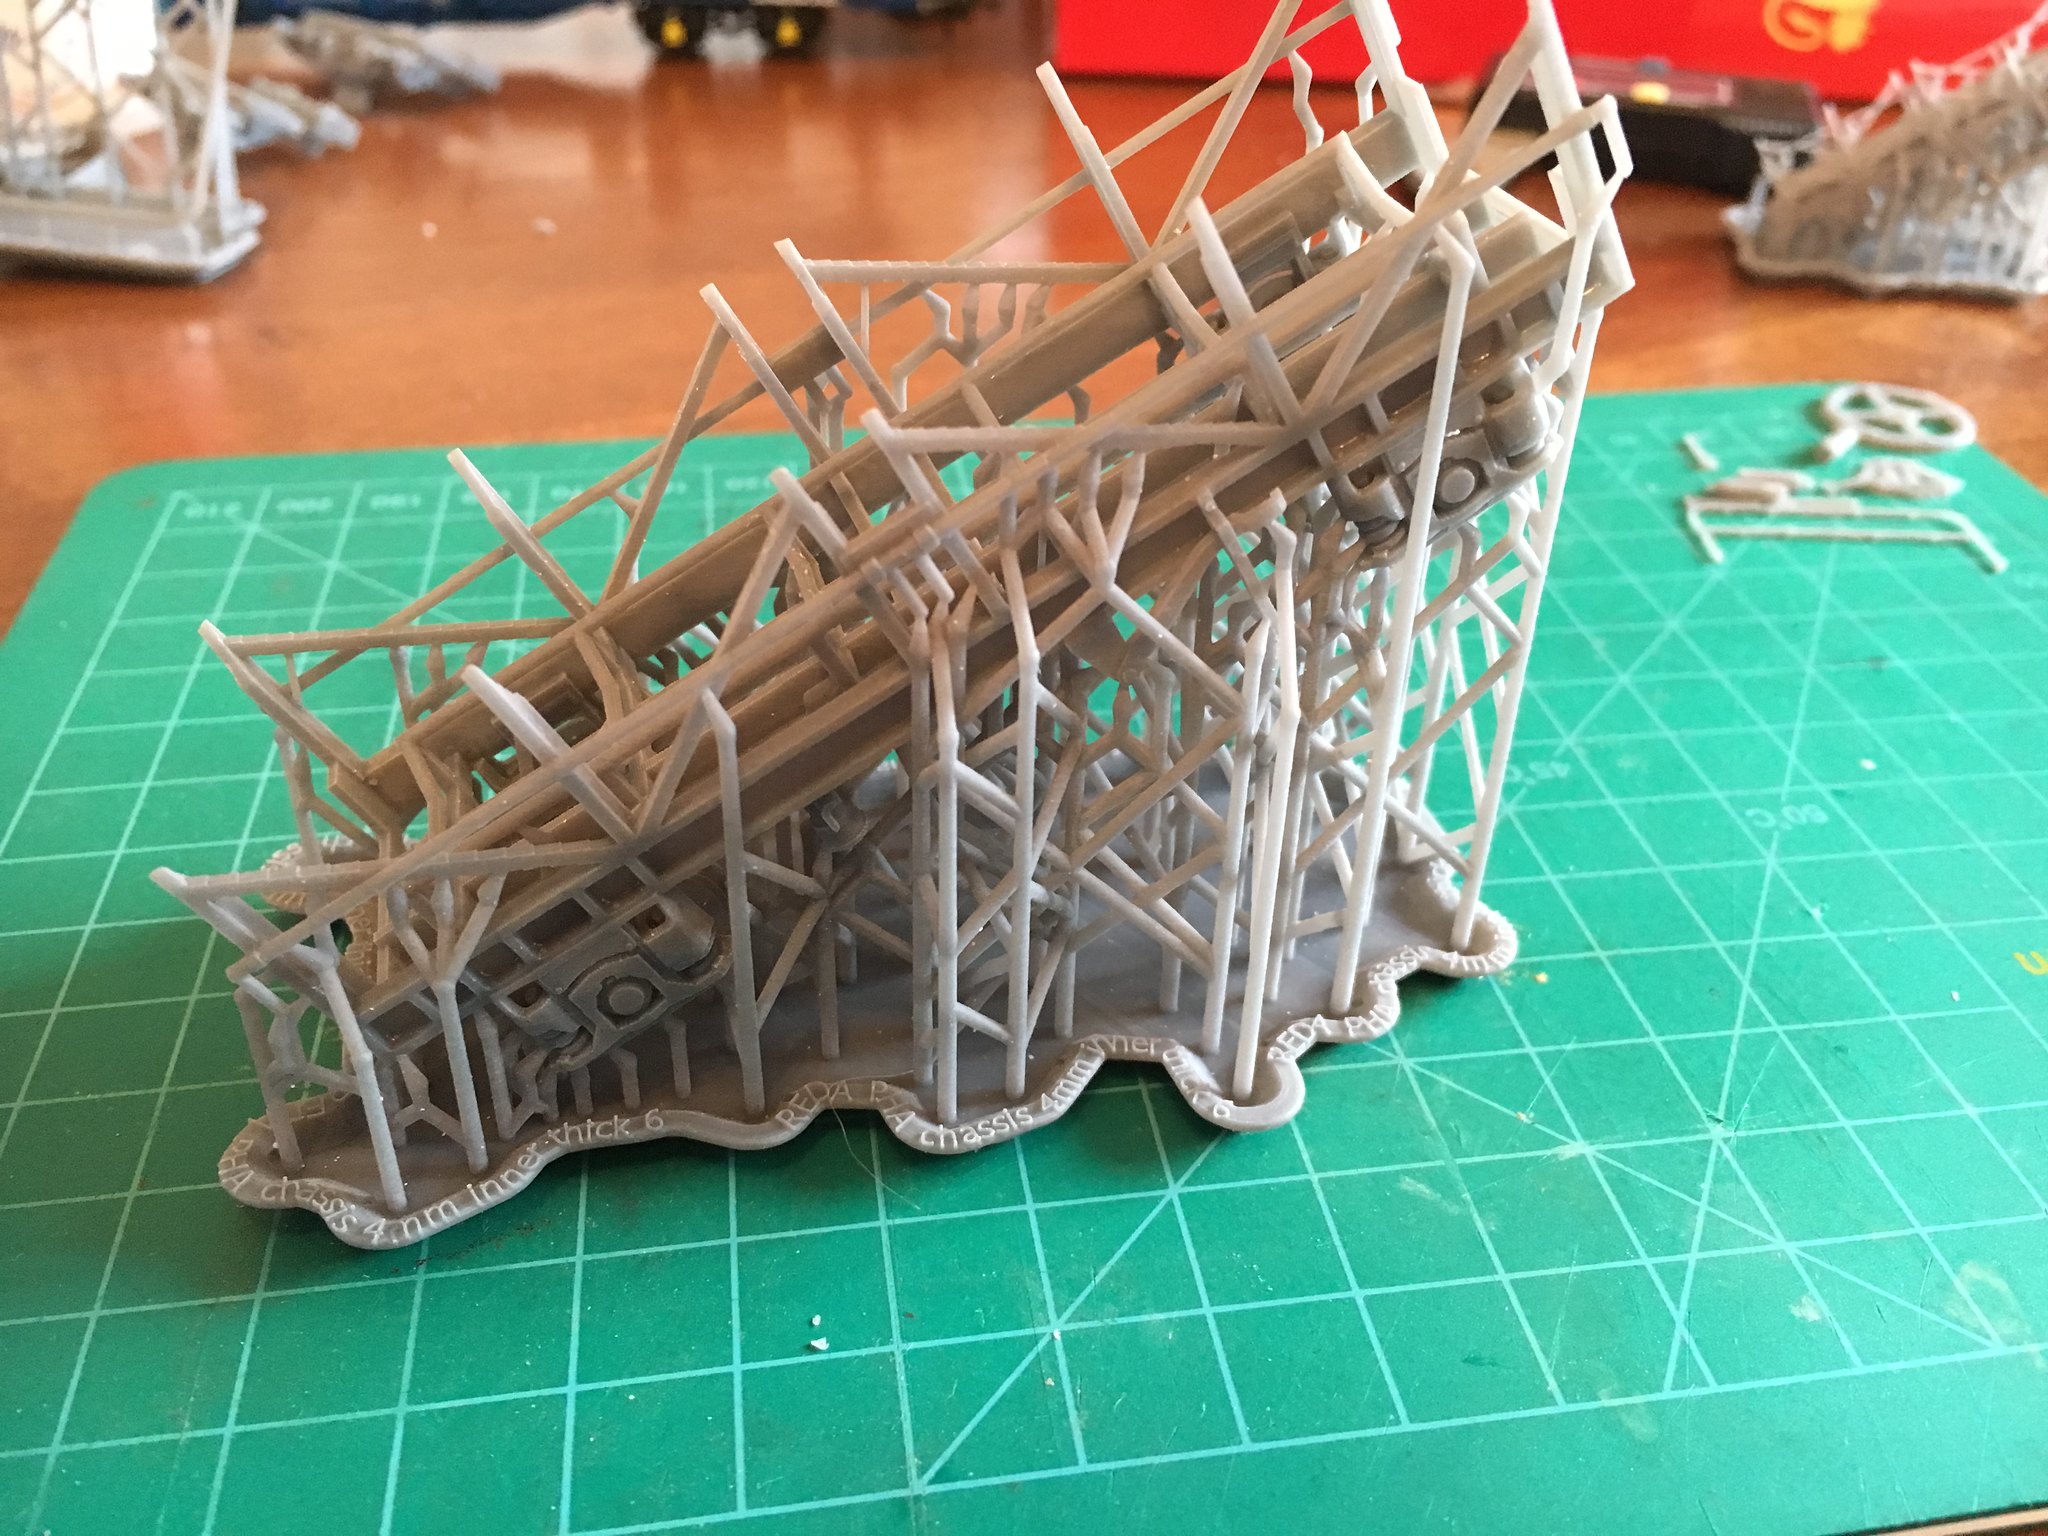 4mm PHA chassis test by simon br blue, on Flickr
The next picture is the 3 different types of hopper in the train - rake end wagon, motor wagon and standard inner wagon. The hoppers are again done on the Balco printer with the motor wagon engine cover printed on the Form 2. the hoppers are as printed with some strings/wires visible from printing where the printer has moved onto the next area to print. One engine cover is as printed and the other has had the support base removed.
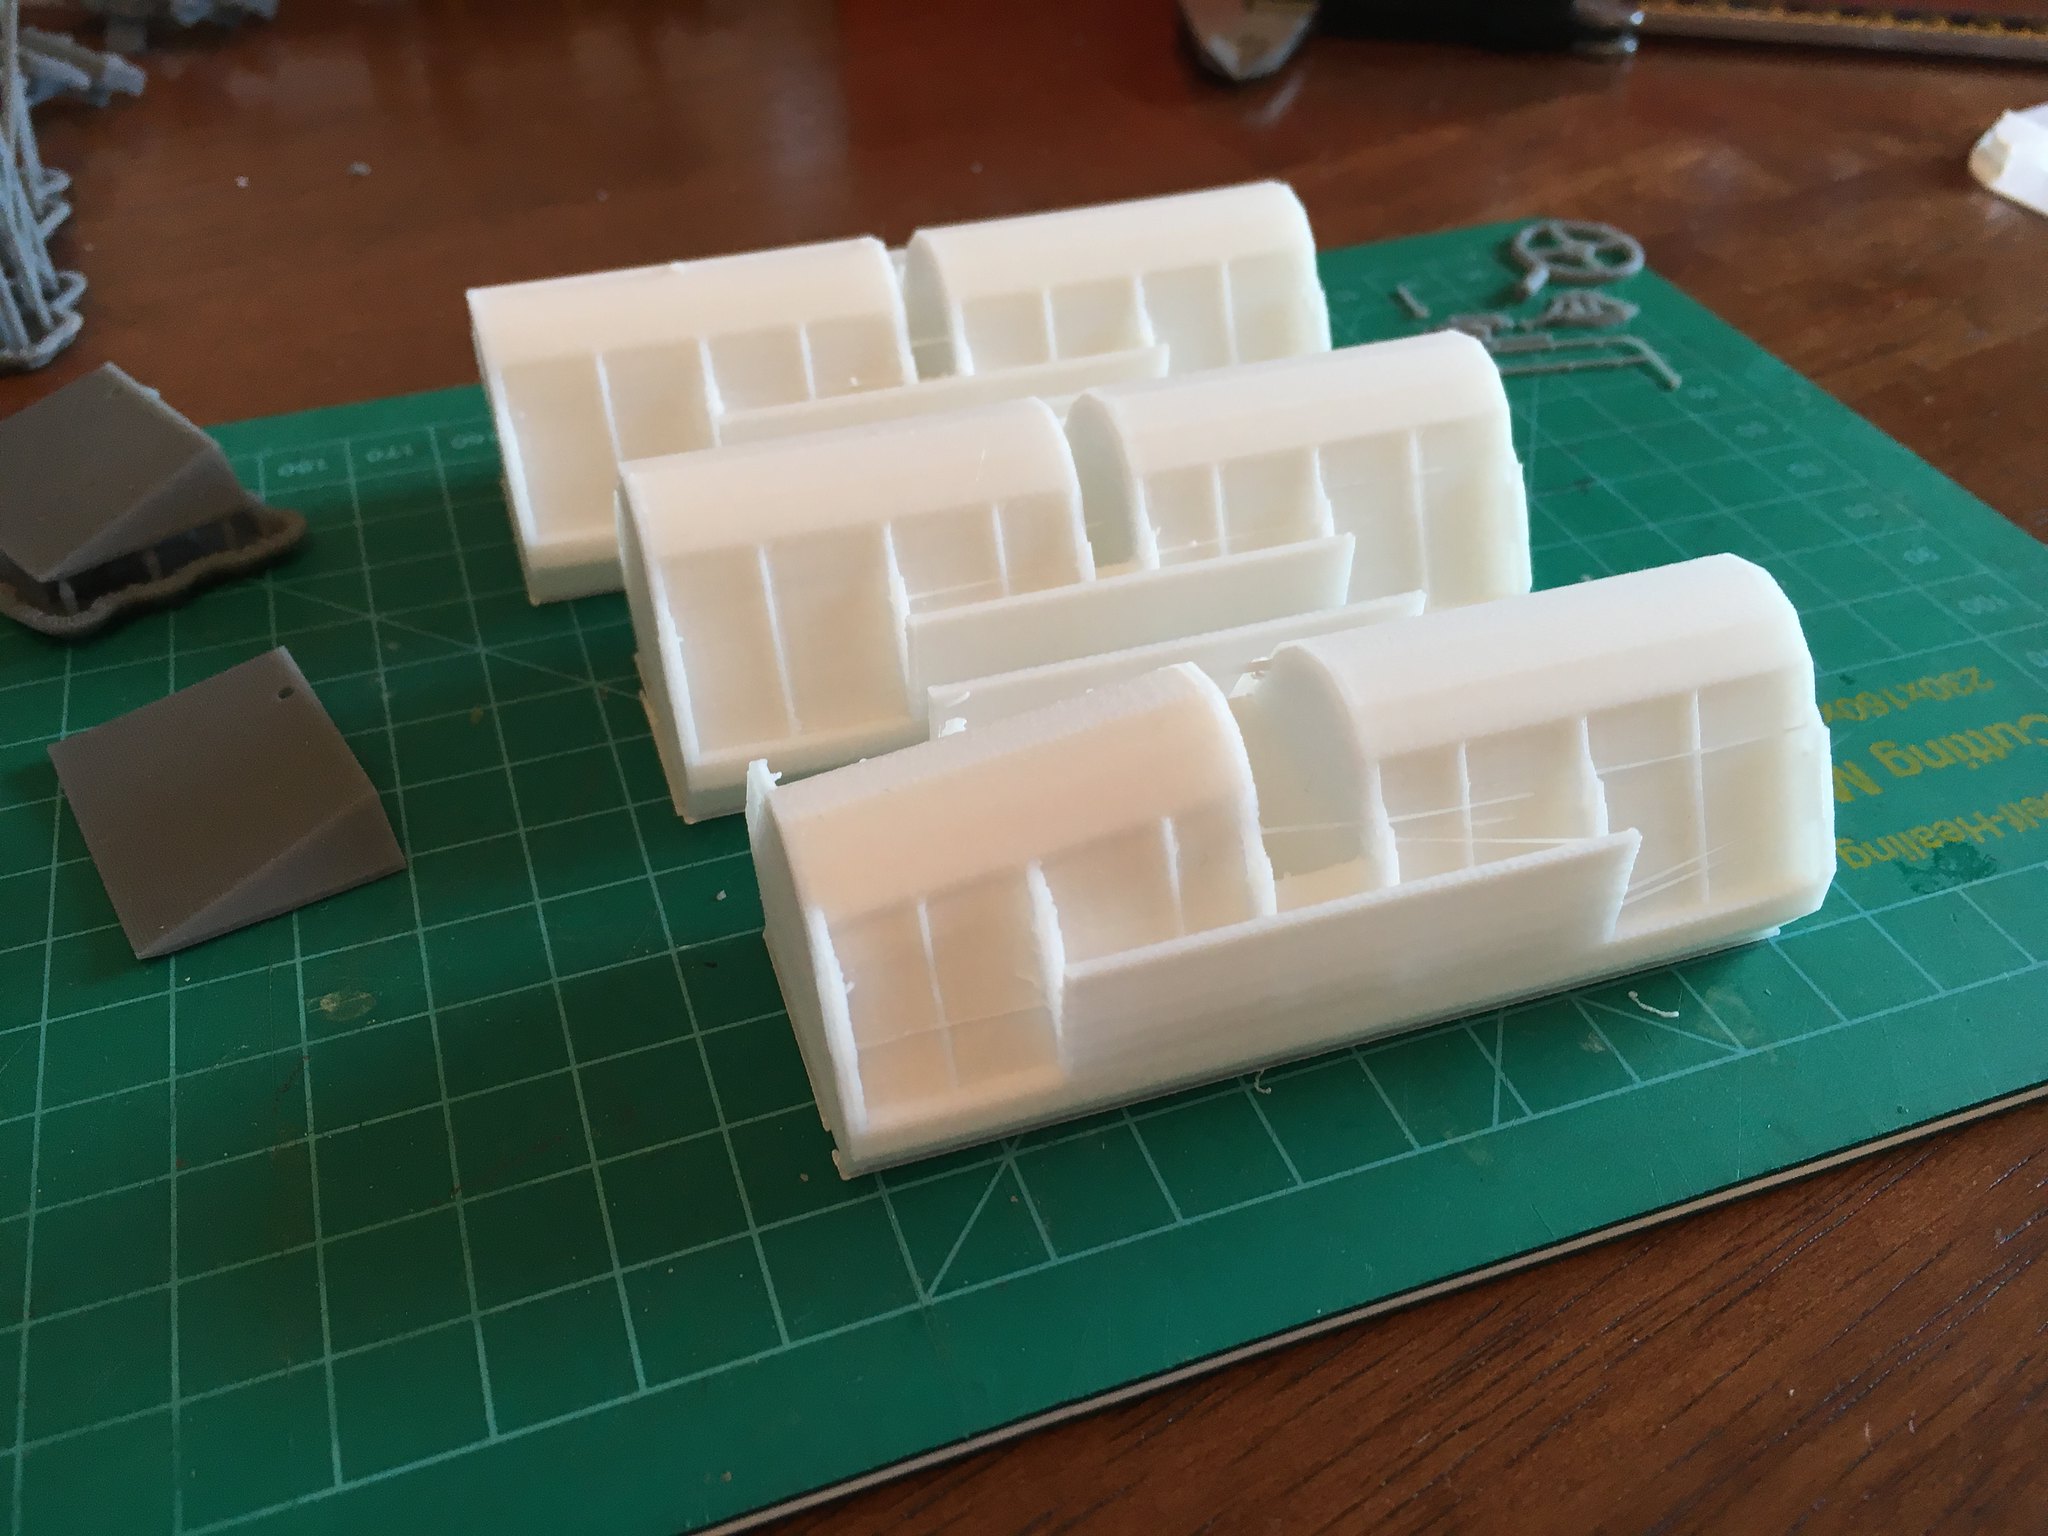 4mm PHA hopper set by simon br blue, on Flickr
The next picture show hopper and chassis together, this has caused a couple of problems with the different materials as some materials shrink or bend a bit when printed.
 4mm PHA hopper by simon br blue, on Flickr
To make printing easier I printed the hoppers without the discharge details on the ends. I printed these separately on the Form2.
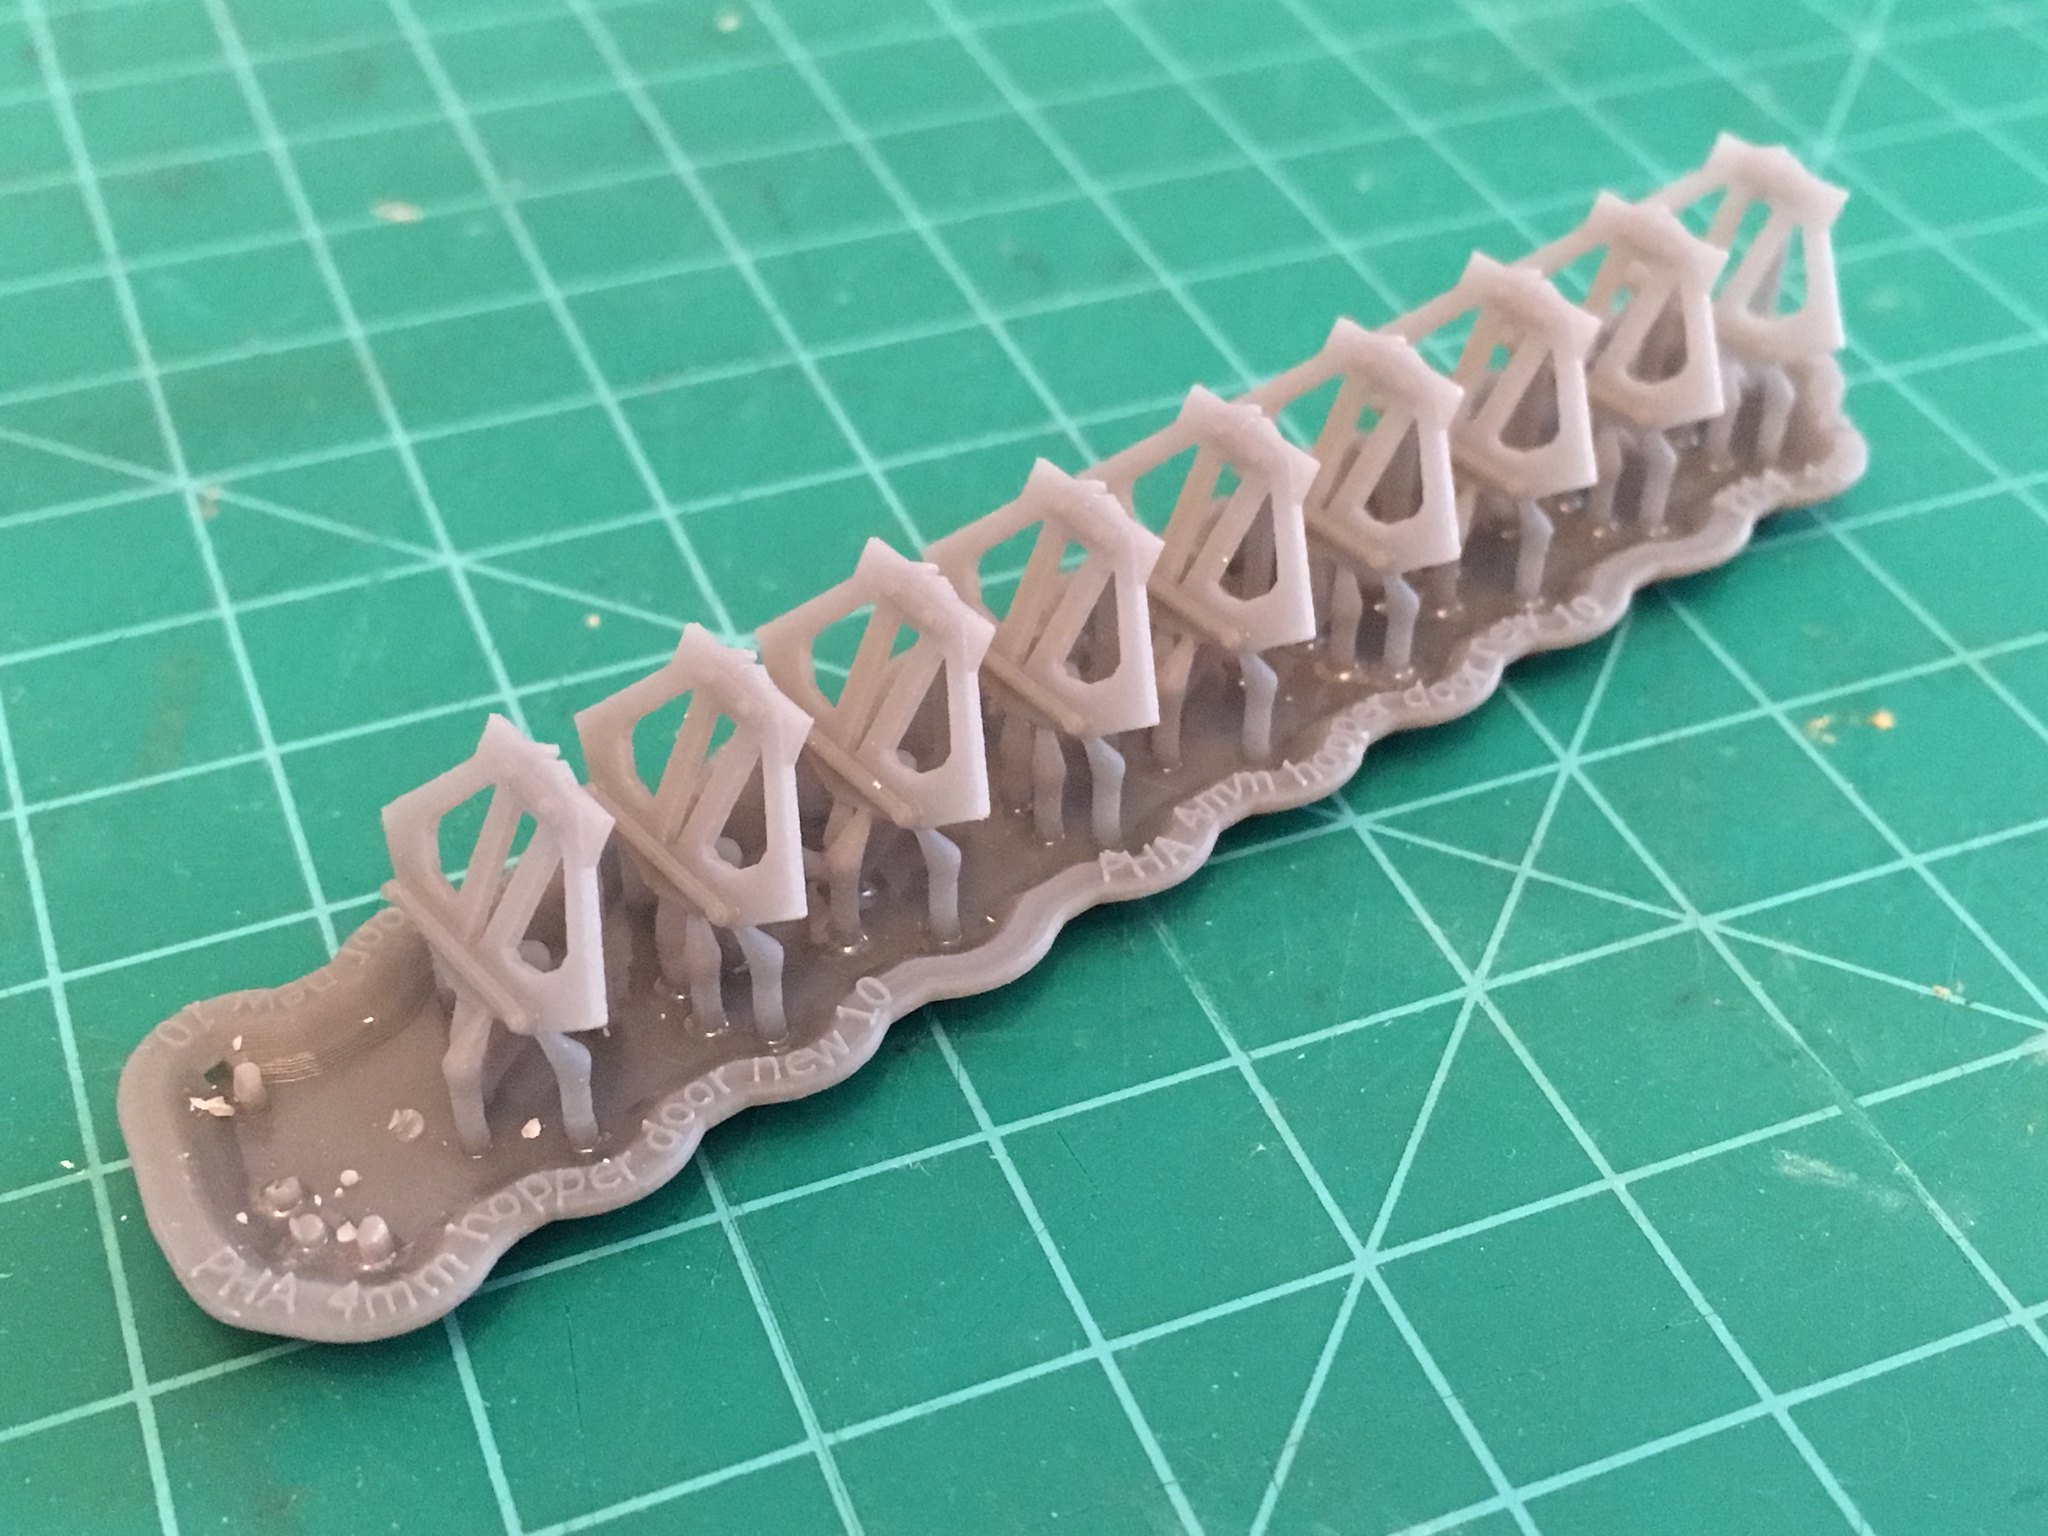 4mm PHA hopper doors by simon br blue, on Flickr
The last picture of PHA shows a paint test on a Form 2 chassis and a Balco hopper. The hopper would really require another sand either after the first prime or after the first top coat to remove some of the lines visible in this view. I also didn't add the discharge door details, maybe I'll add the details and then give it another coat of paint.
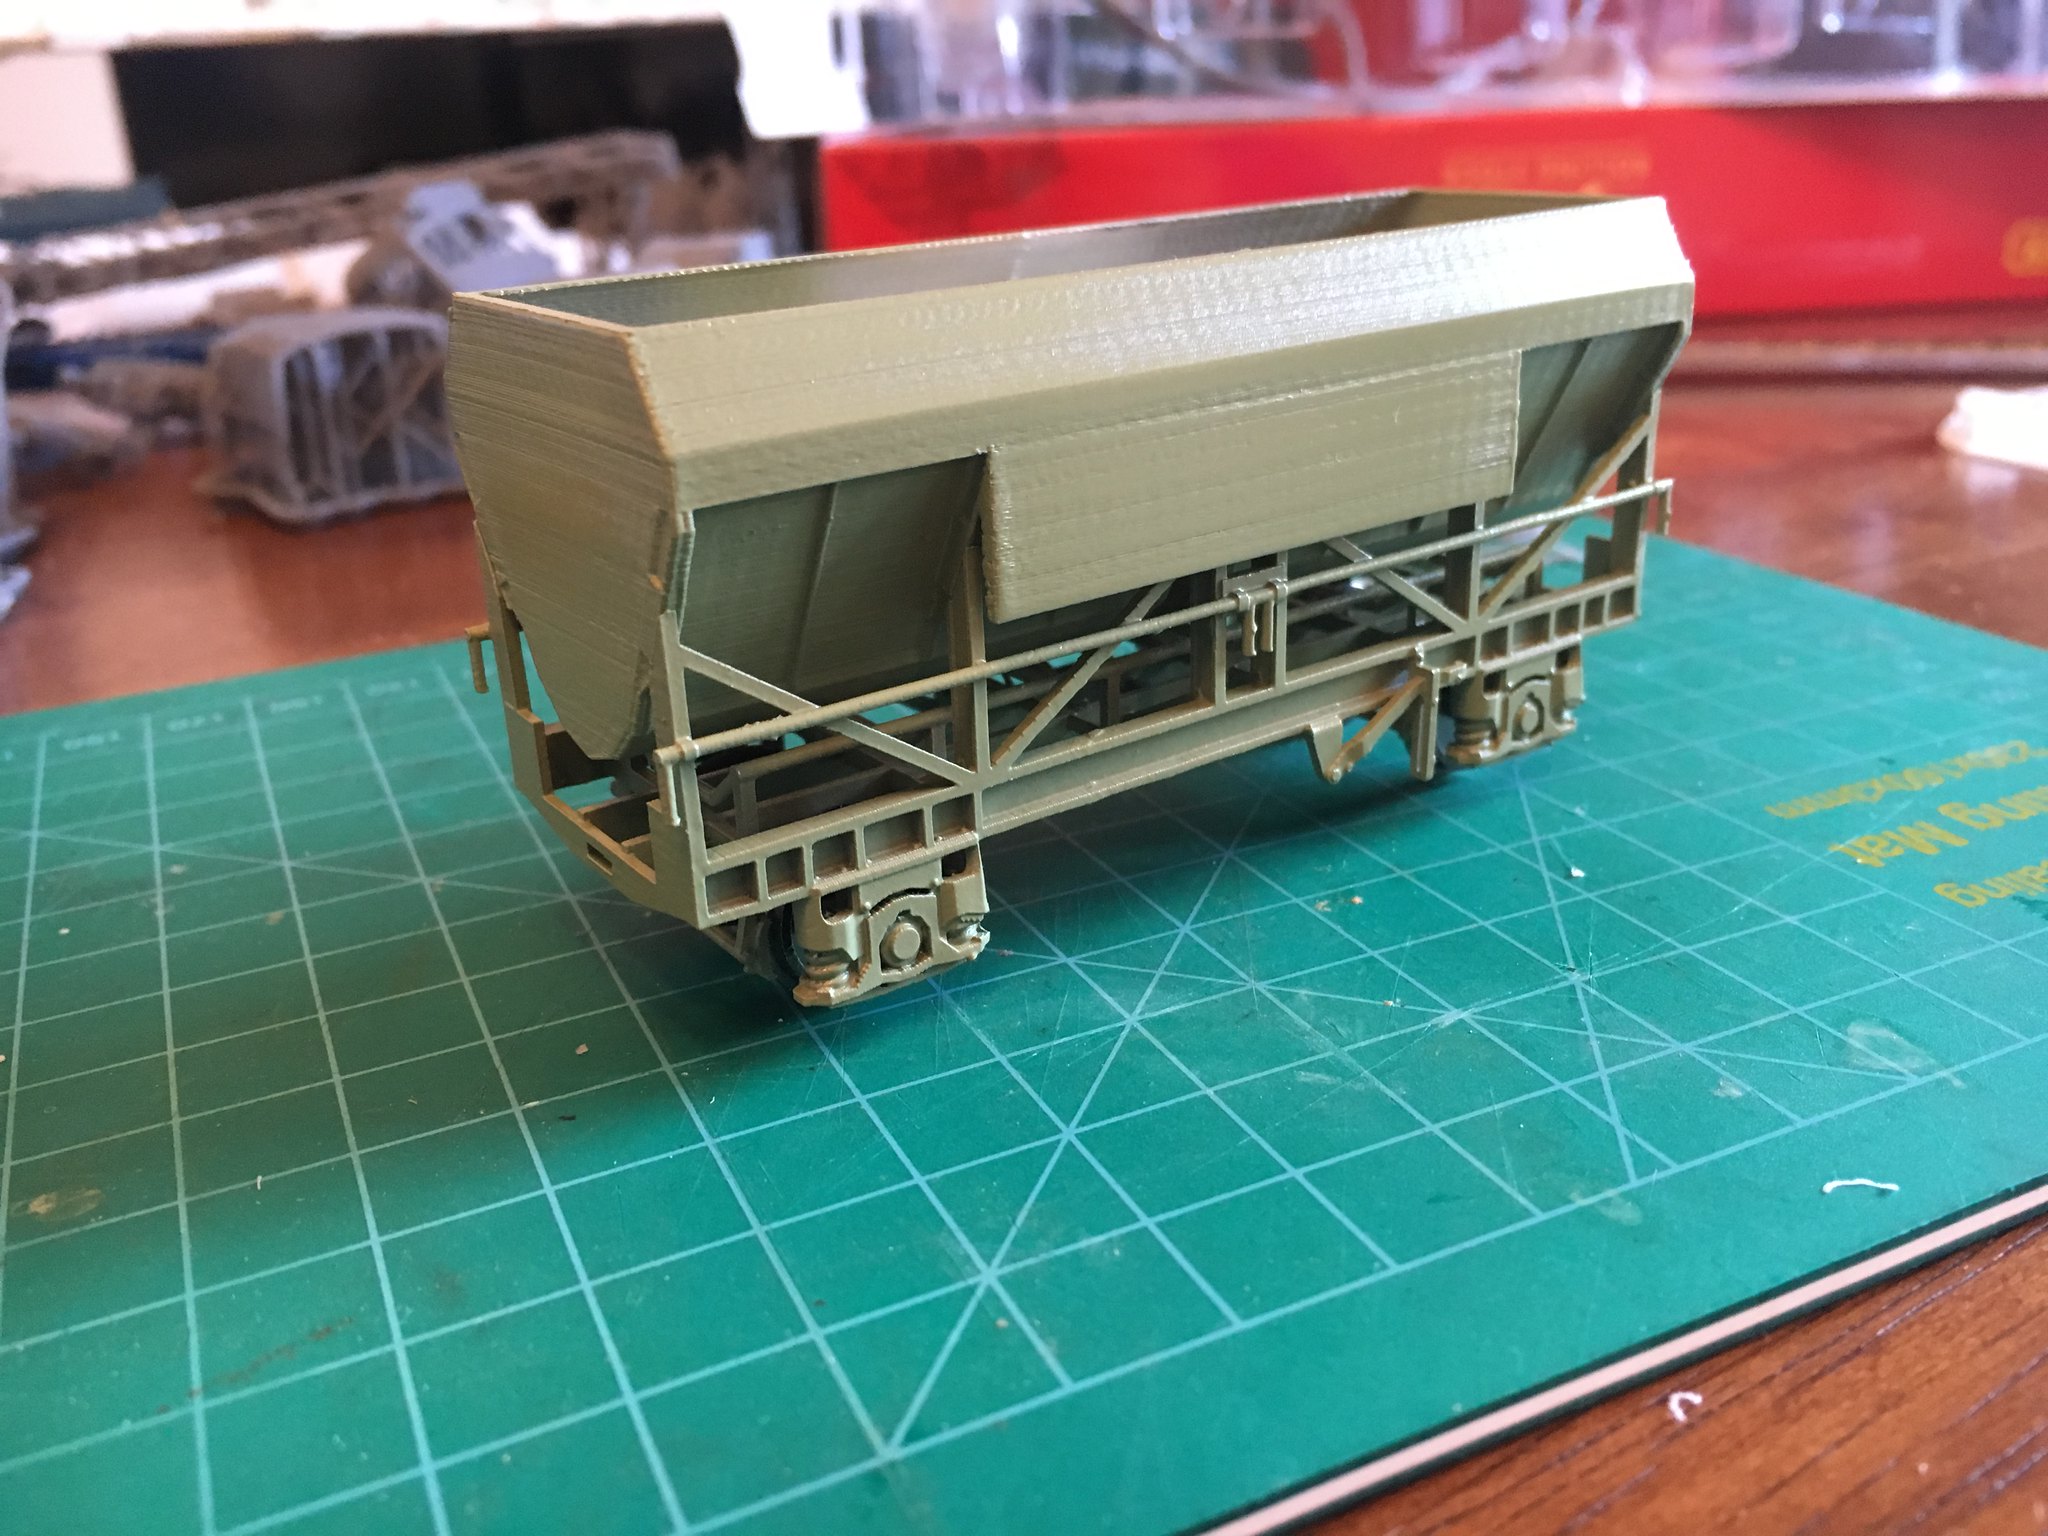 4mm PHA wagon by simon br blue, on Flickr
The last wagon in the set I've printed parts for is the PXA discharge wagon. This uses a Hornby KFA container wagon as a base with parts printed on the Form 2. The photo shows the parts posed on the wagon - I need to add a plasticard deck before fixing the parts on. With the 7mm version the conveyor can move and be positioned but in the 4mm version it will need to be fixed in a position.
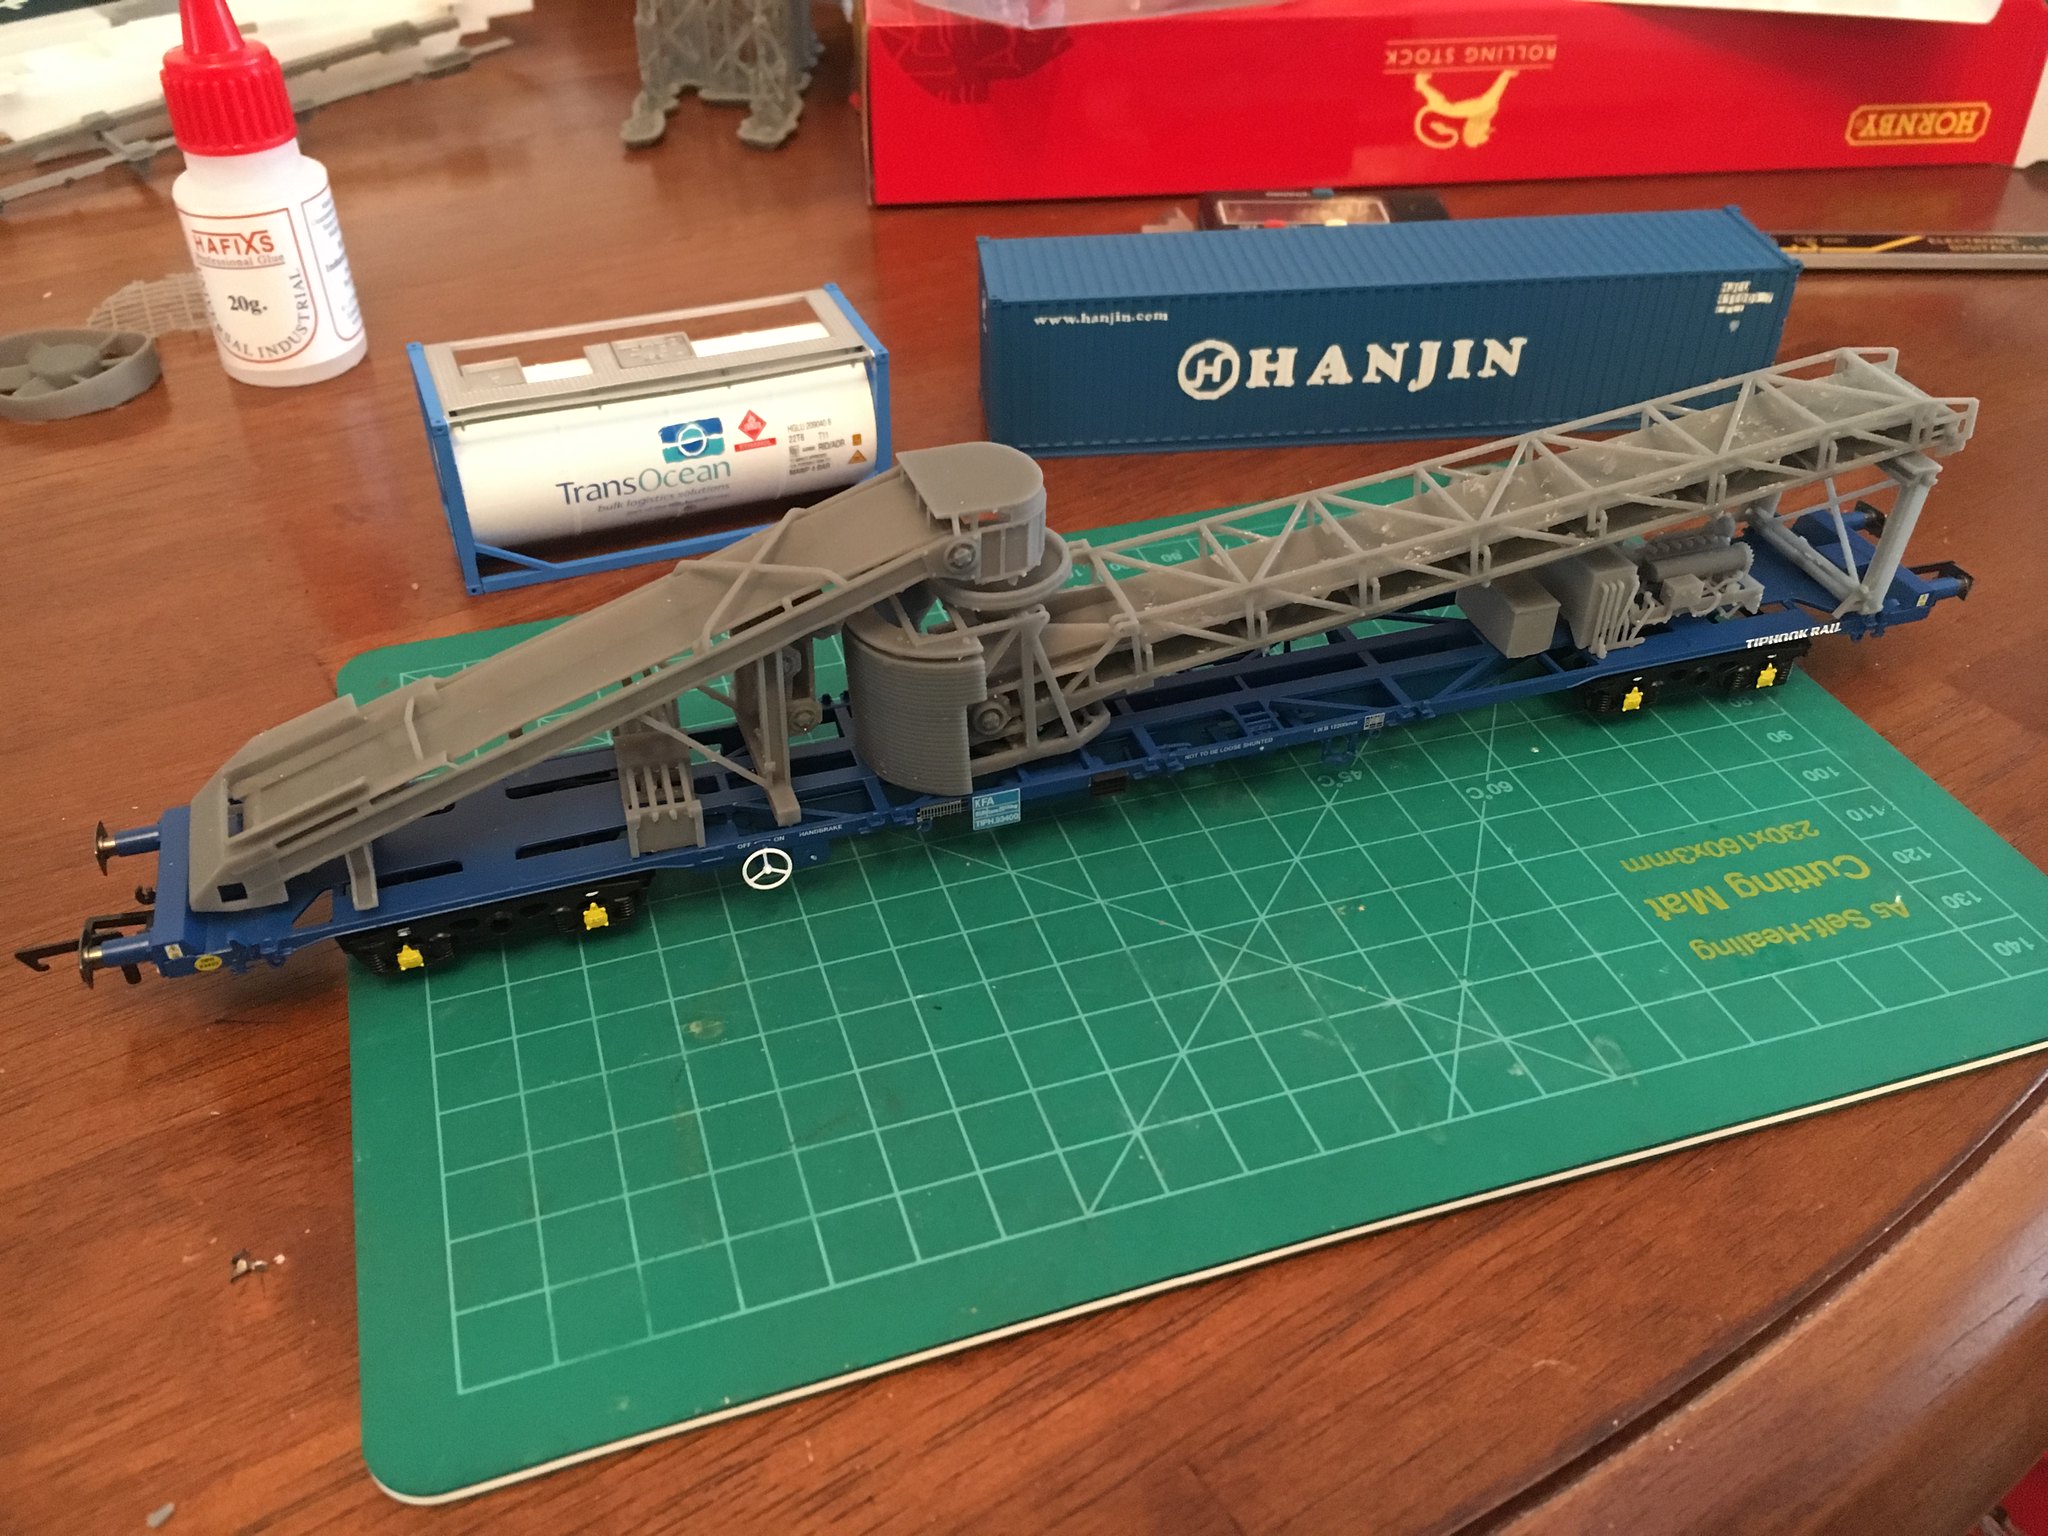 4mm PXA discharge wagon by simon br blue, on Flickr
-
3
-
-
The 20's look great and the picture of 3 together reminds me of March depot. The faded ends and worn paint looks spot on.
-
Another update.
Firstly a couple of photos of a part chassis I drew up to put under some wooden bodied mineral wagon bodies I purchased off Ebay. The WSF chassis fits around wagon wooden chassis parts, first pic on its own and then under the wagon. the buffers were printed as a spur in the chassis print.
 7mm underframe parts by simon br blue, on Flickr
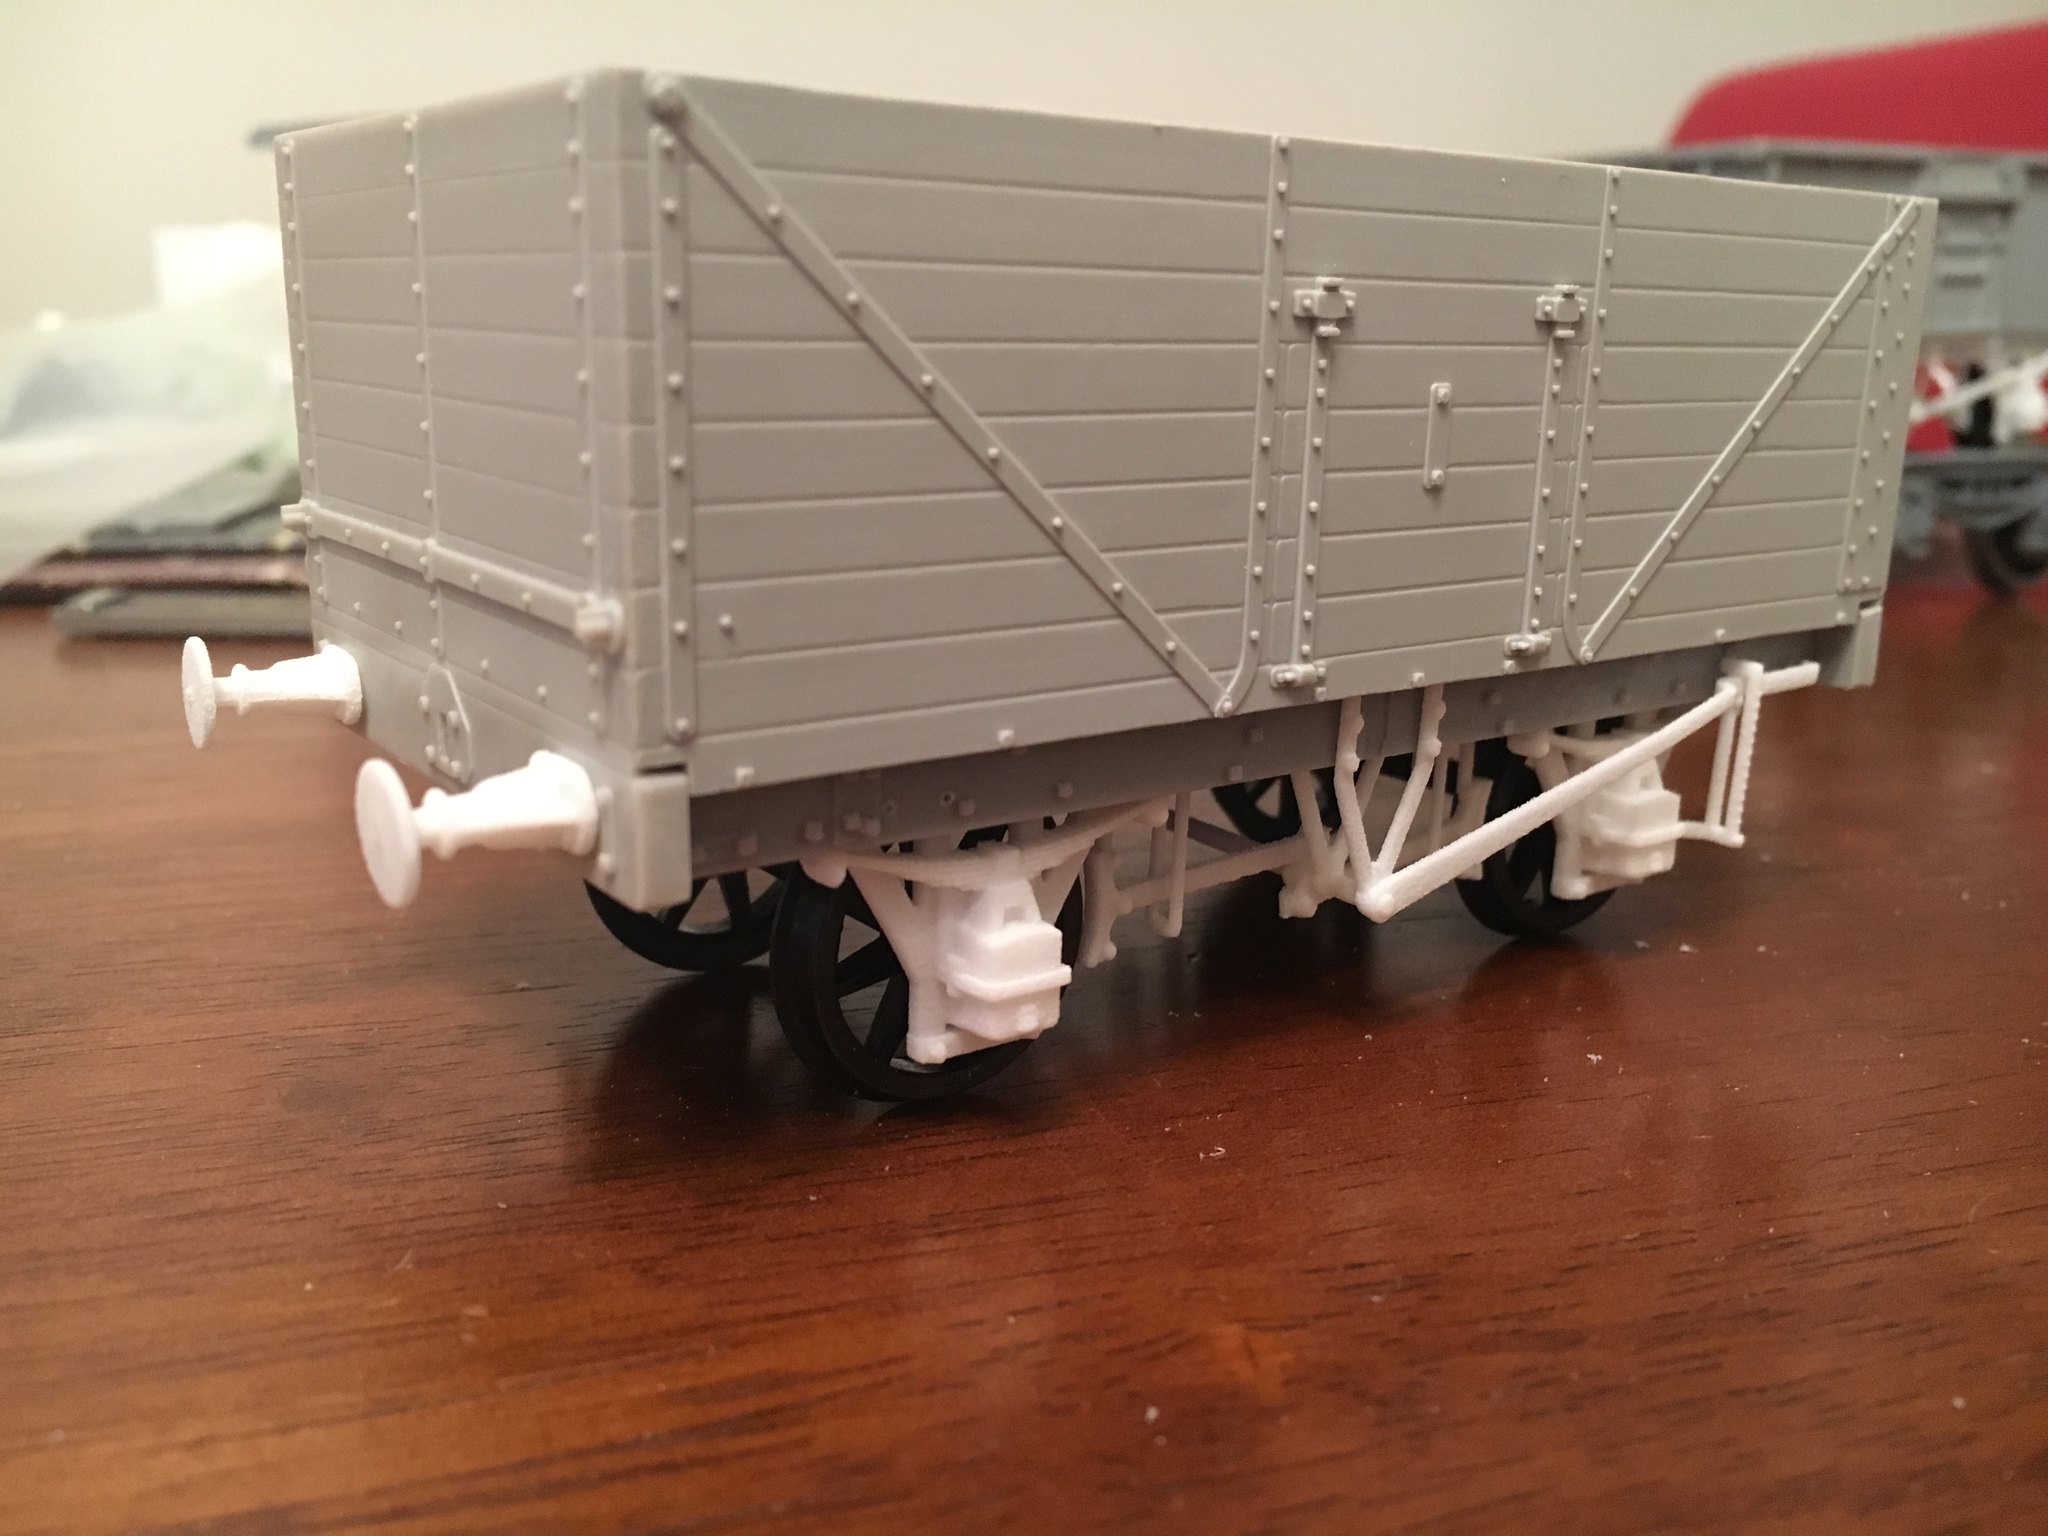 7mm 7mm wooden body mineral wagon by simon br blue, on Flickr
The next photo shows progress on the 1/32 VAA van. The chassis is WSF from Shapeways, the body is made up of separately printed doors, ends and 2 part roof printed on my Balco printer in PLA, one of the doors has had the rivets separated as when they were printed some were joined to each other (I did experiment with different spacing and size riverts but couldn't get a good look without some joining together).
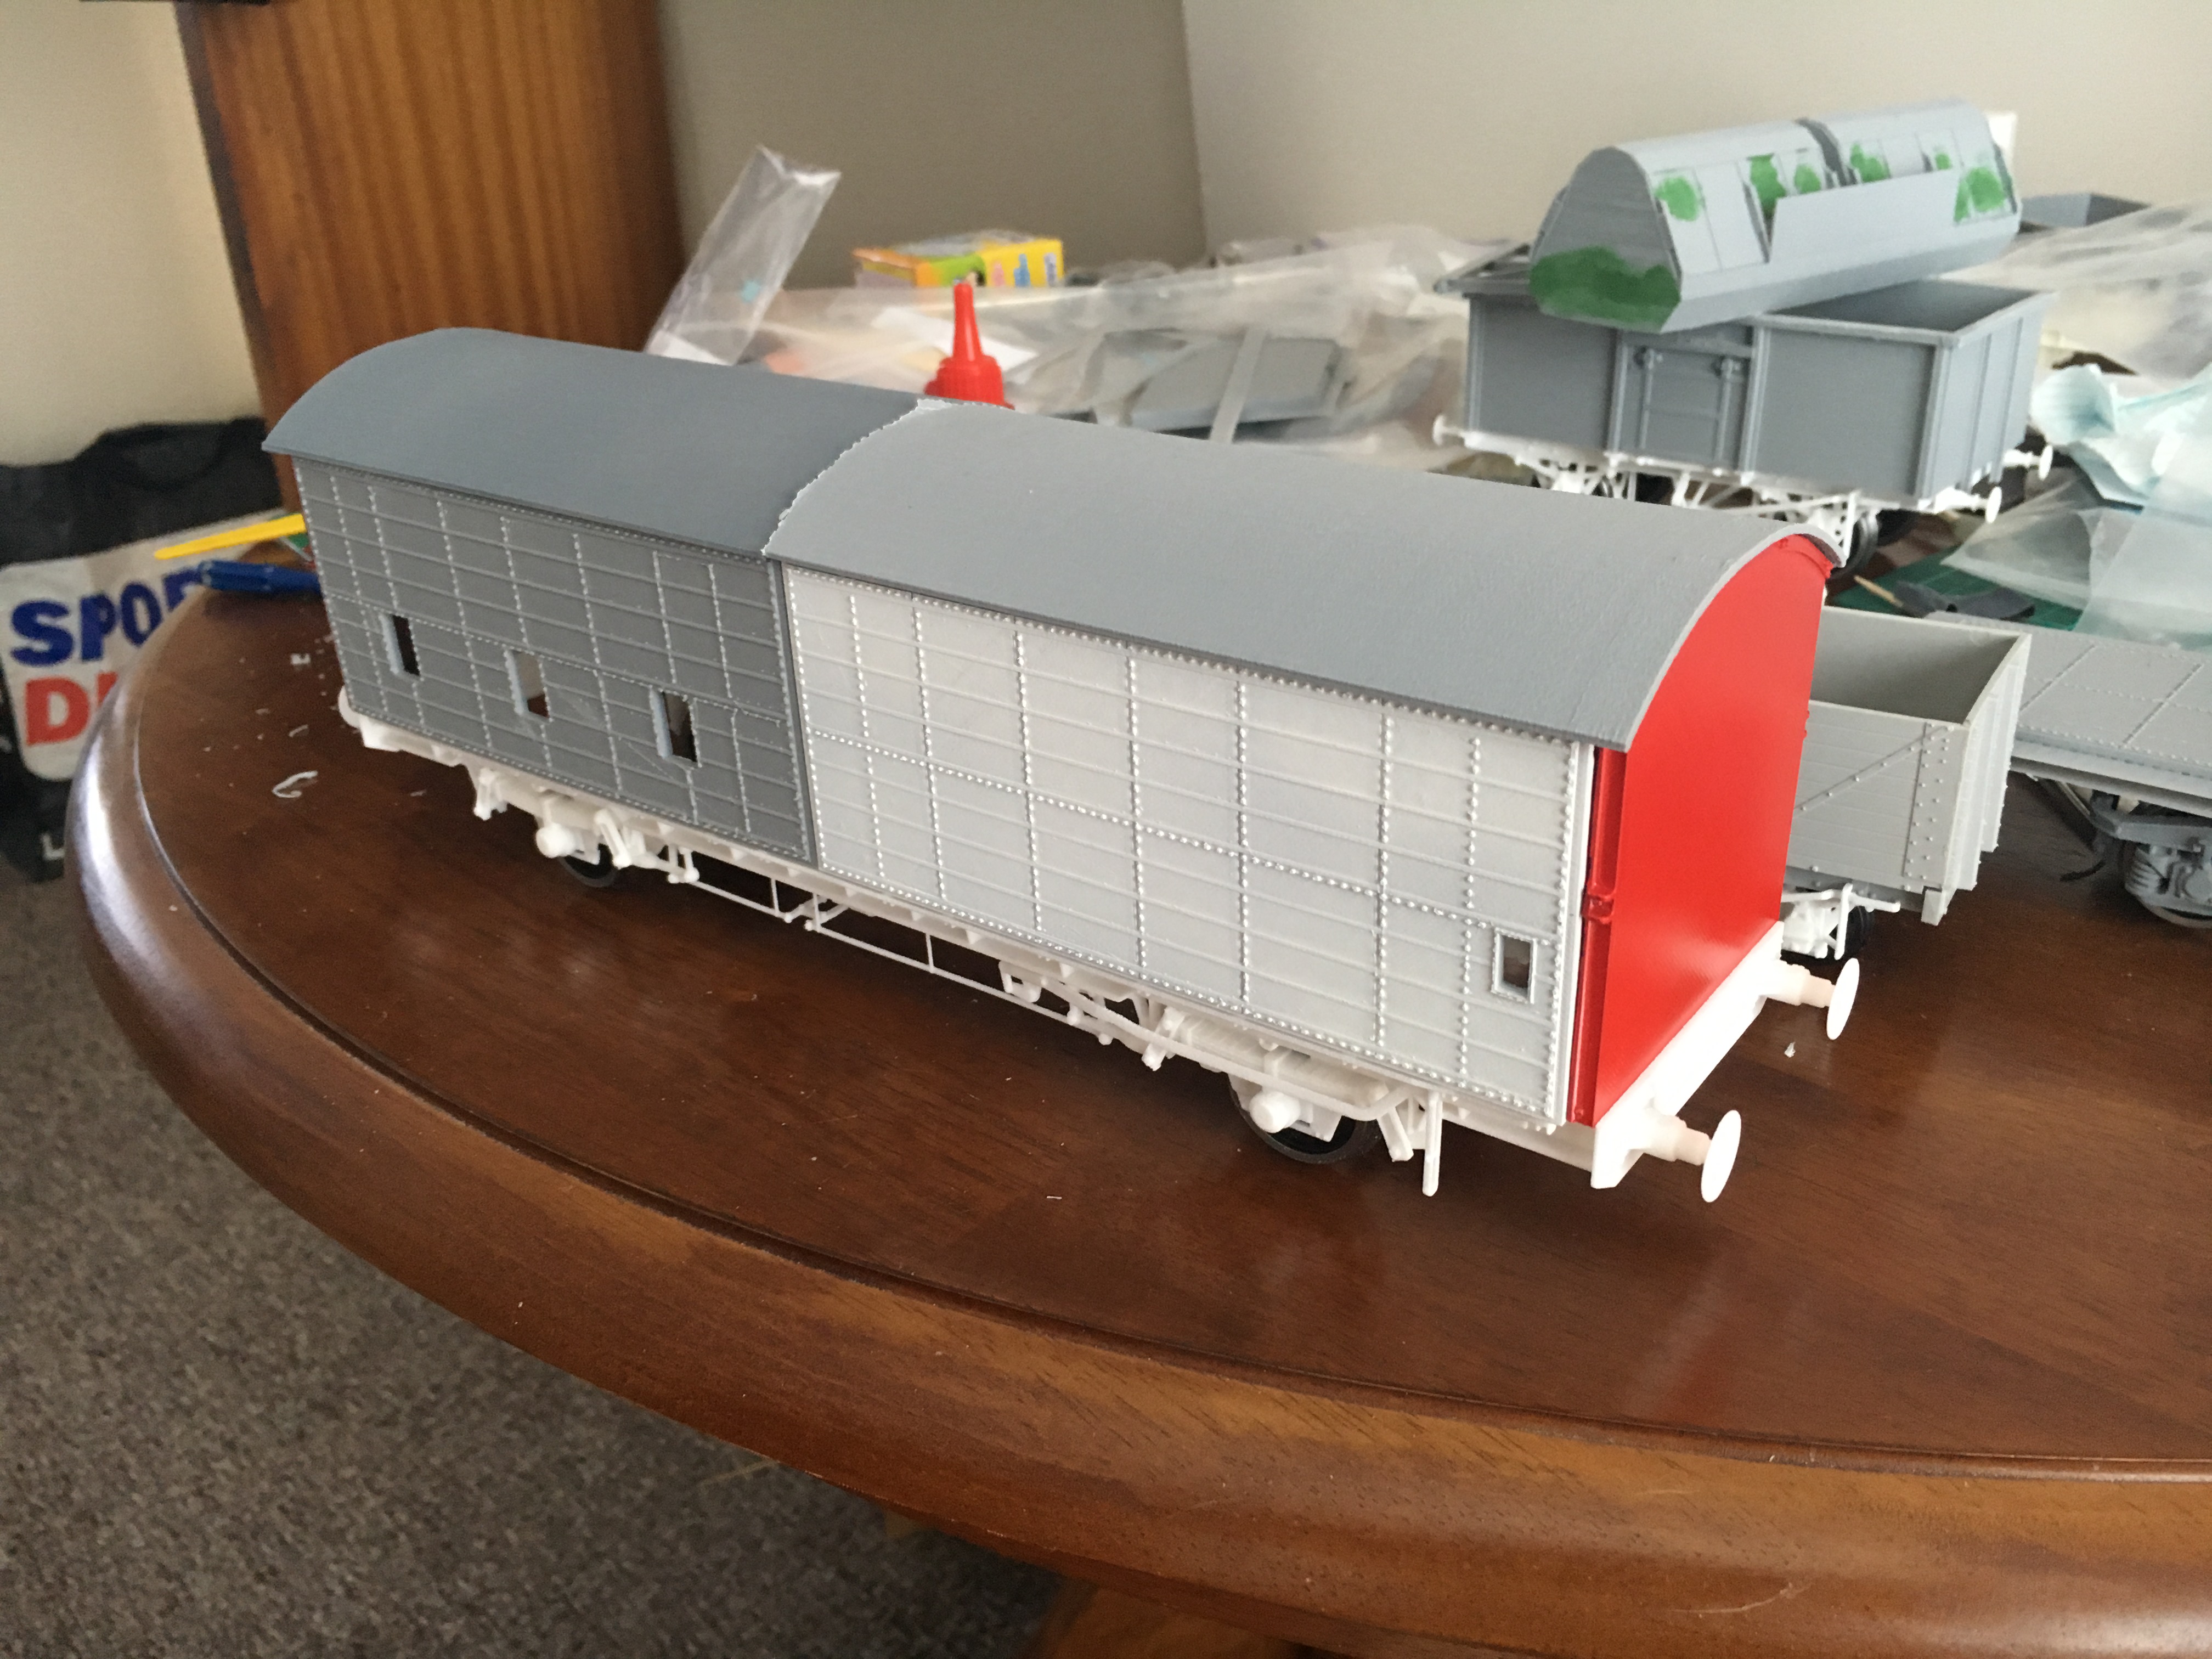 1/32 VAA van by simon br blue, on Flickr
I've done some more work on the 16t mineral wagons. Firstly I changed the 7mm Lima chassis to fit both the Lima and Triang bodies, the piture below shows a Triang body (again purchased off ebay) on the chassis. Both of these bodies are over length for the standard 9' wheelbase so the chassis was lengthened to suit them.
 Triang 7mm 16t mineral by simon br blue, on Flickr
Next mineral wagon to see progress is the 1/32 scale version which now has a WSF chassis to fit under the PLA body with separate Form 2 grey resin door detail.
 1/32 16t mineral wagon by simon br blue, on Flickr
The last mineral wagon photo shows the 7mm PLA print of a wagon body with the sides bent out of shape. The sides have had a bit of filler to smooth out the bends a bit and is pictured with the 3 versions together.
 3 16t mineral wagons by simon br blue, on Flickr
The next 3 photos show a 7mm GER no.16 van test I did on the Balco printer. The chassis was modified from the version drawn for WSF on Shapeways to change the supports to make it easier to print using the Cura slicer software - some supports were added in Blender to make sure parts were supported when printed. The chassis was printed upside down to aid support and the version shown being printed is mk2 with separate steps/boards as these didn't print well in the first version as when tuned up the correct way the top was rough. The second photo also shows the body that was printed up the correct way without a roof as this would have required a lot of support material and limited access when fixed to the chassis, the chassis is as printed without the support material being removed. The last photo shows the body attached to the original chassis (with the poorly printed/supported steps/boards).
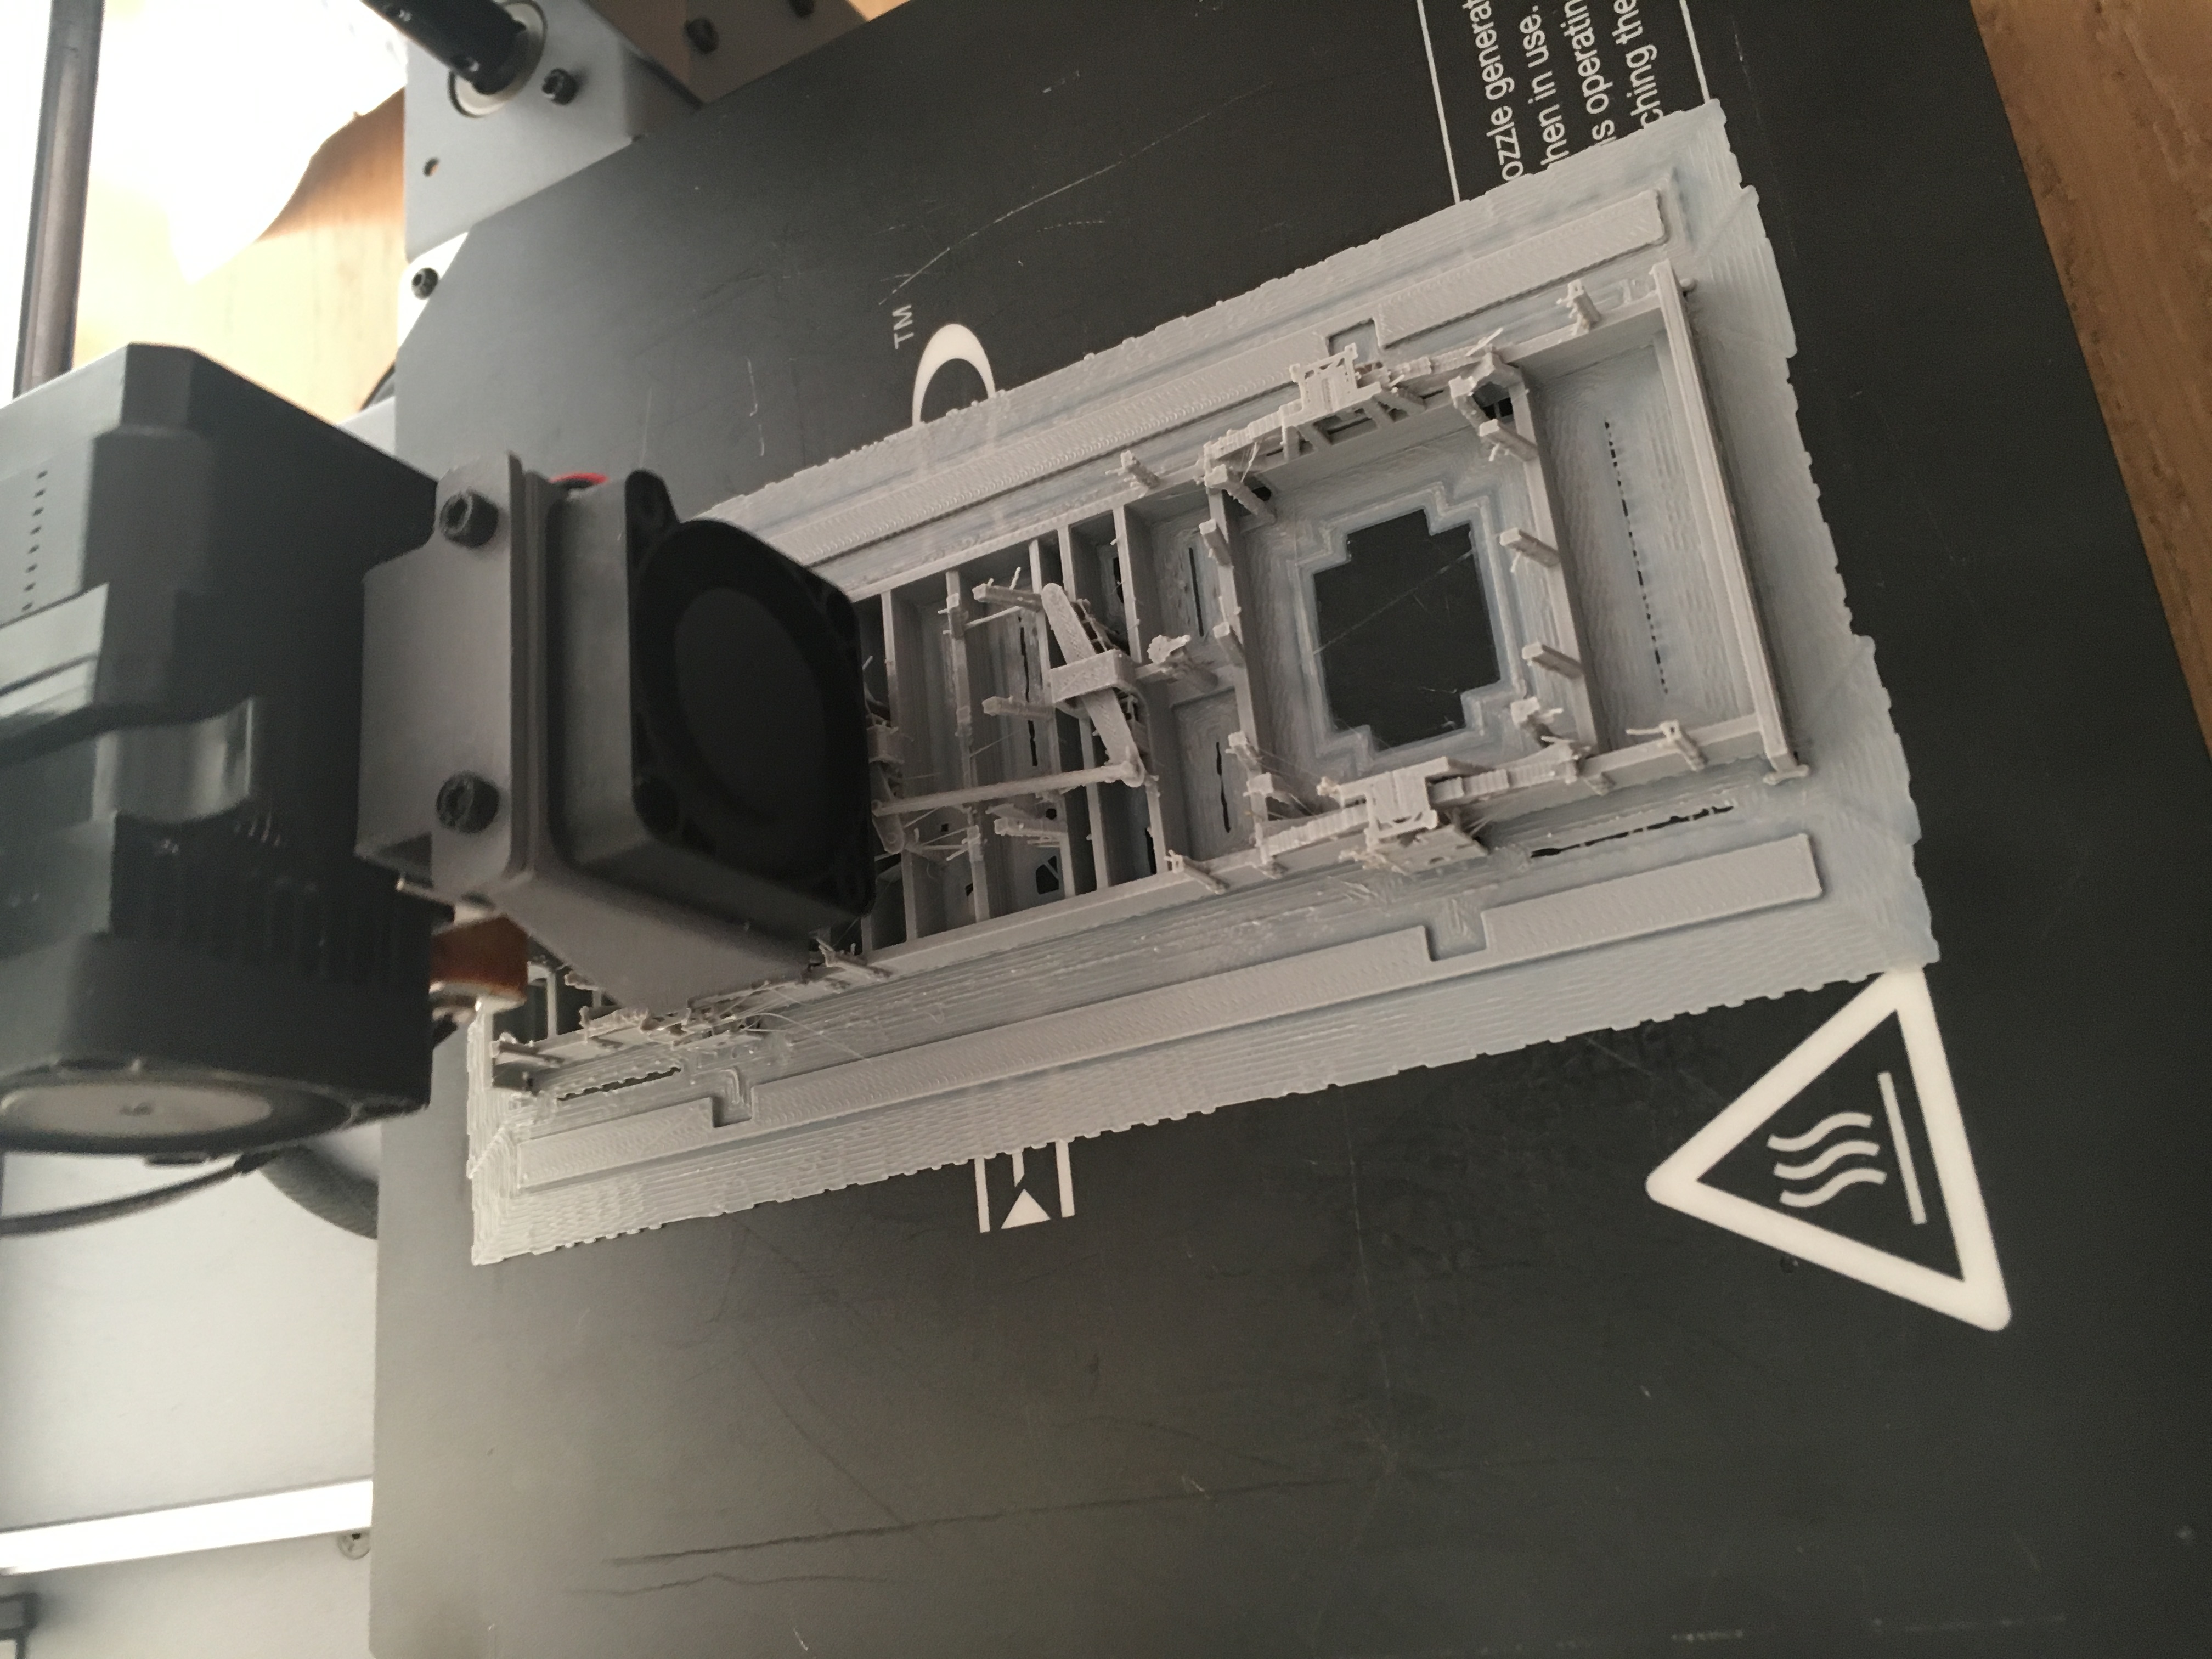 GER no.16 chassis by simon br blue, on Flickr
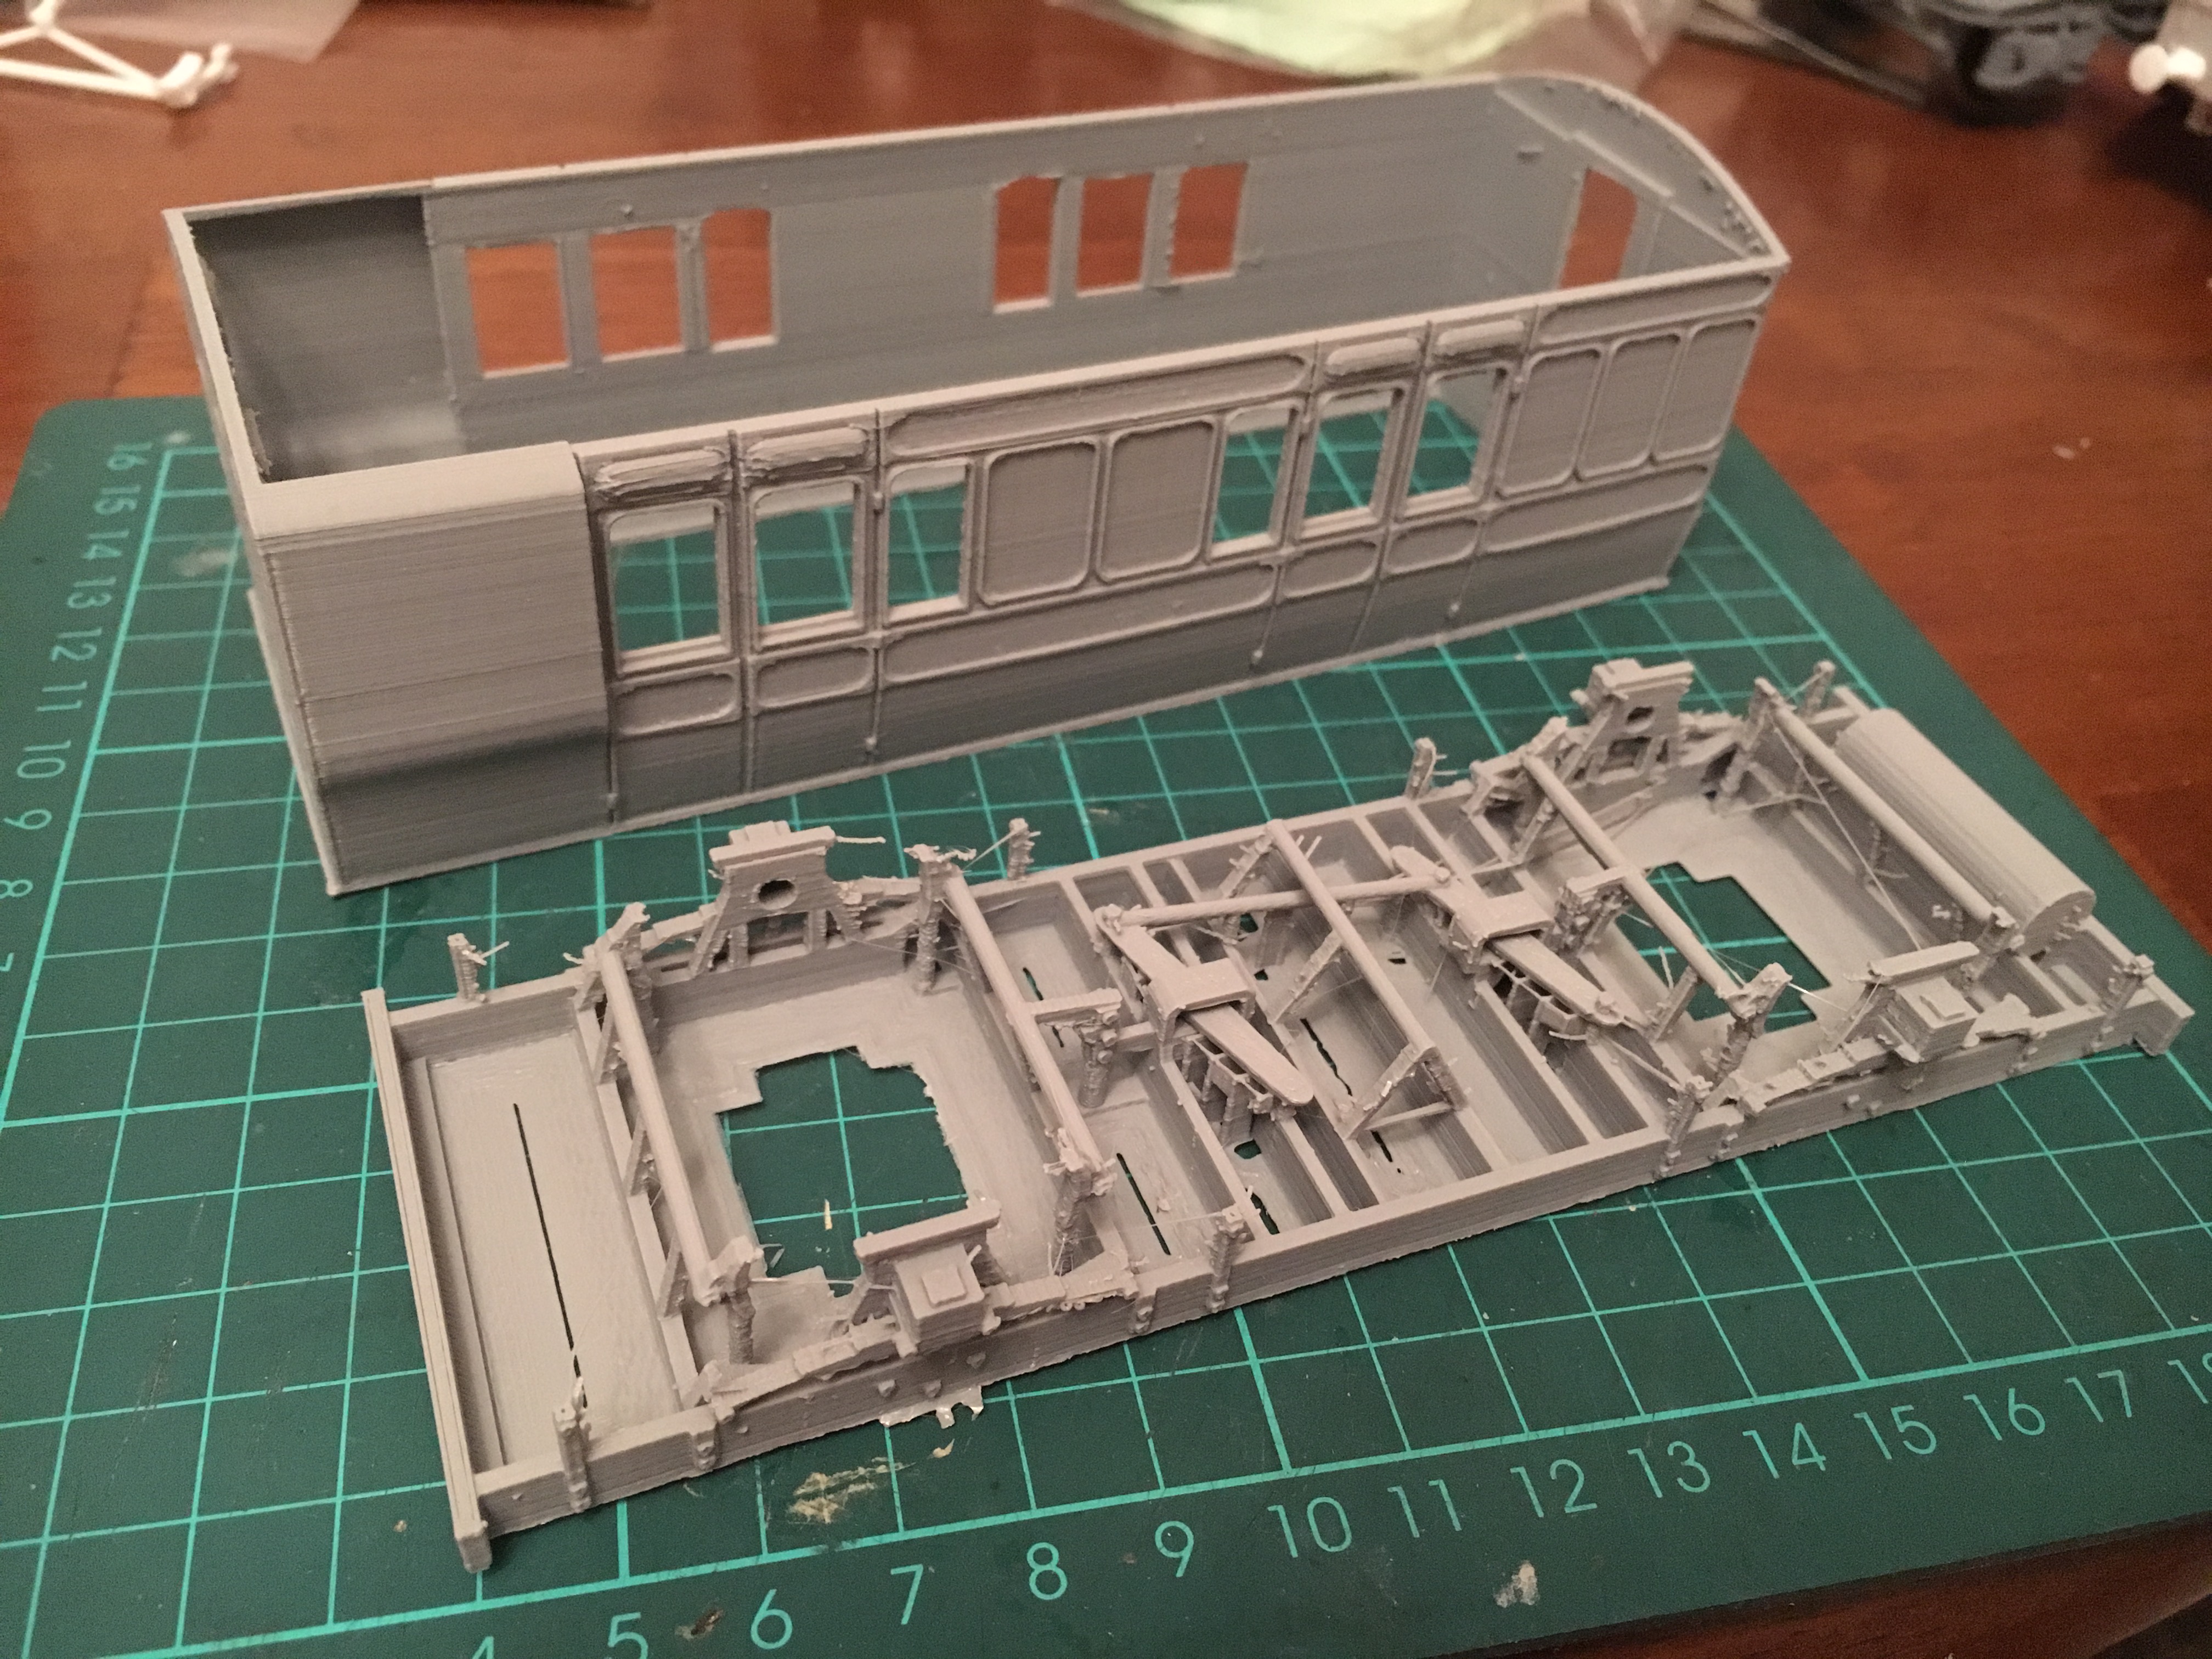 7mm GER no.16 van by simon br blue, on Flickr
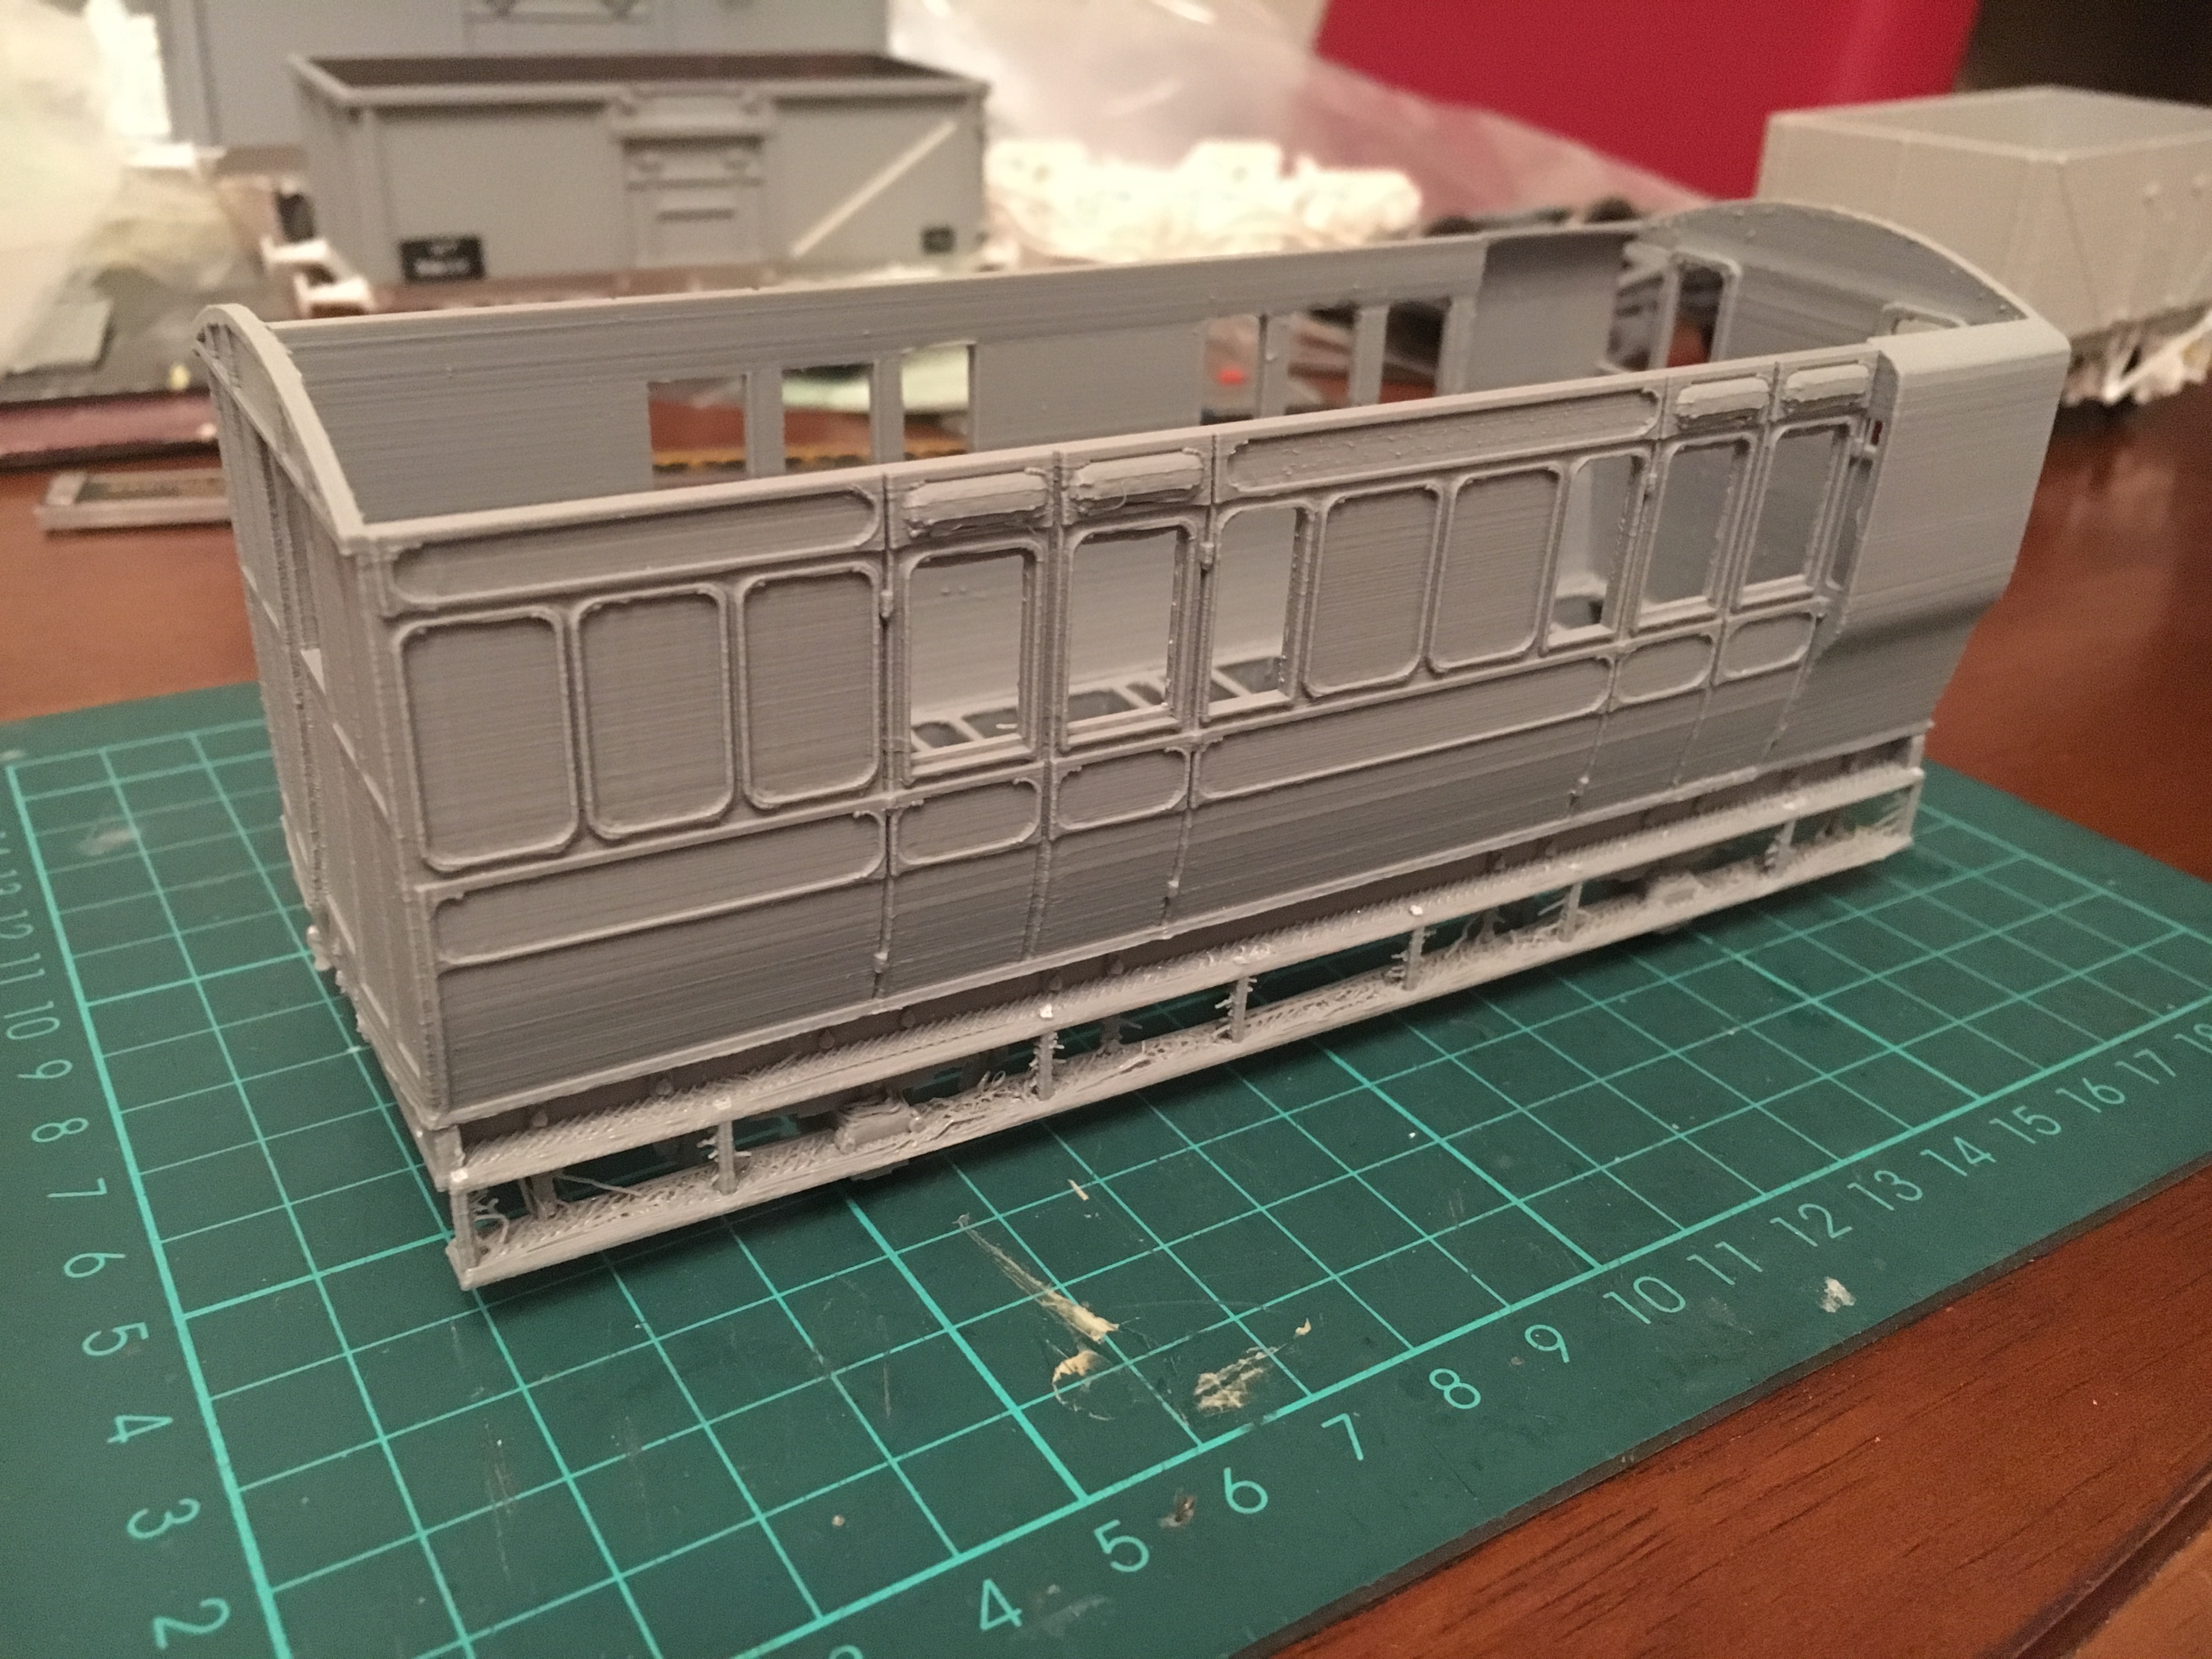 7mm GER no. 16 van by simon br blue, on Flickr
-
5
-
-
As HDA was finishing I decided to place a big order of all the models I’d previously designed for HDA but sadly Shapeways have rejected most of them even though most were based on models printed recently and the drawings modified from them. I guess they’ve given up on this material and trying to print new models.
-
I liked HDA and was happy with most of my prints. I think often the problem with warping was because the minimum thickness was 0.6mm a lot of parts like coach bodies were drawn on the limits.
Personally I don't think that HP nylon is a option for replacing HDA. HP nylon was originally touted as a cheaper and better WSF (which it was until Shapeways doubled the price of it). FUD is a useful material but is let down by the problems with support material being left on designs. Below is a picture of a 2mm coach printed in HDA and HP nylon and the surface detail is totally different.
 2mm W&U bogie coach by simon br blue, on Flickr
A similar material to HDA are some of the resins used in the Formlabs Form 2, below are a couple of pictures of the same model printed in HDA and on my Form2 in grey resin.
 Drewry tram 2mm by simon br blue, on Flickr
 2mm Drewry shunter by simon br blue, on Flickr
-
5
-


3D printing class 25 parts .... Also class 20,37, 2mm and 7mm wagons and 1/32 bogies
in 3D Printing, Laser Cutting, CAD & CNC
Posted
Time for another update.
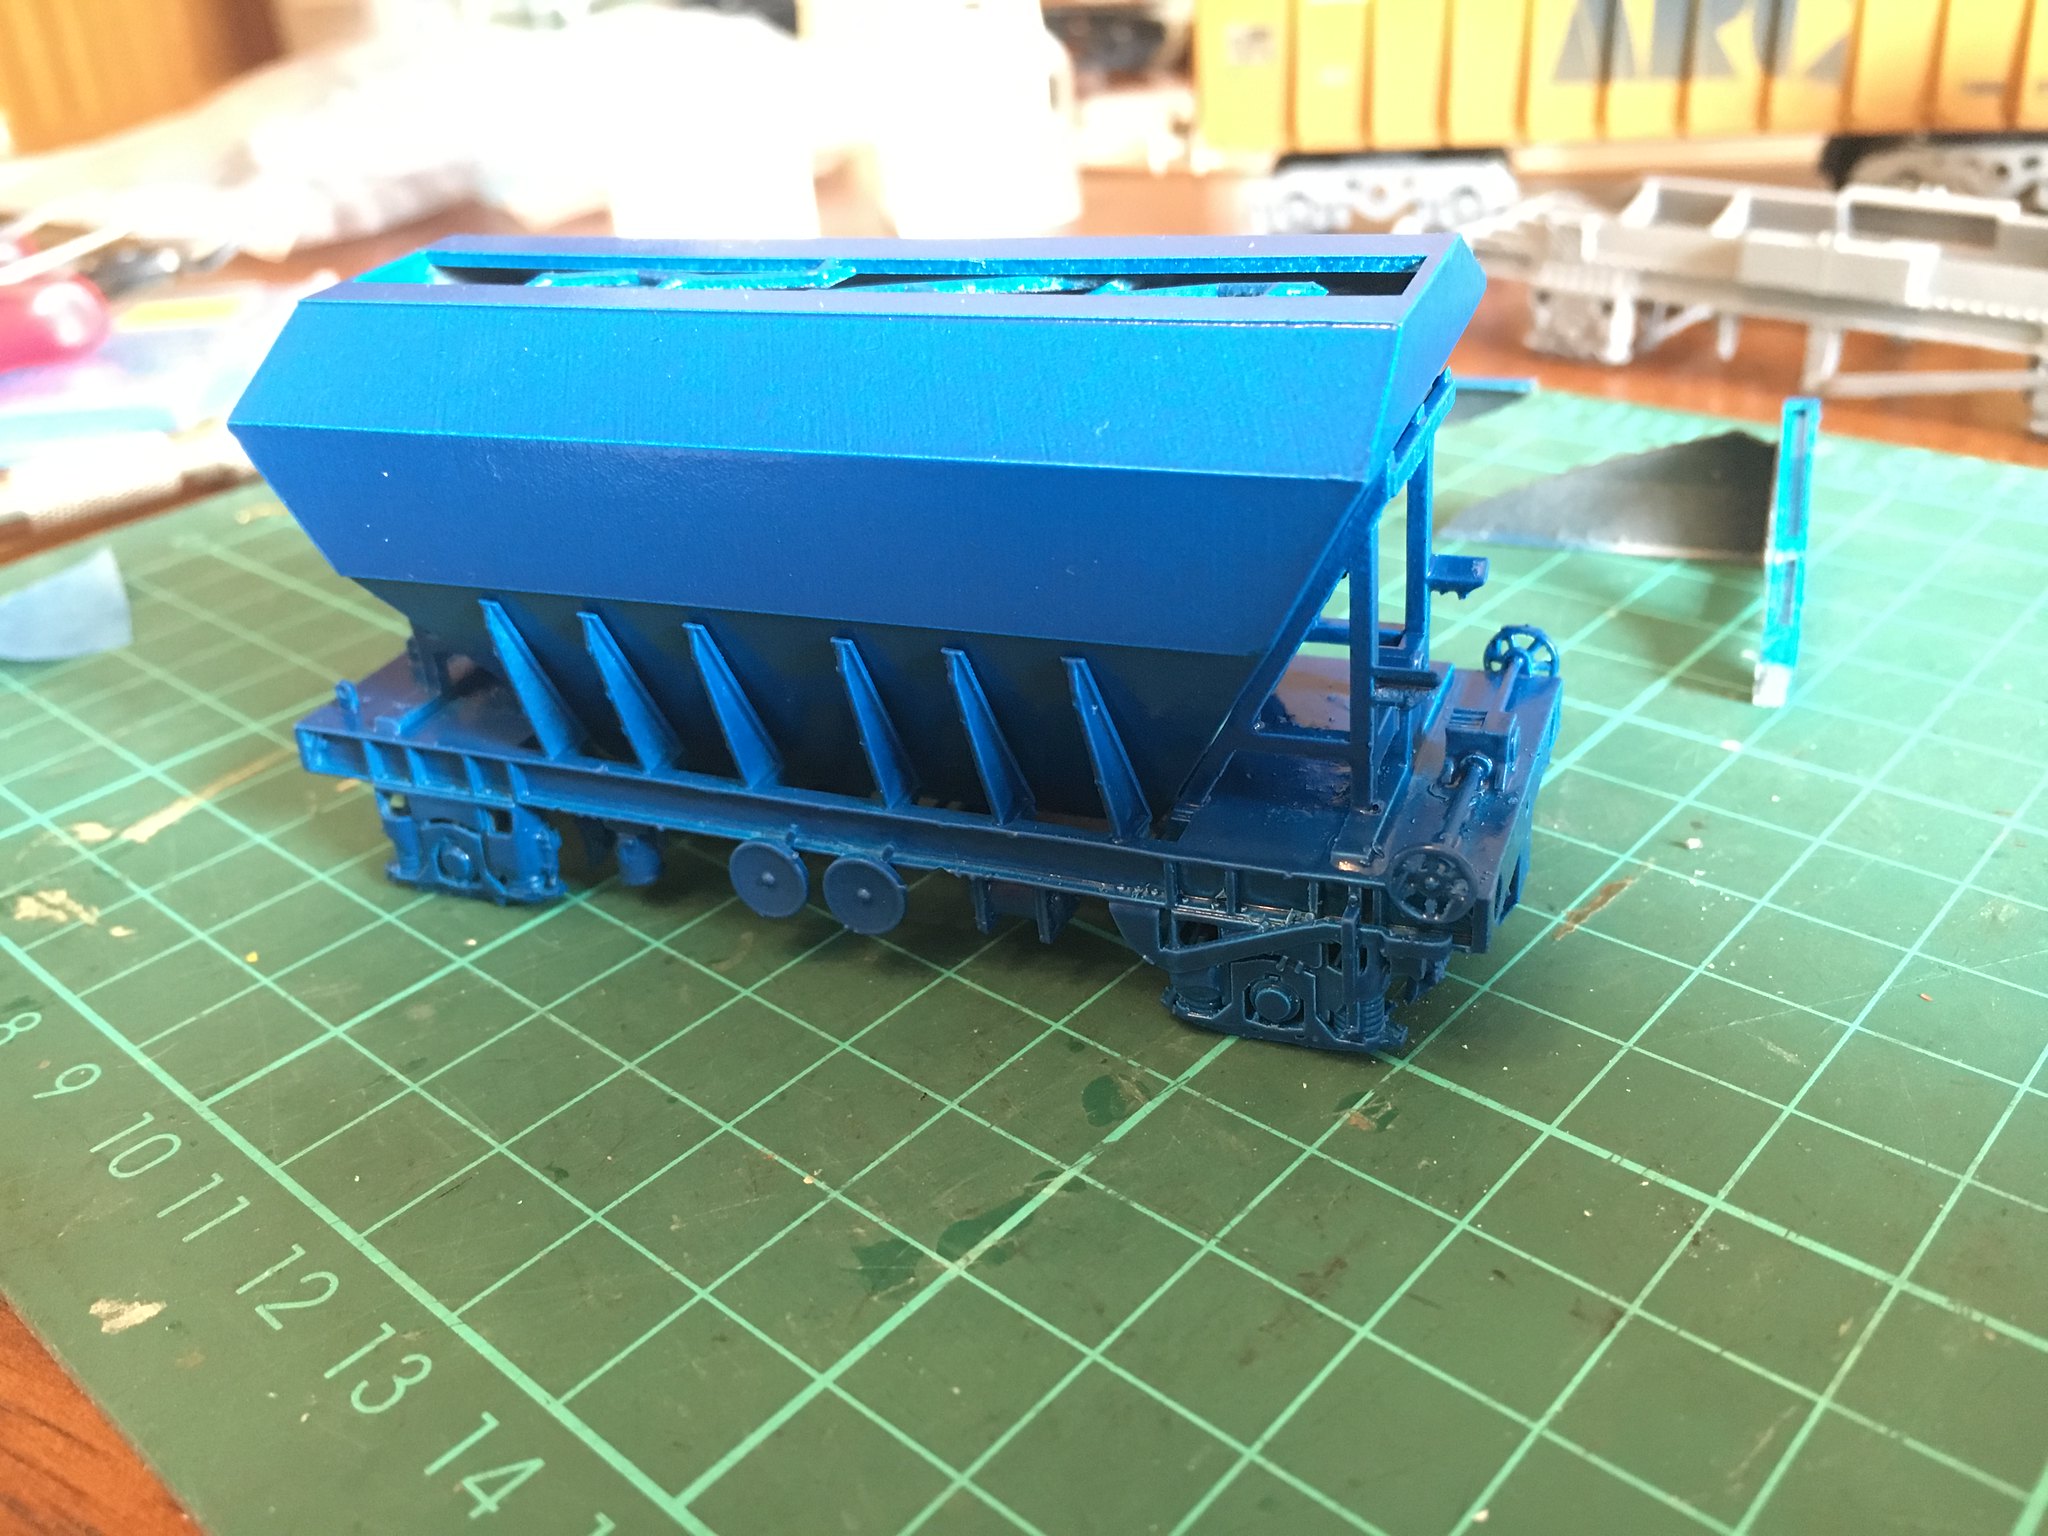
Firstly some wagons that I uploaded to flickr but forgot to post on this thread. A wagon that was finished but waiting transfers, weathering and a load was the 7mm POA scrap wagon. I've made a couple of versions of this available on shapeways with 2 types of suspension and an open or solid bodyside to enable dents and to be made plasticard sides. The transfers are from Railtec and the load is loose material from Ebay. The 4mm Bachmann POA was used as a test for weathering and adding a load.
Also weathered at the same time was a lightly weathered 7mm Campbells soup wagon, a 16t mineral wagon with my printed chassis and homemade transfers and the original Shapeways Polybulk.
A couple of more wagons part built are the 7mm HTV hopper and Grain hopper. The HTV has a Shapeways WSF chassis and PLA hopper, I still need to add the end frame and handrails. The Grain hopper is WSF chassis and details with a PLA hopper and Form 2 resin top hatches, this still needs the side hatch fitting.