


simon br blue
-
Posts
386 -
Joined
-
Last visited
Content Type
Profiles
Forums
Blogs
Gallery
Events
Exhibition Layout Details
Store
Posts posted by simon br blue
-
-
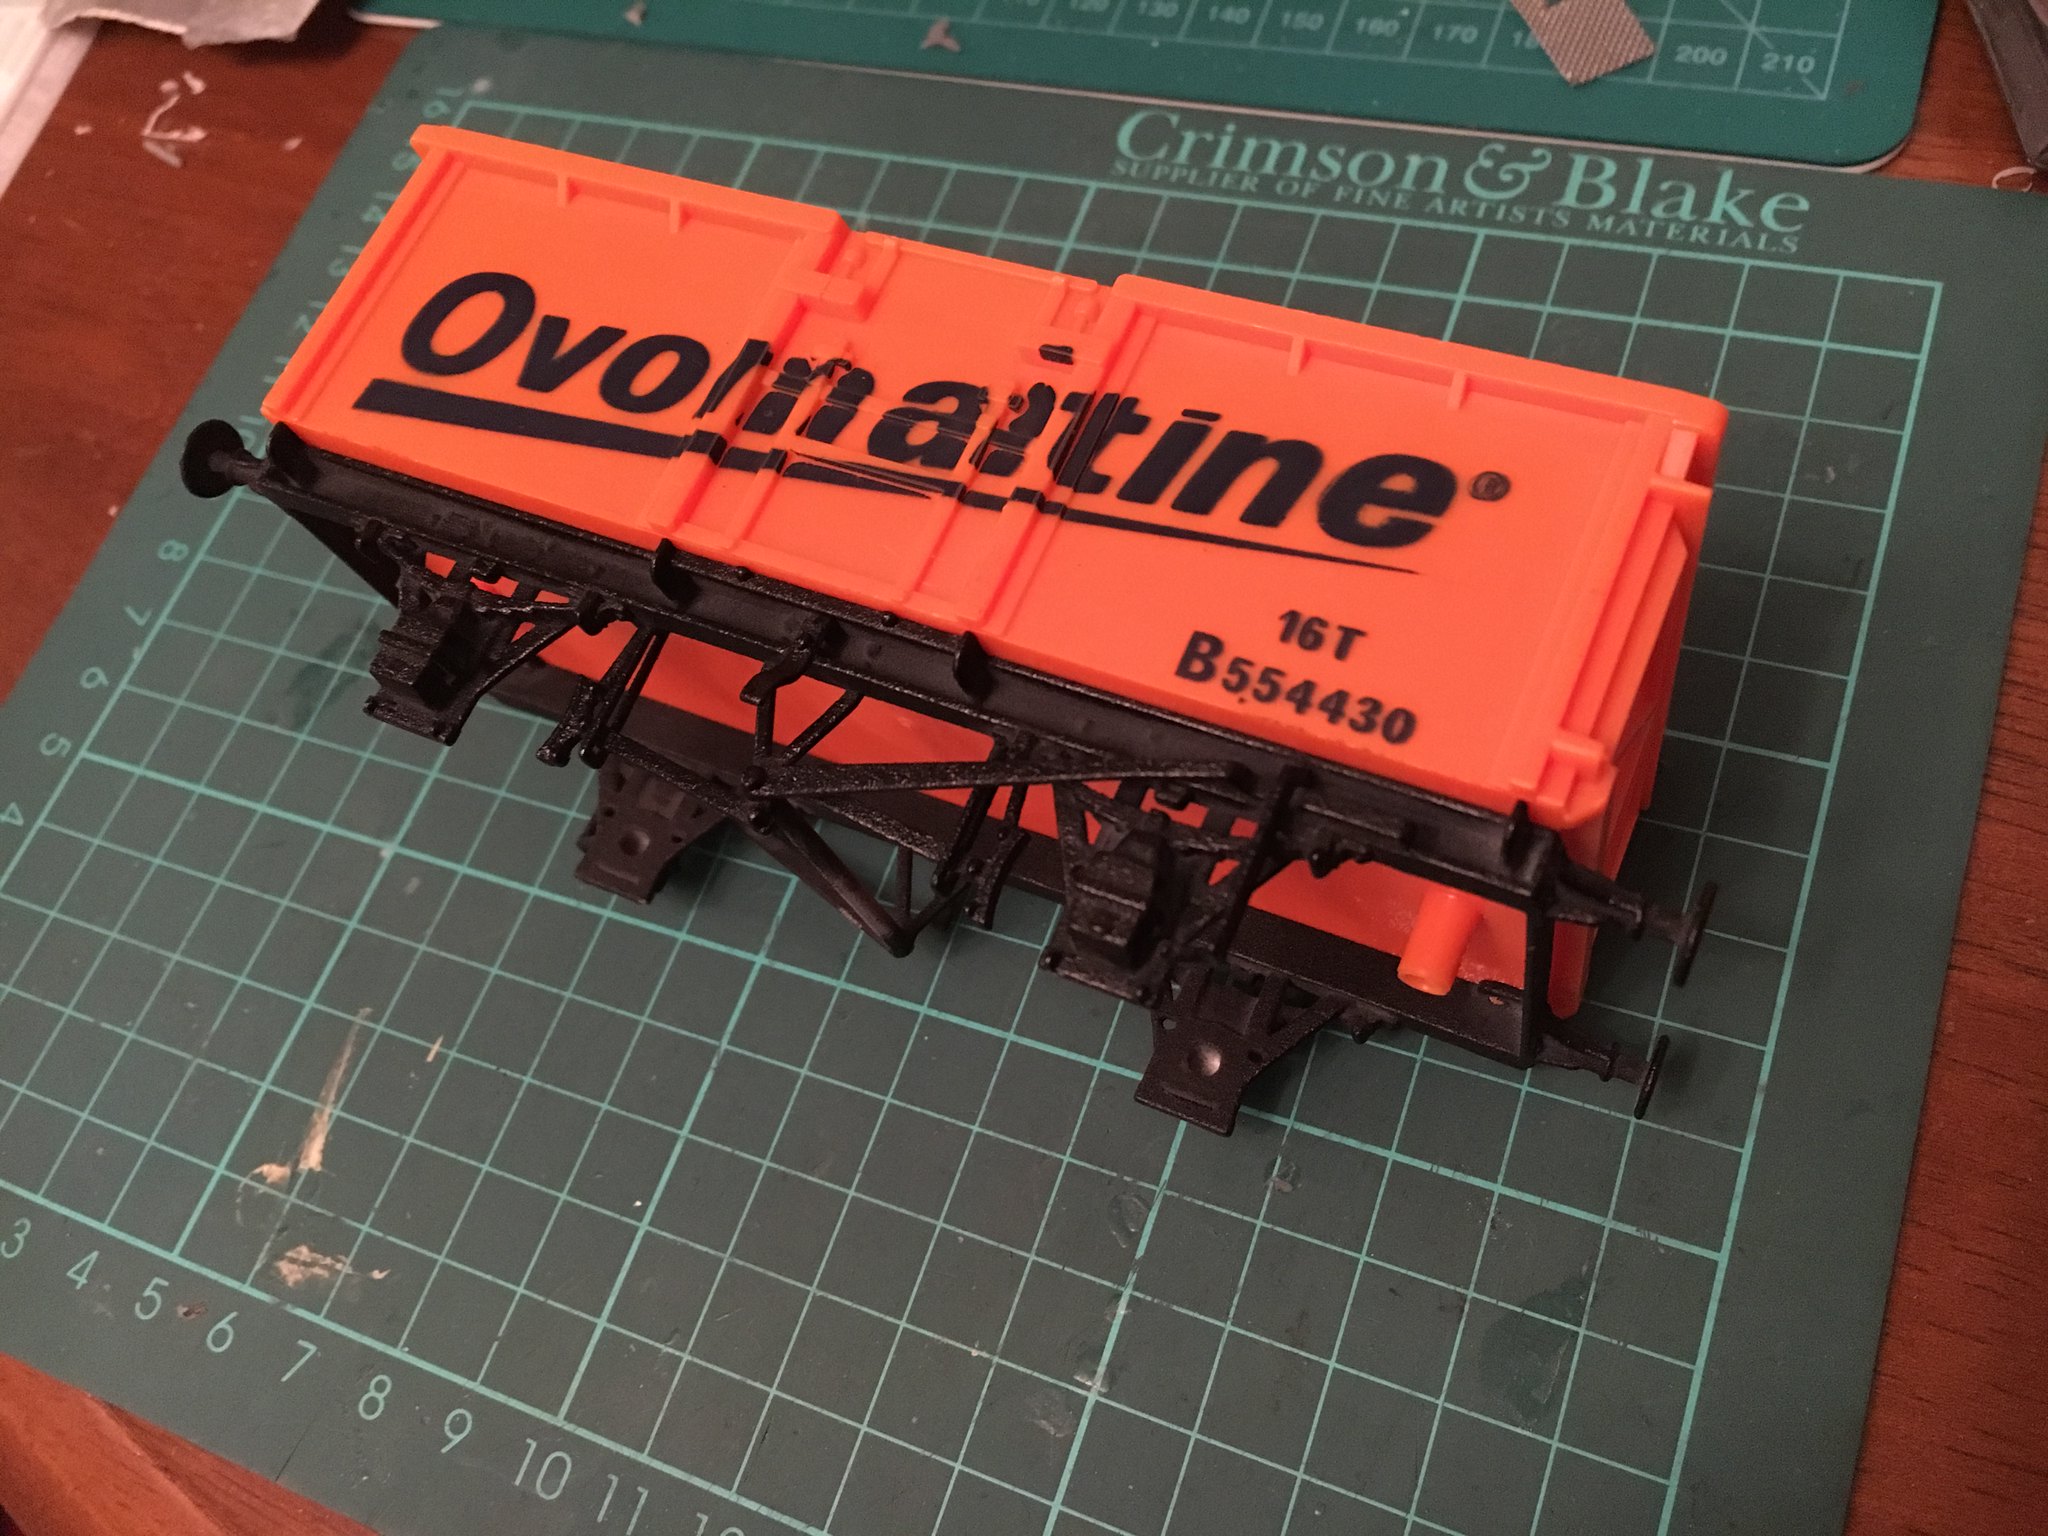
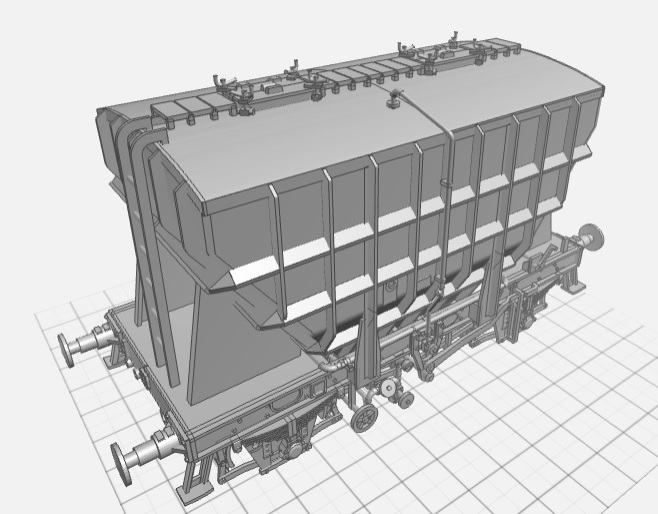
As luck would have it I've printed a 16t mineral wagon body in 1/32 scale. The picture below is the first print, I've now done a second print with a couple of modifications including printing the end door detail separately as top surface (when the wagon was turned up the correct way) wasn't smooth.
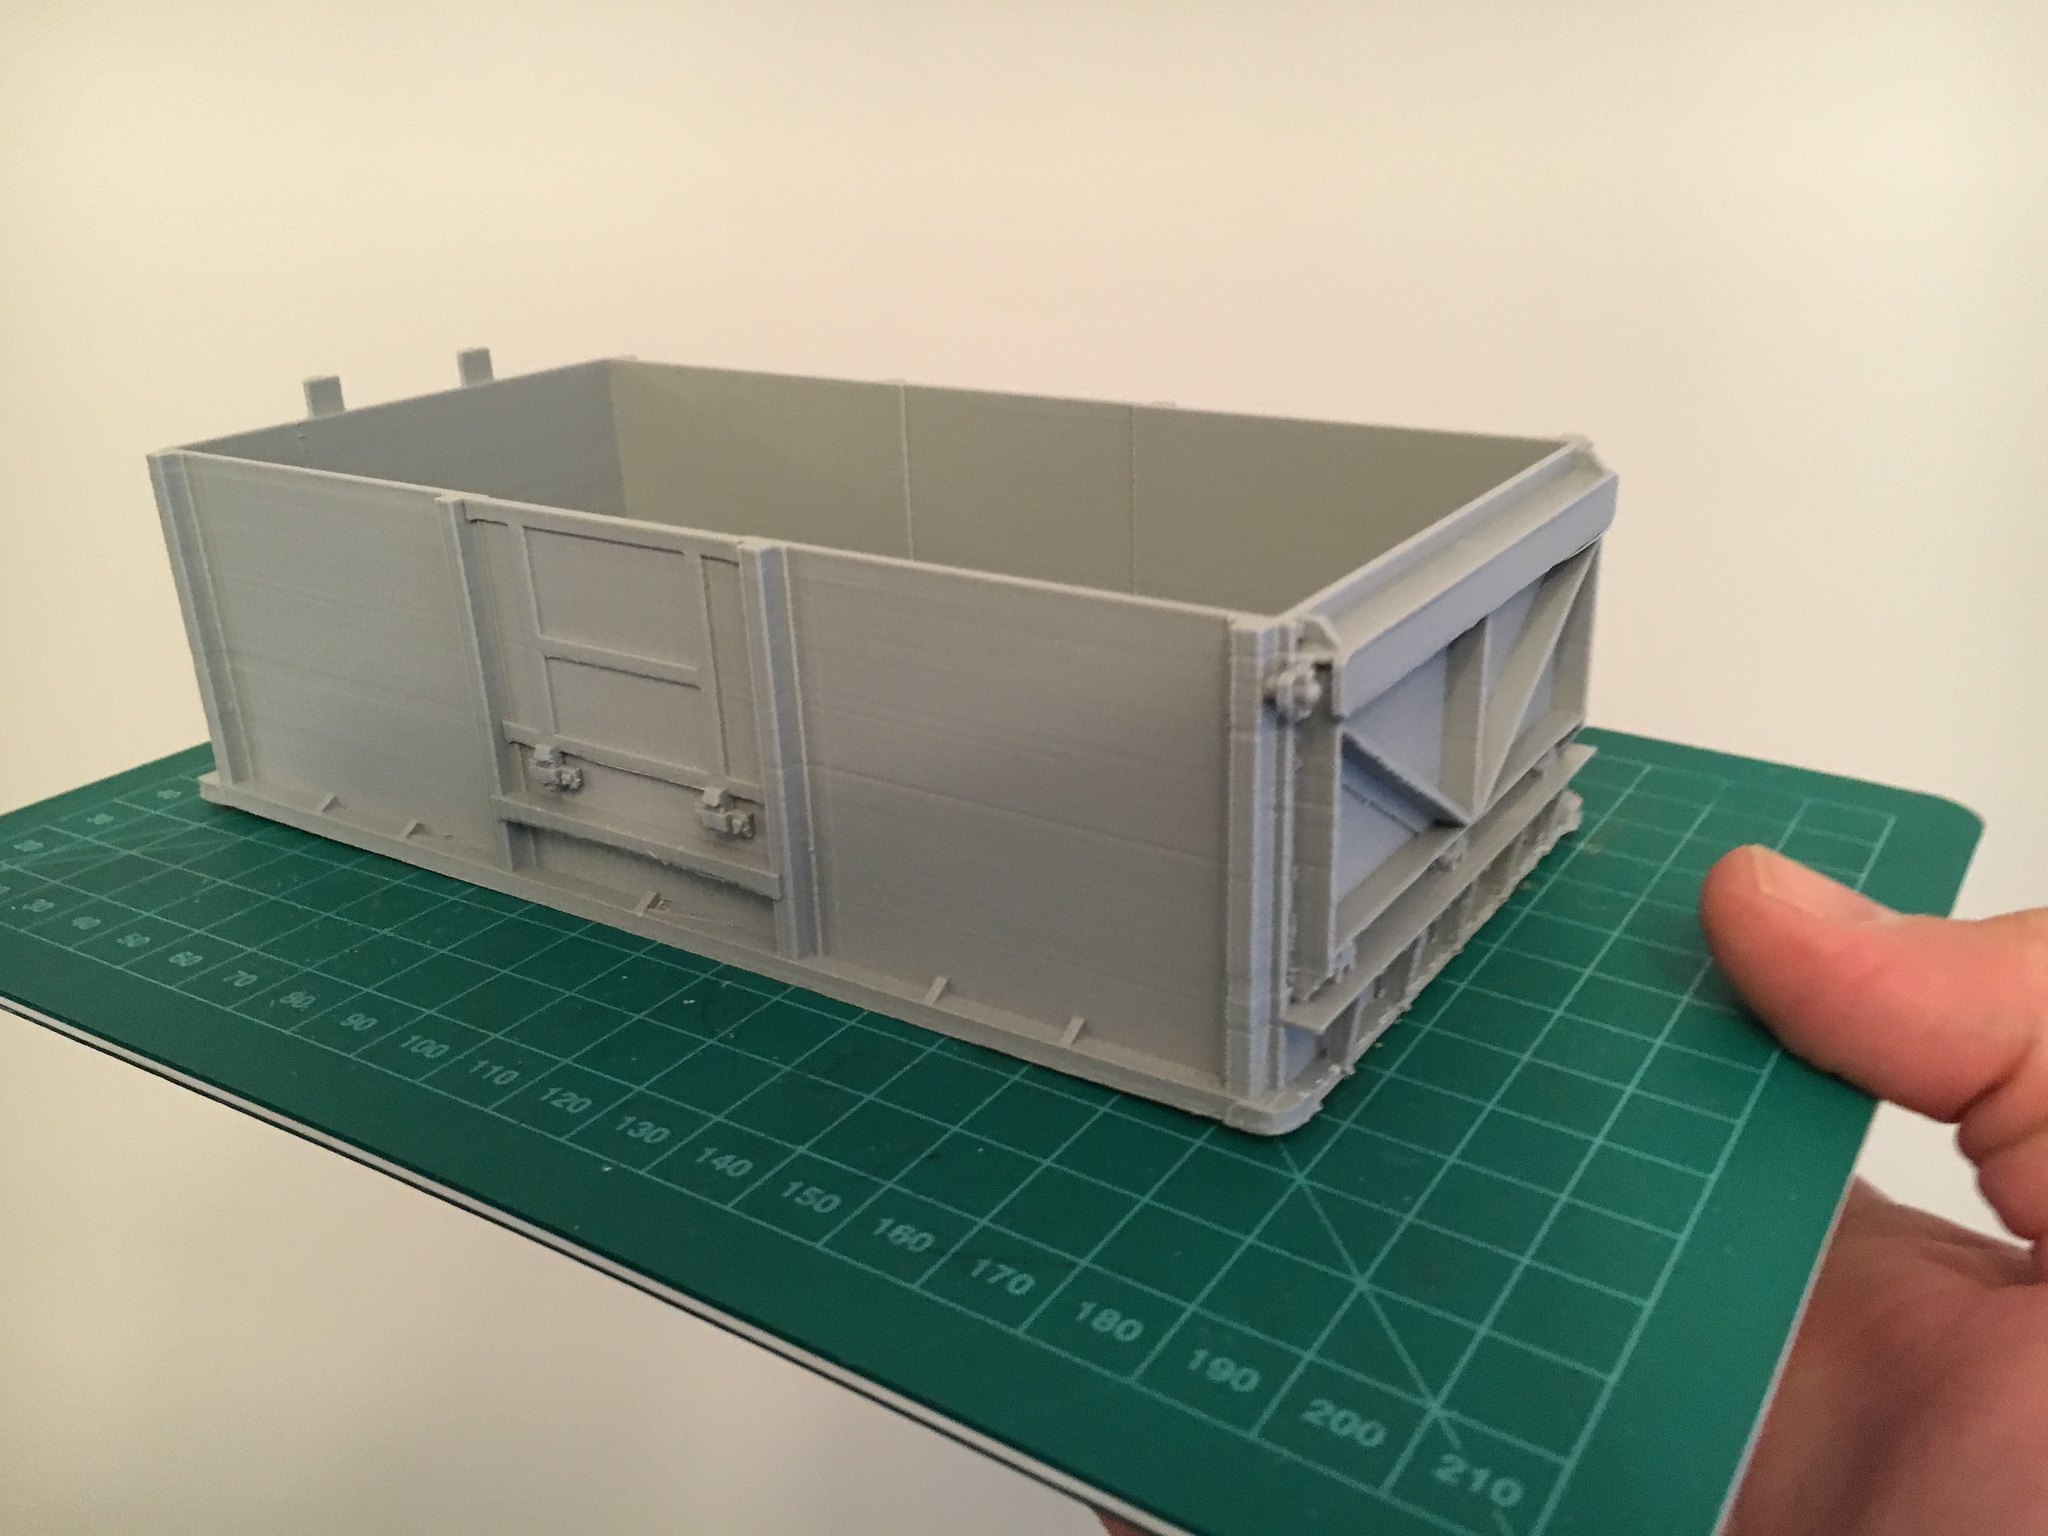 1.32 16t mineral body by simon br blue, on Flickr
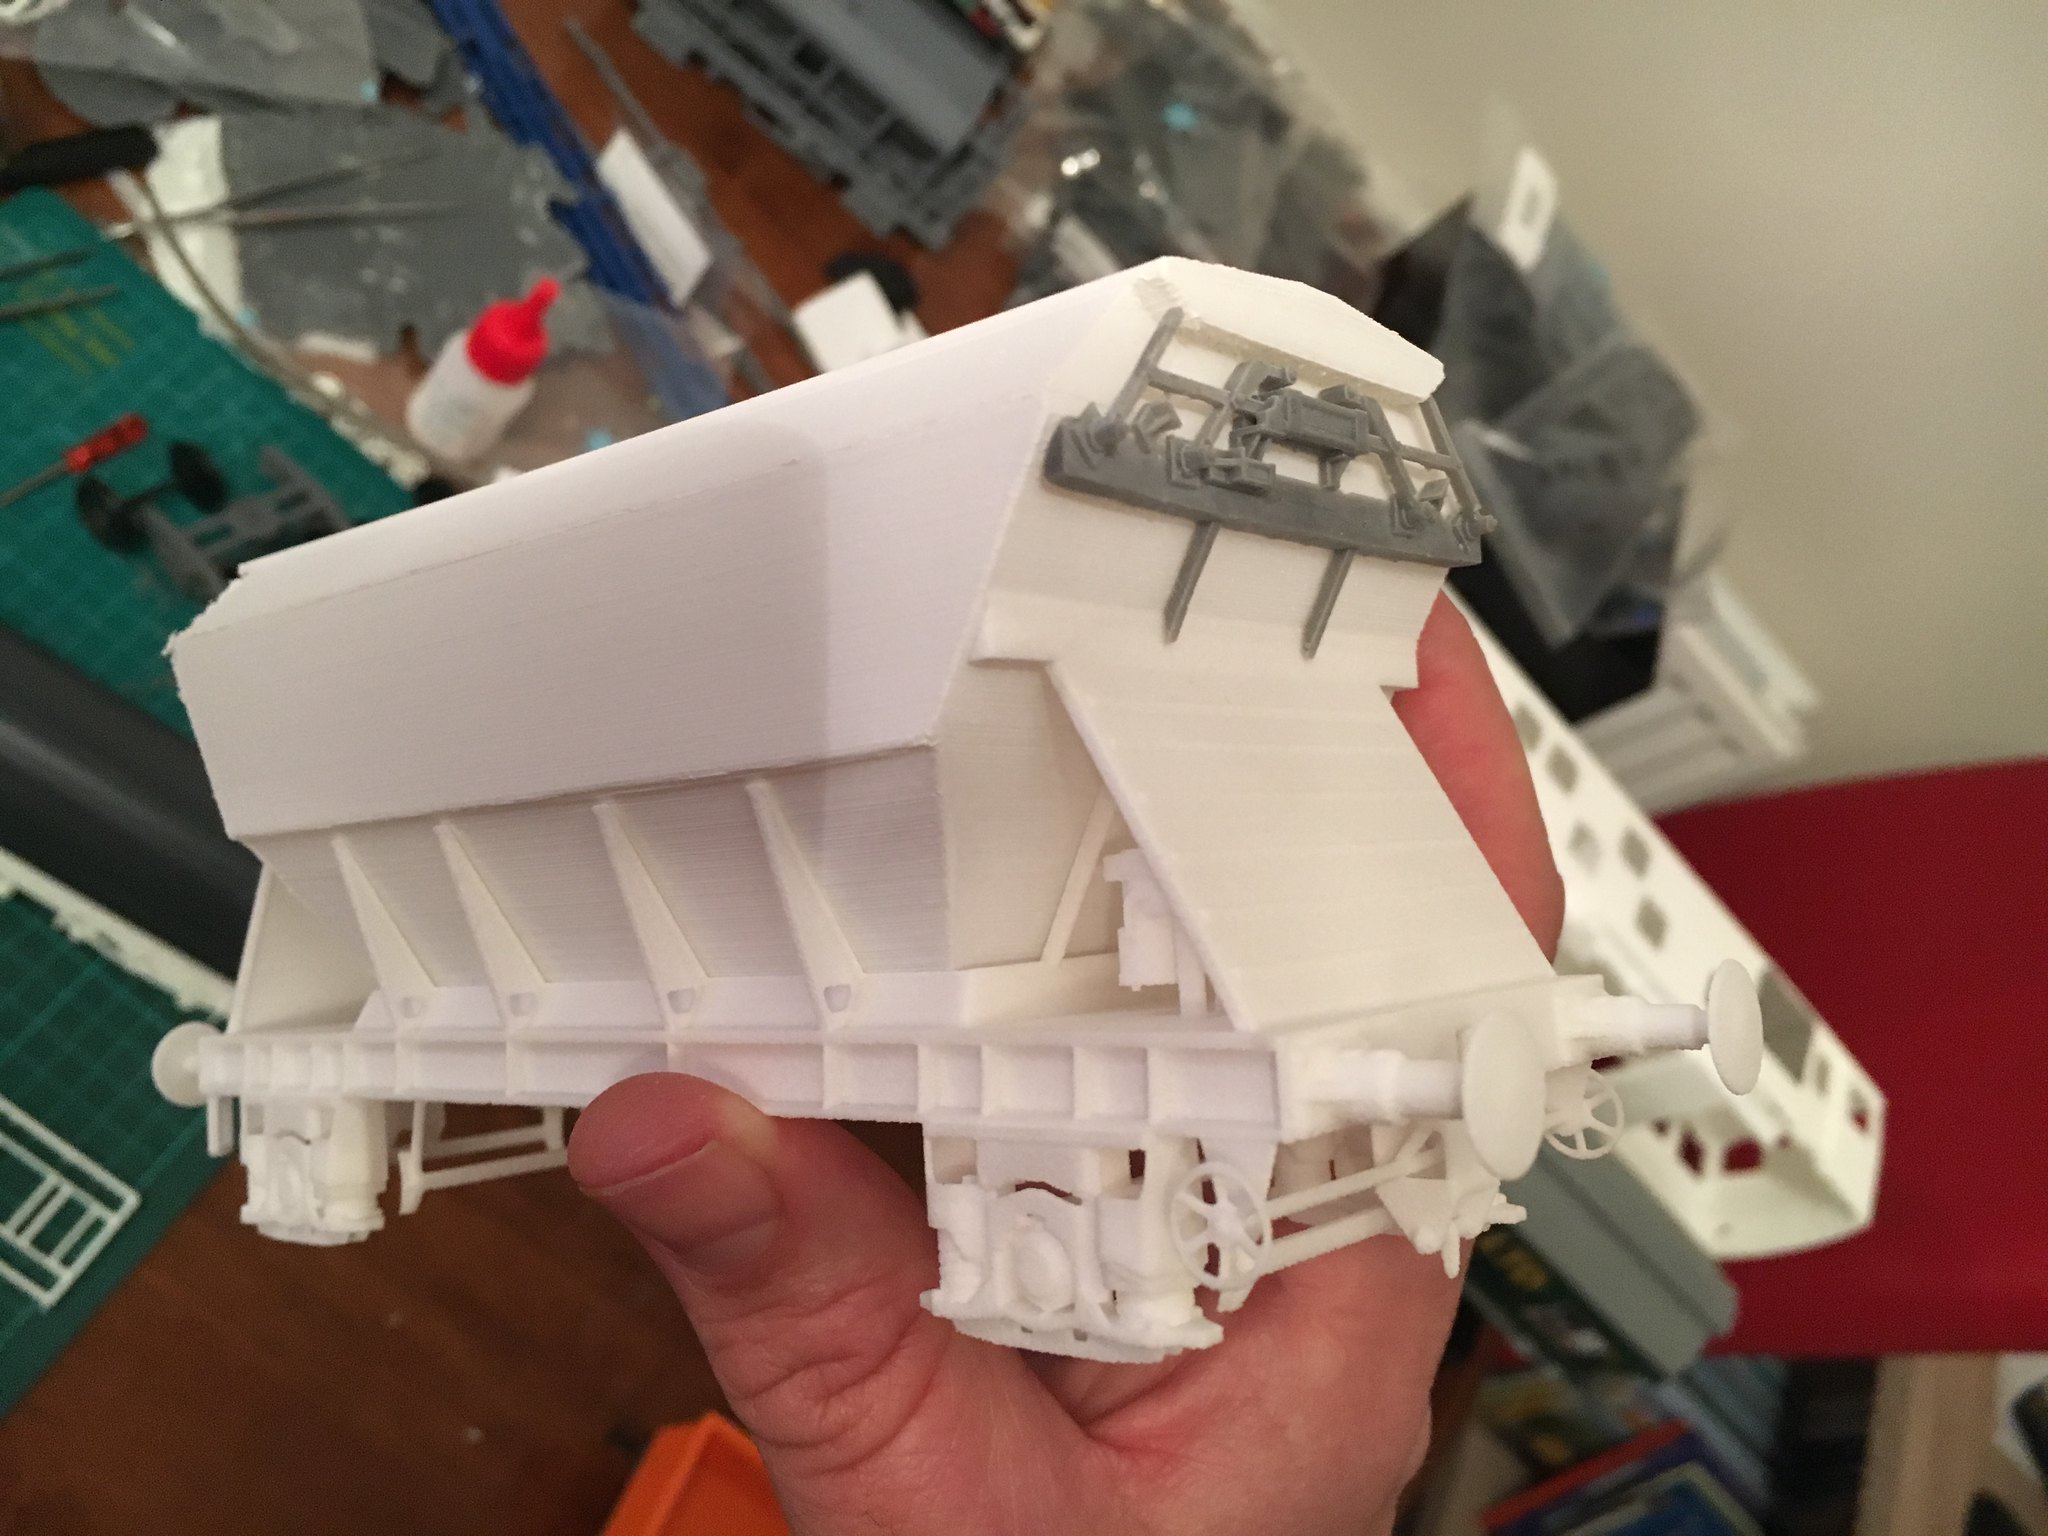
I've also had a couple of prints done of a 1/32 scale Presflo hopper, like the mineral body this was printed upside-down and the top surface is rough and needs covering up.
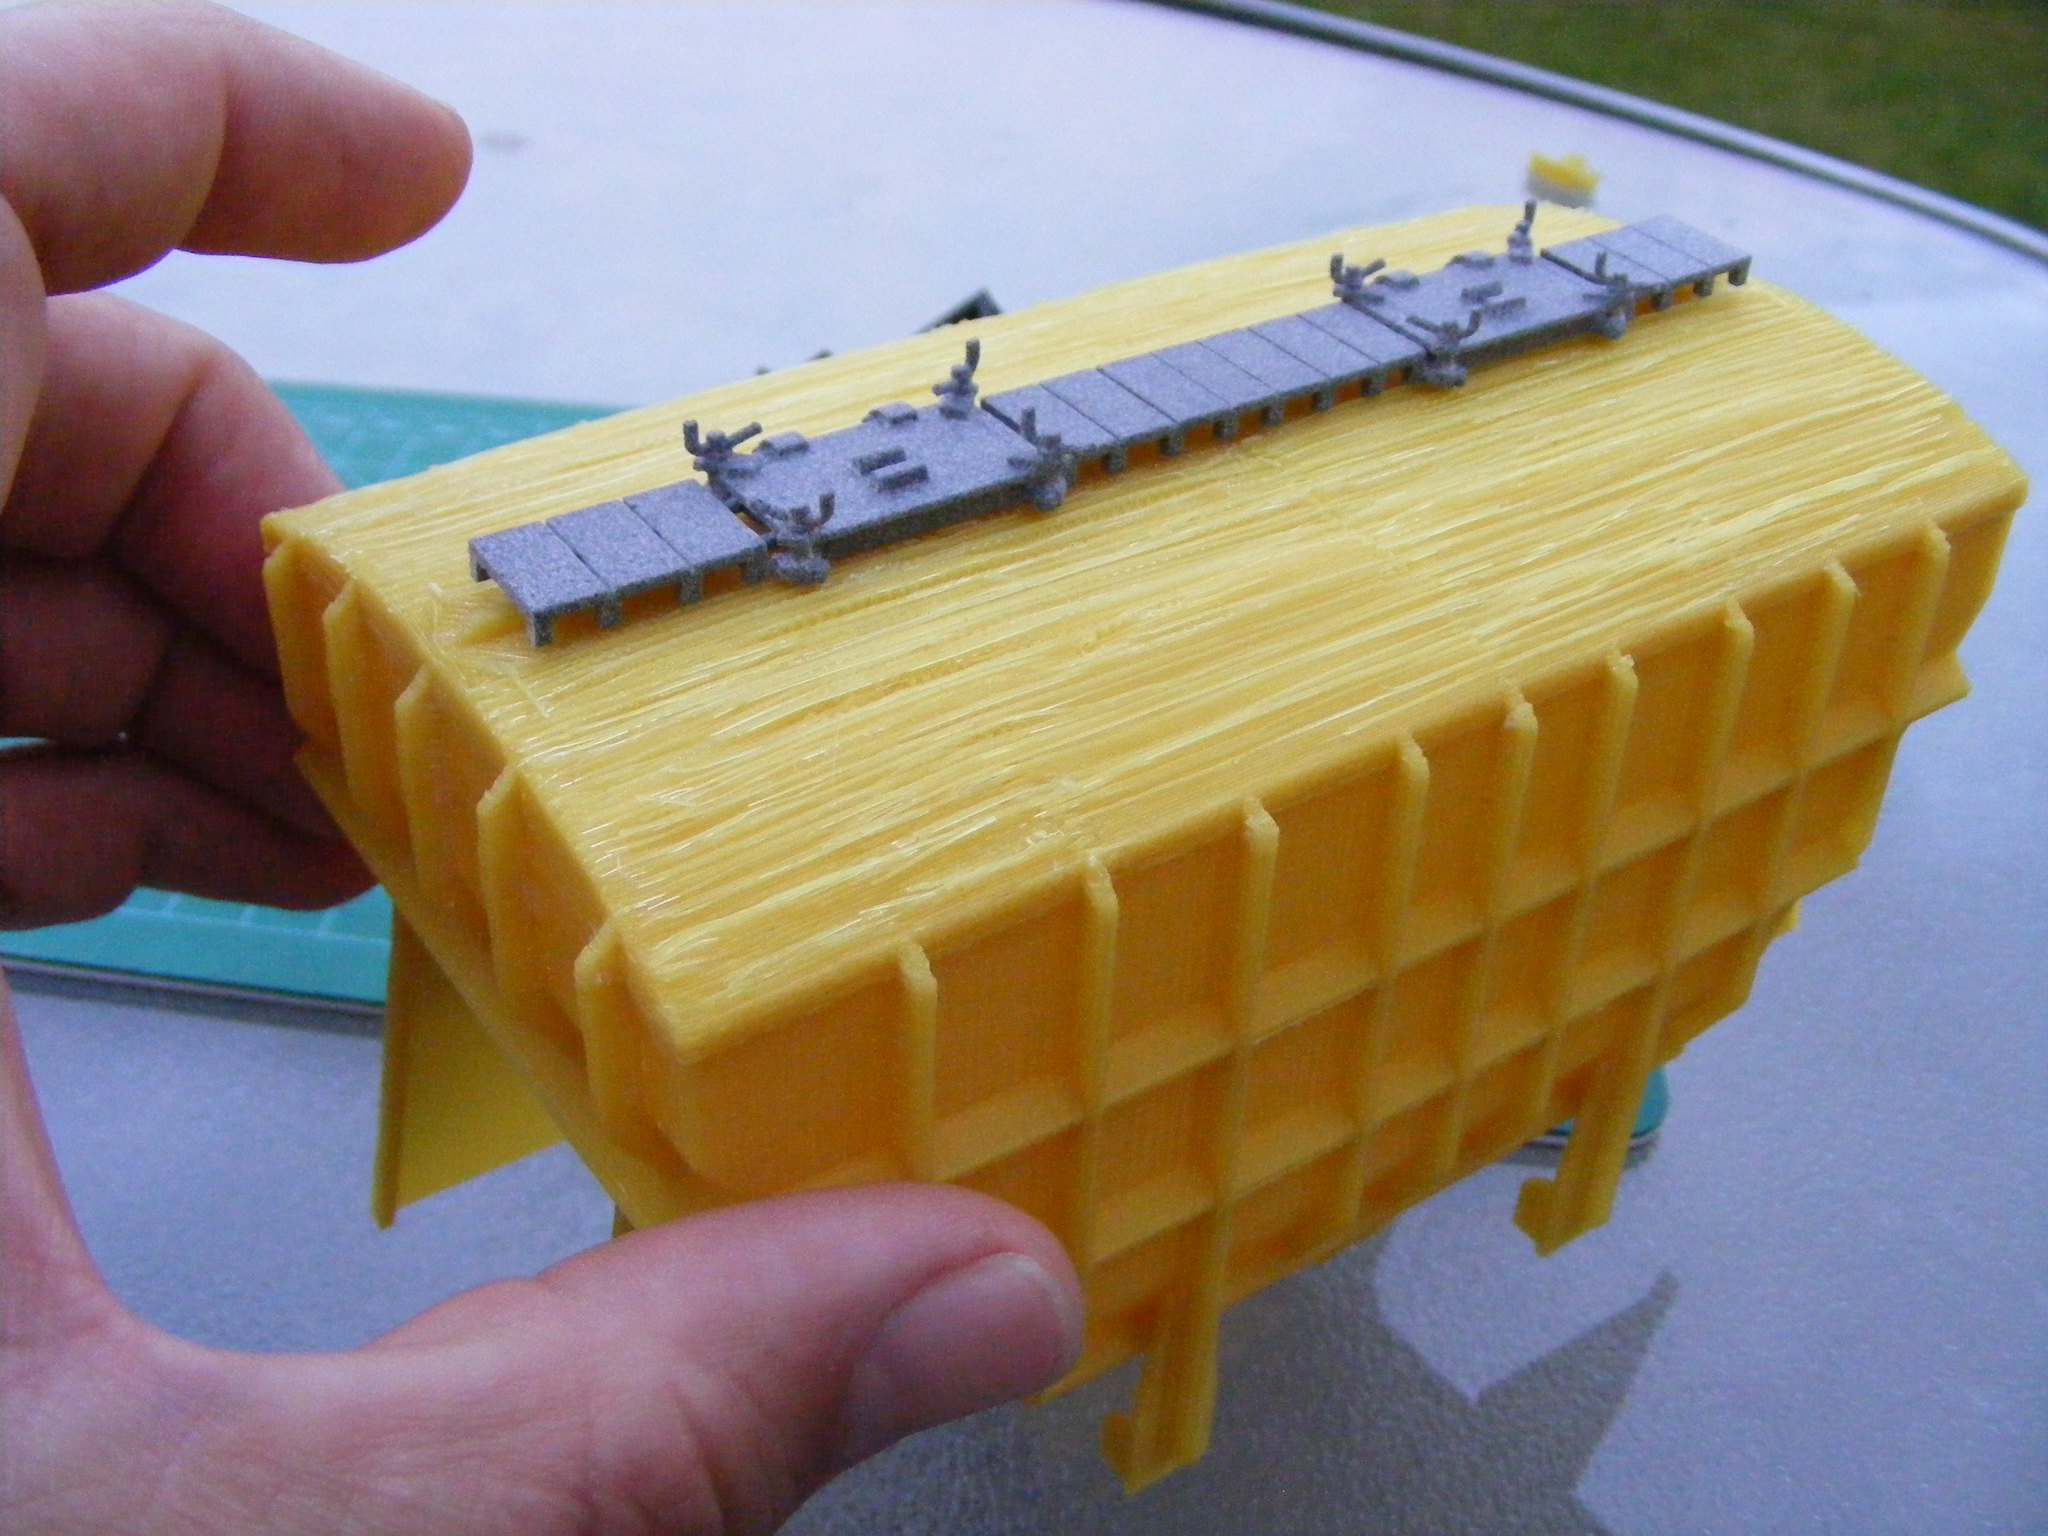 1/32 presflo hopper by simon br blue, on Flickr
 1/32 Presflo Hopper by simon br blue, on Flickr
 -
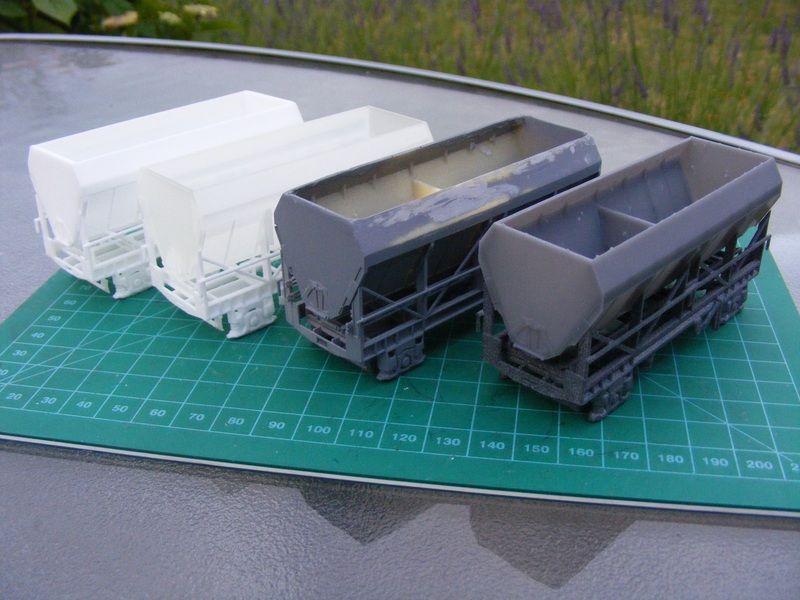
I have used Shapeways for PLA previously and found the quality to be poorer than cheap home printers.
The picture below shows a 4mm PHA wagon hopper with a shapeways print on the left and one from my own printer on the right. The fact Shapeways even though it was good enough to send out makes me wonder what a poor quality print from them would look like. That Shapeways print made me decide to buy my own printer - Shapeways did do a reprint of the hopper but it wasn't as good as my own print.
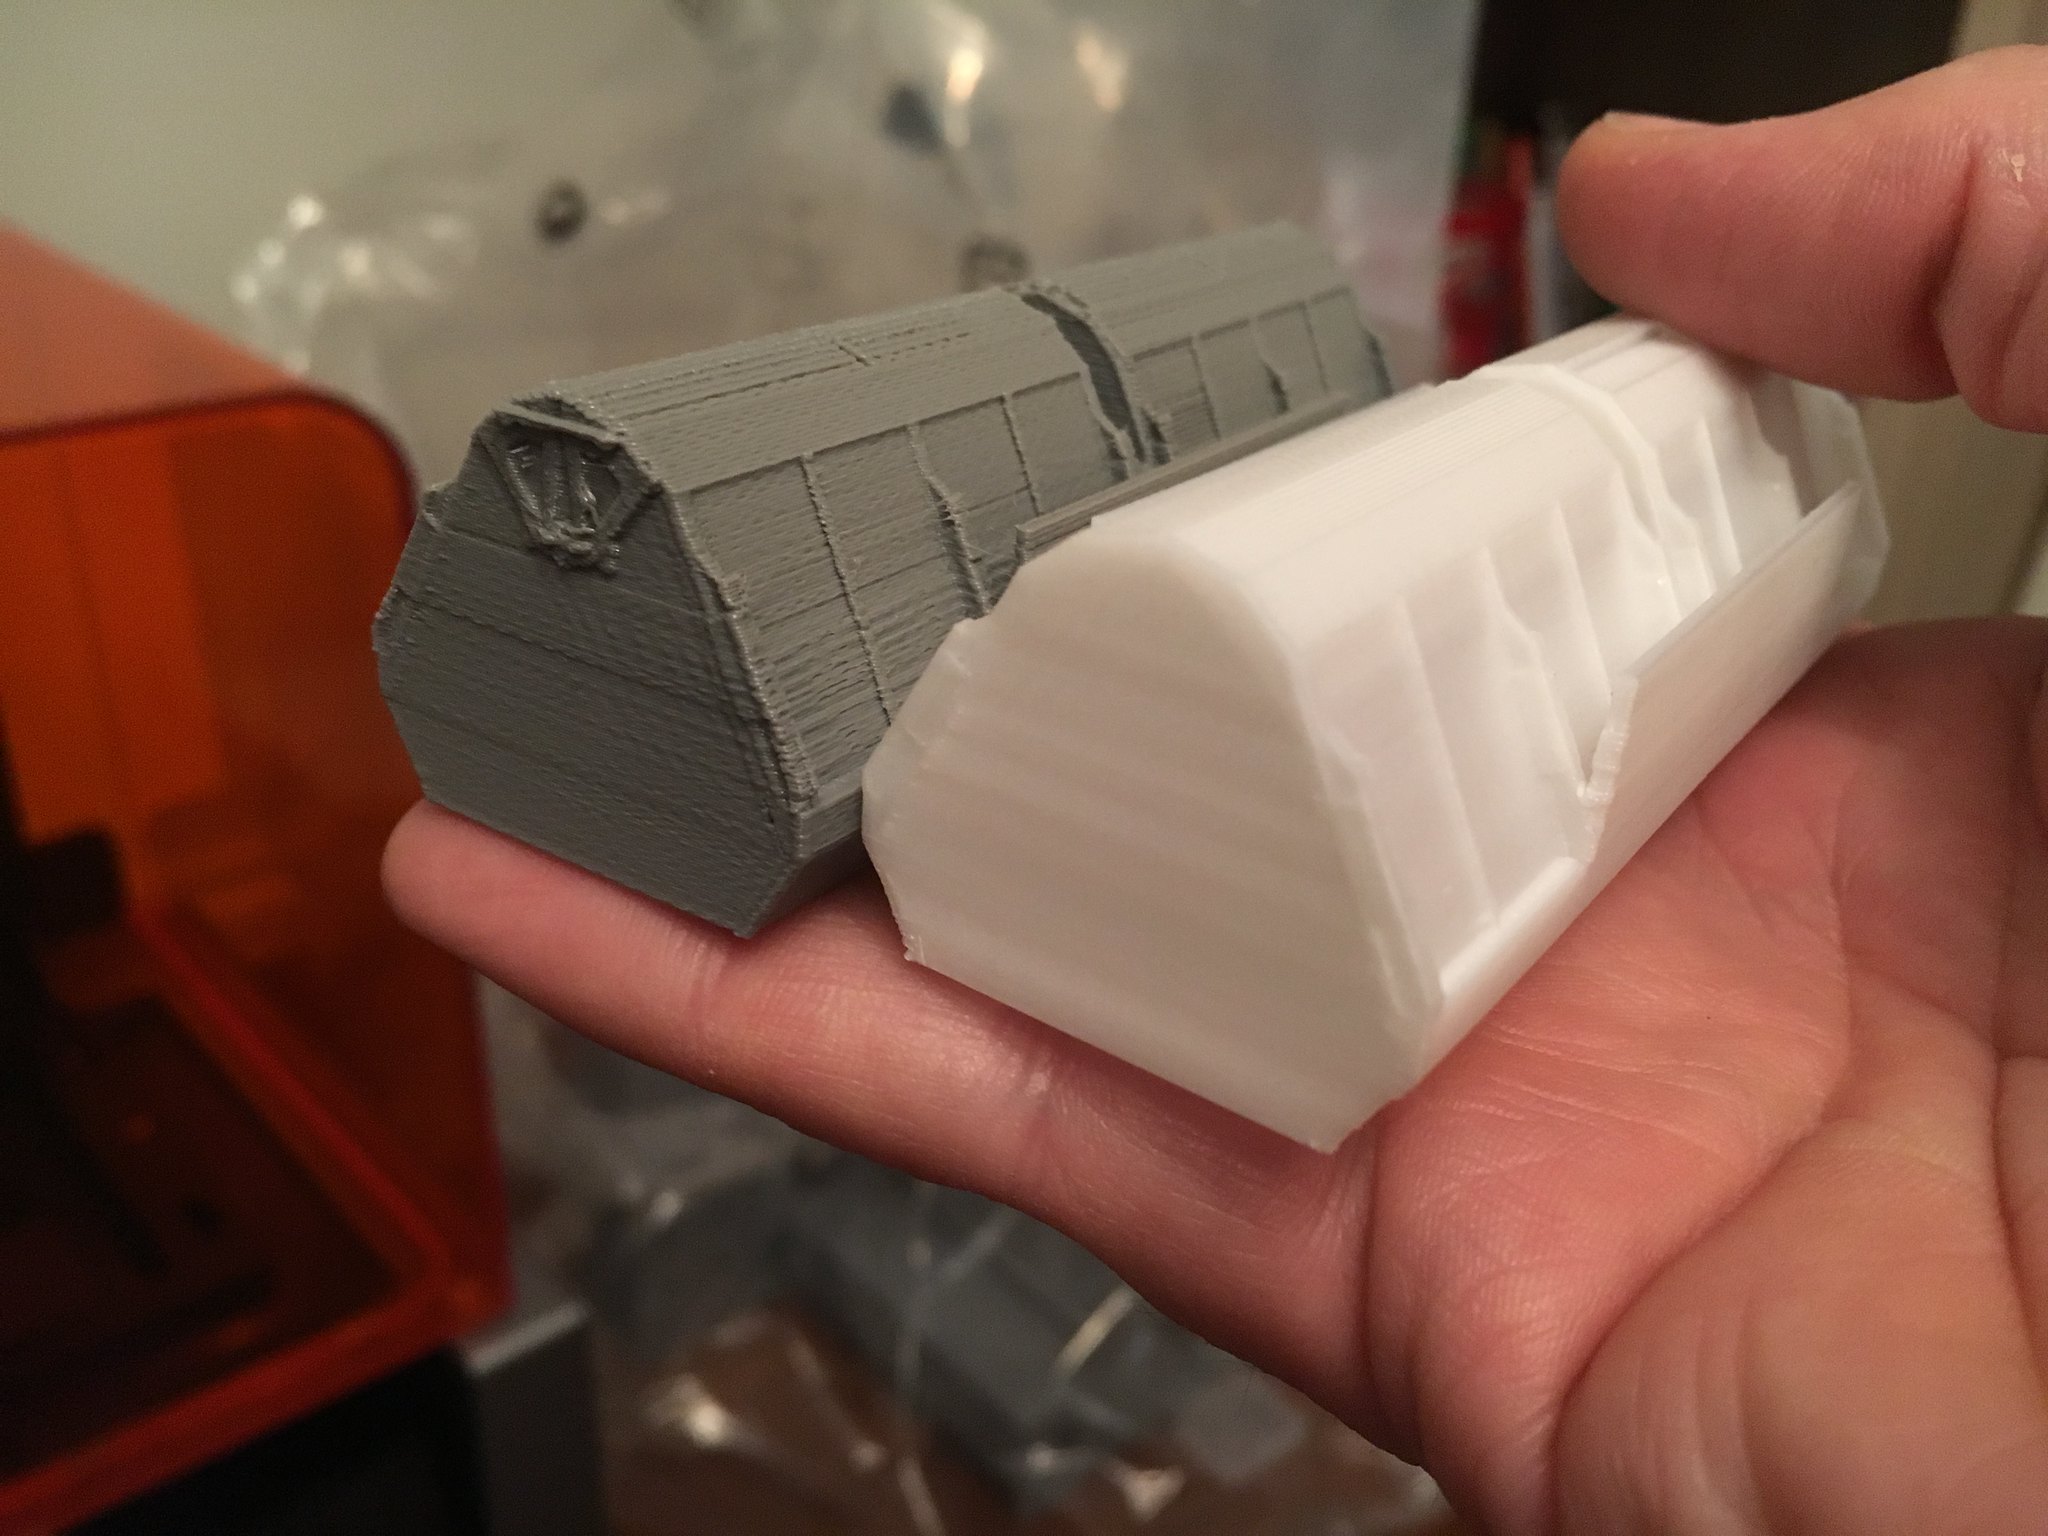 4mm PHA hopper prints by simon br blue, on Flickr
 -
Hi Barry,
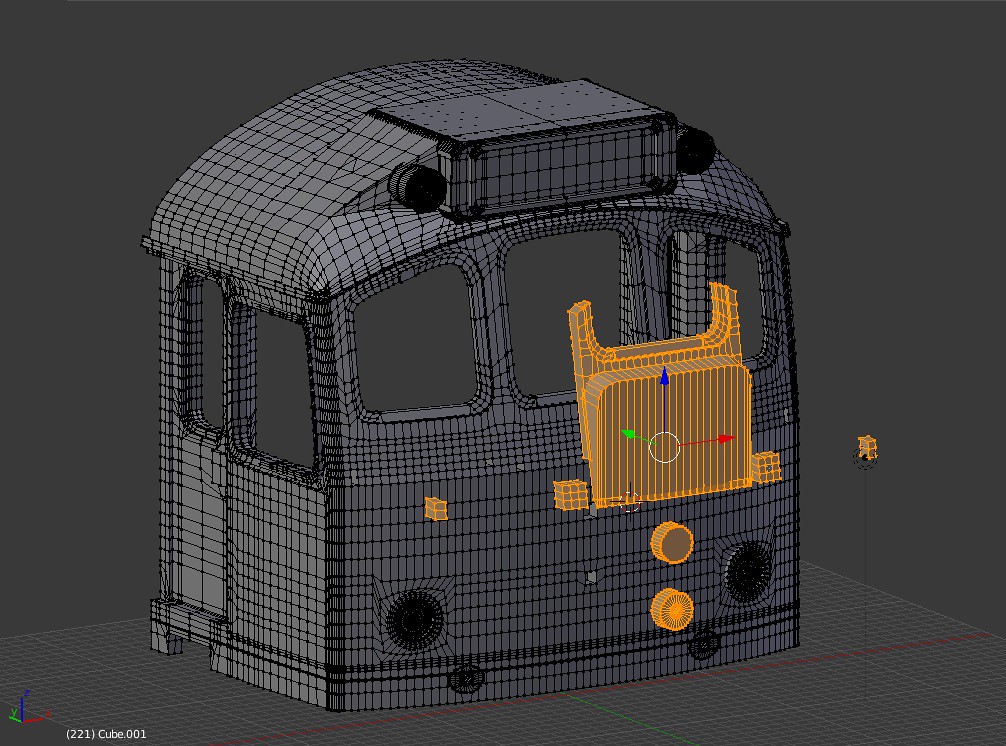
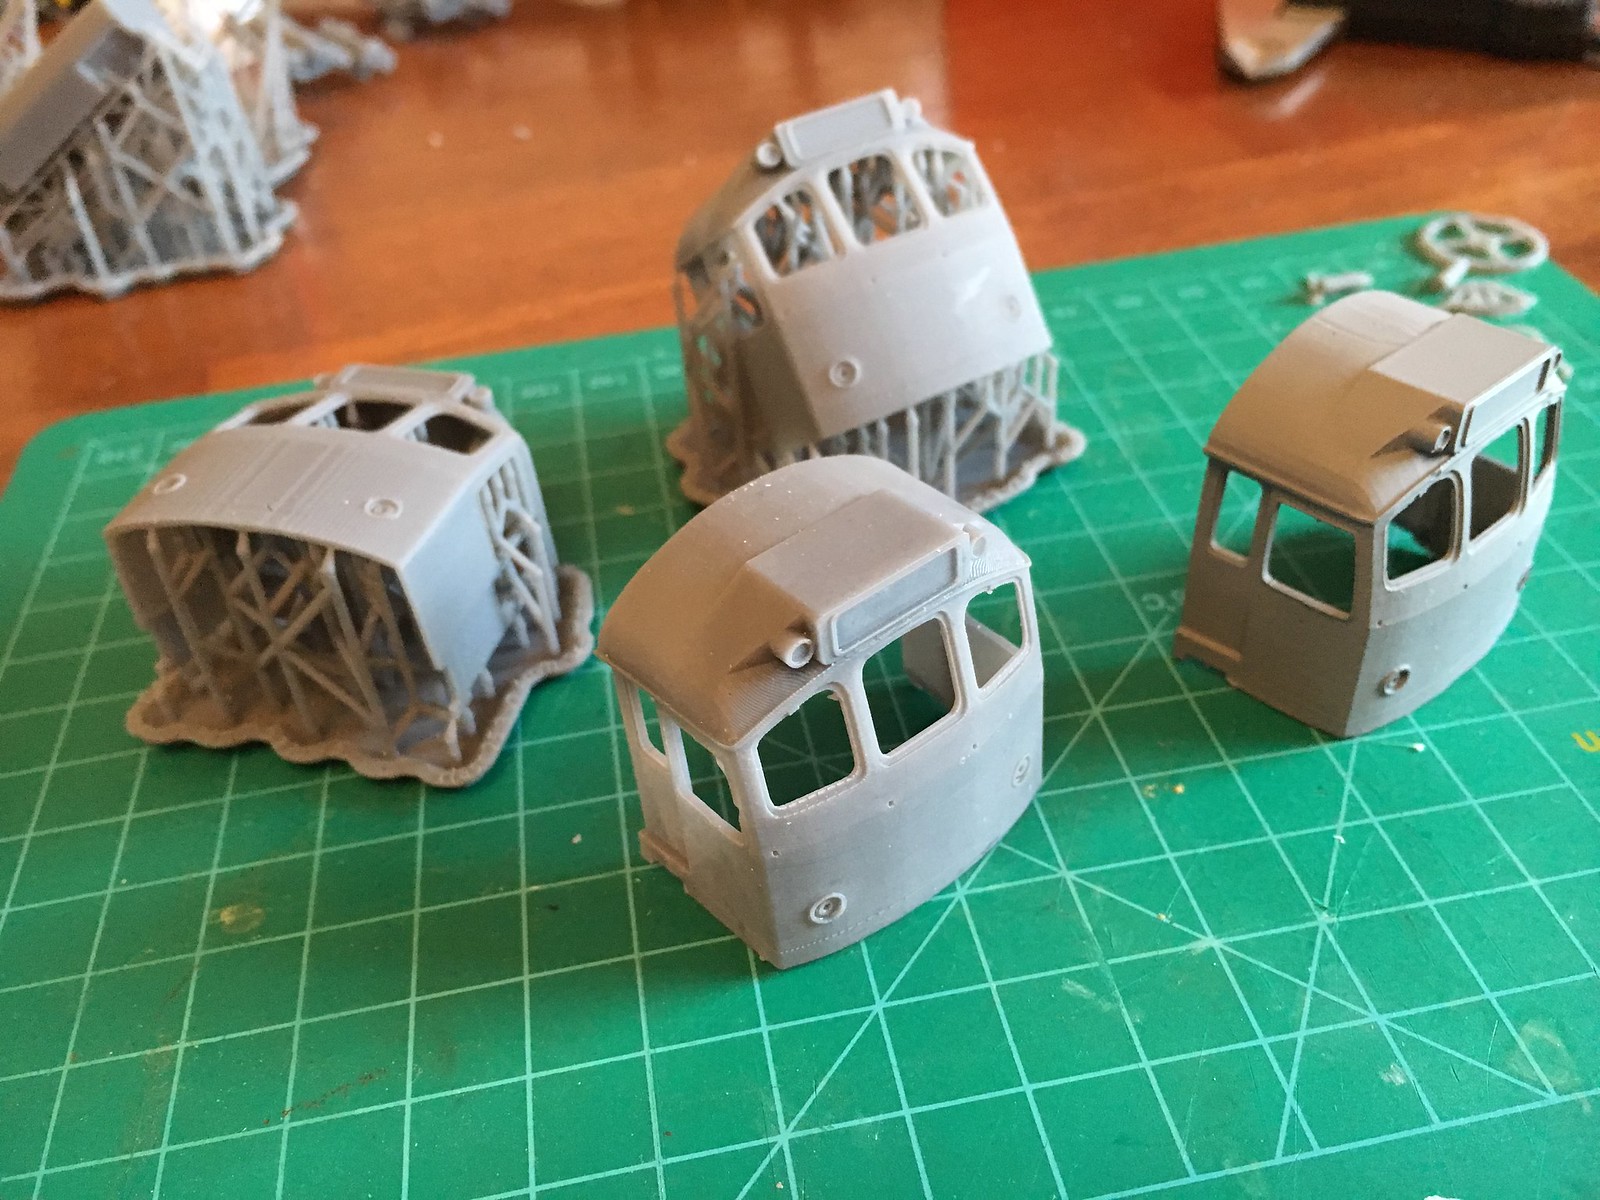
Hopefully the 25 cabs will be ready soon, I'm still wondering if its best to make them available through Shapeways or print them myself. I keep making changes to the cab drawing and am on about version 20. Latest print is pictured below with a Bachmann body.
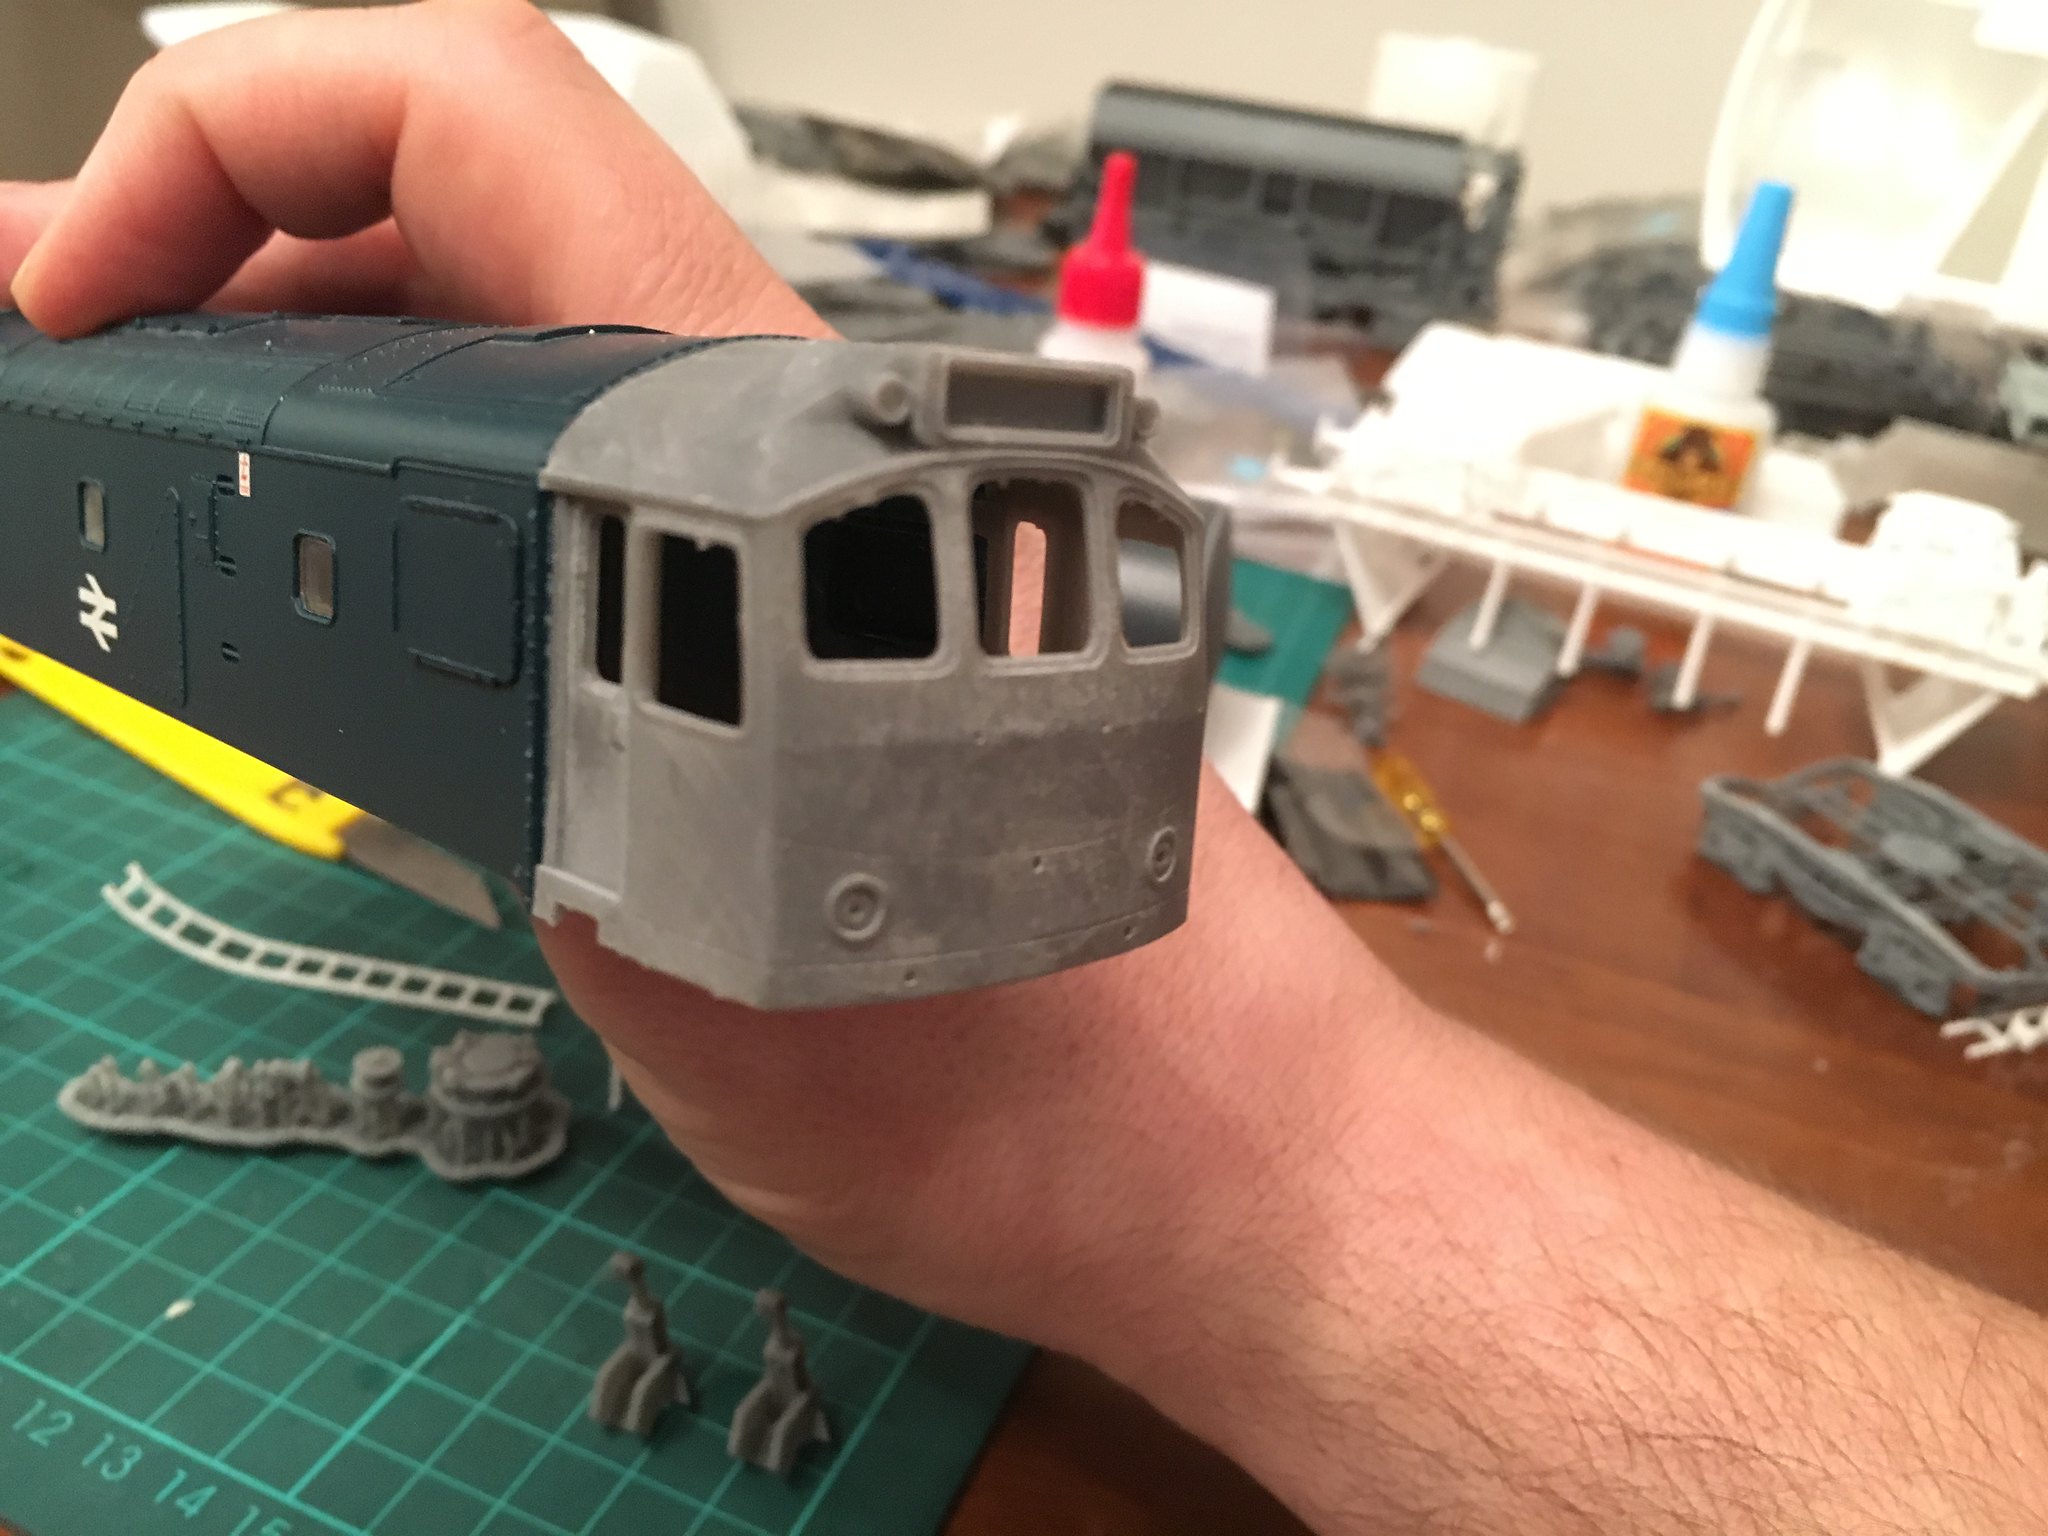 4mm 25.3 cab by simon br blue, on Flickr
I have updated the parts for the 25.1 cab and as can be seen in the picture below they can be added and removed to the 25.3 file.
 4mm Class 25 cab changes by simon br blue, on Flickr
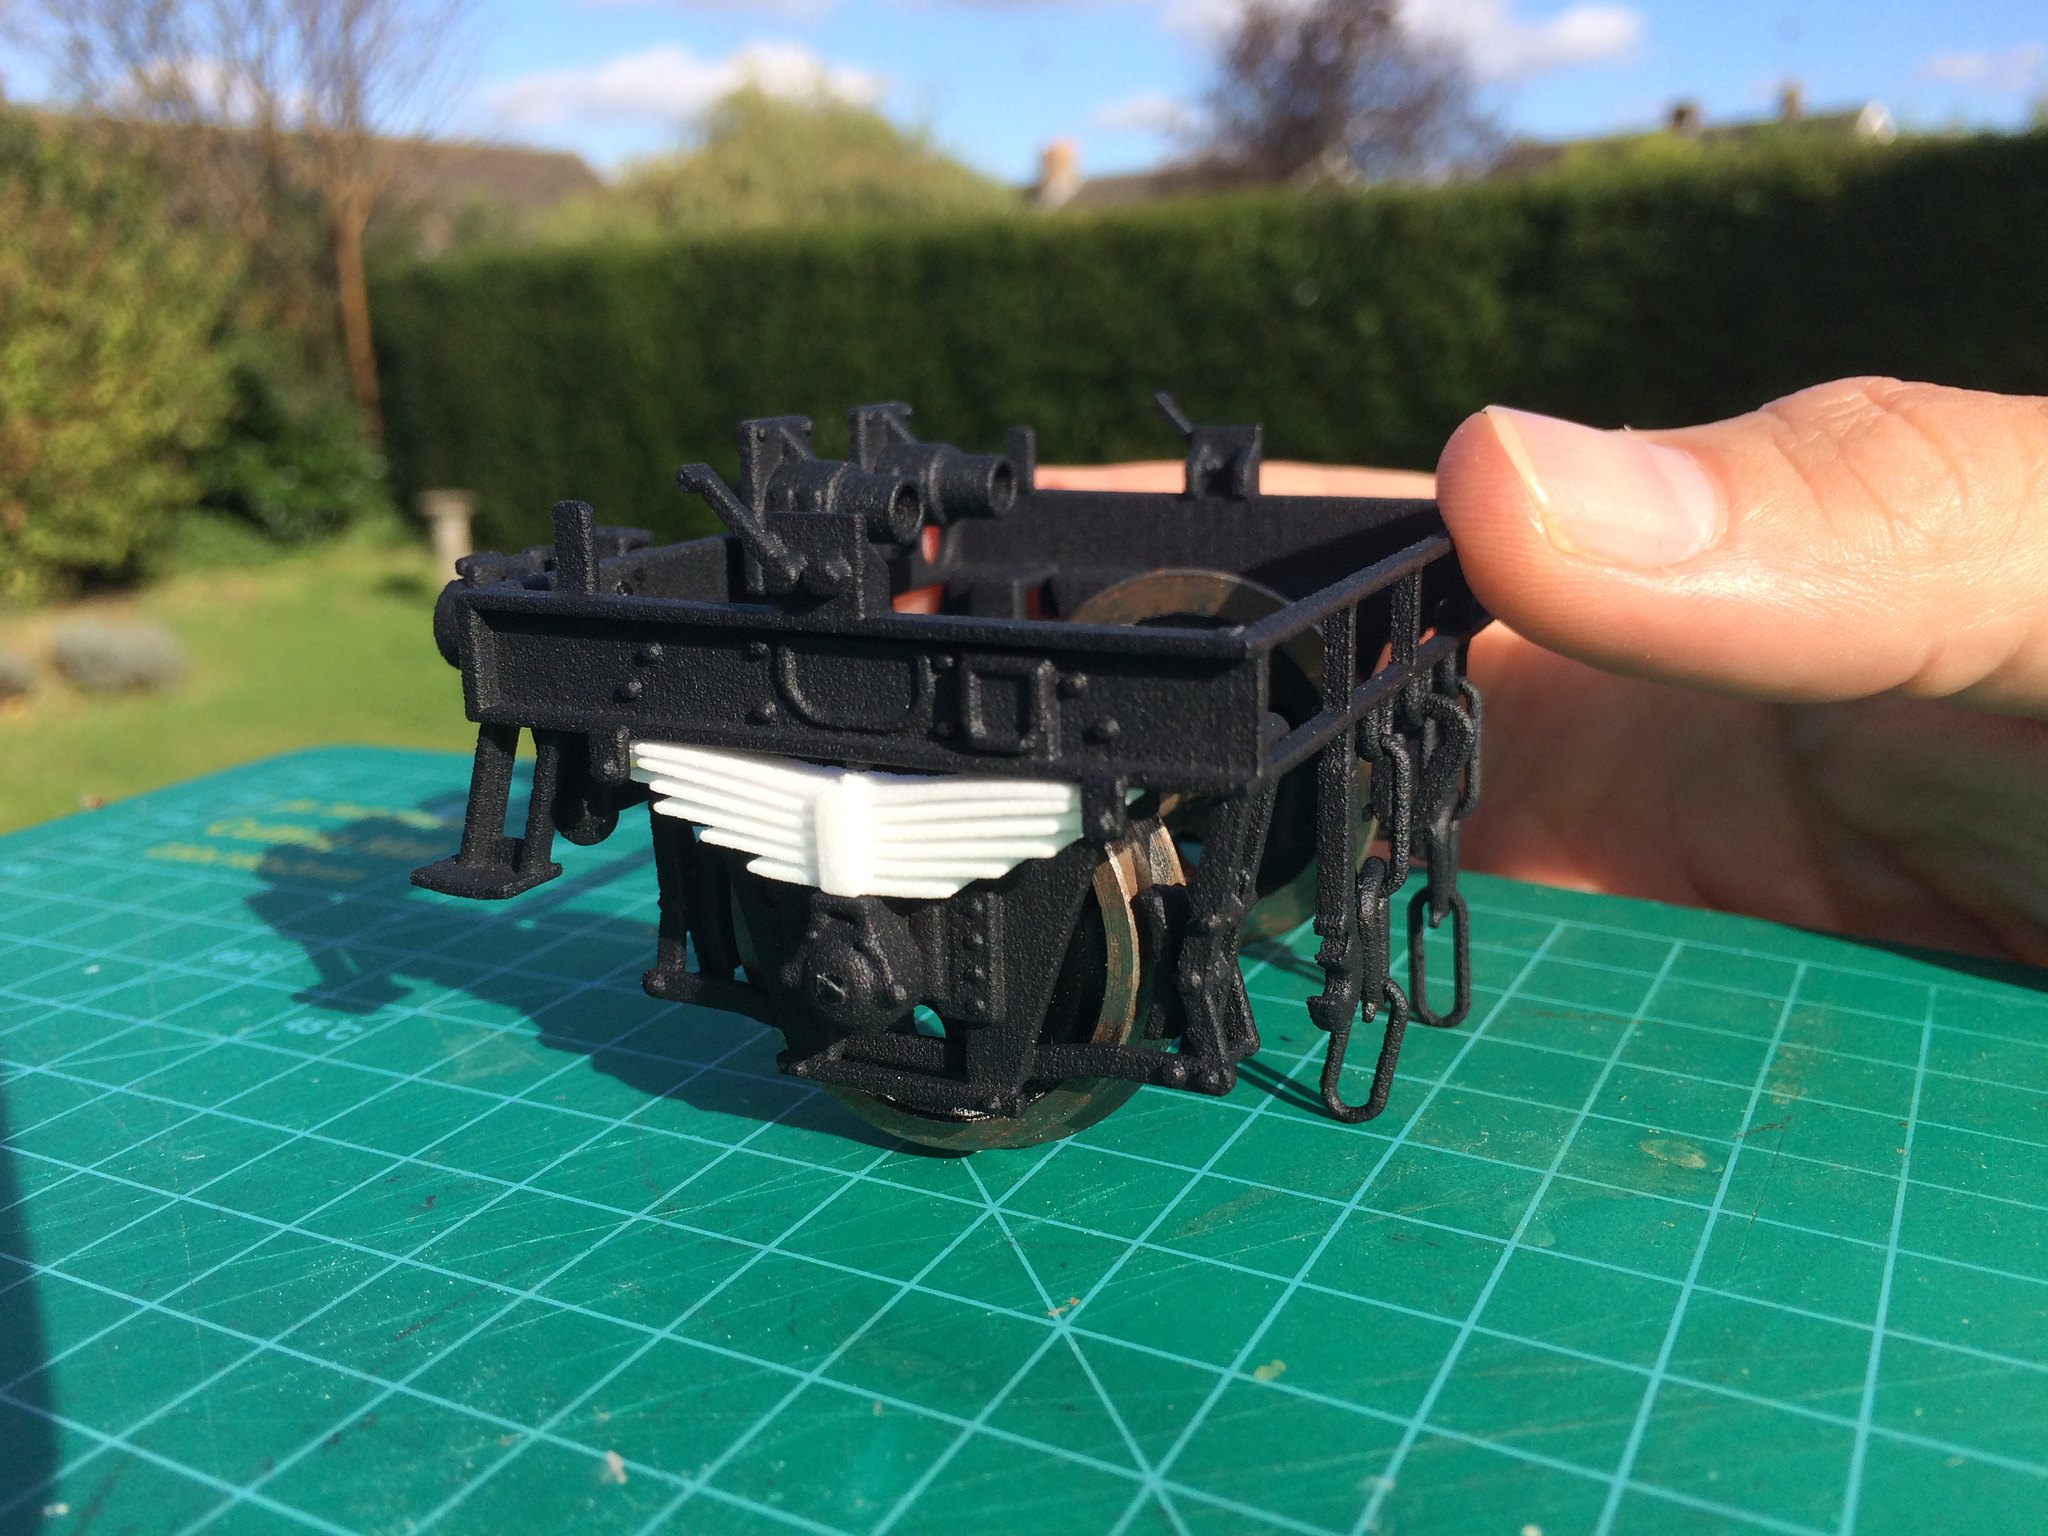
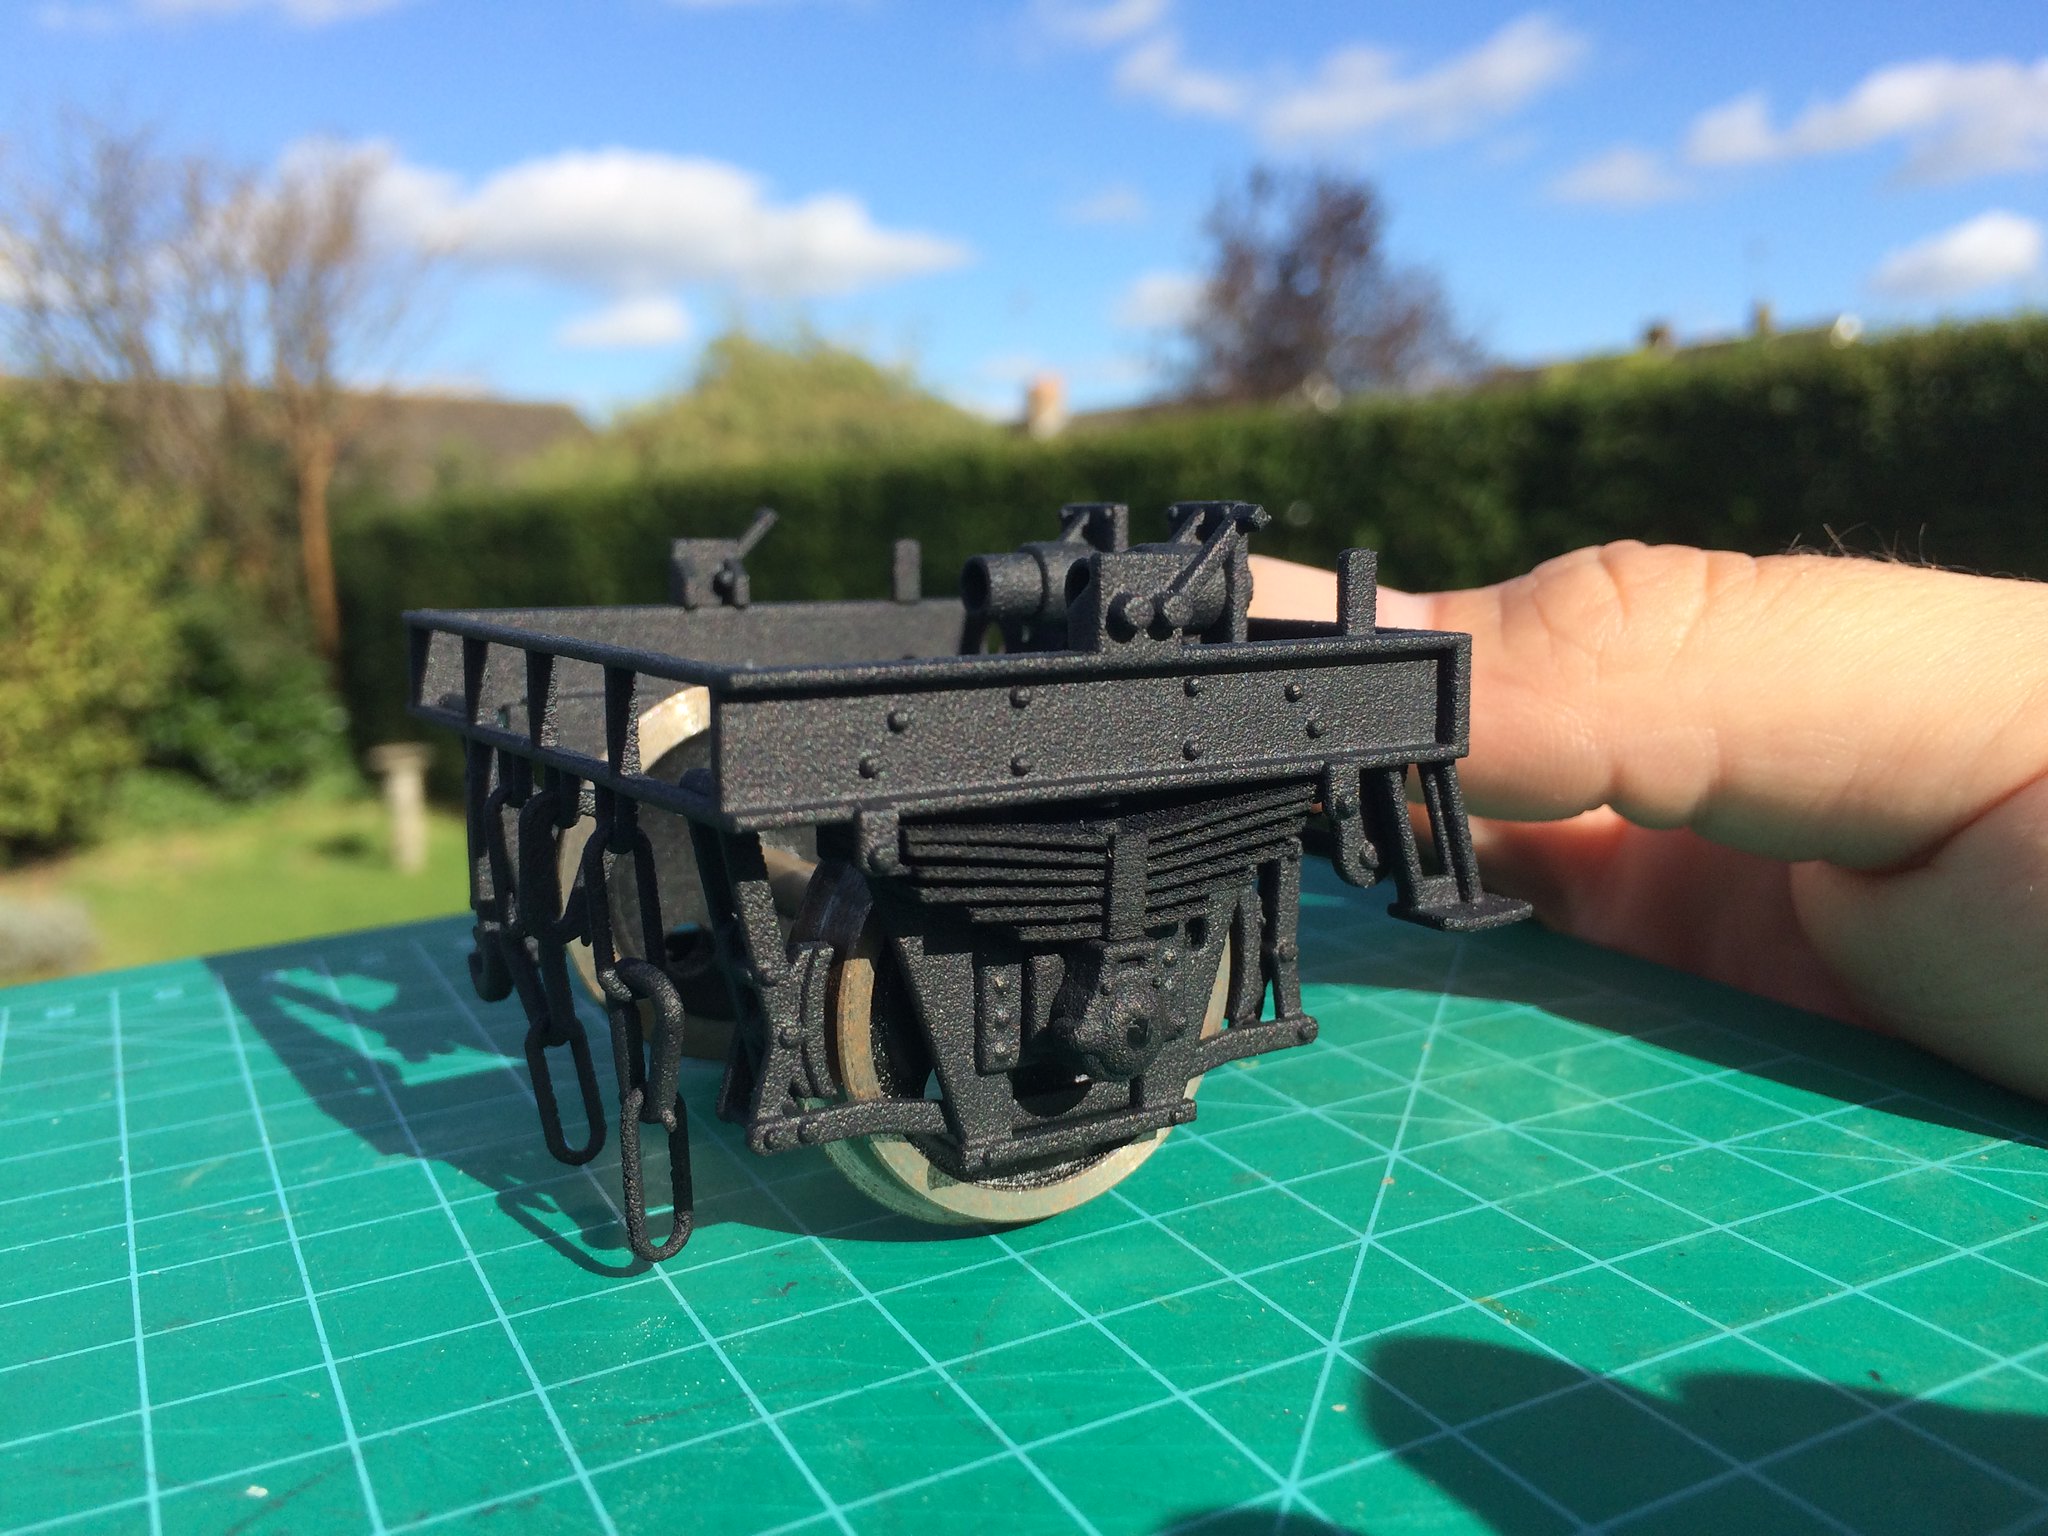
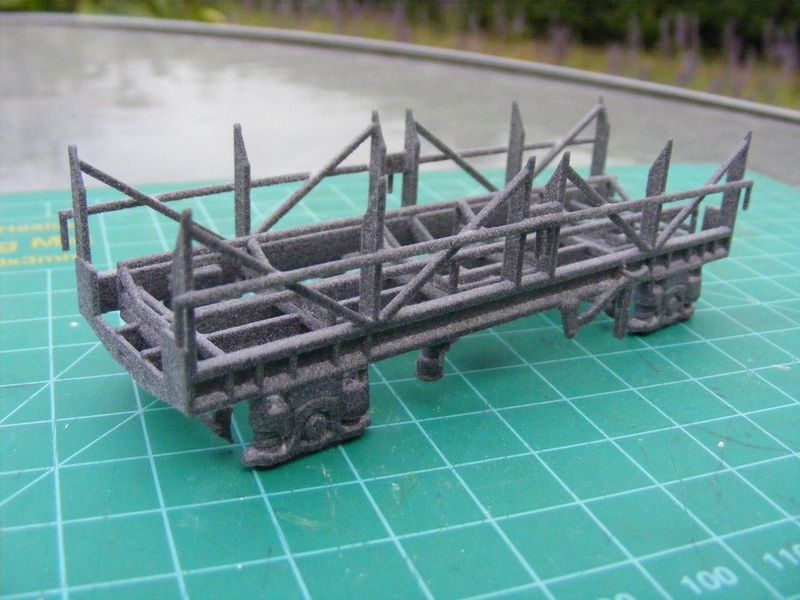
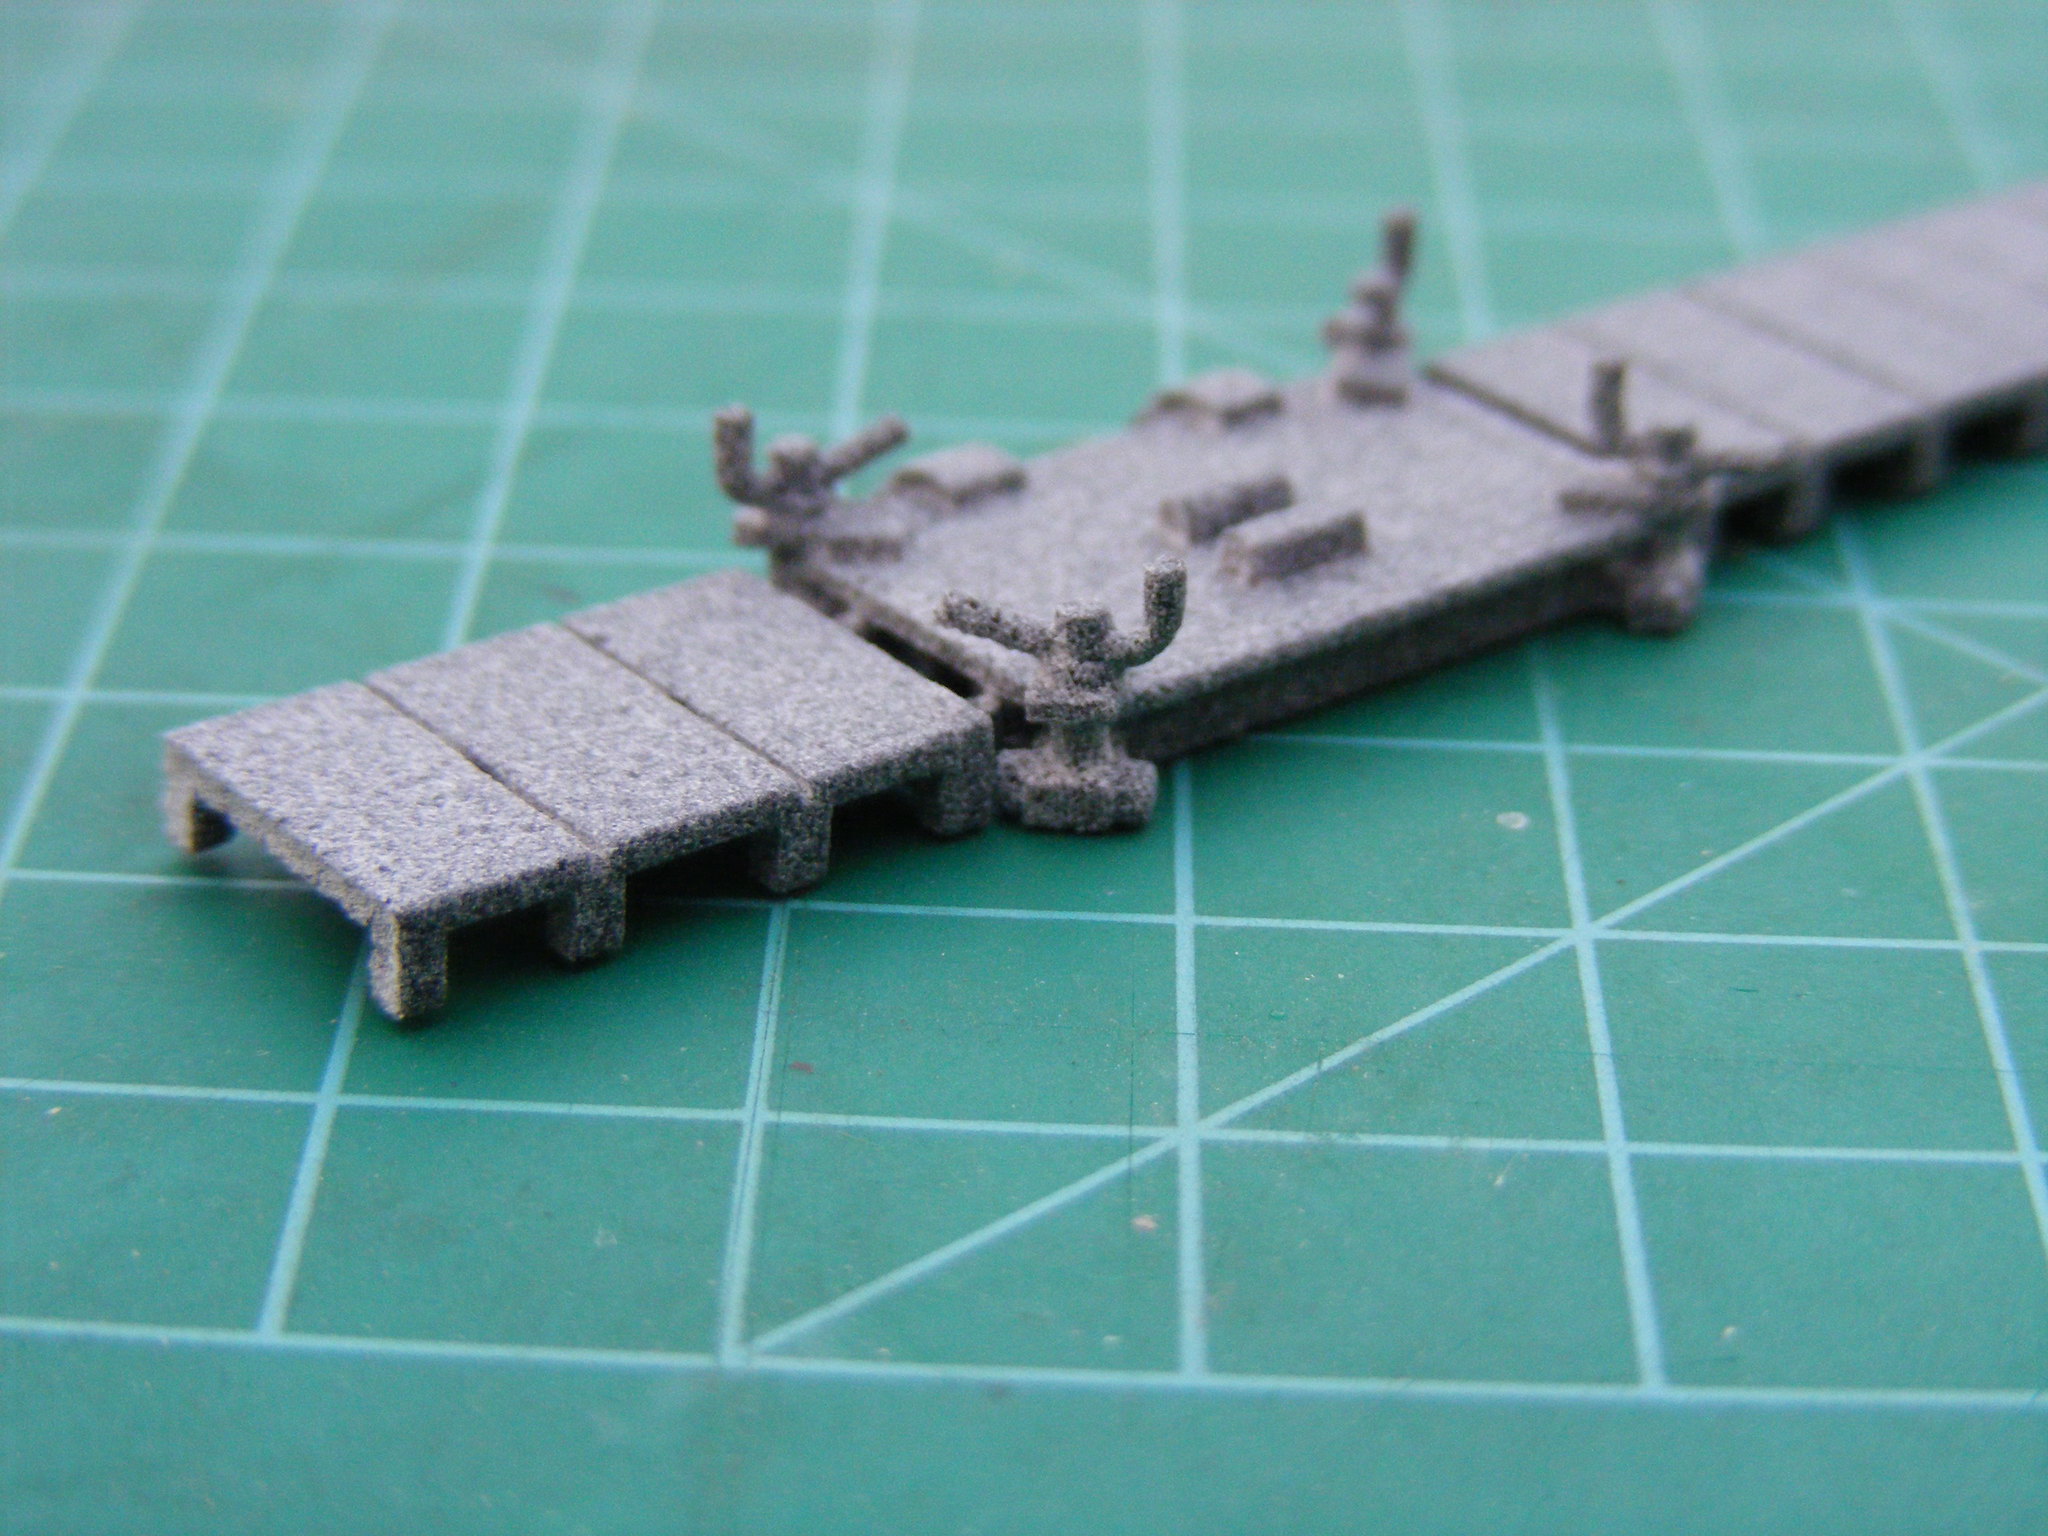
I've recently drew a 7mm 16t mineral chassis to fit onto the Lima body. The only problem is that the Lima body scales up to about a 10' wheelbase. The picture below shows the scaled chassis lengthened to fit the Lima body. It was printed in WSF polished and was given a quick coat of primer and then a black topcoat. Looking into 16t minerals I found that there were some later builds vac braked with a 10' wheelbase so I've modified the brakes to reflect this and will do another print with my next Shapeways order.
 7mm Lima chassis print by simon br blue, on Flickr
After finishing the chassis for the Lima body I drew a correct scale body and then scaled this up to 1/32 scale. The picture below shows the model in Blender. I have Printed the body on my Balco printer and will order a chassis from Shapeways.
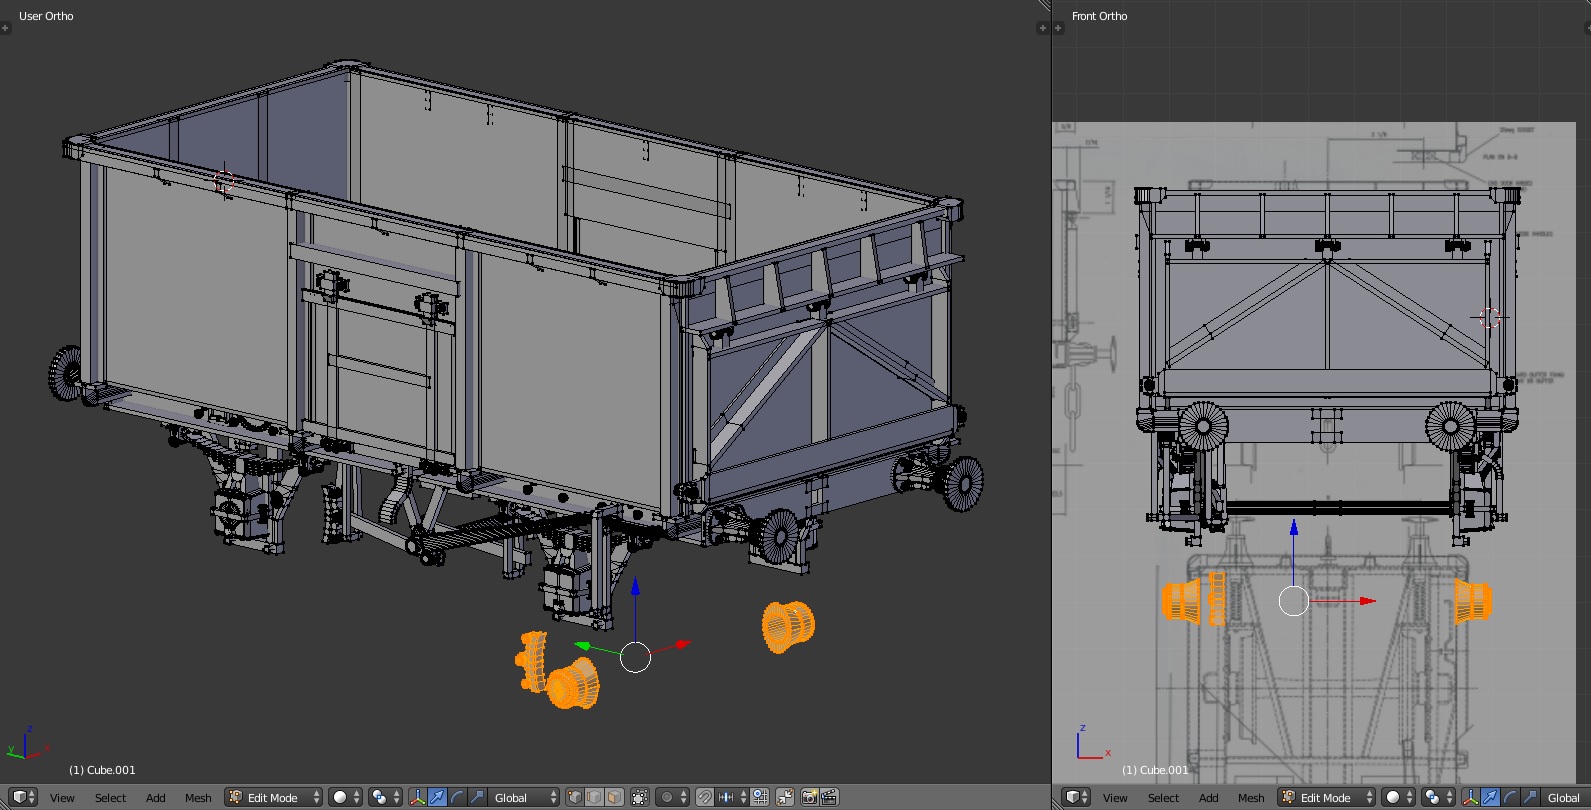 1to32 16t mineral bearing hole by simon br blue, on Flickr
Drawing the 1/32 mineral wagon made me thin aobut another 1/32 wagon I wanted to draw, this was a VAA van. I started by modifying the OCA chassis I'd previously drawn and then drew the body. Due to the size of the body I split it into separate parts to allow it to fit on the printer bed. Below is a render of the wagon.
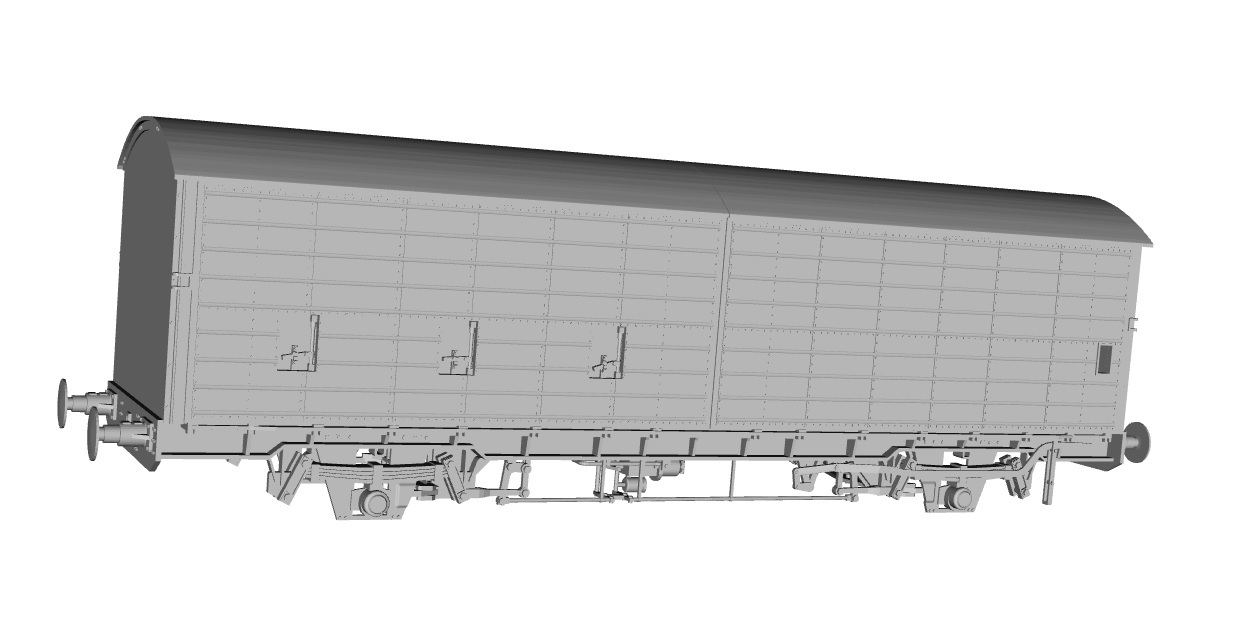 VAA van render by simon br blue, on Flickr
I did a couple of test prints for the parts and found the end came out very well, the roof which I printed vertically on end was ok but had some uneven surfaces and the sides rinted ok but the first version as pictured below had scale size rivets which didn't print very well, the most recent test had slightly larger rivets which came out ok but each rivet seems to get linked to the next part with a wisp of filament which need removing after printing (which was boring and time consuming). The shell is just placed together with the sides and roof having just had a quick goat of grey primer.
 1/32 VAA body test by simon br blue, on Flickr
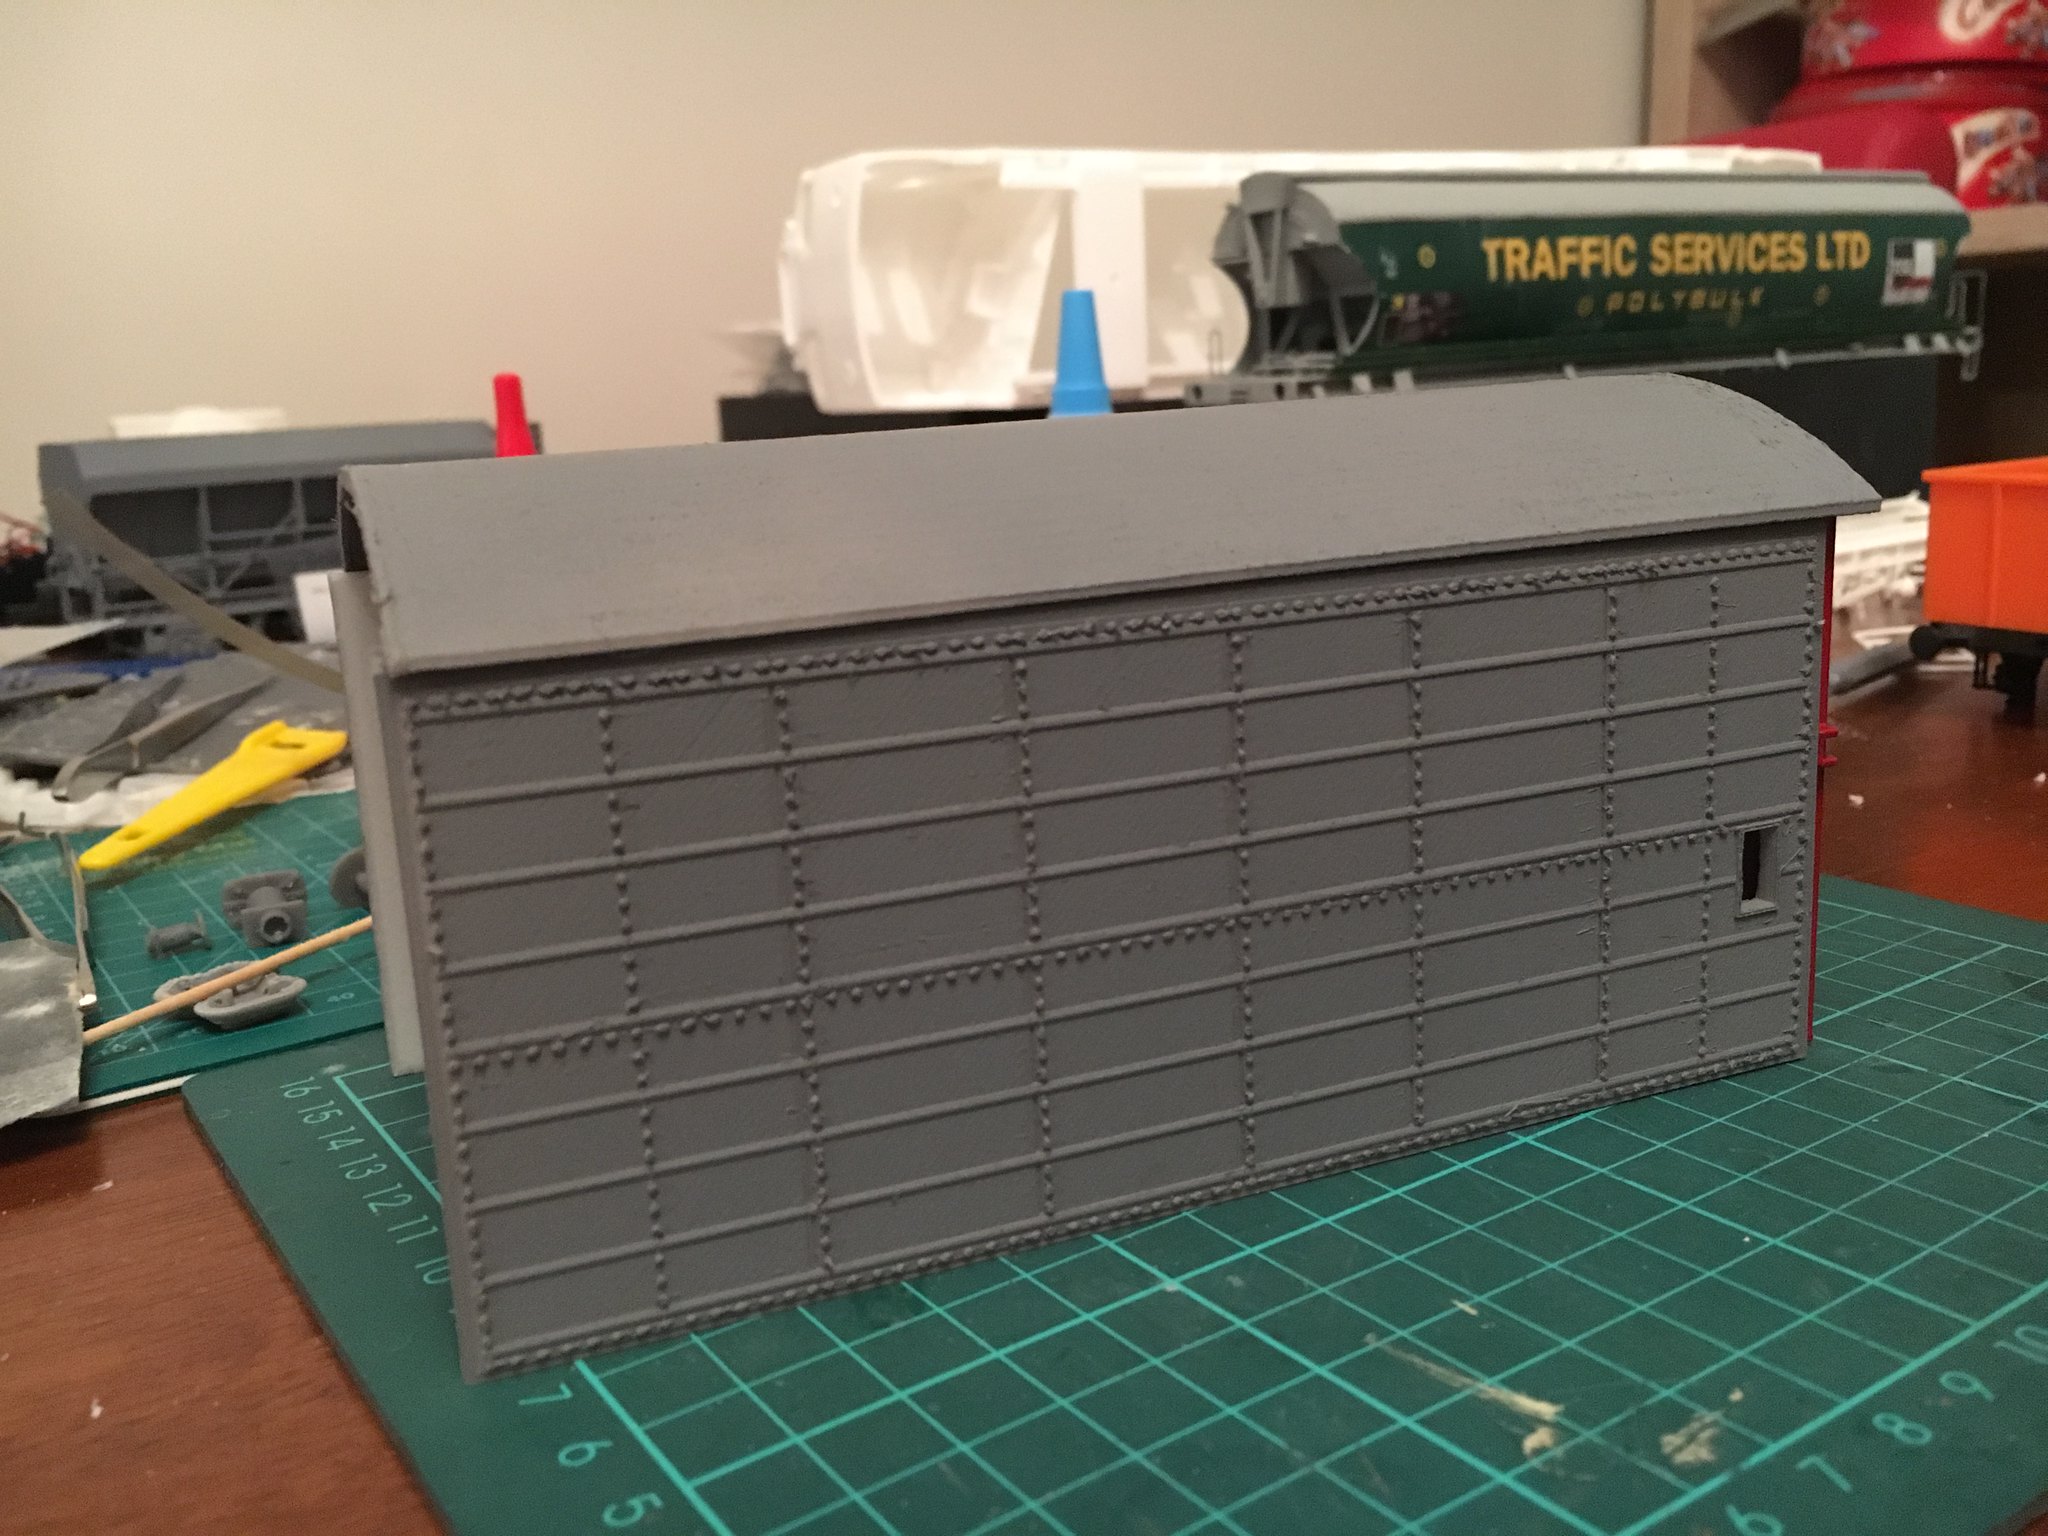 1/32 VAA body test by simon br blue, on Flickr
A couple of 7mm wagons I'd previously drawn but not had printed were a BIS PAA sand truck and a TTA molasses tank. the chassis on both wagons was printed in WSF, the PAA hopper was printed in 2 parts on the Balco printer and the door operating details and bottom doors were printed in my Form2. The molasses tank used the Balco printer for one end of the barrel and the Form2 for the more detailed end and top hatches, the barrel is a 50mm plastic pipe and the access ladder and walkway are WSF (the walkway need some mesh adding to finish it off).
 7mm BIS PAA wagon by simon br blue, on Flickr
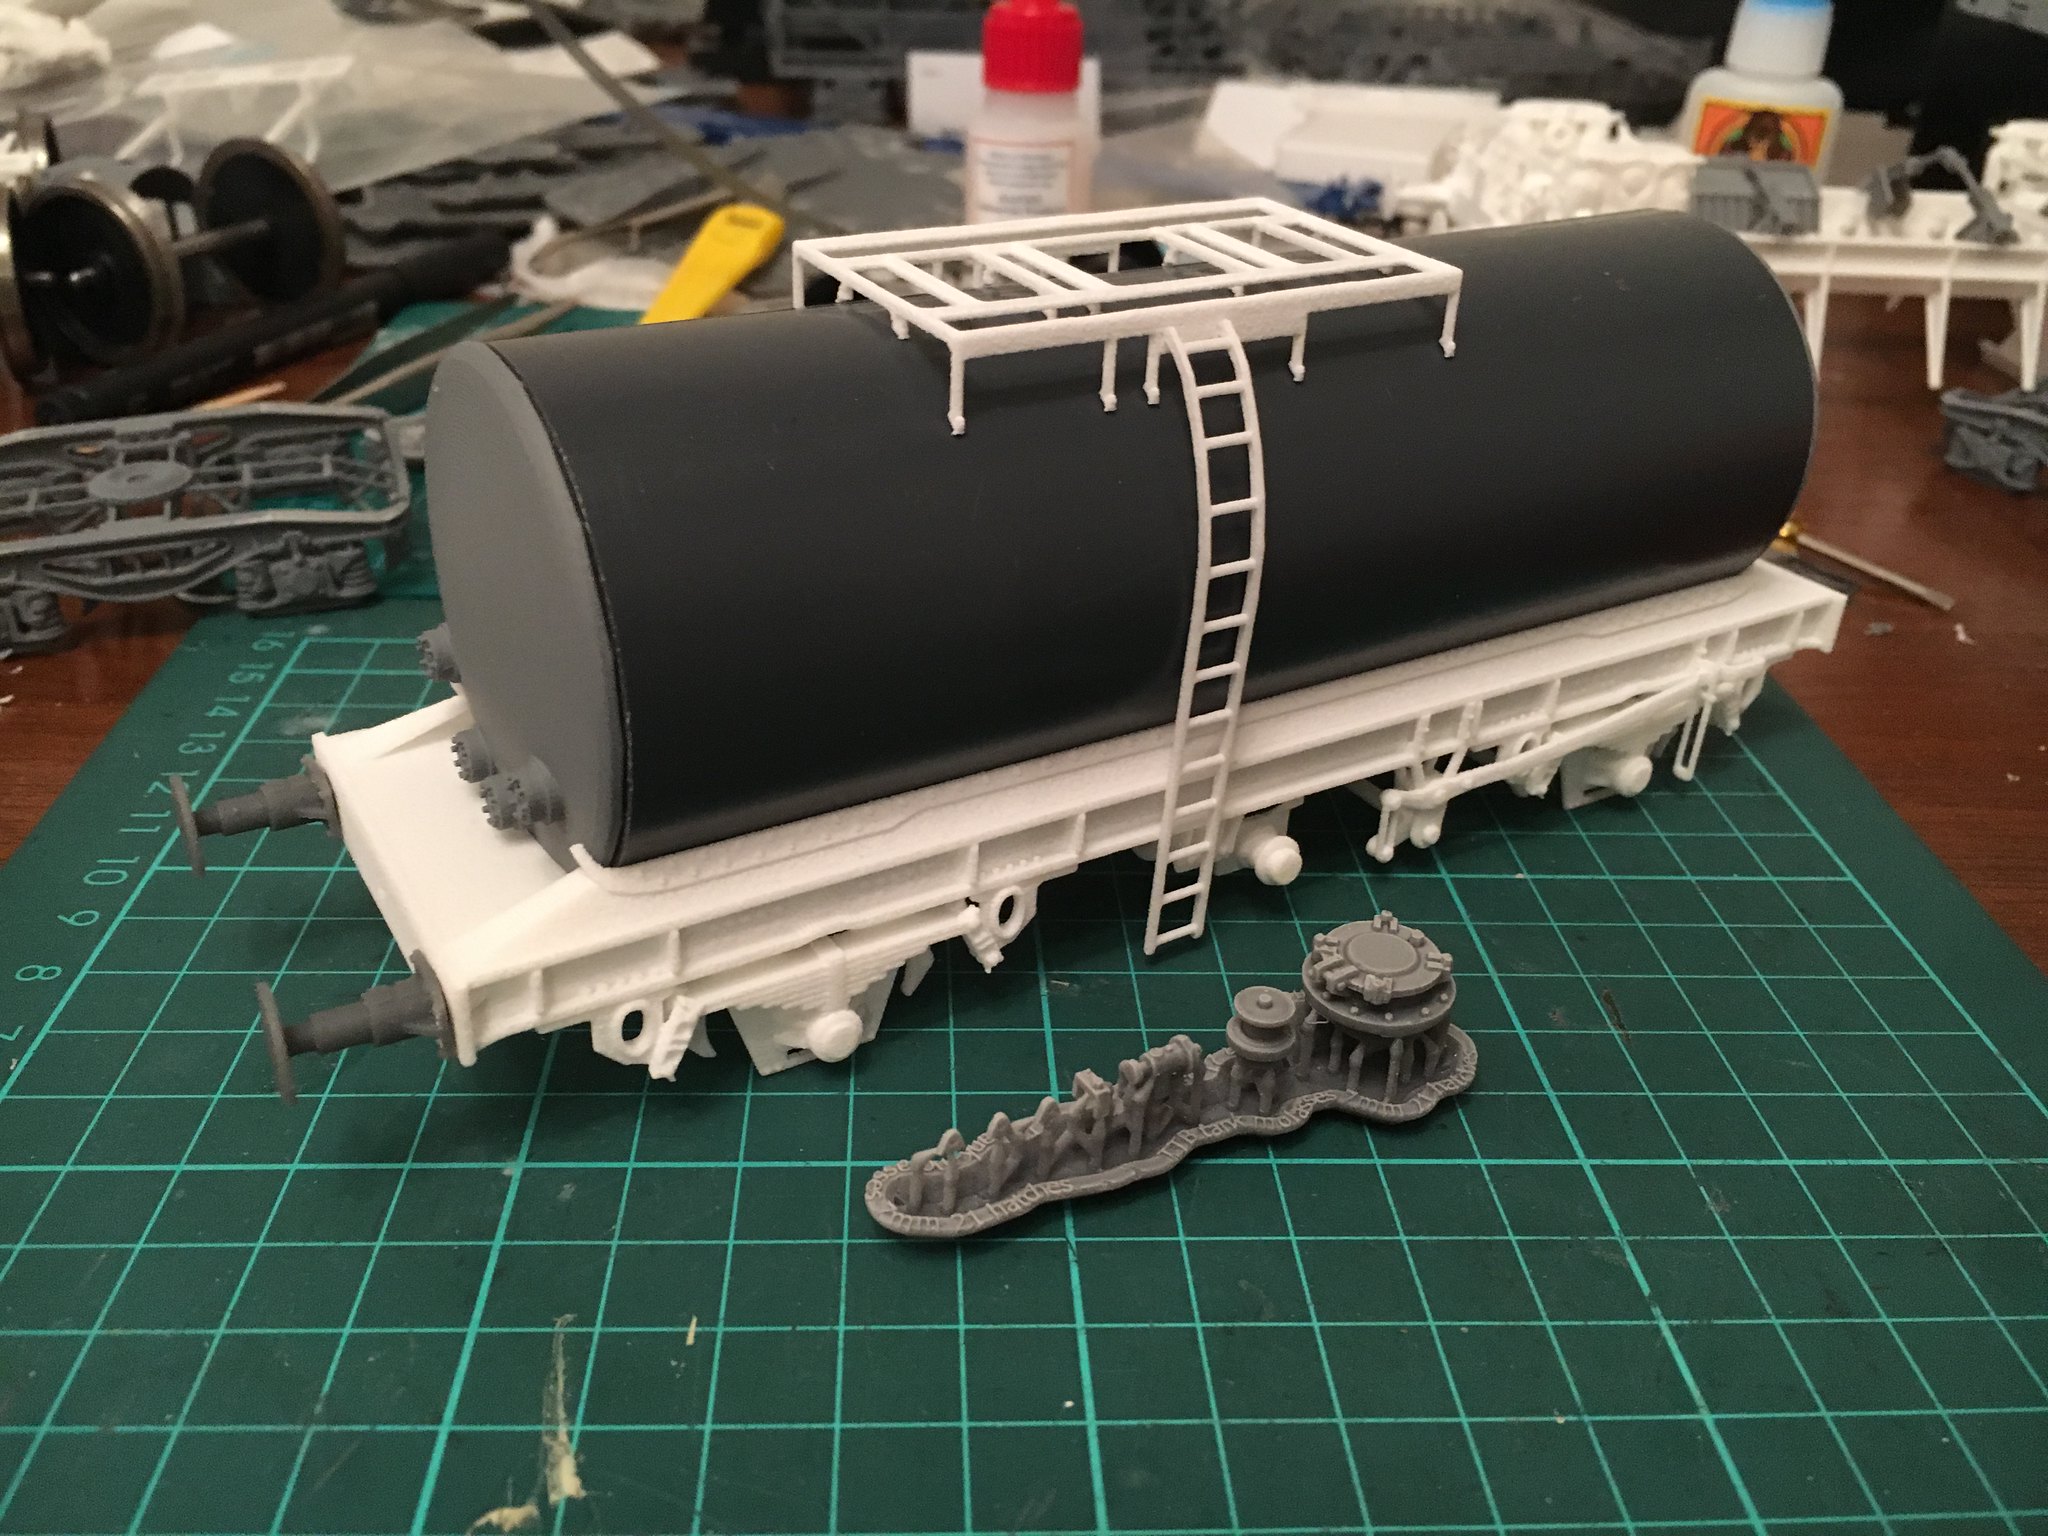 7mm TTA molasses tank by simon br blue, on Flickr
The final pictures for this update are of a couple of tests I drew and printed on my printers. The design is the same but the Form2 grey print is half the size of the white Balco print. Both came out reasonably well and were printed on the 0.1mm setting. Noticeable on the Balco print is the wisps of material that can trail to the next part of the print which was a problem with the rivets on the VAA van doors.
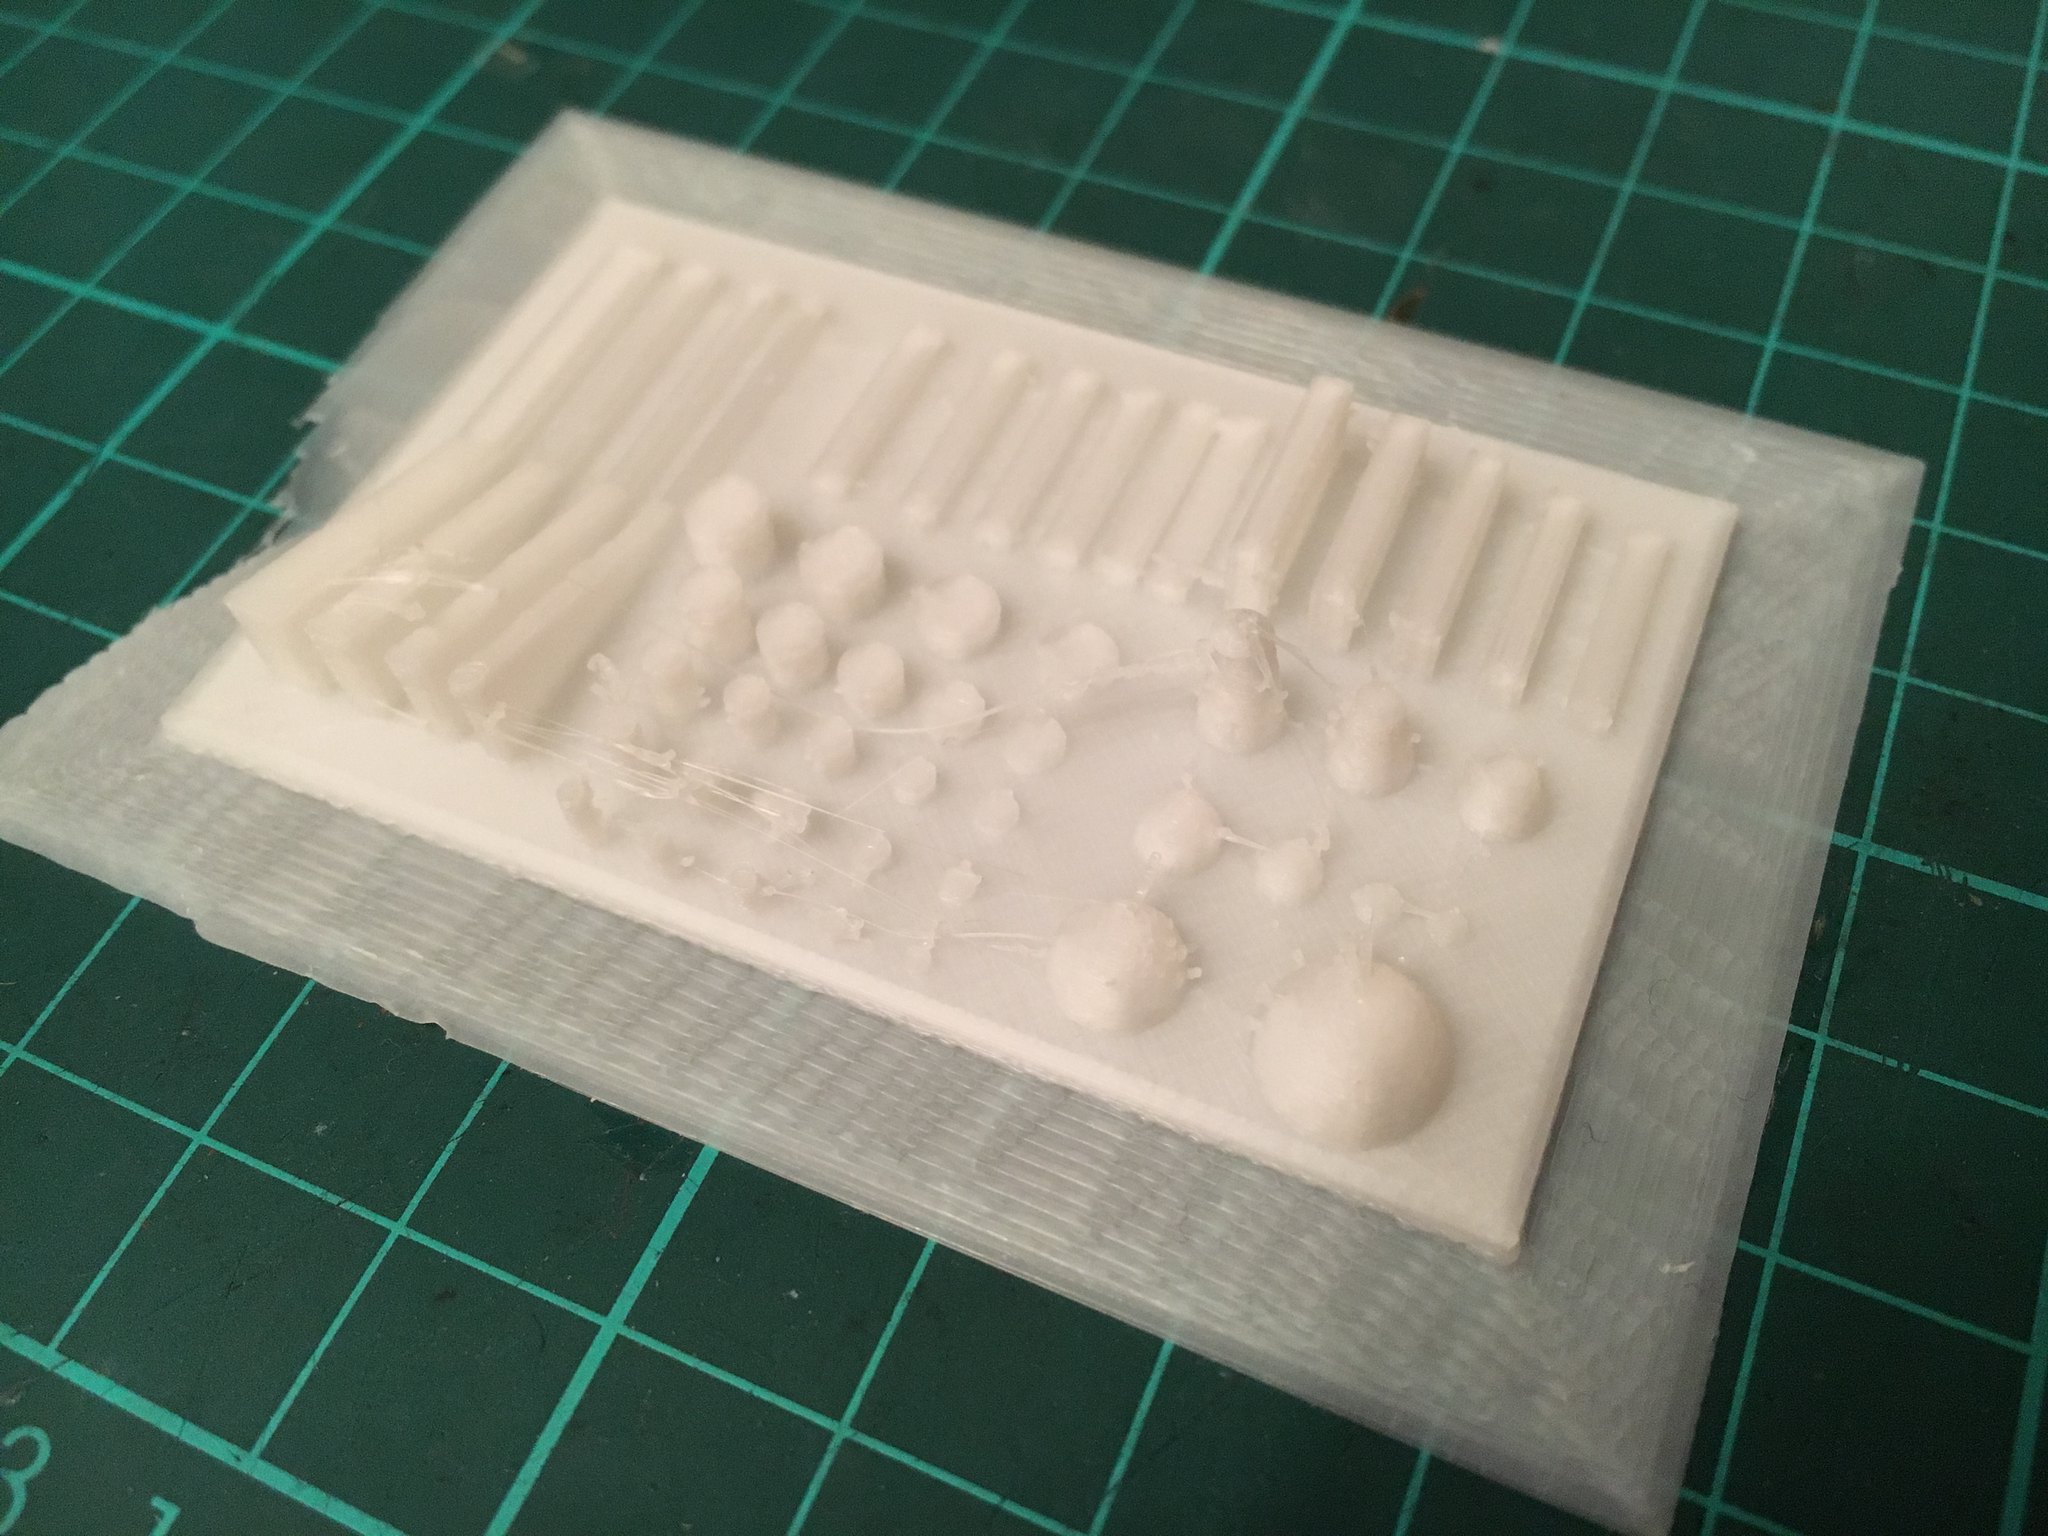 Test print Balco by simon br blue, on Flickr
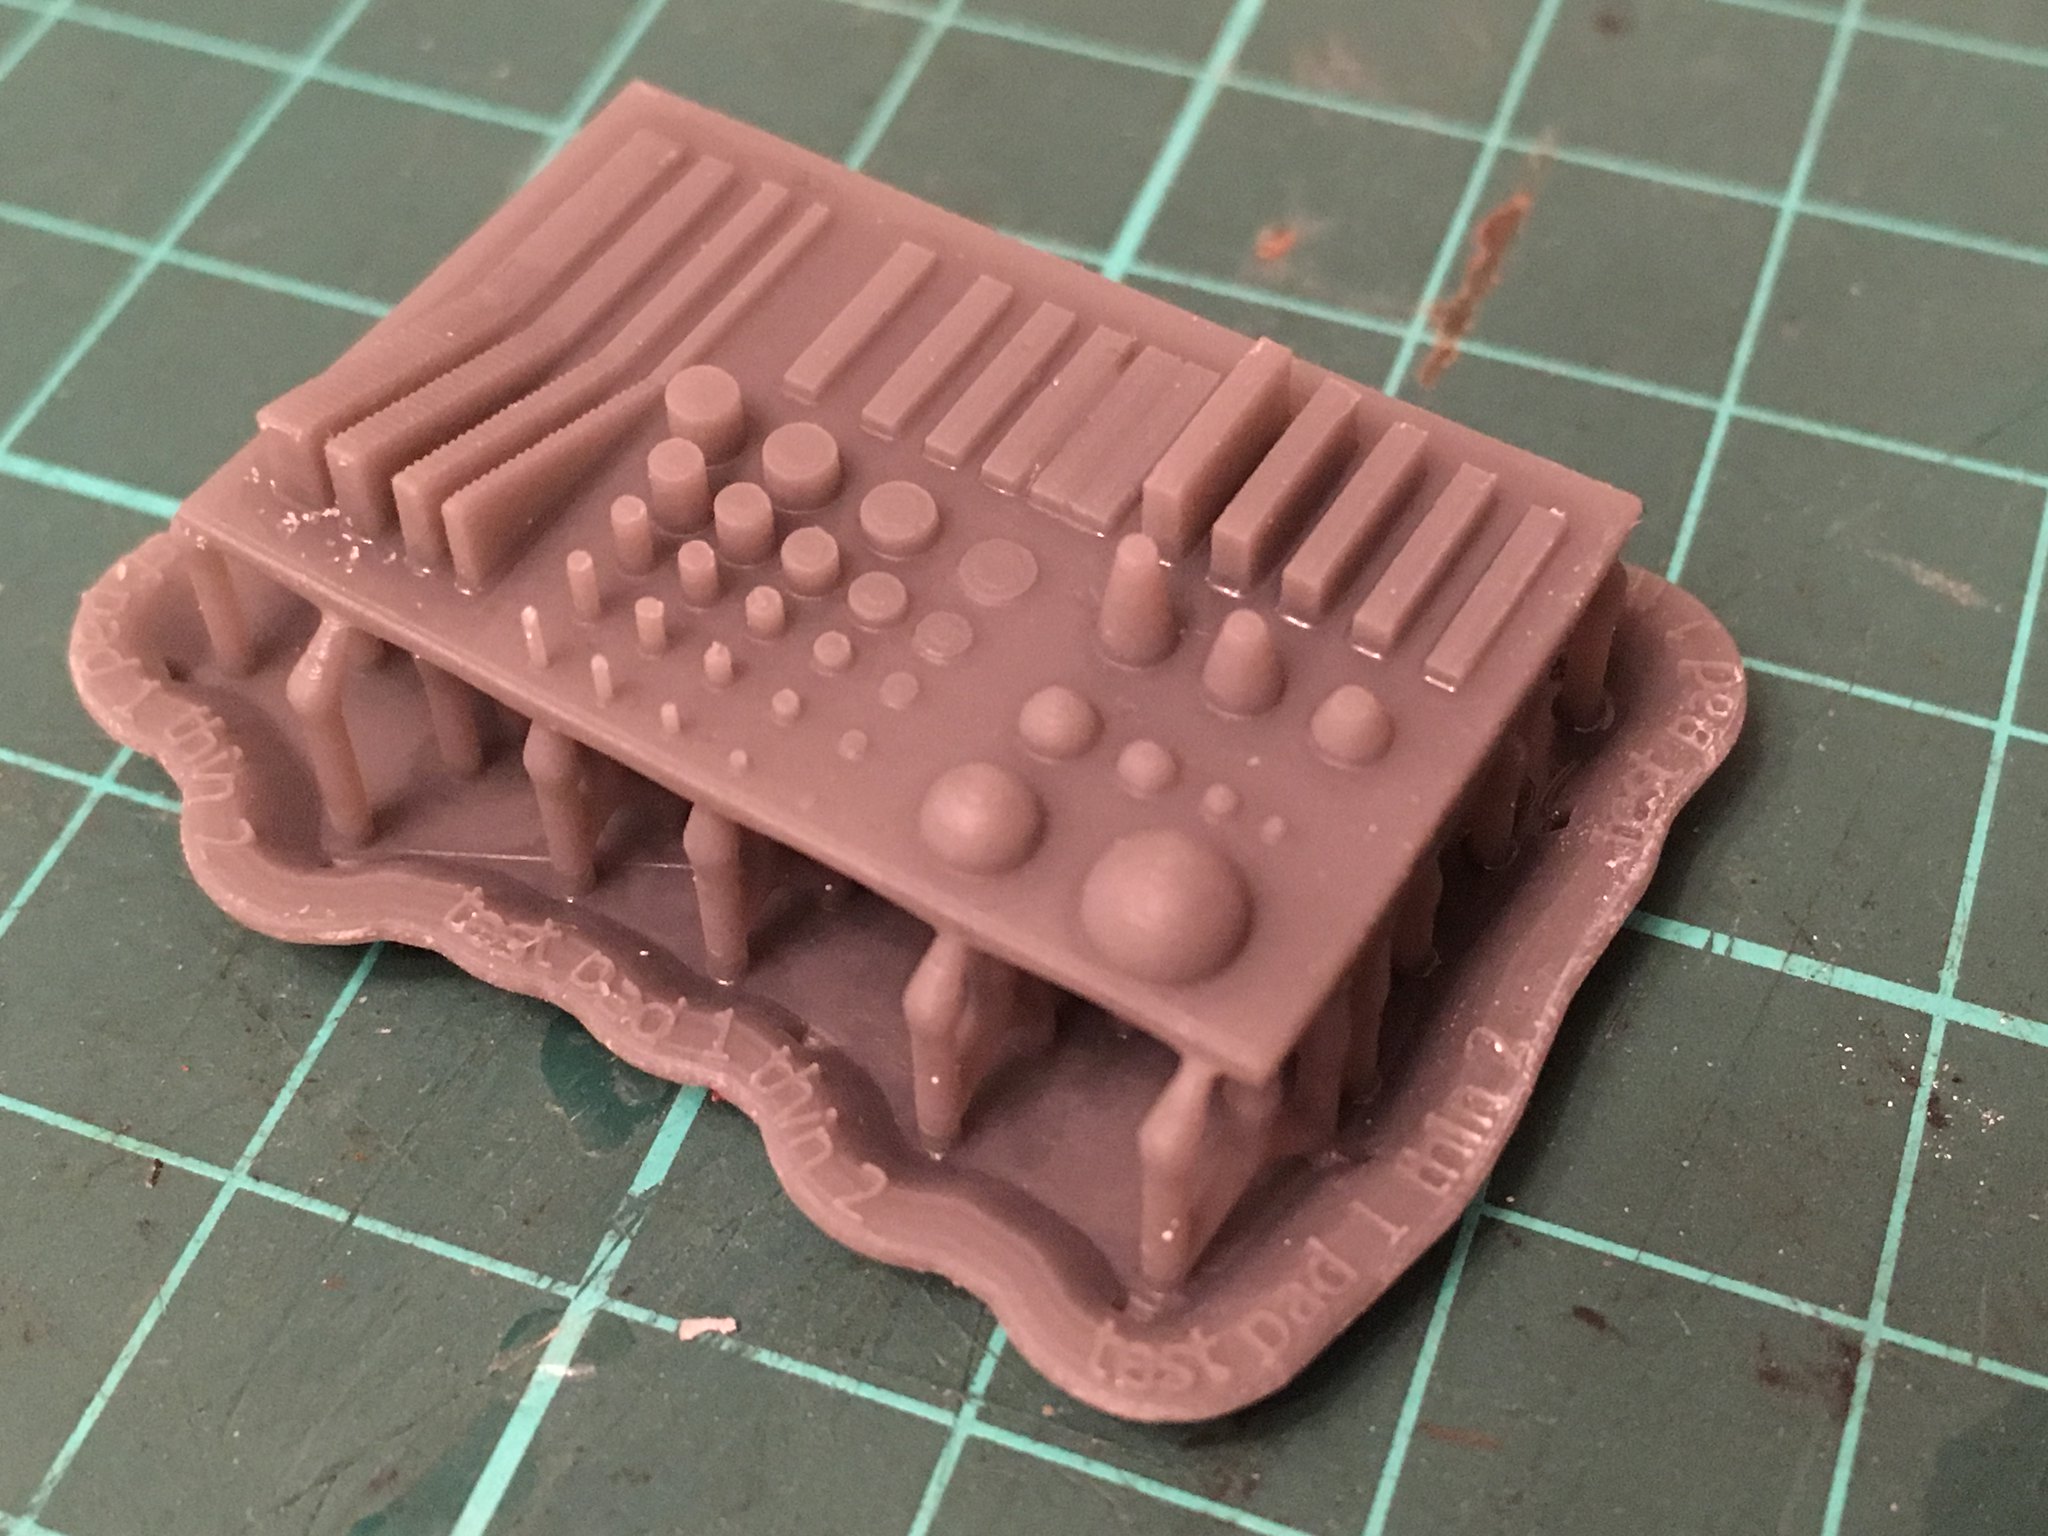 Test print Form 2 by simon br blue, on Flickr
-
 6
6
-
-
Just found this picture of a 40 on some PGA's, don't think its been posted on here before.
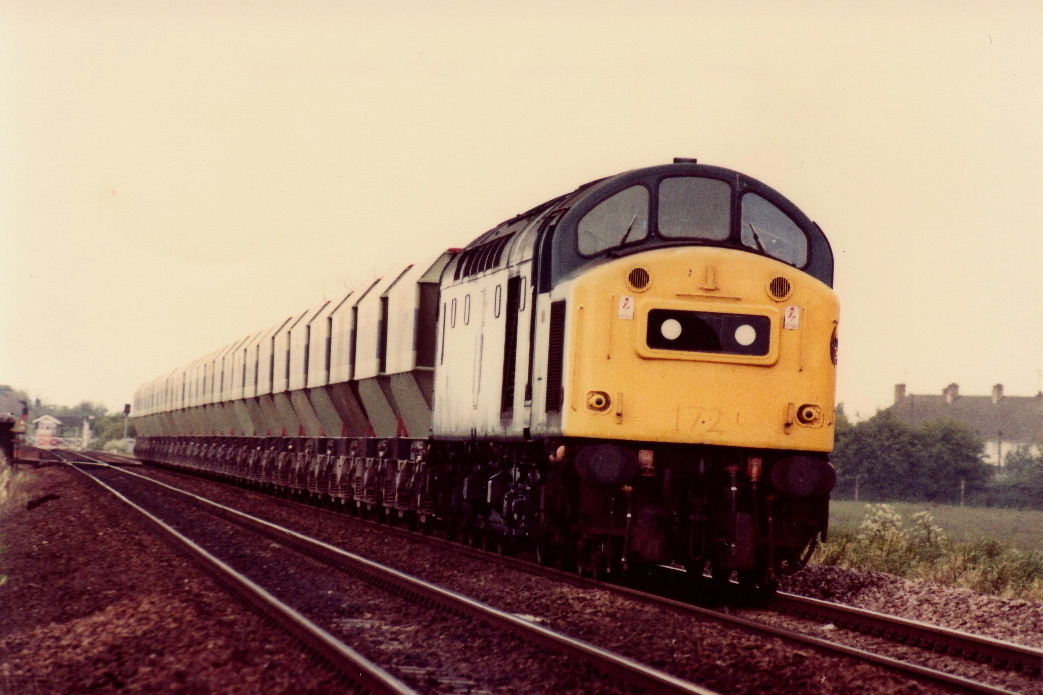 40172c by Kevin Taylor, on Flickr
-
1
-
-
Hi,
I do a similar buffer in 7mm and could easily change it. What scale do you work in?
https://www.shapeways.com/product/8E28DTRJG/pba-buffers-7mm-solid-x4?optionId=65003985
-
1
-
-
Regarding the resizing of models whilst it is easy to resize using the software this is only part of the job.
If I'm making the model smaller I find generally the model will not print in the same material because the original model will be made with detail and thickness's close to the materials limit. The option is to either thicken the model and resize/remove some of the fine details or to choose a more detailed material. If going from an original model printable in WSF 7mm to 4mm or 4mm to 2mm you can often rescale the model and then use FUD, HPSF or HDA for the smaller model. If a model is 4mm FUD and you want to go to 2mm I've been able to do it by thickening some of the parts and using HDA (resizing the model this small can cause a problem as the Shapeways software will some times remove details like rivets as they are too small to print). An example below is of a resized J70 model that was originally drawn for 4mm and was enlarged to 7mm WSF reduced to 2mm HDA. The 7mm version has some details removed to allow these to be printed separately in a finer material and the 2mm has some detail removed as its too small, no boiler to allow room for a mechanism and a roof added to increase strength. I would where possible make models available in all practical materials - some potential purchasers will be looking for a cheap price where as others will be looking for quality and surface finish.
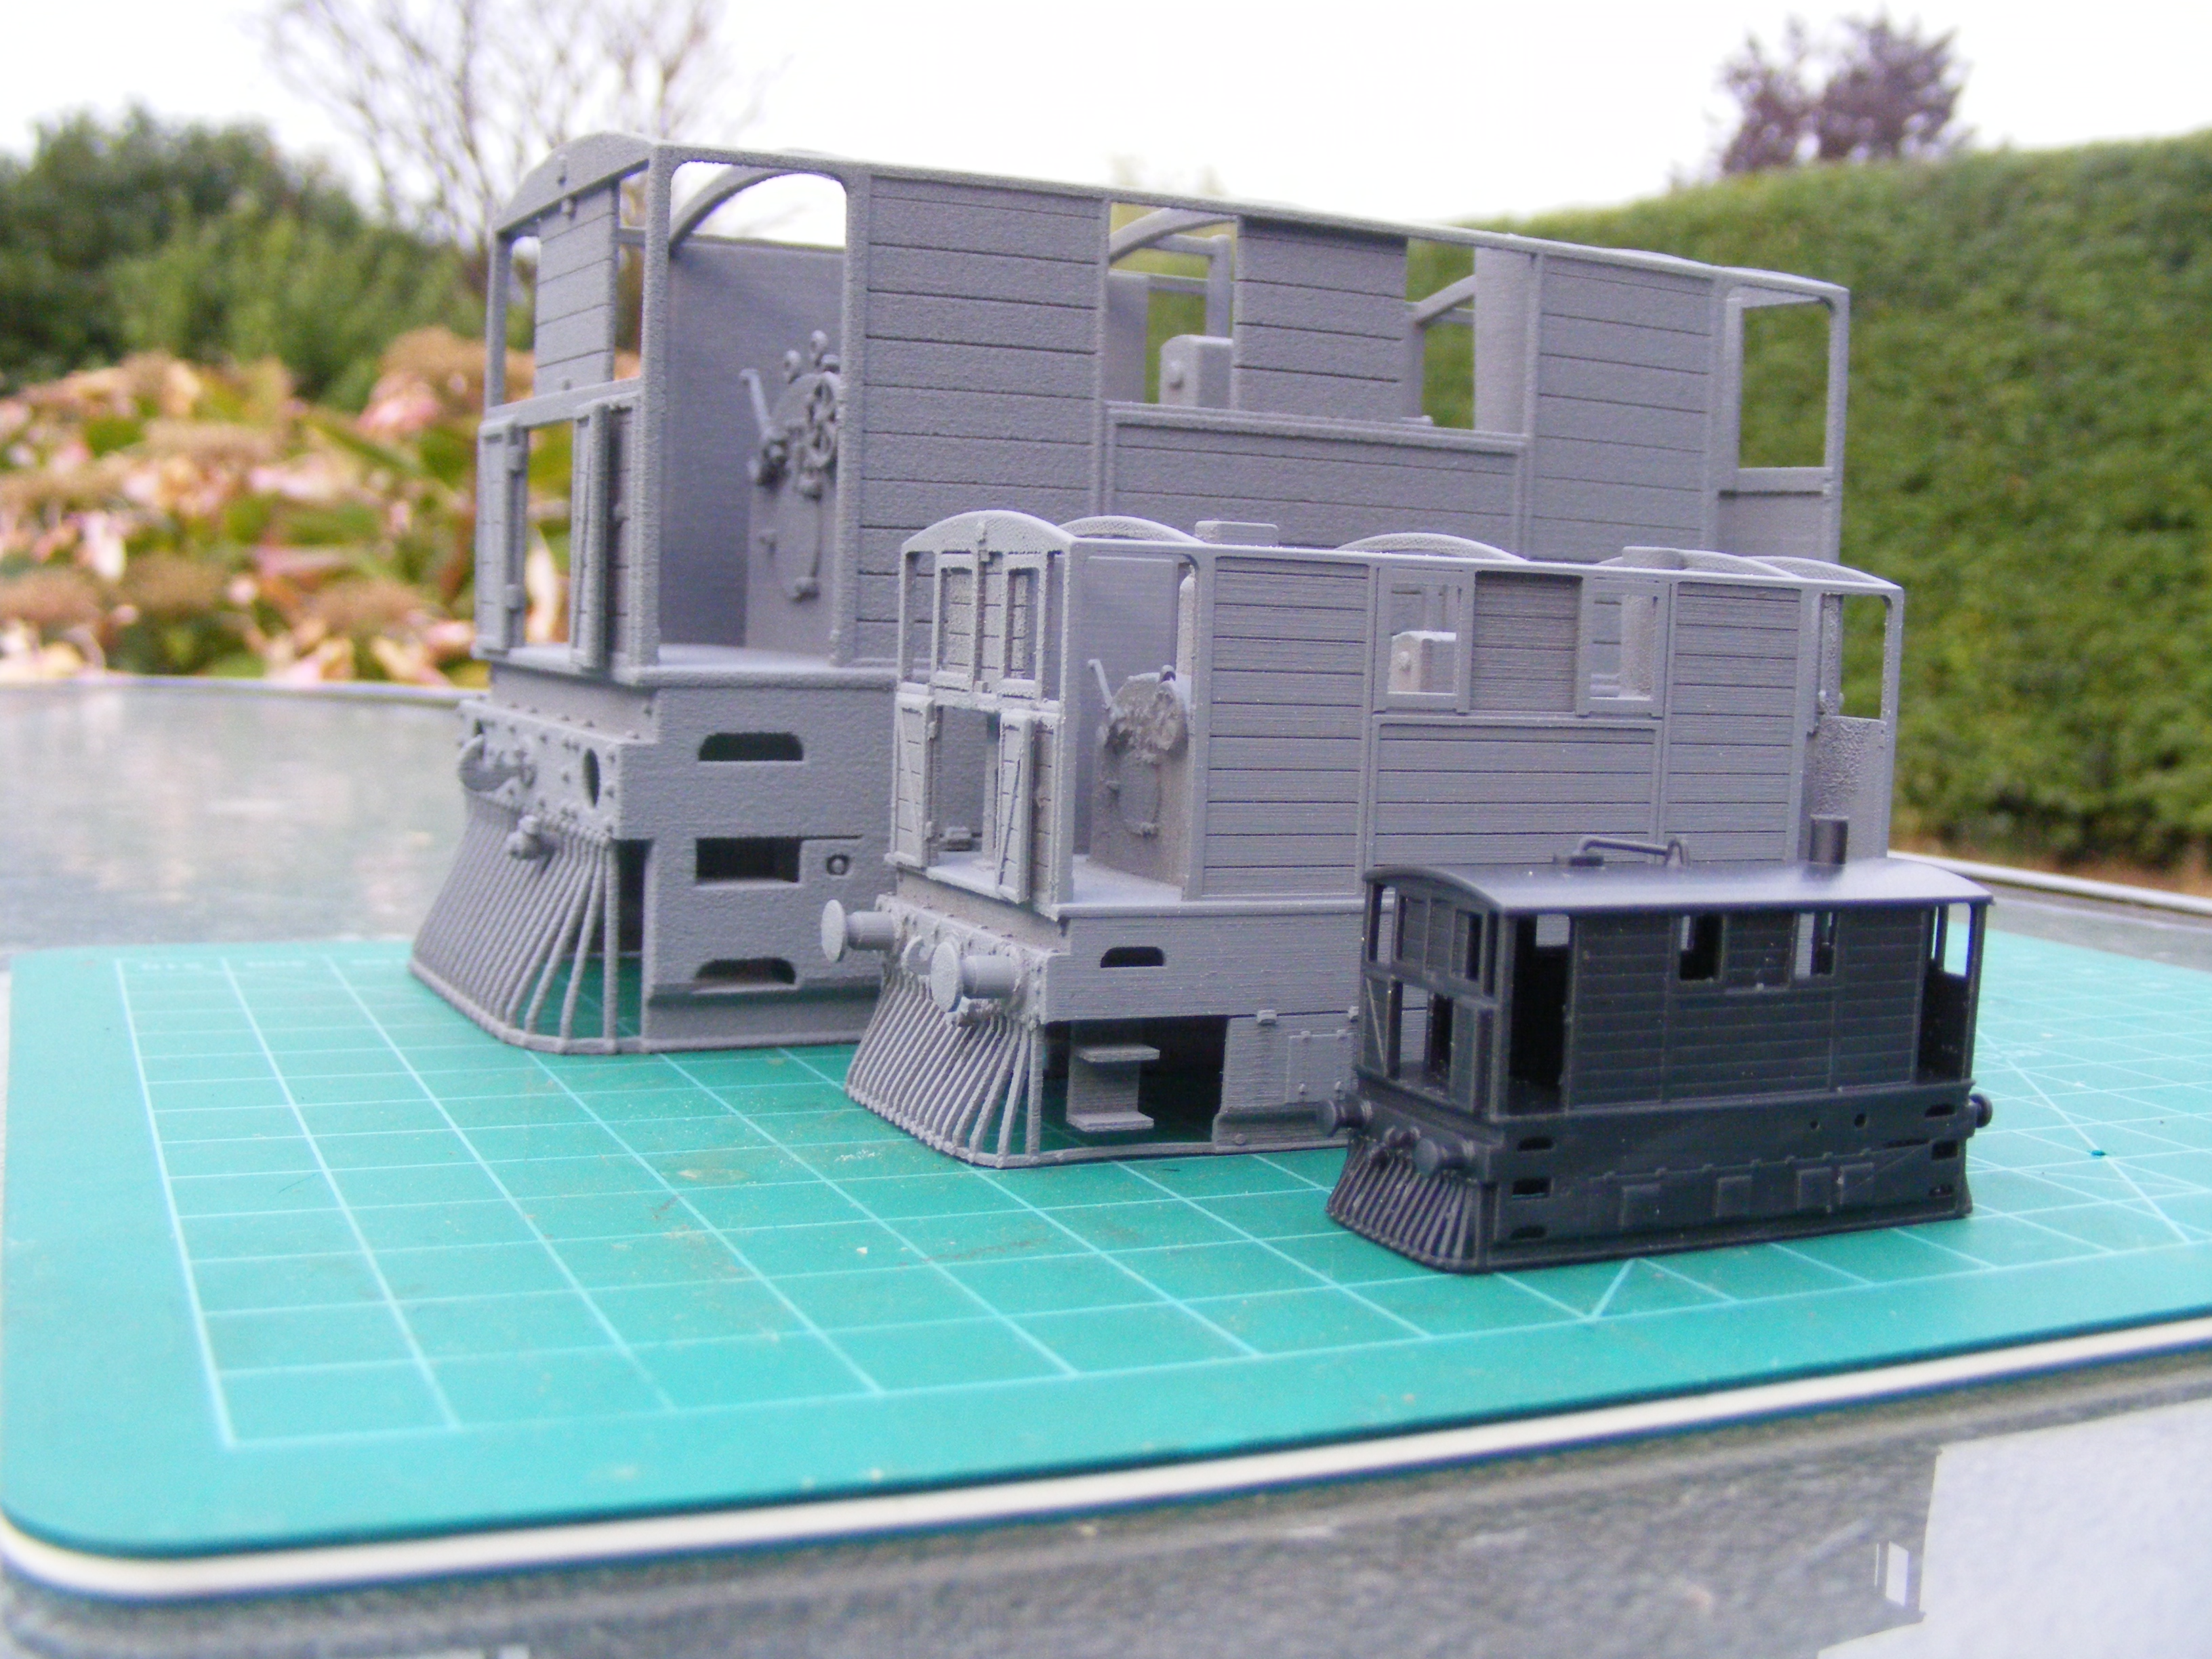 J70 Trams 2mm, 4mm, and 7mm by simon br blue, on Flickr
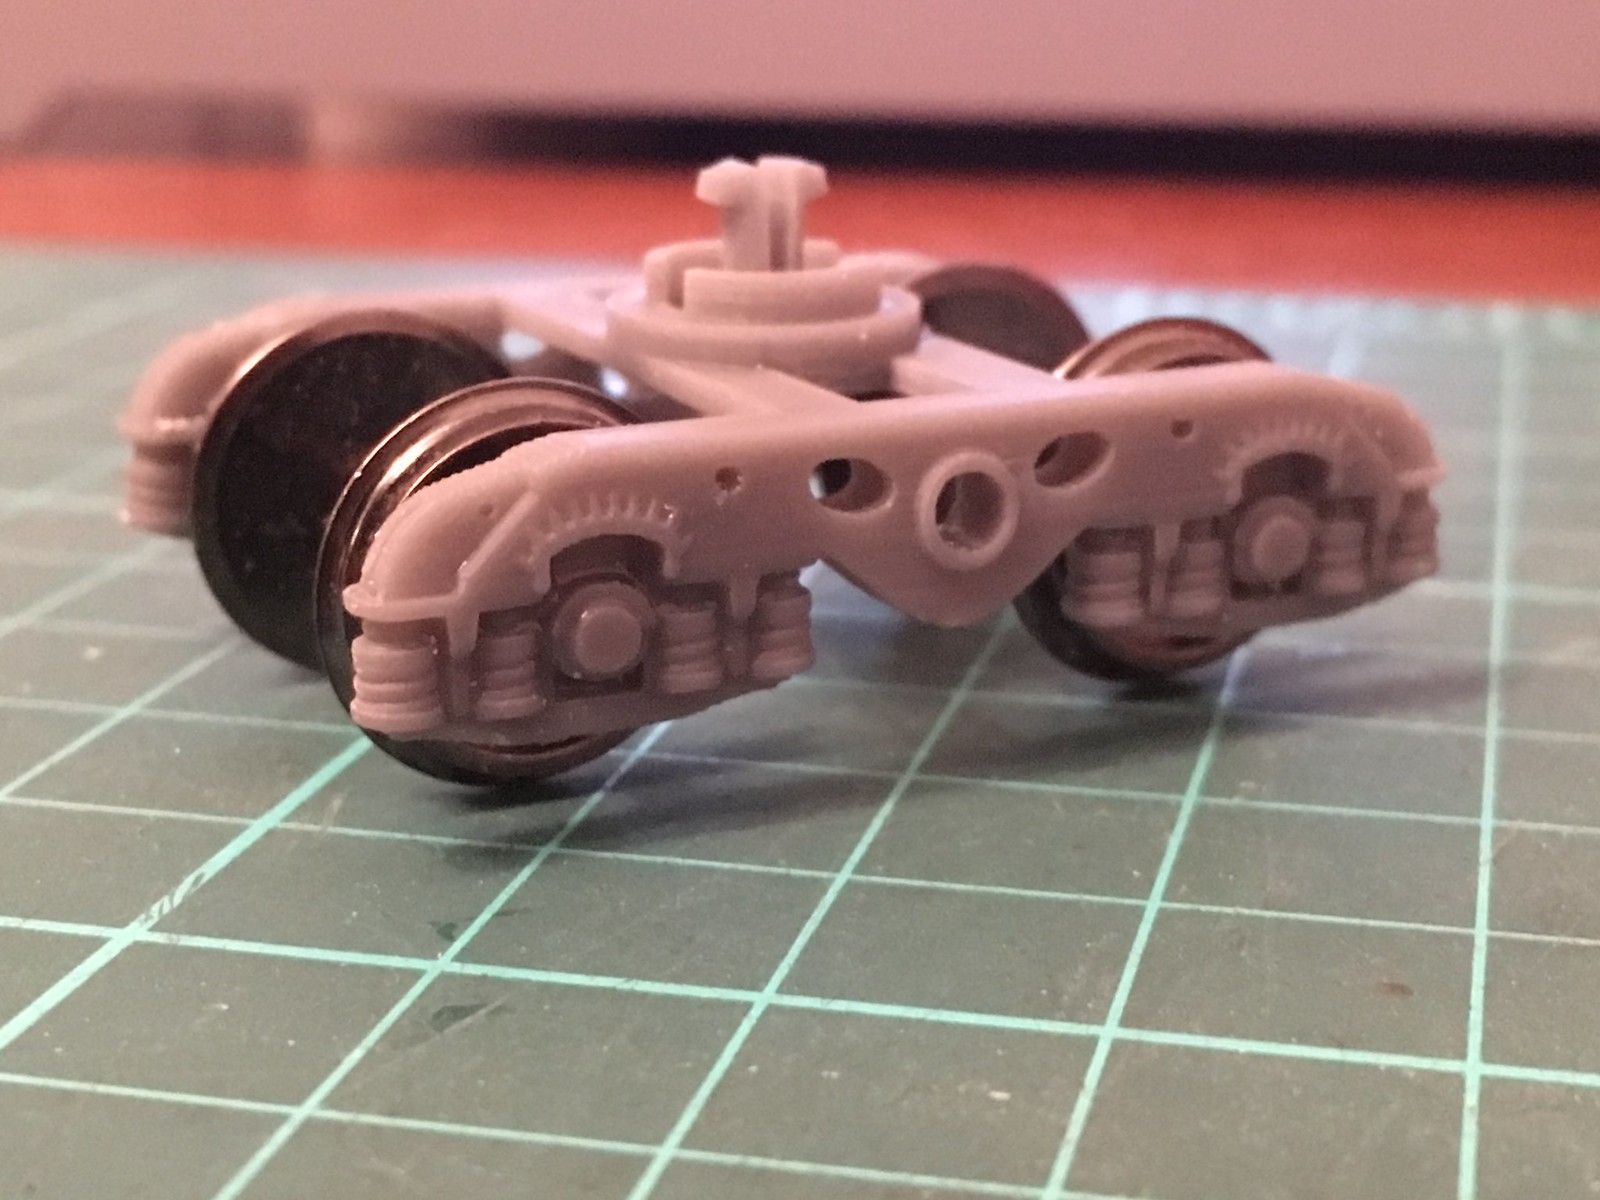
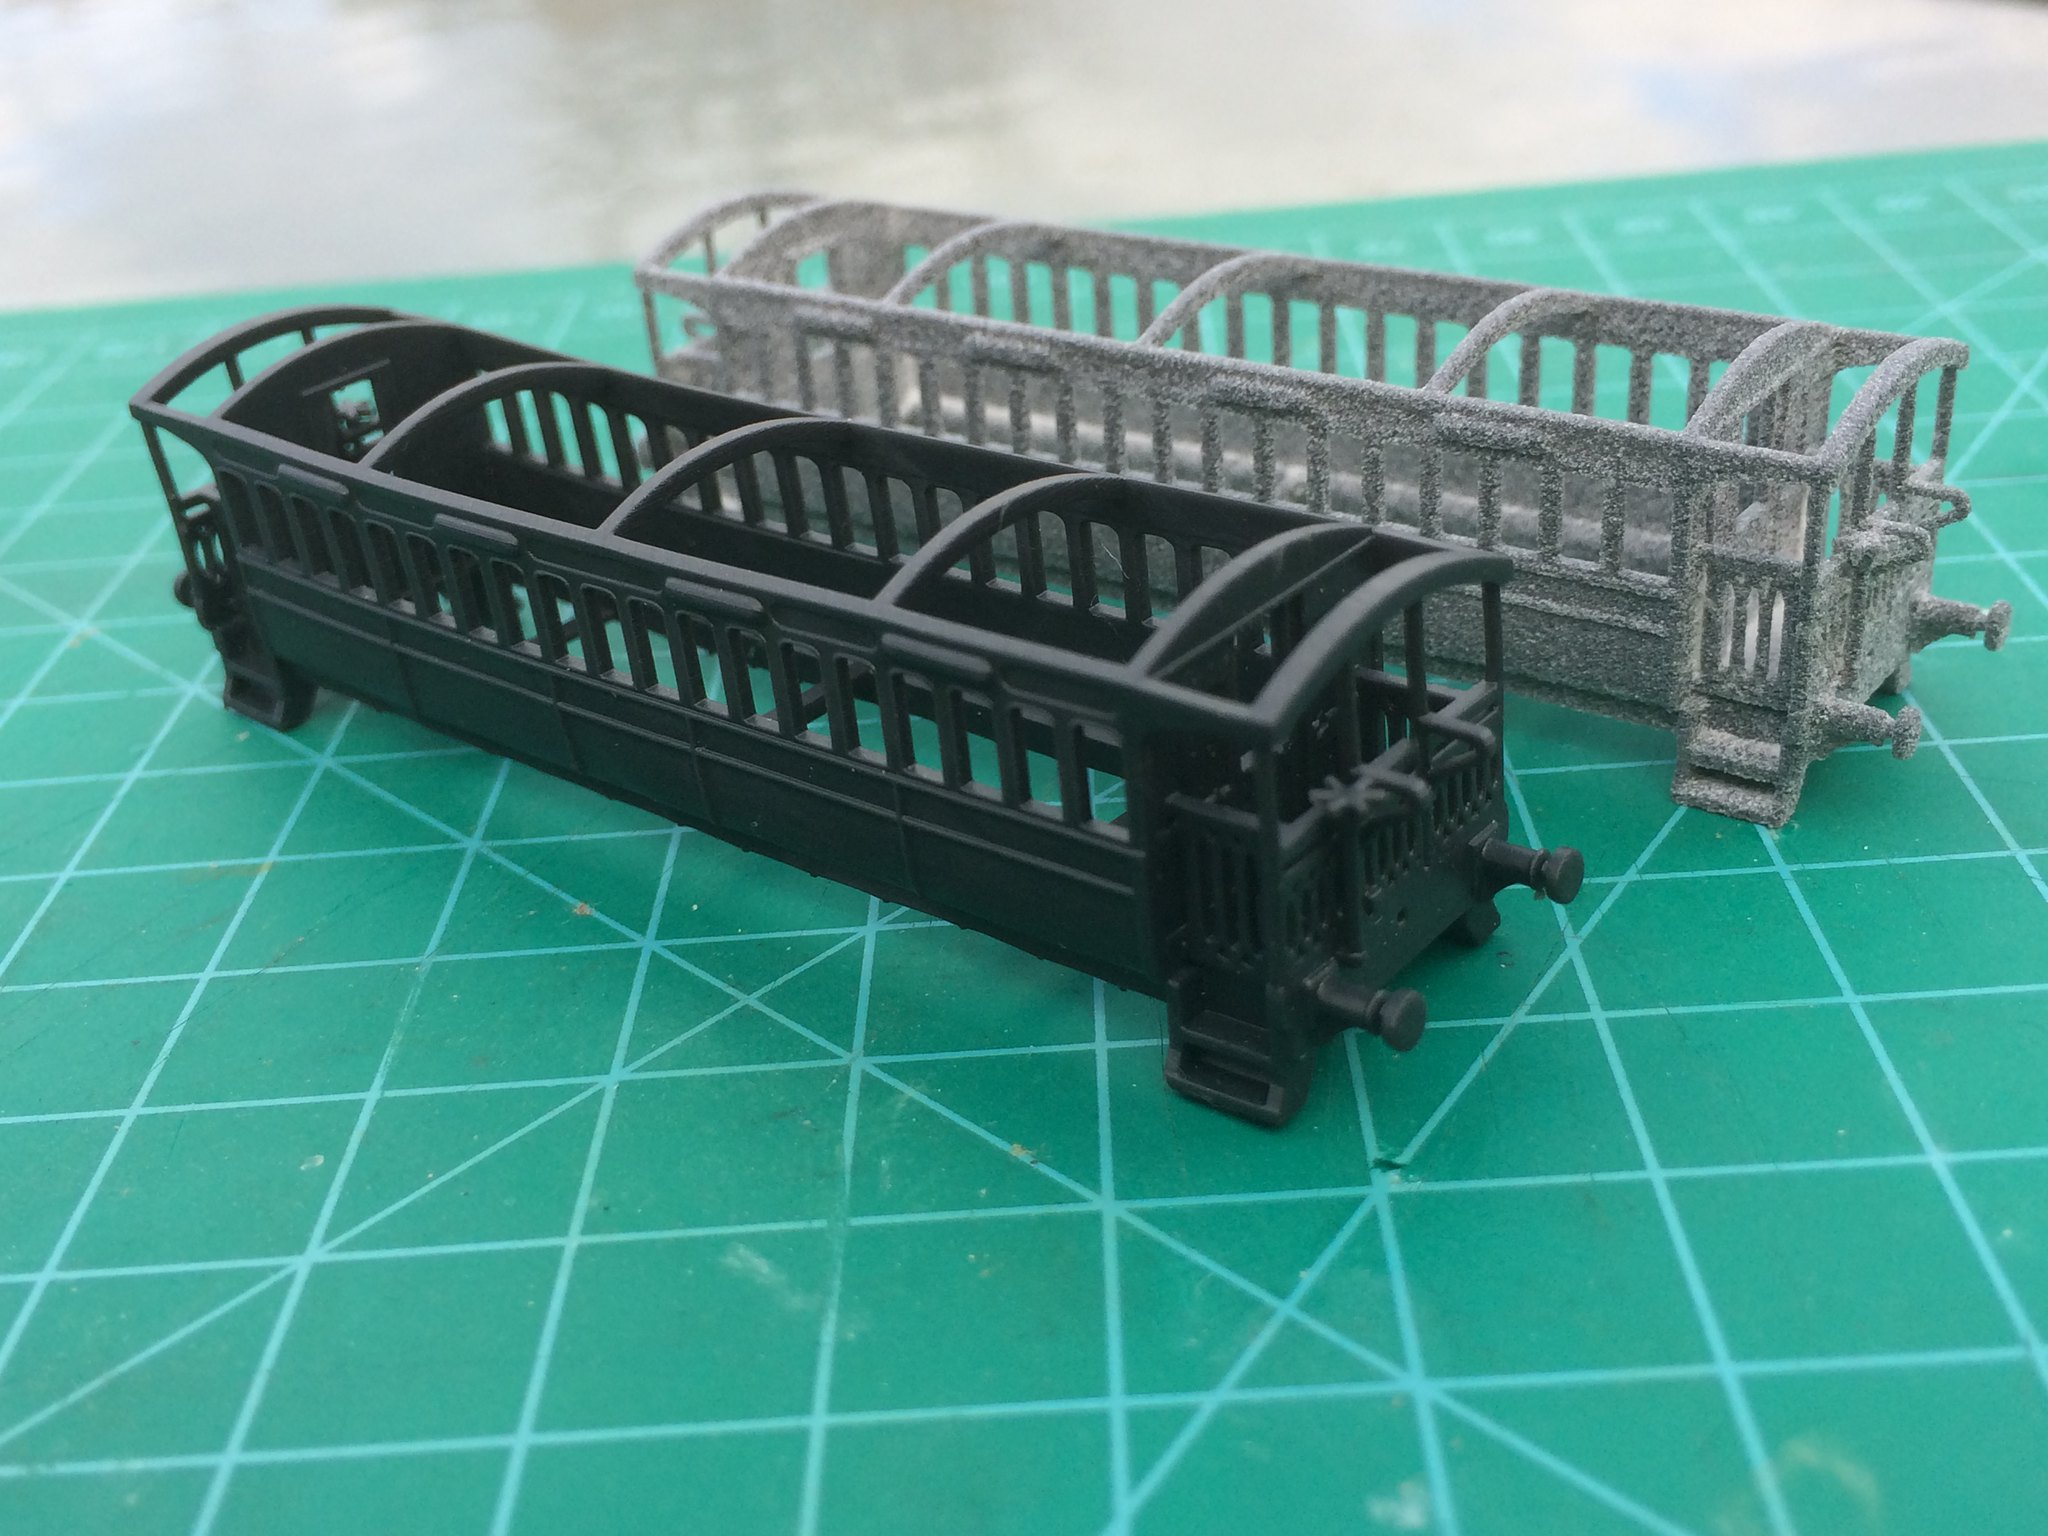
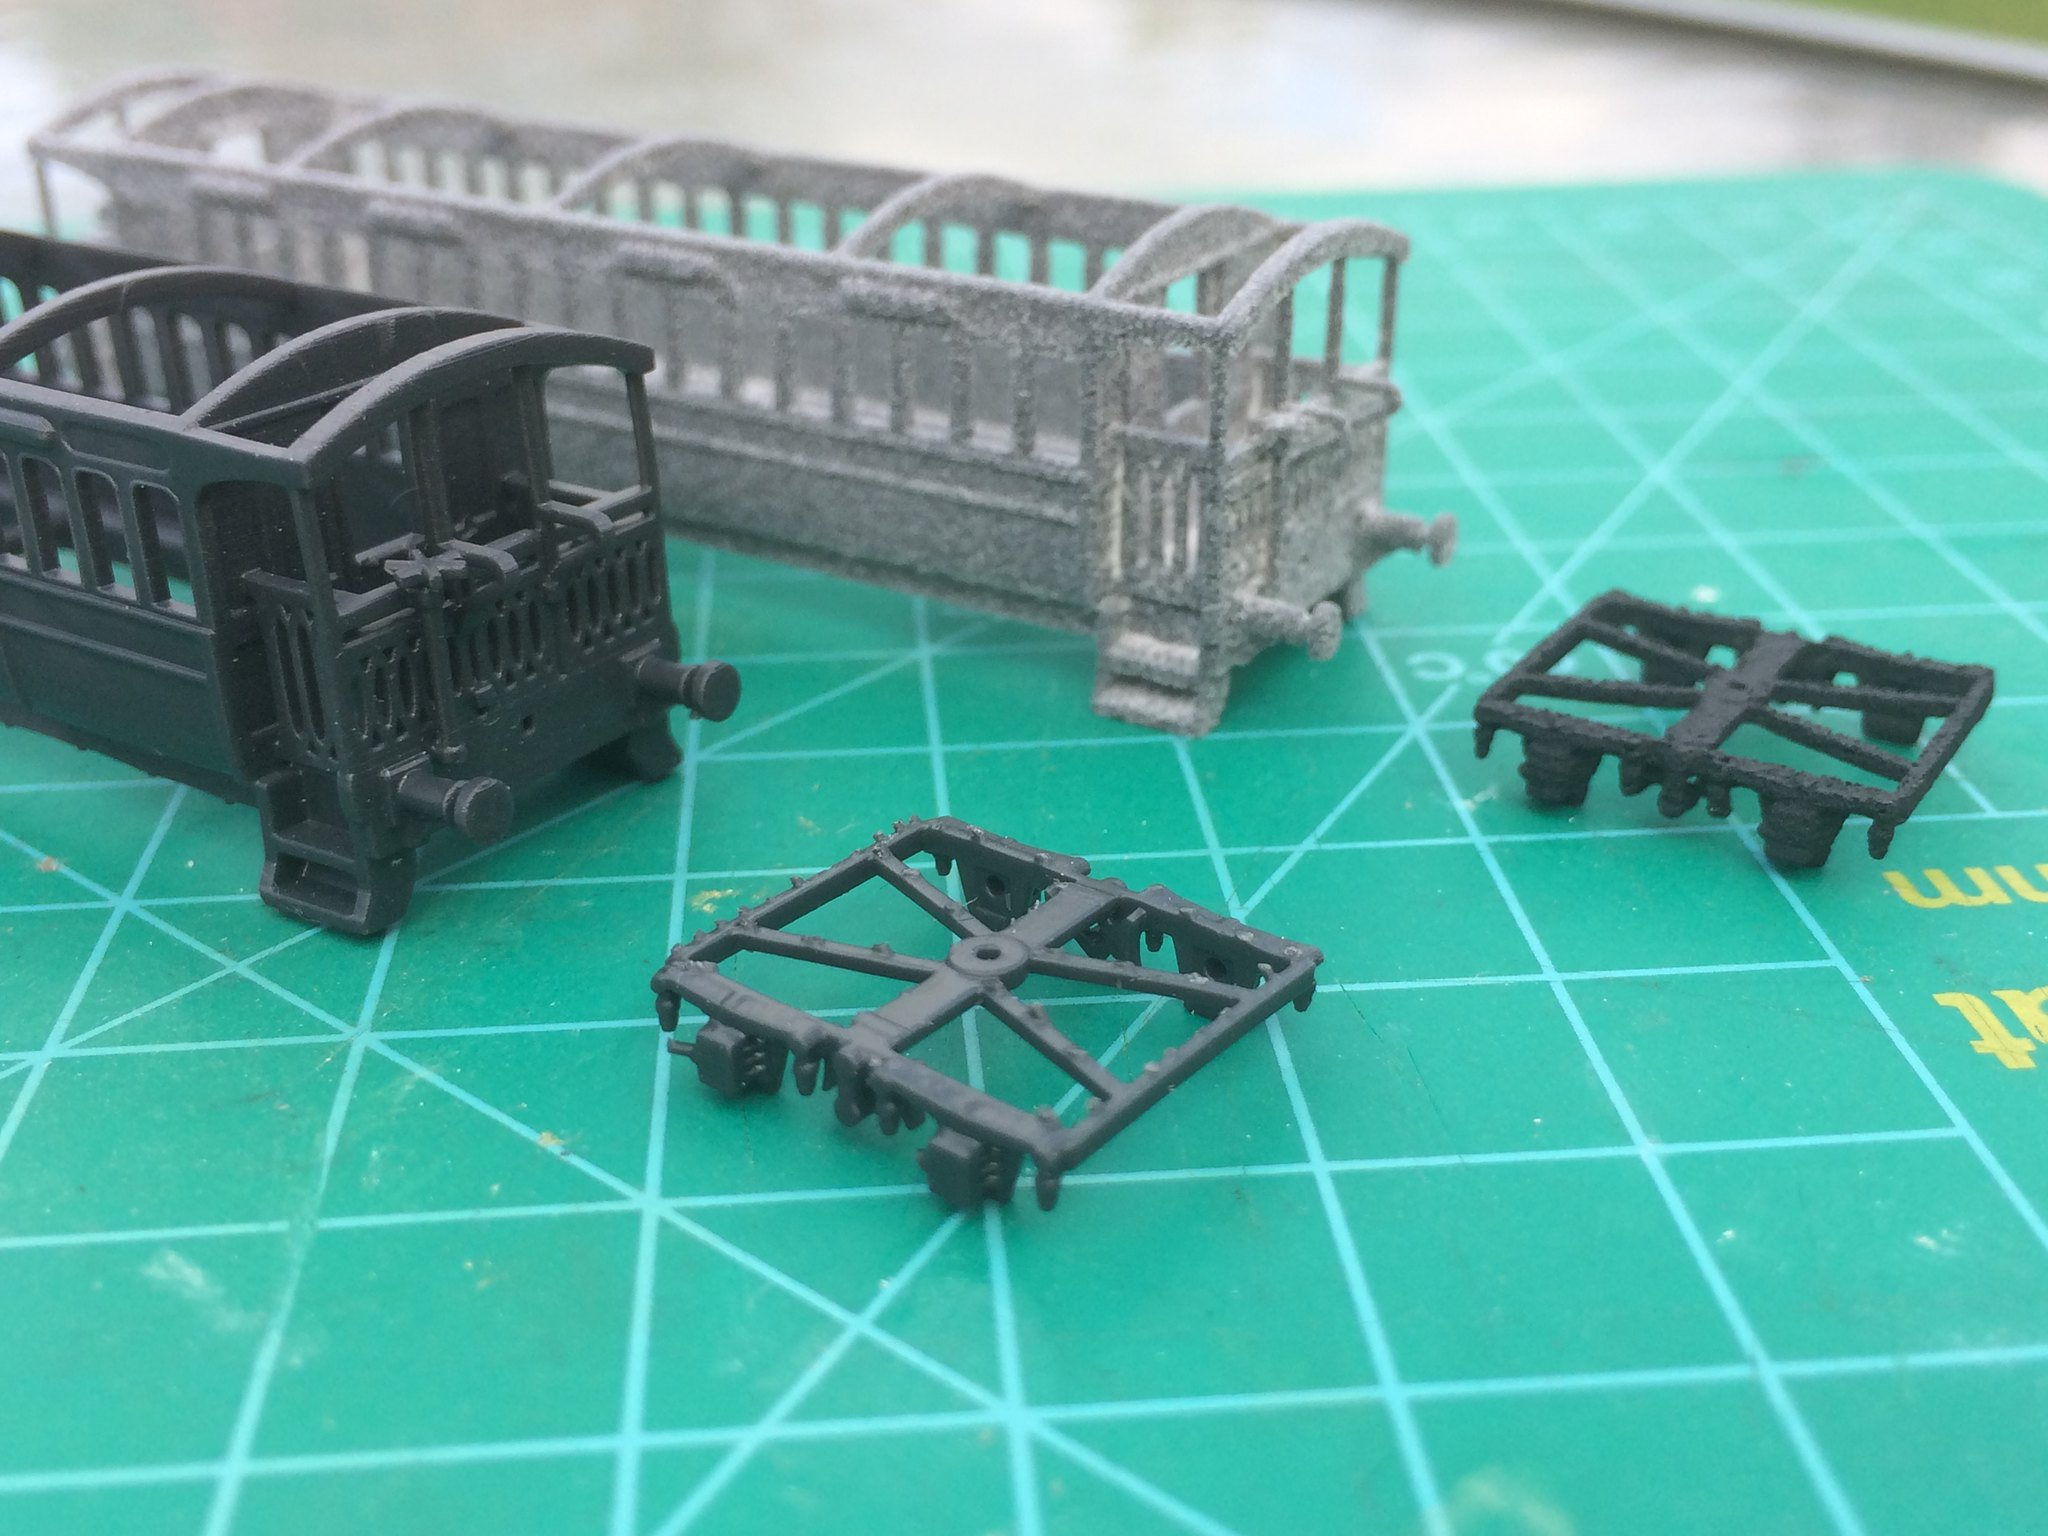
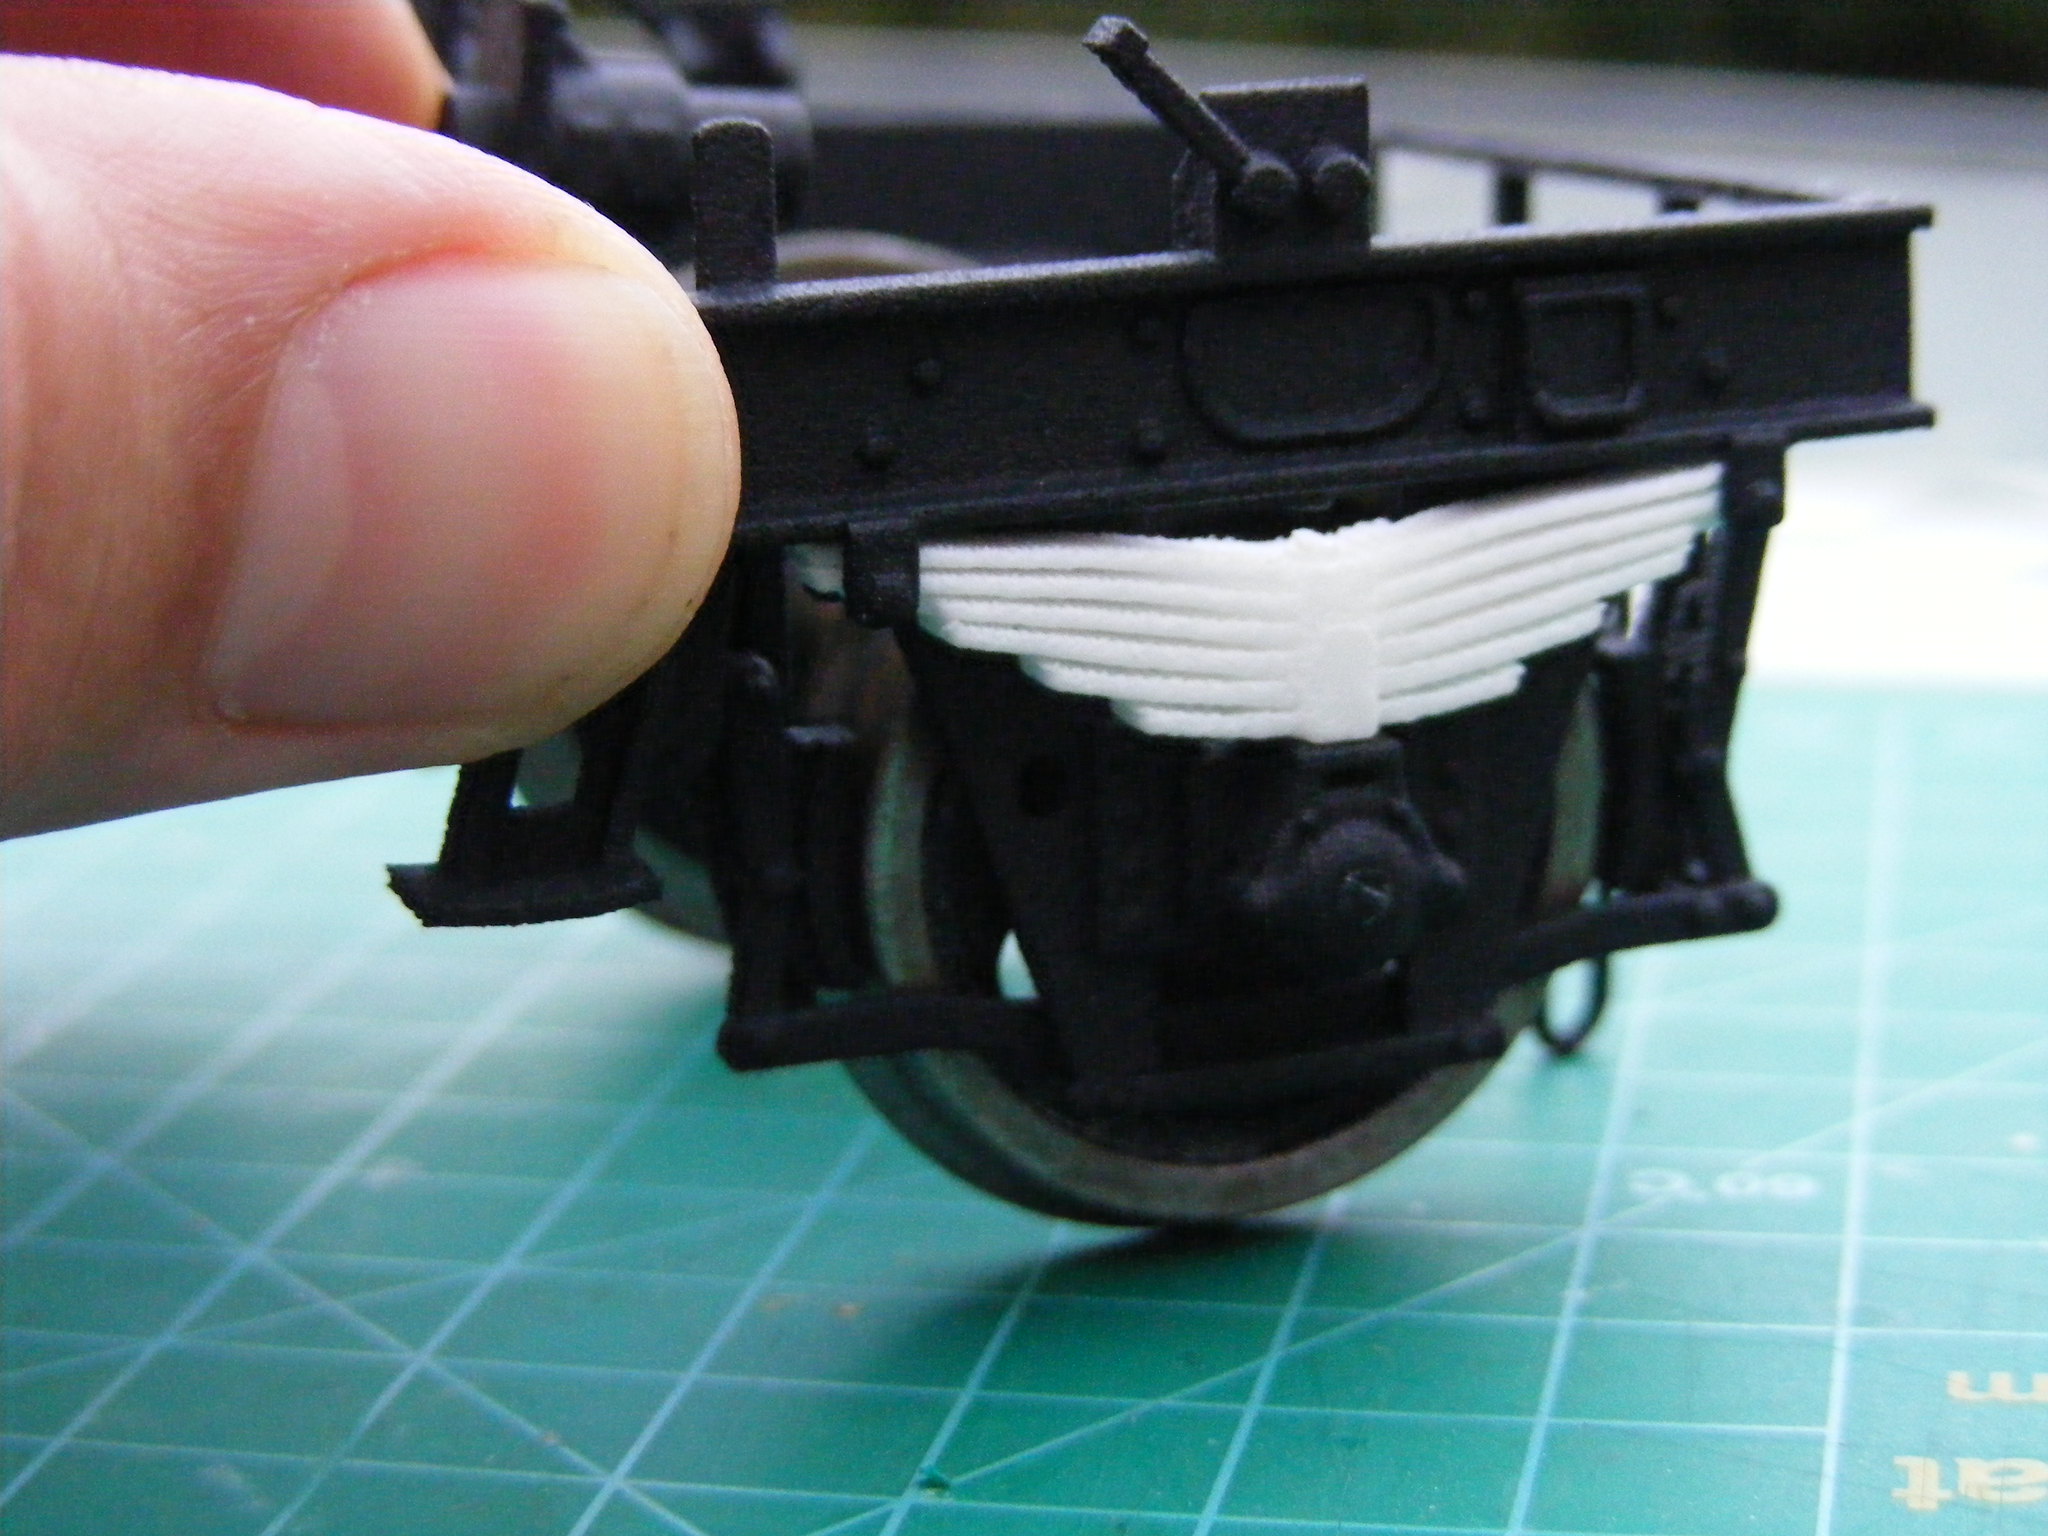
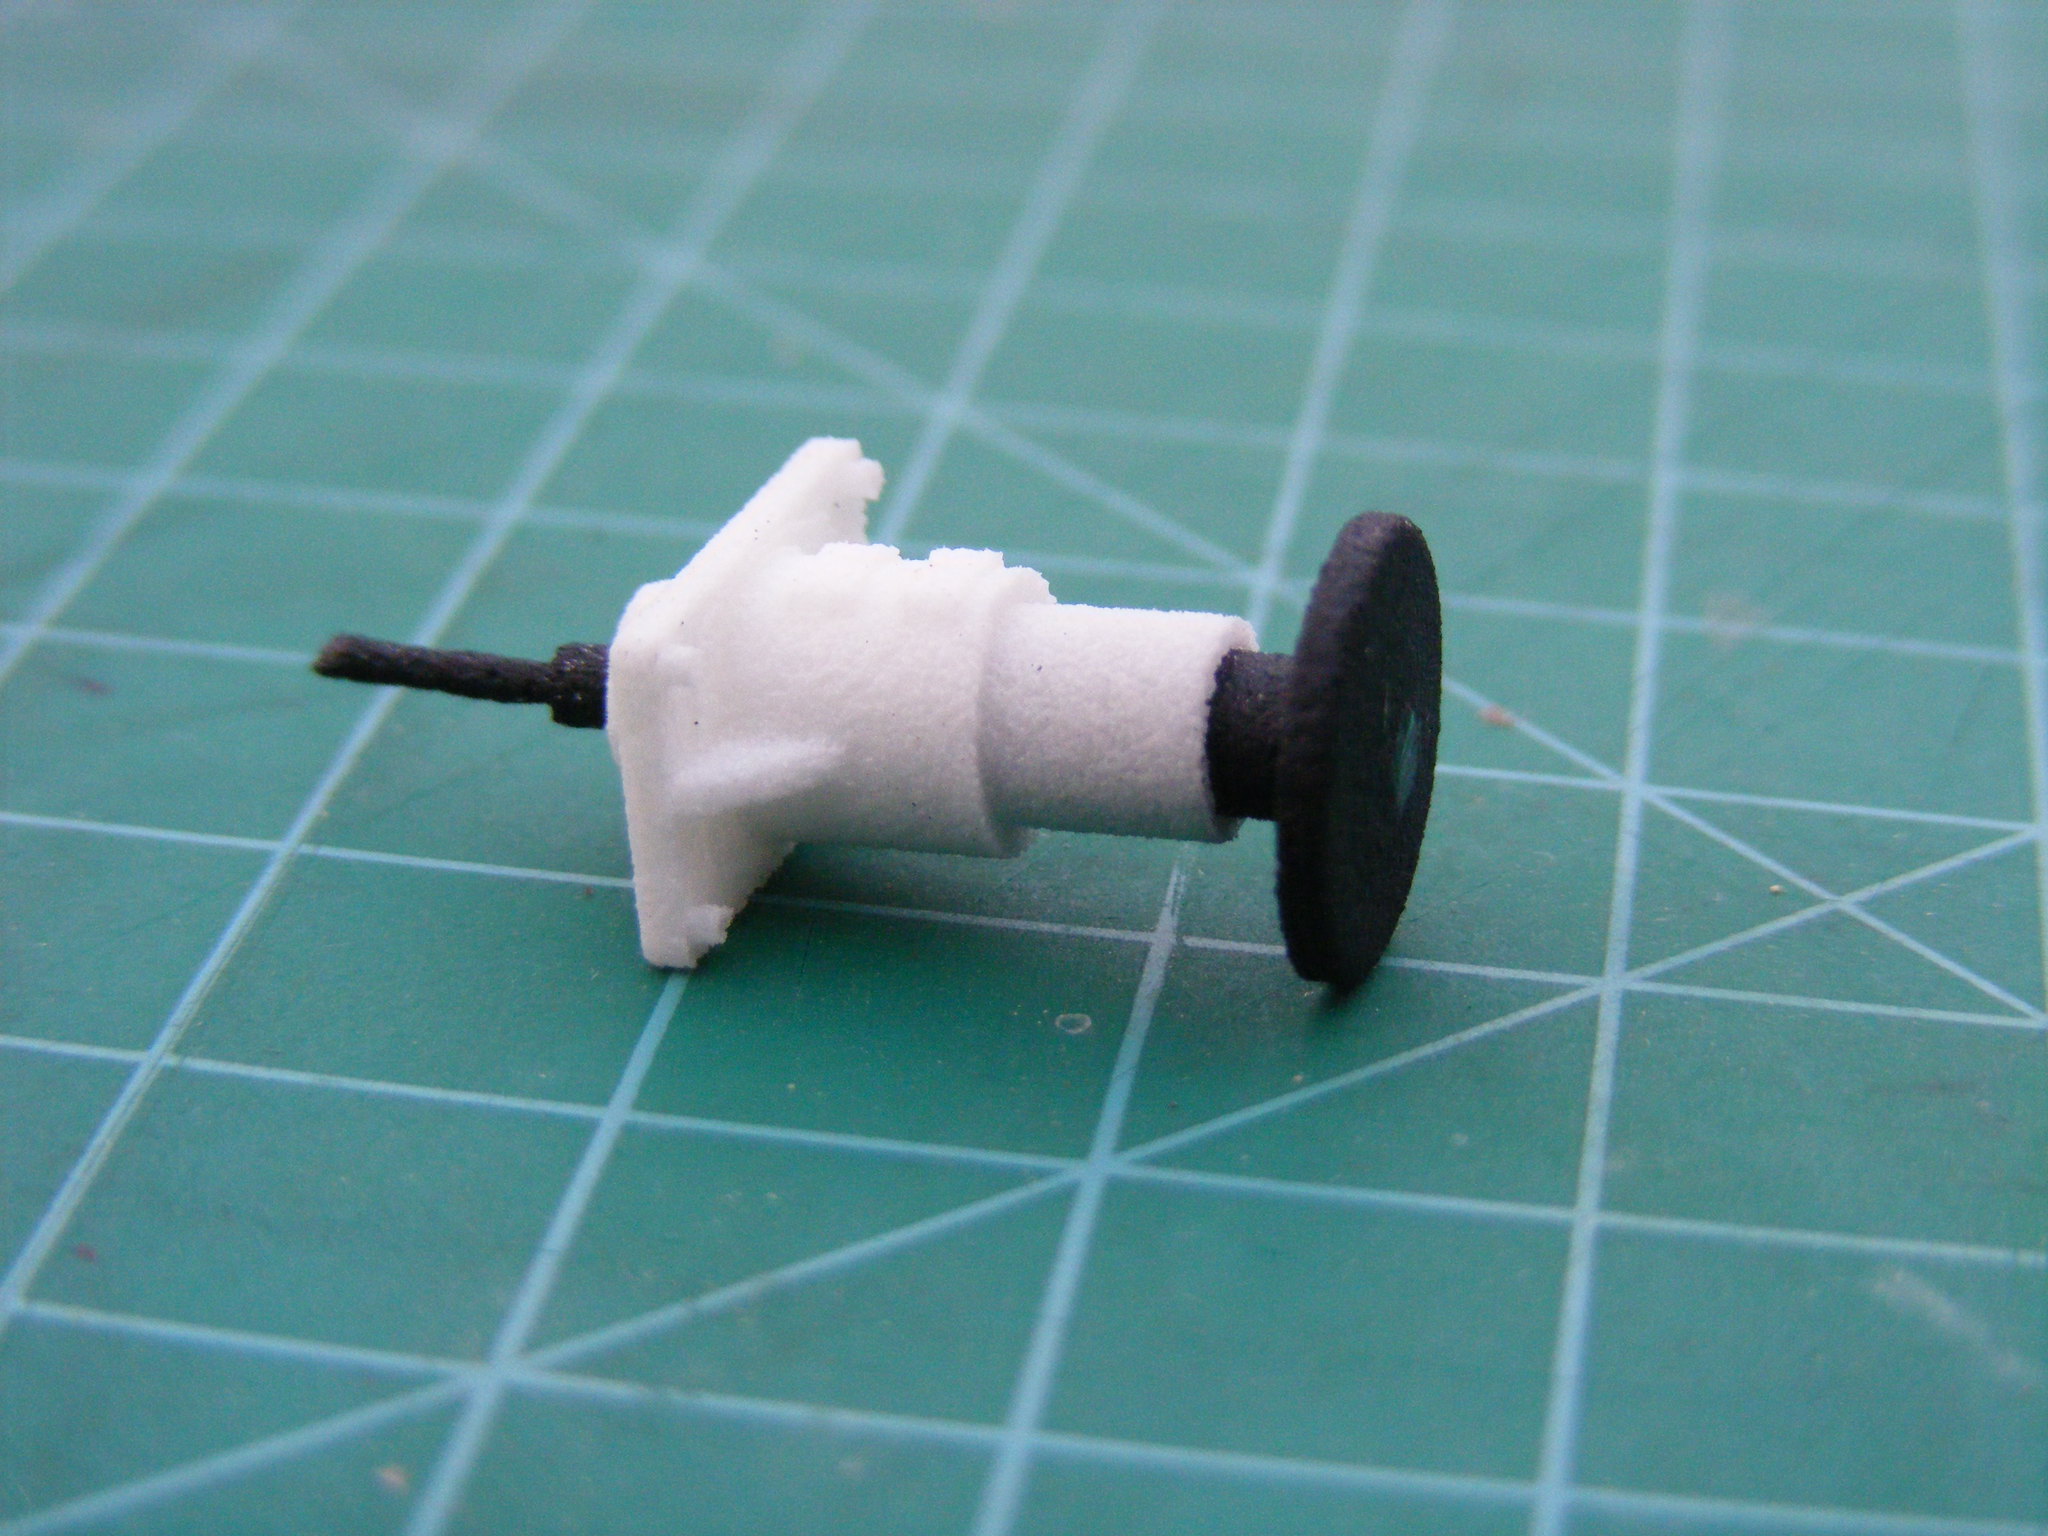
When resizing items to a larger scale it is generally easier some changes need to be made to thickness's to avoid a massive price rise. Another area that is required I the adding of detail as some parts not visible or detailed in 4mm will show up in 7mm or 1/32 scale. I've recently drawn a 16t mineral wagon chassis in 7mm and then rescaled it to 1/32 and added a body to it. The chassis only required a some parts making thinner but the body have would need more work if drawn originally in 7mm - I actually drew it in 7mm but with a wall and detail thickness that would be near the limits of WSF when rescaled. One final part of the resizing is the changes to the model for the scale being used - adjustment of the bearing holes and brake shoes and provision of couplings. The way I add the sale parts is to save the proven sizes for bearings brake shoes and buffers for each scale and import these into the model to be confident they will work. The picture below shows the wagon scaled 1/32 with the bearings and brake shoe shown separately below.
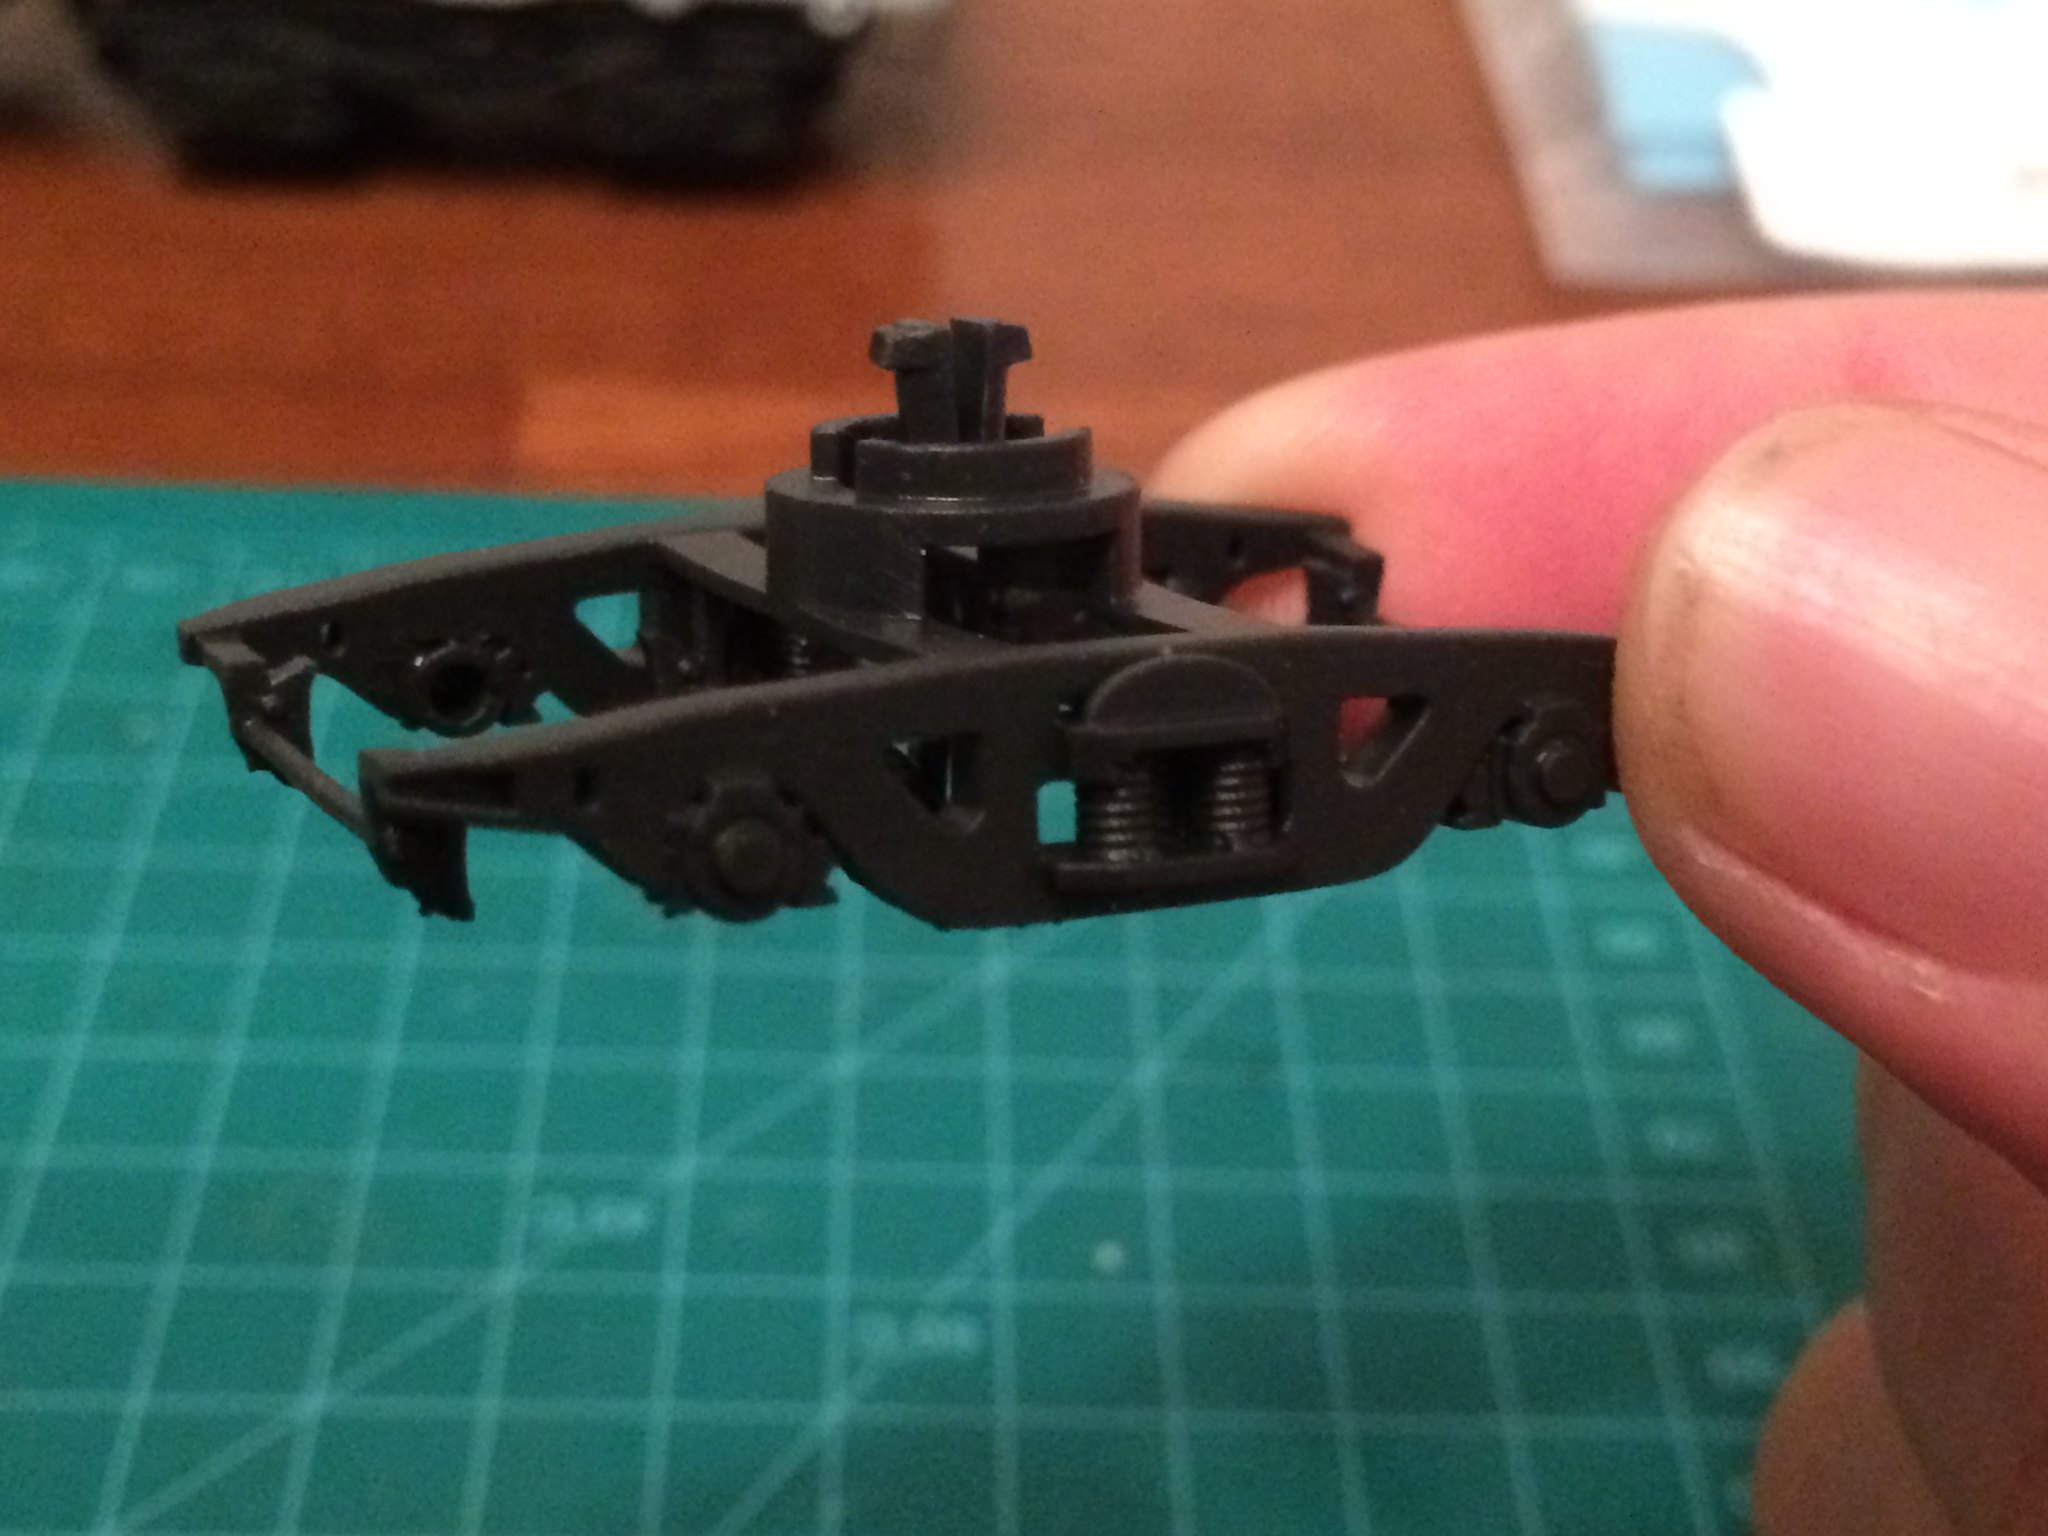
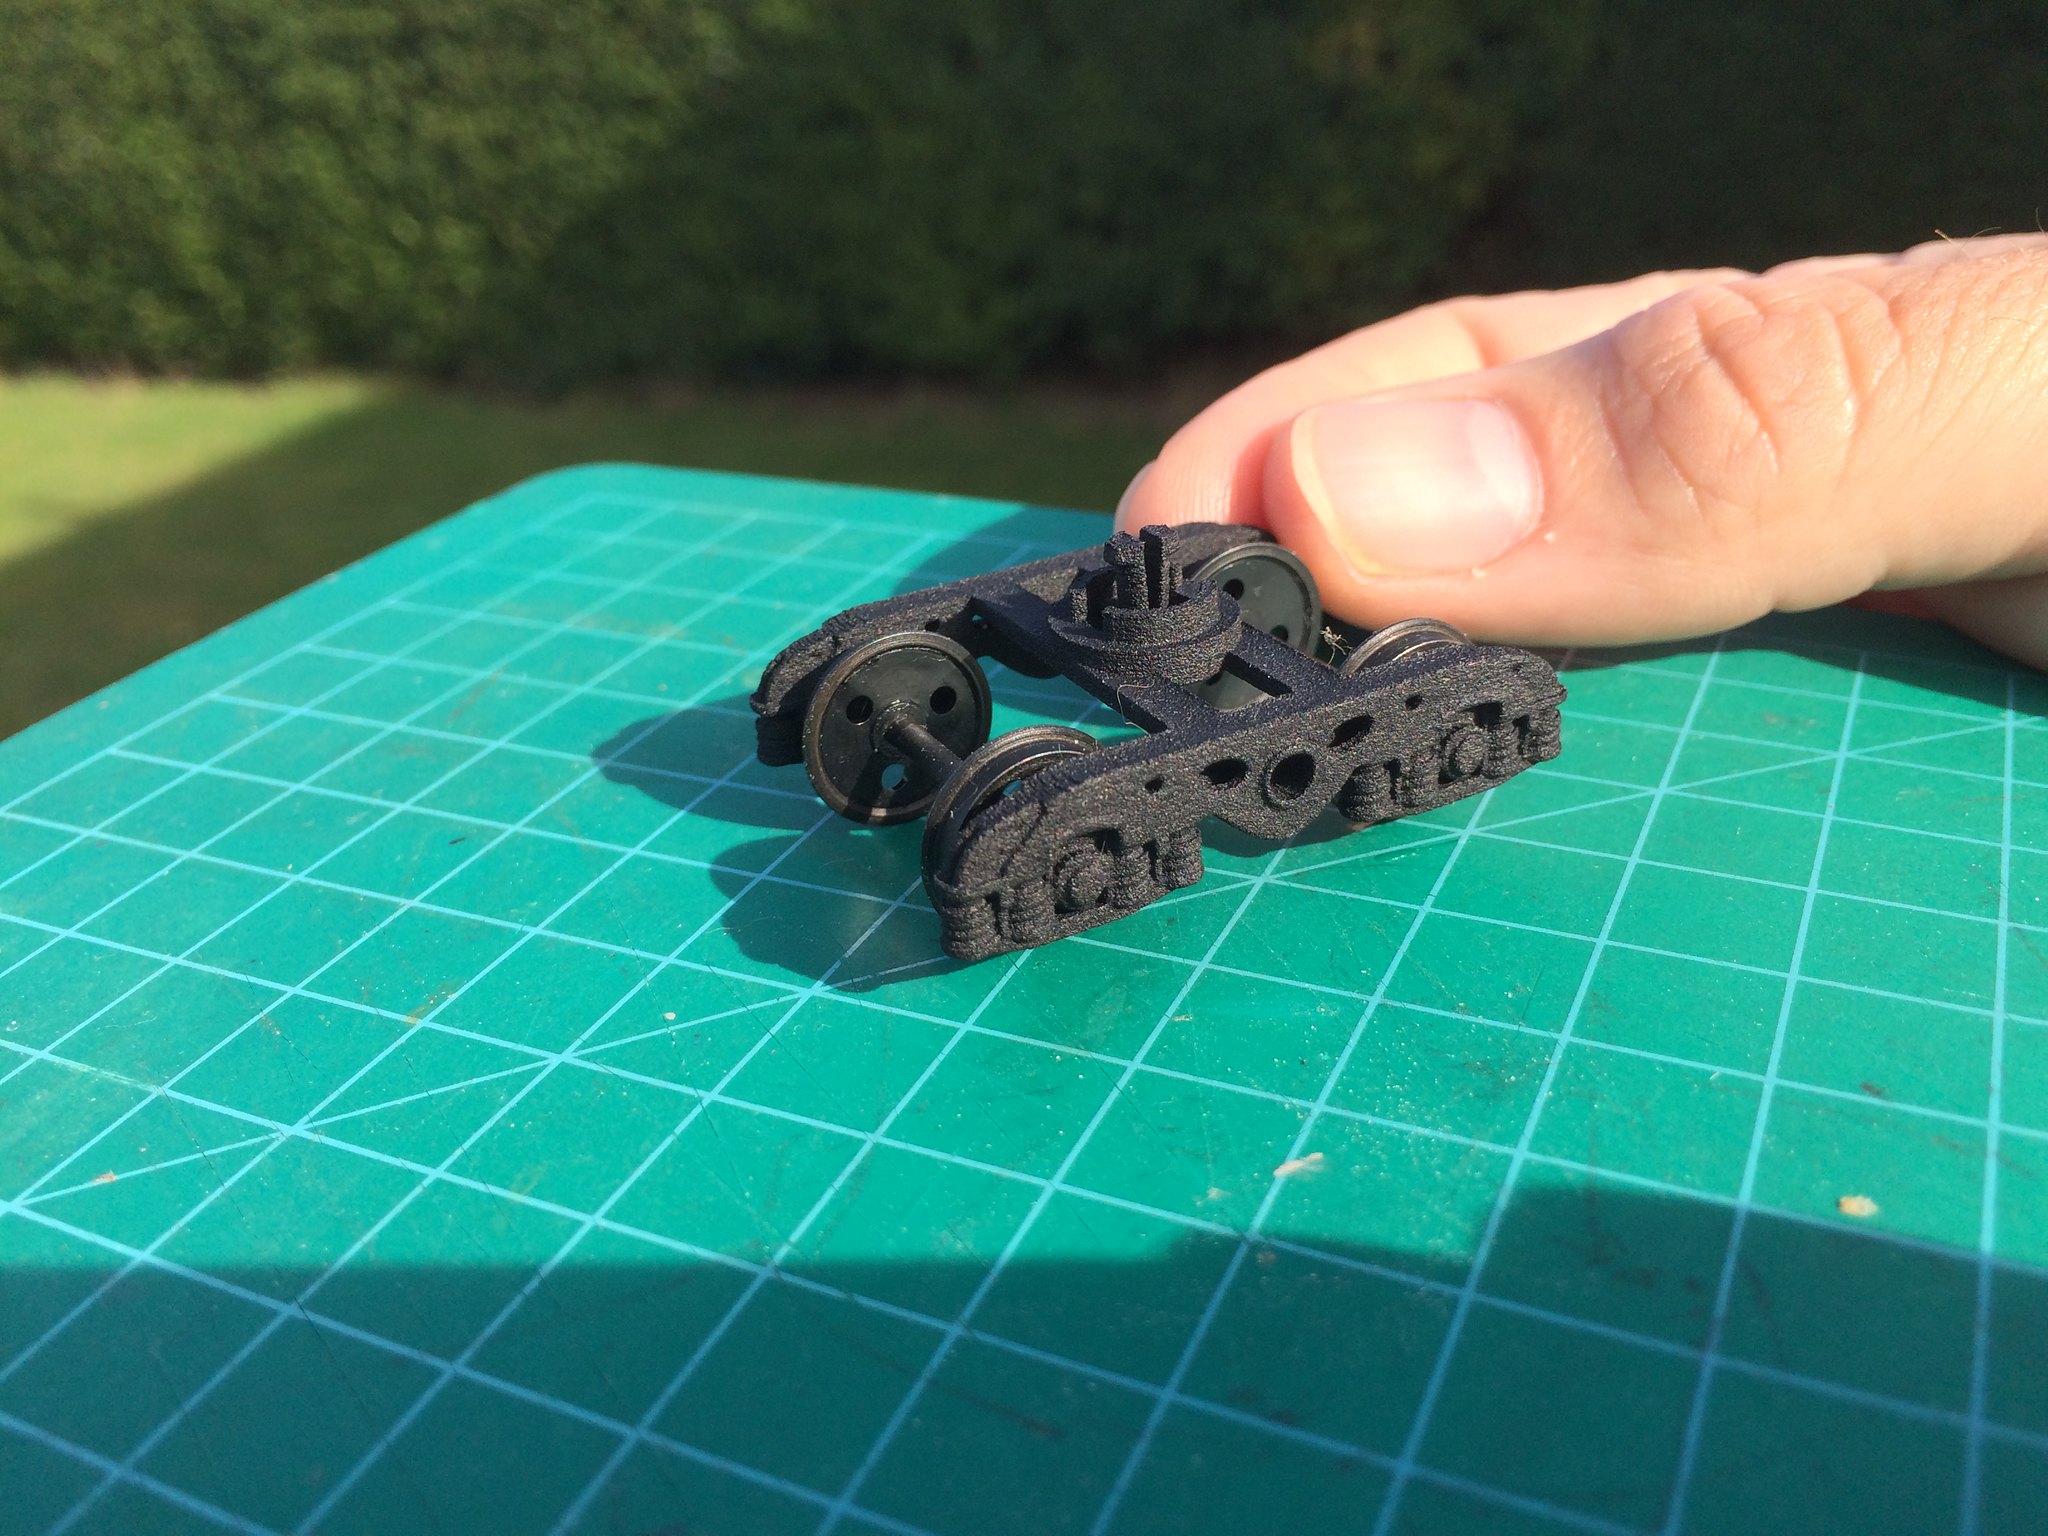
1to32 16t mineral bearing hole by simon br blue, on FlickrSomething this leads onto is printability. A model can be resized but it doesn't mean it will it can be printed or that the printed model can be made into a running model. Some models have tight clearances and this need to be looked at to make sure it will work. Worth checking if parts are printed separately that they will fit together as parts printed in WSF will often be very slightly wider/thicker when taking in account the slightly fluffy edge of the material. The 1/32 class 25 bogie had some tight clearances and a way of checking this was to draw the wheels in blender to check they would fit in the bogie, the picture below shows the bogie with the wheels fitted and the wheels shown in the drawing behind.
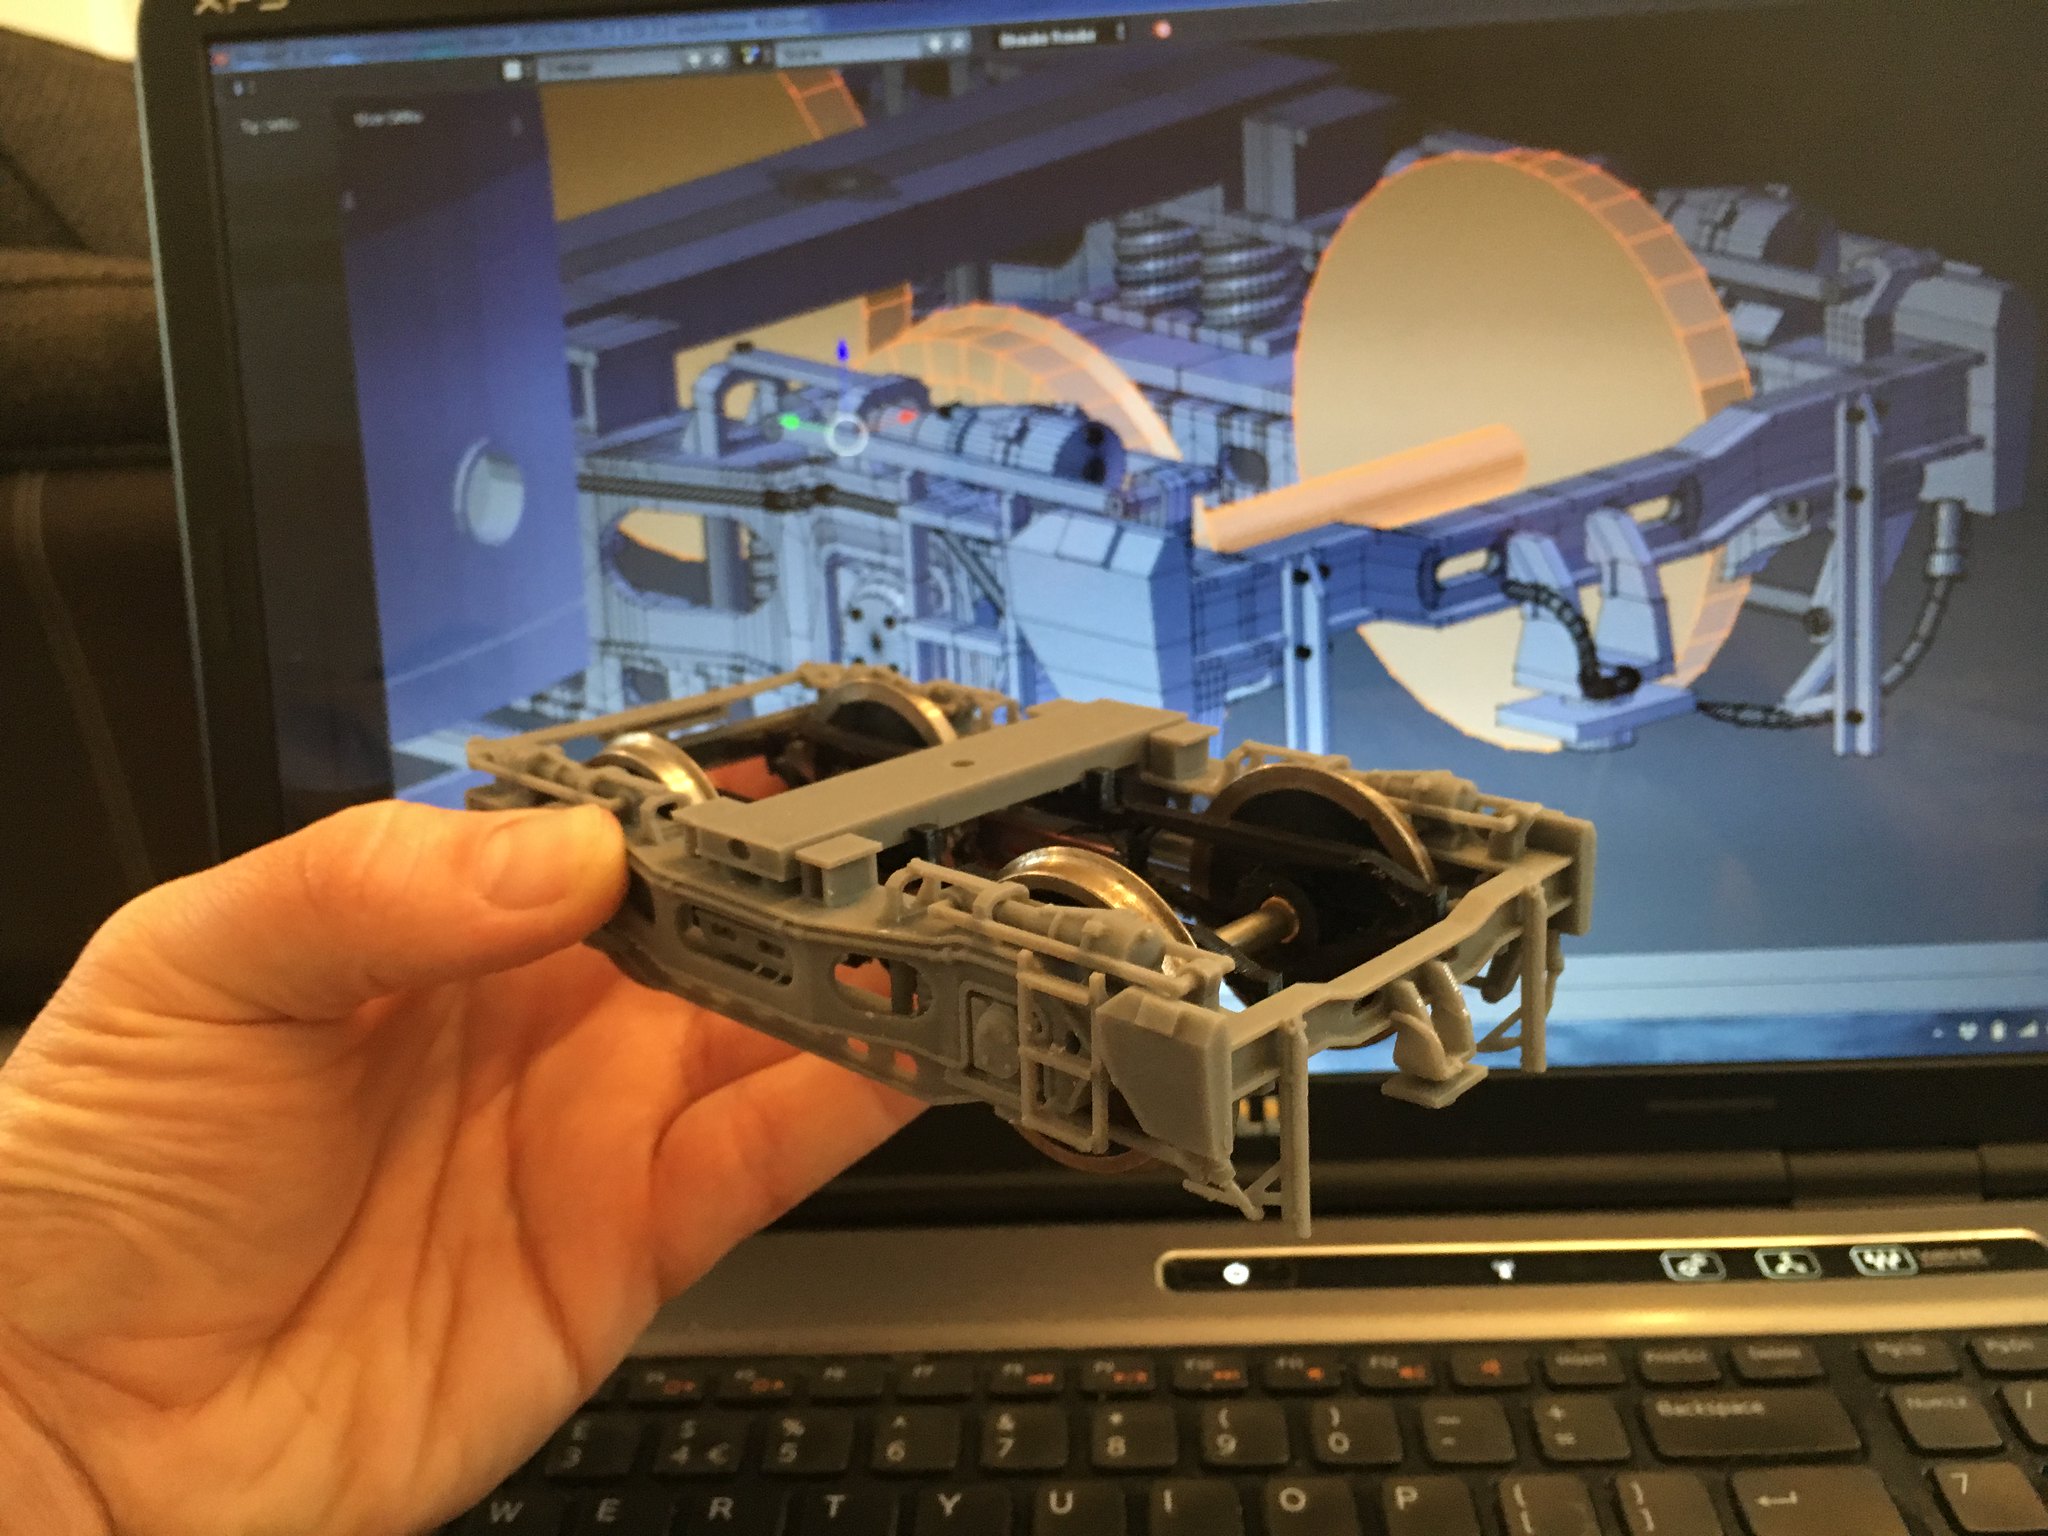 1to32 class 25 bogie by simon br blue, on Flickr
The subject of test printing models. All of the models I made for sale have been test printed before making them for sale but I don't use Shapeways as a business. I draw models that interest me and that I want to print for myself and only make models available if someone expresses an interest in a model I've made. If I was going to make items available I would use the techniques mentioned above to ensure that if someone purchases the model they could be confident that bearing and wheels would fit and work. Some of my models use extra parts like plastic pipe for tank barrels and I've done test prints of the end caps to know that these will fit and often use and existing tank end or chassis to make the next similar wagon, I've currently got a 7mm molasses tank on order with Shapeways but because components have previously been printed I'm confident that it will work first time. One of the problems with Shapeways (and the other printing partners) is that parts and models that have previously been printed successfully can suddenly be rejected by pre printing human checks.
Lastly regarding the accuracy of models, I'm not sure how it would work with if a model you order from a Shapeways shop isn't fit for purpose as I'm sure the print company will say that they have printed the correct size and accurately without defect and the problem lies with the model designer. For model accuracy I will find or take many photos and where I can it try to fid the most accurate drawings available and still cross reference these with lots of photos. The class 25 bogie and J70 were draw using works drawings from the national railway museum and the 16t mineral wagon uses excellent drawings included with the Constructing 5″ Gauge Wagons from HMRS - I purchased this book even though I don't have an interest in 5inch gauge because of the quality of the drawings. Some drawings can have multiple issues and in some cased I've ended up having to find a side on picture that I can manipulate to work along side a poor quality drawing. A lot of my modern wagons have started of using the BR wagon diagrams from the Barrowmore website, these are useful for basic dimensions but often lack detail or have inaccuracies (as they were only intended to provide dimensions and details for railways staff and not railway modellers 40 year in the future).
I hope my way of tacking 3D drawing and printing may be useful for others.
-
4
-
-
For the models I've drawn at 1/32 I've either drawn them at 1/32 scale or scaled them up from o gauge. I've recently scaled up a 16t mineral wagon from o gauge and the body and details don't require much modification (except thinning of the model walls to keep cost down). To ensure the model can be used with scale wheels I already have the correct bearing holes and brake shoe widths saved so that I can import them into the model and everything fits when the model is printed. The picture below hopefully shows what I mean, the yellow parts will accept Slaters bearings.
1to32 16t mineral bearing hole by simon br blue, on Flickr-
2
-
-
Another big gap between update but I've been busy.
After buying the Balco printer I was hoping the new HP printer from Shapeways would give some good opportunities for the drawings I'd drawn for it recently but the day Shapeways made the HPSF materials available for general sale they doubled the price. This was very disappointing after Shapeways touted this new printer as a step forward in terms of price and material properties so I made the decision to buy another printer. After looking around I decided on the Formlabs Form 2, I spend some time looking on EBay until I managed to buy a 2nd hand machine.
First pic shows the 2 printers together, a similar size but the Balco has a bigger build platform.
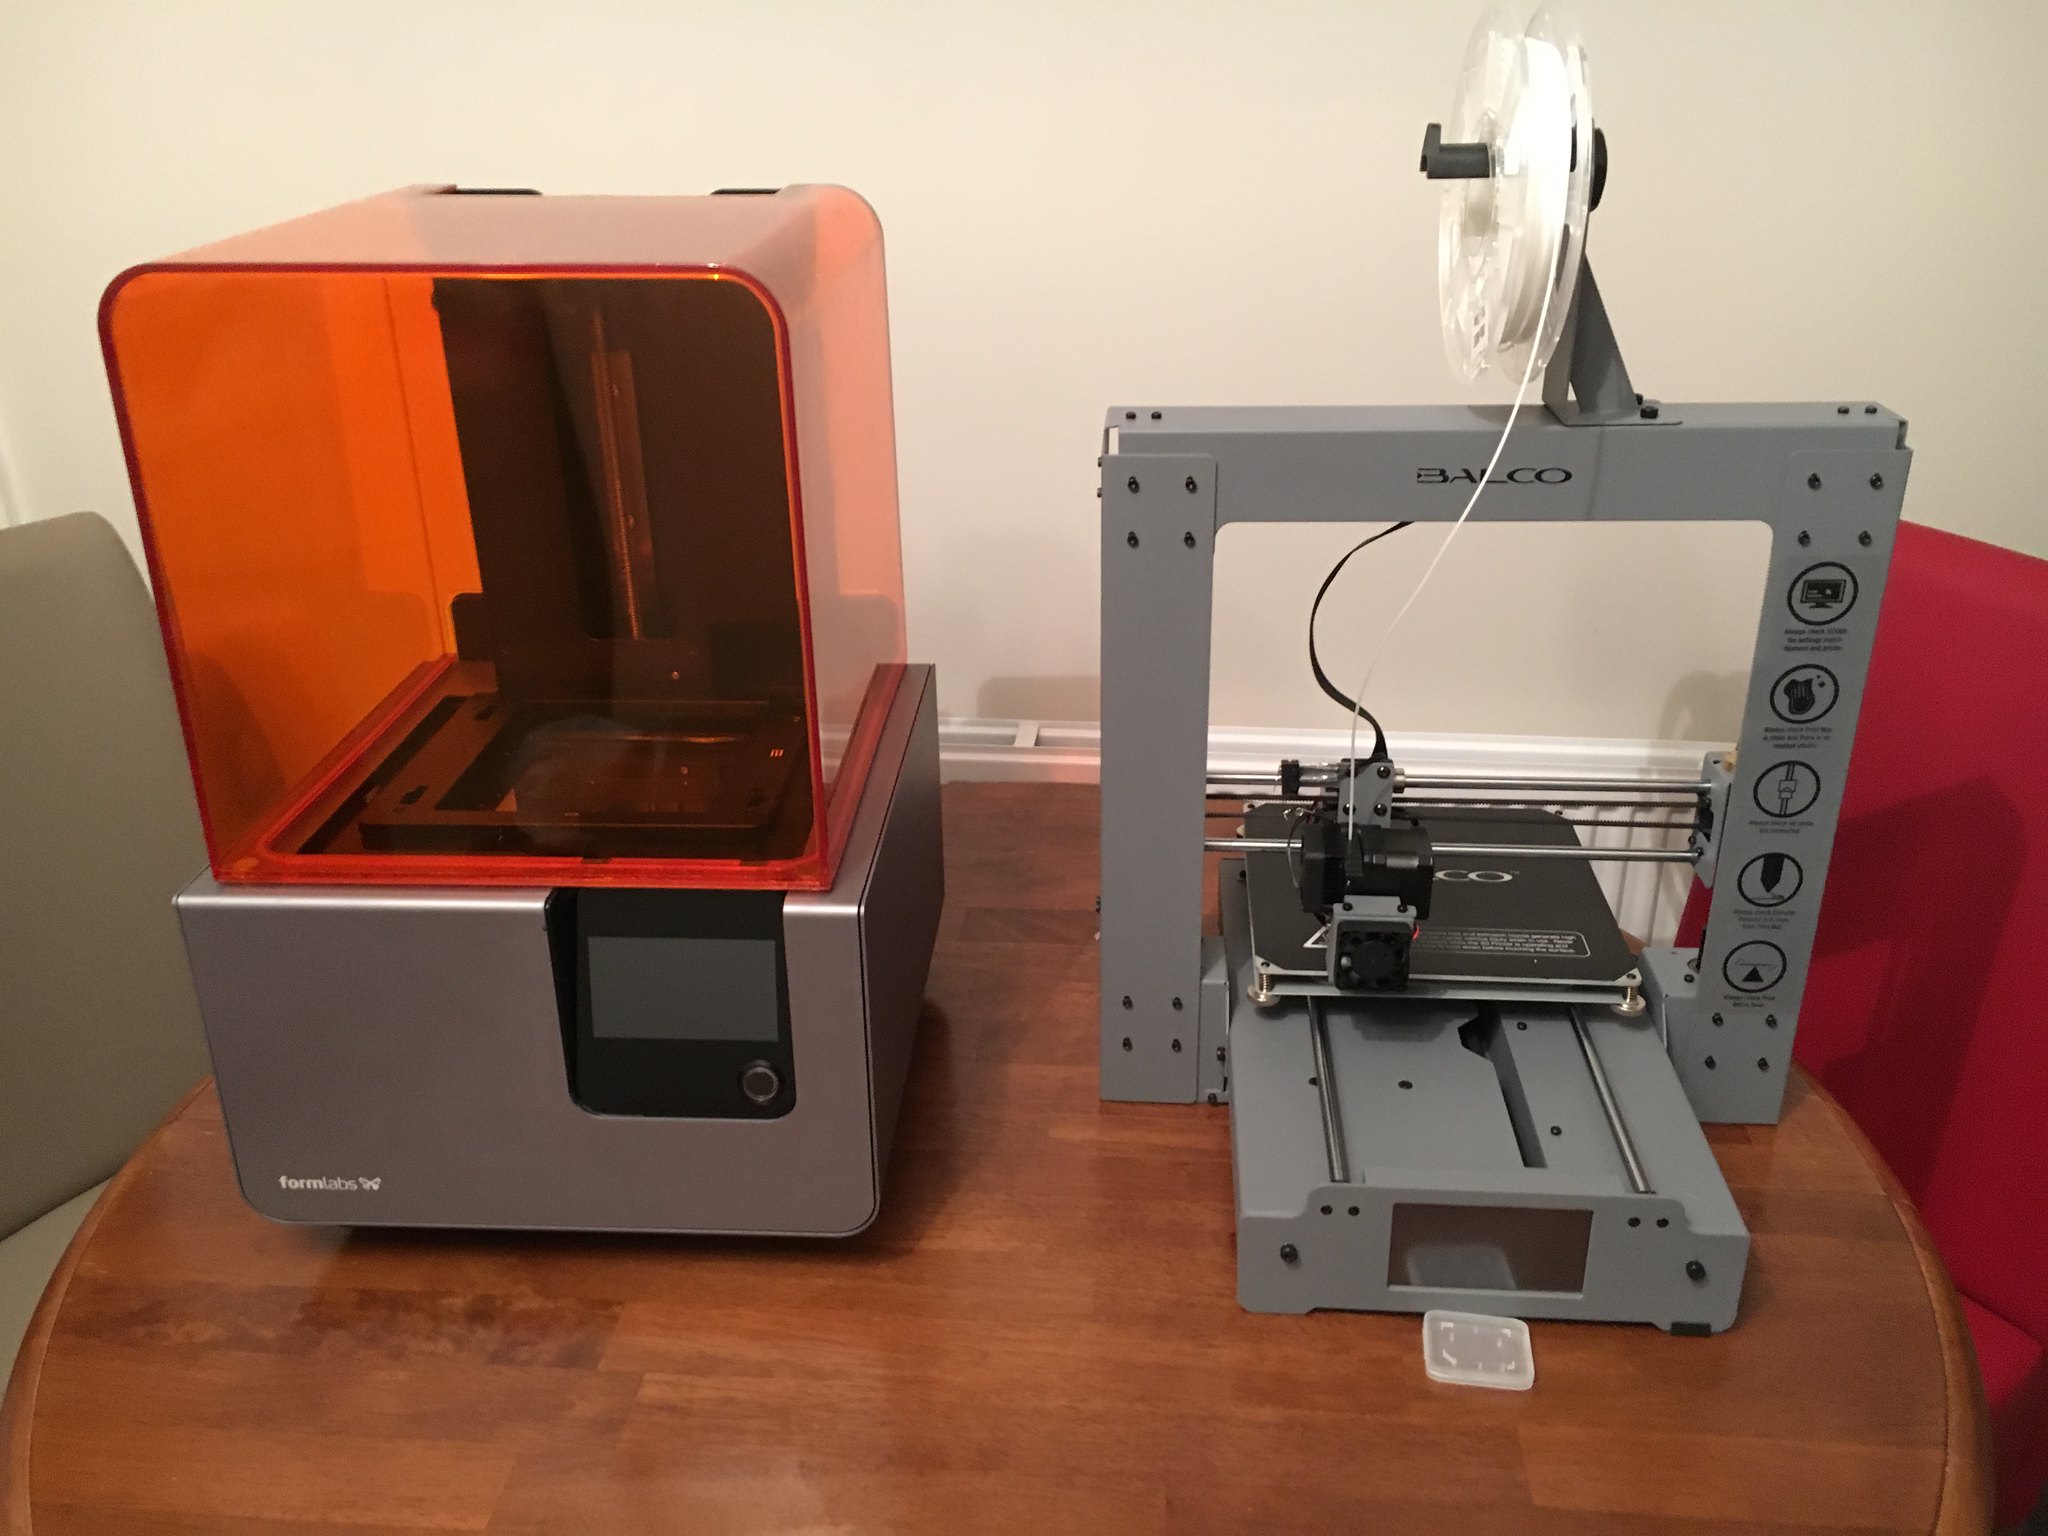 Form Labs Form 2 and Balco printers by simon br blue, on Flickr
The 2 printers use different software to produce the cutting files, in both cases I use the software that comes with the machines. Balco uses Cura and the Form2 uses Preform. Below are a couple of pictures of the programs, both are relatively easy to use but Preform takes more time to set up as inevitably needs manual supports adding and changing to make it printable but on the up side it does show you the problem areas. Both of the software shows you the time and volume of material required for the print.
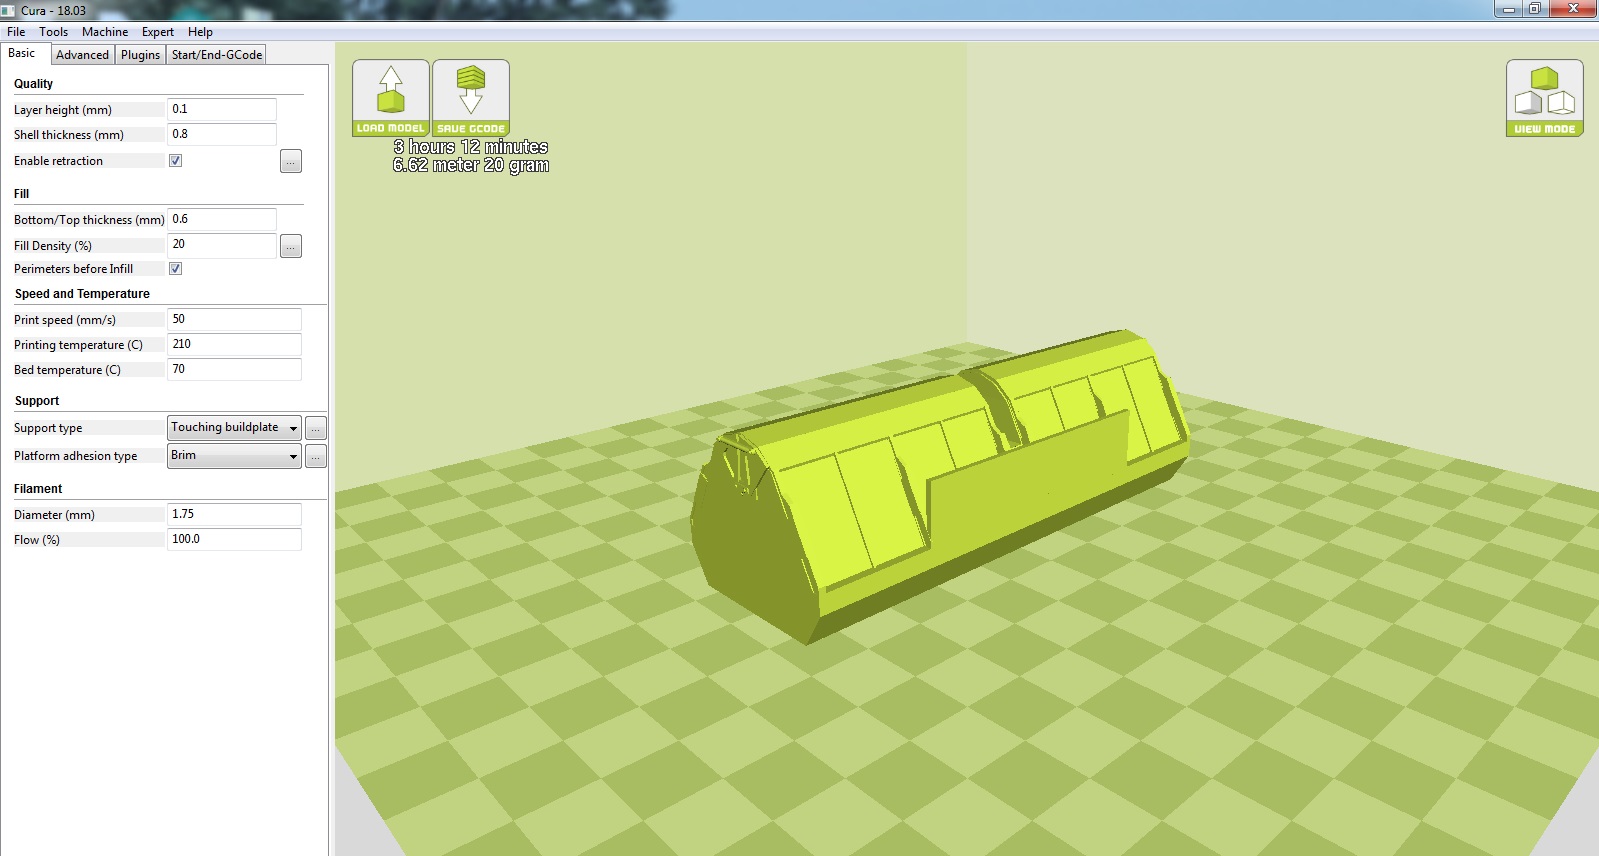 PHA hopper Cura by simon br blue, on Flickr
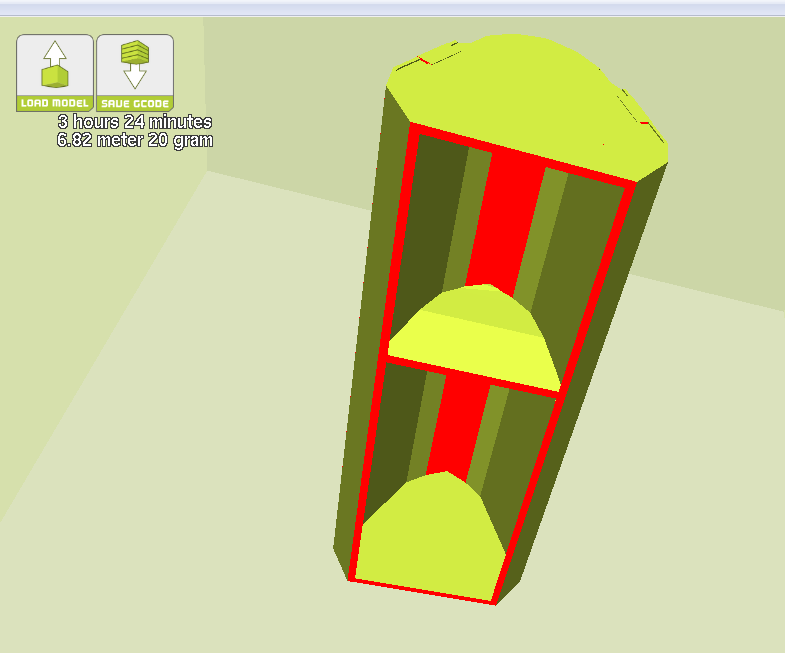 cura supports by simon br blue, on Flickr
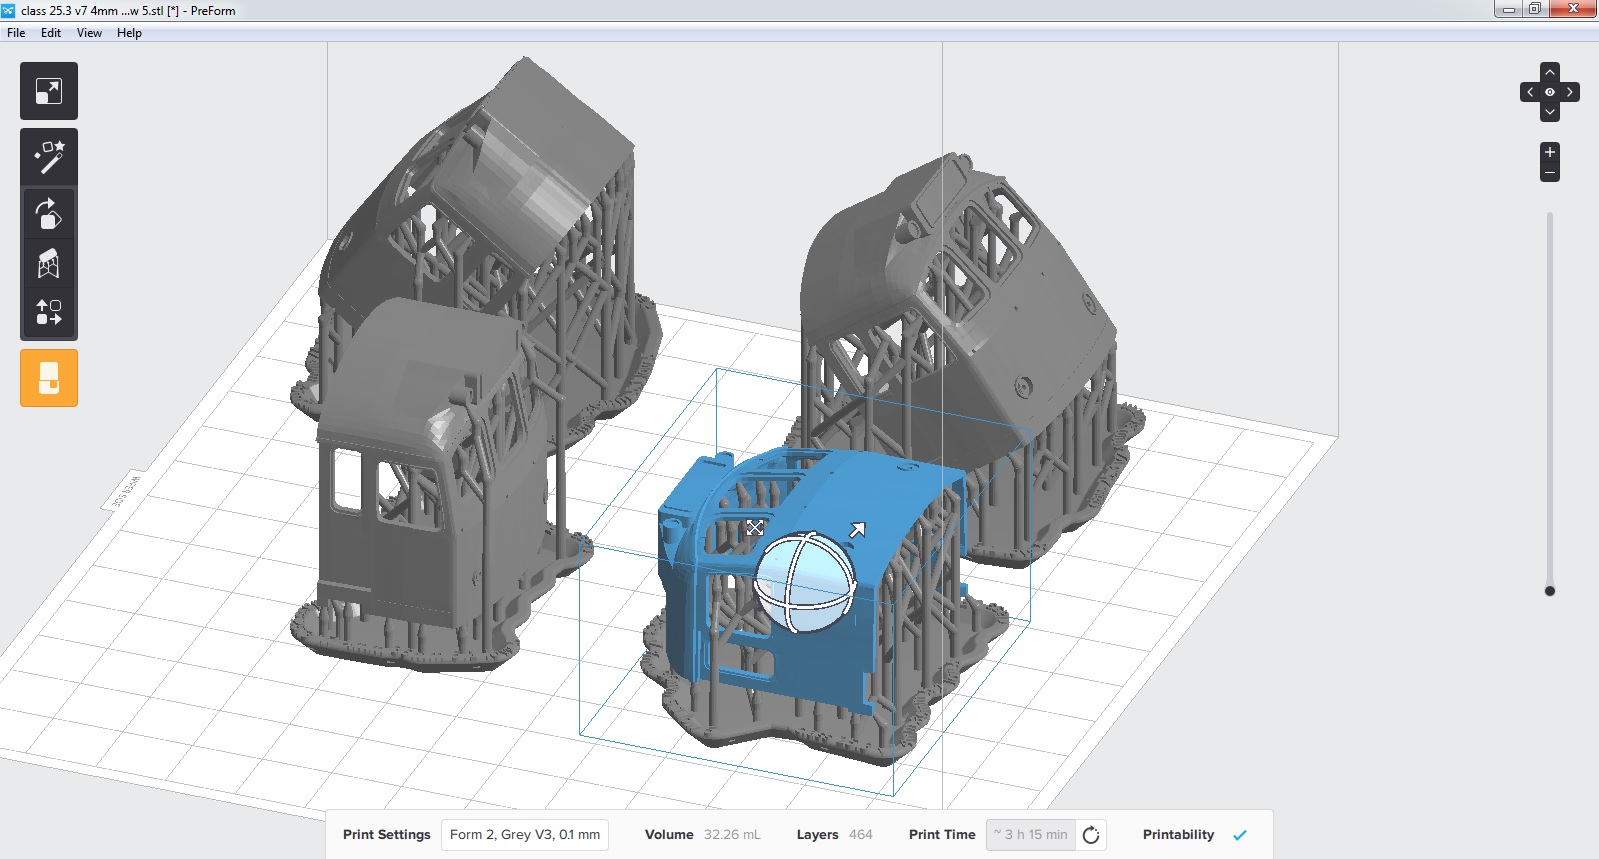 25.3 cab preform by simon br blue, on Flickr
When I first started using the Form2 I had a problem with the base of the print not adhering to the build platform but the problem turned out to be a worn out resin tank, luckily the printer came with a spare platform (and various resins). So far I've only printed using the grey resin but when this is used up I'll go onto the black resin.
The first couple of models printed in the Form 2 were 4mm PHA hoppers and chassis and class 25.3 cab. Also when I set the printer up if I have any spare space I try to fill it up with a PTA 4mm bogie.
When the printer has finished the part needs to be removed from the build platform and then washed in IPA (Isopropyl alcohol) to remove uncured resin and then hardened using UV light.
Pic below shows the parts fresh out of the printer with the parts on the build platform with uncured resin on them.
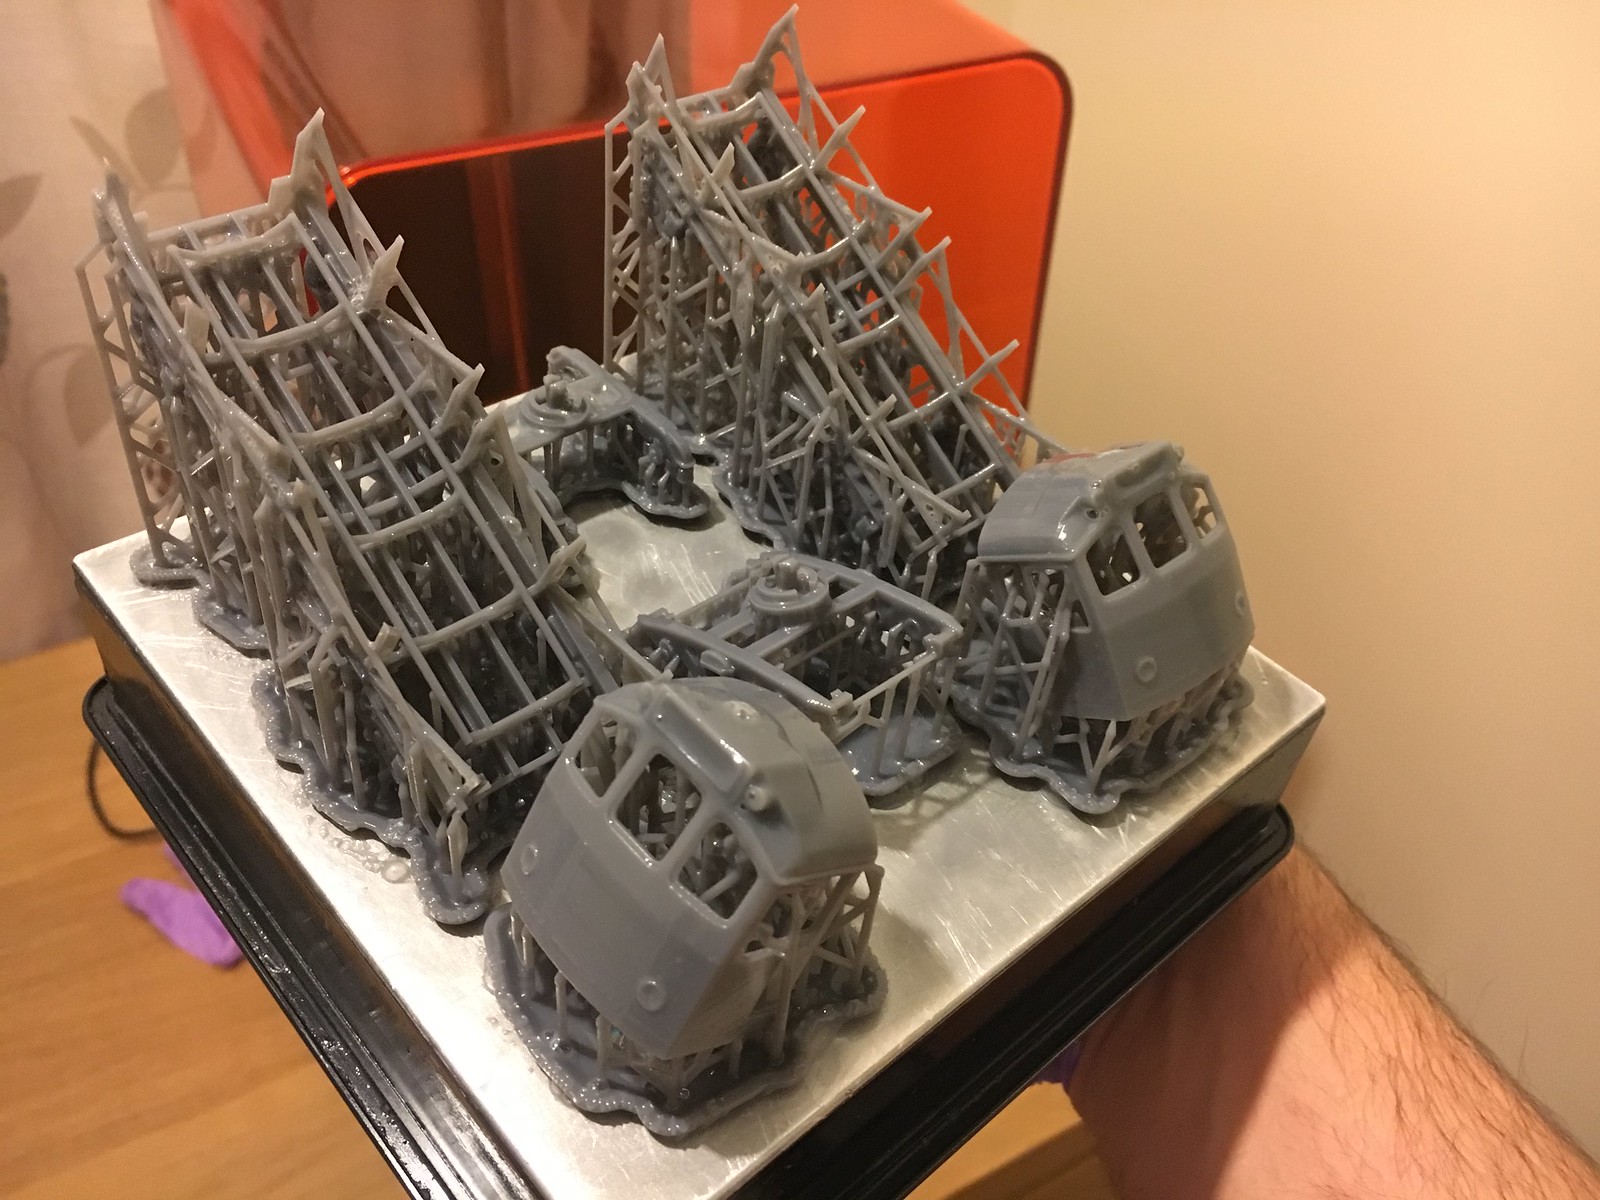 Form 2 grey resin print by simon br blue, on Flickr
Next the parts are cleaned in the IPA using the Formlabs wash station.
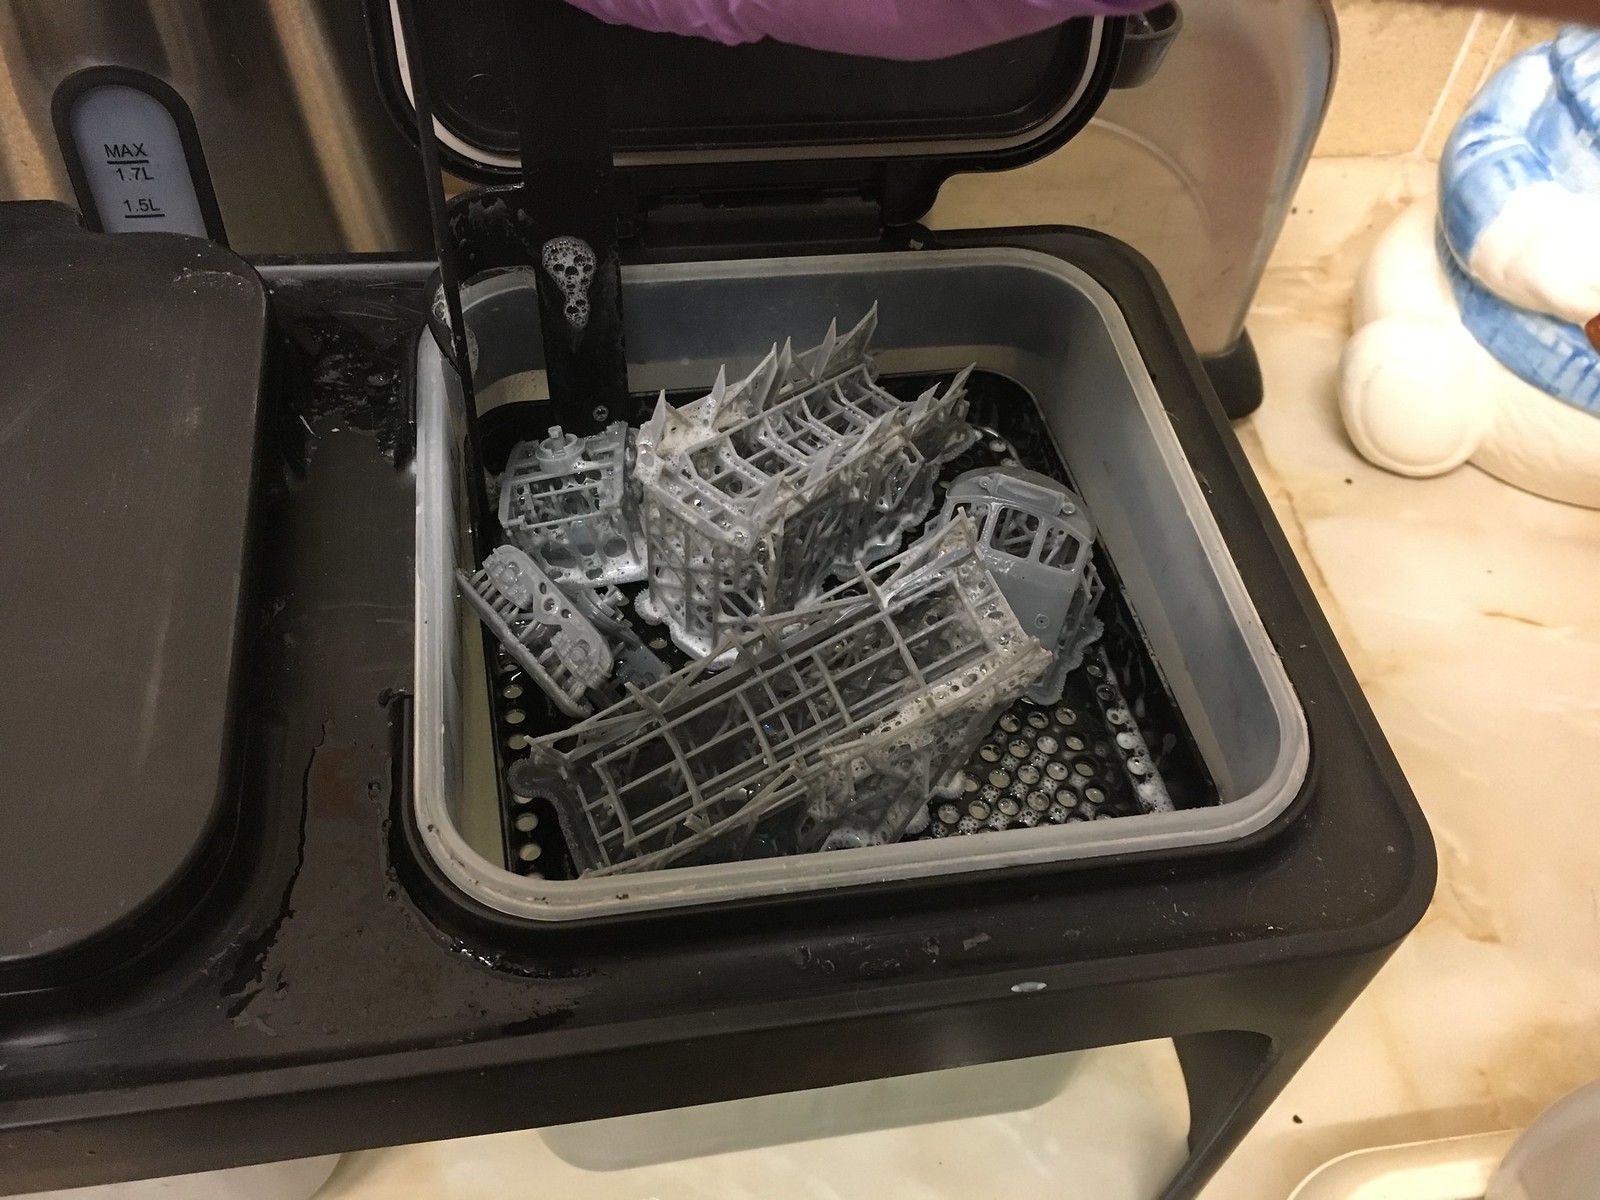 Part cleaning in IPA by simon br blue, on Flickr
After this they need to be hardened/final cure using UV light, looking online it can be done with natural light or UV lamps - I've tried both and purchased some UV LED lights on EBay. Both seem to work ok but I've now purchased a UV nail polish setup to speed up the process. Formlabs recommend removing the support material before exposing to UV light but it seems to work well for me by curing the top, then removing the support and then curing the bottom.
Curing by natural light on the window sill.
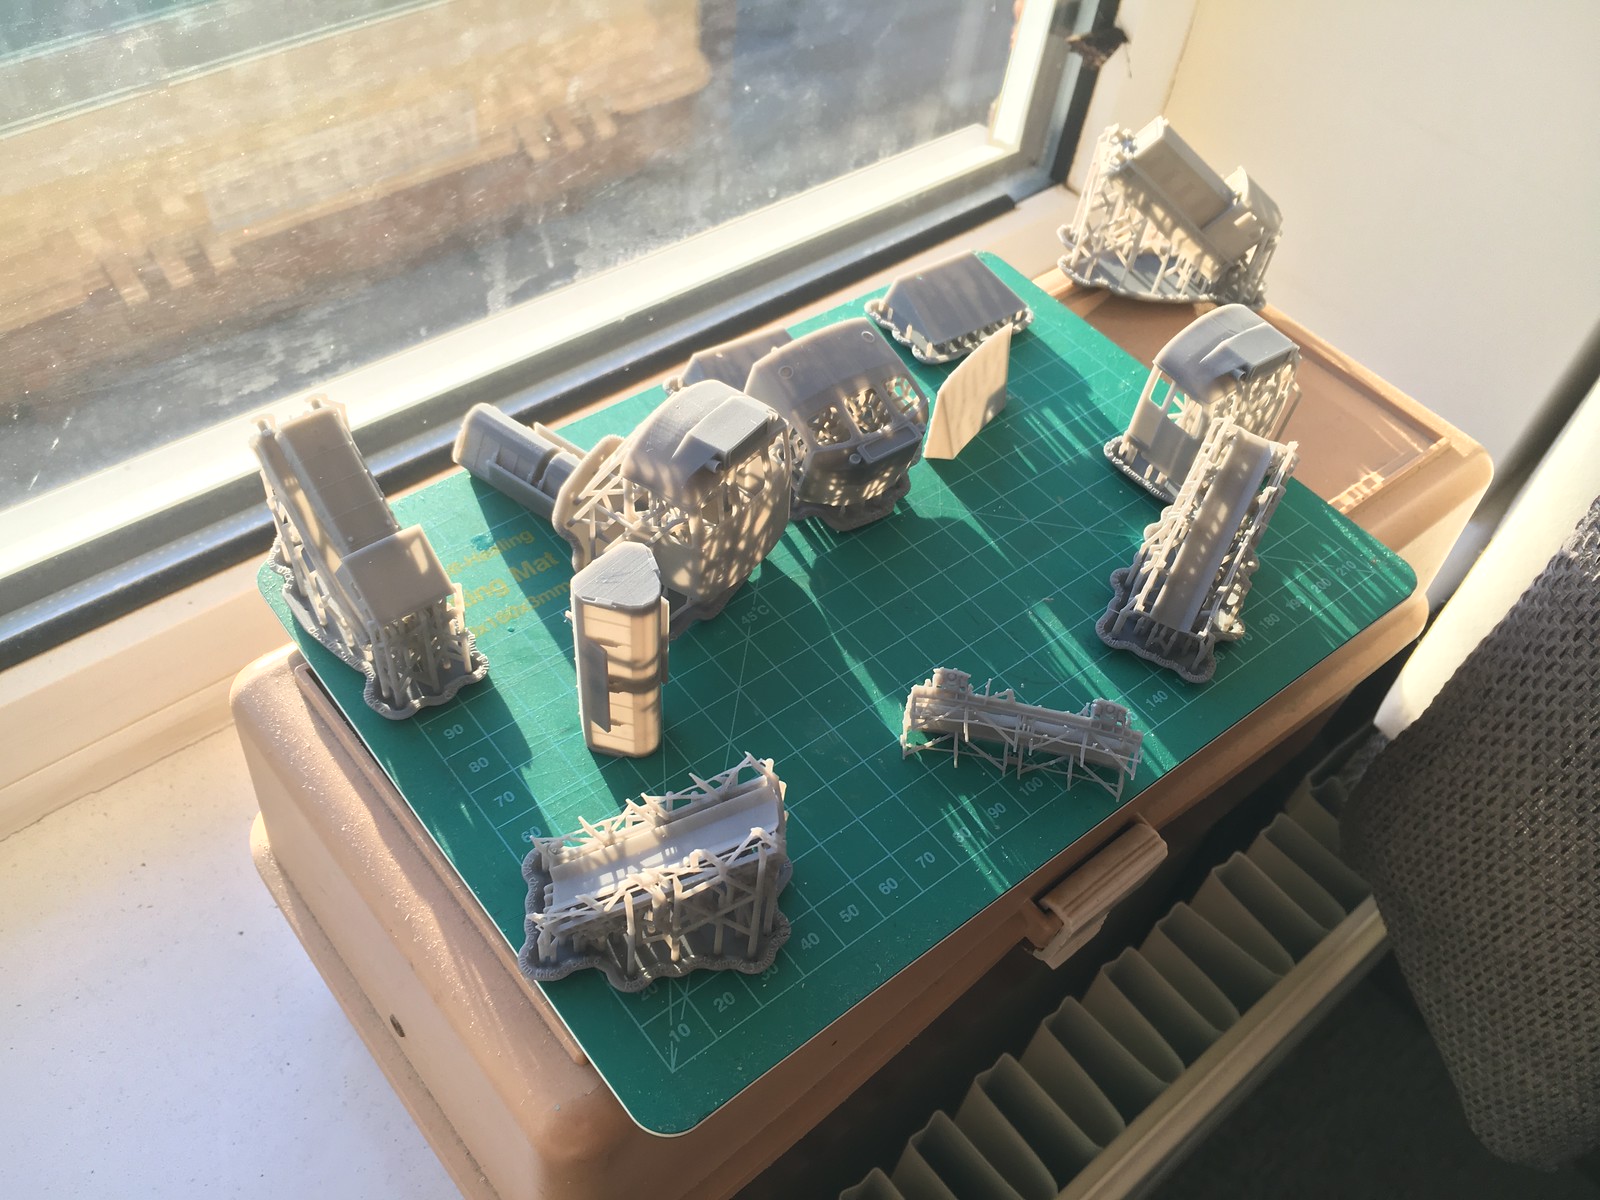 Test print of parts Form2 by simon br blue, on Flickr
Curing using UV LEDs.
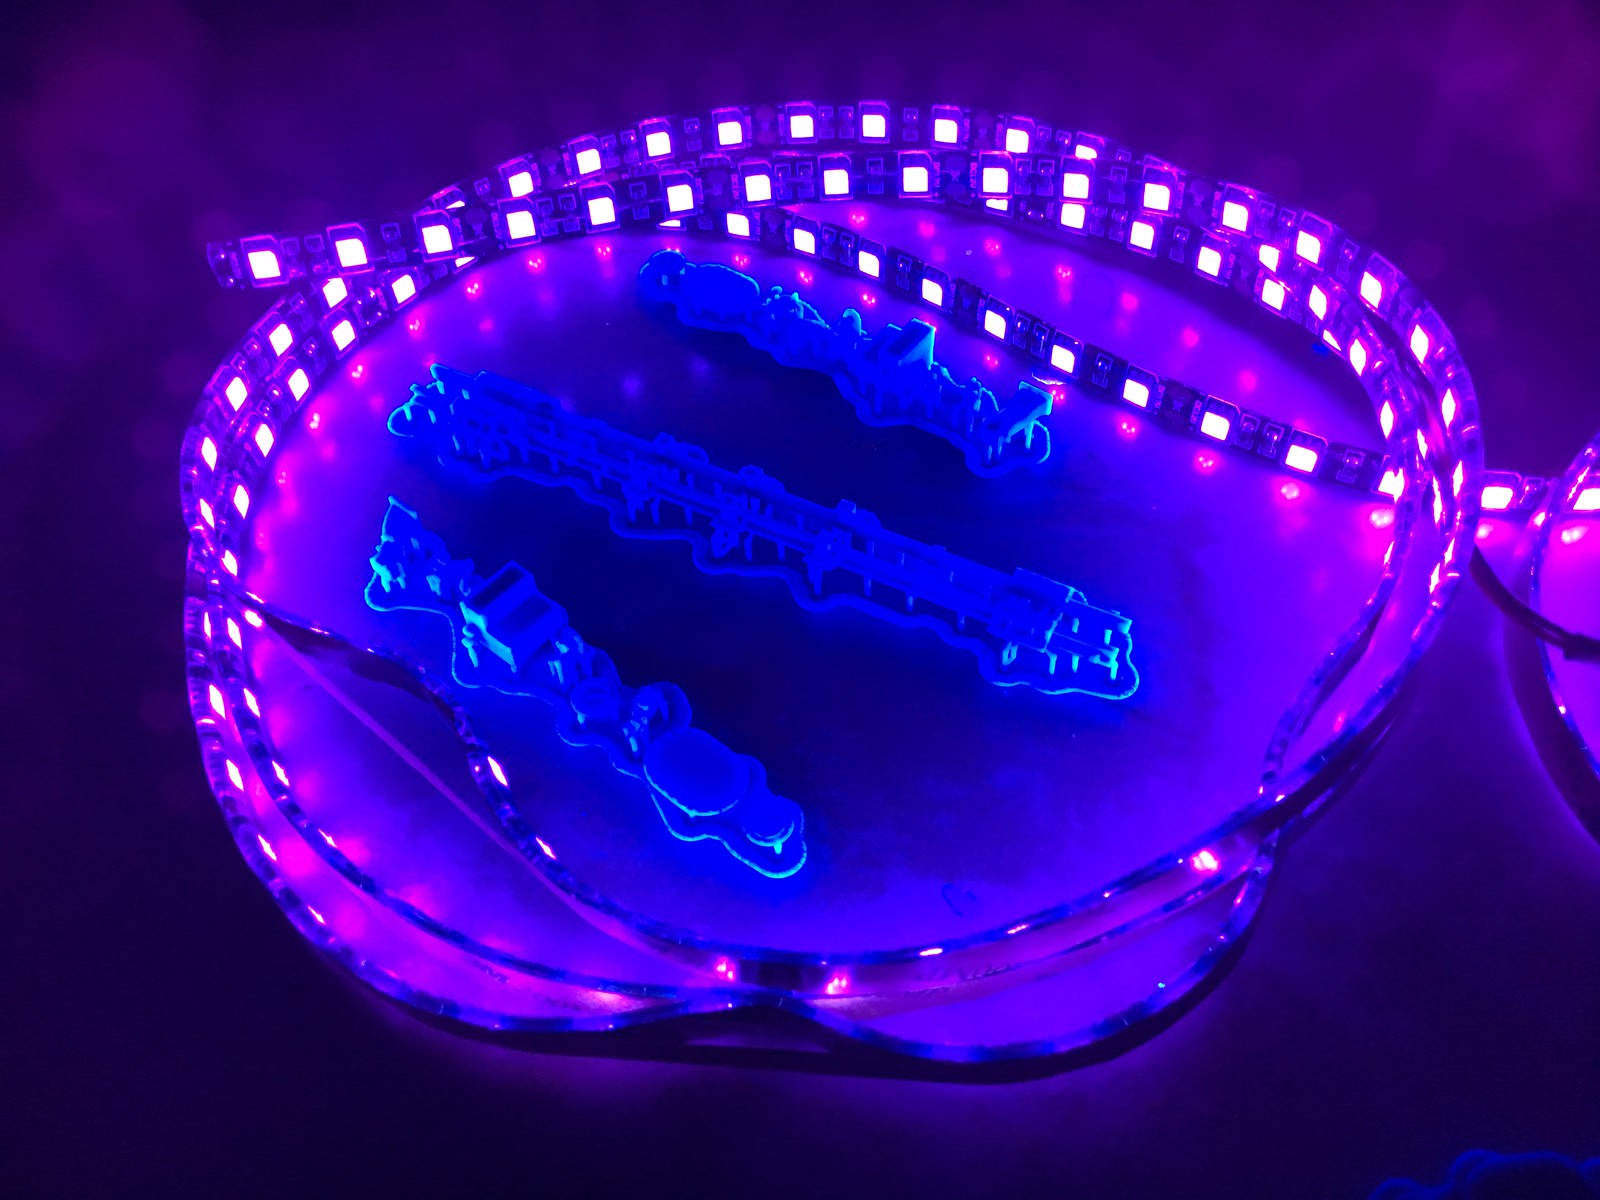 UV LED curing test by simon br blue, on Flickr
Experimenting with the orientation of the prints has shown up the benefits and limitations of the printer, Formlabs recommend tilting the models and looking at Shapeways HDA prints that I had printed with the support material still attached showed about 35 degrees worked. I did a test with 25 cabs in 3 positions and the tilting back at 35 degrees worked best and prevented the layering being visible (Most of my prints are done at the lower resolution of 0.1mm but it could go down to 0.025mm). The pic below shows some of the 25 cabs with different orientation.
 4mm class 25.3 cabs by simon br blue, on Flickr
Below is a pic showing the 25 cab with 35 degrees tilt which prevents layering on the roof or front, it also shows a close up of the support material.
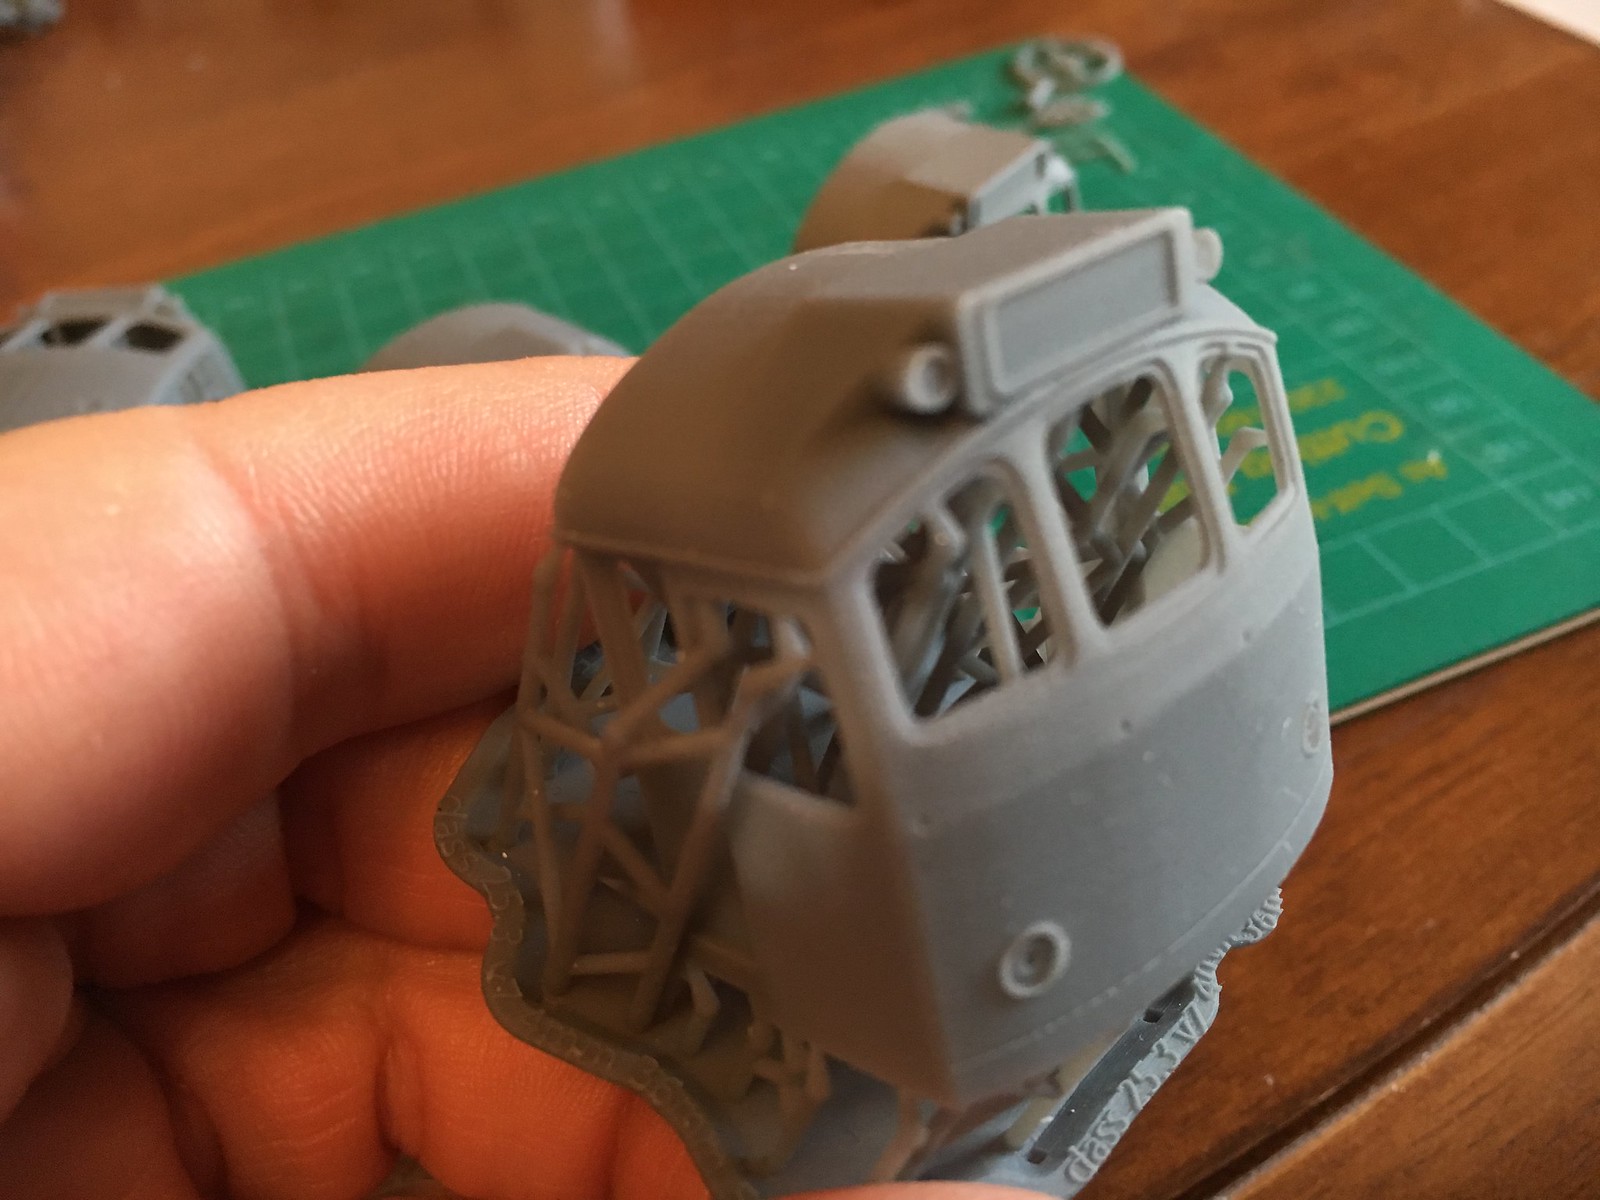 25.3 4mm cab by simon br blue, on Flickr
The PTA bogie was printed previously in HPSF black but I've printed several in the Formlabs grey resin.
As drawn in Blender.
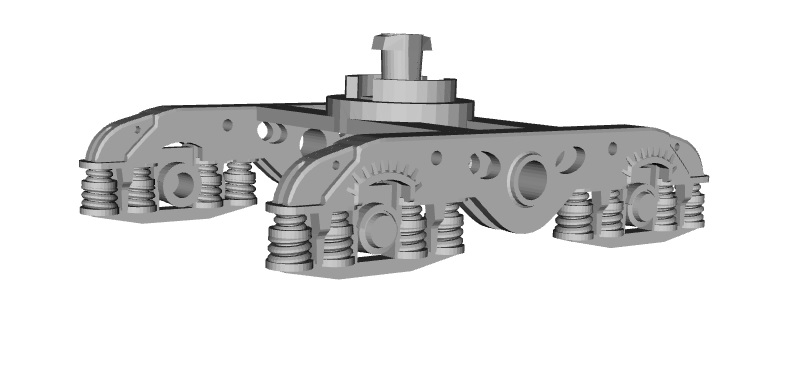 PTA bogie 4mm by simon br blue, on Flickr
One bogie as printed and another with a coat of primer applied.
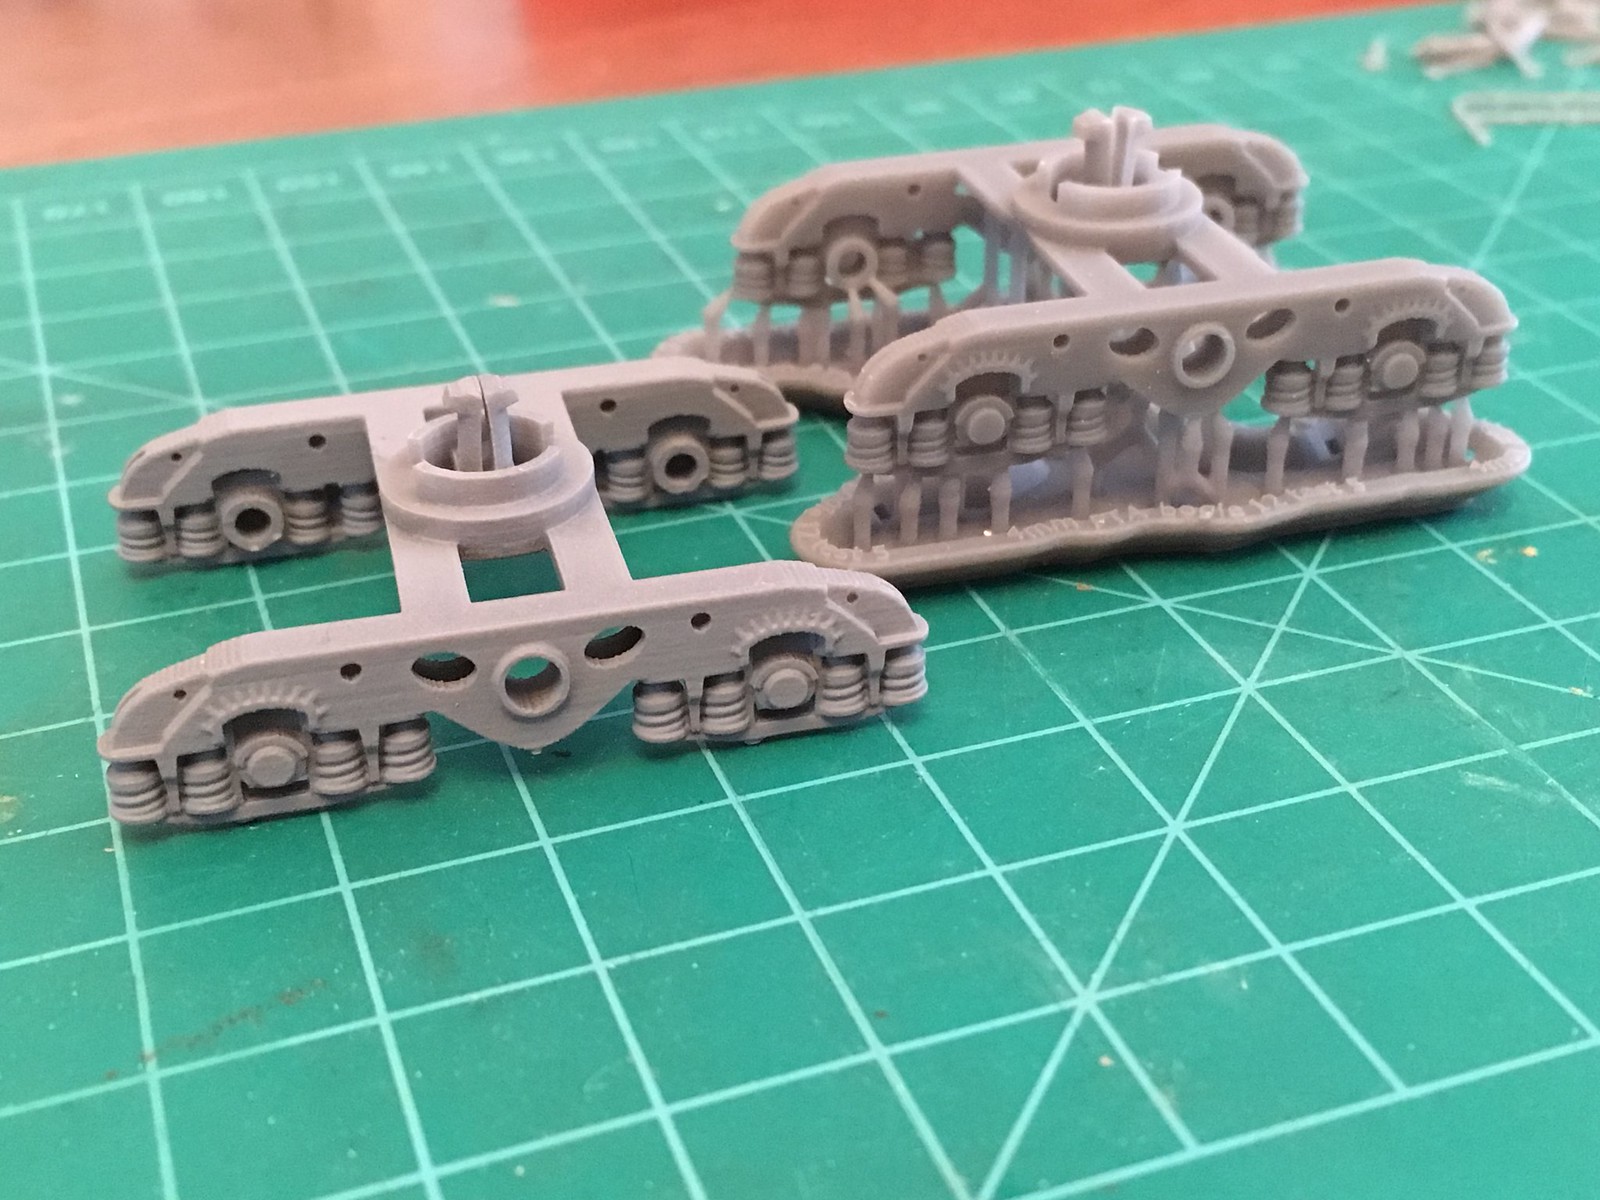 4mm PTA bogie by simon br blue, on Flickr
Bogie unpainted with wheels and bearings added
 4mm PTA bogie by simon br blue, on Flickr
-
11
-
-
0.06 is the thinnest
0.06mm? Is that the thinnest you’ve tried or the limit of the machine/ filament?
-
What’s the minimum layer thickness the printer will do? I’ve only done 0.1mm layers so far.
-
Copied from the Aldi printer thread, I have finally purchased a printer of my own. Set it up this evening and did a test print, only issue I had was the memory card didn't have any files, manuals or test pieces loaded on it.
I downloaded Cura and got the profile details from the Balco website and changed settings as required from the defaults.
Decided to do a quick test print and chose to rescale a PHA self discharge hopper to 2mm. Pictures of the result below. I was very happy with the print as it was done to see how the printer worked. When I originally ordered the printer I was thinking it would be good enough to print 7mm hoppers and then hopefully a 4mm hopper but this print makes me think the that 2mm hoppers maybe possible/usable.
Balco printer set up.
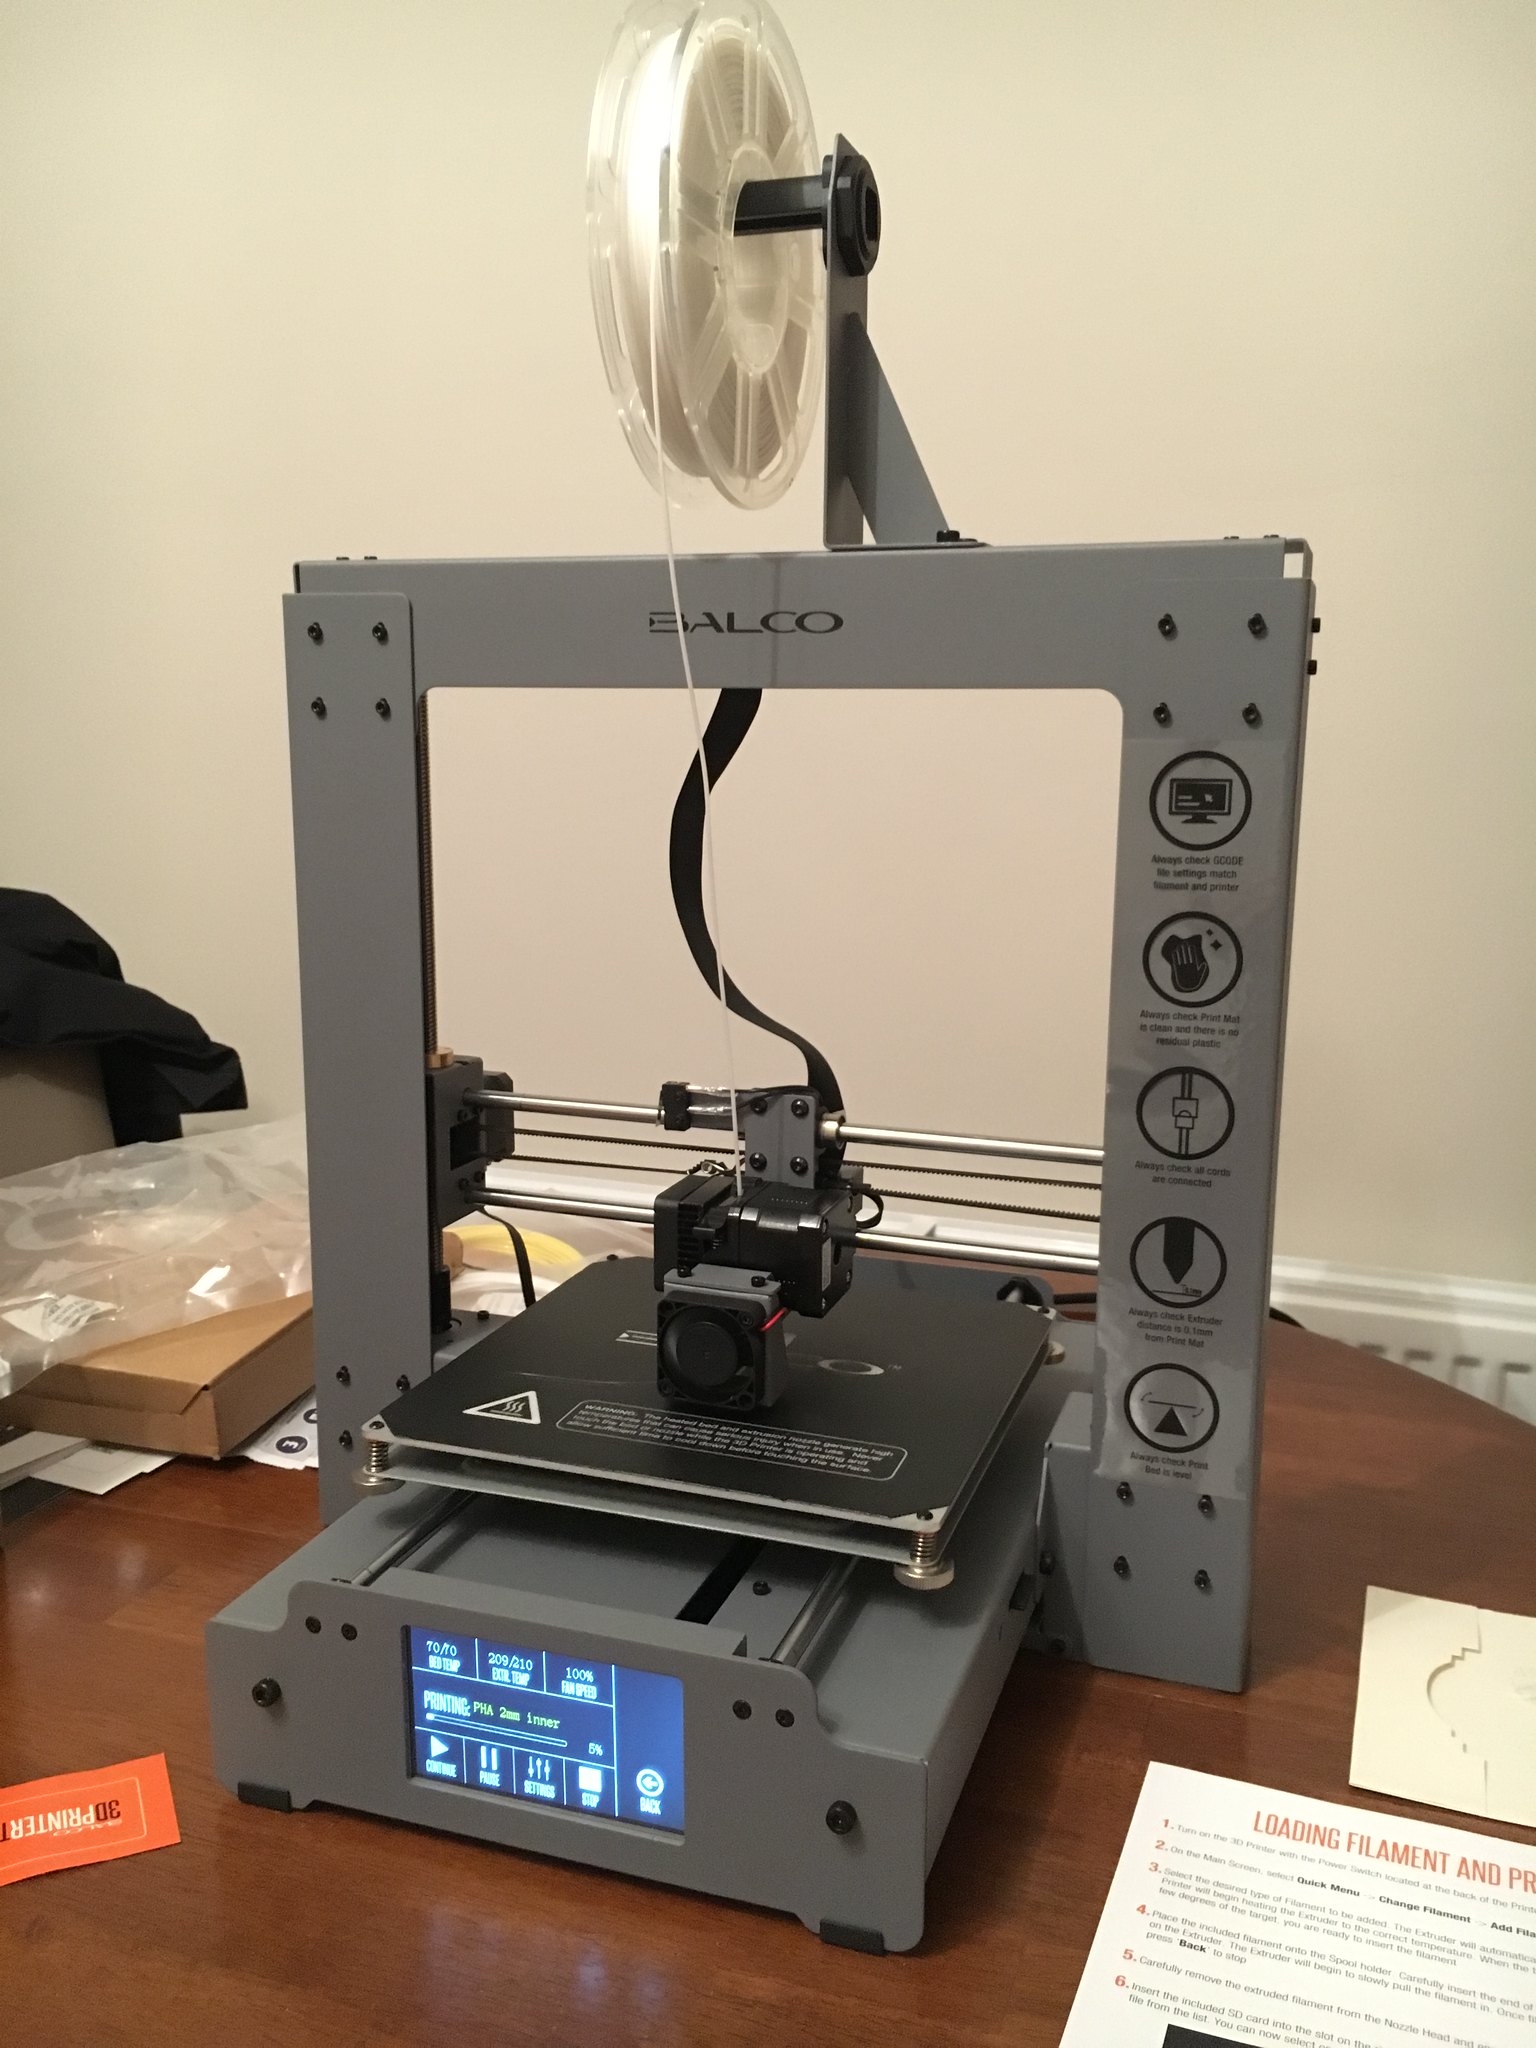 Aldi Balco printer by simon br blue, on Flickr
First test print
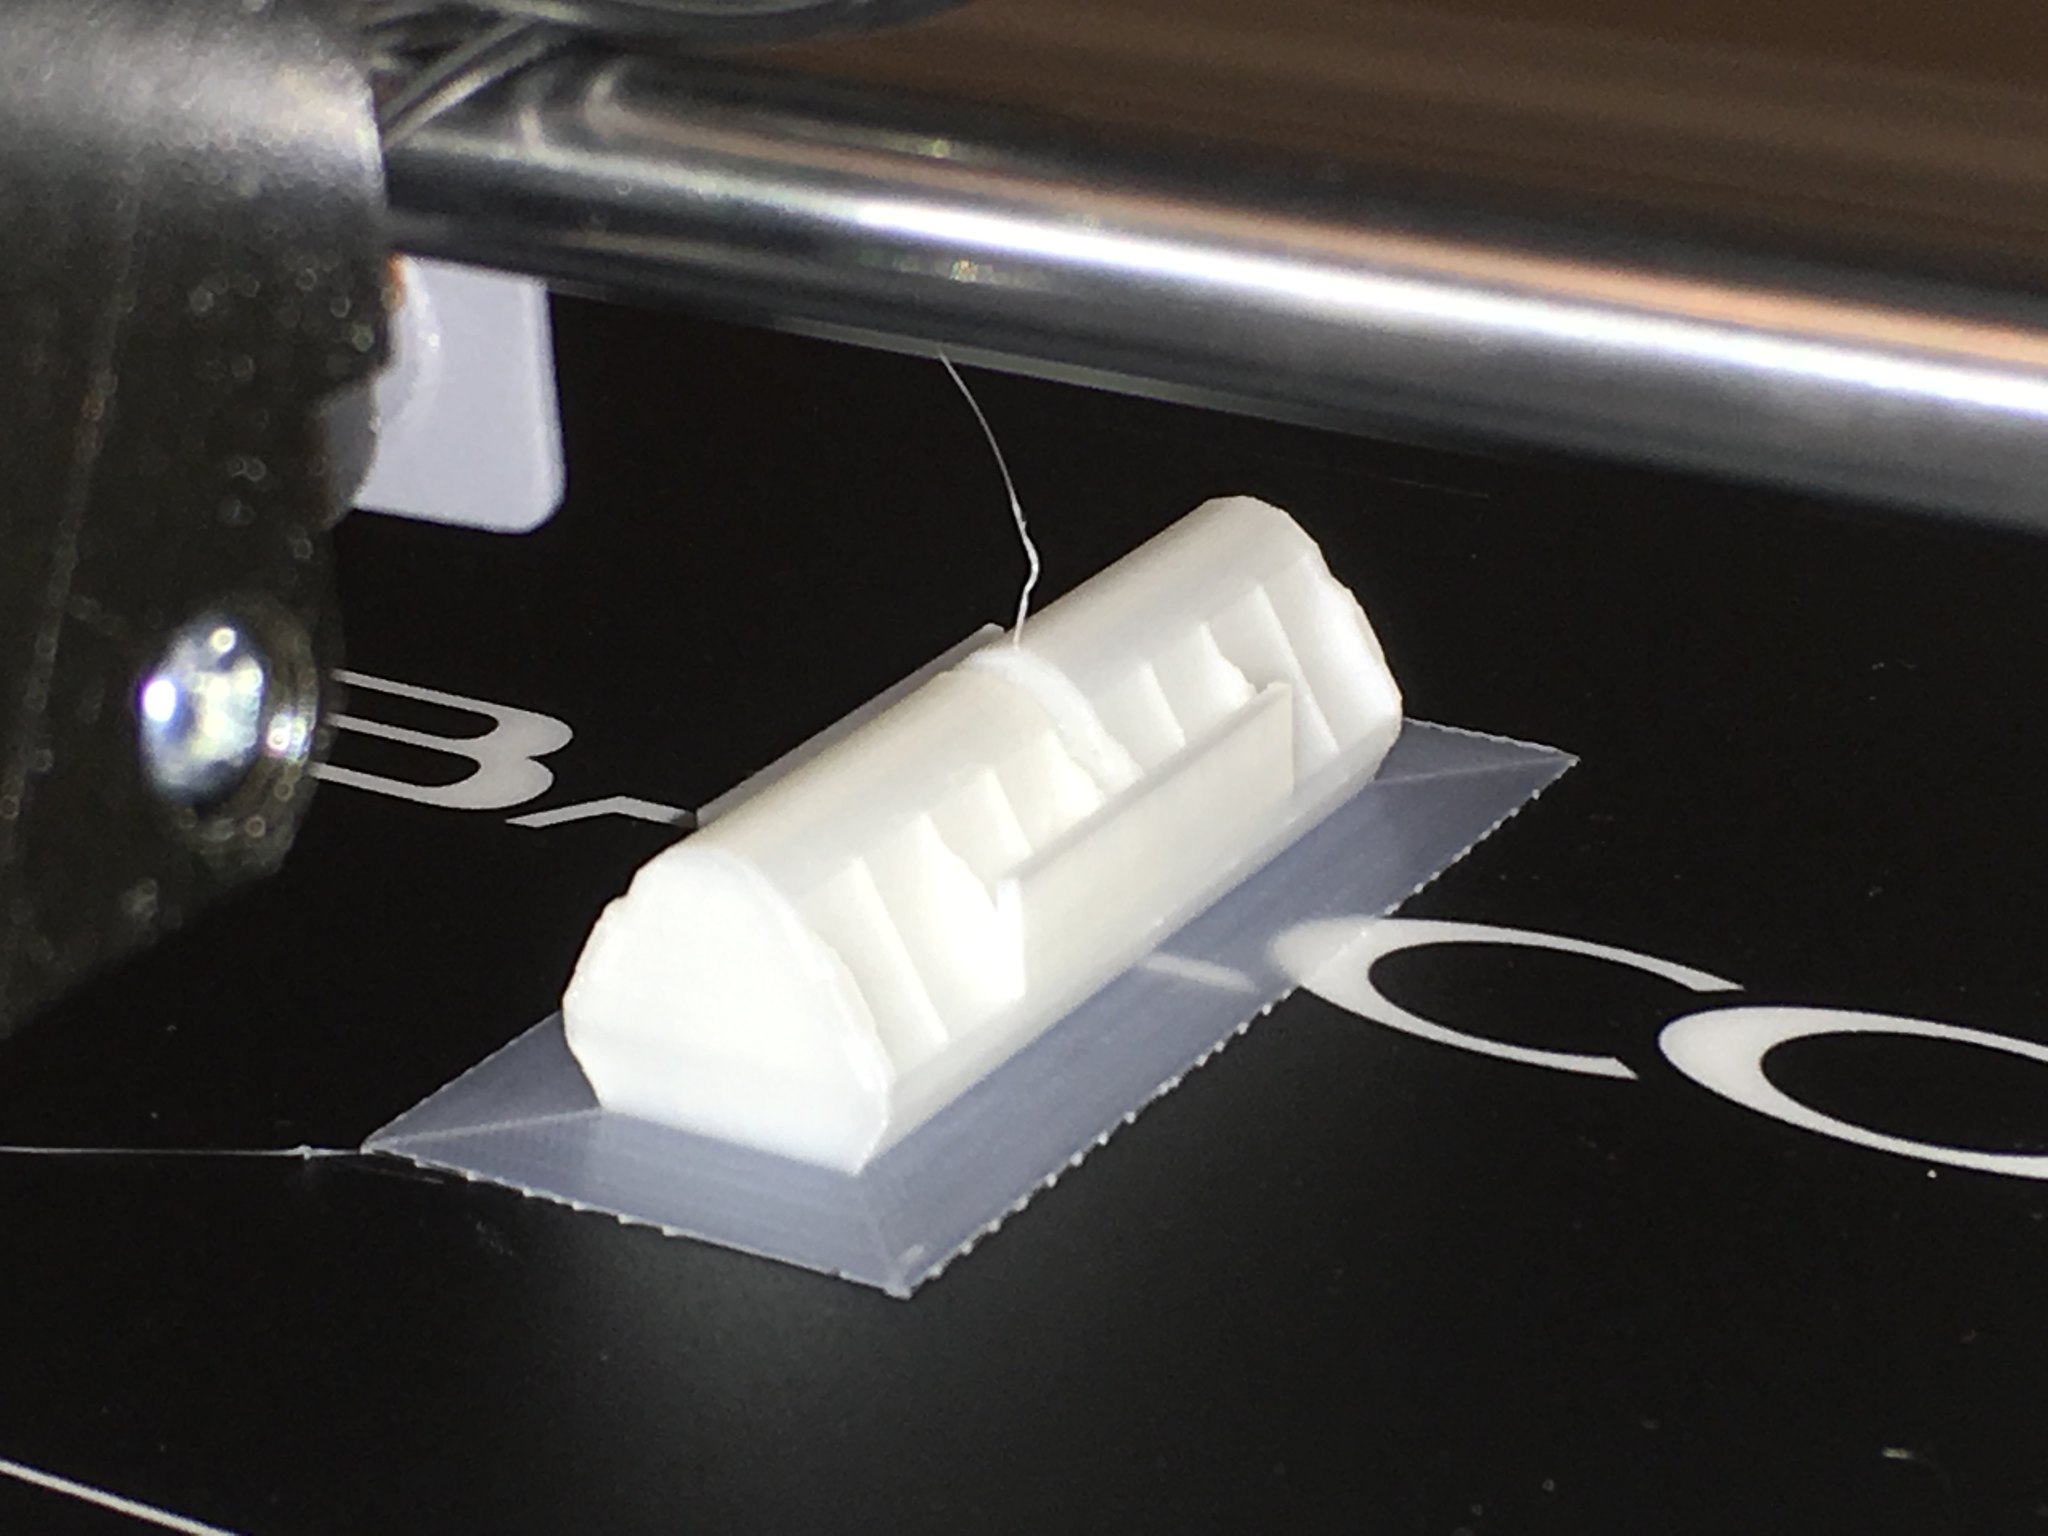 First print Balco printer by simon br blue, on Flickr
First print as removed
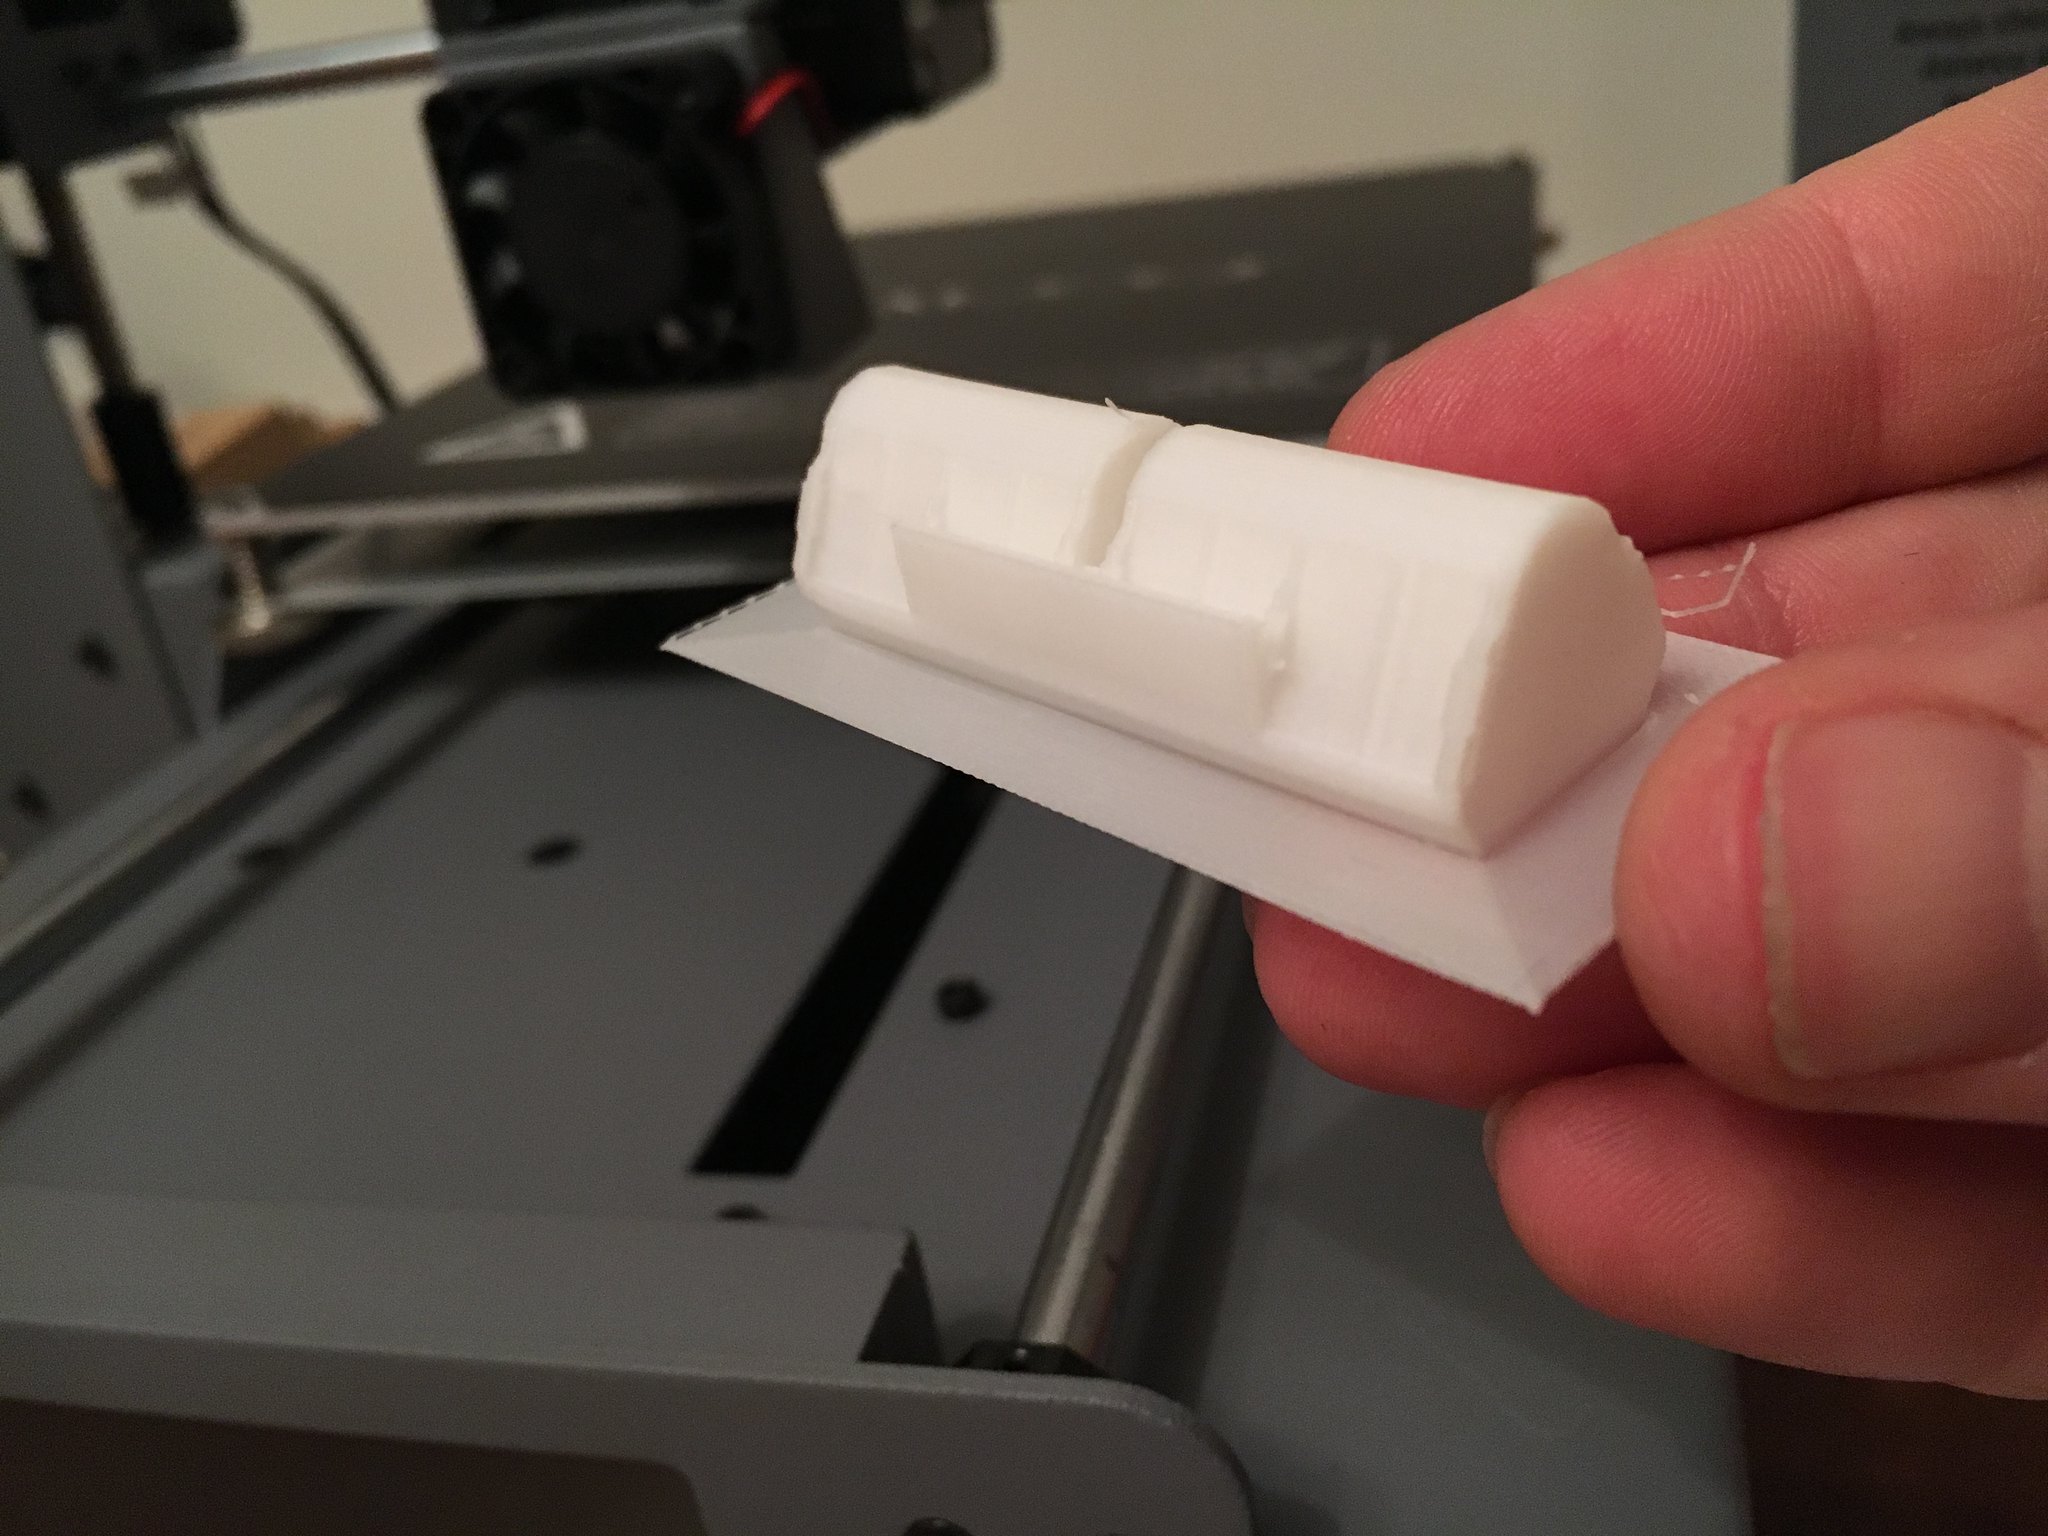 2mm PHA hopper test by simon br blue, on Flickr
2mm hopper with support material partly removed
 2mm PHA hopper test support material by simon br blue, on Flickr
Cleaned up test print - zoomed in on camera phone making it look wavey
 2mm PHA hopper test finished by simon br blue, on Flickr
-
2
-
-
Thanks for the quick replies.
I downloaded Cura and got the profile details from the Balco website and changed settings as required from the defaults.
Decided to do a quick test print and chose to rescale a PHA self discharge hopper to 2mm. Pictures of the result below. I was very happy with the print as it was done to see how the printer worked. When I originally ordered the printer I was thinking it would be good enough to print 7mm hoppers and then hopefully a 4mm hopper but this print makes me think the that 2mm hoppers maybe possible/usable.
First test print
First print Balco printer by simon br blue, on FlickrFirst print as removed
2mm PHA hopper test by simon br blue, on Flickr2mm hopper with support material partly removed
2mm PHA hopper test support material by simon br blue, on FlickrCleaned up test print - zoomed in on camera phone making it look wavey
2mm PHA hopper test finished by simon br blue, on Flickr-
3
-
-
Just setting up my printer. Is the SD card meant to have software on it to install on my PC? Mine appears to be empty.
-
Discount continued for today.
-
This looks tempting. The big plus for me would be that it comes ready made with a warranty/ guarantee from Aldi rather than buying something from China off eBay.
-
In Blender it’s easy to resize. You can import stl files into blender to work on or to resize. Select the part you want to resize, press s and then type in the scale you want - to half the size scale by 0.5, or going from 7mm to 4mm by 0.57086. When exported and uploaded to Shapeways the site will ask what units the stl file uses (I always use mm).
-
Good news and bad news on this material.
Its now available for everyone to order for their own models but the price has doubled.
Having done several tests with this material I have found it useful as a better version of WSF that can have the minimum thickness's of FUD or HDA. I've printed models in several scales and it's passable in 4mm and larger but like WSF a bit rough for 2mm.
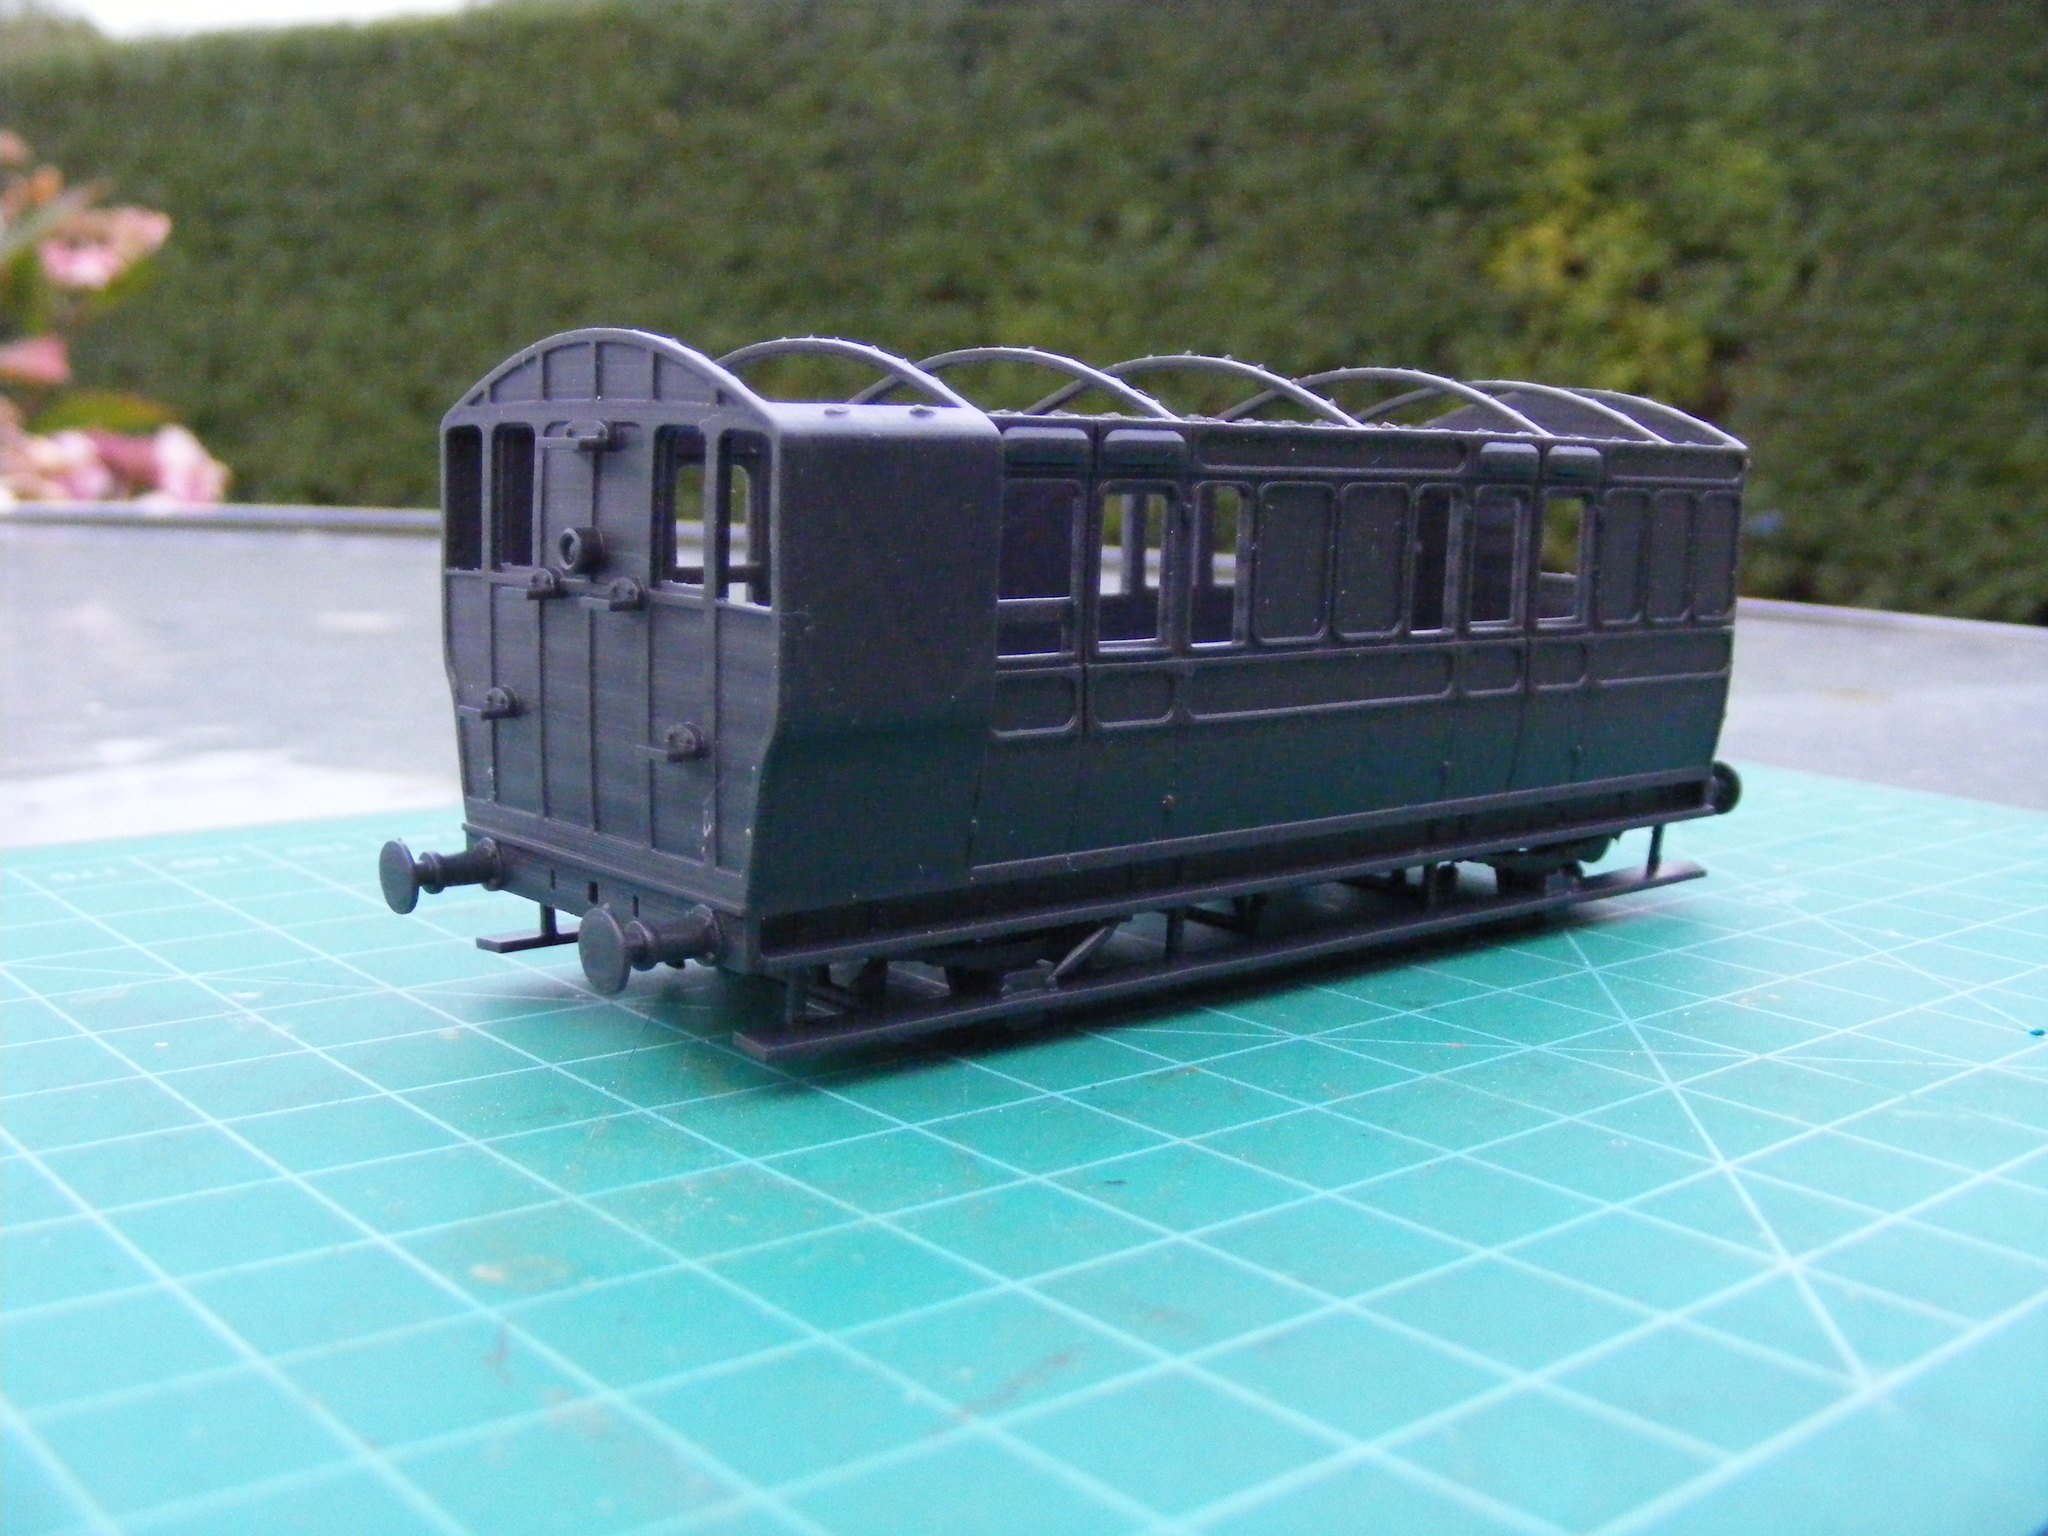
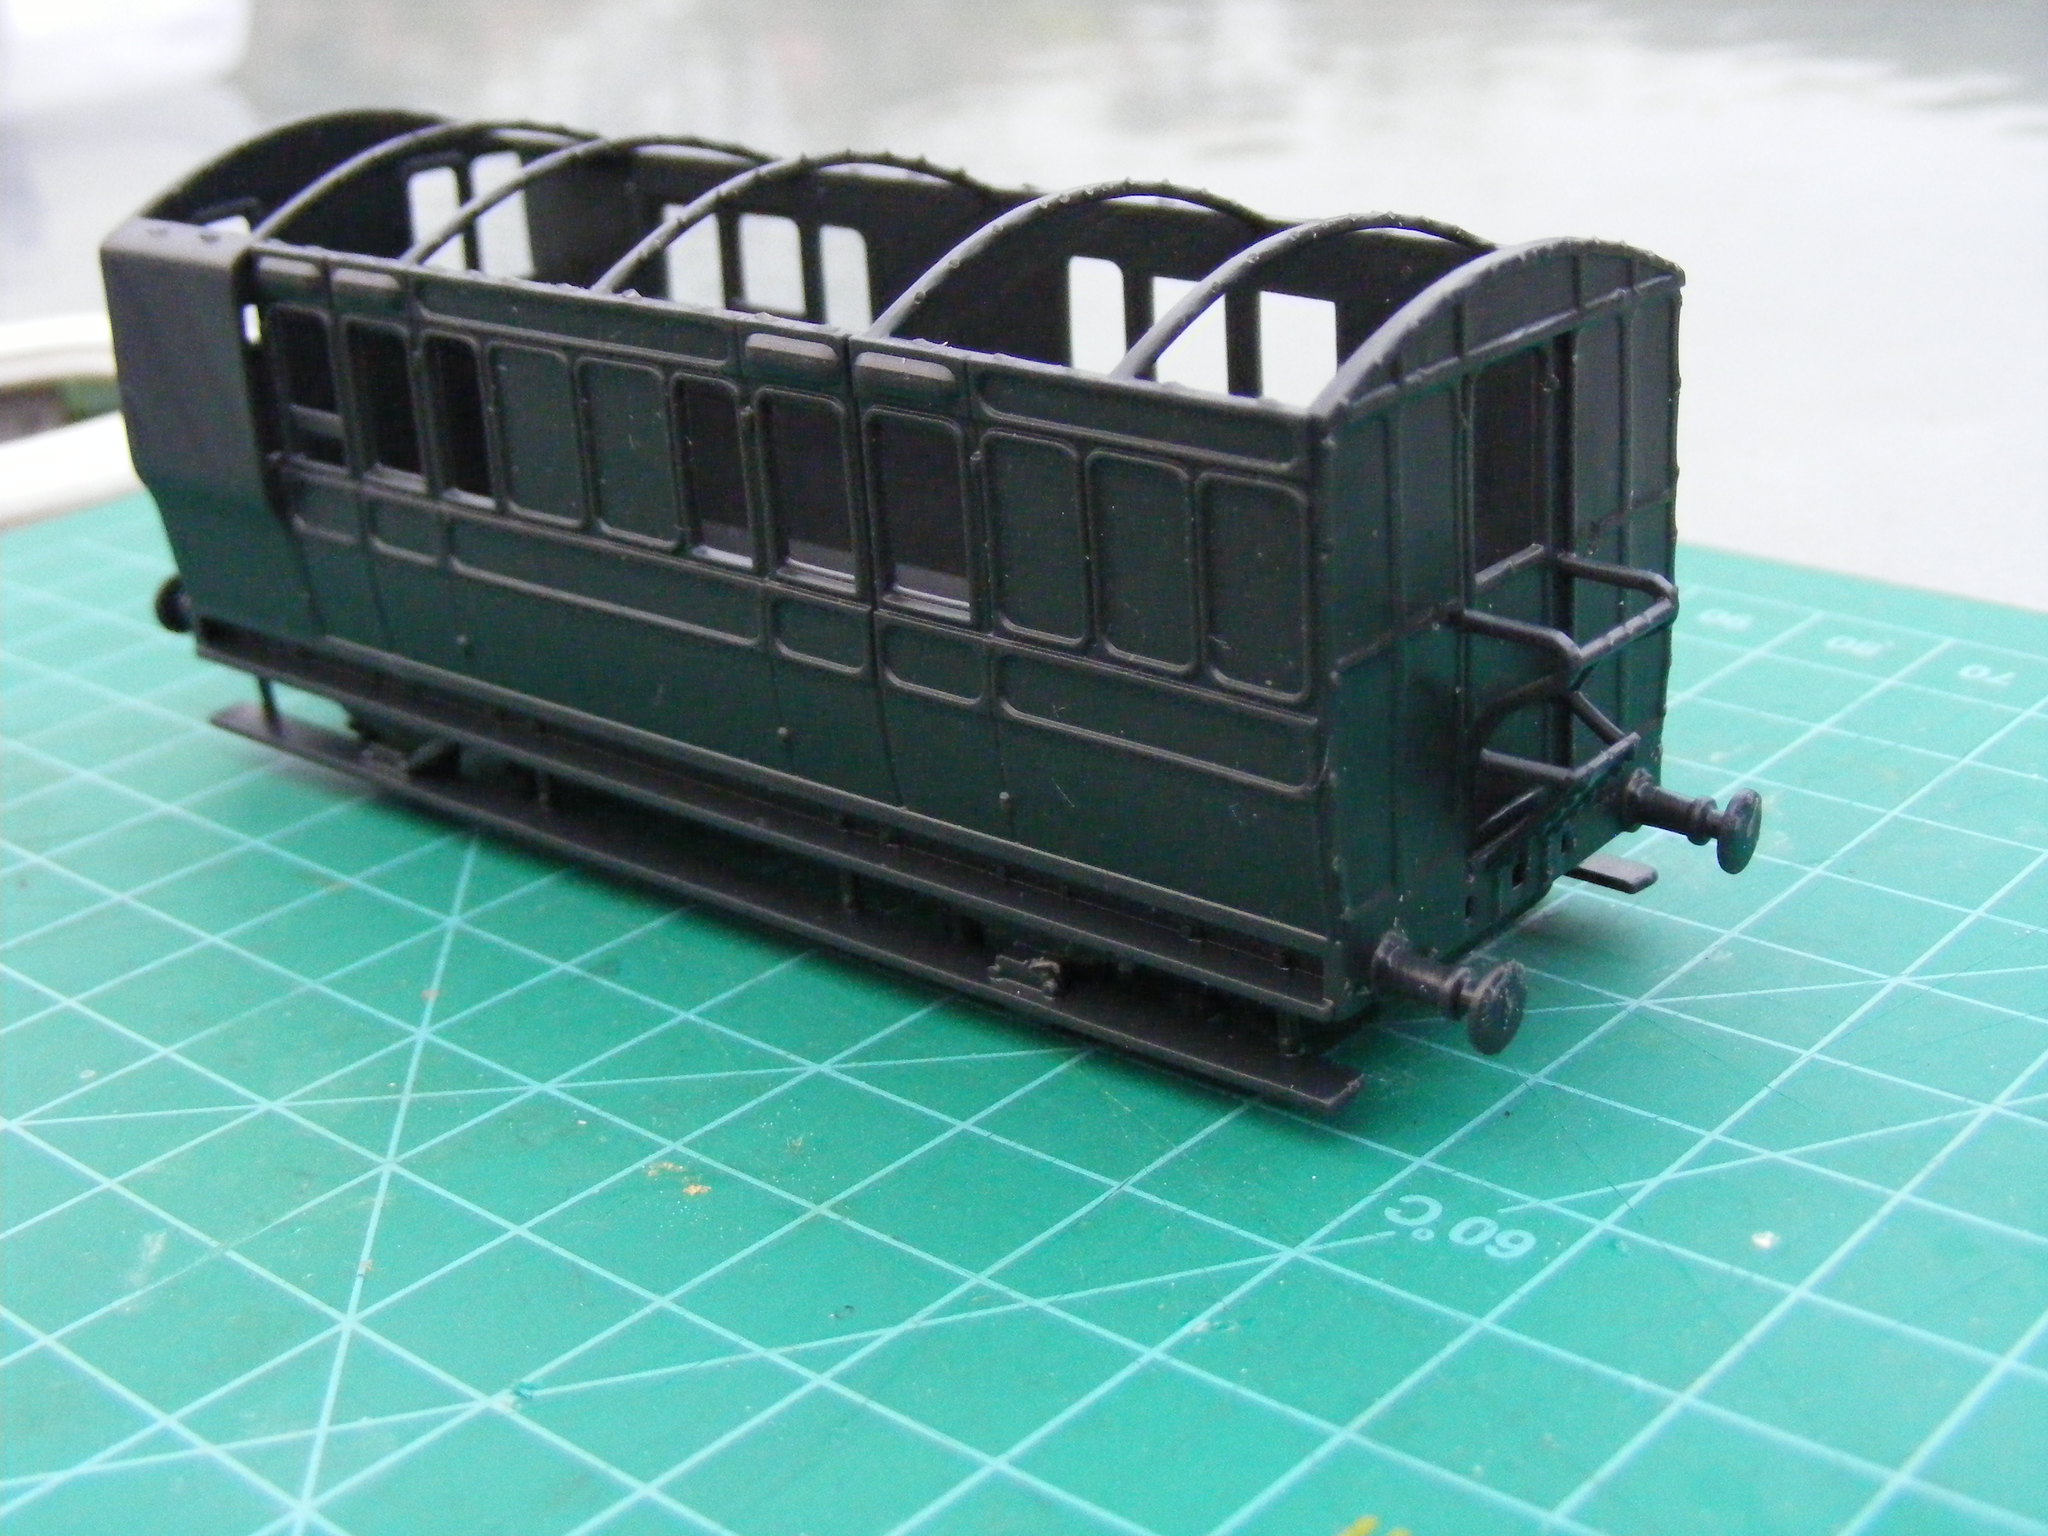
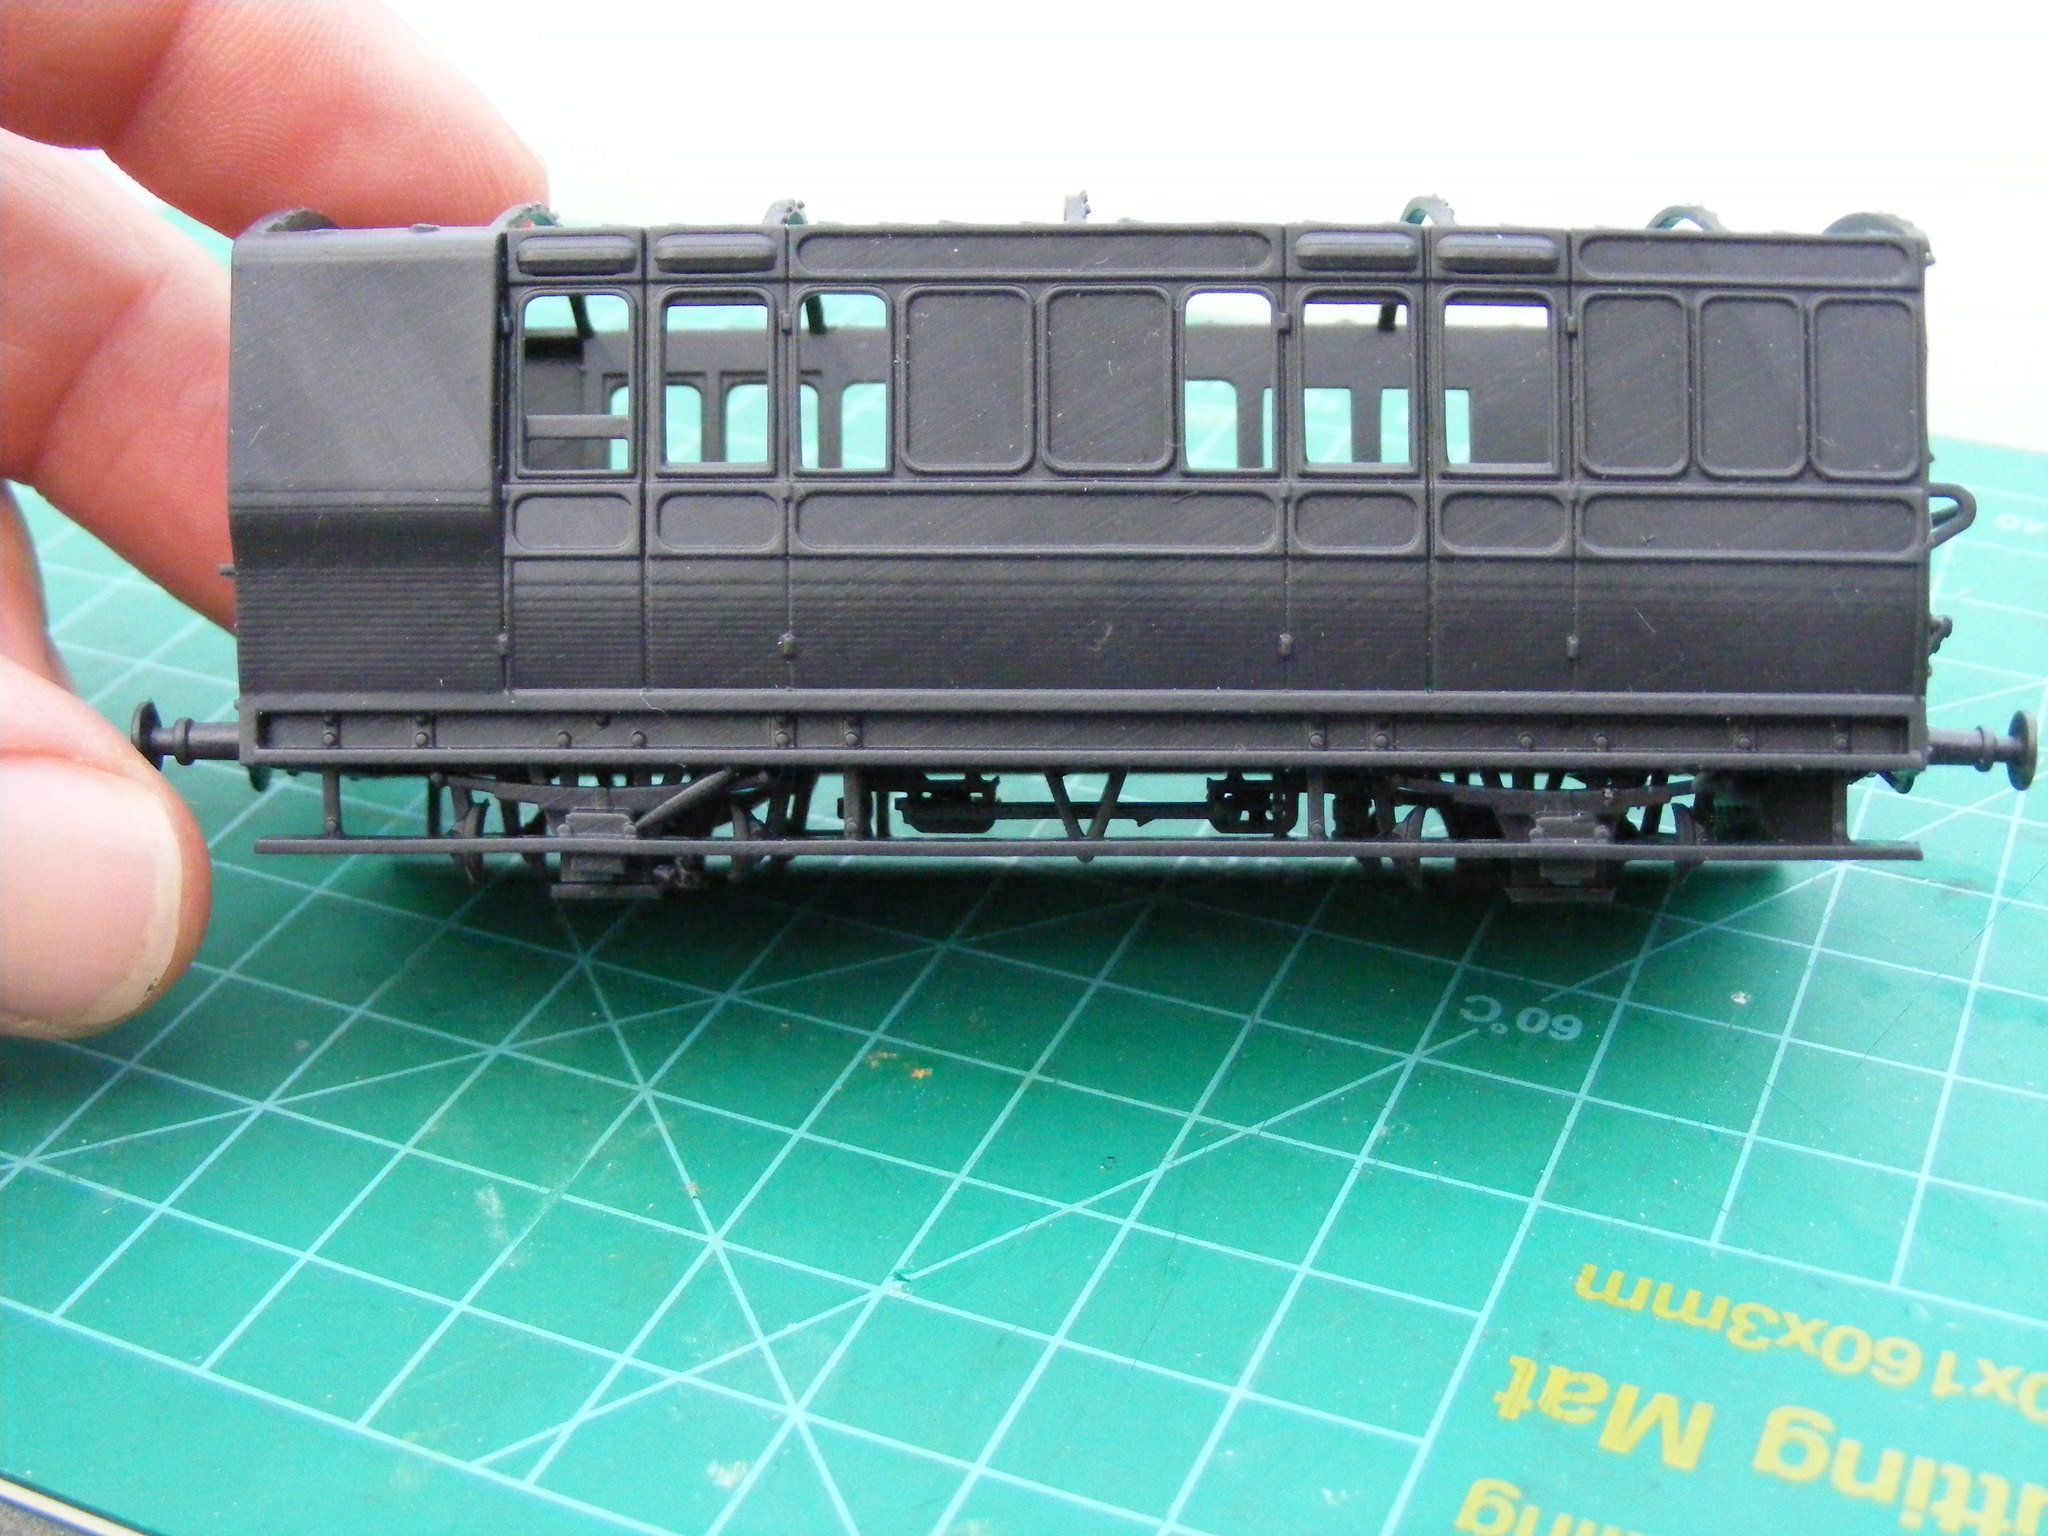
For a 7mm coach it looks better than WSF
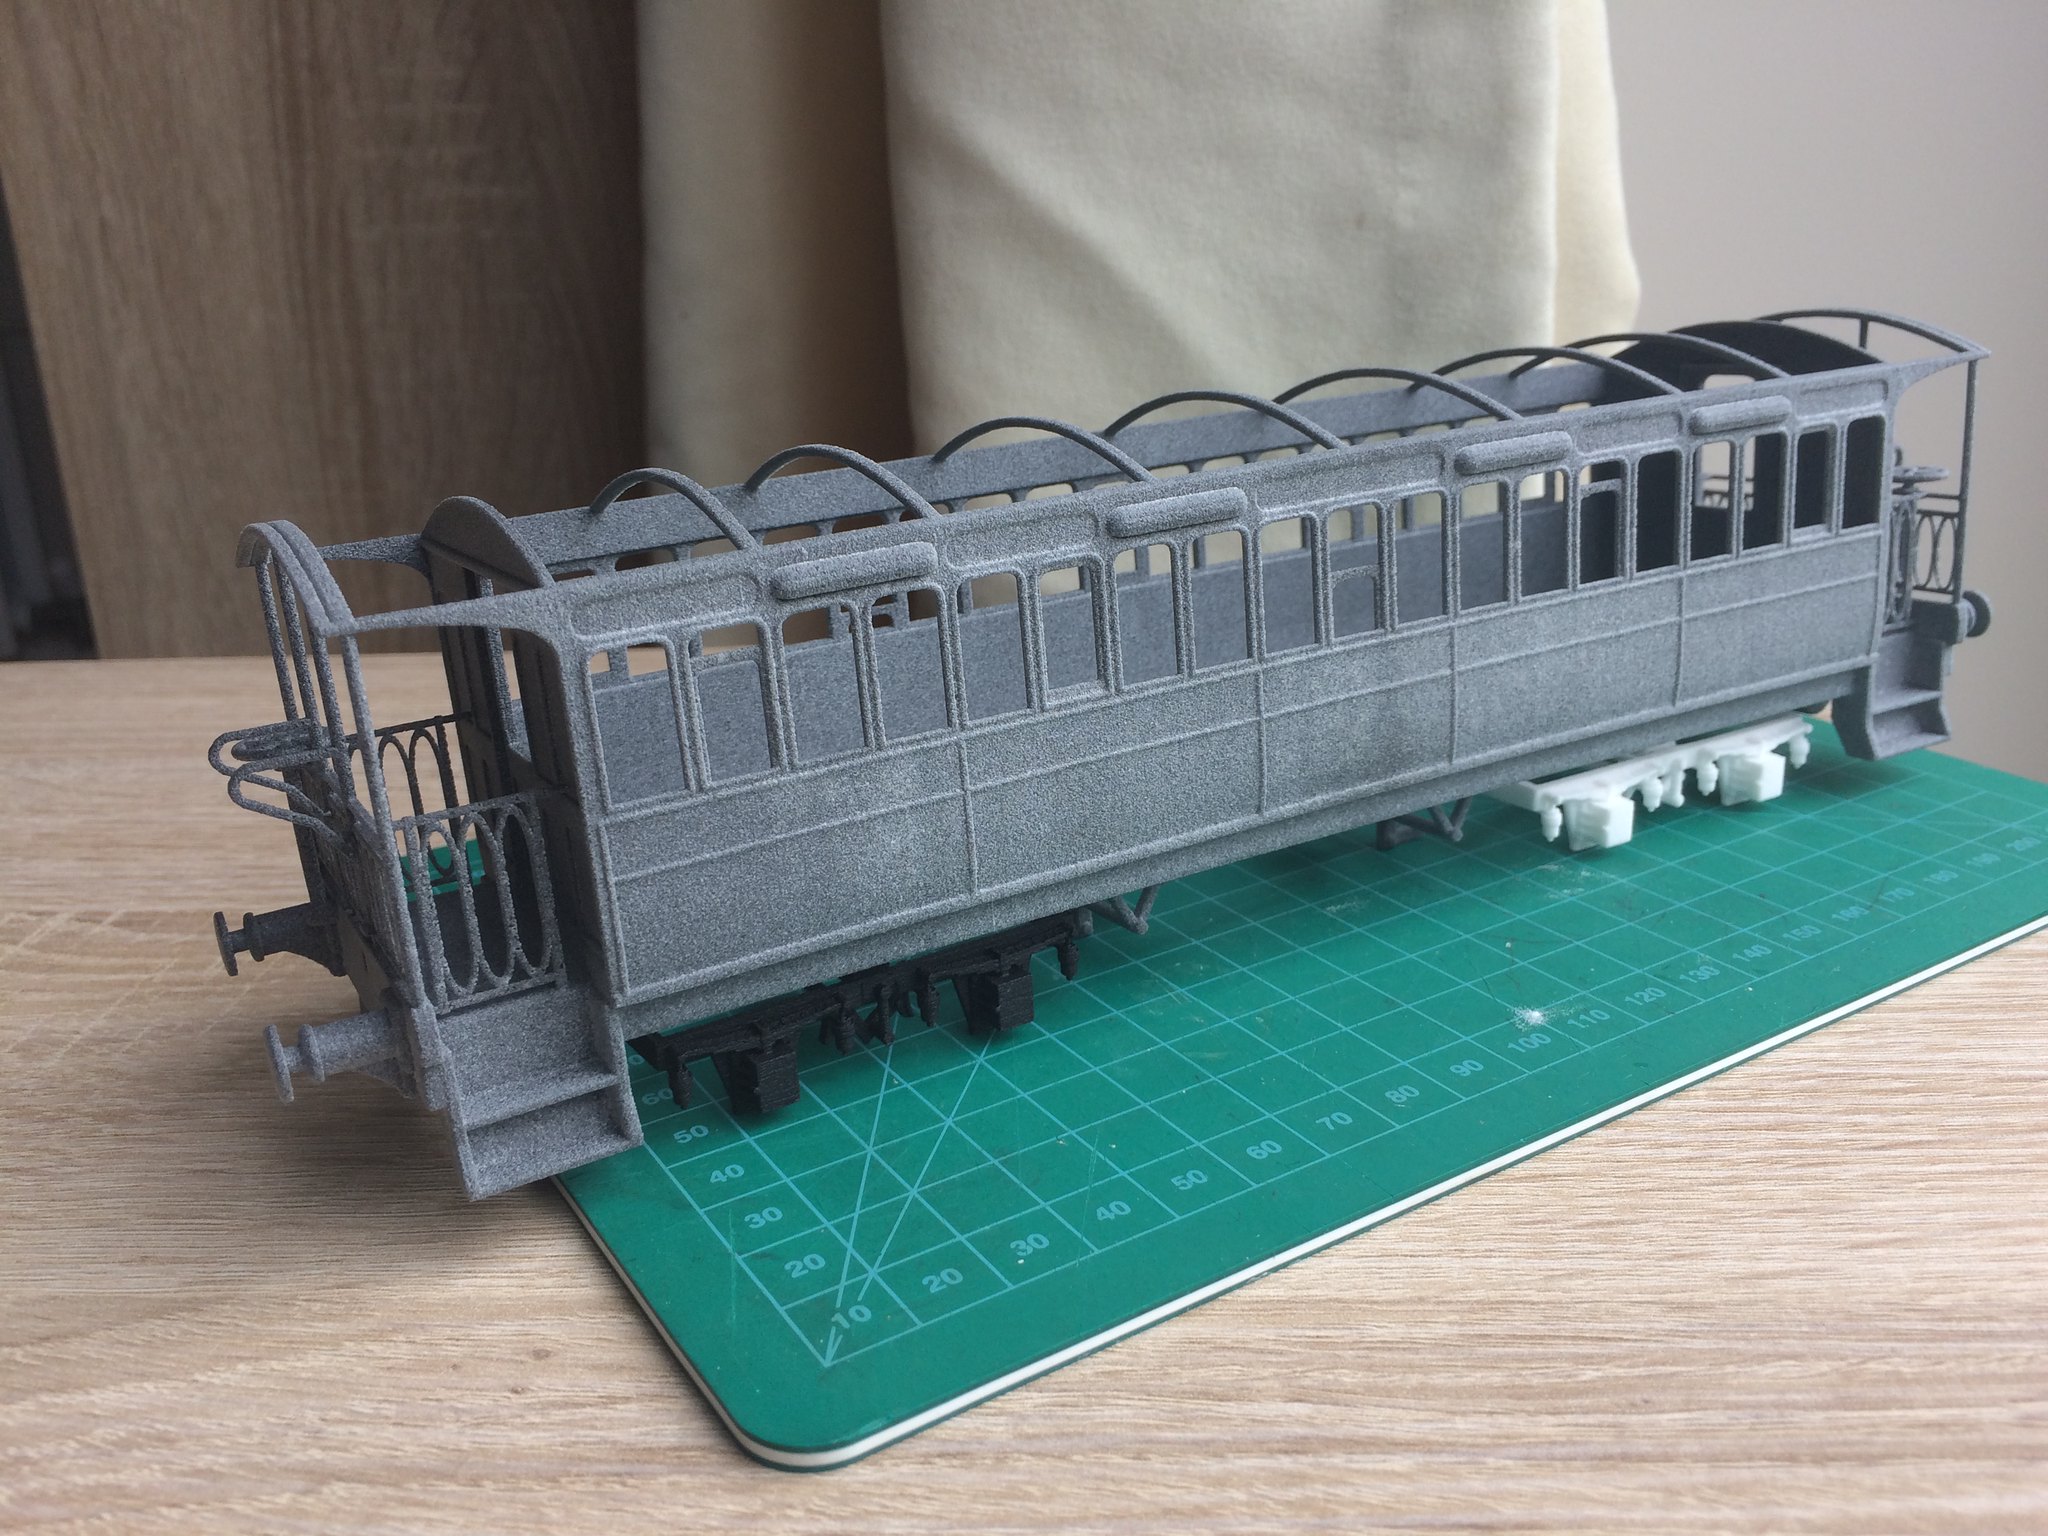 7mm W&U coach by simon br blue, on Flickr
For a 7mm bogie the black version was useful
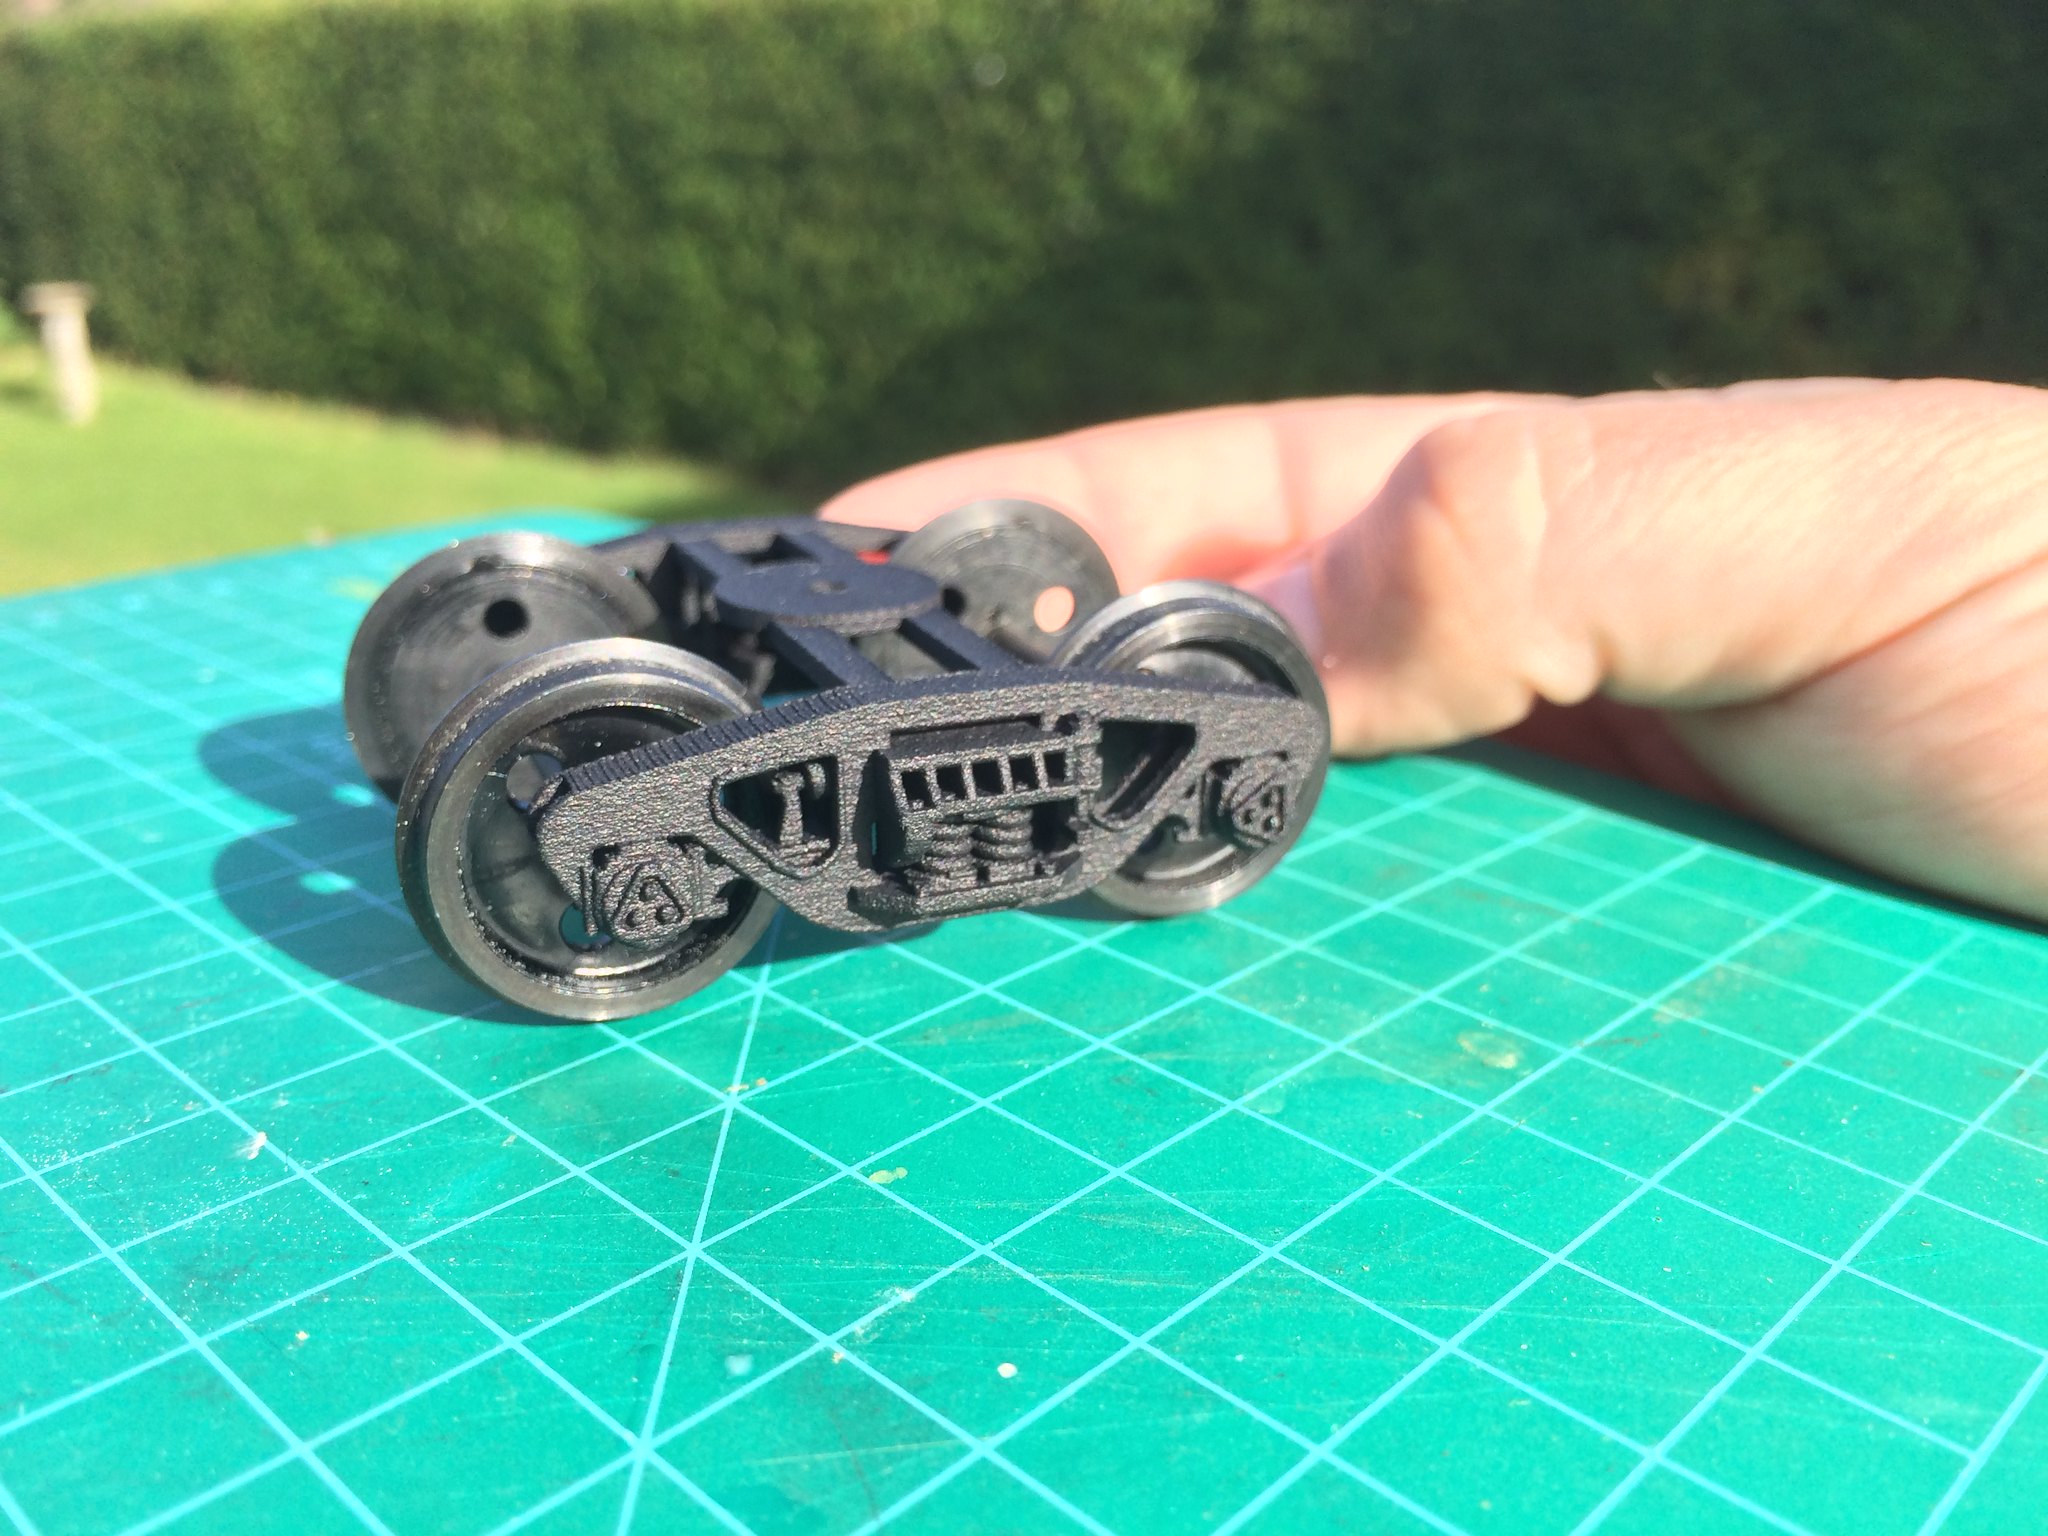 7mm Gloucester bogie by simon br blue, on Flickr
In 4mm it was useful and similar to WSF polished.
 HPSF material by simon br blue, on Flickr
But for 2mm it was a bit rough although the material could be printed thinner than WSF.
 J70 tram 2mm by simon br blue, on Flickr
A comparison between HPSF and WSF on 2 similar 4mm models.
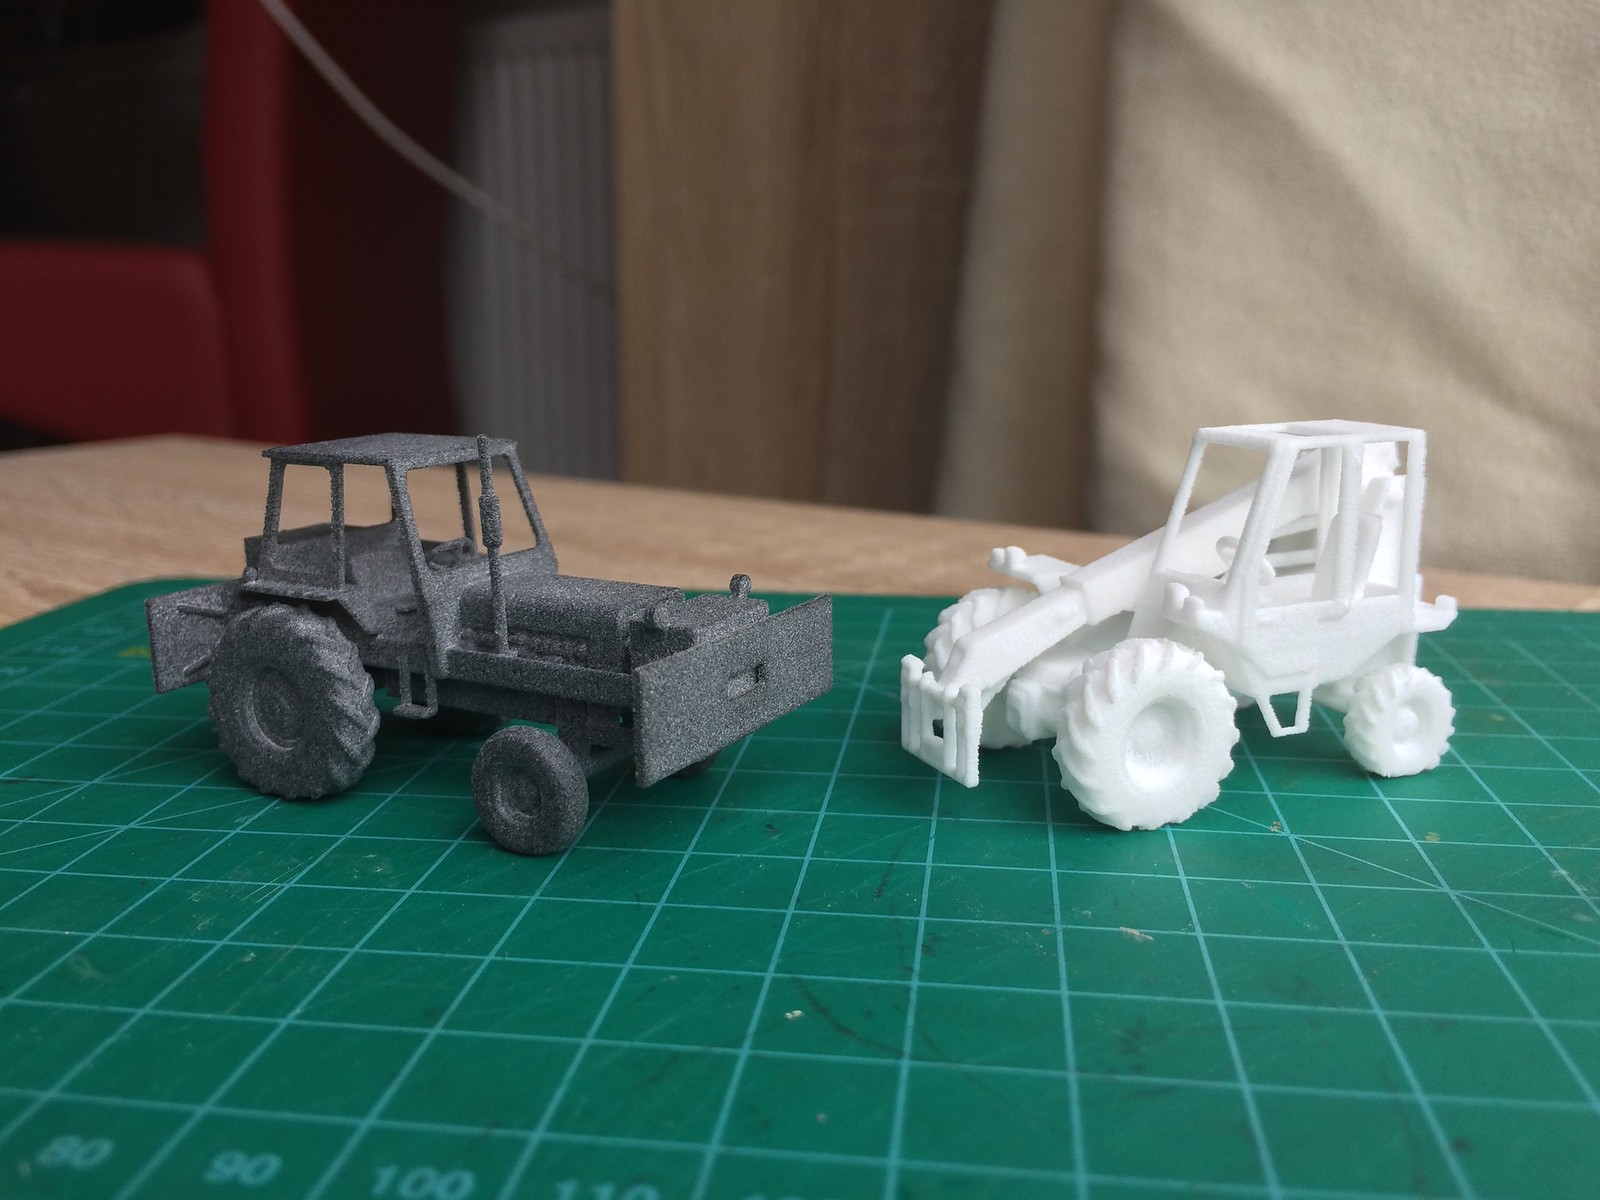
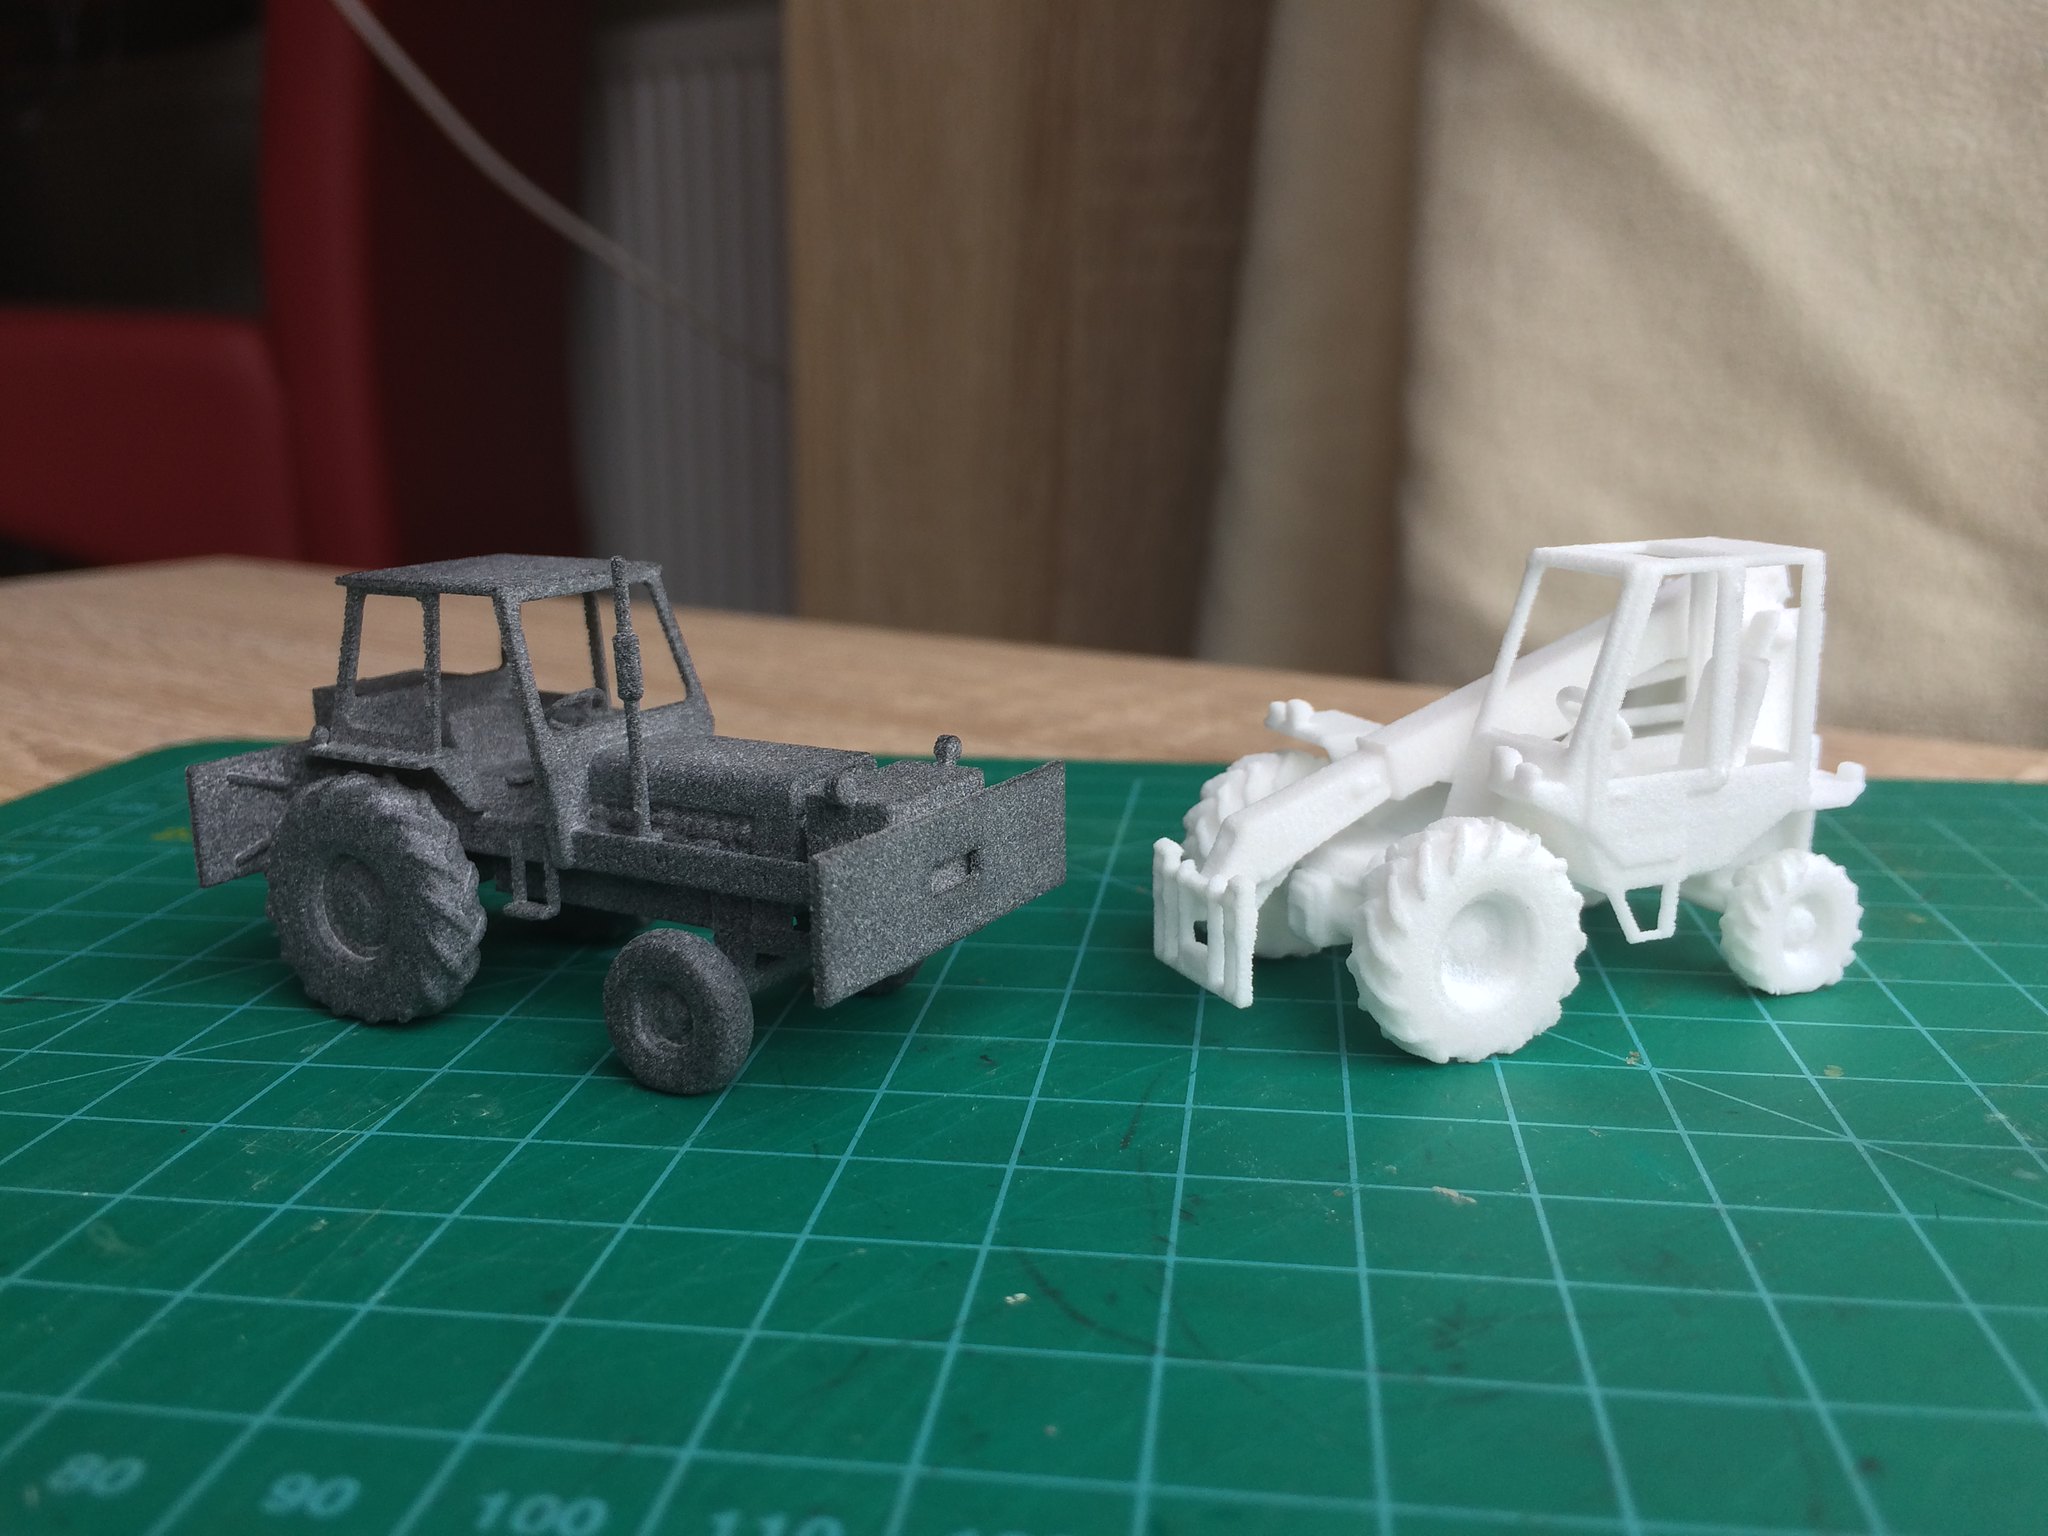 4mm shunting tractor and Loadall by simon br blue, on Flickr
This material would have been useful and there are several models I've drawn recently designed with tolerances set for HPSF. The price was similar to WSF with the benefit of a better finish and finer details but sadly Shapeways have doubled the price on the material. To me this isn't worth the extra price especially when it now works out as the same price as FUD and HDA on some models.
-
1
-
-
Time for another update.
First up I've rescaled the 04 tram down to 2mm and printed it in HDA. I Just had to make some of the walls thicker and change the cowcatchers to allow it to be printed.

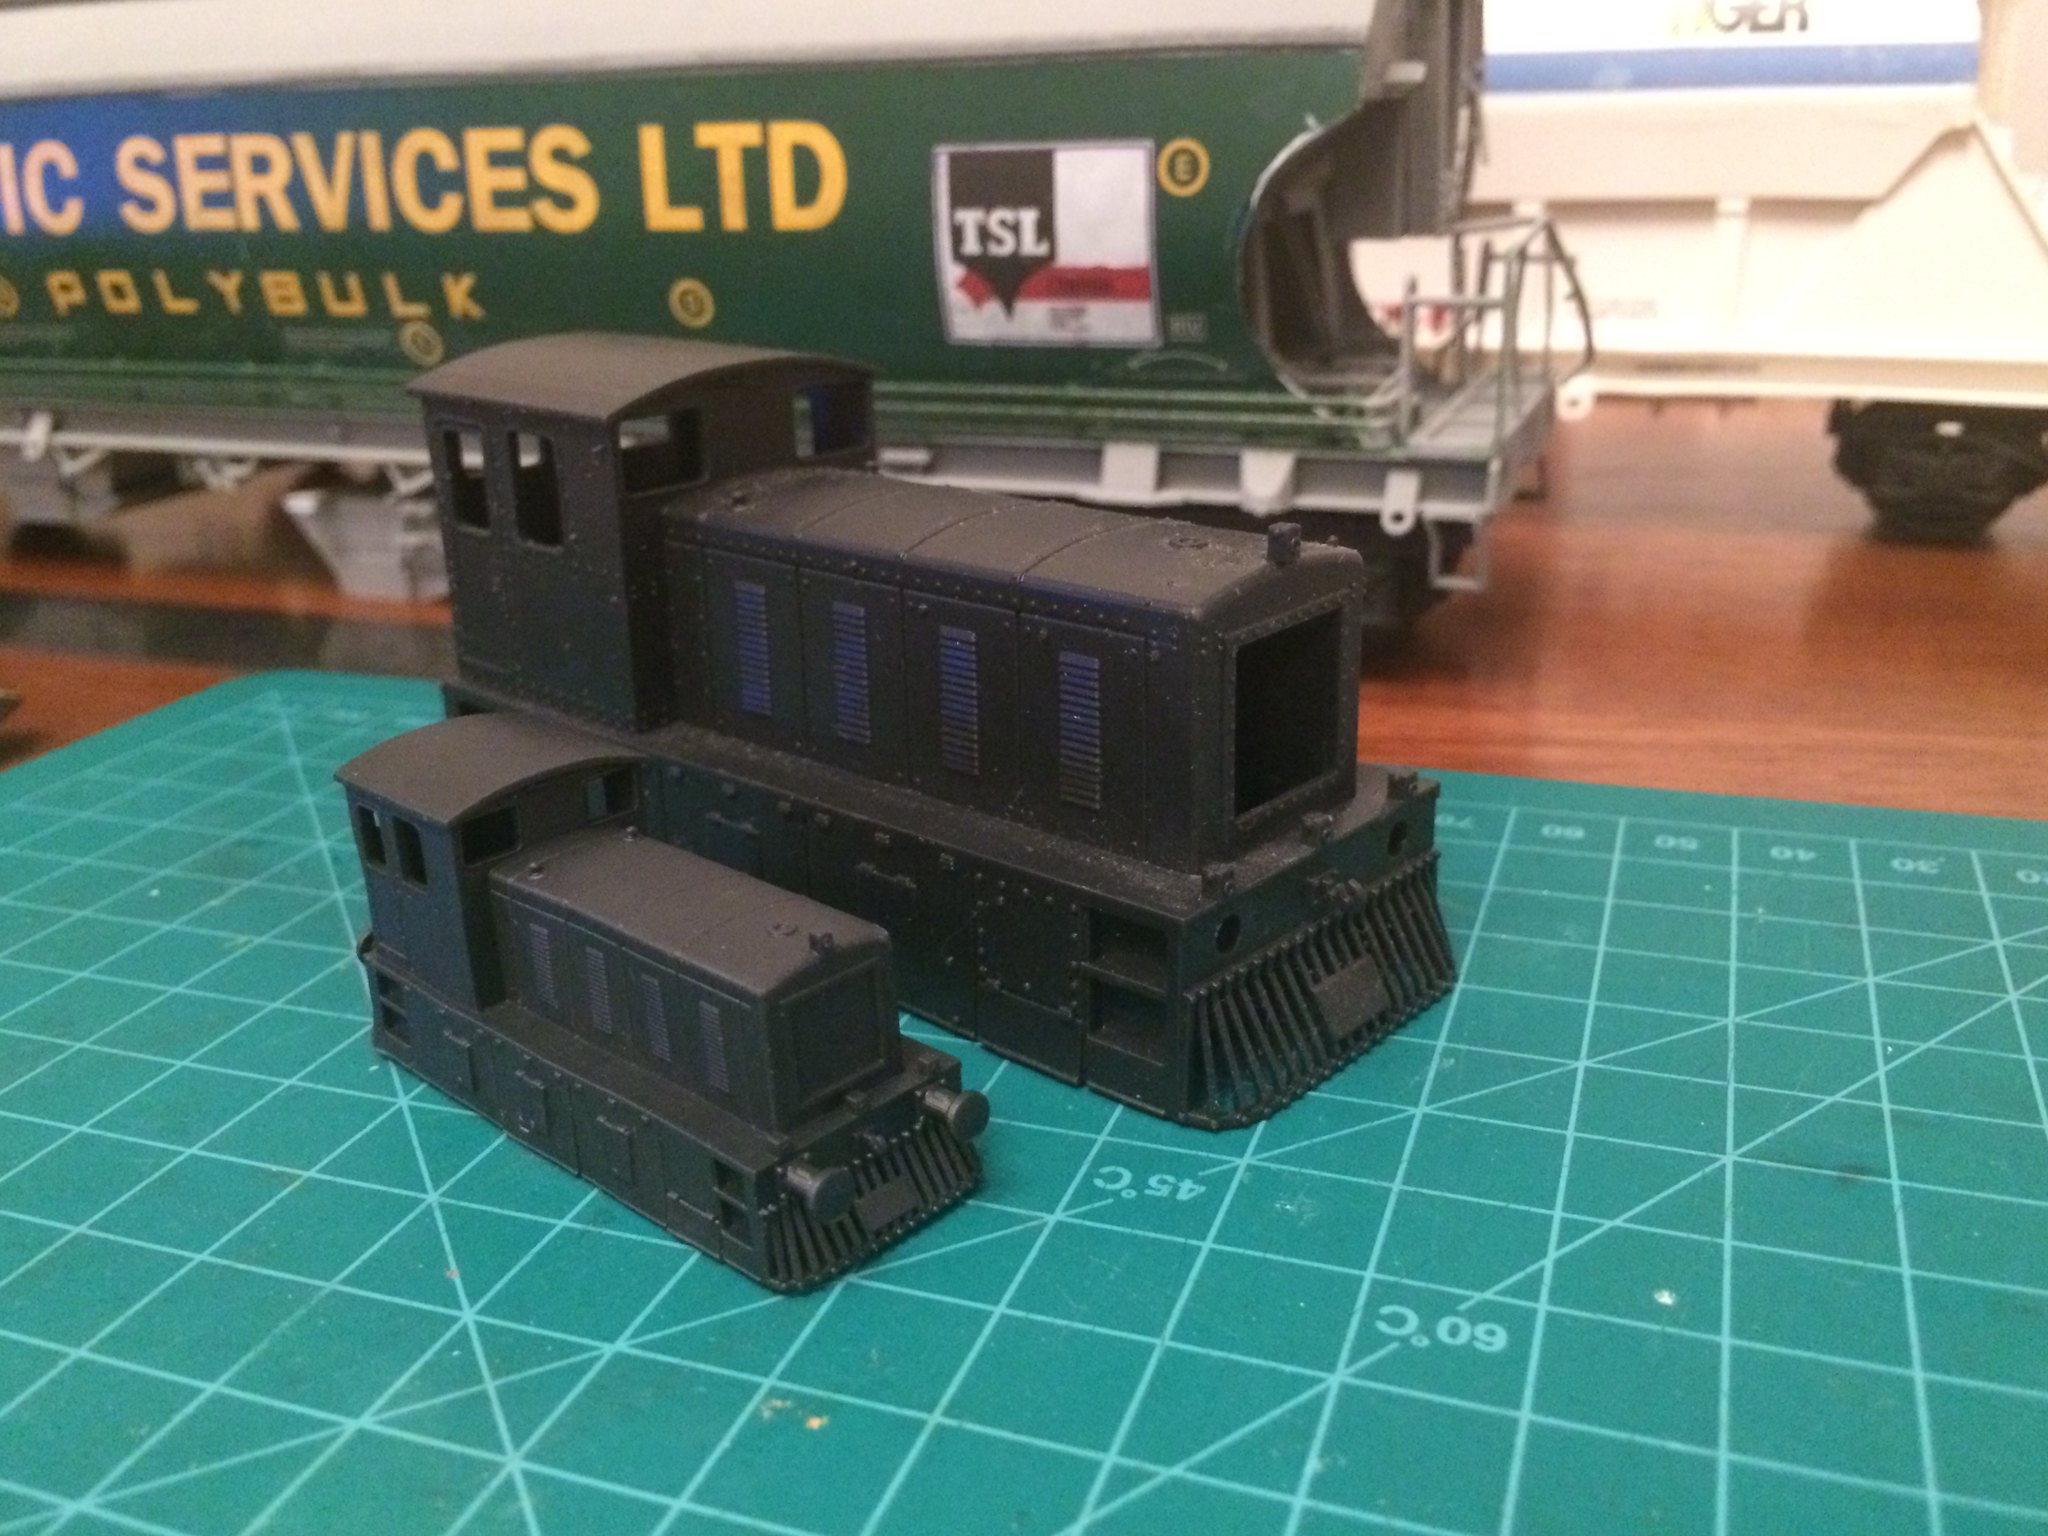
Another W&U item I had printed in 2mm was a J70 tram in HPSF grey, this was the same as the HDA version but thought I'd try HPSF to see what it printed like - it will need a coat of primer to see what it really looks like.
The next W&U 2mm print is a pair of bogie coaches printed in HDA and HPSF. These needed quite a bit of work to thicken them and make them printable. Also printed was a couple of bogies - one problem now will be to find some small wheels for the bogies.
Next up is a 7mm bogie - a Gloucester bogie used under sealion wagons, This was printed in HPSF black.
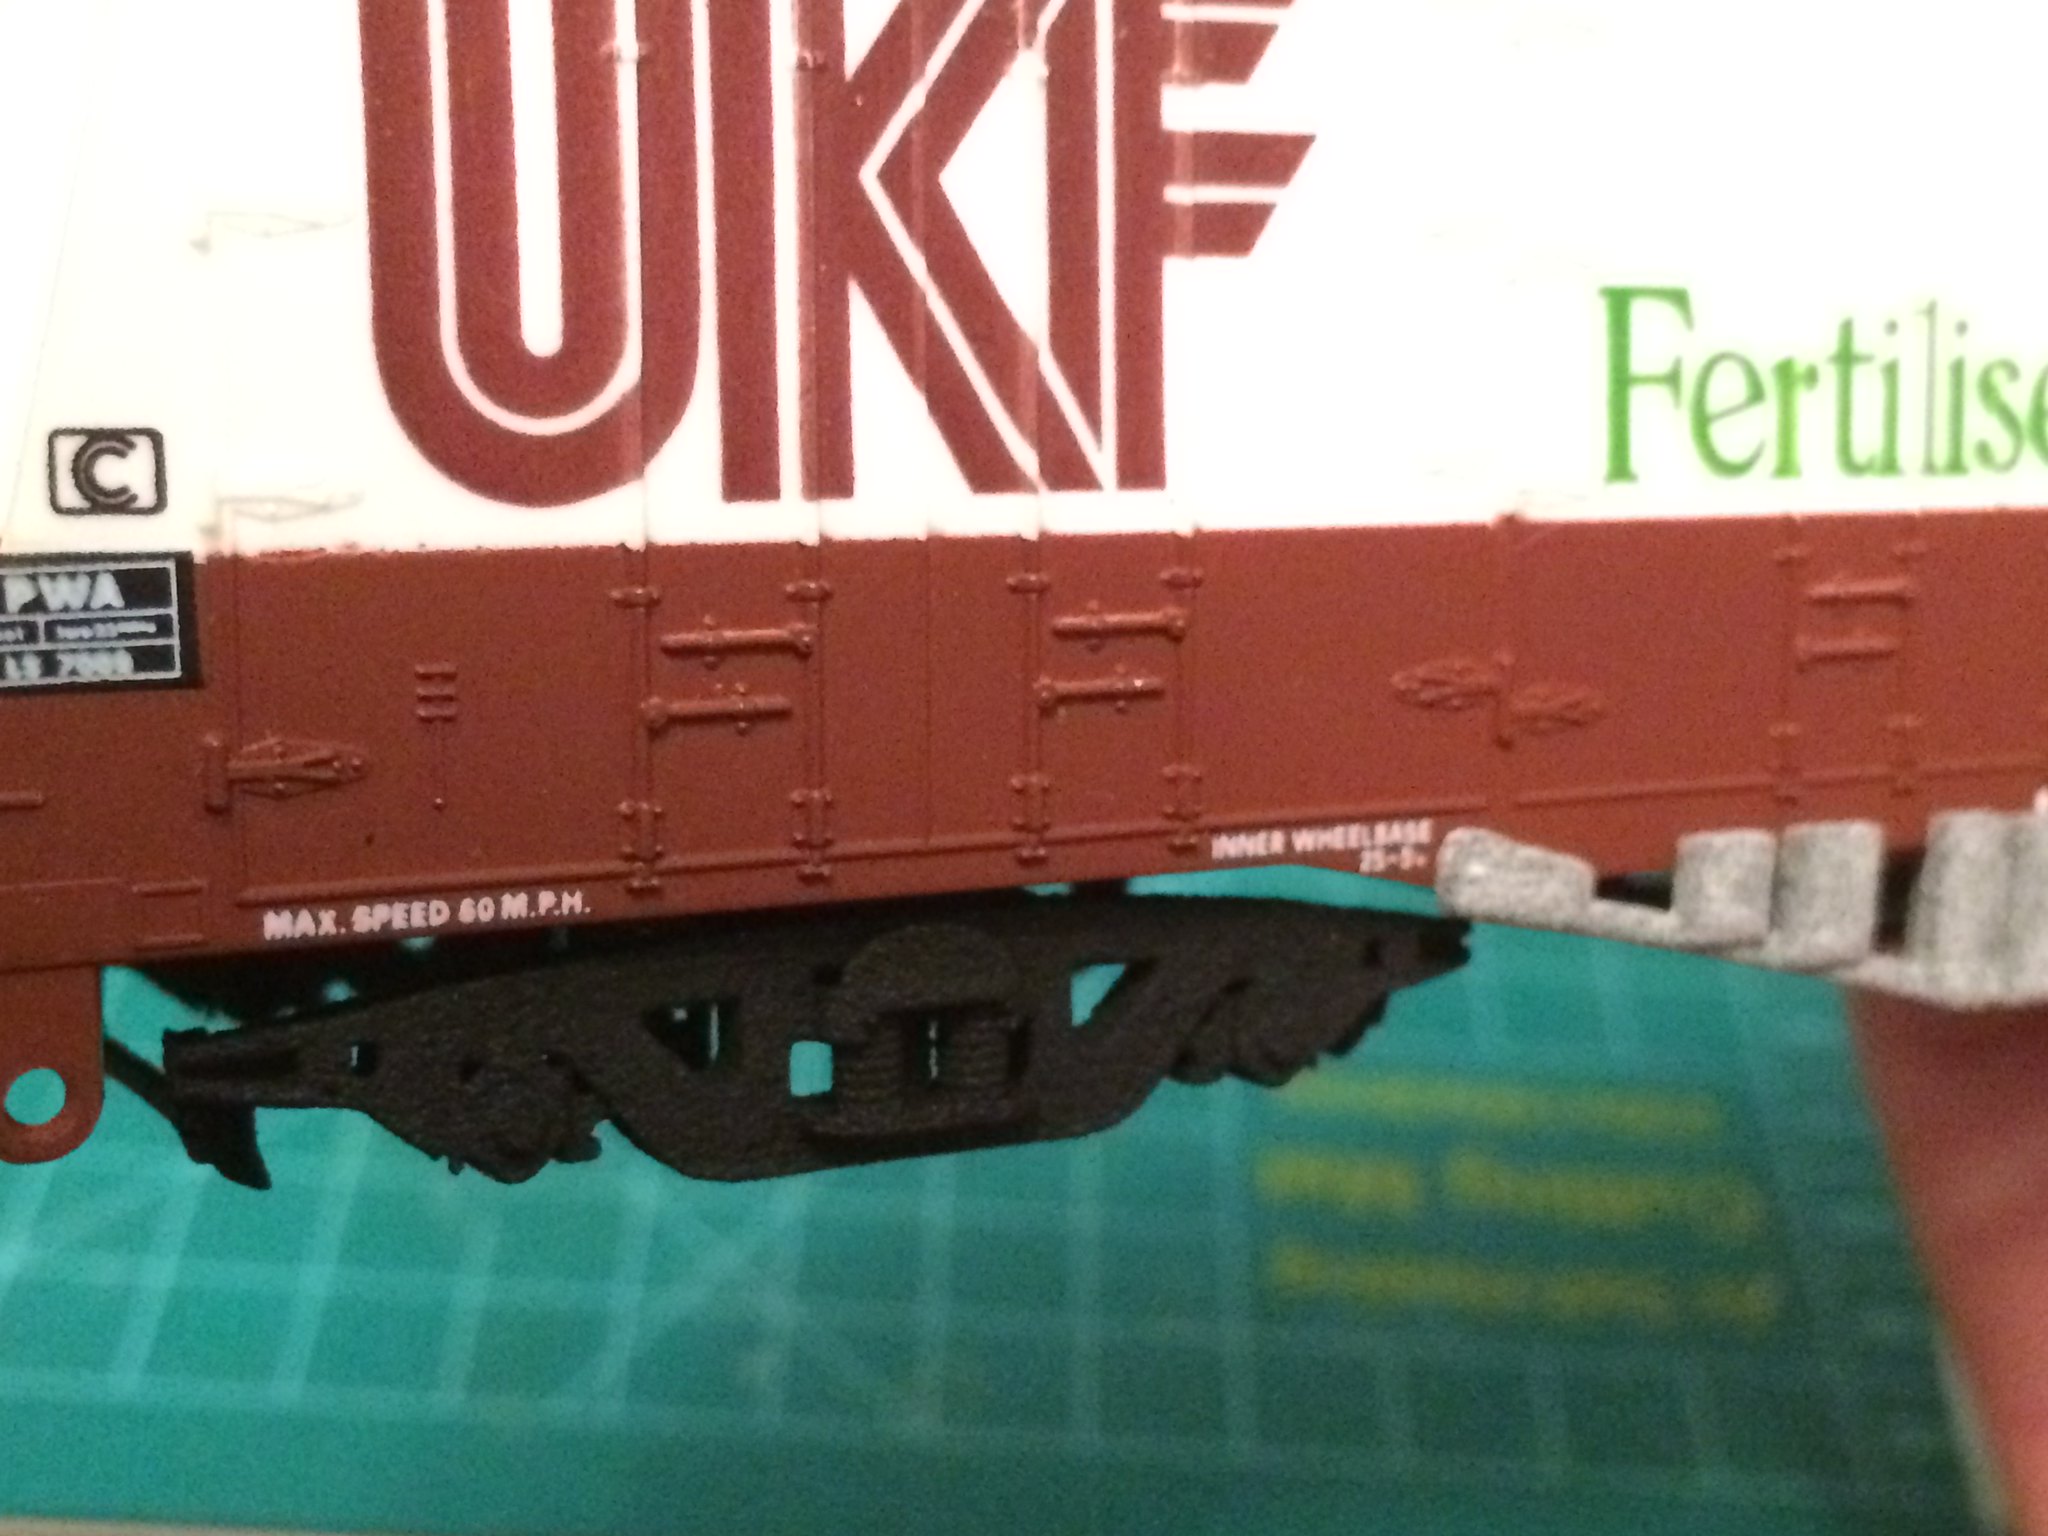
Using the previous bogie I made a 4mm version of the Gloucester Bogie used under the UKF Palvans. I printed got this printed in both HPSF black and HDA and made them as a direct fit onto the Lima chassis. Also visible on the 2nd photo is the sideframe that fits onto the Lima body to make the version with extra chassis bracing printed in HPSF grey.
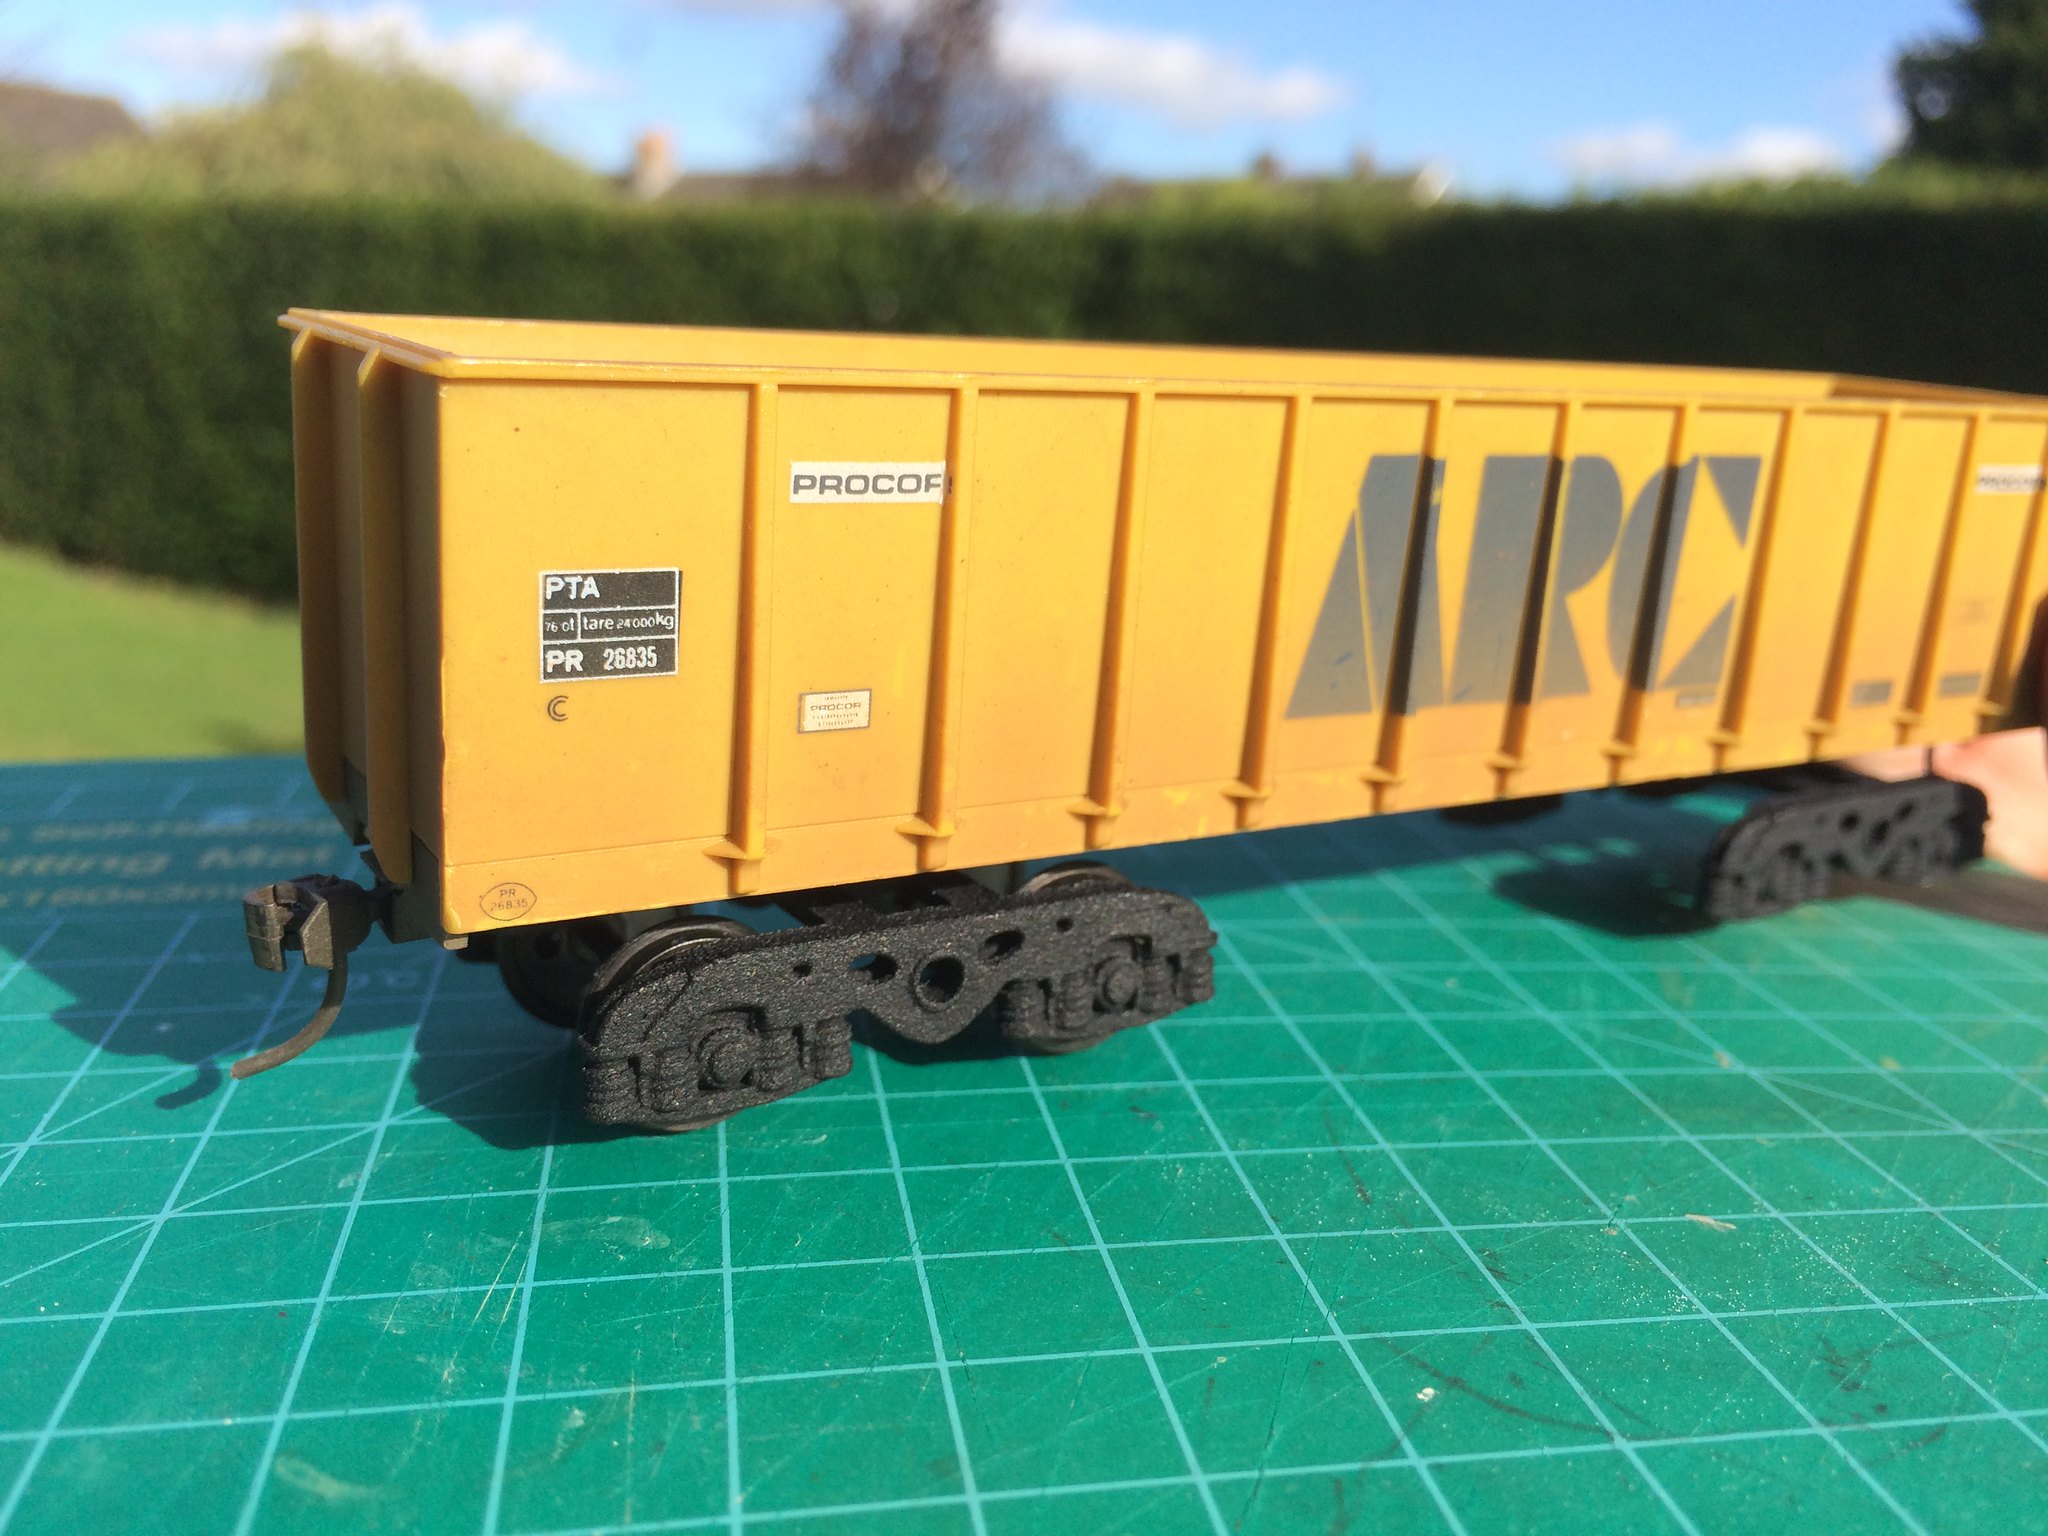
Whilst drawing the 4mm bogie for the Lima wagon I decided to have a go at the BSC motion Axle bogie as fitted to the Lima ARC and Yeoman wagons. This was printed in HPSF black, Again at the same time I drew up the chassis underframe parts missing from the Lima wagon.
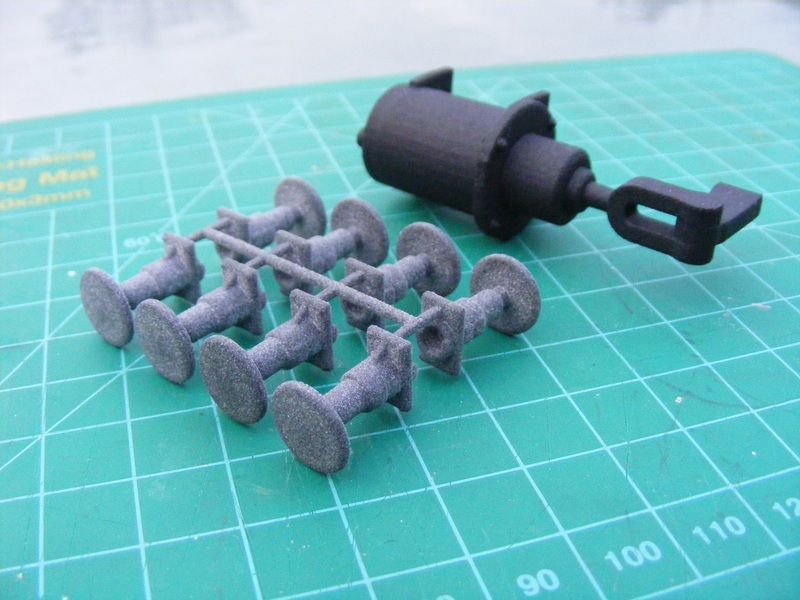
With the order I also got some new springs for the 1/32 scale presflo wagon. These were thinner and fatter than the originals and allow the chassis to sit at the normal ride height with the weight of the hopper on top. I'm still not completely happy with these as the gaps between leaf springs are too large.
-
6
-
-
Time for an update.
Firstly with the Photobucket changes all the old photos have gone. If there are any particular photos you would like to see I can add them again but I don't think I'll go through and add all the old ones back on again. New photos will be on Flickr. https://www.flickr.com/photos/49976725@N08/
Regarding the 37 fuel tanks, they were drawn up to 1/32 scale so wouldn't be printable easily in smaller scales.
Wisbech and Upwell prints.
As a test for HDA I re sized and thickened the J70 for N gauge (without the boiler). I came out OK but will need a clean up with a knife before painting. Pictured with its big brothers 2mm HDA, 4mm FUD and 7mm WSF.
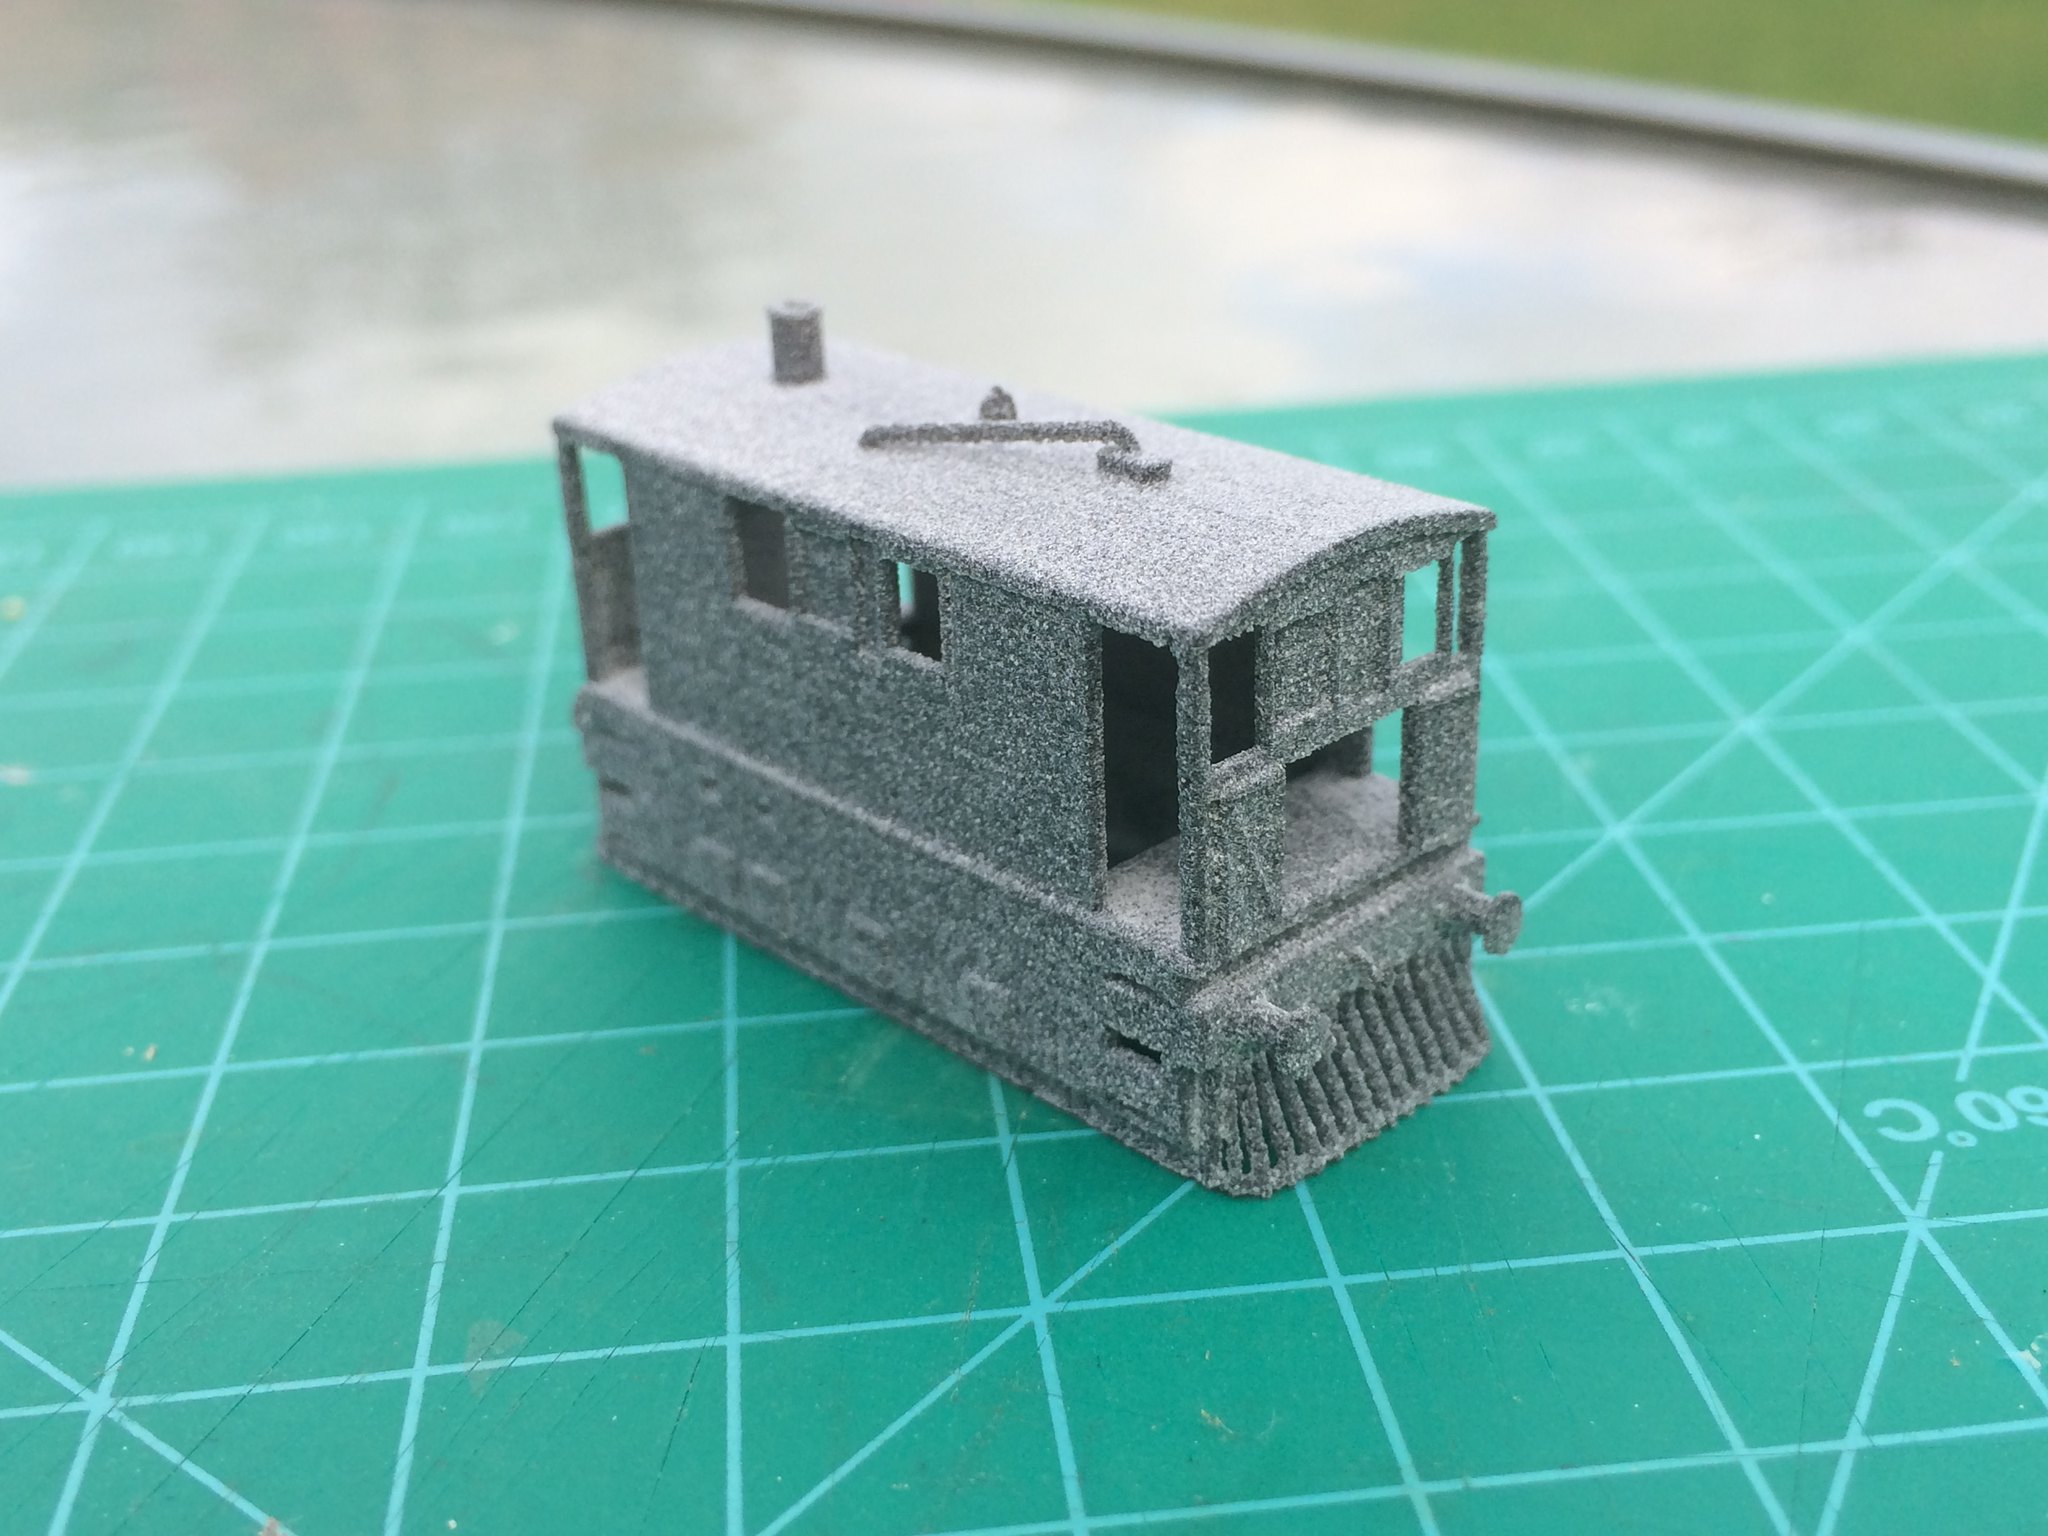
The other 4mm Tramway print is GER no. 16 brake. This was printed in HDA and took a couple of goes to get printed as Shapeways kept rejecting thin walls or wires. The model does show some slight layering on the end - I'll have to see what it looks like when its painted.
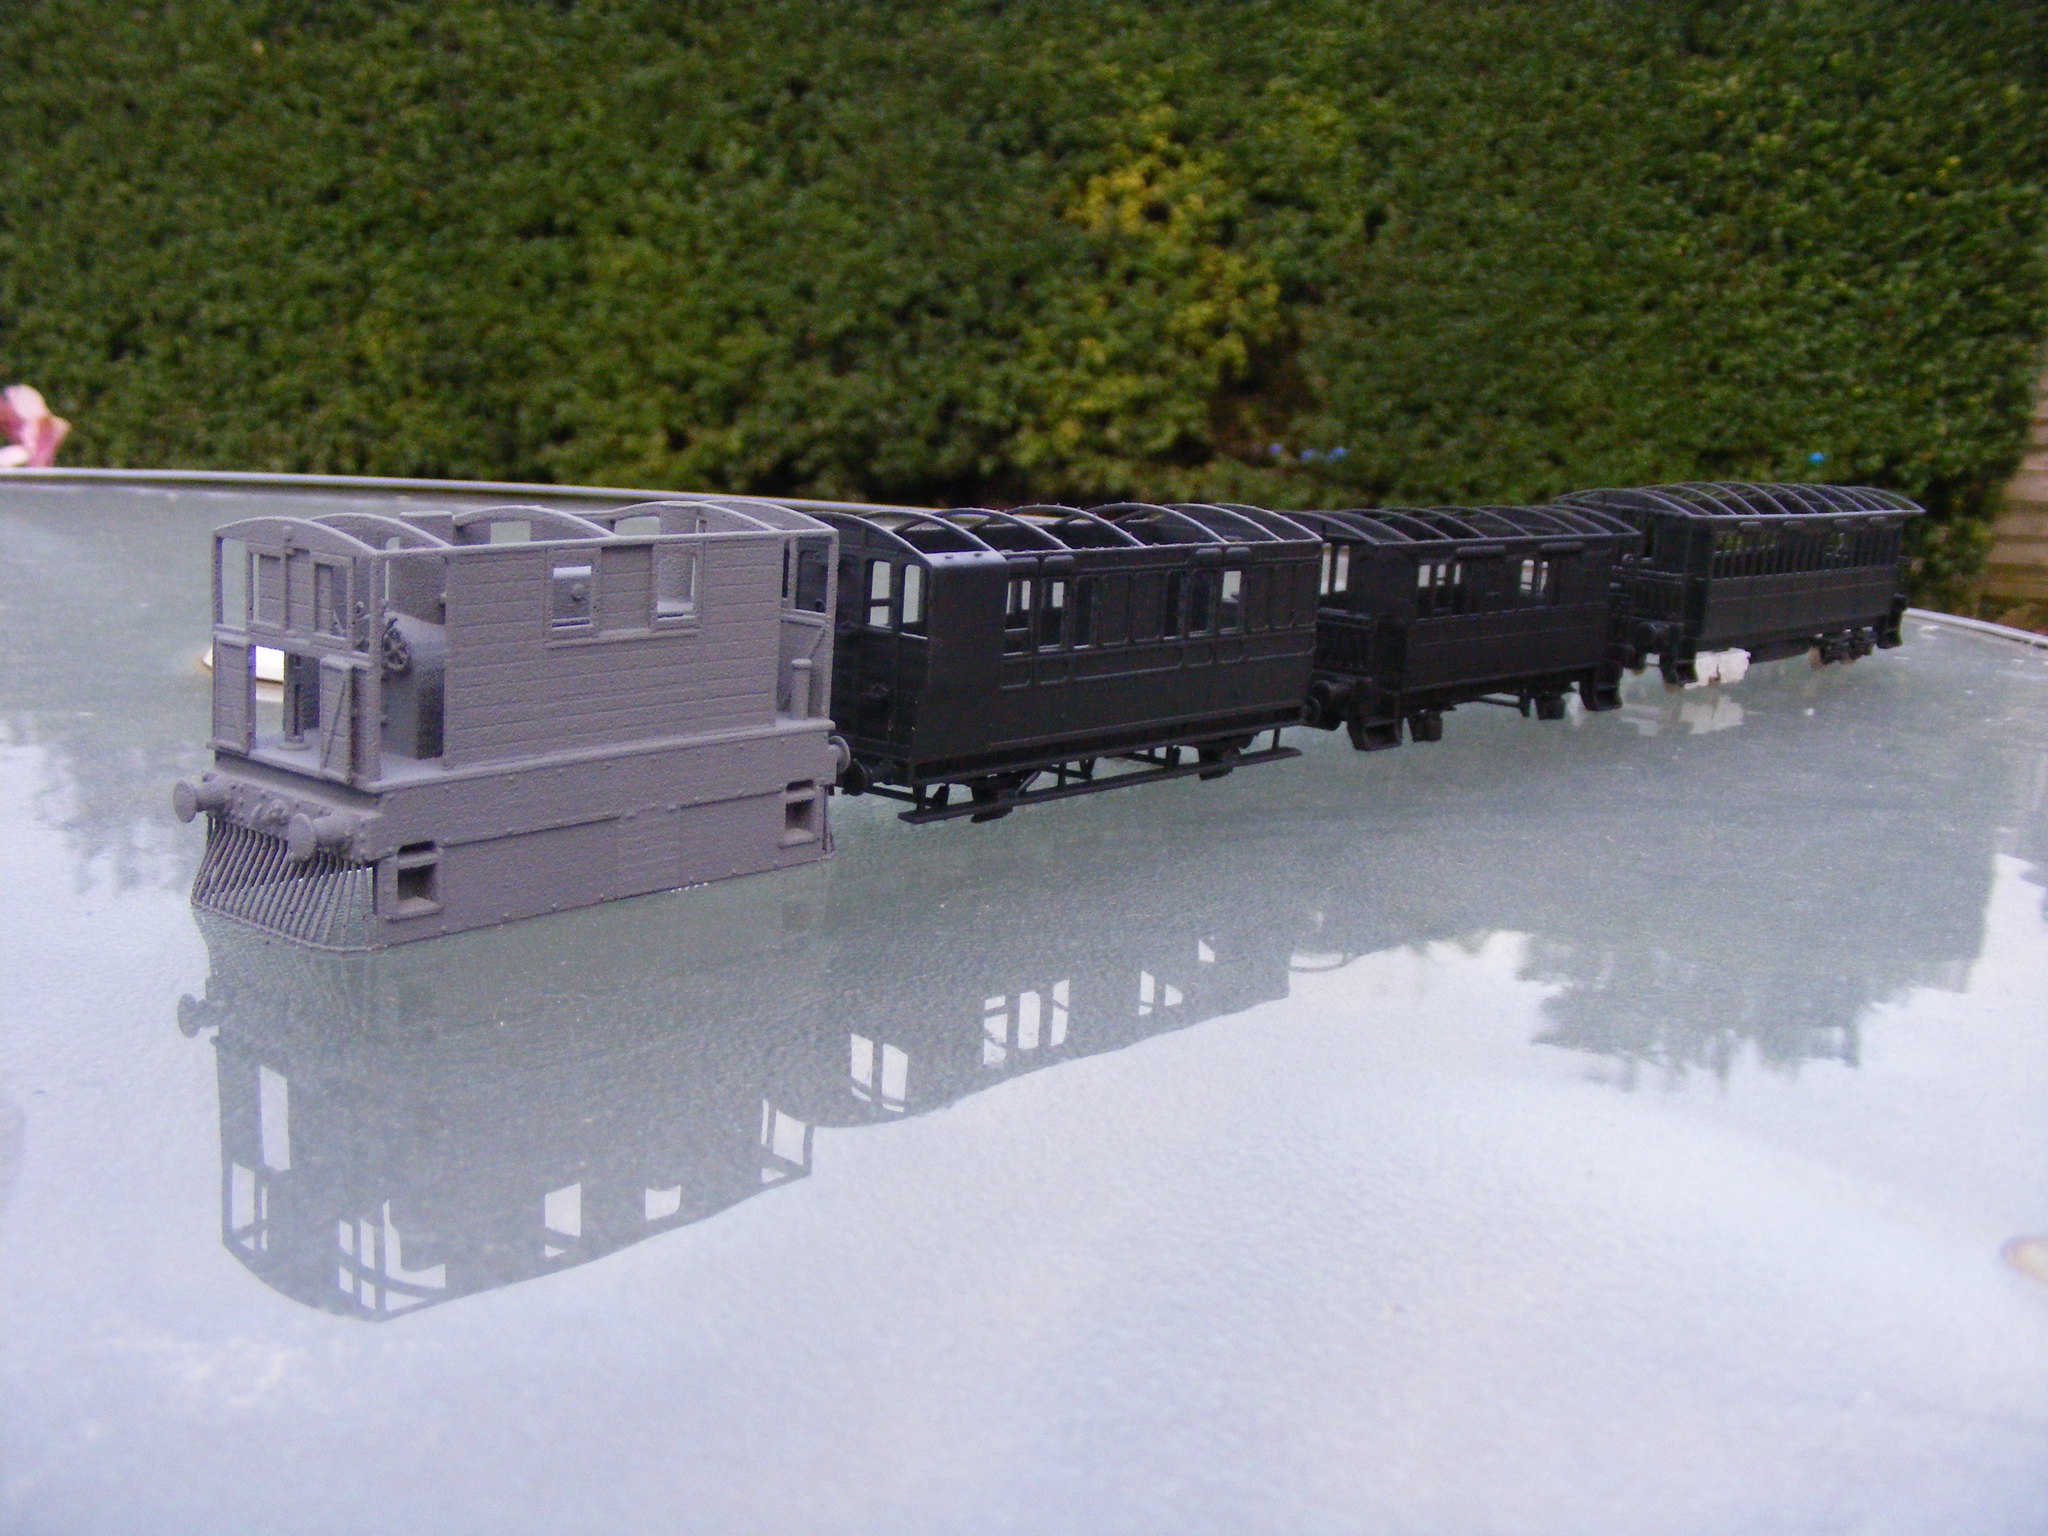
A final tramway picture with a 4mm Y6 and coaches no.16, no.6 and no.18
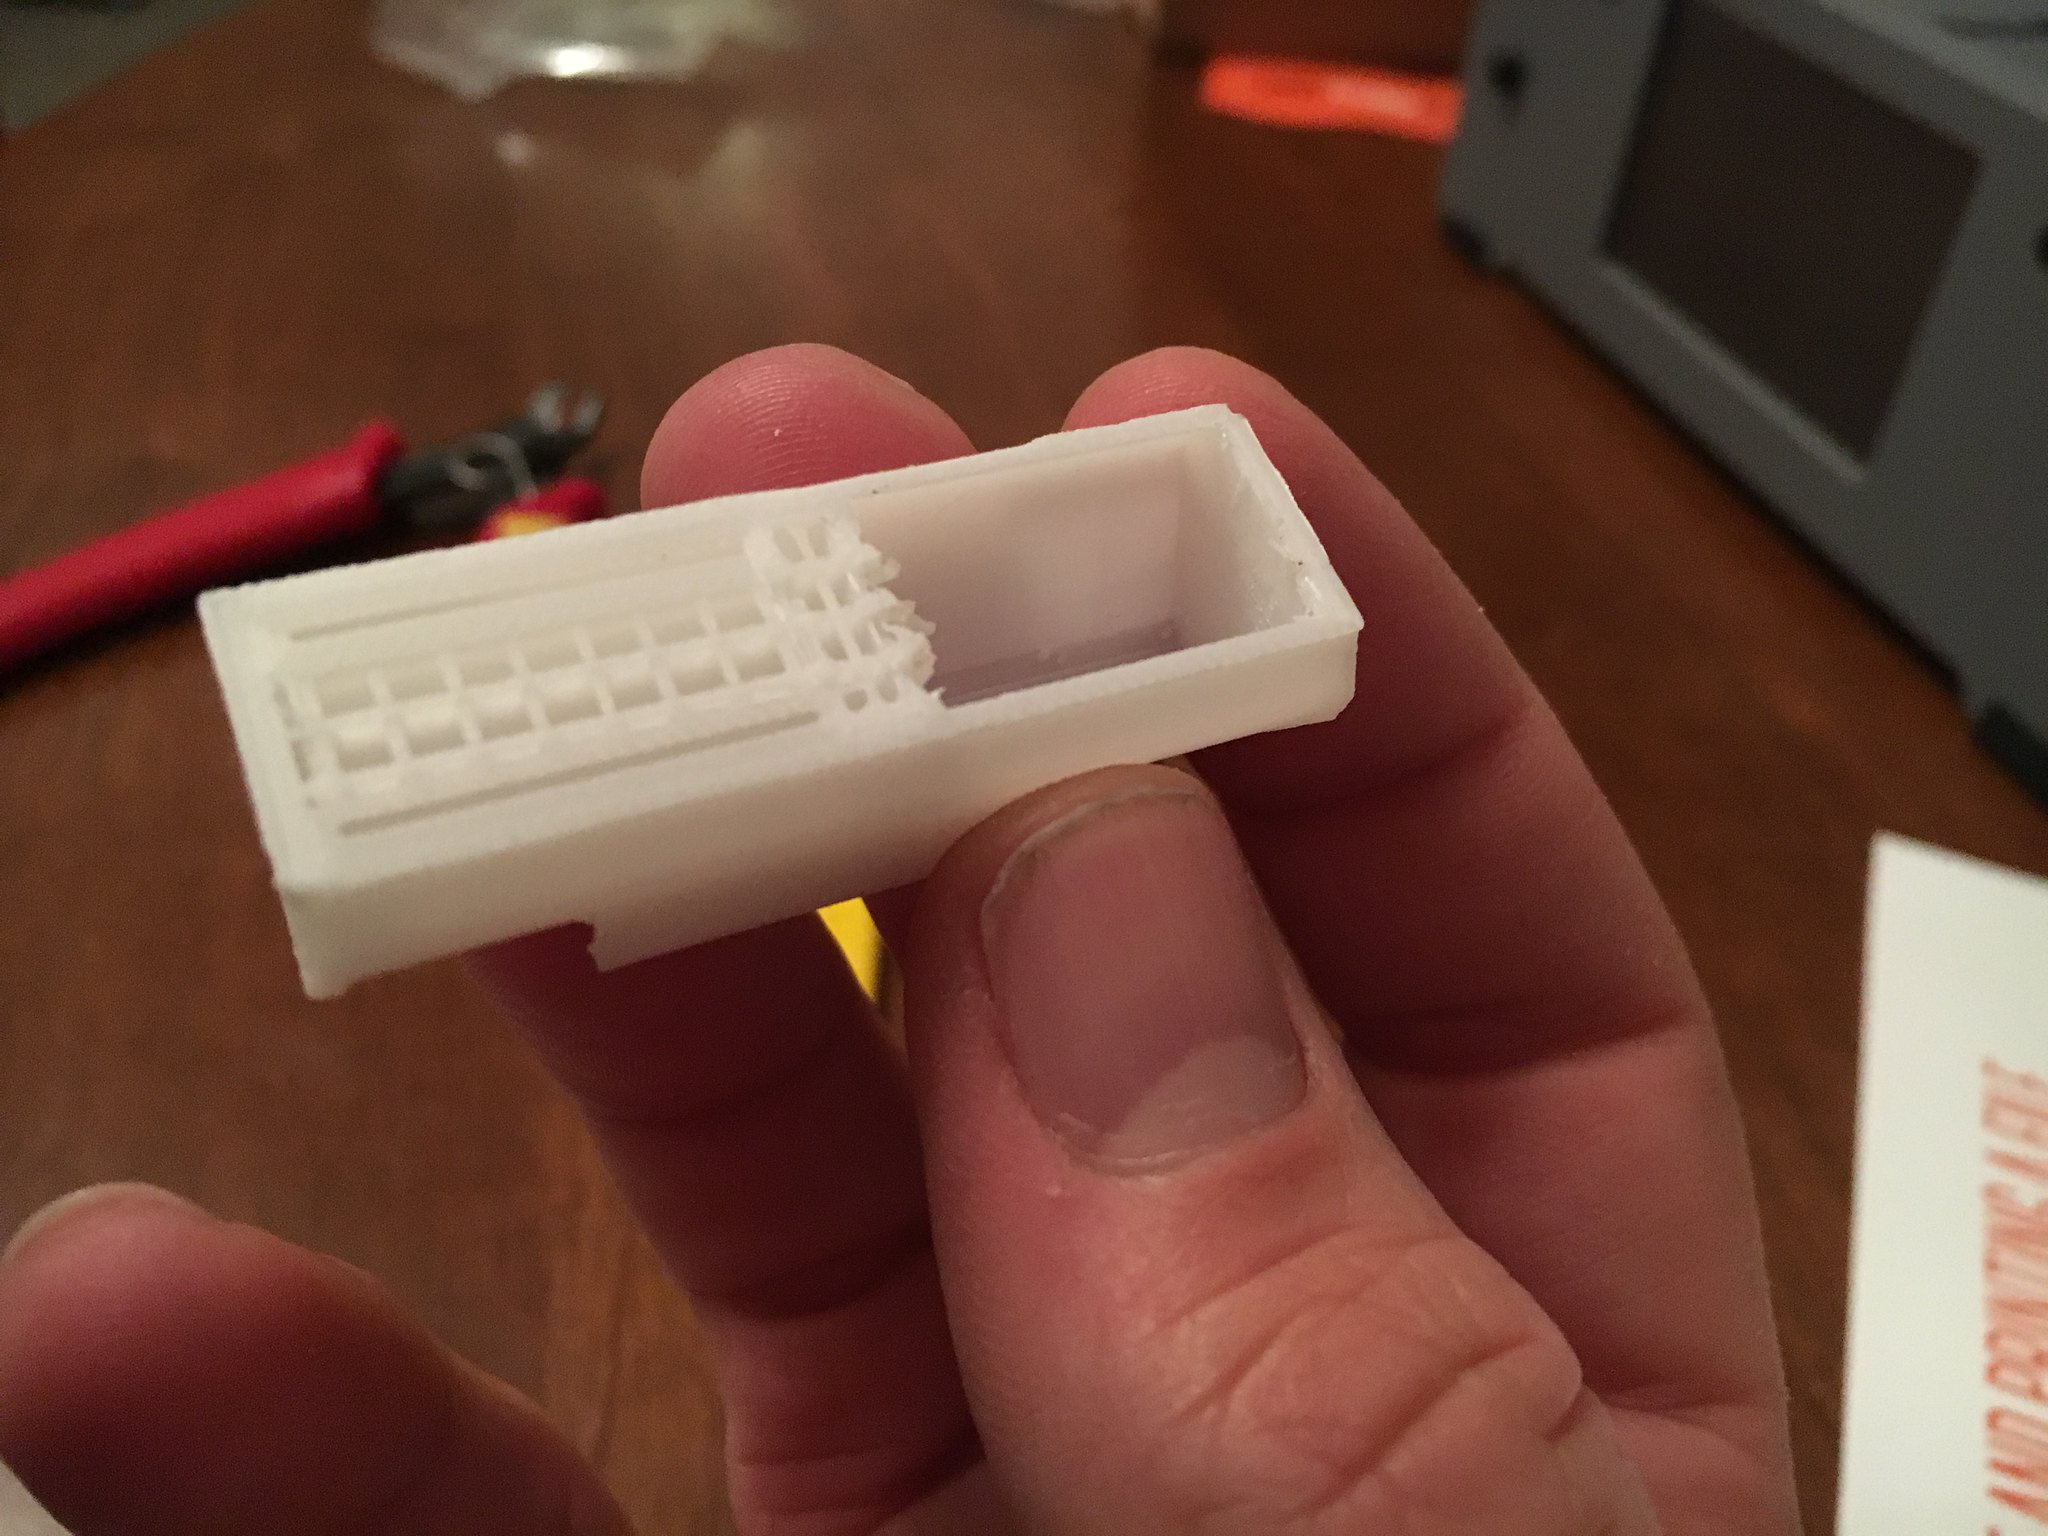
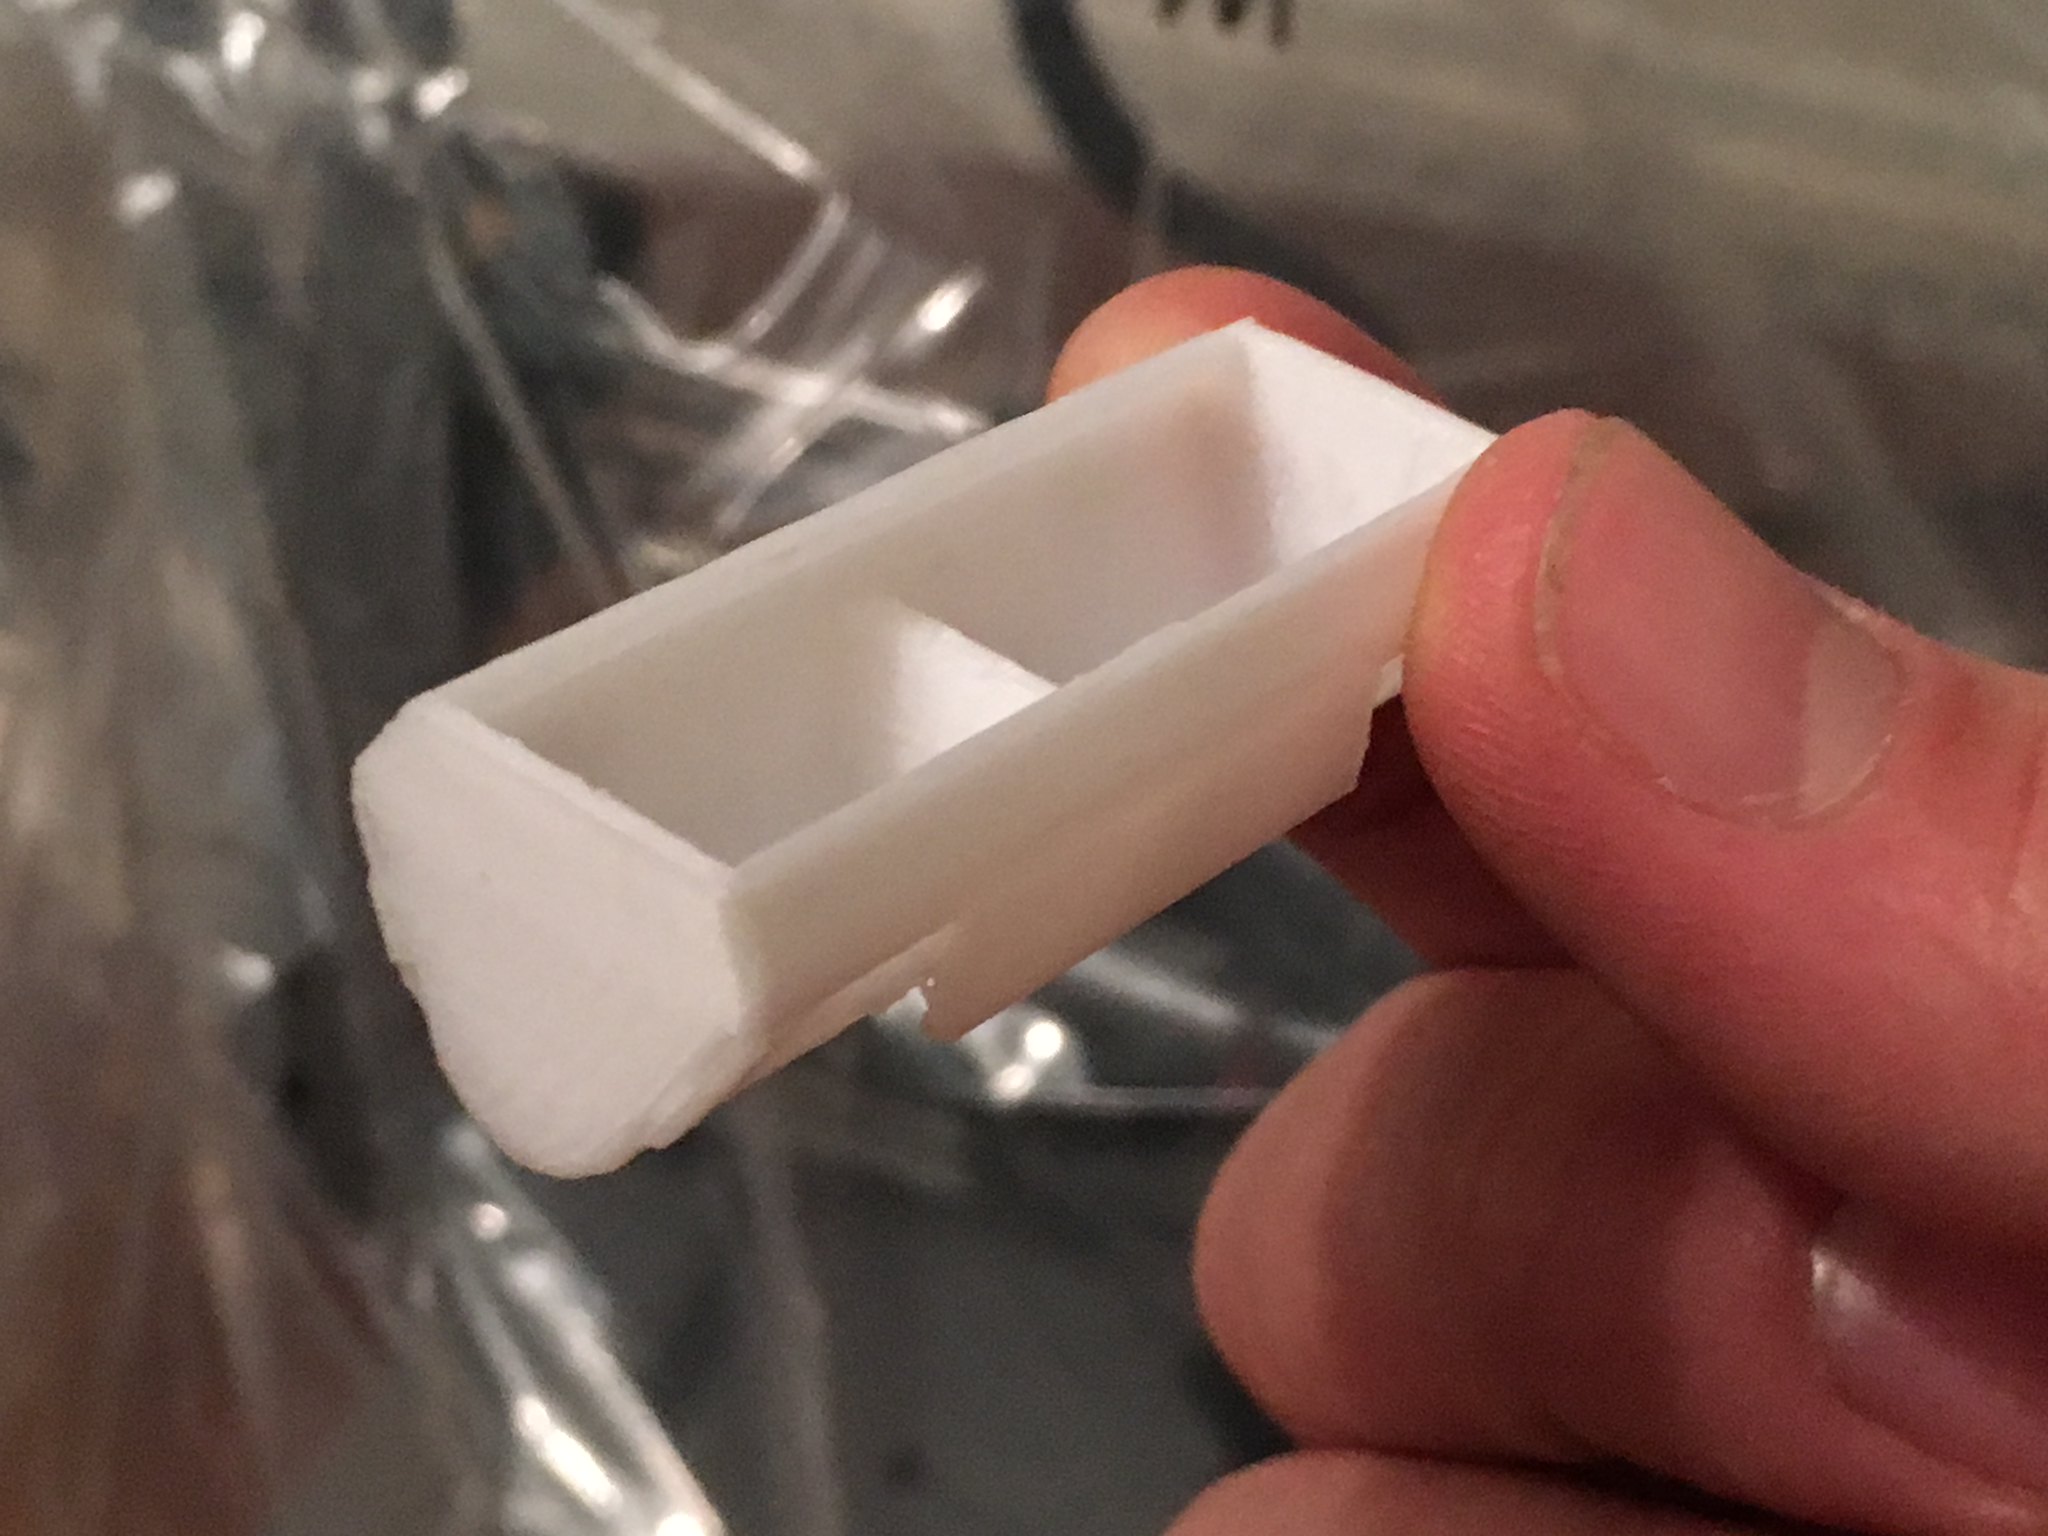
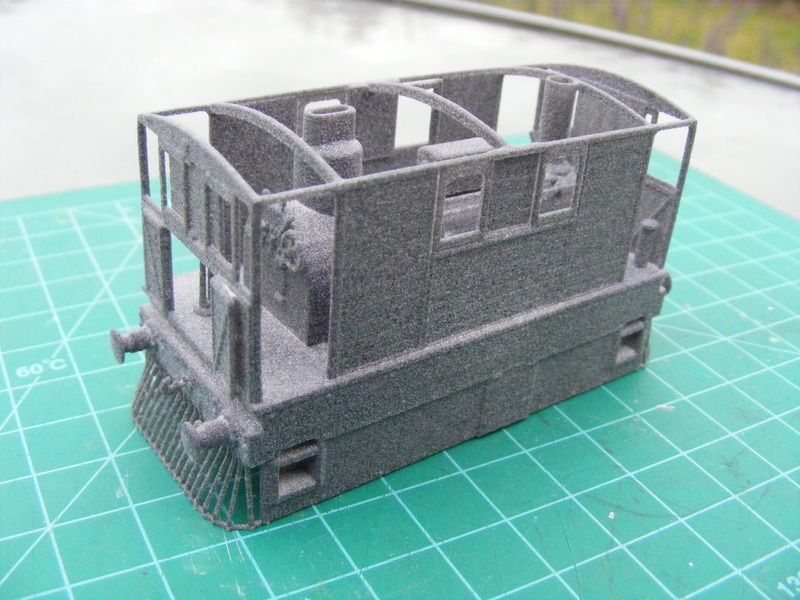
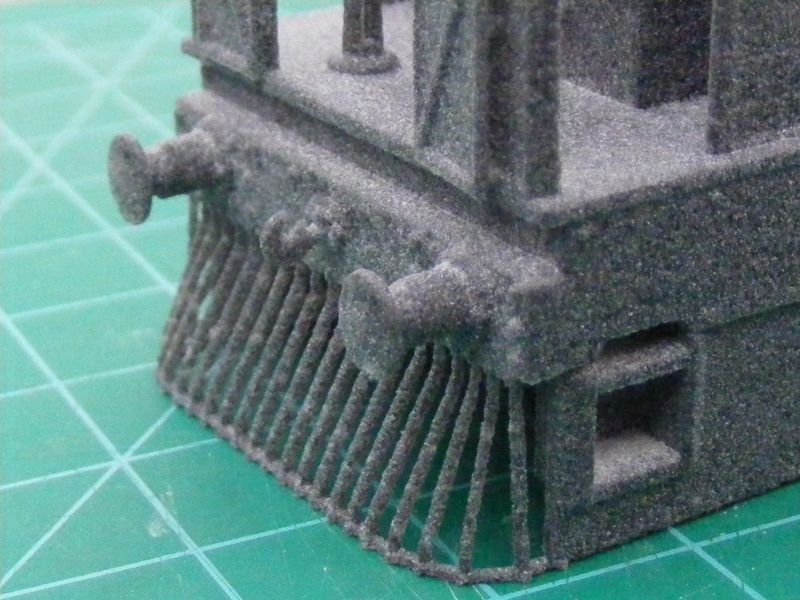
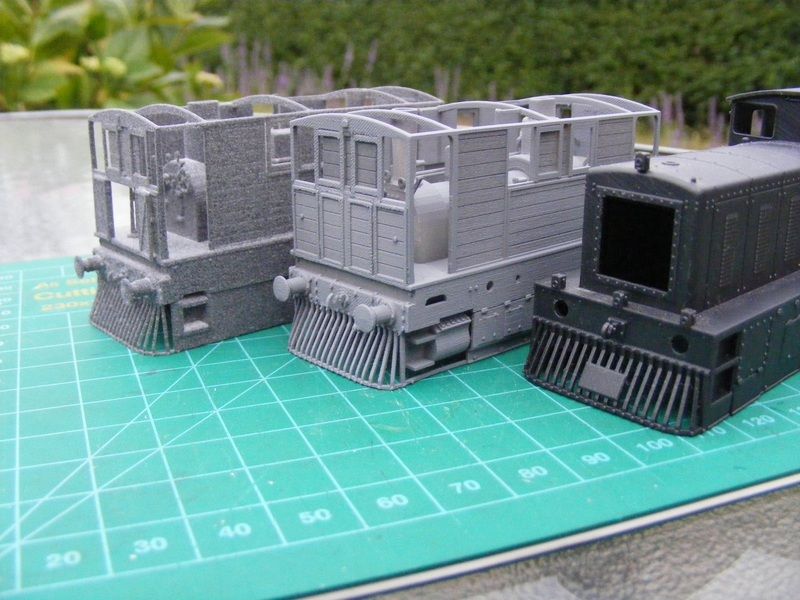
A new item of rolling stock I've drawn recently is a Presflo wagon in 1/32. I was asked to draw a hopper for another modeller and was provided with some drawings and photos so once the hopper was drawn I carried on and did the rest of the wagon. So far I've test printed part of the chassis in HPSF as a test and included some parts to see what clearance is like for working sprung buffers and suspension. The buffer test works with a HPSF head with a WSF base, for some reason with all HPSF the clearance isn't enough and in WSF the spring failed during printing/ cleaning. The chassis looks OK and the suspension works, the only problem is the original springs printed are to stiff and won't compress enough with the weight of the wagon. The hopper was printed in PLA by a fellow modeller and will need a bit of tidying up on the top as this was covered with support material as the it was printed upside down to avoid needing a lot of support material (I was going to get a PLA print from Shapeways but they wouldn't print it as the wouldn't be able to remove the support material from inside the model - even though the model didn't need any support material inside). I think the next print would be best done without the top being printed and adding it from Plasticard. I've had a top hatch/walkway printed in HPSF and this worked well with the detail of the hatch fixings printing well.
 1/32 Presflo chassis test print
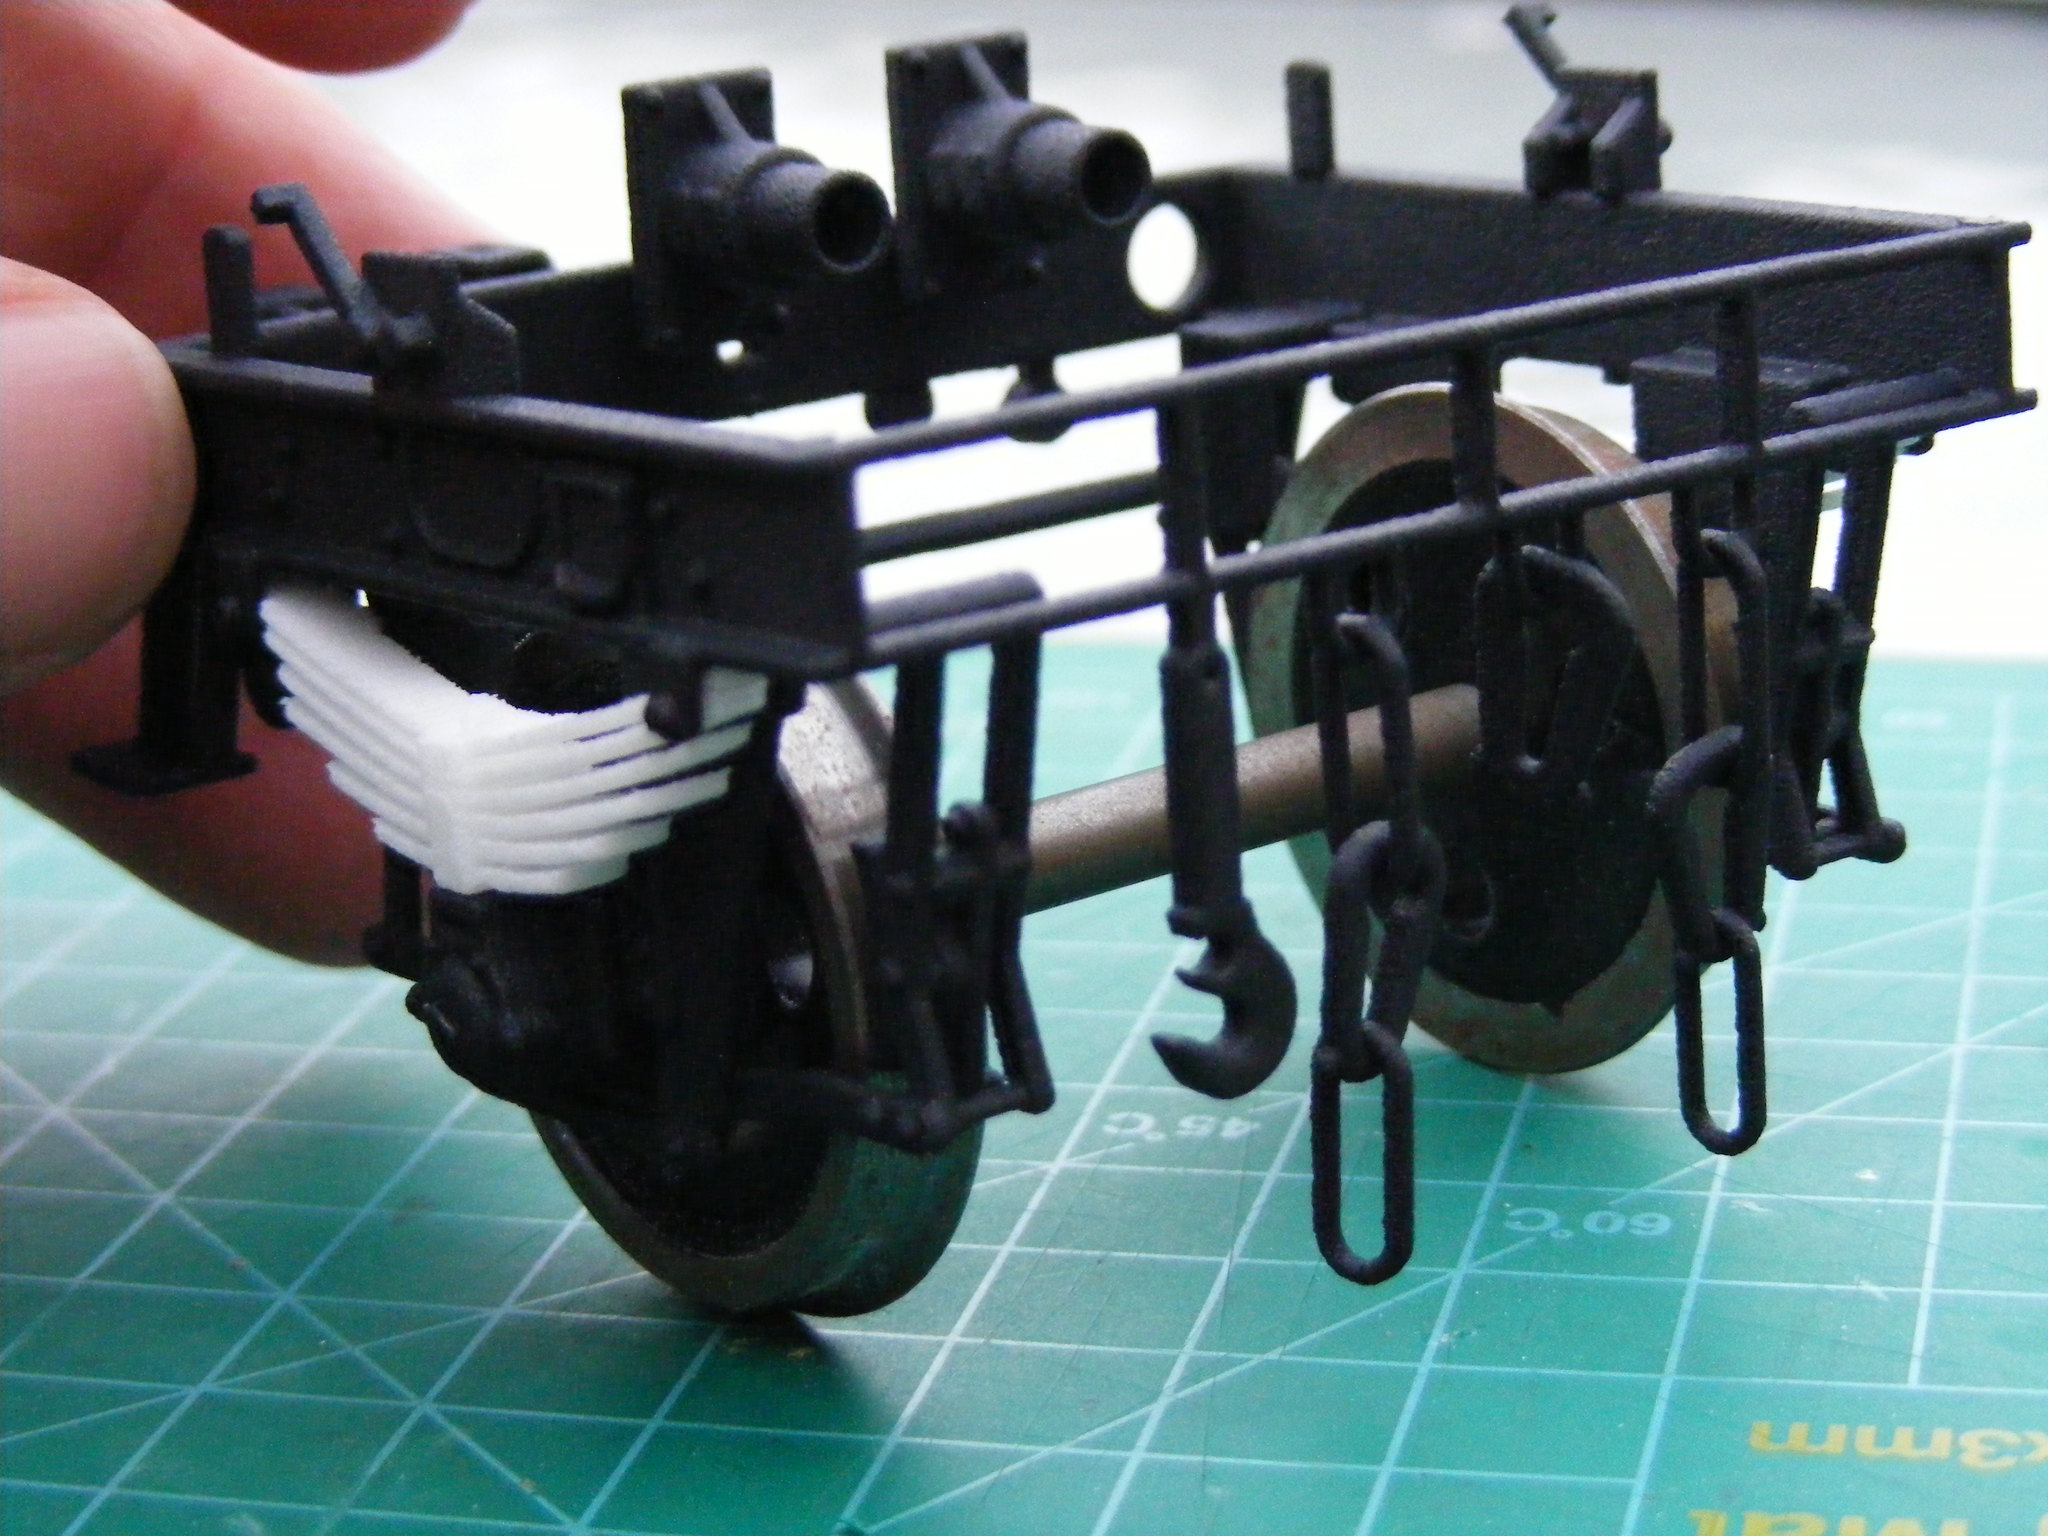 1/32 Presflo chassis test print
-
3
-
-
I've drawn some vehicles and some railway related equipment in 4 and 7mm.
Below is a picture of a 4mm shunting tractor and a JCB Loadall. I've not got round to painting them yet, both printed by Shapeways. The JCB is printed in WSF and the tractor in HP strong and flexible.
-
2
-
-
I've been trying different materials recently.
From 3D print hub I've had a couple of hopper bodies printed, I think they were printed in Formlabs standard resin on a Formlabs form 2 printer. The chassis was printed in HDA from Shapeways.

Regarding HDA warping or bending I've found it softer that some of the other materials and can distort if left under stress. I did a n gauge 25 shell and the bodyshell side walls were on the thin side and they warped. More complex shapes like bogie sideframes tend to be more stiffer by design.
Another new material that shapeways are trialling is HP strong and flexible. The material seems to be like a finer version of WSF that can be printed using the same thickness's as FUD or HDA.
The picture below shows the 3 different materials on similar models.
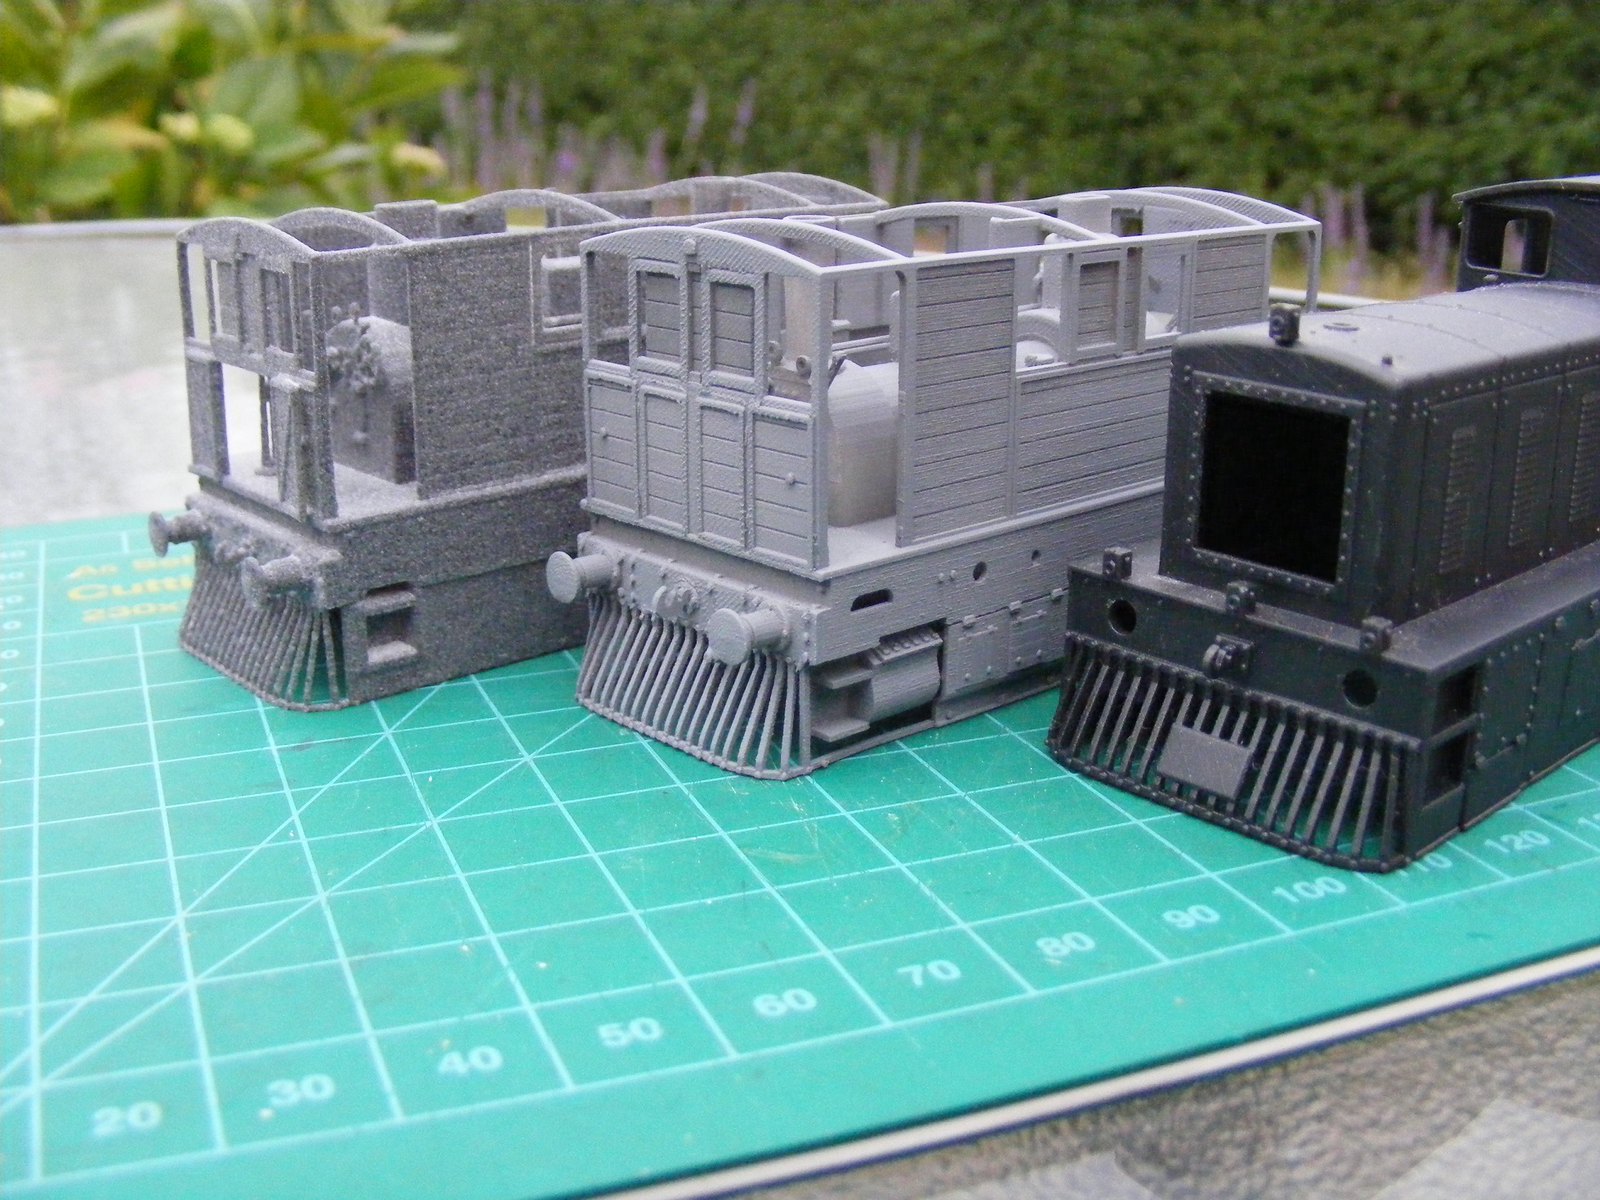
Left to right HPSF Y6, FUD J70 and HDA class 04. The HPSF model looks slightly fluffy like a WSF model, the FUD model is let down by the scars from the support material although it does produce some nice grain for the wooden body. The class 04 looks a lot crisper with the main problem I've been experiencing with HDA is models being rejected at the printing stage because of problems supporting the model during printing (the PHA chassis above had to be printed with the support material left on as a previous model was rejected as they wouldn't be able to remove the support material. It took 10-15 minutes to remove the supports and some were fiddly).
I've used imaterialise and their Grey Resin (previously called Prime Grey) is like Formlabs standard resin but at a lower resolution/ thicker layering. It's good for making bodyshells in S Scale and above.
-
1
-
-
Brilliant.
I thought Shapeways HDA was always black? Your PAA is brown.
When you used 3D Hubs did you find that you paid the price that was originally quoted or did it go up?
The material is black, I think it looks brown as it was taken indoors at night.
Time for an update with a new material. Shapeways have started a trial with a new HP strong and flexible material. I ordered some models as a test to see what the new material was like.
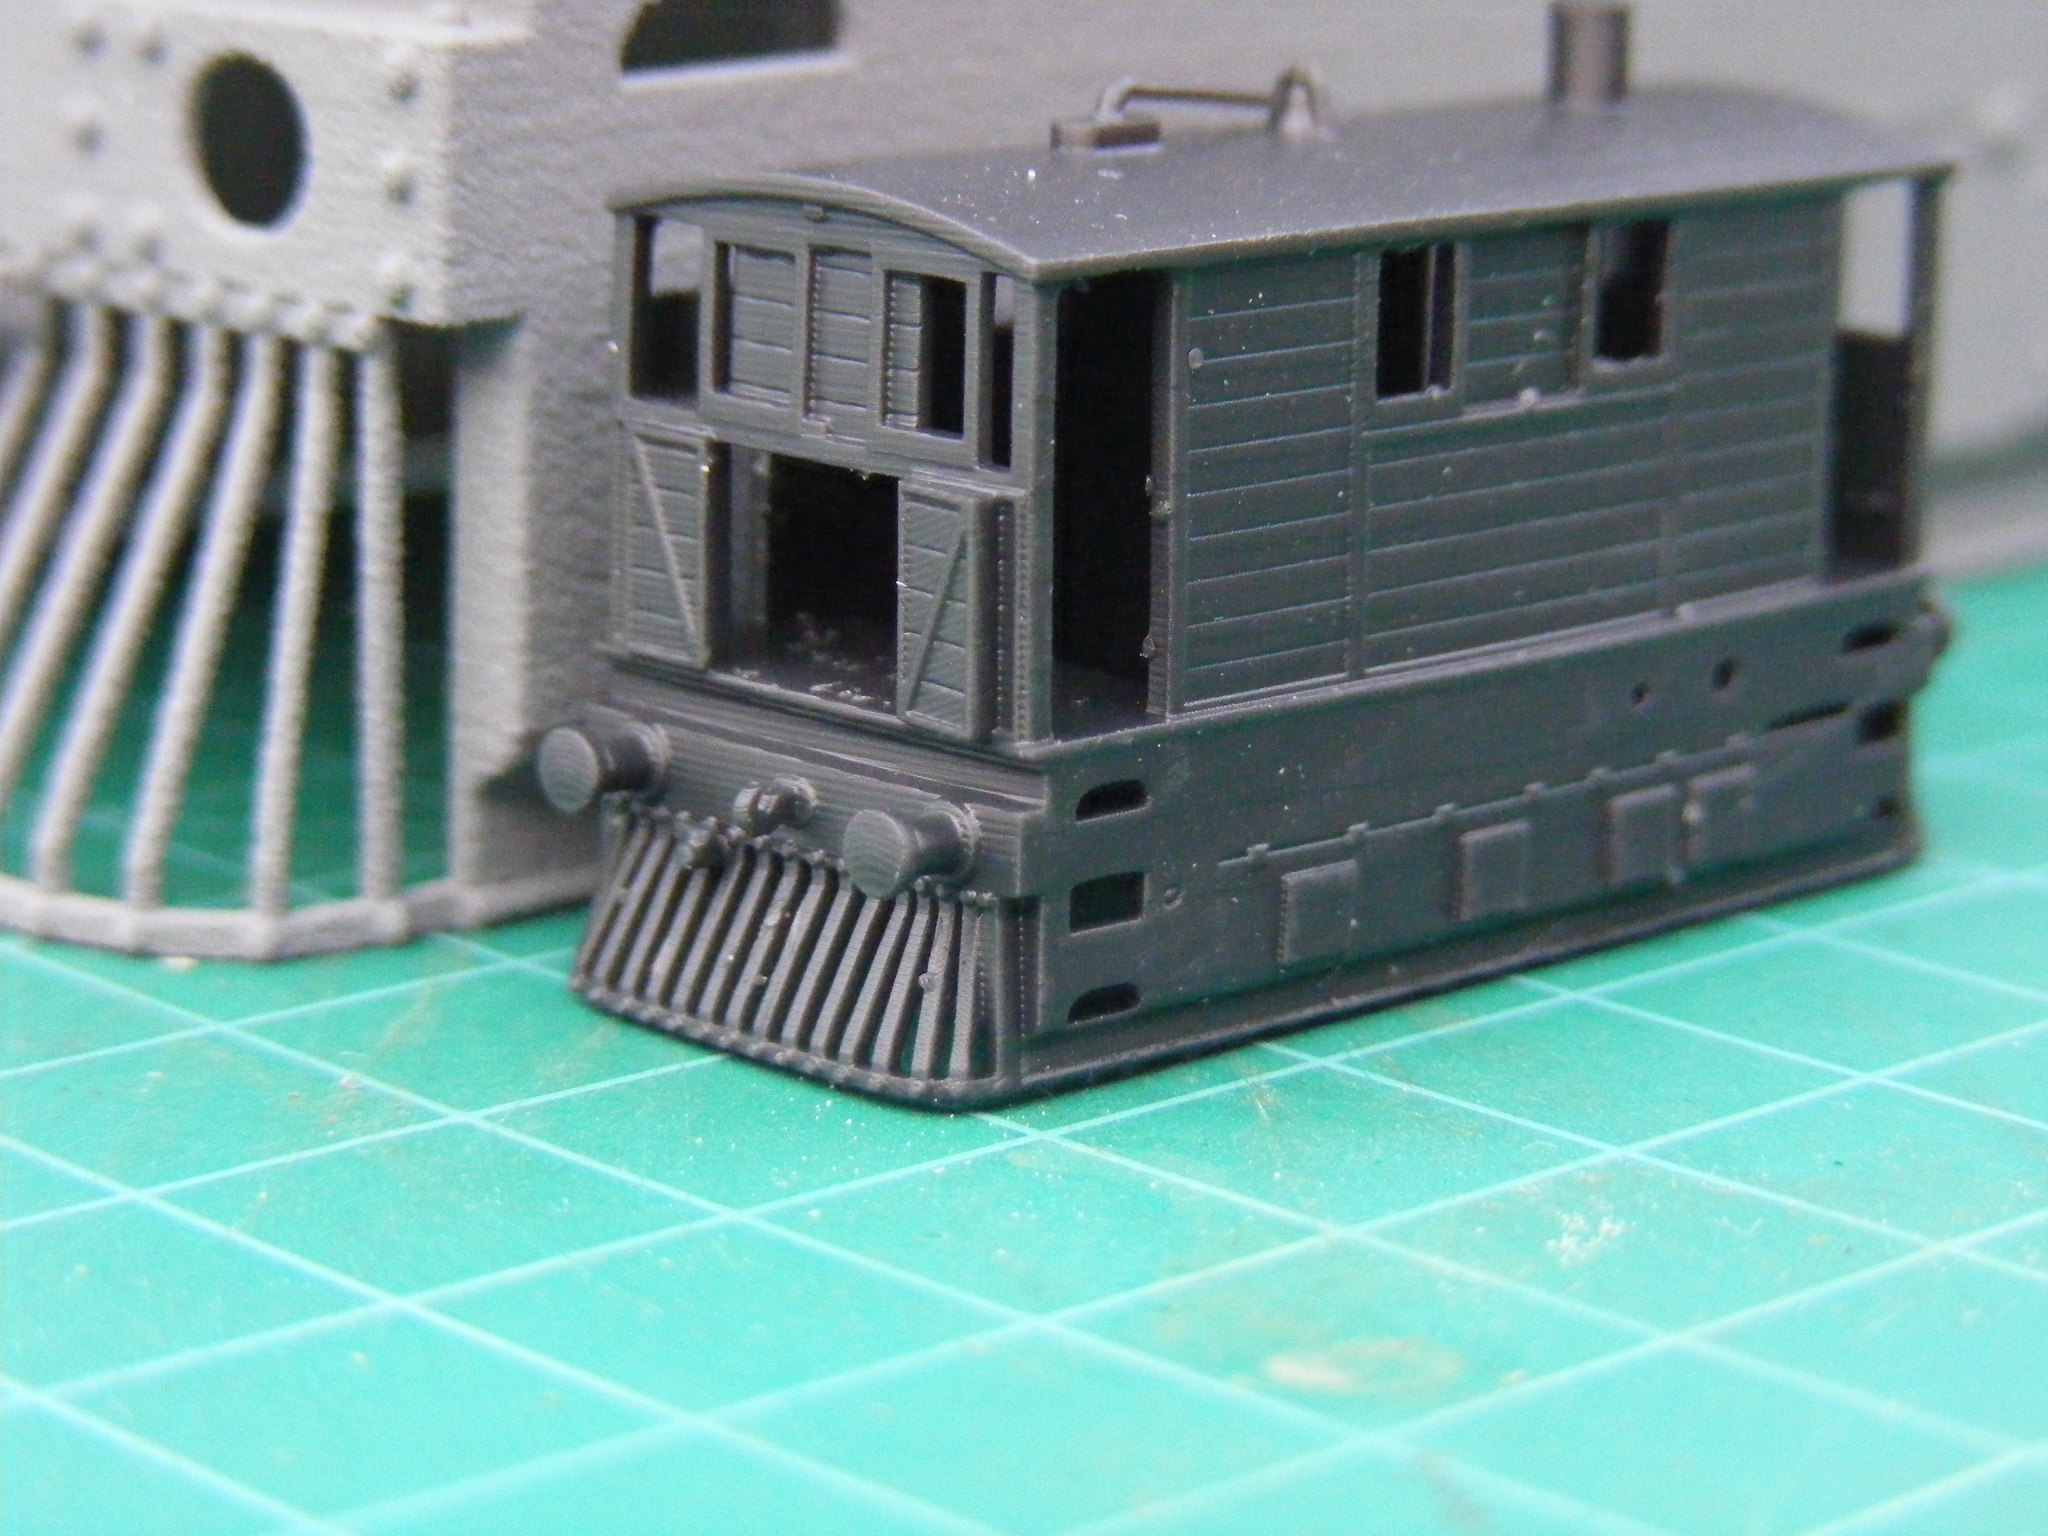
The first model was a 4mm Y6 tram,
The model has printed well with the detail visible. The model was drawn up for printing in either FUD or HDA but it came out well in HPSF.
The cowcatchers are strong enough not to break easily. The close up shows the roughness of the material. To me the material looks like a finer version of WSF. The grey speckled colour of the material makes it look more rougher than it is. The material feels smoother than WSF - more like polished WSF.
The picture below shows 4mm models in 3 different materials together - Y6 in HPSF, J70 in FUD (after a coat of primer) and the class 04 in HDA.
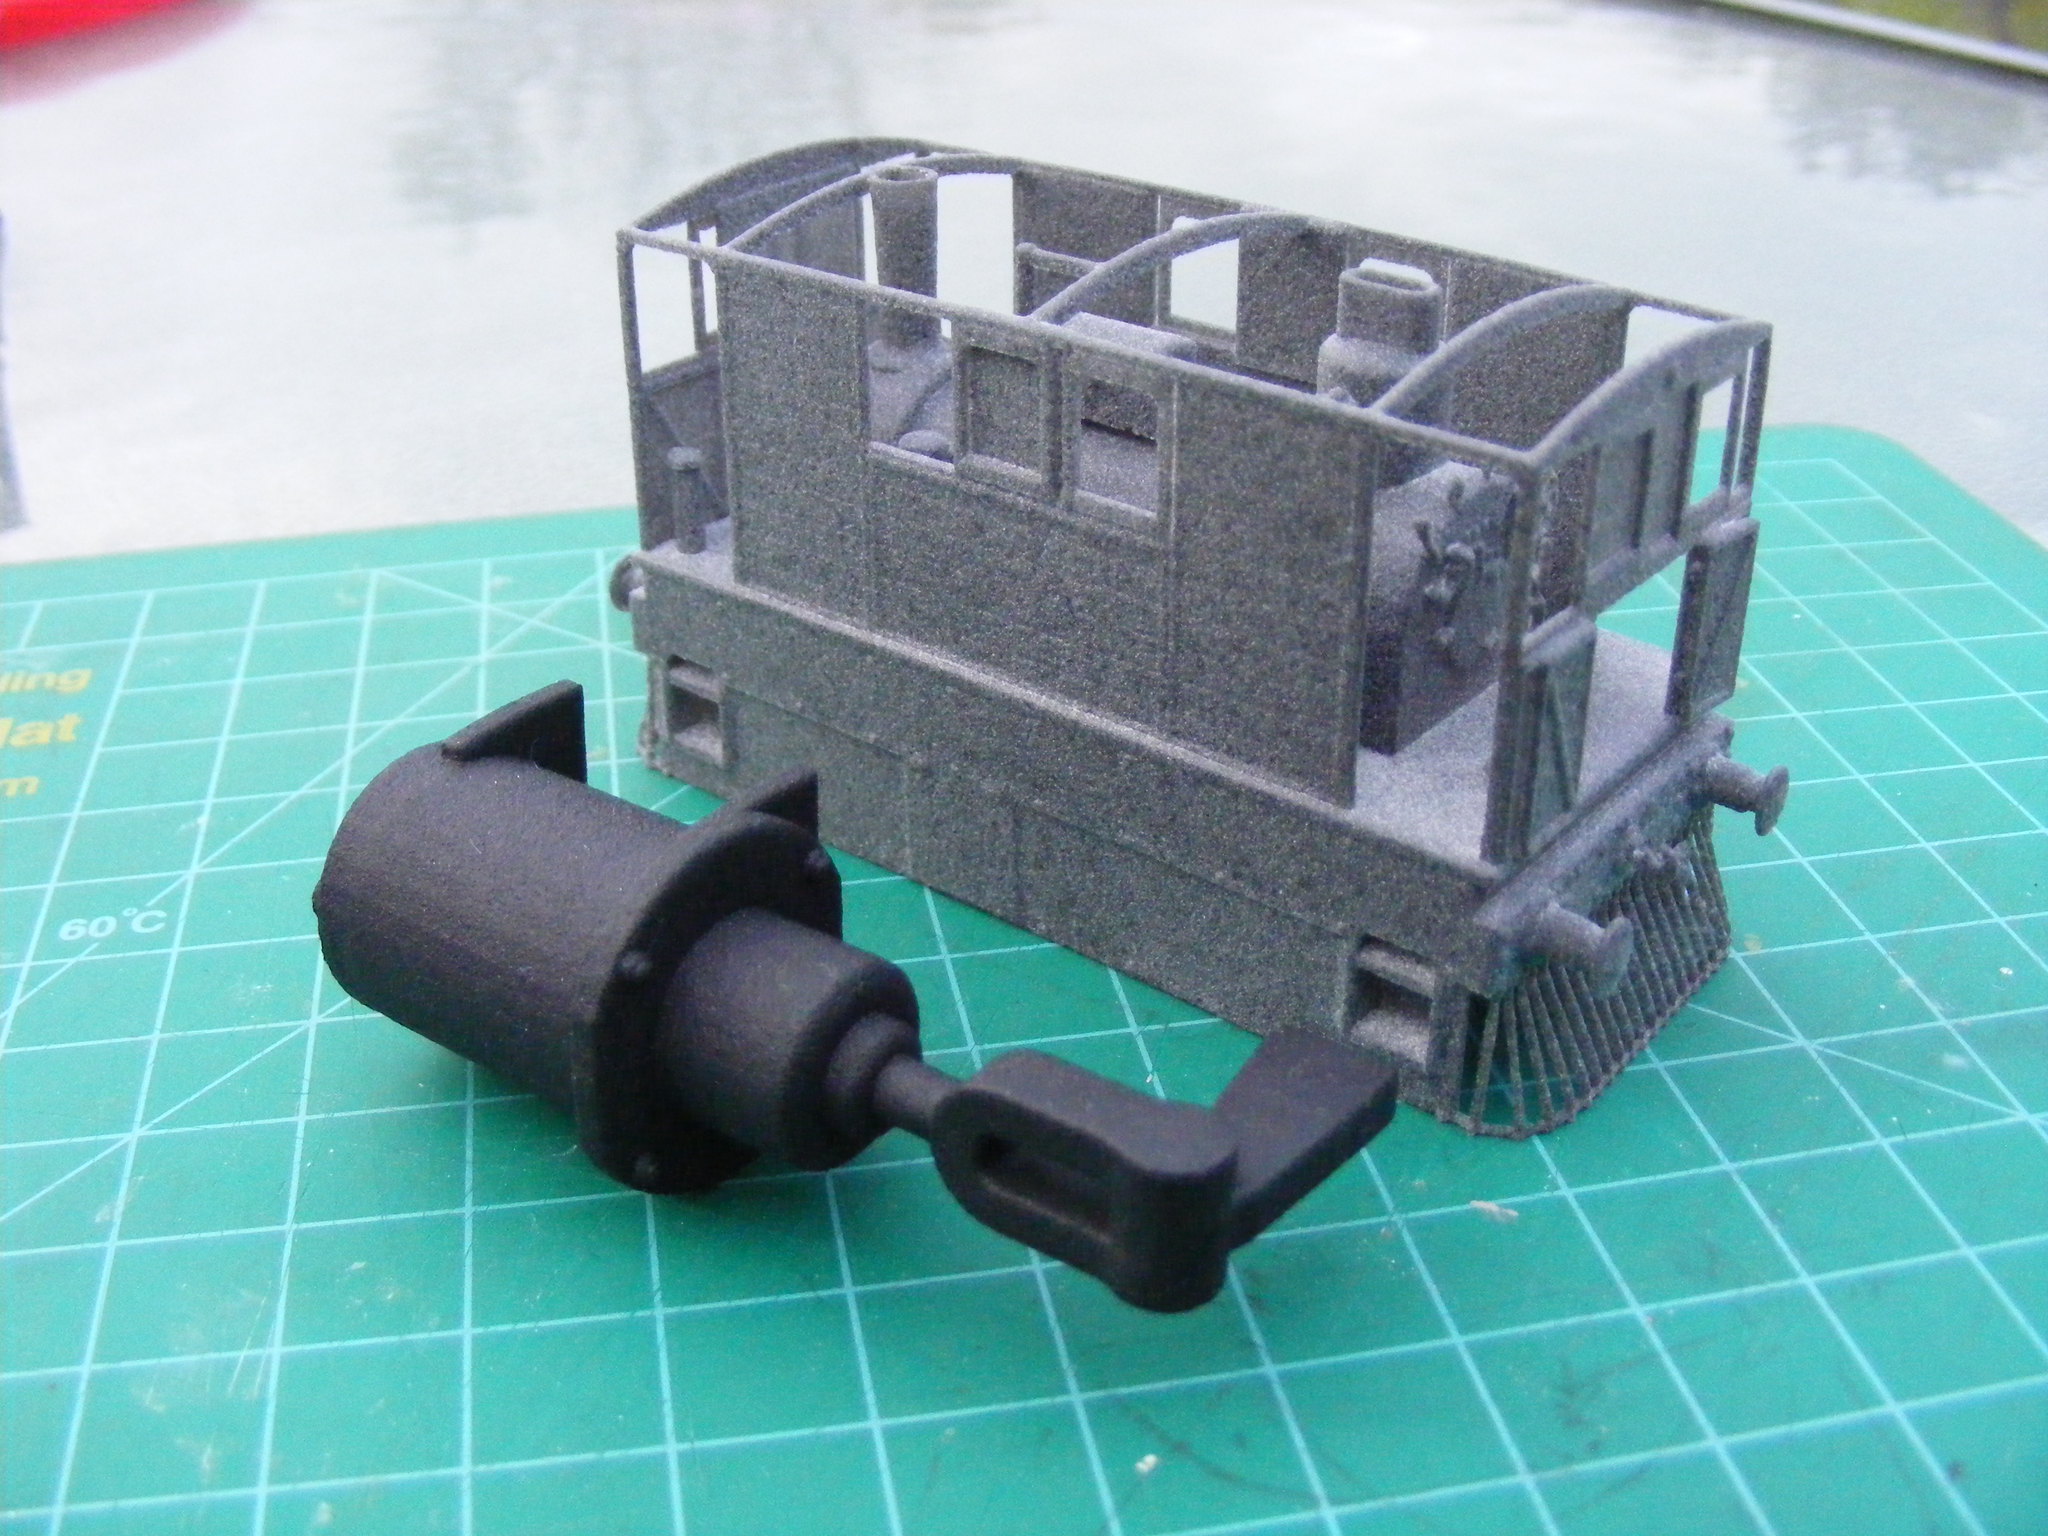
Also test printed was a set of 7mm wagon buffers. These are the same as previously printed in WSF and FUD, they again look like a finer polished version of SWF. The opposite buffer heads to those pictured have the same layering as visible on WSF prints. Also in the picture is a 5inch gauge class 37 brake cylinder. This was printed in the HPSF black material (same as the grey but dyed black). This looks smoother/ cleaner than the grey material but feels slightly rougher - I assume they clean/process the model before its dyed to remove any powder from the surface.
The final part printed in the order was a 4mm PHA wagon chassis. The model was drawn up to be printed in FUD or HDA but slightly thicker than their minimum thickness's to avoid print rejections but again the print has come out strong enough, the print is more detailed than the WSF chassis printed previously. At the same time I ordered the same chassis in HDA but the model was rejected as they said there was a problem providing support for the printing process.
The final picture shows a line-up of 4mm PHA wagons.
left to right -
1 WSF chassis with WSF hopper,
2 WSF polished chassis with FUD hopper,
3 FUD chassis with home cast resin hopper,
4 HPSF chassis and Formlabs form 2 grey resin hopper.
I'll hopefully get time to give the Y6 a coat of primer to see what it looks like painted - if it stops raining tomorrow. I'll also try ordering something in 7mm in HPSF to see what it looks like .
-
 1
1
-
-
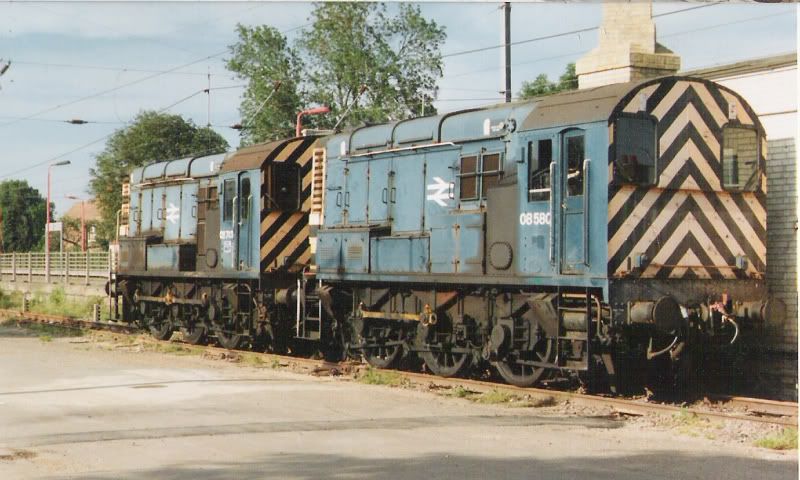
Most likely burst motors due to overspeed. This would often cause bent rods/shifted cranks due to one axle stopping whilst the others keep turning, or at least try to...
I wonder if anyone has a pic of an 08 with bent rods?
Not a bent coupling rod but below is a pair of 08's at Downham after one coupling failed when travelling at speed between Kings Lynn and March depot.
-
6
-
-
Also got clip of the tractor in action.
http://vid135.photobucket.com/albums/q137/simon_br_blue/IMG_6476_zpsa4tkq6rk.mp4
http://i135.photobucket.com/albums/q137/simon_br_blue/th_IMG_6476_zpsa4tkq6rk.mp4


3D printing class 25 parts .... Also class 20,37, 2mm and 7mm wagons and 1/32 bogies
in 3D Printing, Laser Cutting, CAD & CNC
Posted
Have all the PAA wagons been scrapped already? Are you preserving one as part of a group?
I don't normally sell or give away my Drawing files but I can make it available on Shapeways.