


Jaggzuk
-
Posts
778 -
Joined
-
Last visited
-
Days Won
1
Content Type
Profiles
Forums
Blogs
Gallery
Events
Exhibition Layout Details
Store
Posts posted by Jaggzuk
-
-
Great to see finally your layout in the flesh, at Shildon, and my two boys loved watching the trains on the mainline. I really liked the subtle snow effect.
Paul
-
1On 27/09/2019 at 03:58, martin_wynne said:On 27/09/2019 at 03:58, martin_wynne said
Here's another Templot corruption -- 1 buffer stop for 2 tracks:
© National Library of Scotland
Here's a link to the full map: https://maps.nls.uk/view/126518903#zoom=4&lat=6551&lon=9998&layers=BT
cheers,
Martin.And here is another unusual trap point which I saw whilst working at the other junction triangle near Southport, on the Southport to Liverpool line. It can be seen on the same map linked in Martin's
 ost above.

-
 7
7
-
 1
1
-
-
Hi Paull, Thanks for the post. My layout topic has been very quiet, in the main, as I have not done any further building for over a year now! But the layout is still played with most days by my 2 boys (and me ;-) ). Just other commitments have taken my creative time.
With regards to your question, not 100% sure if you are wanting a new whole new layout or to modify your current one? Either way, gradients need a lot of space to a) look good and b) are shallow enough to allow most locos to drive up them.
The key element of my layout is that I achieved the overbridge height by creating gradients which go both ways, positive and negative 2% grades. That means my ground level is actually +40mm up from the baseboard. This may create an issue for you and your folding layout baseboard.
Also, I have nothing less than 2nd radius curves.
Let me know what you are thinking, but perhaps start your own Layout Topic and then we can all help out with ideas and advice.
-
Cheers Lee. A bit shocked that is has been over a year since my last post!! That is not to say the layout has stood still, well scenically it has, but it is played with most days & weeks by the boys (and myself) and some of thier buddies come round and join in the fun too.
Usual excuse on progress, too many other projects on the go, plus a bit of a lost mo-jo! But it is odd to read your post as today I spent a bit of time making some ballast loads using Vermiculite (a trial material due to it being a very lightweight material ) with my eldest we had some loft over PVA/Water mix glue, so ended up doing some ballasting; about 2 x 1/4 radius worth. Mo-jo sprung back into life, still too many projects on the go ha ha.
As for the layout, I think the key thing which has been proven to me over the last year is that a finished layout is not important for kids, but a layout where trains can be run and all the track electrics are complete is the most important aspect. Their imagination fills in the gaps.
I keep getting asked for a turntable, which might one-day get added to the fiddle yard board. Might use it as an excuse to play with motors and gear with the boys.
If you want my SCARM plans, let me know, no worries about sharing it.
All the best with the plan and build.
-
1
-
-
18 hours ago, russ p said:
I was done to test the ride of mk4s on the ECML north of York before it was electrified.
I believe the test was run well over 125mph
Scroll to the bottom of the page
-
3
-
-
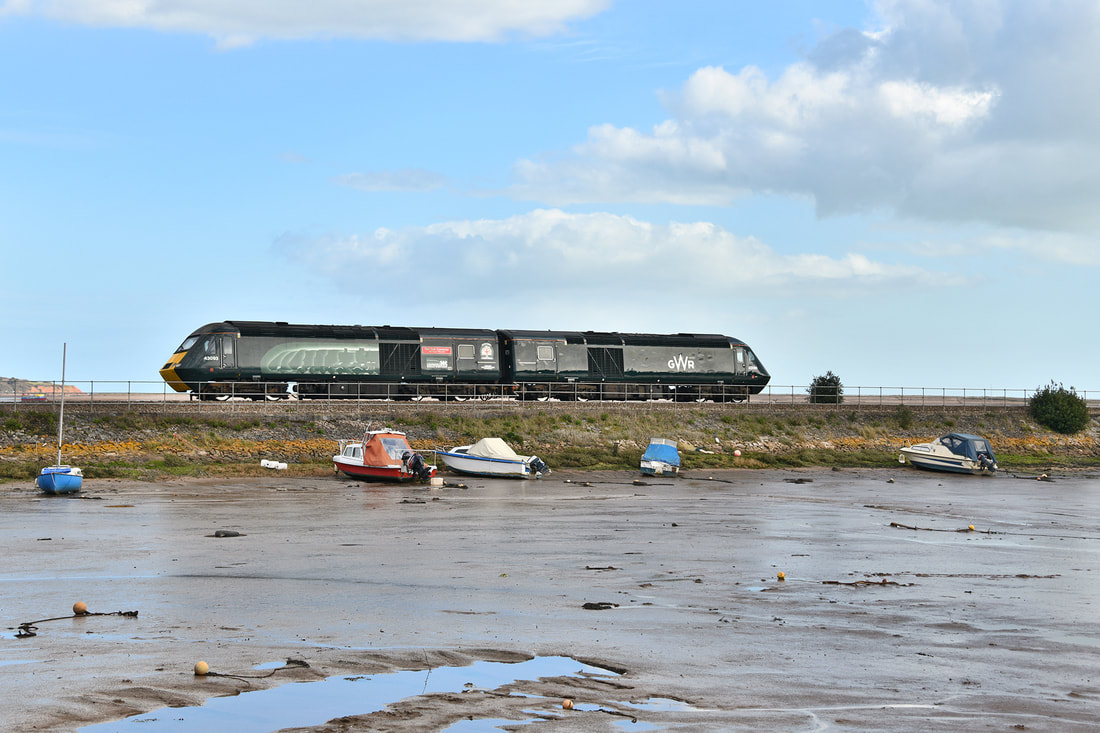
Not an unusual photo, but sometimes we forget that we can run just locos/power cars as a motive power movement on layouts.
http://www.railway-centre.com/uploads/7/2/2/3/7223531/pod-11-03-19_1_orig.jpg
-
6
-
 1
1
-
-
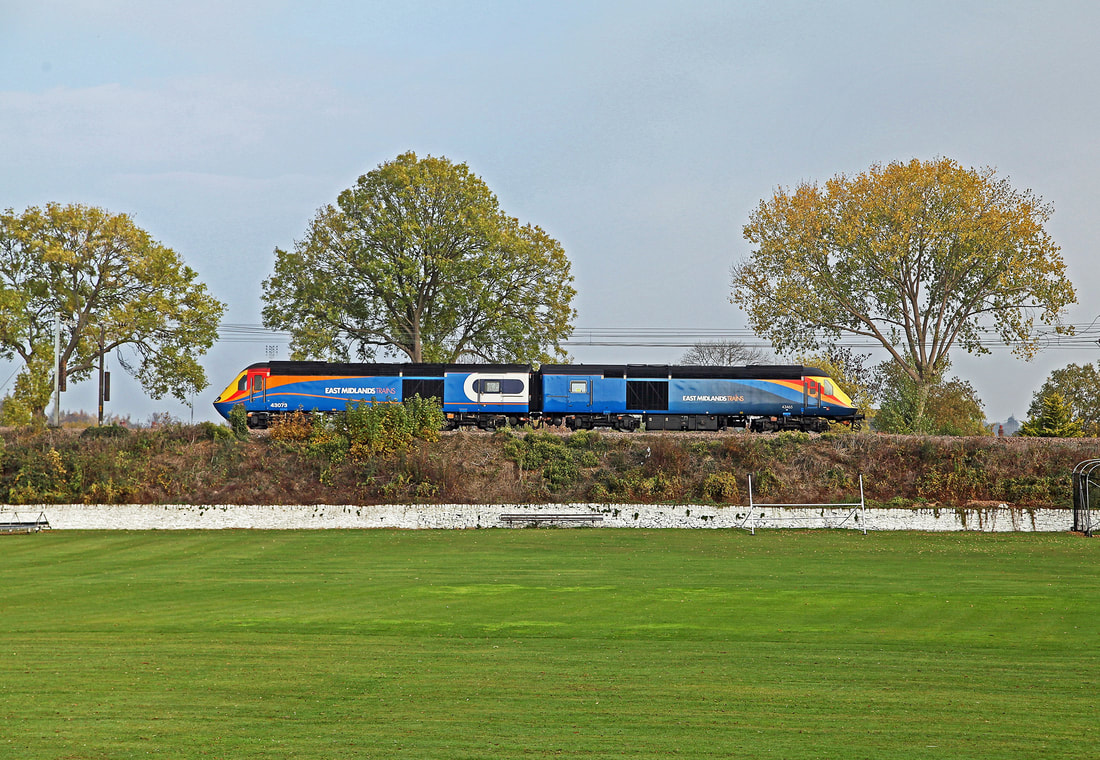
Just in case you can't afford any MK3.
http://www.railway-centre.com/uploads/7/2/2/3/7223531/pod-07-11-18_1_orig.jpg
Citation "07-11-18. On 6 November 2018, two East Midlands Trains HST Power Cars are captured in transit from Leeds Neville Hill Depot to Derby Etches Park Depot, and recorded heading past Sandal & Agbrigg. Leading (right) is ex-Grand Central No. 43465 hauling original EMT liveried No. 43073. The with subtle livery differences can be seen. photo by Peter Marsh" http://www.railway-centre.com/november.html
-
And so your better solution is what, Dad-1 ?
I agree that they require careful installation and set-up and in some cases axel braking, but the handsfree operation far outways any negative aspect and my 8 year old can shunt quite happily now compared to the standard RTR tension lock coupling.
The closer coupling that can be achieved from Kadee is also significant visual benefit.
I know other systems can work well too.
-
Yes, that looks pretty much identical to the one I got form http://www.airbrushheaven.co.uk/. Just different colour. Nice with two airbrushes too.
An interesting obs, is that Airbrush Heaven has stop selling online, while a new supplier sourced.
Hope your purchase goes well, it is a nice piece of kit.
I would also recommend a spray booth like this https://www.ebay.co.uk/p/25w-Portable-Airbrush-Spray-Paint-Booth-Filter-Extractor-Kit-Air-Brush-Art-Craft/19023753932?iid=323445097852&chn=ps. Shop around as they price varies a lot
-
Hi Waverley47708
No help on the running issue, but interested in how you made the conversion. I have seen some images on the web, but the one I had links to have been lost due to the Photobucket issues. How did you fit the small cog to the motor drive shaft? Any photo you could post?
Kind regards
-
Awesome wagons! The rust finish in side and out is fantastic. What I cannot tell is how you gut the rusty scrape marks. Have you scratched off the blue paint to revile the rust brown underneath or applied the brown with something hard like a cocktail stick?
Can wait to see these loaded up!!
-
You could also try 2 rows of 3mm cube magnets between the sleepers. See my ramblings and trials on this http://www.rmweb.co.uk/community/index.php?/topic/106602-family-8x4-oo-layout-trains-running-again/?p=2878762
The two key things to note are:
- The longer the magnet zone is, the less accurate you have to be when performing and uncouple action.
- The higher the N## number is the stronger the Neodymium Magnets will be (and more expensive). N35-N42 will be fine for Kadee from my trial. If too strong the magnet will pull the wagon coupling. N50 will most likely be too strong an effect.
Always mark up the magnet poles when working with rows as this is key in their correct placement es
Use superglue to fix and one row at a time.
Try to ensure uncouple zones are on straight track.
Hope this helps.
-
I have yet used it on the layout, but I managed to find some hanging basket liner with a nice mix of green and brown fibres. Obvious now is the time to source it as the garden centres will have plenty of options. You may also find it on the roll, which will suit your large area to cover.
-
I am intrigued on the Keen/Kadee mix for coaches.
My understanding on how the Keen close coupling work is that the tie bar forms a rigid link between the two sliding parts of the coaches couplings which opens up the gap between the coach ends. How does this wok with a Kadee which has a flexible head?
Could you expand on the working solution please Phatbob? Any photos would be much appreciated.
-
Love the atmosphere of the depot and the IC125 mk3s are awesome. The interior detail you have added it really shown to its best at night time with the platform lights.
-
1
-
-
Every once in a while you come across a little cracker here on RMWeb and for this is one of those!!
The detail is just superb and very life like, your scrap is as JLTRT. For me the big pile of mixed scrap, the compressed bales and the scrap in the blue hook lift skip (post #1) are awesome.
I am in the process of creating some Bachmann POA wagon loads of scrap for my boys layout and you have provided some great inspiration. But I am a bit stumped on some of your techniques. Would you mind sharing the how you created the following?
- The compressed bales
- Loose wire in the yellow skip, is it painted wire wool?
- Is the split rusty scrap metal at the bottom of the concrete wall real metal drill swarf? (seen in post #1)
For your big pile of scrap metal, did you pile then paint or paint then pile the bits?
Thanks
-
Cheers LongRail for the advice. So apart from the airborne paint particles would this still be advisble for water based paints? I guess for small lungs it is good advice.
I shall aim to use the extractor pipe connected to a window when using thinner based paints.
-
Not much to report after the Easter break but there has been lots of playing trains, which is great.
A few more wagons have Kadee couplings and we have made some Parkside kits together. We also tried out the new airbrush spray booth,
which was great and now means we can airbrush indoors without fear of weathering the whole room. I have also had a moment to try out some photos of one of my favourite views across the layout of the lower goods yard

An Airfix 1/72 Hunting Percival Jet Provost kit reviving its nice shiny red coat.
Views across the lower goods yard with the Class 08 stabled after having shunted a trip freight for unloading.
-
9
-
-
Hi Gavin, love the model of the model, great 3d version of the plan.
Hope all goes well with the build start. I have not found the 3% gradients we have a real issue. We have a number of light weight locos, such as any 0-4-0 and a few Hornby Railroad locos but I have a load of old letter press printing lead which solves most of the traction issues.
I can see the advantage of the DC Concepts Powerbase which uses Neodymium magnet, nothing electromagnet about them But as Nicolas says you will need to add the Powerbase under your track, so plan it in.
It all depends on your loco collection and how much stock each loco is to haul. Do not forget trucks carry loads and they can get heavy, especially when little boys load them up with anything they can get their hands on -a rake of trucks full or match box cars is a pretty heavy train!!
-
Hitachi's new aggregate train ;-)
Load and sound testing seen at York 19th March. All fitted out with seats and tables and lots of bags of stones. I missed the set number but it could be 800101?
With all the load and soft furnishing, it sounded much quieter compared to previous empty shells I had seen at York. It sounded much quieter on the track too..


-
2
-
-
Very nice, small but very nice. Are these home made or bought?
Once you enter the world of lighting you will realise you need lights inside those dark buildings, then you will realise that you need interiors!!! That's is why my building kit construction had ground to a halt as I need to wire in the lights and create some form of interior. My Metcalfe small factory kit with three floors is still in flat form!
As for the Village People or is that the Full Monty at the dole office?
-
1
-
-
Have been watching your MGR project with interest. From my experience and possibly a slightly empty stable comment here, but I found nothing better than a lump of real coal crushed up and added to a load former to get that MGR look.
Also the look of the load will vary quiet a bit dependant upon where and how is was loaded.
see http://www.rmweb.co.uk/community/index.php?/blog/469/entry-13100-mgr-wagon-haa-making-coal-loads/
-
1
-
-
Hi Gavin
Yes sure, very happy for the plan to be used, in fact it has at least two/three other brother layouts out there.
It was drawn in SCARM track planning software, so if you want to use that then I can send you the raw data file. The issue is that it is now over 100 objects in size so any changes you make cannot be be saved unless you buy a licence. But I would recommend the software as I found it very use to use and fun when planning our layout (usual applies there are other planning packages out there that do a good job too)
Here is one of the layout brothers http://www.rmweb.co.uk/community/index.php?/topic/122082-brambleford-layout-new-arrivals/page-1
An 8x4 is a very good place to start and I have used it as a place to try out my skills and learn new techniques . But I always knew I would want it to grow so planned in the extension for a fiddle yard at the beginning.
If you think that it will grow, plan how all the 8x4 effort could be incorporated into a bigger round the room layout.
I hope you have a comfy armchair for all the planning ;-)
-
1
-
-
Just stunning coach work! The buffet car is fantastic.
What lighting have you used, the light look just right for the original Mk3s.
 ost above.


NCE USB interface problem
in DCC Help & Questions
Posted
Hi, rather than start a new topic, I thought I would ask my question under this title.
I have just got working my new USB Interface/adapter with JMRI. The setup process included a huge amount of headbanging and scratching - apparently not all NCE leads are equal and work when it comes to the USB interface I have found!
I have two straight though 6 wire NCE RJ-12 curly leads, both work with my PowerCab when it is plugged into the PCP lefthand socket. But as soon as I add the USB interface to the setup I found out, after a lot of hassle with settings on PC etc, that only one of the leads actually works with the USB adapter when the lead was plugged into the lefthand socket on the PCP as per the instructions. The only difference I can tell is that the colour order of the six wires appears to be different - one is White, black, red, green, yellow and blue, the other is the complete reverse even though the plugs were held in the same orientation.
Anyway, my other big issue which has stumped me and I hope someone can answer is how do I get a 2nd NCE Throttle to work in the setup when also using the USE Interface and JMRI WiThrottle. I am using the PCP as follows: NCE PowerCab lefthand socket. USB Interface righthand socket and an NCE Cab06 Engineers Throttle in the back socket - see below
What actually happens is this:
With all three connected, WiThrottle running and DecoderPro showing a comms connection to the system, none of the Throttles work on the PC or Android tablets but both the PowerCab and Cab06 work and I can drive trains. When I unplug the Cab06 from the PCP and reboot JMRI then run WiThrottle, the Throttles now work on the PC and tablets as does the PowerCab.
So is a second NCE Throttle and JMRI / USB Interface incompatible?
Note: The Cab06 is connected via a NCE 4 wire curly cable. Using both NCE Throttles was my setup before buying the USB Interface.
Before anyone asks why do I need both setups. My two small boys are perfectly happy to use the NCE Throttles and have done for several years now, but when I join in we need more than two Throttles, one each, hence branching out to JMRI, which has added a whole new fun element using tablets and smartphone Throttles. But I need to have an easy option of running both systems., I do not want to have to keep unplugging wires.
Help much appreciated.