


kirtleypete
-
Posts
1,394 -
Joined
-
Last visited
Content Type
Profiles
Forums
Blogs
Gallery
Events
Exhibition Layout Details
Store
Posts posted by kirtleypete
-
-
I'm glad it's not just me!!
Peter
-
You may well get on fine with them, it's just down to personal preference really.
Peter
-
That's interesting; I have the same trouble with the colour photocopier at my local print shop. I print off a master of, say, 7mm scale bricks, get it just the shade I want, and the damn copier changes the colour...it's very frustrating. Even worse, next time I go in there is no certainty that it will do the same thing in the same way so matching colours is very difficult. It seems fine with multicoloured images like a sheet of enamel adverts, but has trouble when it is mainly all one colour. Ironically the old copier they had was fine, then they bought a hugely expensive all singing all dancing machine and it's much worse.....naturally they can't change it having spent all that money. Basically it's too clever, it doesn't just copy what's on the glass which is actually all you want it to do.
Sorry - I needed to get that off my chest!
Peter -
Improved carriage green?!!
Peter-
 1
1
-
-
Thanks, I'm enjoying doing, even if I am airing my mistakes in public!
Peter
-
1
-
-
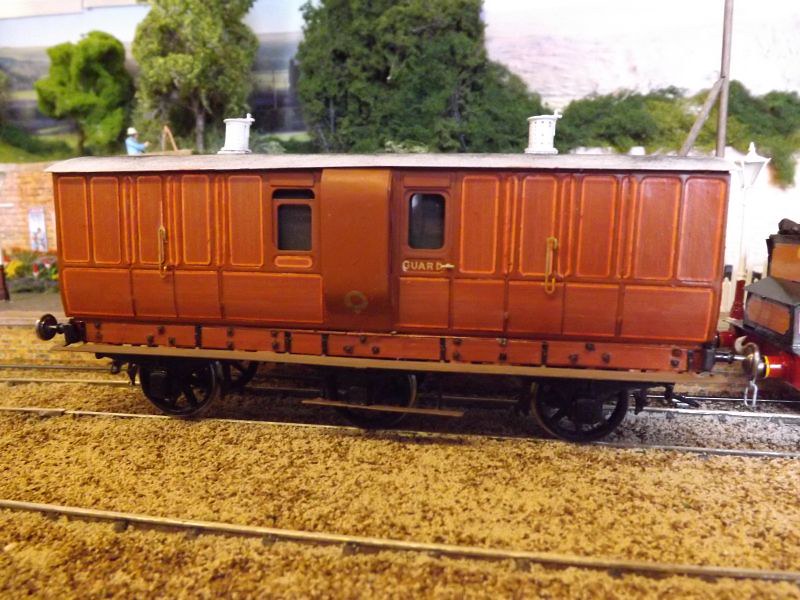
See what you think now; I gave the whole coach side a coat of diluted Light rust paint and I think it has toned it all down and blended the colours together. It's not mahogany red, but it's not too far off. It looks better with wheels too!
Don, you're right, but on page 18 of 'LB&SCR carriages' it says that Stroudley coaches were lined in 'light orange or gold', so that's what I did. I think the lining is OK, it's the wood colour that was wrong though I suppose you could say that 'light orange' and 'straw' could be two descritions of the same shade.
Peter
-
15
-
-
Thanks for pointing me in the direction of this thread Eric - a very interesting read.
Peter
-
I've been reading the carriages book over and over Eric but there's so much information in it I keep getting lost! It certainly gives the lining colour as orange in the chapter on Strouidley carriages, though. I agree about the mahogany, I should have read it again before doing the model.
Happily I've been able to give the coach a wash of colour so that the lining has been toned down and the colours all blend in a lot better - I'll take a picture tomorrow. In the meantime, I'm going to find a picture of Brian May's guitar!
Peter
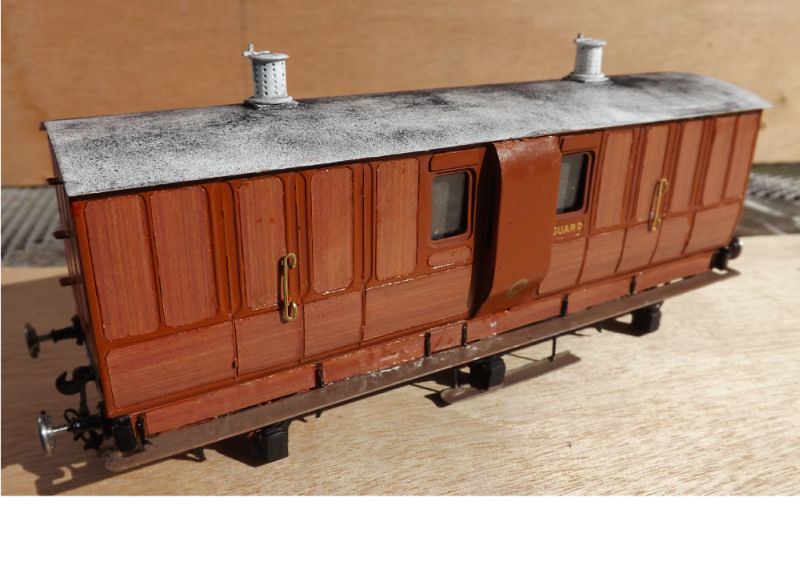
-
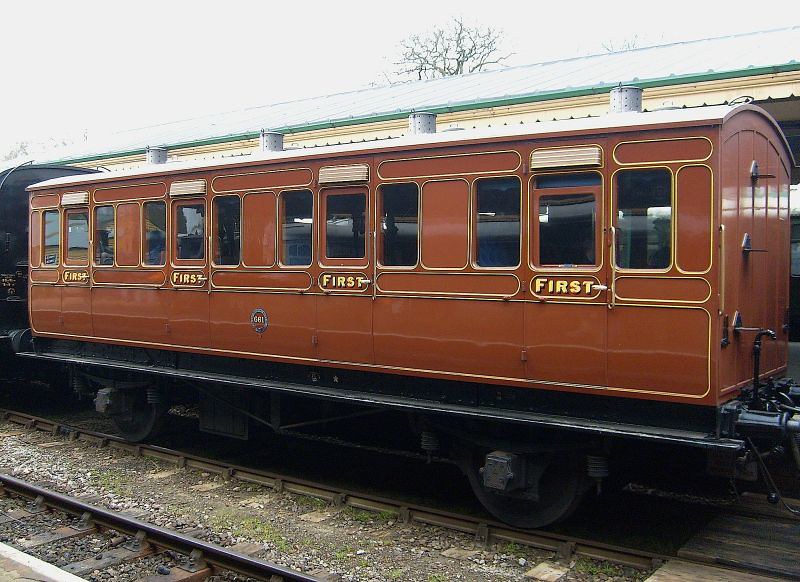
The more i look at my coach the more I don't like the colour; it's the orange lining, it doesn't suit the colour of the wood. This is what I picture when I think of a varnished teak coach:
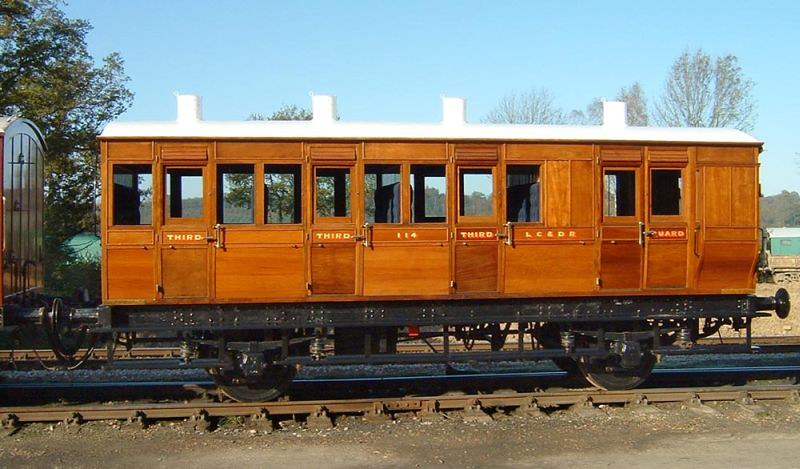
This is as close as it's possible to get to a Stroudley coach in varnished teak at the moment, one of the lovely LDCR coaches on the Bluebell. All the LBSC coaches, as far as i know, are painted rather than varnished. The first thing that strikes me is that it looks nothing like my model!
However, for the panels I used a picture of real teak. What has gone wrong?
Reading the LBSC coaches book again I also realised that some, perhaps most coaches were mahogony, not teak, and that's another colour again.
The problem also is that there is really no such colour as 'teak' because there is a huge variation in tone:
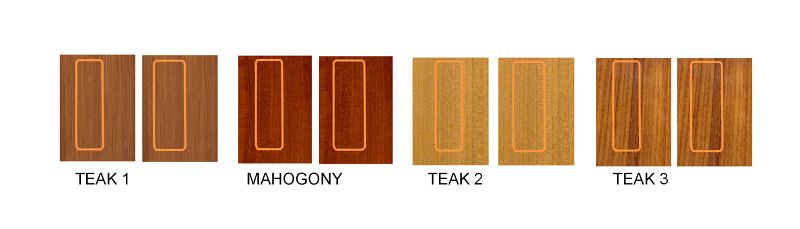
On the left is the wood I used, with the panel lining in orange. I looks OK here but it looks wrong on the coach, at least to my eyes. Next is a mahogony, much deeper in colour and much more red, and much more like the colour the LBSC used when they painted the coaches. The lining stands out far more.
Then there are two more teaks, very different from the first sample. Teak 2 looks like the wood on the LCDR coach and but it's nothing like the colour the LBSC used when the coaches were painted which was supposed to match the existing varnished stock. I'm beginning to wonder if I should have used mahogony, giving that lovely deep red colour. This is what the painted coaches look like:
The mahogony certainly matches that pretty closely.
It's too late for my full brake; the side without lining looks OK so I can run it that way round and perhaps weather it a little. The next coach, though ,will be mahogony and we'll see how that turns out.
Peter
-
2
-
-
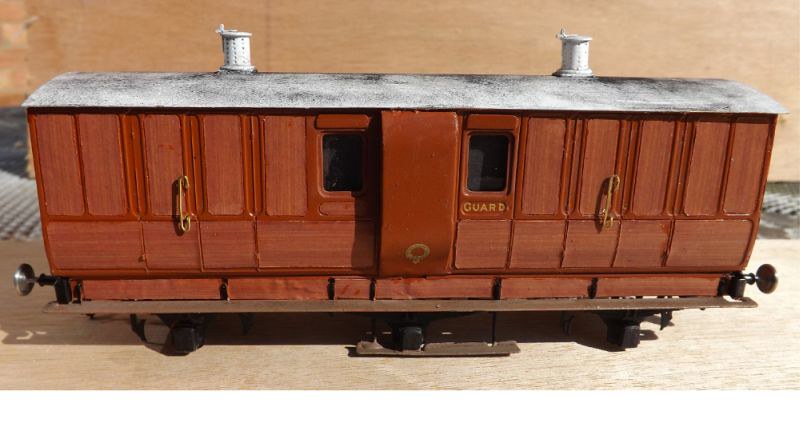
I've had a go at liing the coach using paper panels printed with the teak and the lining. This was orange except on the first class stock which were lined in gold.
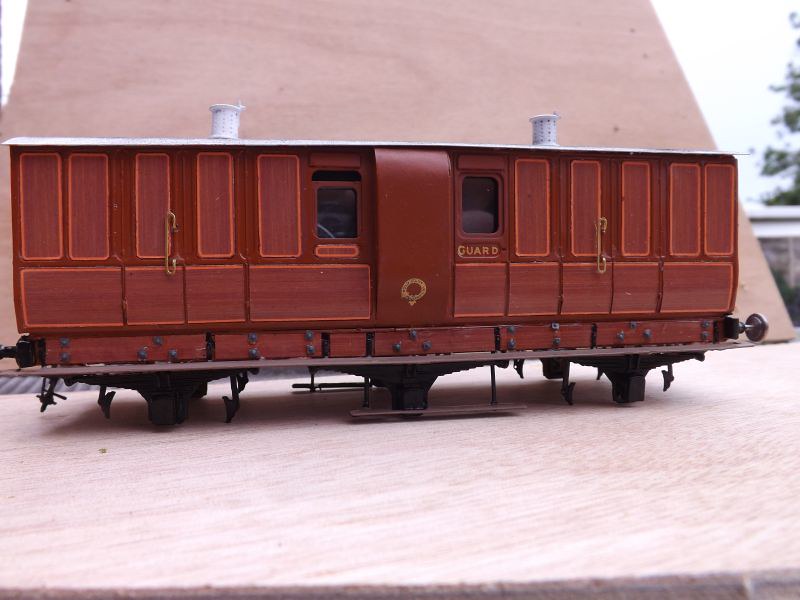
The advatage is that it's all regular and neat, the downside is that it makes the mouldings look wider than they should be. I might have a go at putting it where the doors are as that wide brown strip looks wrong. It's certainly better than I could have done with a pen or a brush.

Added a couple of hours later.................I've doen the thin panels alongside the doors which makes it look a lot better. Now I need to straighten that lamp top!
Peter
-
8
-
-
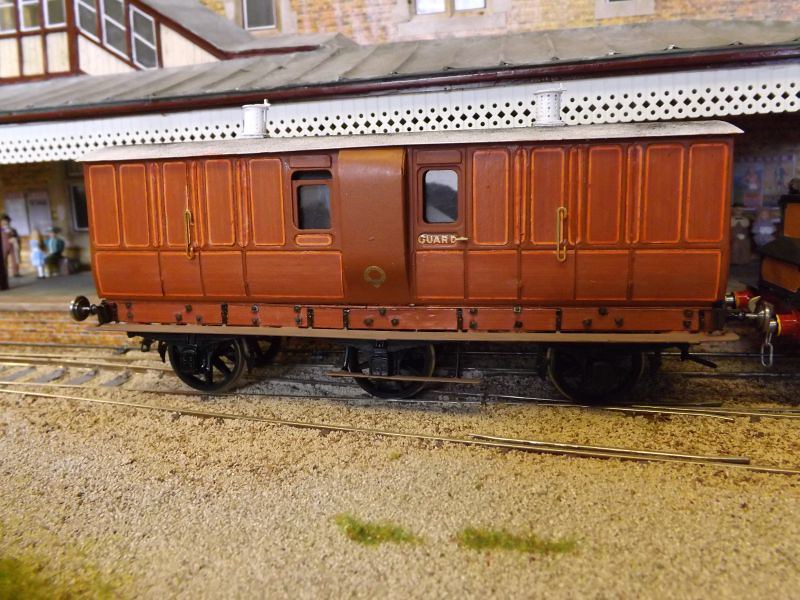
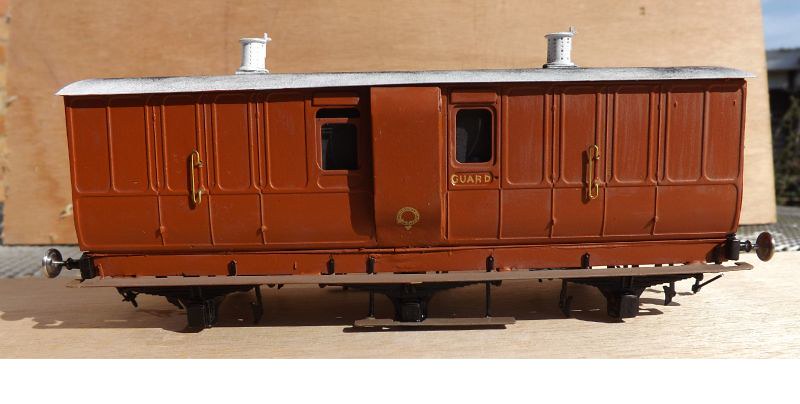
While I was working on the wagons and D1 I pretty much convinced myself that printed paper wasn't going to be much use for coaches. Then I put together a Roxey Stroudley full brake:
Don't worry, I haven't forgotten the wheels, they should arrive tomorrow!
I wanted to finish it in varnished teak. The Brighton outshopped their coaches in varnished teak and then after a dozen years or so when they were starting to look grubby they painted them in a colour very similar to the teak and they remained painted until they were scrapped.
With a layout set in about 1890 I thought that most of my coaches should still be teak, they wouldn't be old enough to have been painted. I sprayed the full brake with Railmatch dark rust and then brushed on light rust, trying to make the paint look like grain in the wood. It doesn't; not surprisingly the paint does what it is designed to do and covers the surface and then dries. The colour looks right, but it doesn't look like varnished teak....for a later painted coach it would be fine.
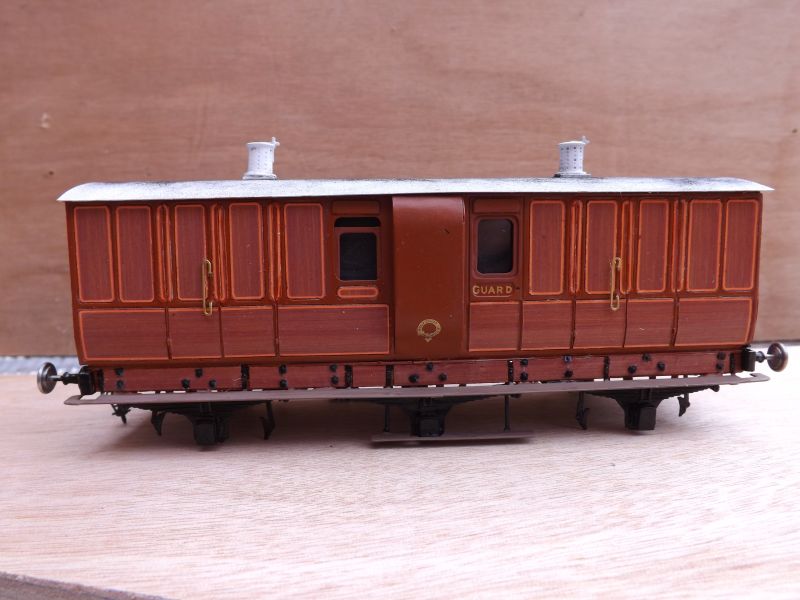
So, you won't be surprised to hear that I turned to printed paper. I downloaded a nice picture of a teak panel and resized it before cutting and pasting to give me a long strip. I copied the strip until I had a page full and printed them off onto Epson matt paper. Here's the result:
All I have done is stuck paper onto each of the panels, other than that it is exactly the same as in the first piture. I cut out each panel with my scalpel, painted the edges with the light rust paint to match the framing, and glued the paper in place with Evostick. The grain can be adjusted to run in the right direction, and of course if a piece goes wrong all that has been wasted is a piece of paper. Once it was all done the coach was varnished with Microscale satin, brushed on. The ducket by the way was clad in metal sheet so that was always painted.
It's by no means perfect, but it's good enough to encourage me to keep on with the technique. I'm not sure what to do about the lining; it should be lined, but looking at the photo's in 'LBSCR Carriages' the lining on the teak coaches if far less obvious that that on the painted ones. I might have a go at printing panels with the lining on the other side of the coach, and if it doesn't work it can be finished like this side. My feeling is that no lining is far better than badly done lining.
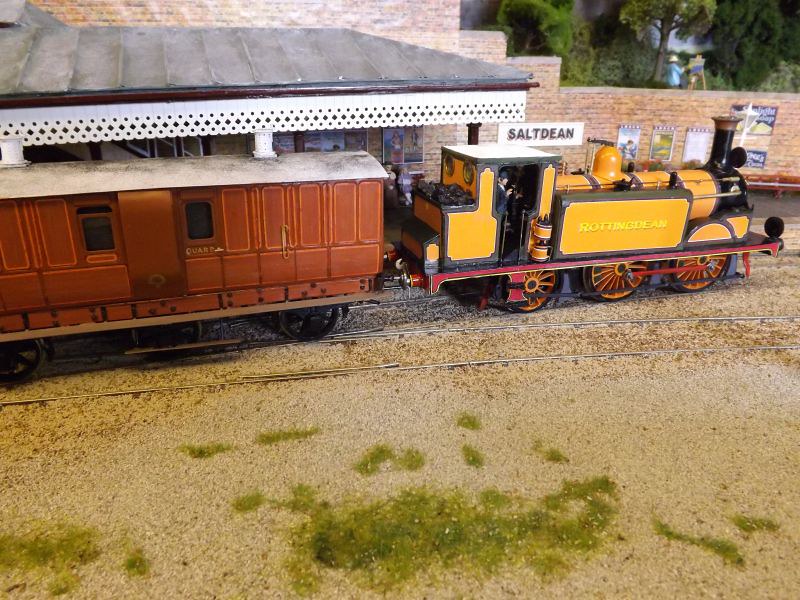
I'll take some pictures on the layout when the wheels arrive,
Peter
-
6
-
-
Superb! That just shows what's possible with this technique.
Peter
-
That sounds interesting James - do share it when you've made a start on the model. It just shows there's more than one way to skin a cat.
Peter
-
1
-
-
I'm sure if Roye England has been starting Pendon now he'd be doing exactly that rather than painting them all by hand!
Peter
-
1
-
-
That works really well Jim; anything flat sided is ideal.
Peter
-
I bought some trees at Perth show at the weekend to put around the station area; as the station has only been open for eight years or so small trees meant for 4mm scale are just right. I sprayed some with Photofix and sprinkled on some Greenscene scatter as blossom to add a touch of colour...the layout is meant to be in May so I had to resist the lovely apple tree with a full set of fruit.
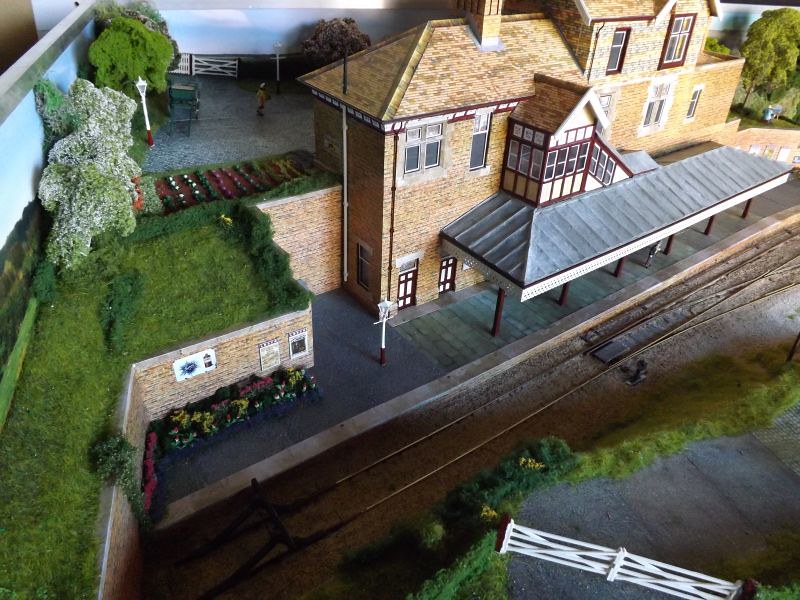
It's amazing how all the coal merchants in the area seem to share the names of well known locomotive designers! I bought a Peco yard crane for this area but it's much too big and too modern looking so I'll use a different one. It needs more carts too.
One final picture; no trees but just because it's nice.
Peter
-
16
-
-
I'm afraid life is too short to get involved into reseach about fonts - I've got a layout to finish by next Easter! You have to draw the line somewhere or nothing gets built.
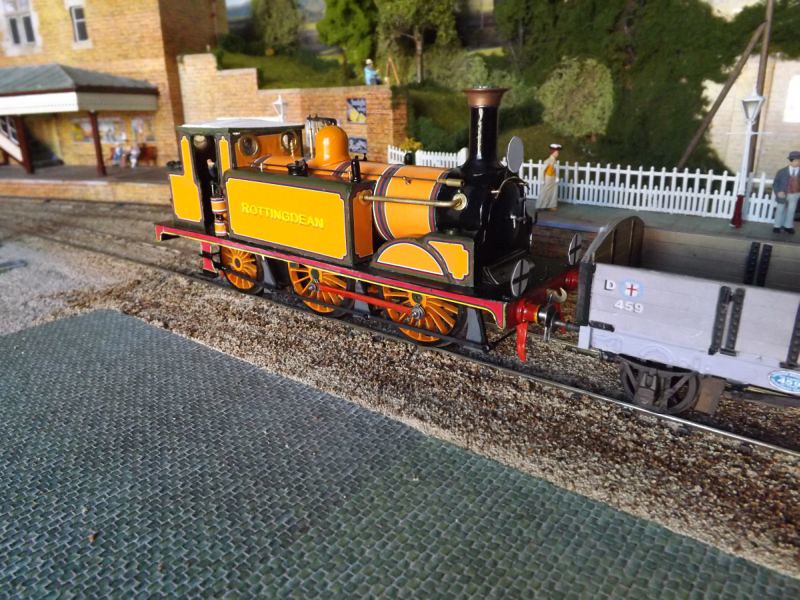
I saw the pre production Terrier at Alexandra Palace and my first reaction was that it was too yellow, but it depends on the lighting in the hall and it was the pre production model. My second reaction was that I wanted one, whatever colour it was!
Peter-
1
-
-
Nice one James! There are more of us out there....
Nick, thanks for the tip about the roof edges - I'm all in favour of things that are as easy to put right as that. I must join the e-group, I hadn't realised there was one,
Peter
-
1
-
-
I'm glad you did Ian - now I've got a much better model. I imagine trying to draw a Stroudley roof in two dimensions when you are doing the artwork for the kit isn't the easiest thing to get right. Seemingly he designed them like that so that they didn't vibrate and irritate the crew - at a time when a lot of designers didn't even give the crew much of a cab!
Peter
-
1
-
-
This is what Peco would have done in the 1906's if they'd had our technology. I find the computer is as useful as my scalpel and cutting mat as a modelling tool these days.
Peter
-
Sometimes you have to be shamed into doing the right thing!
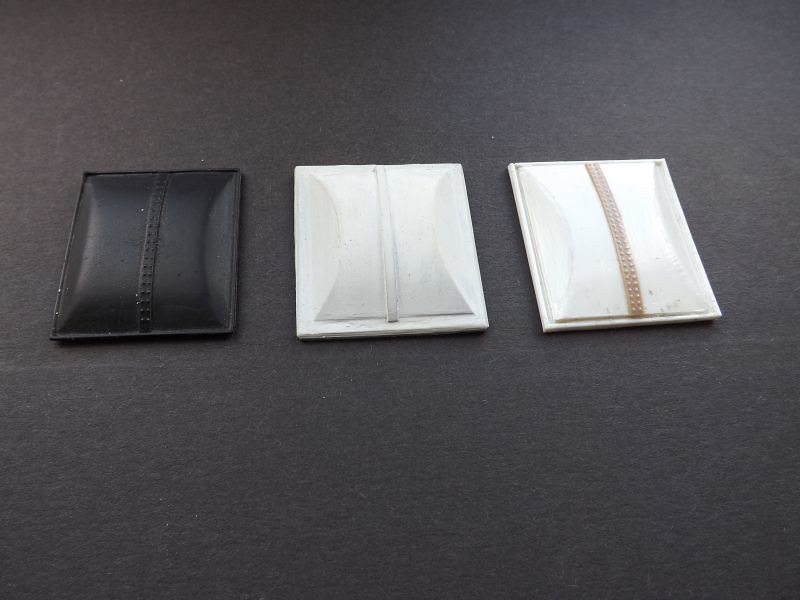
On the left is the cast roof from the Vulcan Terrier - a superb item, I'd have used it like a shot if it hadn't been too small. In the middle is the etched roof from the D1 kit, and on the right is the plastic one I've just made. It's much shallower, and it looks right.
Unfortunately trying to photograph something white is a waste of time, but hopefully these pictures might give the impression of how it looks. I've levelled off the top of the cab with a disc in the Dremel, (without damaging anything!), and it should all now be the right height.
The edge looks a bit rough, mainly because the paint was still wet.
I think it looks much more like a Stroudley cab roof, so I'll know what to do with future kits.
Now.........I really must get back to work!
Peter-
7
-
-
I know, but I chickened out of doing it as there is no metal at all left in the middle over the opening.....it's too late to do it now, as with the side strips around the roof, trying to change things would cause too much damage. The tops of the brass window surrounds would have to be reduced too - I should have done it, cowardice triumphed over doing the right thing.
My concern about the roof isn't the height from the track - frankly I don't really give a damn if that is too high or low by a mm or so - but the rise of the raised section in the middle compared to my Vulcan Terrier which has a nice cast roof. The whole thing is much flatter. Sadly, the Terrier roof won't fit the D1 - I've tried!
The answer is to make a new roof from scratch, probabaly in plastic as I'm much more comfortable working with that. Watch this space.
Peter-
1
-
-
Well spotted Ian - I did! The trouble is then if I try to fold them back they'll just snap off. I still think the raised part of the roof is too high, though, even allowing for that. I'll get inspired to do something about it one day.
John, I'm delighted you're having a go. No idea what you mean about the colour, though!!
Peter
-
1
-
-
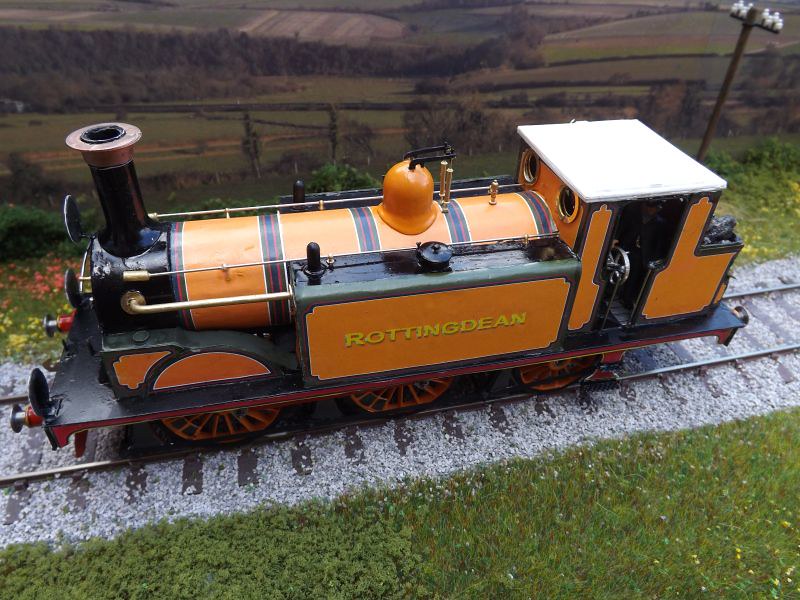
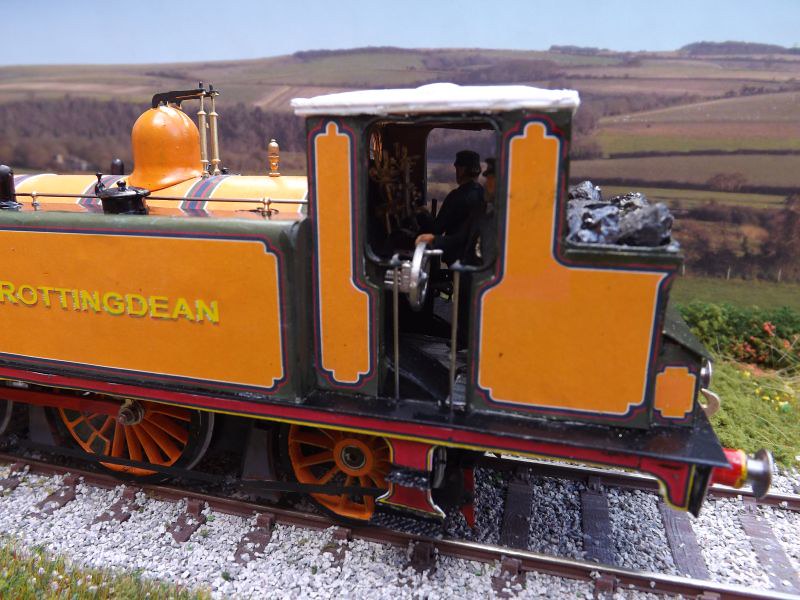
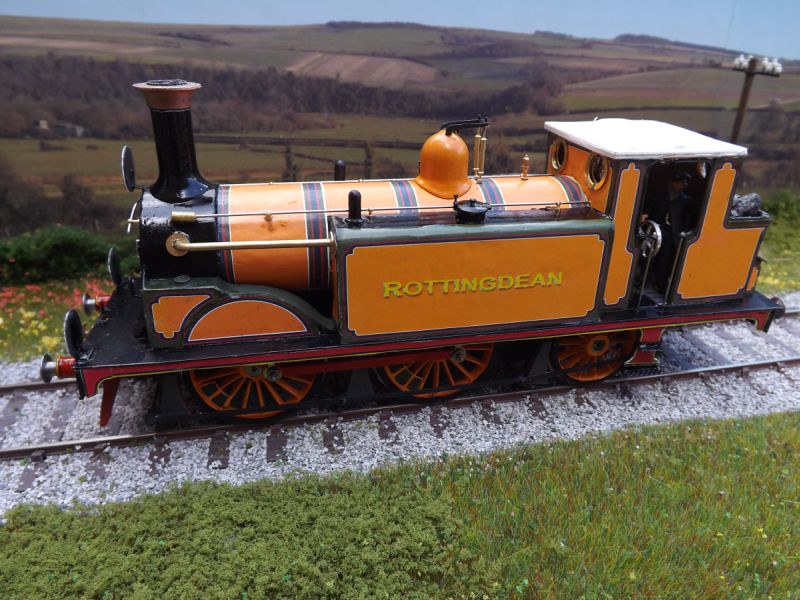
Three final pictures, at least until the plates arrive. I've fitted the Salter safety valves so that she now really looks like a Stroudley engine. I'd been looking for castings for these but in fact you get two etched parts and the instruction to fabricate the rest out of wire and tube - I wasn't impressed. I used the etched parts for the top levers and stole the nice brass pieces from my Vulcan Terrier for the pillars.
I've also improved the ends of the handrails alongside the smokebox, but these are only there until the correct sized brass tube arrives. The cab windows need glazing using Microscale Krystal Klear, as used by aircraft modellers; it's a thick white liquid that you put into the opening on the end of a piece of wire until it fills the space, then it dries hard and clear - much easier than cutting little discs of clear plastic. Clack valves need adding too, and they are on order. The ones in the kit were OK but have you tried drillnig a 1mm hole in a tiny brass casting using hand tools to make a hole for for the wire? Meteor do them with the wire cast in, much easier.
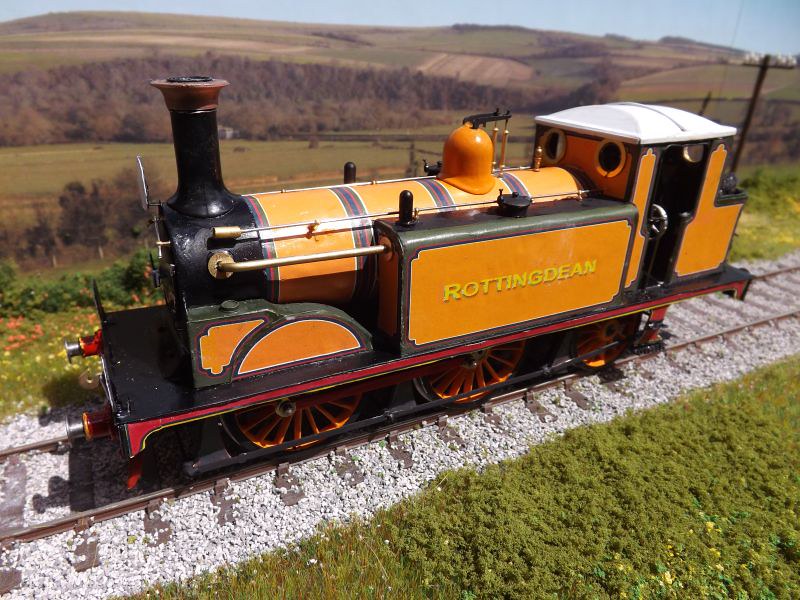
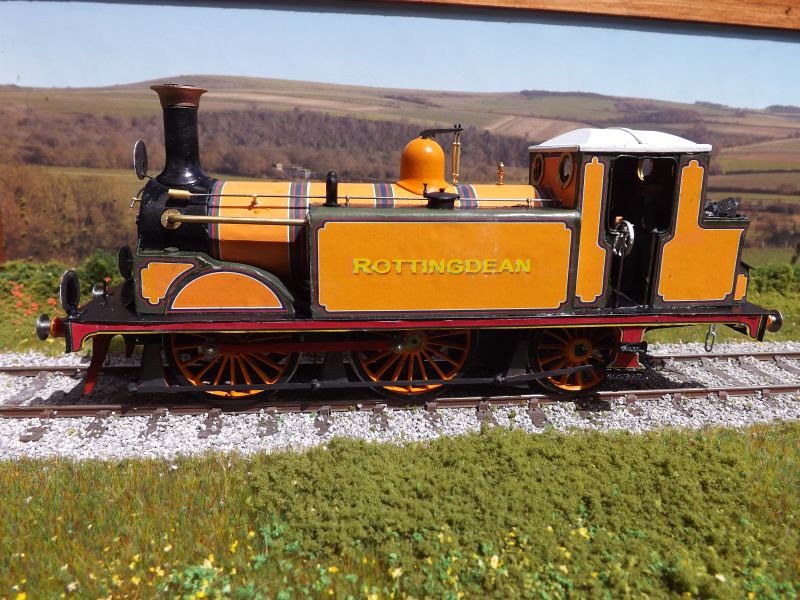
The cab roof has been fixed in place, and I replaced one of the side panels so that it was the same height as the one adjacent to it. I think the cab roof is too high - it looks like a white duvet! - but I'm not sure I can build a repalcement from scratch. Maybe one day..............

Peter
-
6
-

Painting locomotives without (much) paint.
in Pre-Grouping - Modelling & Prototype
Posted
You live and learn, don't you.
Peter