


kirtleypete
-
Posts
1,394 -
Joined
-
Last visited
Content Type
Profiles
Forums
Blogs
Gallery
Events
Exhibition Layout Details
Store
Posts posted by kirtleypete
-
-
I have used the papers successfully Mikkel, but I have three issues with them. One, I find it hard to print a clear image because the ink doesn't soak into the paper and the wheel on the printer that pulls the paper through marks the surface with a row of little dots.
Second, it can be hard to remove the transfer from the backing paper without it stretching and distorting, especially for large transfers....I found that using really hot water helps. Last, they can tend to peel off too easily and the edges lift, especially with small transfers.
The clear sheets are better than the white, but the white one is what we modellers find most useful. The three coats of varnish (I use Dullcote) make the transfer quite thick as well.
Having said all that, I haven't found any better way of making your own transfers, it's just not the perfect solution.
Have a play with them, you might find you like using them and I'd be interested to know what you think,
Peter
-
For the last couple of weeks I've been pondering about how to do the lettering on the wagons; they were white shaded black and quite small, and no transfers are available. I could have used Crafty Computer Paper to make my own but having used it before I'm not too enamoured with it. In the end I went back to what seems to be my default position and simply printed them on paper in the same way as the private owner wagons. In this way the LBSCR logo could also be included....this is how I went about it.....
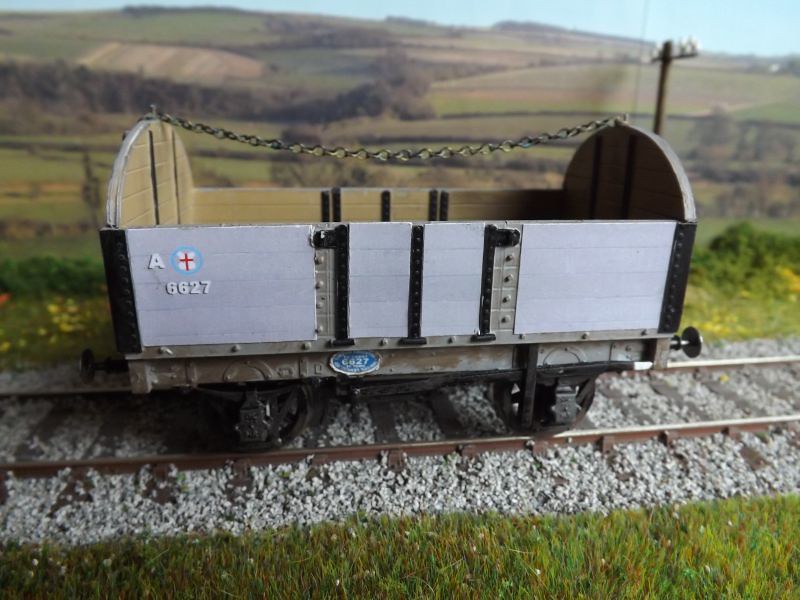
The new paper panels are the lighter grey areas, simply stuck onto the existing wagon. I've taken the chance to get closer to the correct shade of very light lavender grey as well. This is the wagon on which it works least well because I chose to leave the line of bolt heads; on the others the new panels go right up to the strapping so there is no obvious edge.
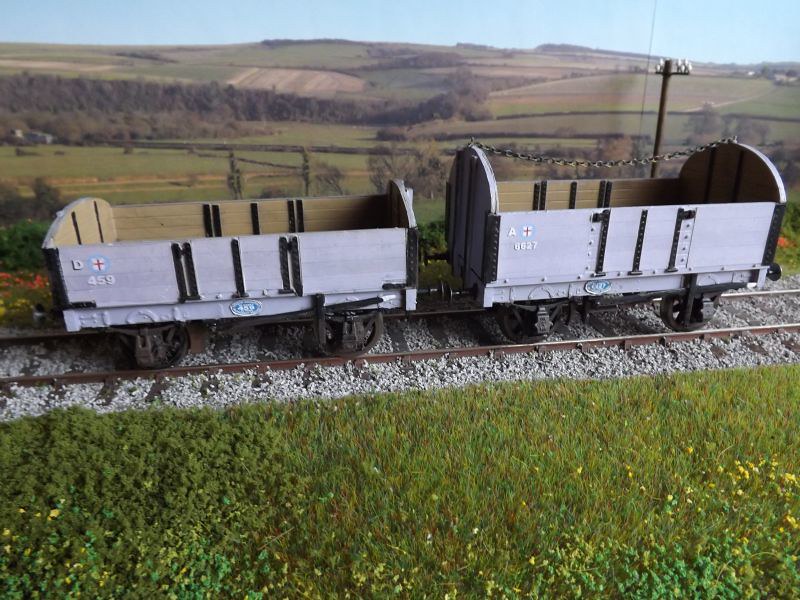
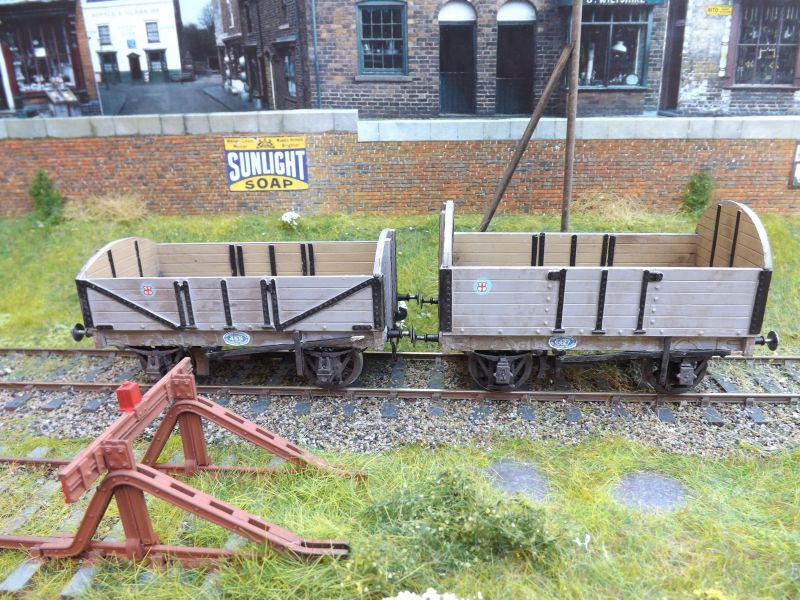
This is how the finished open wagons look, with the areas of the former livery that still showed painted in the new grey to match the paper. This was mixed from Tamiya acrylics, a new jar of flat white with one brush each of black & purple.....it worked first time, purely by luck! I took the chance to get rid of the incorrect diagonal stapping on the 'D' open as well.
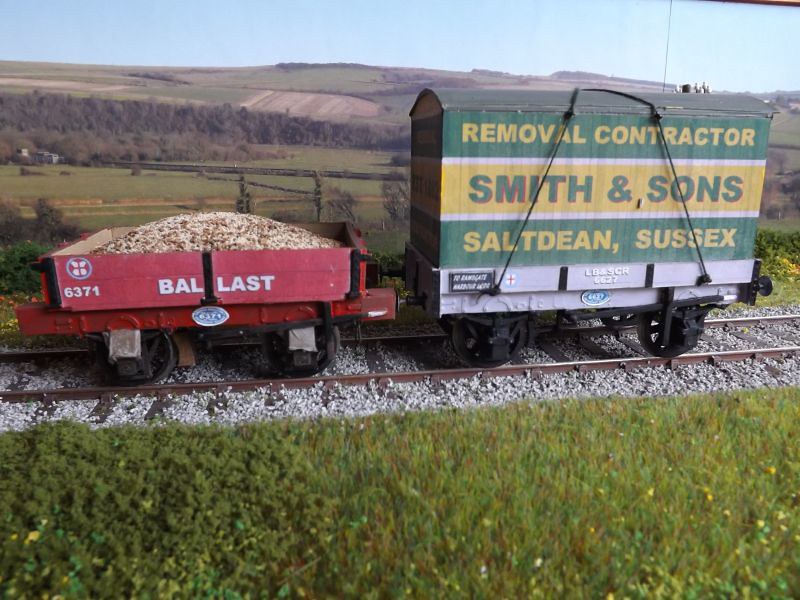
The flat wagon and ballast wagon...
...........and the van and brake van. I'm pleased with the brake, it seems to have worked well. All the panels are now paper, with just the framing painted.
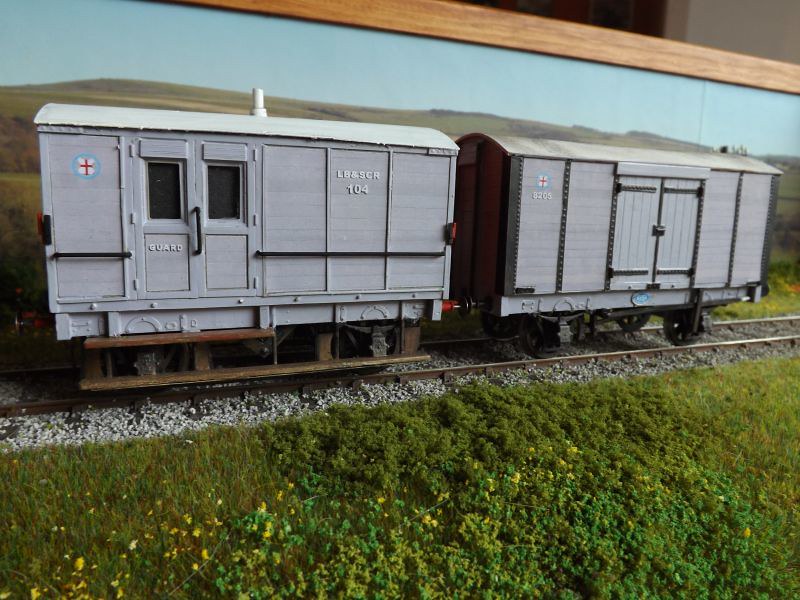
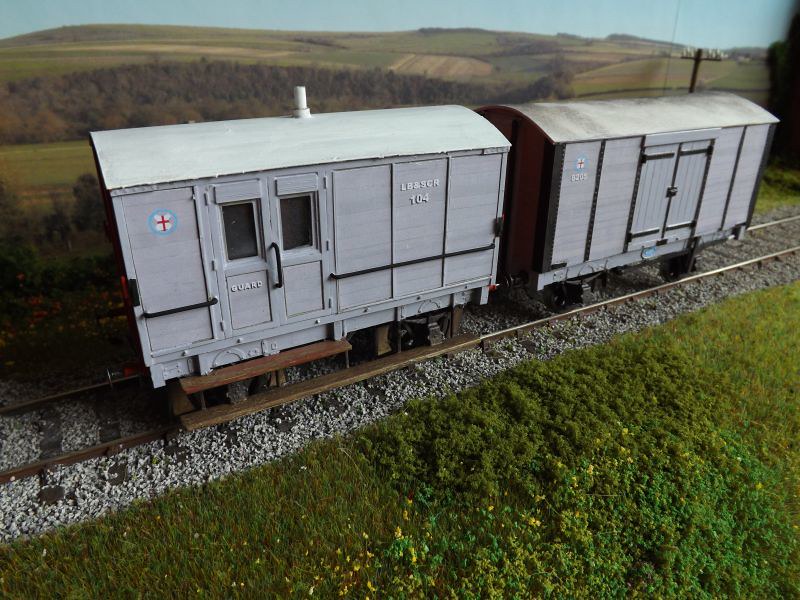
I've painted the handrails and lamp irons in the correct black now as well.
Now I've found a technique that works I can proceed with the rest of the goods stock. Coaches are going to be a far more interesting challenge!
Peter-
 8
8
-
-
Great stuff Eric!
Peter -
Thanks Eddie - I've just been lent a copy, it's a cracking read too. Lots of good stuff about the LBSC!
Peter -
Compared to the ones Andy Duncan produces they're tiny; the trouble is I don't know which are correct! The Peco ones may be OK to use on a platform....actually I probably ought to have hanging lanterns under the canopy instead but that won't be happening any time soon.
Peter
-
Thanks Gary, that's vey interesting.....there's no way I can justify running it on Saltdean, but when has that ever stopped a modeller doing something?!
Peter -
I've got another appeal folks - I hope it's OK to keep posting like this. If there is somewhere more appropriate please say so...I realise this isn't strictly about the Digest.
I've become interested in this little beauty....
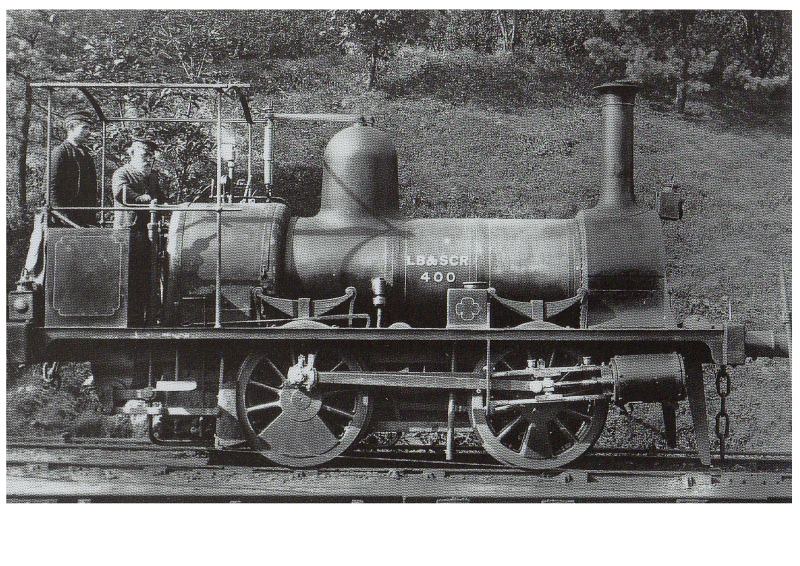
She was photographed in 1890 in full Stroudley livery, and would make a cracking little model. She was working on the line into Earlswood Asylum at the time, and I haven't been able to find any more pictures of the engine or the railway into the hospital.
So, over to you - does anyone know of any more pictures?
The loco has Stroudley boiler fititings so has clearly been through Brighton works in the not too distant past....obviously she would need a running in turn then and my branch to Saltdean would seem to be ideal for the purpose! It might be a touch draughty though...presumably at some point she must have had a full cab?
Peter-
3
-
-
Well spotted! Mine now look like this:
The kits arrived this morning so the timing was just right, and now I've seen your picture maybe I need to round the ends of the wooden plank.
Peter
-
2
-
-
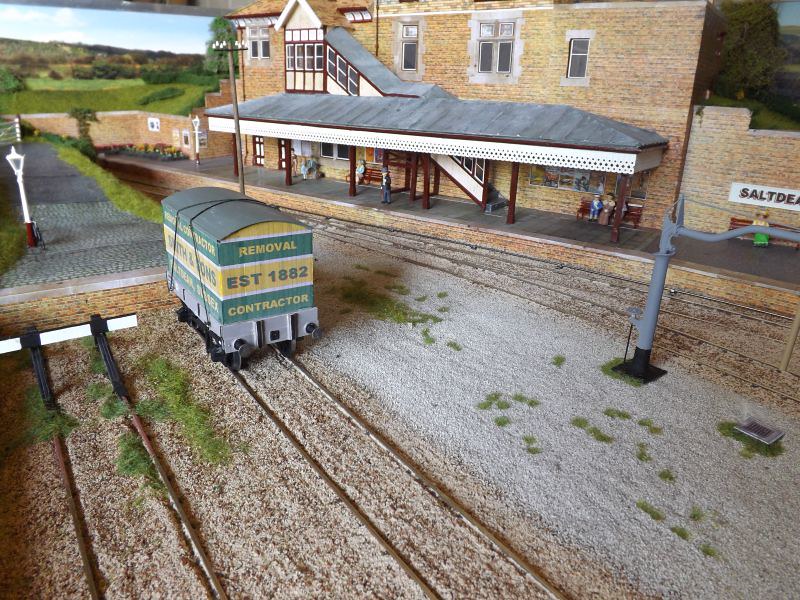
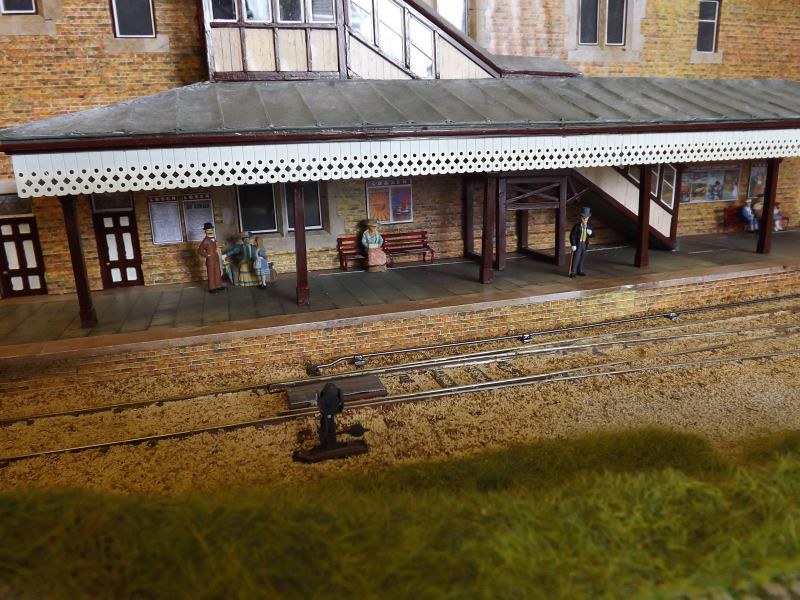
The water crane and LBSC buffer stops have arrived so here are some more pictures:
Peter
-
13
-
-
Thanks Ian - black and white they shall be if the damn kits ever turn up!
Peter-
1
-
-
That sounds likely Steve, I should have thought of that. The black stripes are distinctive, I've never seen that arrangement anywhere else.
Peter
-
I've just re-read Phil Taylors article in the Digest on building a buffer stop as I've got some 7mm scale kits on order from Andy Beaton of Ragstone Models. Phil shows the wooden crossbeam on his buffer stop painted white with two vertical black stripes where the buffers would hit. Andy shows a white beam, with a red stripe horizontally across the centre.
So....who is right, or are they both right? Knowing me I'll get my kits, paint them one way and then find the other is the correct one!
Peter -
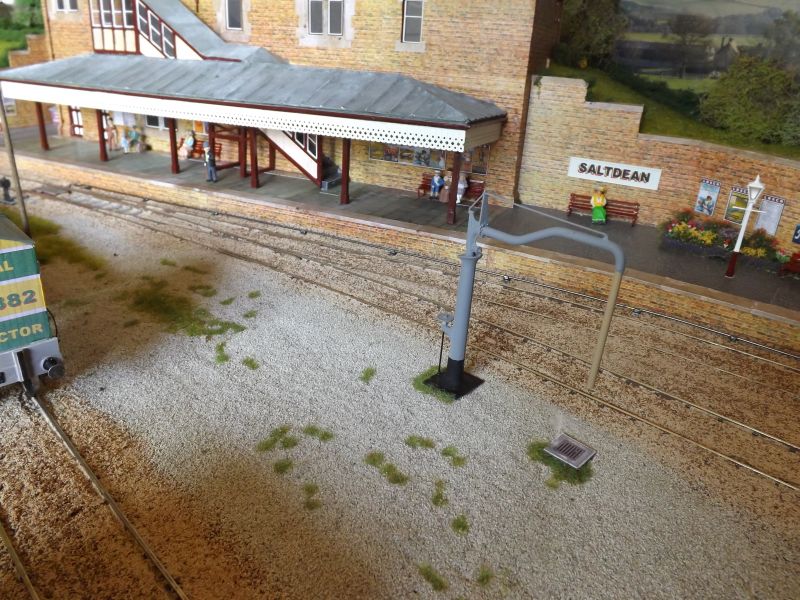
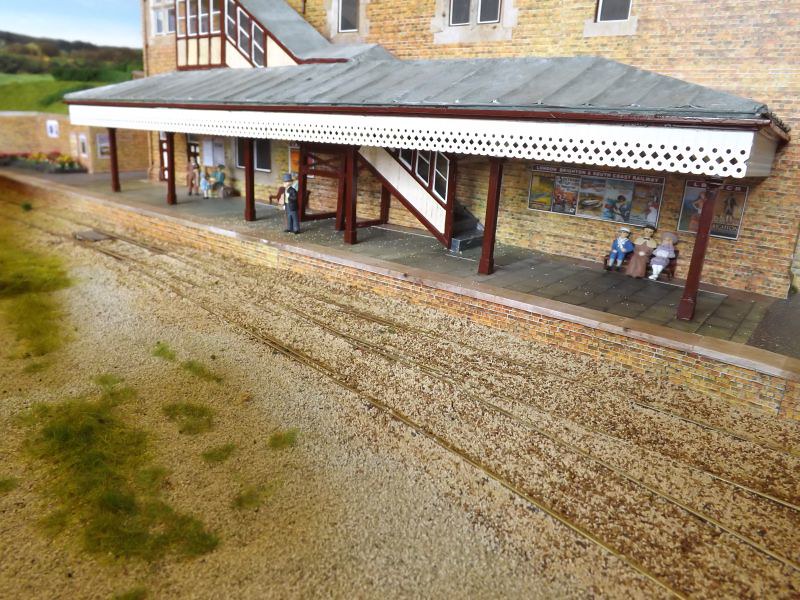
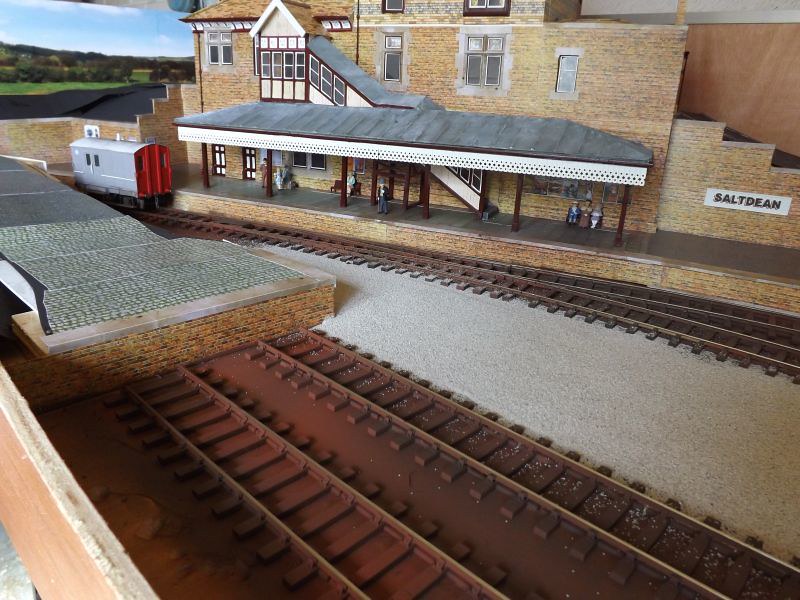
Some more pictures now that board 1 is about there....I'm still waiting for Andy Beaton to send the water crane and correct buffer stops.
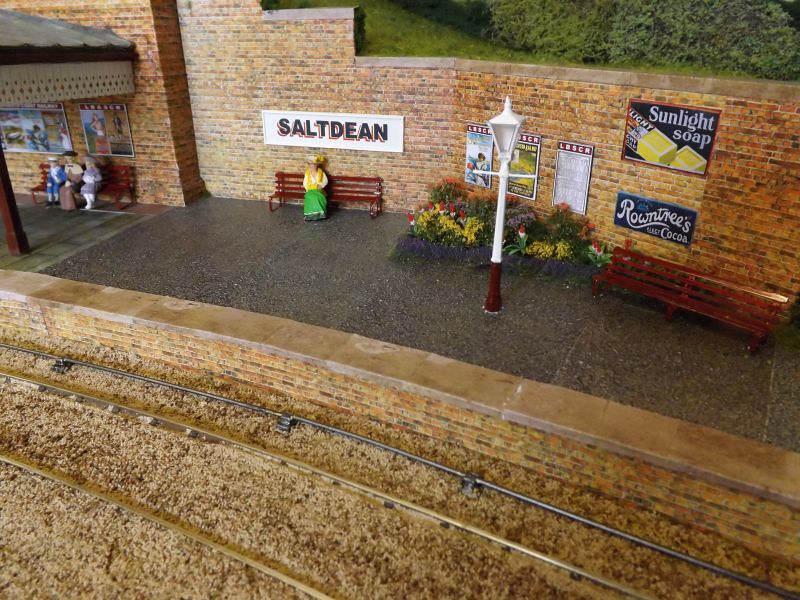
The gas lamp is the new Peco product which looks a bit on the small side - what do others think?
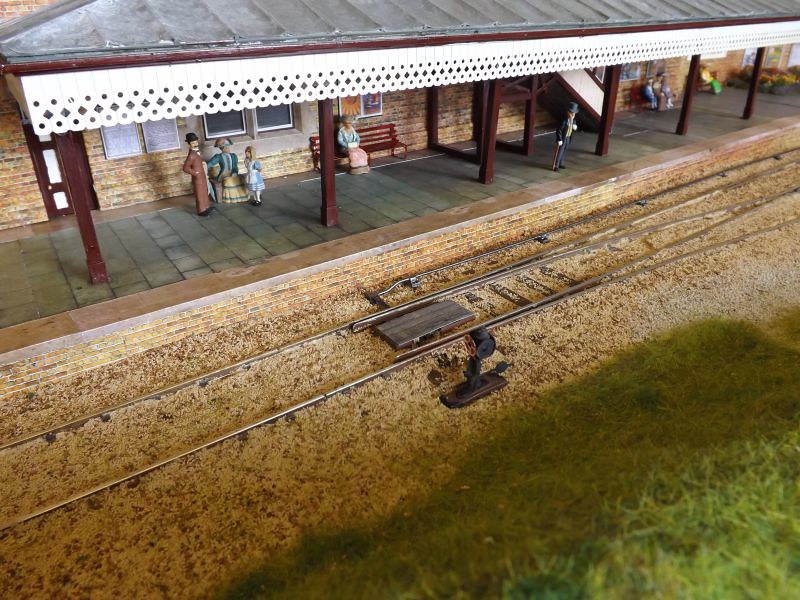
Peter
-
13
-
-
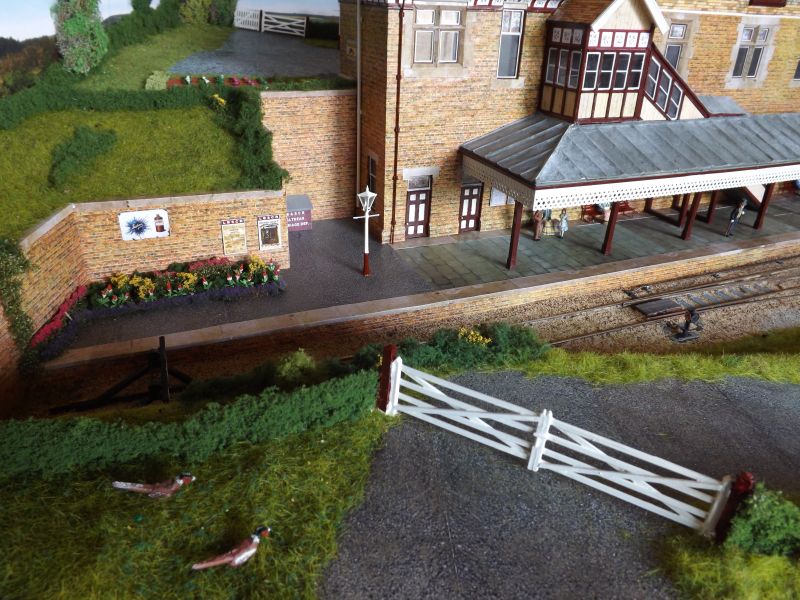
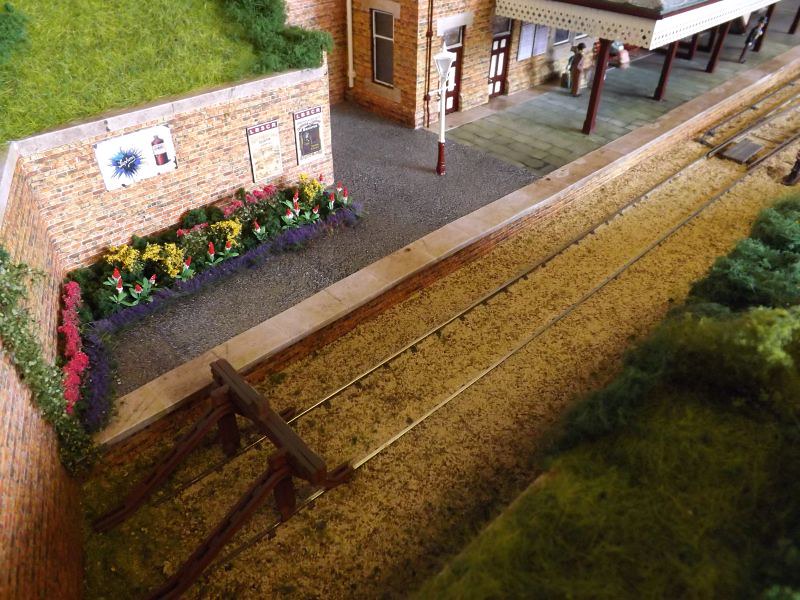
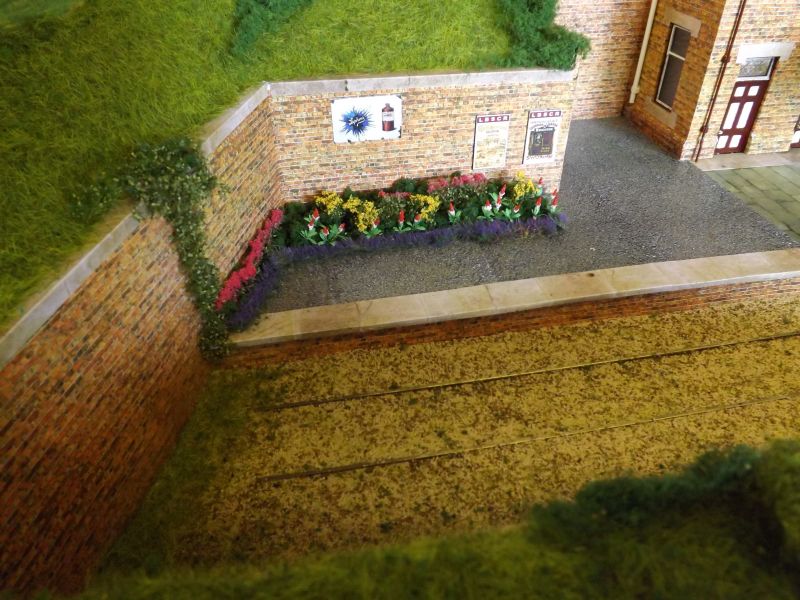
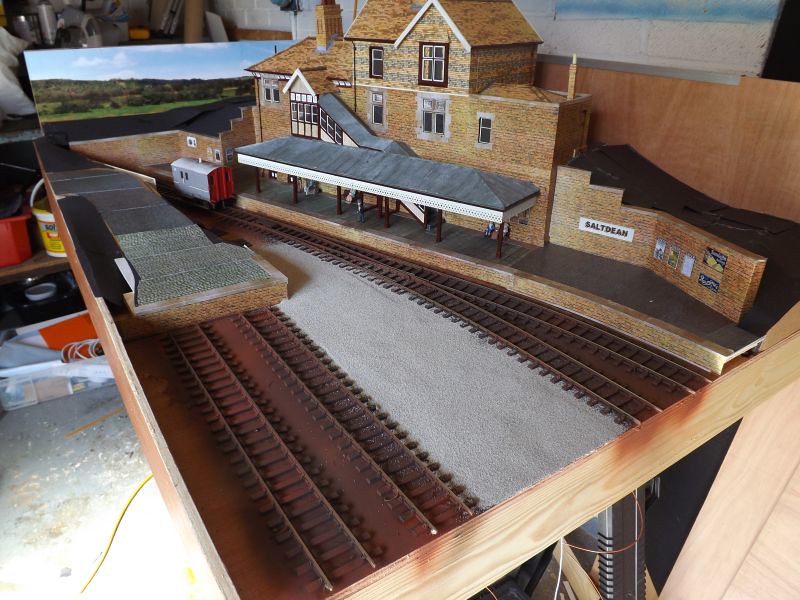
Things have moved on again; the track looks a mess because the PVA hasn't dried enough for me to clean it up - a job for tomorrow hopefully.
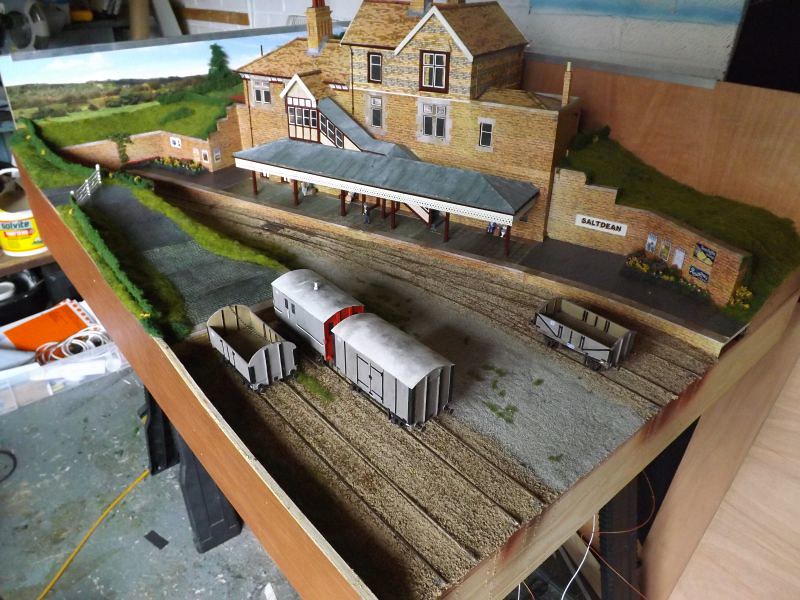
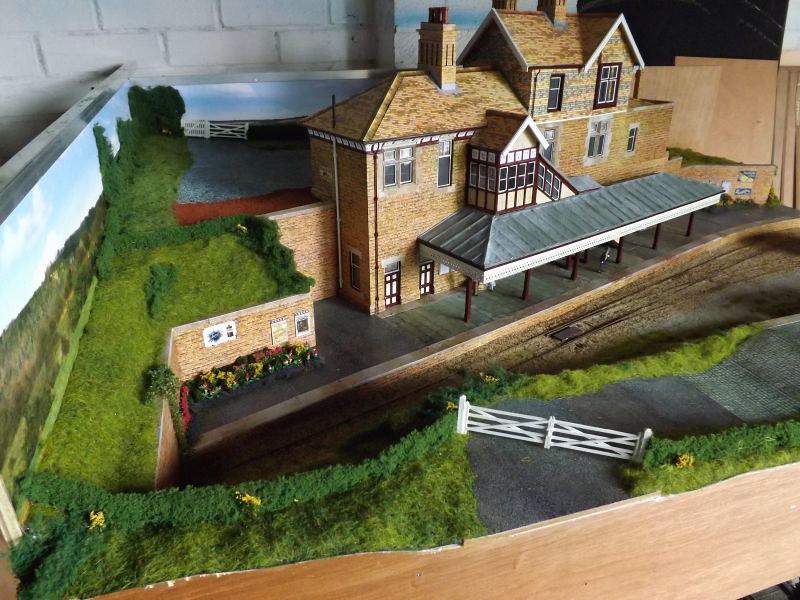

When it was too late I realised that the flower bed prevents the posters being changed - perhaps they only do it in the winter!
The ballast is a mixture of Woodland Scenics medium brown and fine buff.

I'm not sure where the tumbleweed on the track came from!
The tall red and white flowers are meant for 00, a classic case of ignoring the label and using what looks right.
I've got gas lamps, buffer stops and a water crane on order, then this board should be looking fairly complete, though there's scope for more figures and a horse drawn vehicle or two eventually.
Peter
-
13
-
-
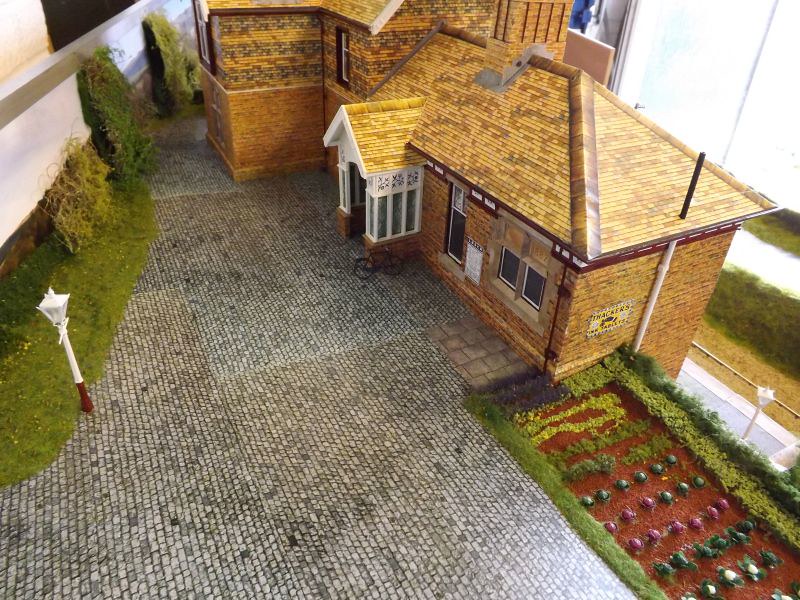
I've made more progress with the first baseboard today - three pictures are below.
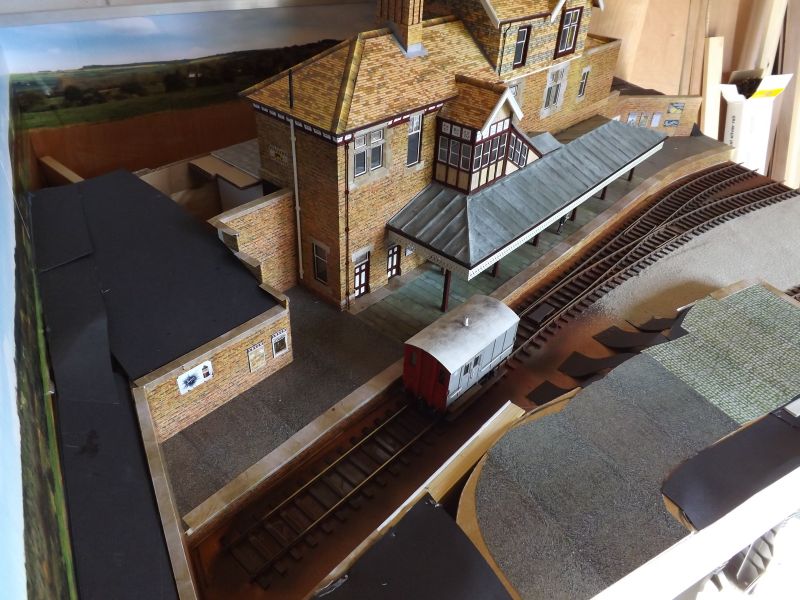
That idea I had of keeping the station building separate until after the Gauge 0 Guild show at Cleckheaton on the 30th didn't last long!! I'll just have to build something else now.............
The other thing I ought to mention is that I'm using 4' baseboards; if I'd used 5' boards the brewery buildings would cross a board join and I don't want to do that. Now they will all be nicely on one board.
Peter
-
9
-
-
Thanks Mikkel, it's a very useful technique.
I'm planning to use it to 'paint' LBSCR loco's in Stroudley livery - watch this space!
Peter
-
1
-
-
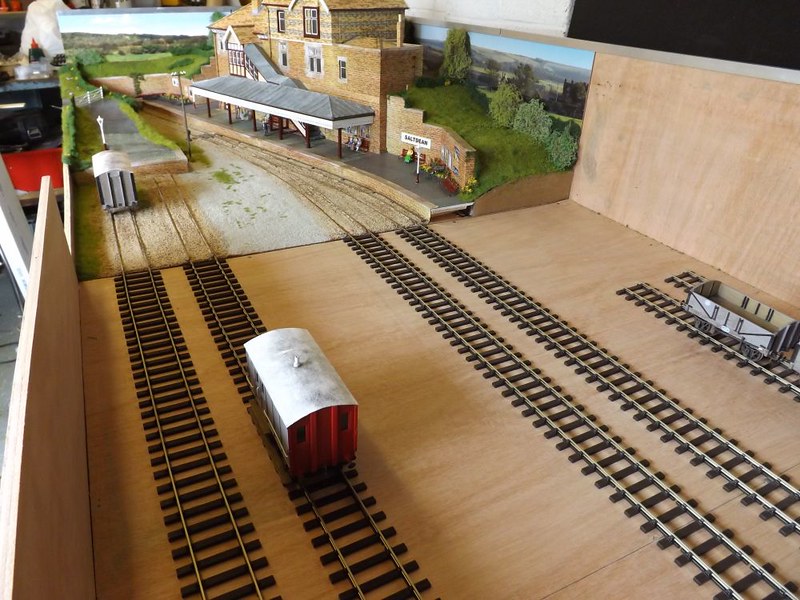
I've finally been able to make a start on the actual layout, and already I've made changes from the original plan. This is the first baseboard:
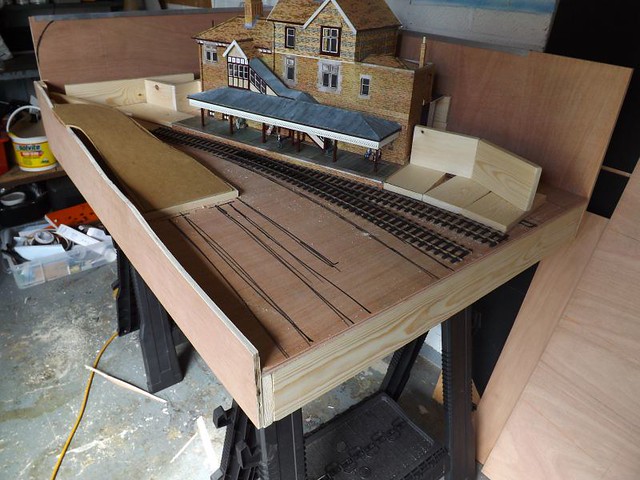
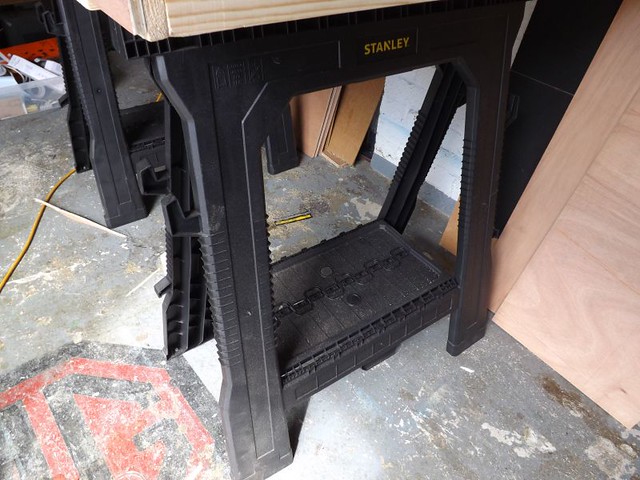
The surface is 12mm ply - I have learned the hard way that an exhibition layout needs a good solid baseboard that will put up withg being taken in and out of vans for the next five years or so. The backscenes are 9mm ply and the framing is timber 3" deep. My local timber merchant cuts the ply for me so it is exactly the right size.....pretty much like a baseboard kit really. The baseboards are going to stand on plastic trestles from Stanley, sold as a saw horse...they are light, strong, easy to store and transport and not expensive.
The retaining walls around the station building have been 'sketched in' with timber and the approach road to the end loading dock installed using hardboard. The station building isn't fixed in place at this stage,
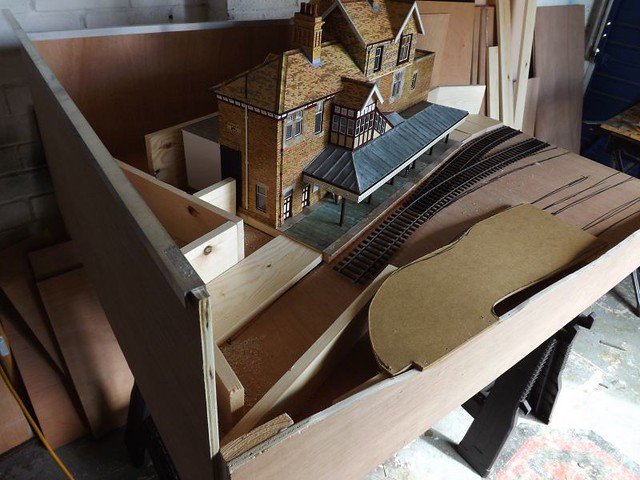

Because the station building is higher than the backscene an additional piece of ply will have to be attached to the backscene to protect it when it is transported.
That's as much as I can do until the track arrives, other than making the second baseboard of course.
Peter
-
4
-
-
You've got a good memory if you do! It must have been in the Modeller in the late 1990's I would think. That was the layout that cured me of modelling a prototype station, it looked great but operationally it was awful! I could have done something much more interesting in the same space. Mind you, if we'd had DCC them it might have been better as the trains could have been double headed or banked. Never mind, it's long gone now and I seem to be gradually moving along the south coast.
Peter
-
I've done some more work on the wagons today - I posted a big model to the US yesterday so today is recovery time!
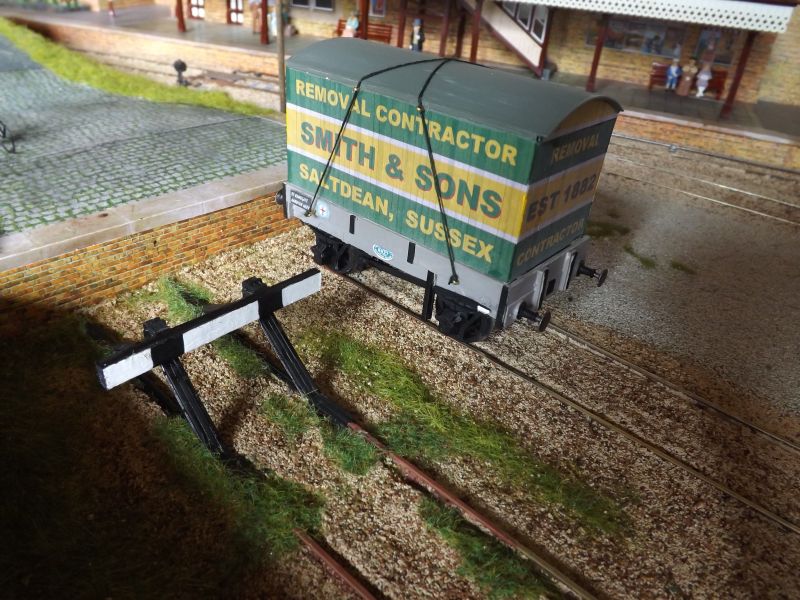
I've made up a little flat wagon with a furniture container; I've redone the LBSC logo/illiteracy symbol on the computer and on the model it is just printed on paper and stuck in place...not ideal but it is correct now and at least they'll all be the same. The chalked board was done the same way.
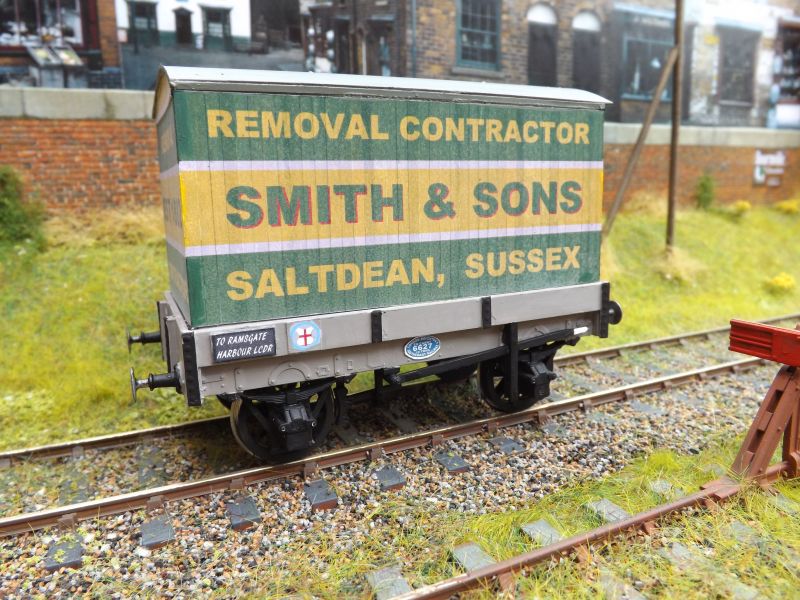
The container was done by cladding a simple plastic card box with printed paper, done using Serif Pageplus like this.....
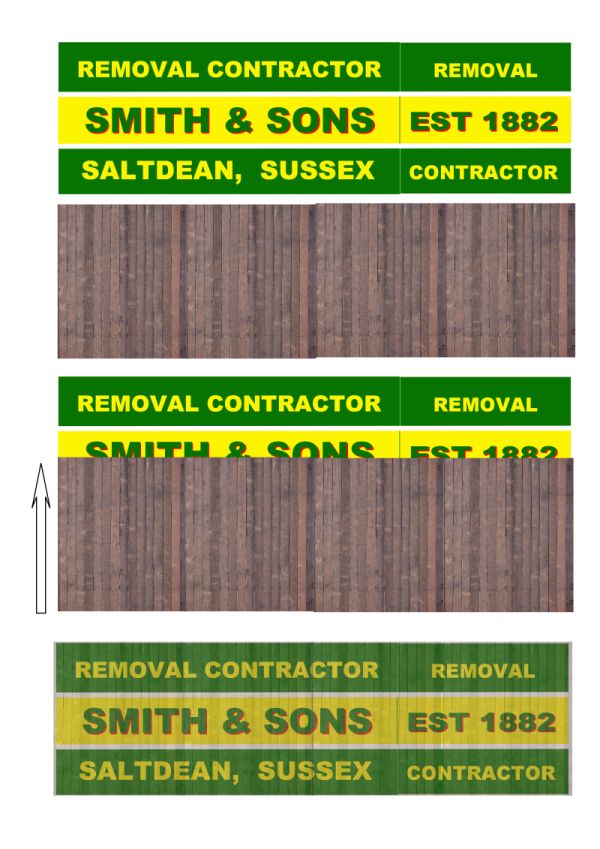
I just made the container to fit the wagon. The side and end artwork were done first, then a photo of a planked surface was placed over the top. This was made more and more transparent until the artwork underneath showed through but the planks could still be seen. It was printed off onto gloss photo paper, cut out, glued to the plastic box and then sprayed with Dullcote - easy! The roof was rolled from a sheet of thin brass and painted. I have to admit that my container has no doors, so I'll redo one end and add those now I know the technique works. As long as you only look at one end at a time It's OK!
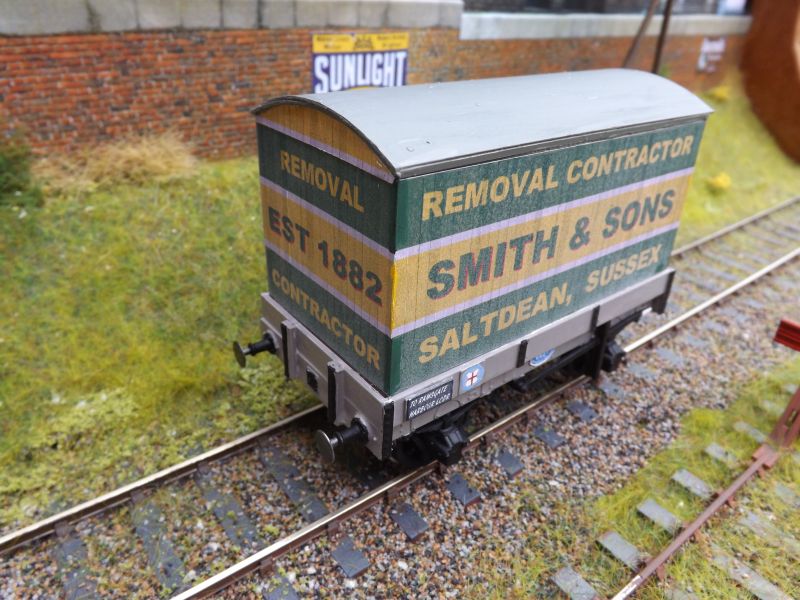
It need some ropes and lashing rings to finish it off properly.
Then I started wondering what else I could do in a similar way.......
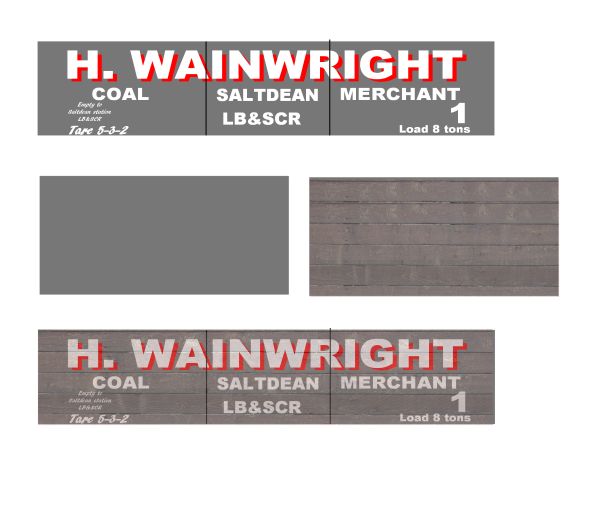
I'm going to want some PO wagons based at my fictional station so here's the artwork for the first one, done in just the same way. The wagon body was made up from plastic card, and the printed sides were stuck in place:
Then the strapping was added, cut from Slater's embossed rivets sheet and glued in place with Evostick. It was then painted black. The lettering which is covered by the strapping has then to be painted in, which is why my wagon has no diagonal strapping!
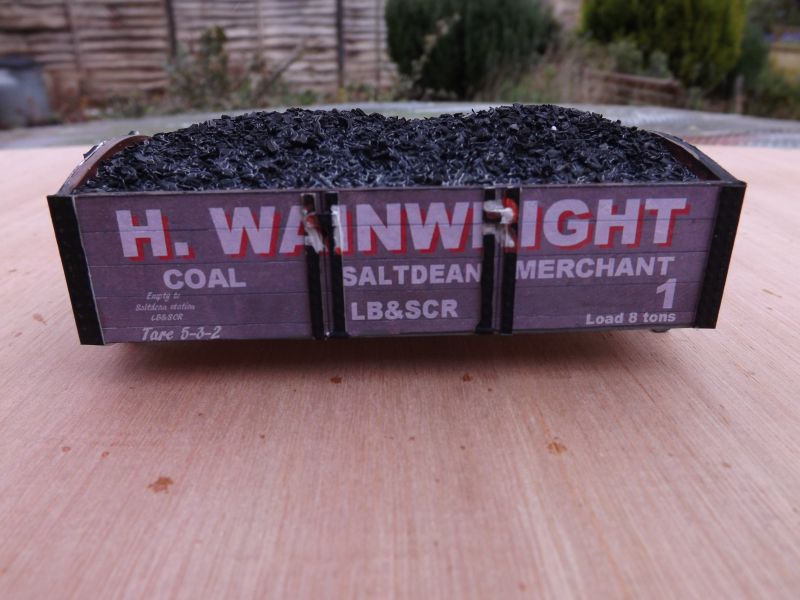
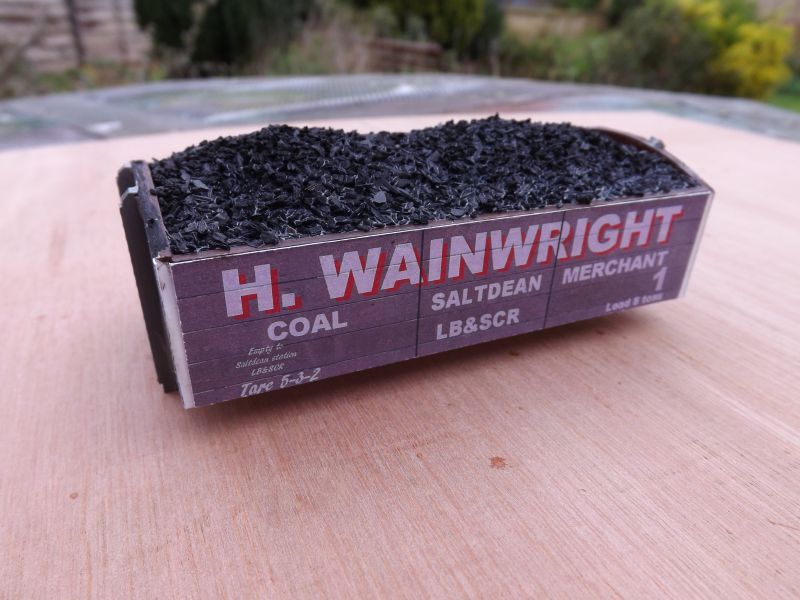
Here is the second wagon:
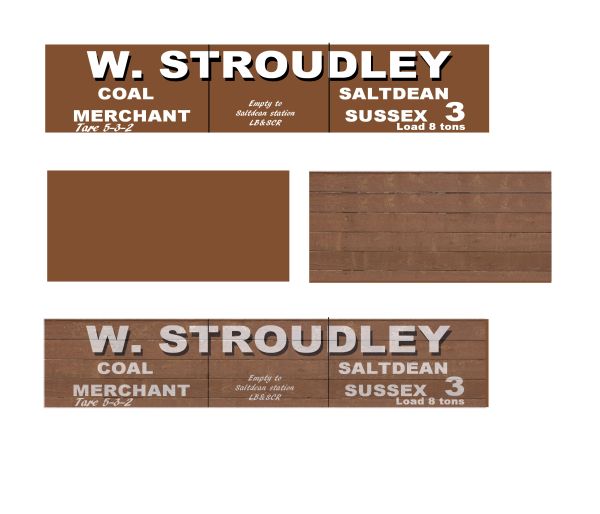
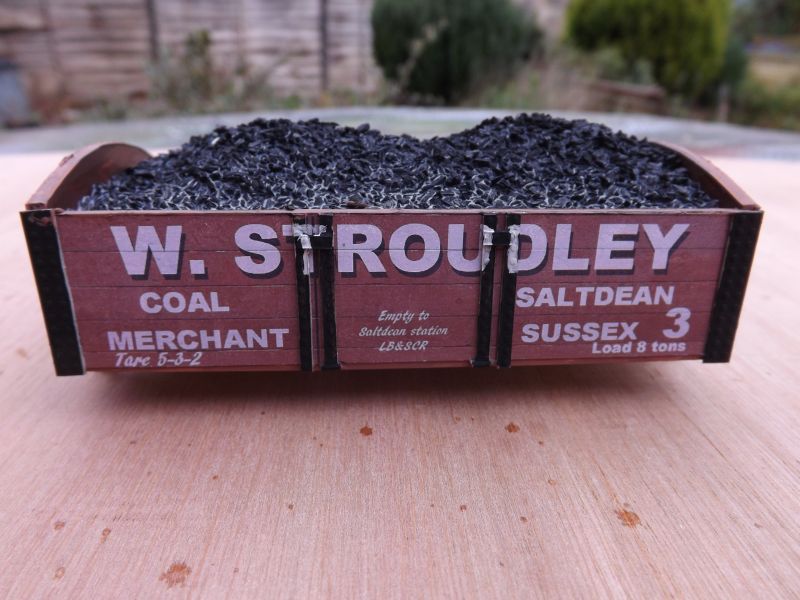
i need to order some more underframe kits from Slaters so I can finish them off.
The beauty of this method is that it can be used for any scale; in 2mm I would print the strapping as well.
Doing multiples is easy too, just change the number on the artwork and print off another sheet. The look of the wagon can be varied by increasing or decreasing the transparency of the planking. The best thing of all is how cheap they are compared with kits, and you end up with unique models.
I'm going to need half a dozen beer vans for my brewery, so that's going to be the next wagon. Watch this space!
Peter-
9
-
-
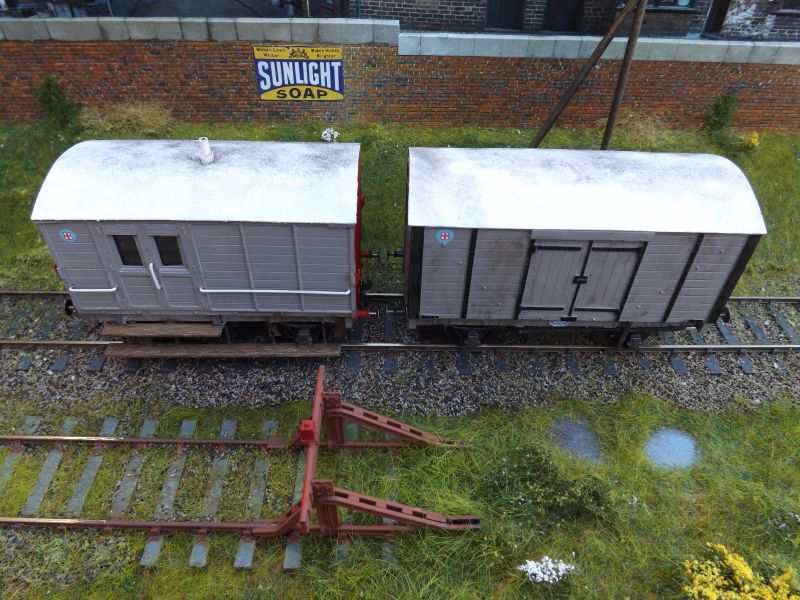
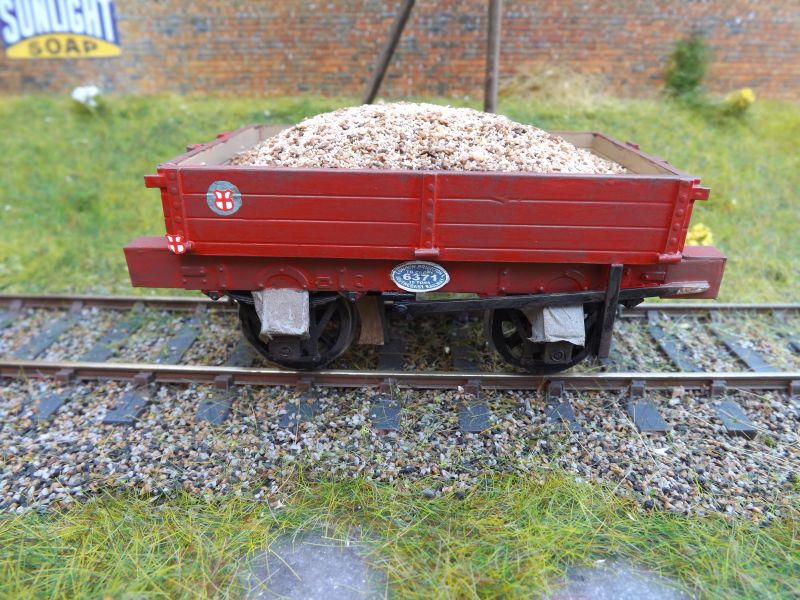
The transfers have arrived from Powsides for the LBSCR illiterate symbols so these have been added to the wagons. I was a bit disappointed that the blue circles weren't included, just the red and white shields. My blue circles were hand painted which is why they are a bit large. They symbols certainly look attractive, and I've also weathered the wagons lightly. More transfers are on order for the lettering and numbers which can be added later.
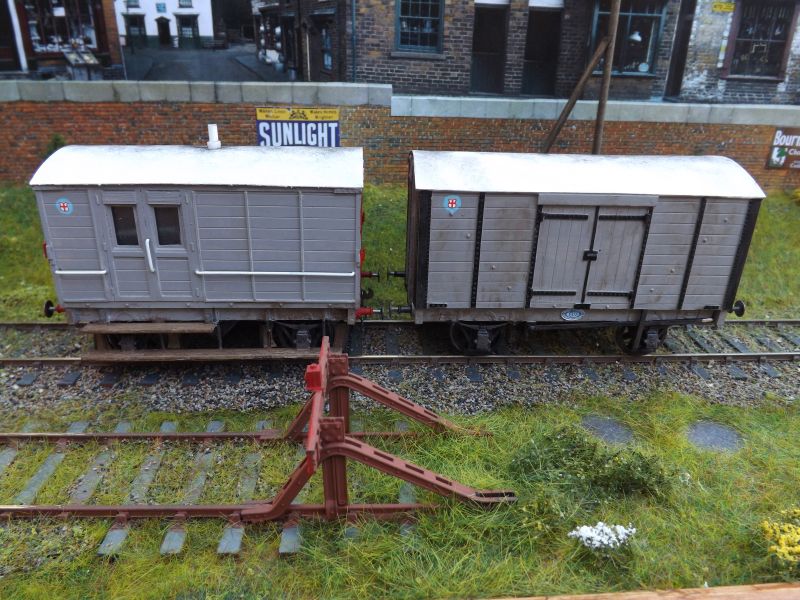
The white roofs were toned down with weathering powders, then sprayed with Dullcote.
Peter
-
15
-
-
I think 0 is the perfect compromise, big enough to see but small enough to fit a fair amount in. The figures look like real people in this size, for instance.
I've decided to take the bold step of using metric baseboards for the first time...having done some sums (all right, used an online conversion site) a 5' board is 1500mm, 2' 9" wide is 840mm and a 15" high backscene board is 380mm....good enough for me. Hopefully I can get the wood cut for the first two this week,
Peter
-
Likewise Jim; I used to model the SECR but it was the Chatham side of things I'm afraid. Good luck with your layout and keep us posted as it progresses.
GWR...wasn't that a little tramway somewhere down in the west country?!!
Peter
-
I hope it's not out of place to mention my new 0 gauge LBSCR layout 'Saltdean' which has a thread on the Layouts section of the forum.
Peter
-
3
-
-
My new 0 gauge LBSCR layout 'Saltdean' has a thread in the 'layouts' forum. No baseboards as yet, but the station building and some wagons have been described to get things going,
Peter
-
2
-

Saltdean - LBSCR in 0 gauge
in Layout topics
Posted · Edited by kirtleypete
I've built the little signal box which will stand at the end of the platform; for the pictures it isn't in the right place, I just stood it on the baseboard. It's based on the ones on the Cuckoo line and measures just 11' 6" x 9' 6".
The structure is all plastic, with 3mm thick glazing for strength. I painted the whole thing brown as an undercoat, then the dark red on top...when that was dry the cream panels were added from printed paper, with the ventilation holes included on the top panels. There is no cream paint on the model at all. Most boxes were planked below the windows but a picture of Horam taken in 1882 shows plaster panels similar to those used on the station buildings so I copied that because it's unusual. The nameboard with the chunky serif lettering was copied from Sheffield Park.
The open door adds interest.
The roof was covered with my building papers and a stove pipe added from plastic tube; the little finials are 1/32nd scale wine bottles and unfortunately that's what they look like but they'll do until I can find something better.
The roof lifts off to give access to the interior:
I have also bought a lovely little horse drawn cart which was built from a kit by Parliamentary Trains; laser cut in plastic it is superb and I will be buying more.
The next job is to install the platform on the second baseboard and wire in the track, then the signal box can be put in the right position.
Peter