


CF MRC
-
Posts
2,032 -
Joined
-
Last visited
Content Type
Profiles
Forums
Blogs
Gallery
Events
Exhibition Layout Details
Store
Posts posted by CF MRC
-
-
Try working on a 3.5” gauge loco for a contrast in size!
Tim
-
Interesting carriage that, Jim. I do like the WCJS carriages. We could justify a LNWR Birmingham businessman’s train on the NLR to Broad St, hauled by a Jubilee (not Nick’s type). I did procure etches for some of the coaches but unfortunately they went AWOL with a former member of the group. I think we have more than enough other projects on the list though…
Tim
-
Will you make a Cardean, Jim? I always thought the old GEM kit looked very impressive.
Tim
-
The great thing about model railways is, that as a hobby, it is always changing and that to me is a very positive thing.
Following recent events, analogies to previous major changes in the hobby have already been made. It is often the case where a group can’t see a way of making something work that they give up. That happened in 1995 with the demise of IMREX, which was frankly overshadowed by the emergence of the Warley show at the NEC and a change towards more finescale modelling. The Model Railway Club went through a very sticky patch thereafter because it relied too heavily on exhibition income to be viable, with massive running costs. A new group then came along and changed the way the Club worked and used its major asset, Keen House, to generate income and hence pay off a substantial loan. The loss of the Warley NEC show has a familiarity about it, but I am sure that the Warley Club will adapt and go from strength to strength.
The MRC is now in a very healthy condition with increasing membership, a vibrant Young MRC & Junior section and with nearly 25 years of successful exhibitions jointly held with Warners at Ally Pally. The show promotes the Club, but it does not rely on it for running.
From a personal standpoint I have no doubt that Copenhagen Fields could not have been built without the support of the Club. The layout is now in its 40th year. The team that work on it are learning from the originators and indeed it’s exhibiting is getting more and more streamlined as old methods are questioned by new sets of eyes and hands. Such layouts are a cost to the Club in many ways and need to ‘pay back’. To that end flying the flag at outside shows and also Ally Pally are key. One has to be innovative: we had the first ‘exhibition’ at Keen House following the Covid lockdowns in July 2021, showing small groups of visitors around the layout with an up-close personal ‘tour’. It was great fun, I think well received and raised revenue for the Club. For our 40th birthday celebrations we will probably do something very similar at Keen House in early December, but also have our other new London-based layouts also on display; S7 ‘Bow Junction’ & EM ‘Orchard Wharf’. Conventional exhibitions are not the only way of promoting our interests.
So the hobby is changing, step up and do something to support an event you enjoy, embrace it and enjoy it!
Tim
-
 15
15
-
 1
1
-
-
Posted before completion.
-
I had two of those Graham Farish ‘standard’ engines: they worked as bankers on my old layout. With two working together you needed ear defenders and they used to like shedding their coupling rods as well. Pretty grim really.
Tim
-
The standard stock was scratch-built 30+ years ago by Stewart Hine and used on the Caledonian Tube part of the layout. It has a modified Tomix tram mechanism in it at present, but will probably get a re-work based on Stewart’s original chassis in the near future.
We will also be making a new train for YR and of course the Revolution ‘38 stock will be a godsend. It will be backdated to the prototype stock and probably run on the Cally section.
Tim
-
3
-
-
That’s a good idea, but the photo would almost certainly have been taken during the comparative trials with an A1 out of KX in July 1923.
Tim
-
2
-
-
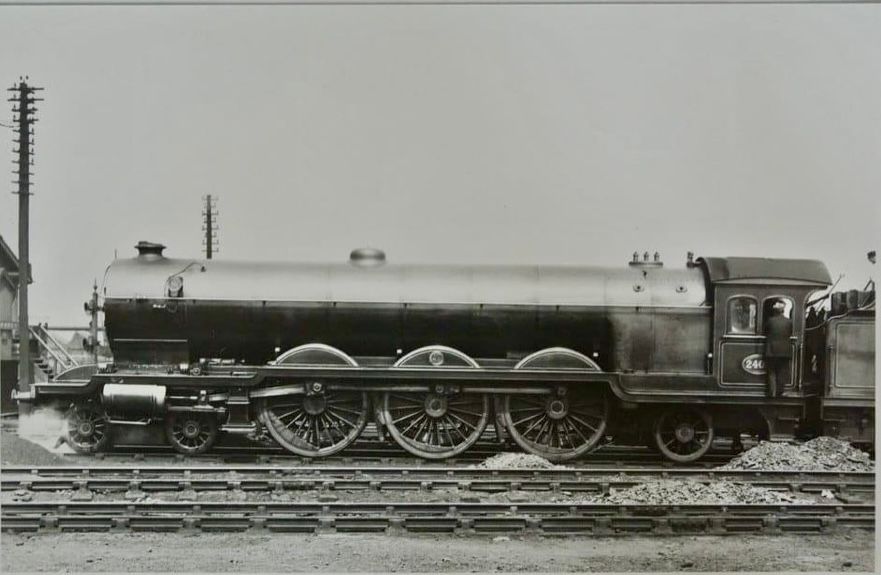
Don’t worry, it’s not forgotten, but I have too many projects! I found this photo recently which shows it in exactly the condition I’m modelling it.

I suspect the photo was taken at KX. Quite interesting that the rear 3/4 of the cab appears to have a cover over it, which also is visible in the classic KX picture.
Tim
-
8
-
 1
1
-
-
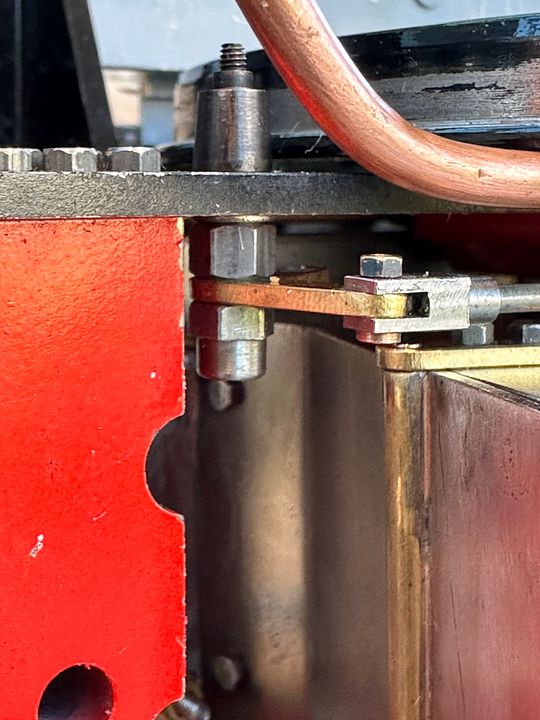
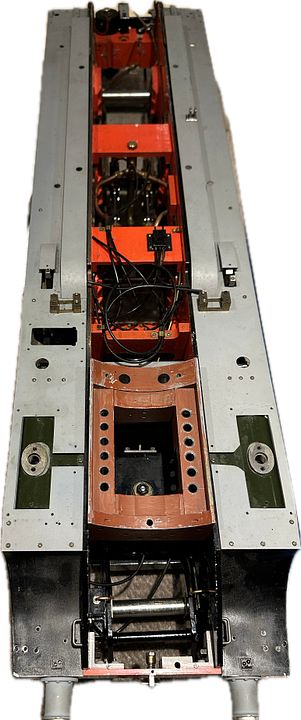
I have now worked out the mechanism to work the bottom ashpan flap. Ian Jaycocks very cleverly used a nut-bolt fixing onto the rear brake to act as a fulcrum for the first operating crank.
It was much easier working on Sir Sagramore with the brakes removed and this also simplified plumbing alterations.
The mechanism will need a connection in the cab but I think I have a solution for that. It also gives me a steer for the damper linkages.
Tim
-
2
-
 3
3
-
-
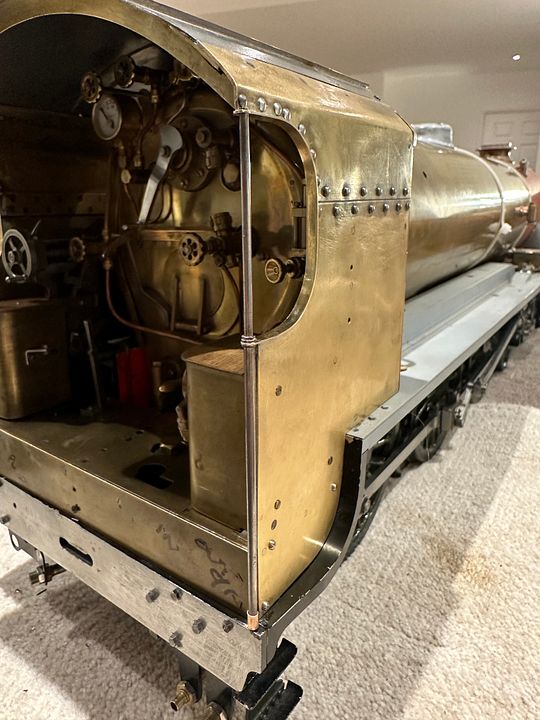
Might be a bit quiet here for a while as I am having a bit of a change of size, working on Sir Sagramore
Details in the Model Engineering section of RMWeb.
Tim
-
7
-
-
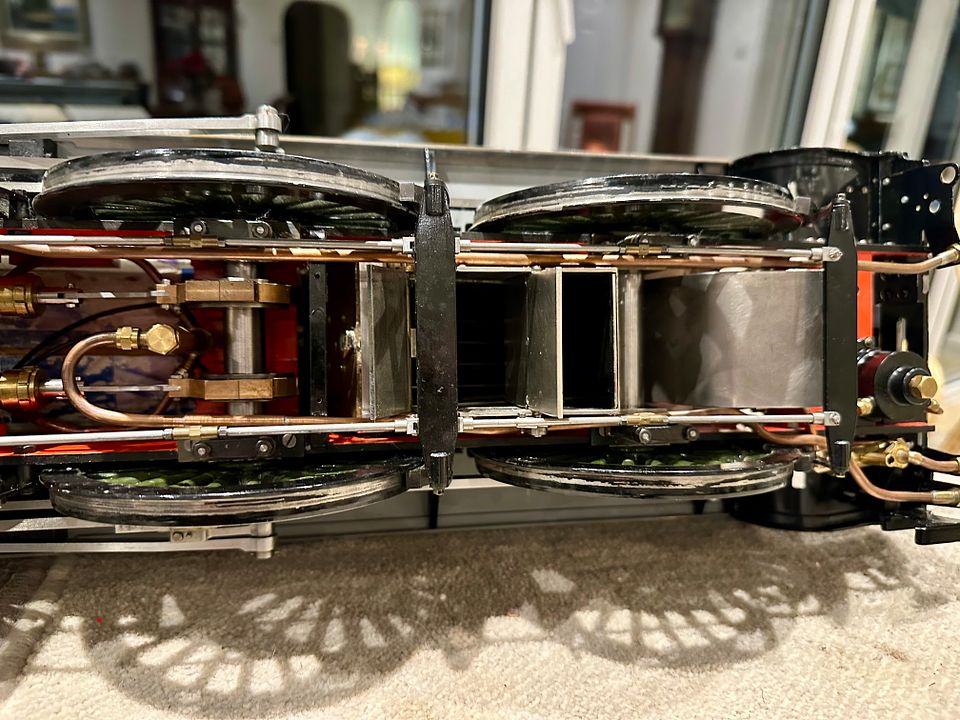
After a fairly heavy couple of months making 2mm scale tube railways I thought a change of size was needed. Some remedial work was needed on the cab side sheets following a mishap.
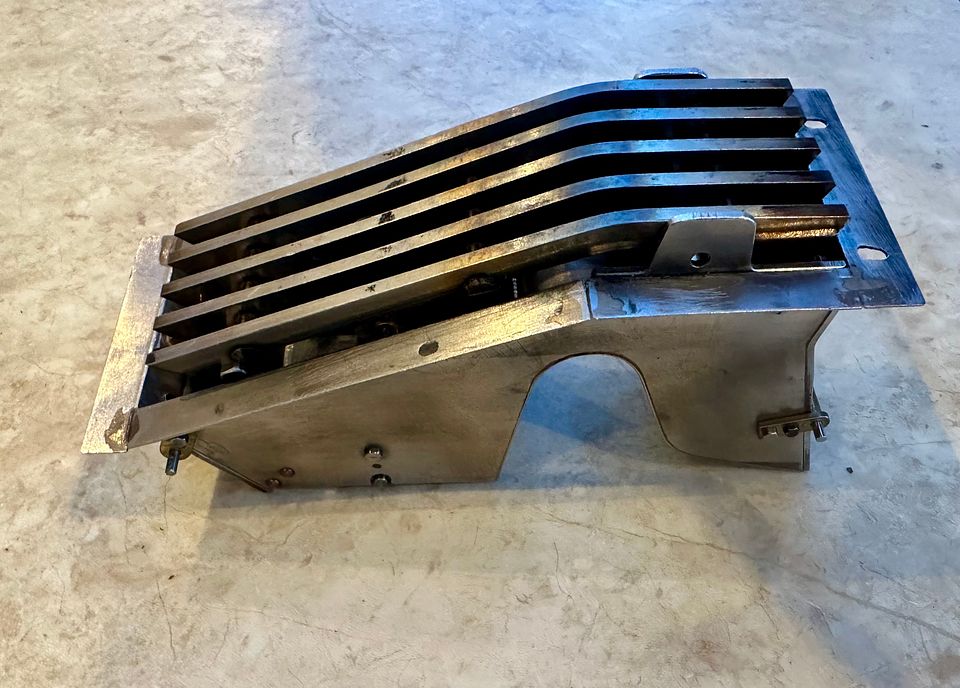
Sir Sagramore has now been dismantled to fit the ashpan and grate.
There has been a huge amount of head scratching to work out how it all dismantles and fits. Obviously, the boiler came off, but so also did the smokebox, steam pipes, mechanical oiler and reversing linkage.
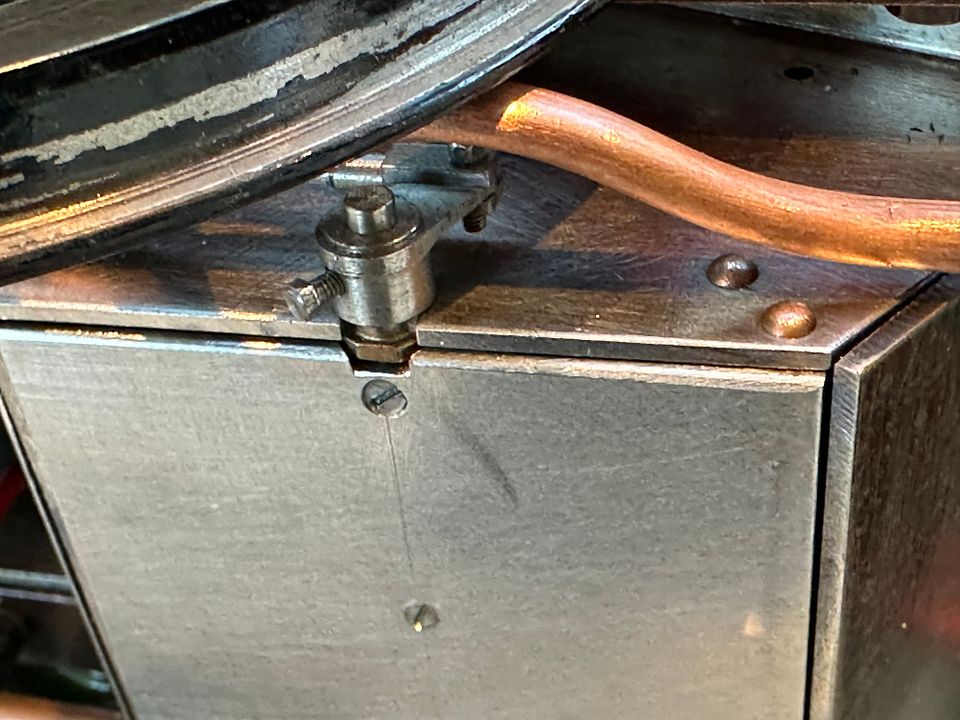
The ashpan is complicated by straddling the back axle
It is also complicated by having two dampers and a bottom emptying flap on the model.
Once in situ everything gets very crowded, in this view the dampers and flap are closed.
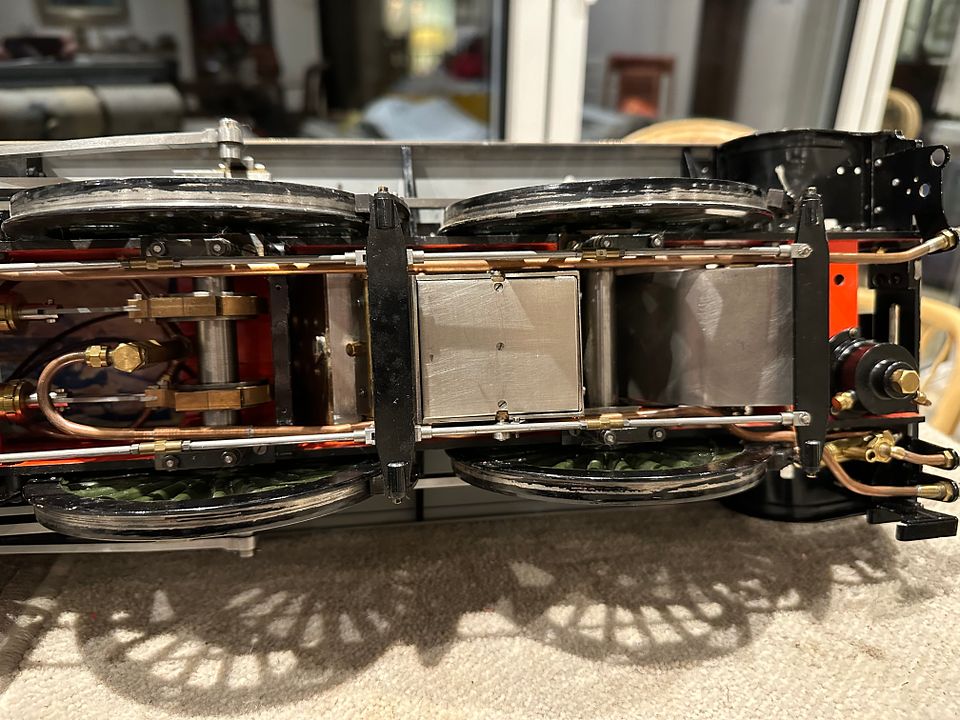
Here we see the bottom flap and front damper open.
The bottom flap will be good for emptying ash and manoeuvring the grate into the firebox - for sure it will need a special tool made for the job. The front and rear dampers will also need robust linkages to work well. These will need to be threaded in to the space behind the wheels, brakes and axle driven mechanical pump plumbing. That is not too difficult, the challenge is how to bring the control linkage into the cab and also make it dismount-able for servicing and repairs.
Oh well, at least it gives the little grey cells something to think about…
Tim-
5
-
1
-
-
I find that wrought gold turns very nicely for whistles…
Tim
-
2
-
 1
1
-
 1
1
-
-
About four years ago, I purchased a 3.5” gauge A3. After some mainly cosmetic work it became Hyperion.
One aspect of the engine that eventually meant that I sold it on was that, like many live steamers, it had slide valves with outside admission, which meant that it had the radius rod below the valve spindle: once I realised this it niggled greatly. Its performance was also adequate, but I think it would have needed some fairly extensive work to make it sparkle. Many locos like that never get re-assembled once someone starts to fiddle.
It was replaced by a 3.5” Maunsell King Arthur, which I am currently working on. This was 90% complete and has some exceedingly fine engineering in it.
The engine has inside admission piston valves with the correct valve gear layout. The cylinder cover sheets are not quite the correct shape at the top by the running board: they should be flush and so are due for re-working. Might that account for some of the previous comments about the S15 cylinders?
I always set wheels in the relationship of the prototype: there is no reason not to in 2mm scale.
Tim
-
9
-
1
-
3
-
-
Perhaps Copenhagen Fields contradicts that last paragraph, David? (Not that it is all to dead scale, though - tunnels aren’t that exciting).
Tim
-
1
-
-
I’m afraid you simply can’t run FS wheels on track with N gauge clearances. The tread width could, in theory stay the same but with extra thick tyres: not an easy solution and very ugly to look at.
Probably best to either tighten the gauge through hand made turnouts for N, or go to 2mm FS.
Tim
-
2
-
-
Back in 1978, Keith Armes solved the problem of working slips on Chiltern Green by tightening the gauge to 8.9mm; this then tightens the check rail and crossing nose clearances so that the wheels fit the track better. It would be good if the Finetrax turnouts and crossings did the same.
Jim Snowden did the same in O gauge Finescale which has a horribly sloppy set of standards.
Tim
-
3
-
-
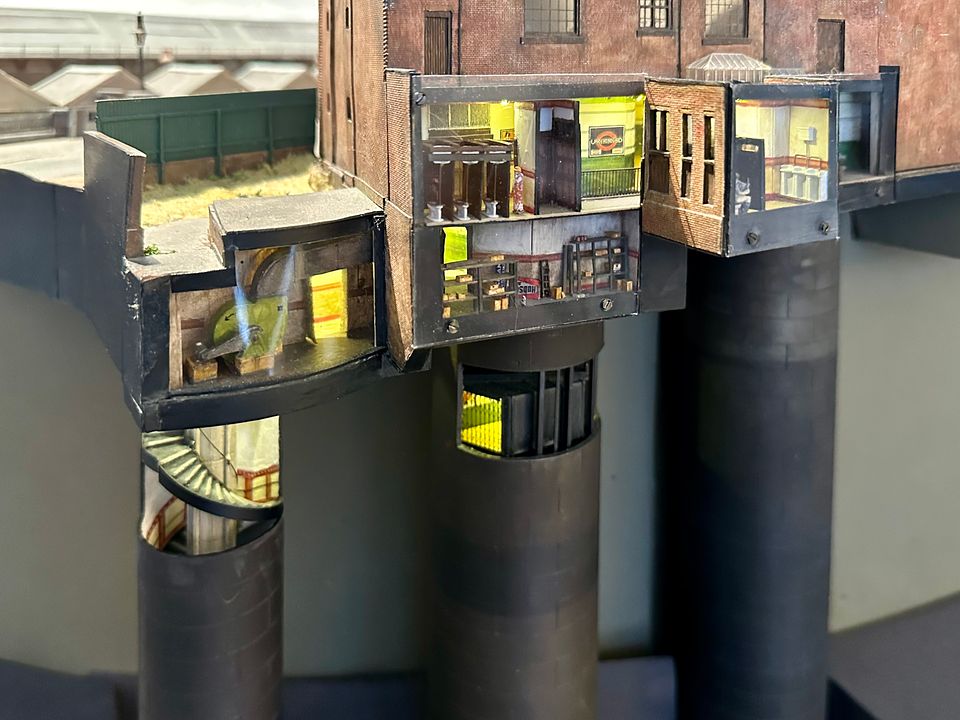
What I was trying to say, was that we generally try to make models of complete scenes rather than buildings with e.g. walls missing so that you can see inside. But this tube scene has become a bit of an ‘educational model’ such as we used to have in museums. Virtual reality screens have now replaced many of these displays: I prefer models…
Tim
-
10
-
-
- Popular Post
- Popular Post
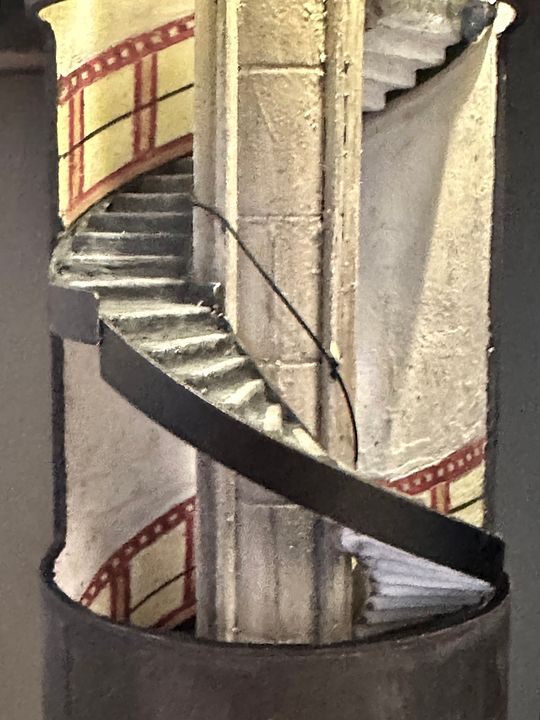
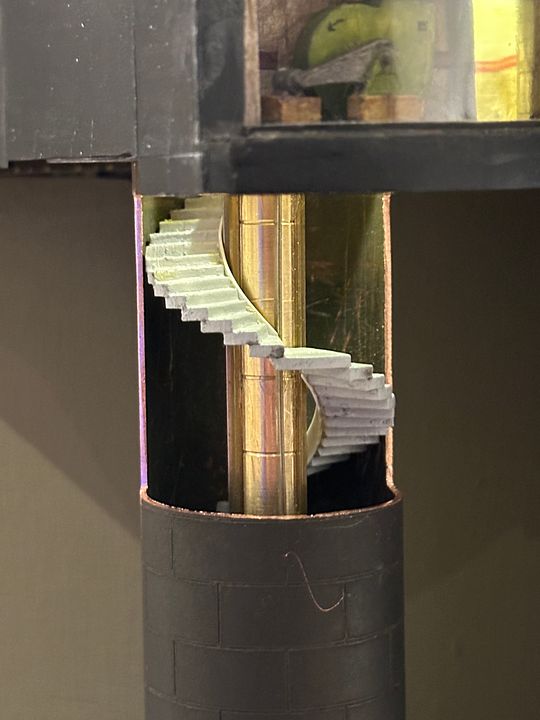
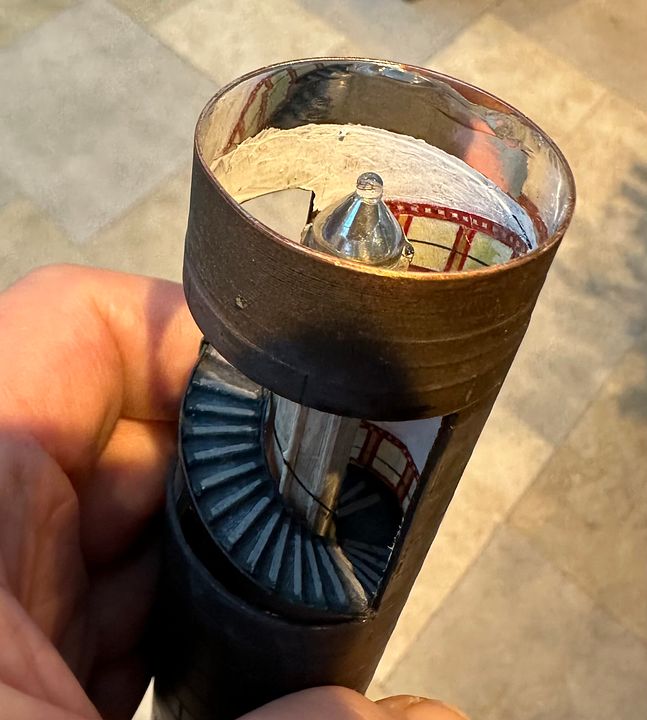
York Road spiral stairs are now complete, after a weeks work: the illuminated steps will help to draw attention to the lift and give a raison d’être for the funny shape on the southern side of the tube station.
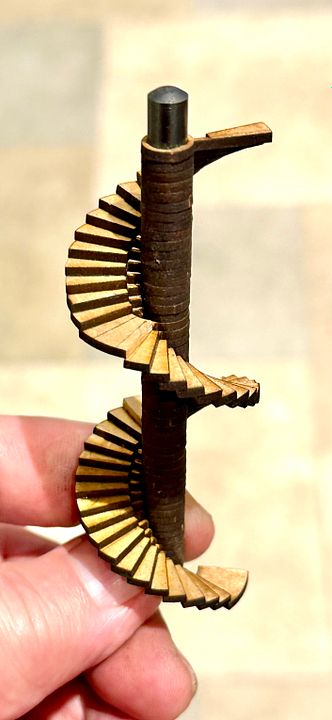
The construction was aided by John Jesson producing laser cut step sections using the MRC laser-cutting facility; rather like a castle stairway (the top step shows the profile).
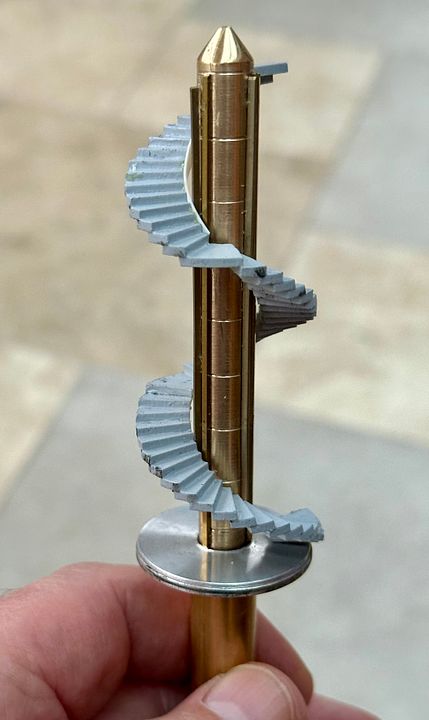
Once glued together, the centre section was cut away, the steps trimmed with a high speed tungsten carbide trimmer and a new brass ventilation shaft turned up to the correct diameter, complete with plate work jounts scribed into place. The aluminium collar helps to centralise and support the stairs towards the bottom. The reason for the polished conical tip will become apparent later (it’s not an ICBM).
The copper pipe of the stair shaft had a window cut into it using diamond discs and the position of the stairs was then determined.
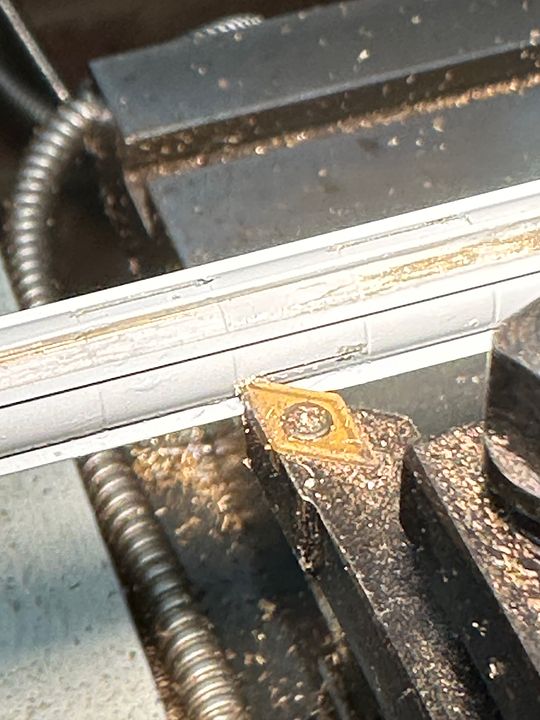
There are a number of conduits surrounding the ventilation shaft and these were represented by brass square section and strip. The vertical plate joints were scribed in using a tool in the lathe, where they would be conspicuous.
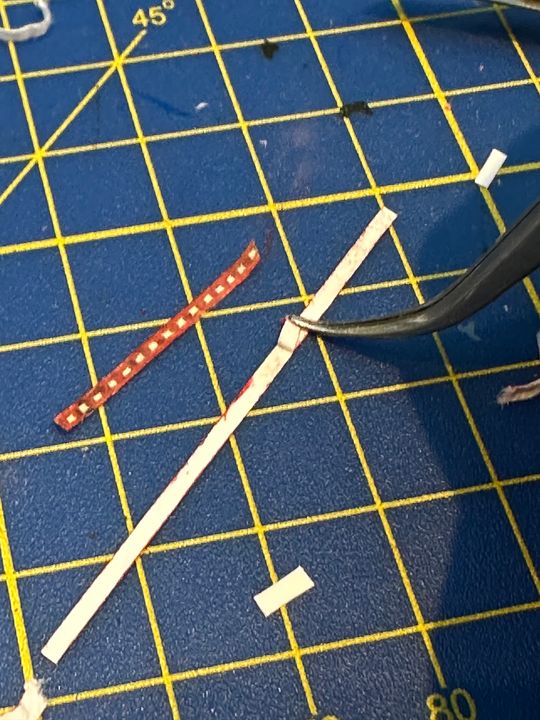
The artwork for the tiles was already available from the station building. Tile strips were cut out and thinned down from behind with a scalpel and tweezers so that they were almost like a transfer.
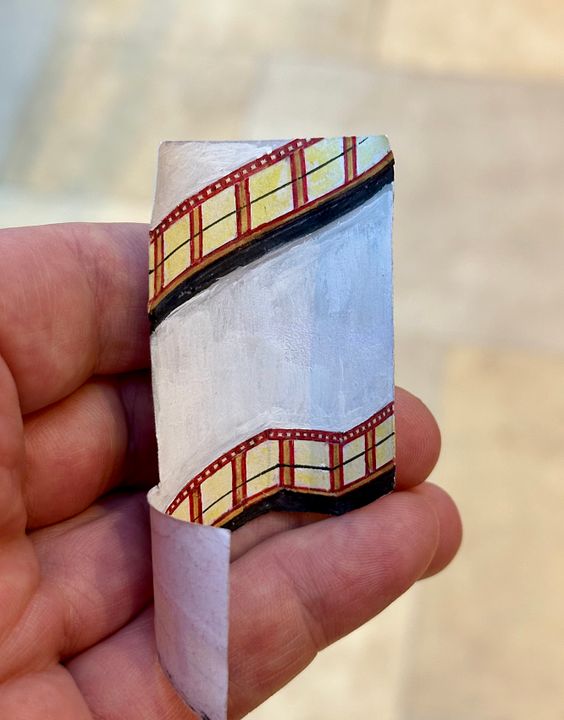
A paper liner was marked up and the individual tile patterns glued into place. I’m sure some clever person could have drawn all this up and printed it, but I’m more of a make it directly sort of person.
The liner was held in place with photo mount and a chrome metallic pen used to finish the top of the ventilation shaft cone and the top of the main shaft lining. Finally a light cured resin spherical lens was made to go on top of the cone. The reason for this? There is an LED positioned immediately above the main shaft in the roof and these reflective / refractive devices might capture and improve light transmission down the stairwell. I did not want to fiddle with extra LEDS.
The final scene fulfils the aim we had three years ago of showing how a tube station is laid out. It’s not really realistic modelling, but I’ve found it great fun to do.
Just for completeness here is alink showing the famous Covent Garden steps. https://www.reddit.com/media?url=https%3A%2F%2Fpreview.redd.it%2Fiwl8o3d7eebb1.jpg%3Fwidth%3D3024%26format%3Dpjpg%26auto%3Dwebp%26s%3D4d5f74c09a51902e8548e2fd49a23467d3bf2a61
I think that’s enough tube modelling for a while, apologies for the long post!
Tim
-
25
-
1
-
12
-
10
-
That is not the same set up as those are just single lenses rather than pairs in a telescope body. That arrangement gives you working range.
Tim
-
1
-
 1
1
-
-
My students use variations on these:
https://www.amazon.co.uk/BoNew-Surgical-Binocular-Distance-Aluminum/dp/B07CCLW8QC
It is easy to modify a pair of prescription plastic frame glasses to take the loupe unit.
I have used this type of magnifier for decades (albeit higher price versions) - they give you a greater working distance and depth of field, compared to single lens devices.
Tim
-
 1
1
-
1
-
1
-
-
Nah. The cottage pre-dates all the ugly Victorian industrialisation.
Tim
-
3
-
1
-
-
That’s a very impressive water cart, Jim.
Tim
-
1
-
-
If you have chickens, you have rats. You could also have Peter Rabbit.
Tim
-
5
-
1
-


Mersey Railway 0-6-4 tank livery
in Pre-Grouping - Modelling & Prototype
Posted · Edited by CF MRC
Stephen Curry, a friend of mine in Australia has just made a Beyer Peacock 0-6-4T, ex Mersey Railway, in 2mm scale. He would like to paint it in Mersey Railway livery. Does anyone know the livery specification?
Thanks
Tim