
- Popular Post


CF MRC
-
Posts
2,032 -
Joined
-
Last visited
Content Type
Profiles
Forums
Blogs
Gallery
Events
Exhibition Layout Details
Store
Posts posted by CF MRC
-
-
31 minutes ago, stewartingram said:
Converted from N gauge? How did you get on with adjusting the B2B?
Replacement reindeer set. Edges of sleigh thinned down etc.
Full instructions in the 2mm section.
Tim
-
 1
1
-
 3
3
-
-
- Popular Post
- Popular Post
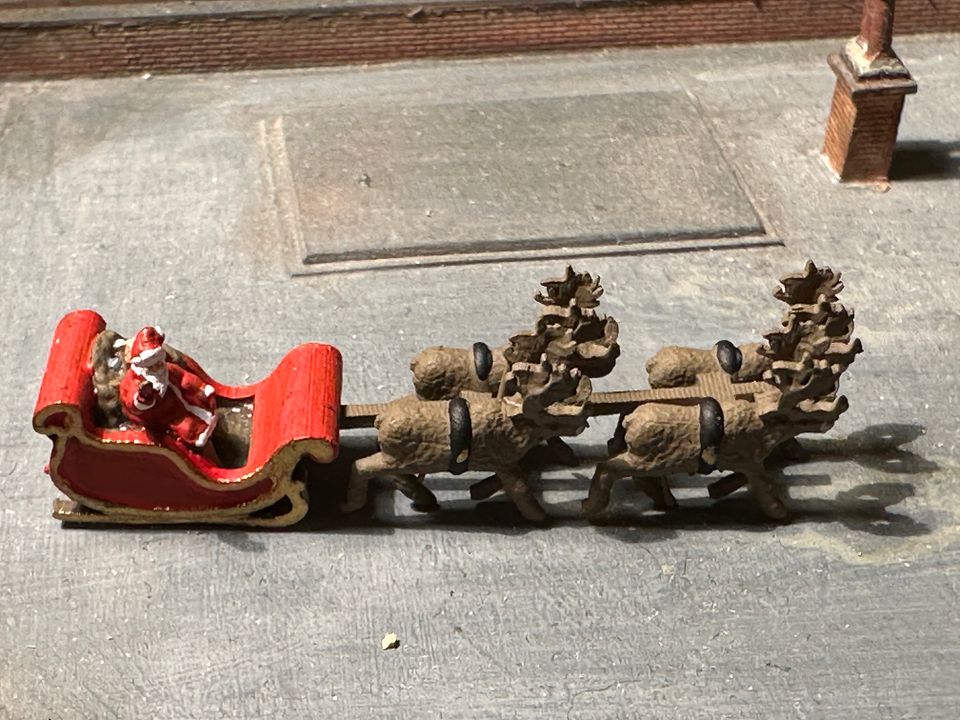
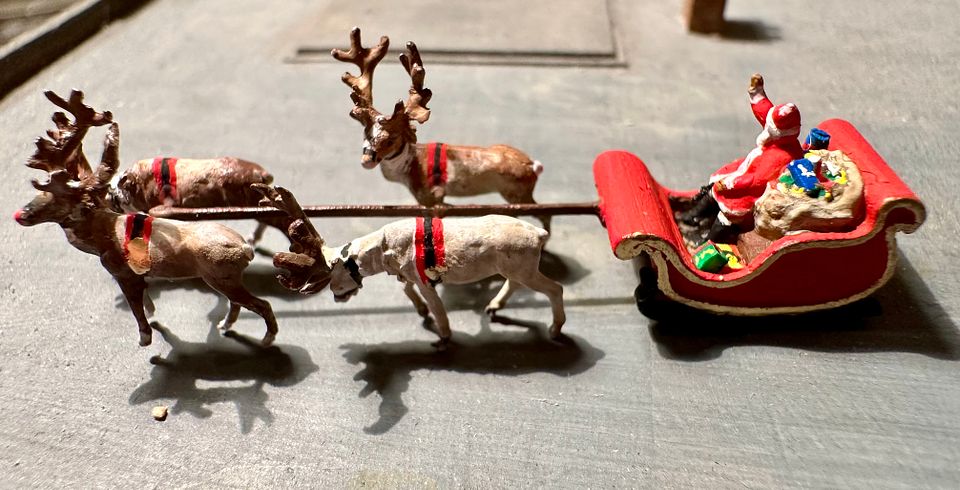
In December, the MRC usually holds a pre-Christmas mini exhibition. The York Road tube diorama was having its first outing with a working train for the show. Whilst certain features such as the toilets and occupants are popular with all ages, I thought it was appropriate that the younger members of the audience get a preview of Santa Claus and his reindeer on a flight test. Having spent far too many hours making the underground tube station I wanted something nice and simple. Osborn Models came up trumps with a nice little 3DP of Santa in his sleigh with four reindeer out front.

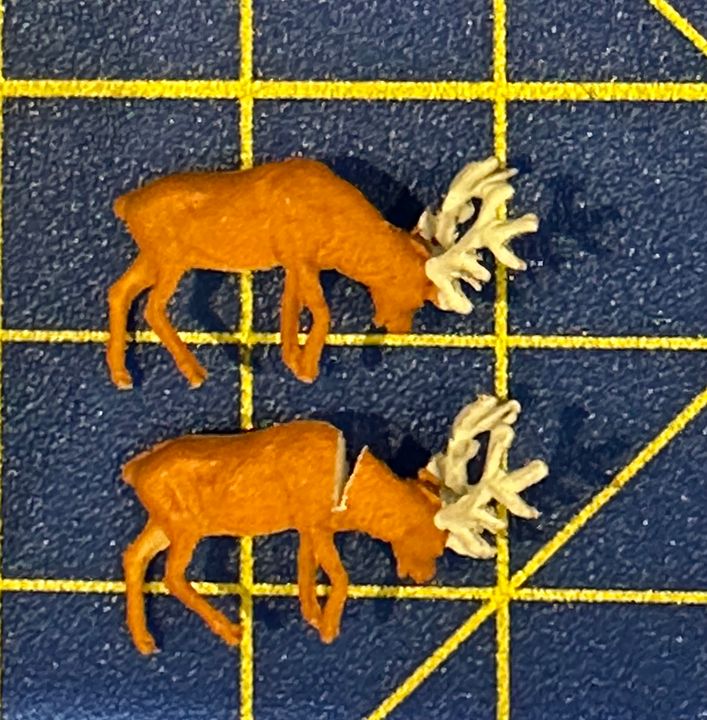
This had landed on the YR tube station roof and attracted many favourable comments from the audience, not least Phil Parker from BRM who was surprised to see such a model on CF. In discussion, I indicated that I thought it was capable of improvement, especially in the motive power department; CF is, after all, 2mm FS. Close examination reveals that the antlers and heads of the ‘reindeer’ pass a strong resemblance to a love child of a triceratops and a moose. There could be a case for an after-market bespoke antler etch if someone was very keen: I certainly didn’t fancy soldering up eight antlers from wire as an alternative. I then recollected that Preiser make some reindeer as a plastic moulding. Now these come as a very fine six pack in pairs, including four adorned with rather more plausible antlers. The challenge with these models was that they come in pairs and two of them would have looked as if Santa had done an emergency brake application with their heads down grazing. These therefore required plastic surgery with a triangular neck re-section.
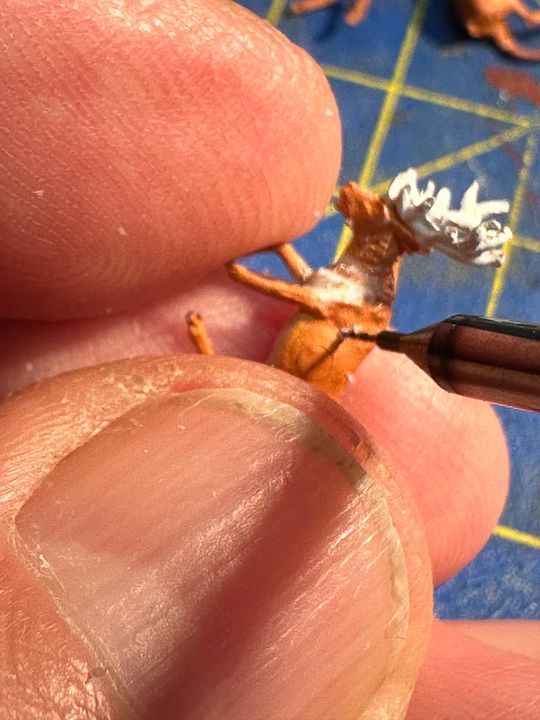
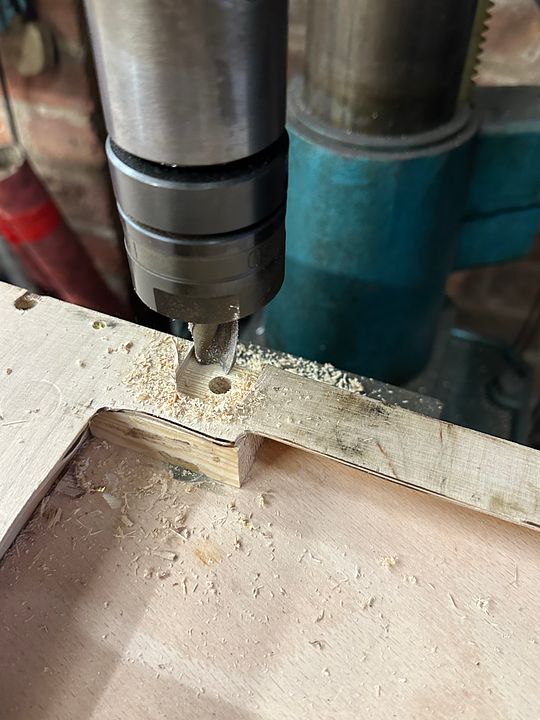
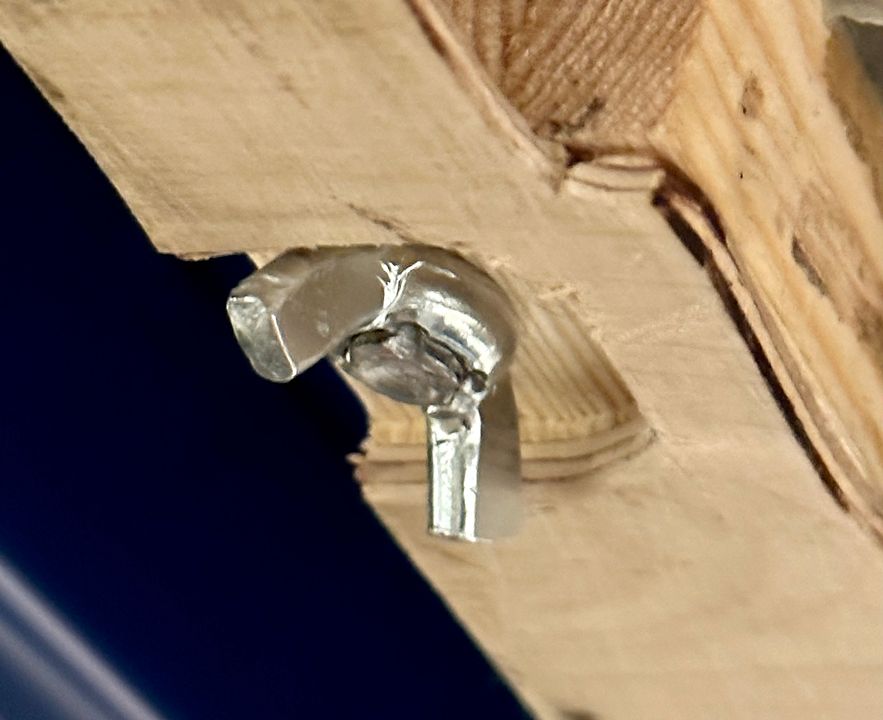
With the other pair I moved the head around on one of them to create a bit more variation. The Preiser reindeer are not too steady on their feet (maybe it’s not just carrots they have on Christmas Eve) and so some sort of location was required. A centre pole was made from metal strip and cross pieces of 0.4mm brass wire soldered in place. This replaced the chunky 3DP structure which was actually quite weak. At this stage the reindeer underwent key hole surgery with a 0.4mm tungsten carbide drill to locate the cross pieces just behind their withers. The antlers were also trimmed a bit.
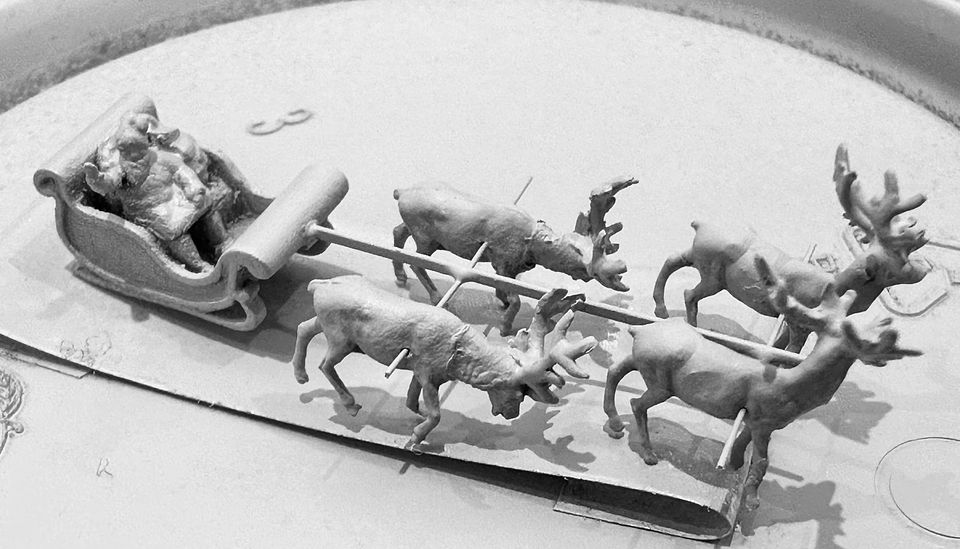
After a fair bit of thinning down of the sleigh edges with a scalpel and very sharp chisel the whole assembly was given a puff of grey primer, to show any major defects.
At this point I had a serious look at reindeer liveries on-line. They are very similar to dairy shorthorn cattle with a mixture of beige, yellow ochre, umber & white. The antlers would generally be darker shades. The noses are generally pink and of course one of them (Rudolph) has a red nose. Any bridles / tackle were painted on with a fine brush. The parcel load in the sleigh was augmented with extras and some are carrying the initials of the grandchildren. The gold lining on the sleigh was re-instated using a fine line gold marker pen.
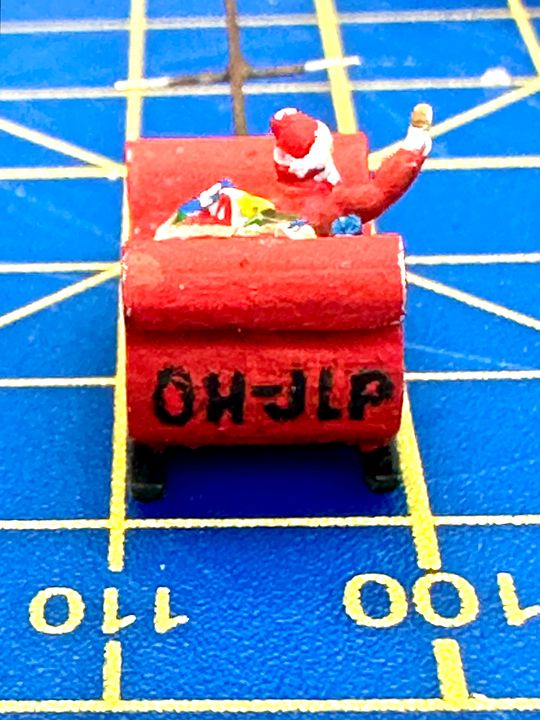
Finally, I thought that the sleigh ought to carry some aircraft recognition marks for Lapland. These are OH-JLP. Those of you that know about these things will recognise that OH is the symbol for Finland and JLP is a shortened form of Joulopukki, Finnish for Santa Claus, or literally ‘Christmas Goat’. So now you know.
Of course you could save yourself a great deal of work by purchasing a Modelu Santa & sleigh 3DP, which came out just as I started this project, but where’s the fun in that?
I look forward to seeing the grandchildren’s faces when they see Santa Claus on CF.
Tim
-
16
-
 2
2
-
 9
9
-
1
-
- Popular Post
- Popular Post
14 hours ago, Tony Wright said:Including.......
There are many 'detailing' bits to fit, including some incredibly fine, pierced etched covers for the end windows' protection. I'm going to have to be incredibly careful with my use of superglue, because this is a magnificent model.
I do hope my hands will be steady!
Super glue can be very tricky to use near ‘glass’ because of frosting effects. I often use thickish matt varnish from Tamiya to fix such details. Takes a while to set / dry out and the component needs to be a good passive fit, but much less stressful.
The extra parcels were fixed in place on this finescale vehicle for CF in this way.
It was converted from N gauge.
The grandchildren should like it on York Road.
Tim
-
25
-
1
-
On 10/12/2023 at 18:07, AndyB said:
1975. The National Railway Exhibition organised by the MRC found me enthralled by The Newton Tracey Branch constructed by Keith Ames.
A beautiful N gauge GWR BLT.
©MRC
I've no idea how long I stood by the halt hoping one of the trains might stop; they never seemed to.
But there was definitely something about the bucolic scene with a pannier tank trundling through it that caught my imagination.
I'd like to think that it partly inspired my Nantford Spinney layout many decades later.
©MRC
It was at the Croydon autumn 1974 exhibition that I stood for hours watching Newton Tracey and first met Keith & Heather. I also met John Geach, secretary of the MRC which I then joined. Keith’s layout was therefore shown at Central Hall the year after and the rest is…
Keith made the turnouts for Chiltern Green (8.9mm gauge) so that the slips could work and much of the point work on Copenhagen Fields. A great man.
Tim
-
7
-
-
1 hour ago, queensquare said:
Communal toilets for the block? Don’t forget the tin bath(s).
Tim
-
2
-
-
- Popular Post
- Popular Post
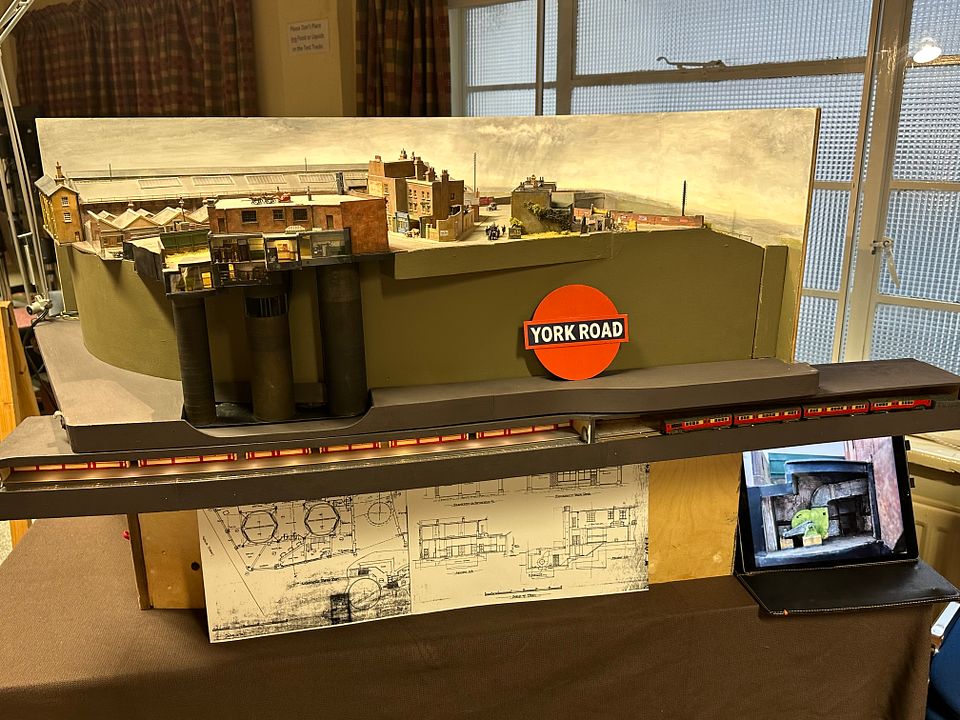
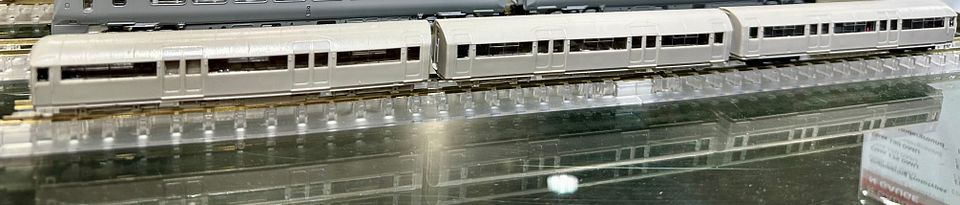
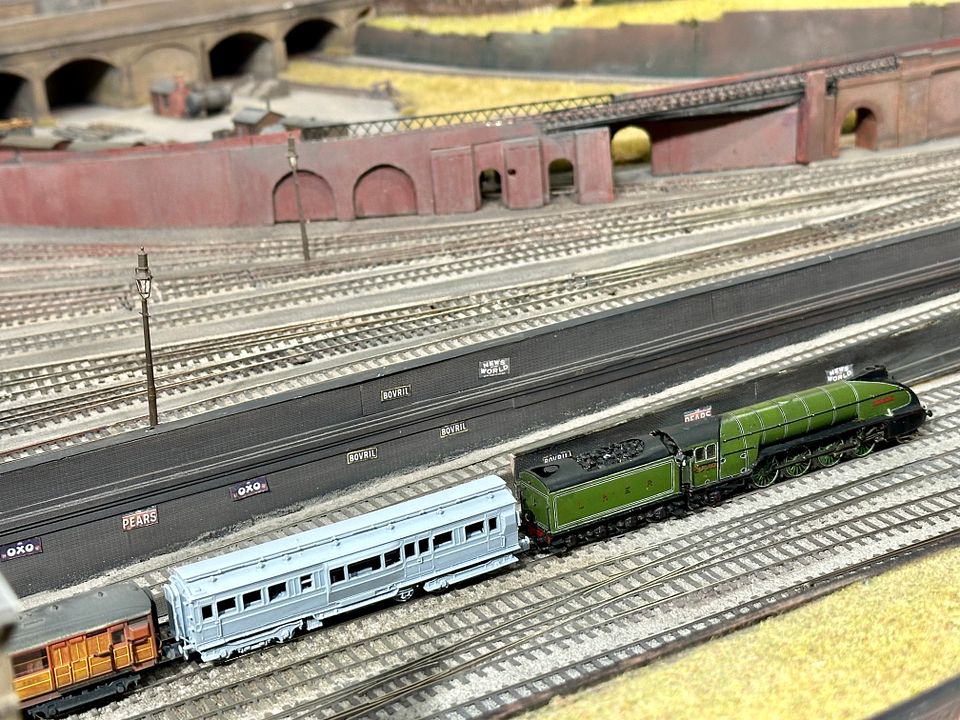
Had a great day at the MRC mini exhibition with YR in its first outing as a diorama.
The standard stock also ran and looked the part. This train may get a new mechanism and act as a prototype for the gate stock which is currently at the design stage in the Jim Watt works.
Signage and posters soon.
Tim
-
30
-
 1
1
-
 1
1
-
1
-
3
-
Being tinplate Bing, that LNWR Precursor isn’t going anywhere fast. We have one and train at the MRC.
Tim
-
1
-
-
- Popular Post
- Popular Post
-
11
-
1
-
8
-
8
-
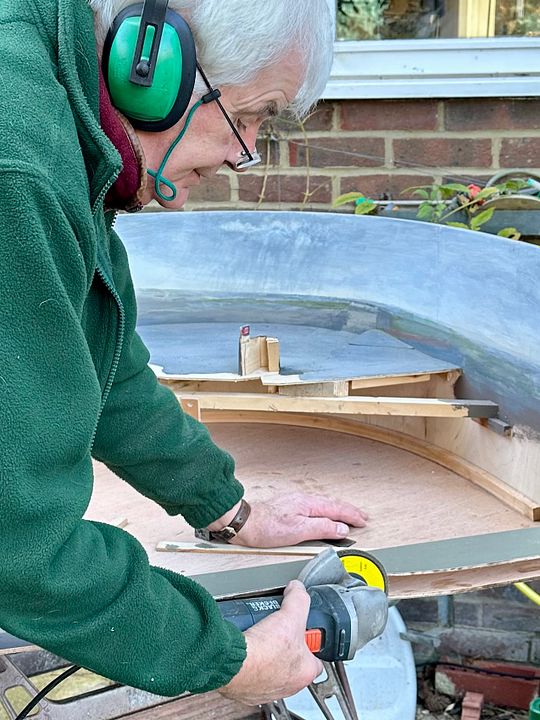
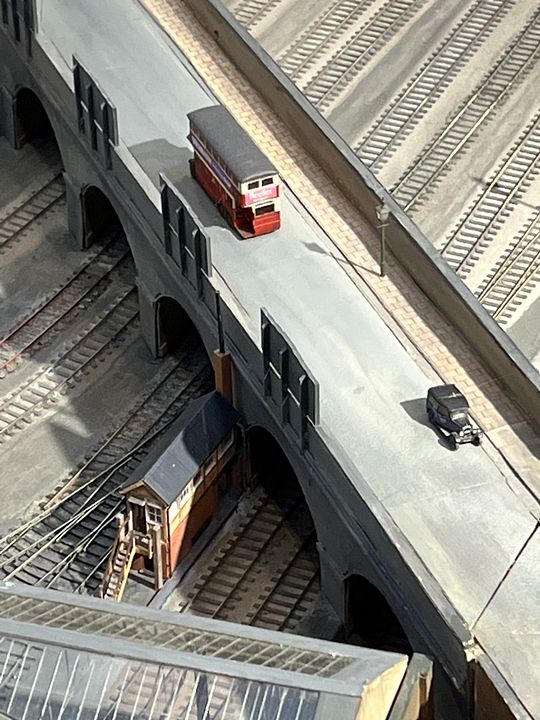
Following on from various discussions on the visibility of the YR tube platform, I decided to adjust both the diorama box and the platform roof itself, cutting back about 1/2” from the top of the latter. This was achieved with a well known fine scale modelling instrument.
The station track work is now much more visible and is complimented by some pleasant curves in the infrastructure.
Next job will be to lay some temporary strip track so that we can get a train running for the MRC mini exhibition on 10th December at Keen House.
Tim
-
18
-
1
-
-
Just that.
Tim
-
1
-
 1
1
-
-
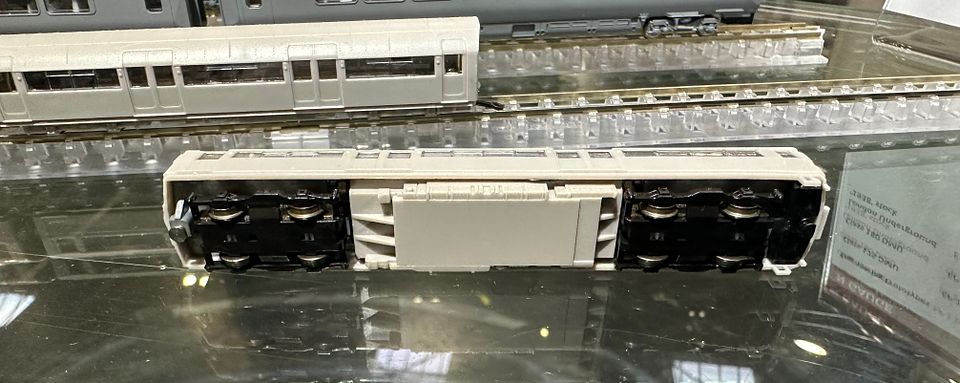
I was very lucky to have a close look at the ‘38 stick at Warley. It really is very impressive and should be amenable to modification to make ‘35 stock for use on Copenhagen Fields.
The bogies have been cleverly designed to allow the train to negotiate small radius curves and of course there is no buffer locking.
N gauge tube modelling will now be a whole lot easier.
Tim-
11
-
-
In its natural environment.
This will be very special.
Tim
-
2
-
-
- Popular Post
- Popular Post
22 hours ago, Simon D. said:York Road is brilliant, but very low down. Does CF need to be raised up a foot or so? I always think most layouts are too low, and steps or periscopes are available for the vertically challenged. I did also see Mr W. struggling a little on one knee showing it off to a visitor. I know YORK is much different to CF, but the height works very well indeed for that. We perceive trains more realistically at eye level or slightly above from the side, rather than a 'drone's eye' view. Iain Rice talked about this in some of his books. (Yes, I know CF is a hugely intricate jigsaw, and raising it up is probably a logistical nightmare, but I bet a lot of people missed such a magnificent piece of modelling).
Thanks for the observations, Simon. When high layouts first became popular in the mid 80s we raised CF by 6” at one show. This was met with universal complaints that people couldn’t see the trains in the cutting - the experiment was not continued with. We have also always had a barrier with a step rail for children to be able to see the trains and of course they also get the best view of the underground railway.
The use of diminishing scale and perspective on the layout is designed to work with the viewing height as it is at present. The intensity of colours is very much down to individual taste, but I think that many layouts have a much too saturated use of colour: London was undoubtedly black in our modelled era, but the reality is that black isn’t - when viewed from a distance. I work in a 30 floor tower block in London and the effect of aerial perspective is very noticeable at height - which is broadly the scene before a viewer of CF.
The YR tube is low when displayed on CF because it is underground relative to the whole layout (I suppose that is somewhat a statement of the obvious!)
The view of the lit tube train running along the front of the Belle Isle part of the layout will really complete the scene, when we get that far and highlight its position.
.
For the Cally section of the tube, the new Revolution Trains ‘38 stock (backdated to ‘35 stock) will be a godsend.
For those wanting to see YR tube at a comfortable height it can be seen at high level when displayed as a diorama. The tuba-shaped box it travels in doubles as both the diorama and base when shown on a table, bringing it up to a very comfortable eye level view. We will be showing this at the MRC mini-exhibition on December 10th at Keen House.
We also had a preview of another super model from Rapido Trains at Warley that will look good on the layout - especially behind the Raven 4-6-2 class 2400 on trial at KX in 1923.
Finally, we have Matthew Wald’s latest lovely signal box for CF: Five Arch, which apart from the Pope-selecting chimney is scarcely visible from the front. The south end operator can see it though.
Quite a lot going on, really, and we have a good list of jobs to do on CF before its next exhibition in Buxton in July ‘24.
Tim
-
18
-
1
-
1
-
30 minutes ago, 2mmMark said:
It's a grave mistake to make 2mm/N models too dark. If anything, it's better to make a them bit lighter.
Keith Armes reckoned to aim for a pastel-type approach to scenery colour and I think he was right.
Copenhagen Fields does get dusted from time to time but as you can imagine, it's quite a task. When not being worked on at Keen House, the scenic sections live in sealed boxes. This keeps them in pretty good condition.
Tim posted this image on his Facebook page yesterday. It's the amount of fluff collected after a days running at Warley
Just back home from Warley. The layout was actually given a major dusting before its previous outing. There were colours in parts of it that I had forgotten about!
Tim
-
4
-
1
-
 1
1
-
-
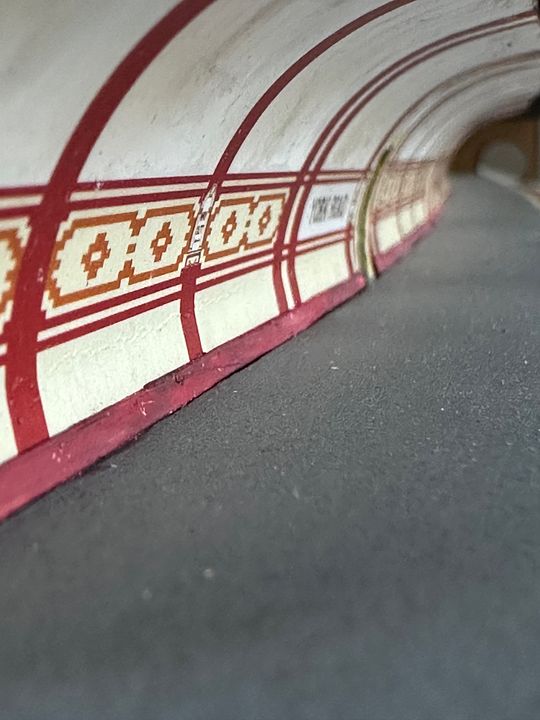
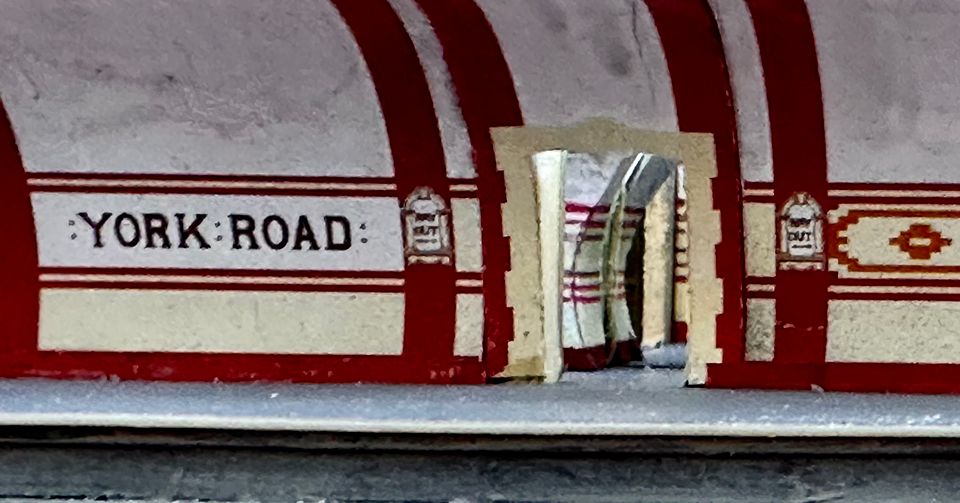
A mouse’s view (from the track) of York Road. That is as far as I got before Warley. Really looking forward to seeing what it looks like on the main layout.
Tim
-
9
-
-
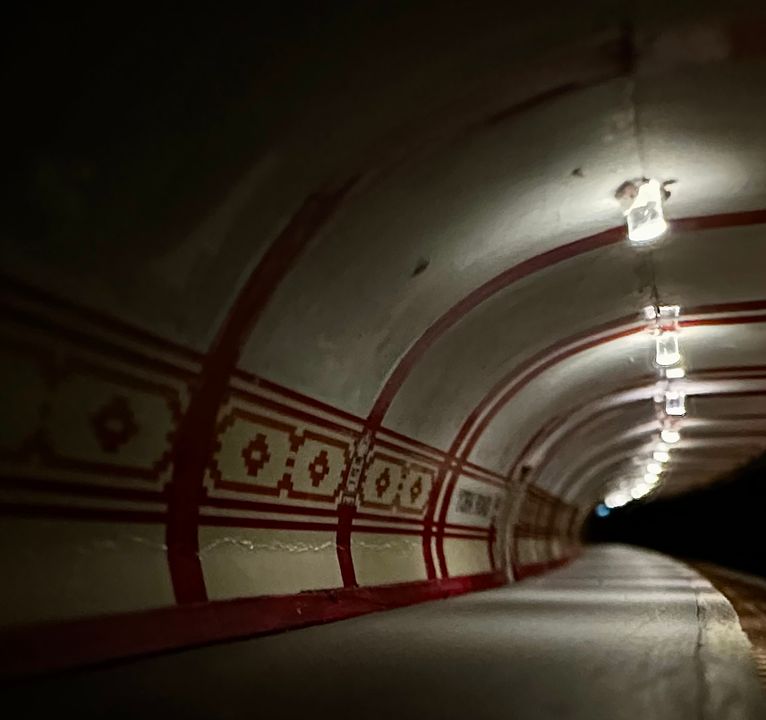
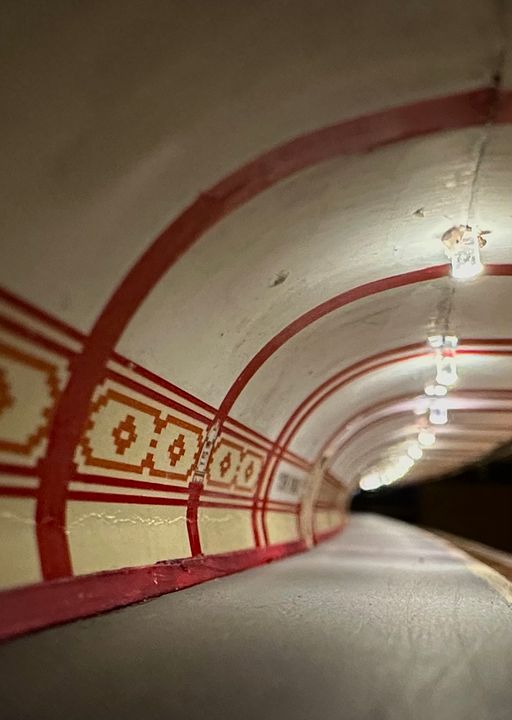
LED lighting installed. Lamp shades will be made, amongst other things.
Tim
-
9
-
2
-
-
- Popular Post
- Popular Post
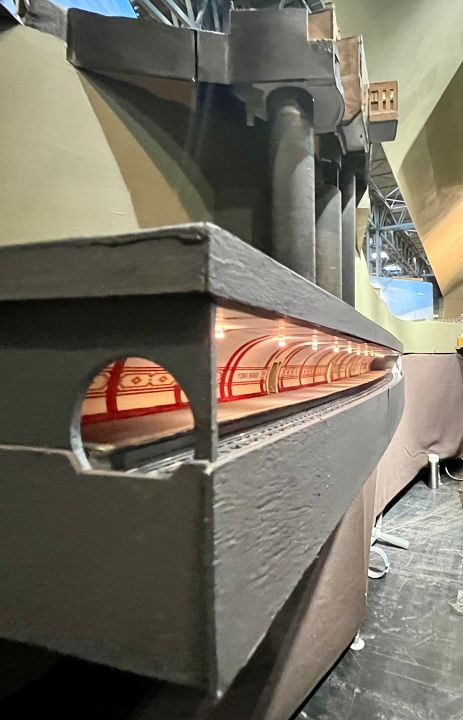
The LEDs have been installed and will need a bit more tweaking - lamp shades etc.
With the body and base of the LEDs blacked out above the ceiling, the lighting can be better controlled.
Making a 2D representation of the lamp shades is fairly straightforward, but it might be nice to have the correct shape. Maybe they could be 3D printed in clear resin with a 2mm hole for the LED. I’m also not sure whether or not to leave off the head wall at the western end. It would allow people to get this view. Any thoughts?
Tim
-
24
-
7
-
- Popular Post
- Popular Post
The head lining and top fascia have now been completed and are nice and solid. It looks a bit like another YORK layout…
I have some 2mm Lighthouse LEDs which should serve as light sources. Not sure if shades will be necessary, but that is the next job.
Tim
-
26
-
2
-
1
-
I think the artistry of Heybridge is manifest in the very clever use of the beautifully artistic Bilteezi buildings and back-scenes
Tim.
-
5
-
4
-
-
- Popular Post
- Popular Post
If all the LB stuff gets a bit overpowering, Tony, you could always go underground.
Details, as ever, in the 2mm section.
Tim
-
24
-
3
-
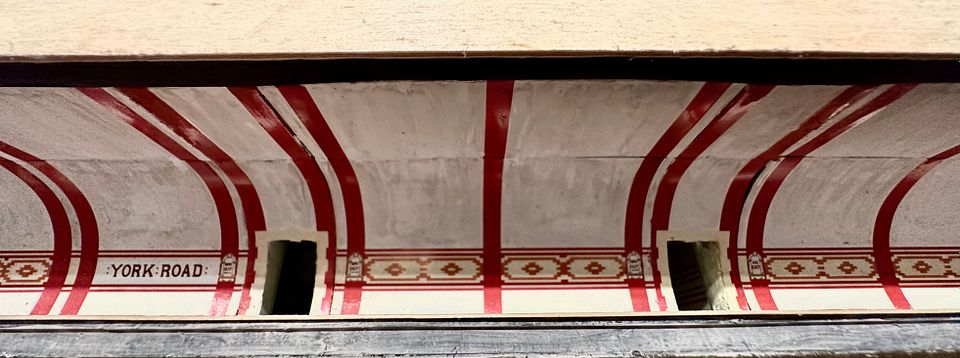
After a bit of a lull, with the station building having been completed a couple of years ago, work has resumed on the deep underground section of the model.
The station uses laser cut ribs for the carcass.
The curvature of the platforms complicates construction.
The tile patterns are from
’Tiles of the Unexpected, Underground’ by Douglas Rose.
The lift and stair lobbies have been modelled.
The shaft infrastructure has also been made.
More construction details are in the 2mm scale section. It has a long way to go yet…Tim
-
9
-
1
-
1
-
-
- Popular Post
- Popular Post
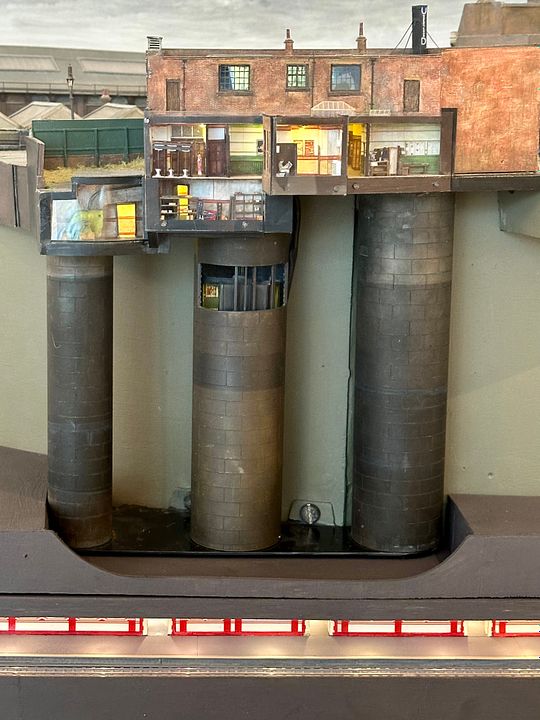
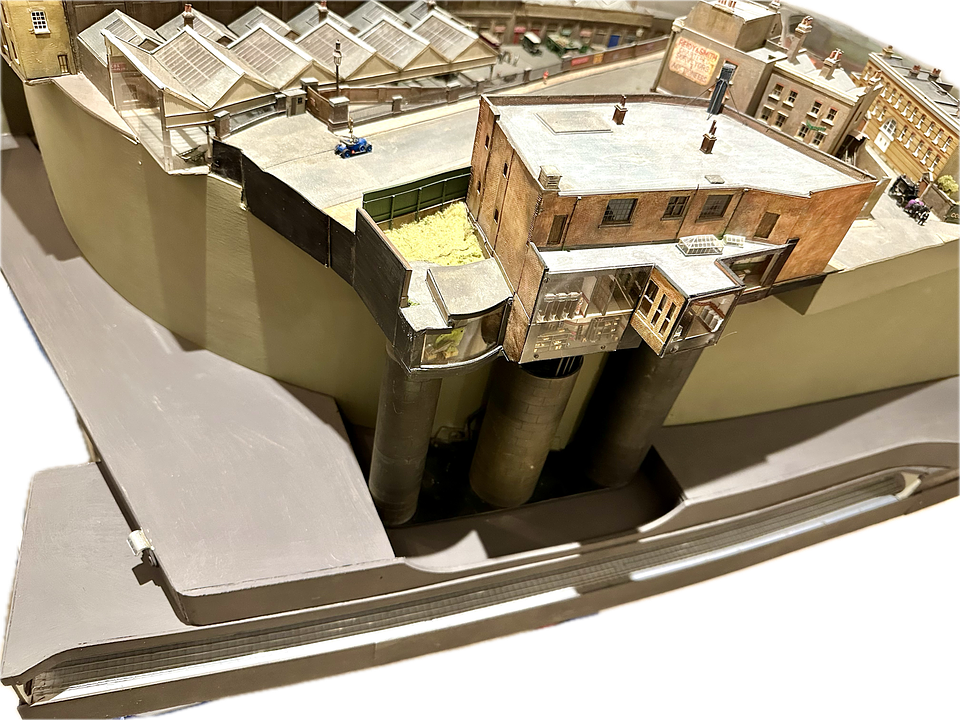
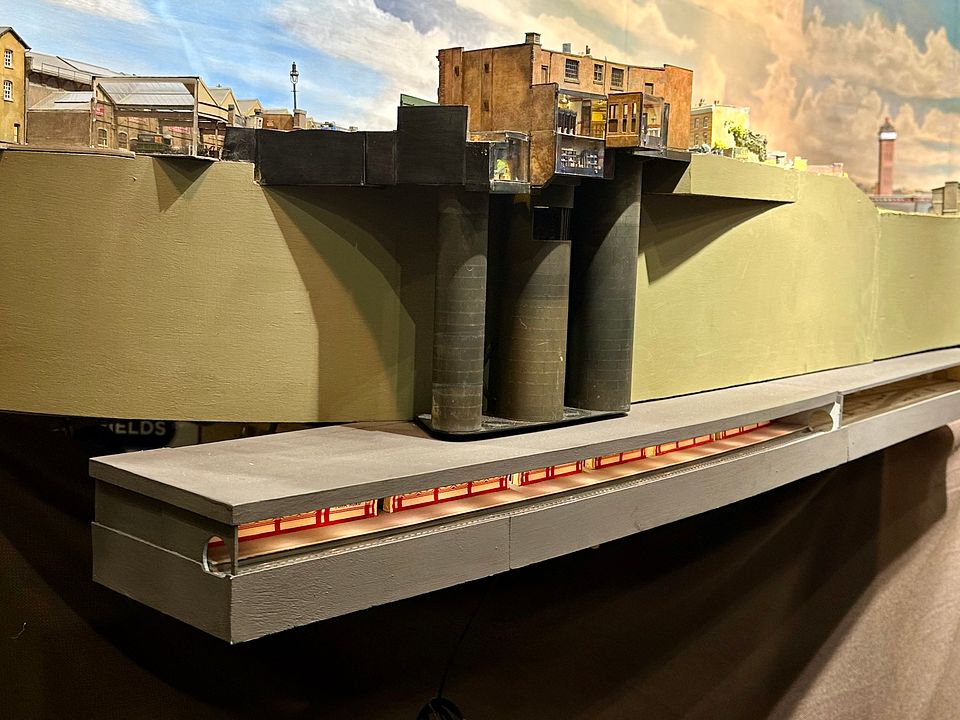
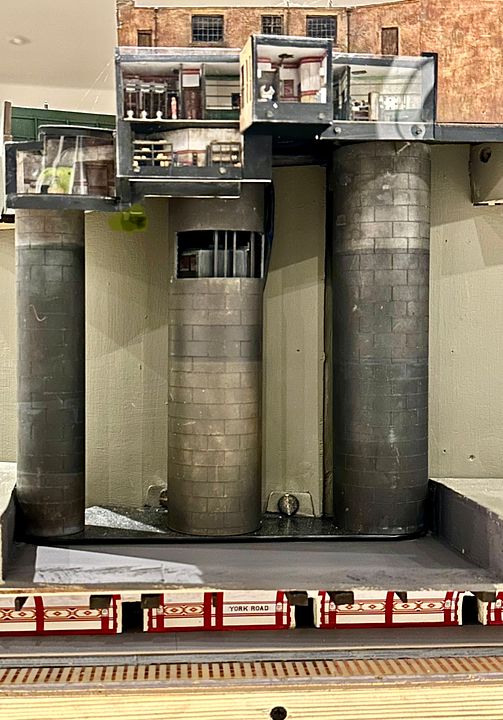
I couldn’t resist showing this picture of the YR tube platform mounted below the lift shafts and station building. I think it will be the first time that a deep level tube model has shown the interaction of the railway, the service shafts and the overlying station building.
Thankfully, everything lines up as it should, with the lift and escape stair lobbies just about visible.
The spiral escape stairs will be modelled in time: I have a simple solution to these, using laser cut components. The stairs will be visible through a window in the shaft as with the lift.
The platform board is firmly held on to the main baseboard by two long 8mm bolts fixing into captive T nuts. Unfortunately, I made the bolts a little too short, not taking into account the longer length required for when the platform section is displayed with the small diorama scene. Rather than make longer bolts I simply milled out the bottom of the baseboard to slightly bury the wing nuts.
It makes the assembly a little less dangerous for any heads in the vicinity and there aren’t an excess number of turns to get the board in place. On CF every second counts during set up and take down.
The next job will be the track and lighting. The former will be very labour intensive as the insulators were placed every other sleeper: 300 holes for pins in the station area alone.
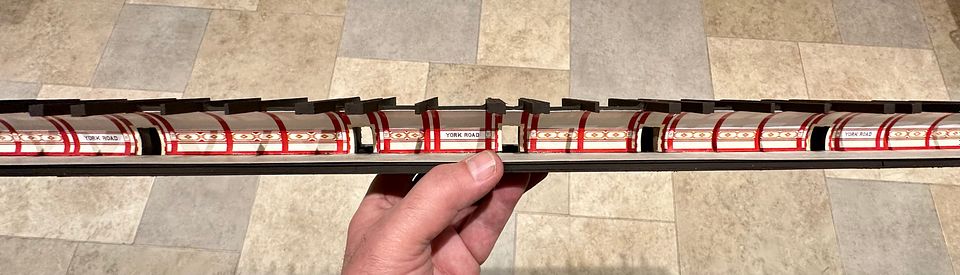
This photo shows the early style track and also an early pattern station name roundel. I have one of the team drawing that up for YR.
Lighting LEDs have been sourced, so there is plenty to be getting on with.
Tim
-
23
-
1
-
6
-
We need a Thunderbird on CF. What size replacement wheels (Association number) should we use for the Graham Farish Prototype Deltic, DP1?
Thanks
Tim
-
1
-
-
1 hour ago, MarshLane said:
Can I ask which foundry you used to do this, and (if its not impertinent) was this a special agreement for you/MRC, or do they do hobbyist work in general?
Rich
It was a slightly tongue-in-cheek comment Rob as they were cast in CoCr alloy (as used in dental & hip prosthesis). They were cast at my work by a technician colleague.
Tim
-
1
-
1
-


Copenhagen Fields
in 2mm Finescale
Posted · Edited by CF MRC
Peter rabbit has come to visit his distant London cousins for the Christmas holidays.
Tim