Jump to content
 

Buffer stops, point levers, fishplates, loading gauge, wall


Mikkel

2,943 views

Here’s an update on the sidings at Farthing, or "Old Yard" as I have now dubbed this part of the station.


39934853265_ba8430c861_o.jpg


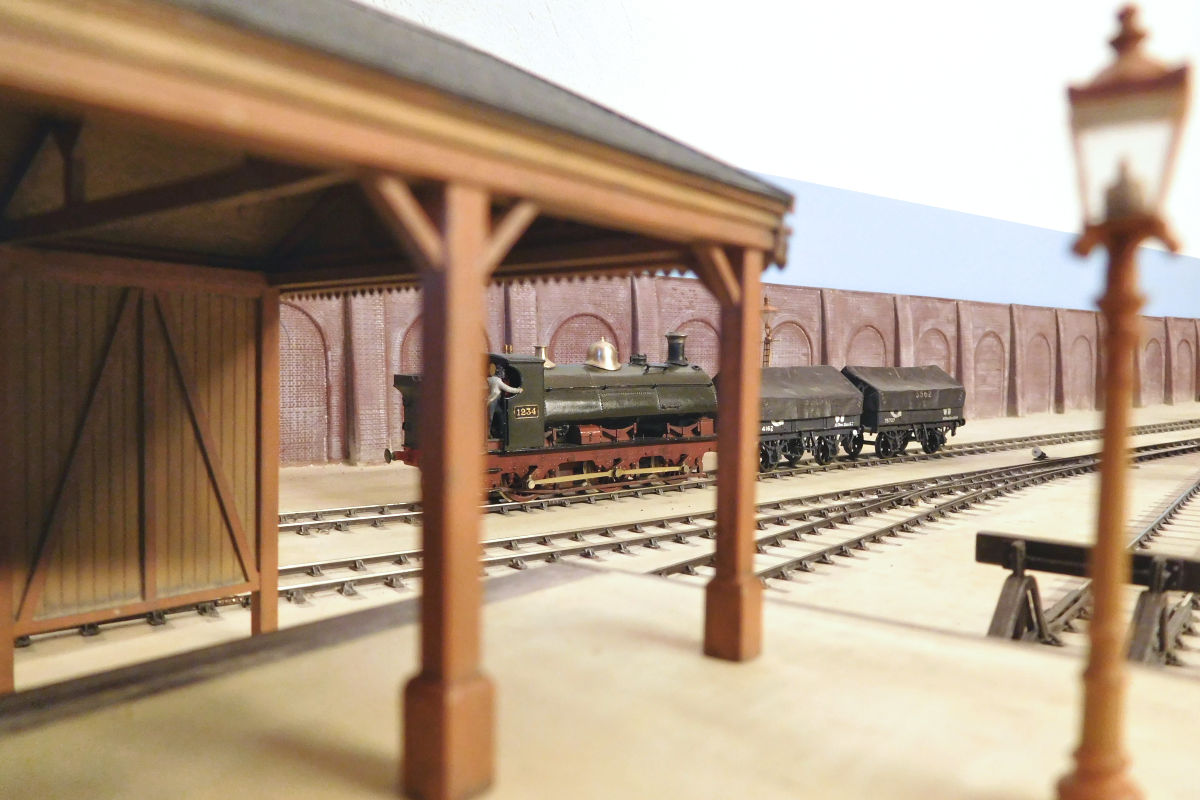
I have reached the point where detailing can begin. I'm going for the uncluttered look, although a few weeds etc will be added at some point.


40120383674_55ebdaf61b_o.jpg


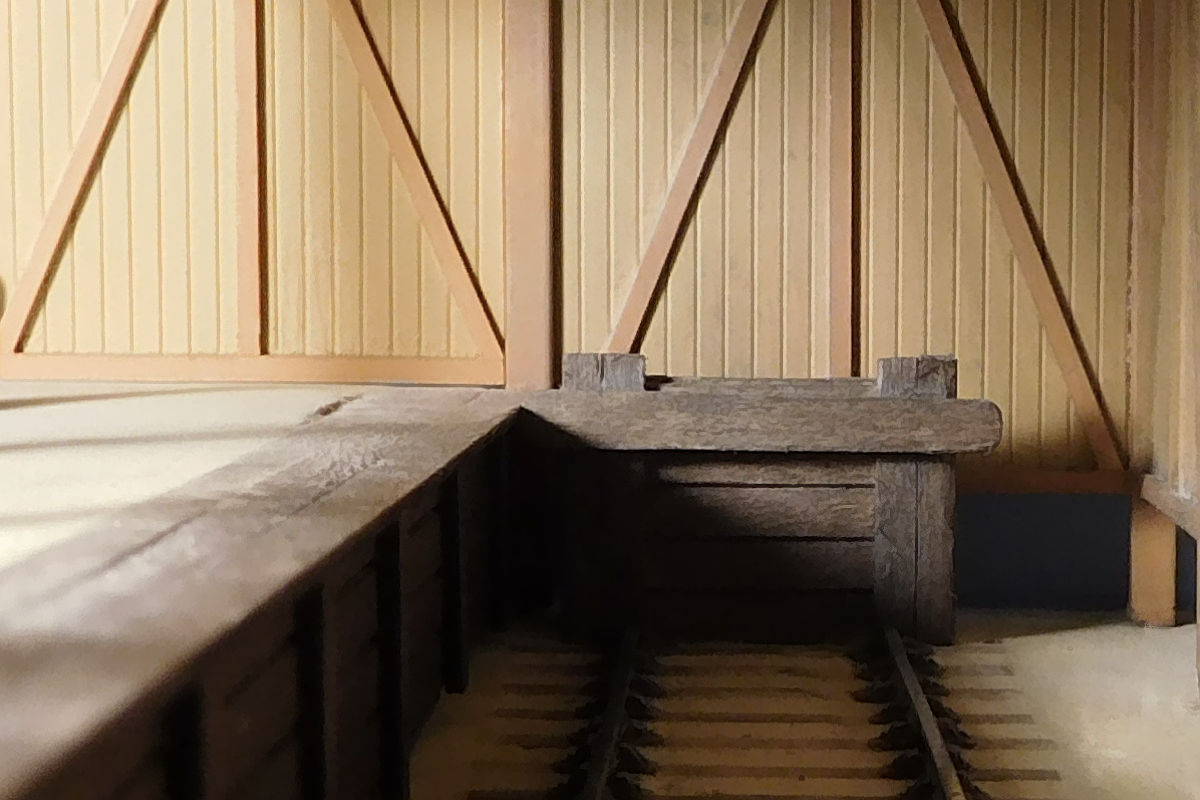
Inside the "biscuit shed" we find an old timber built buffer stop. Like the shed itself, it is a survivor from N&SJR days, before the GWR gobbled up the proud little station and turned it into a goods yard. Being a modest lot, the N&SJR built their stops from coffee stirrers.


40120383894_59fa9dc1ea_o.jpg


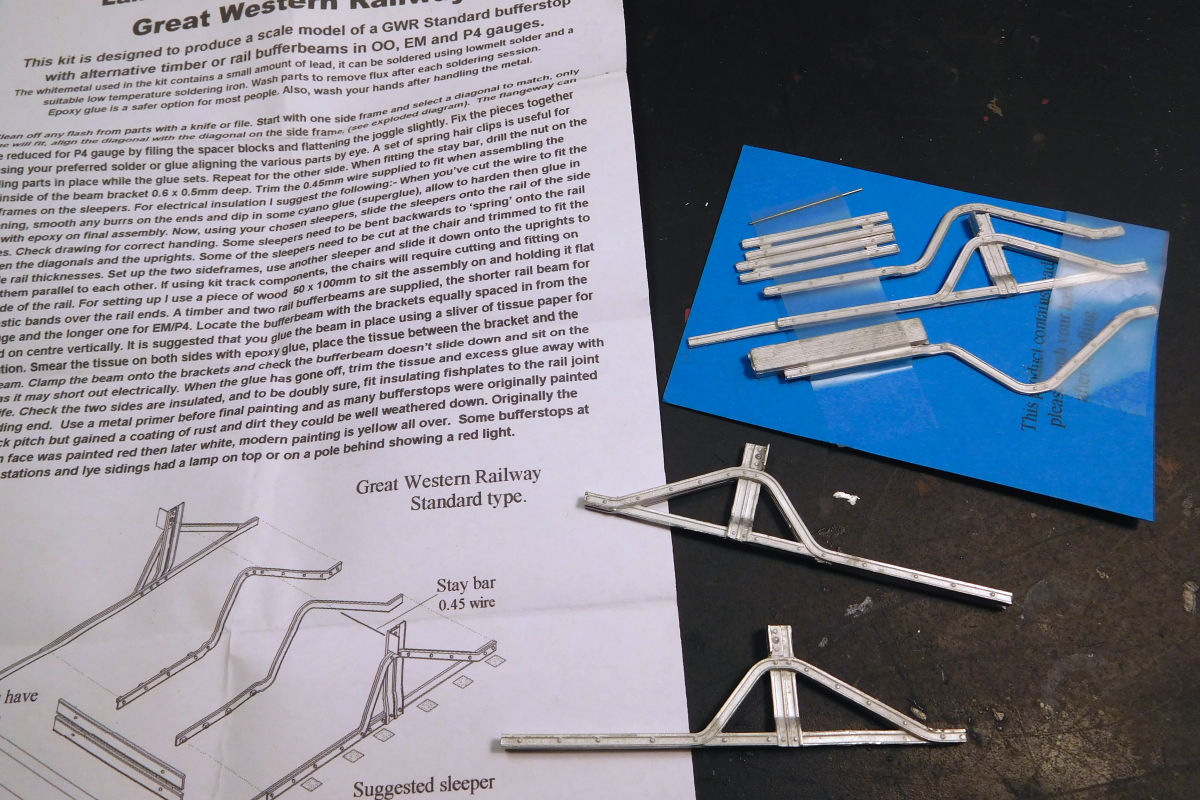
Elsewhere, standard GWR stops rule the day. These were made from the rather nice offerings from Lanarkshire Models.


39934852825_2e87e1d597_o.jpg


I've modified the kits slightly by removing the left hand section of plain whitemetal rail, as I needed to have proper rail as far in as possible.


39934853355_a4956d89c9_o.jpg


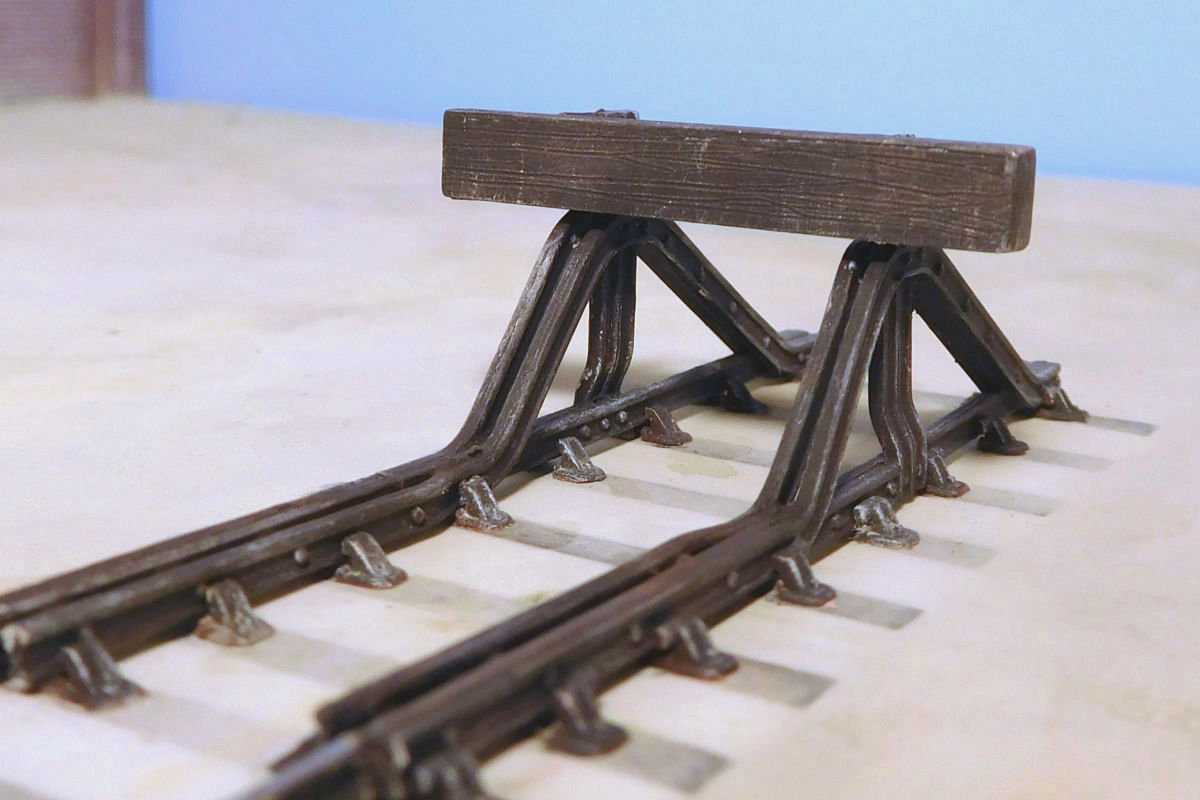
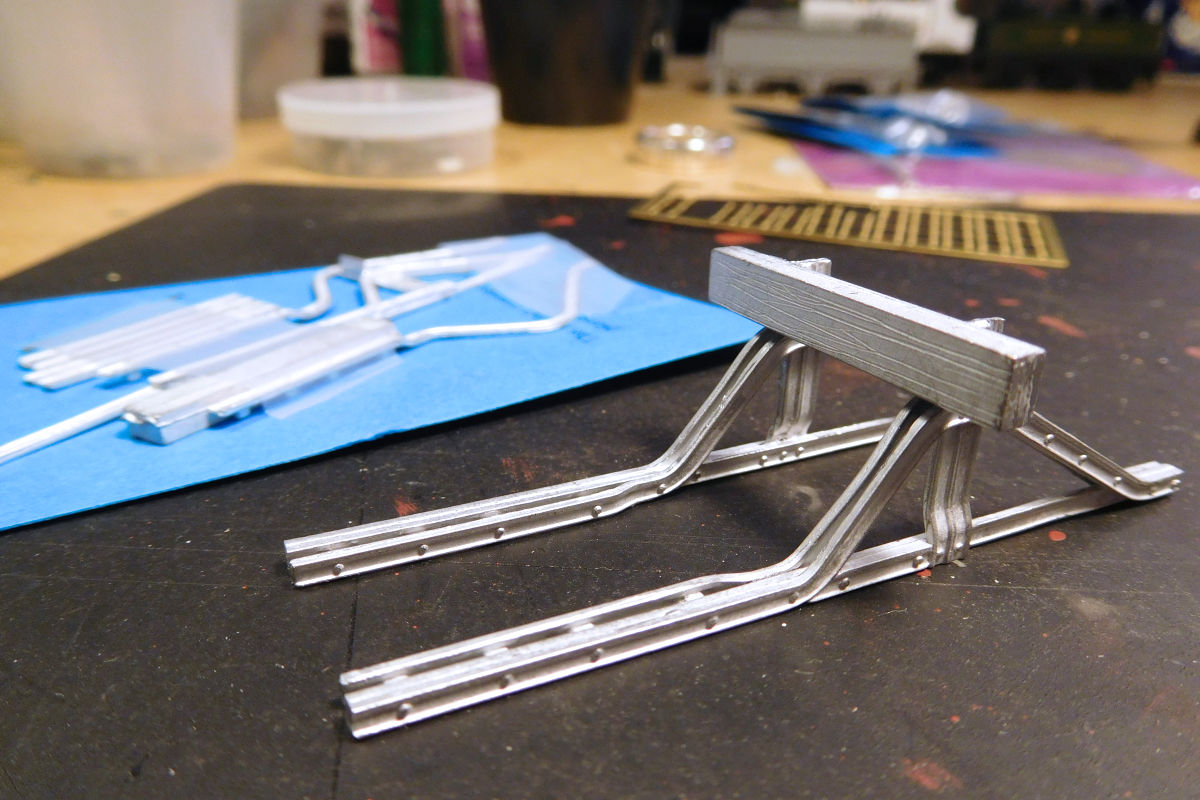
The finished kits have a nice chunky appearance. They look like they could, er, stop a train.


40120383784_55ebdaf61b_o.jpg


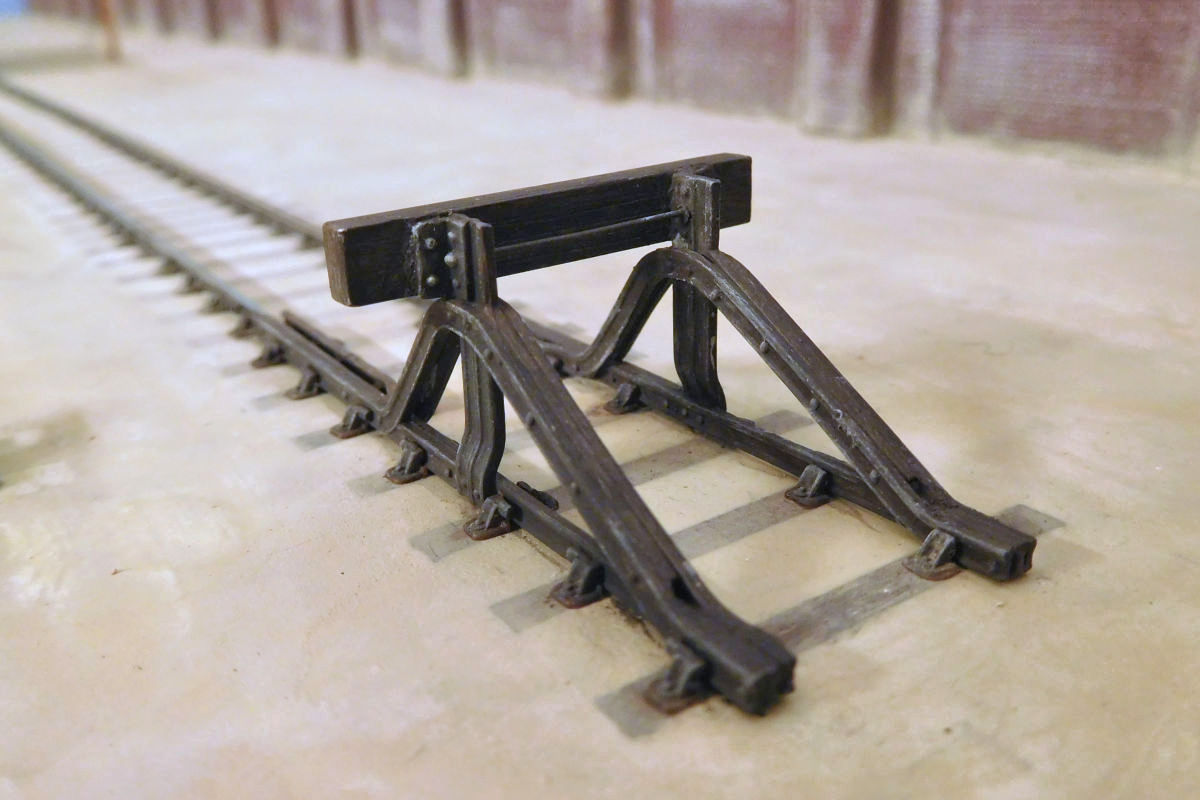
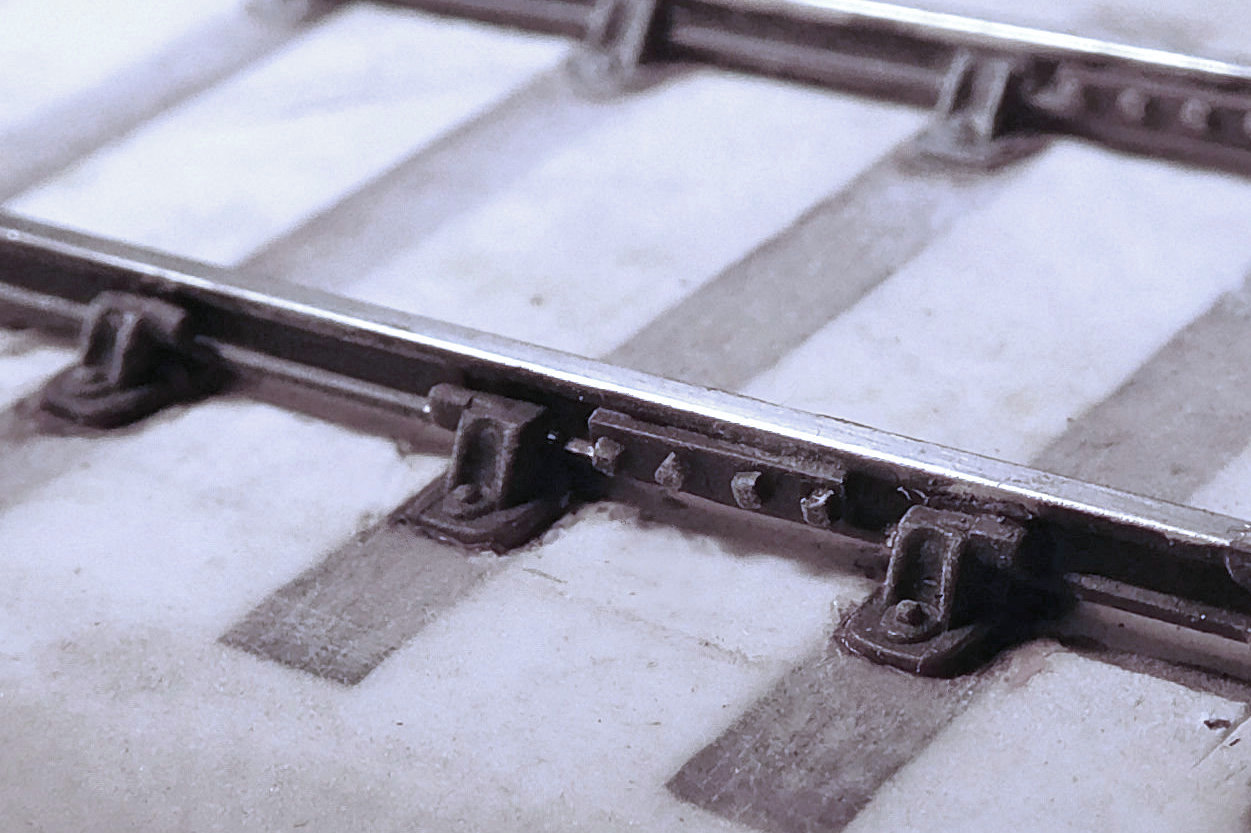
Close-ups can be so cruel. Someone will be having a word with the PW gang about those chairs, not least the missing one!


39934852605_4c931cfbd6_o.jpg


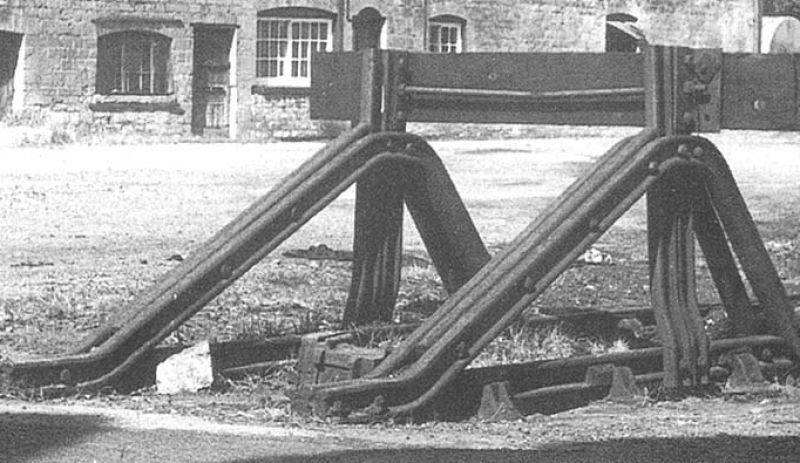
Mind you, the real thing wasn't perfect either. This was cropped from a larger photo, to illustrate that it’s OK if you bend the stay bar...


25988293318_1e4f43054e_o.jpg


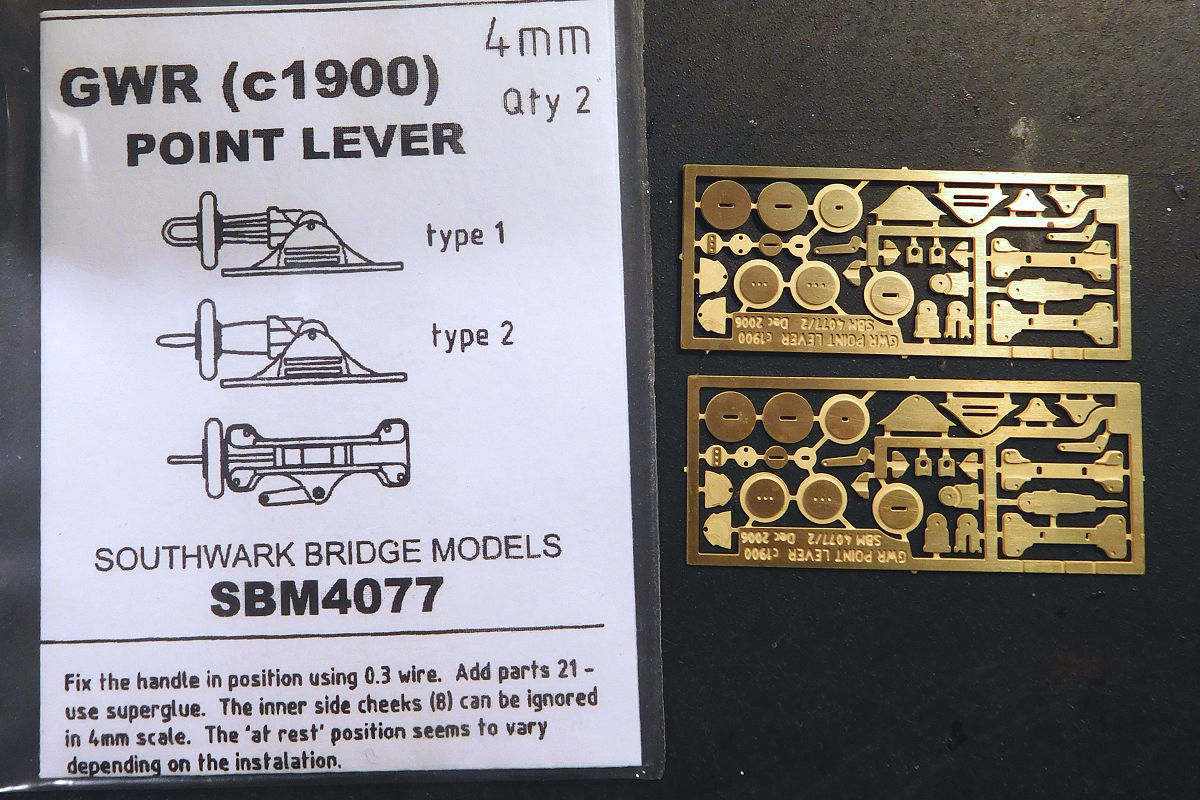
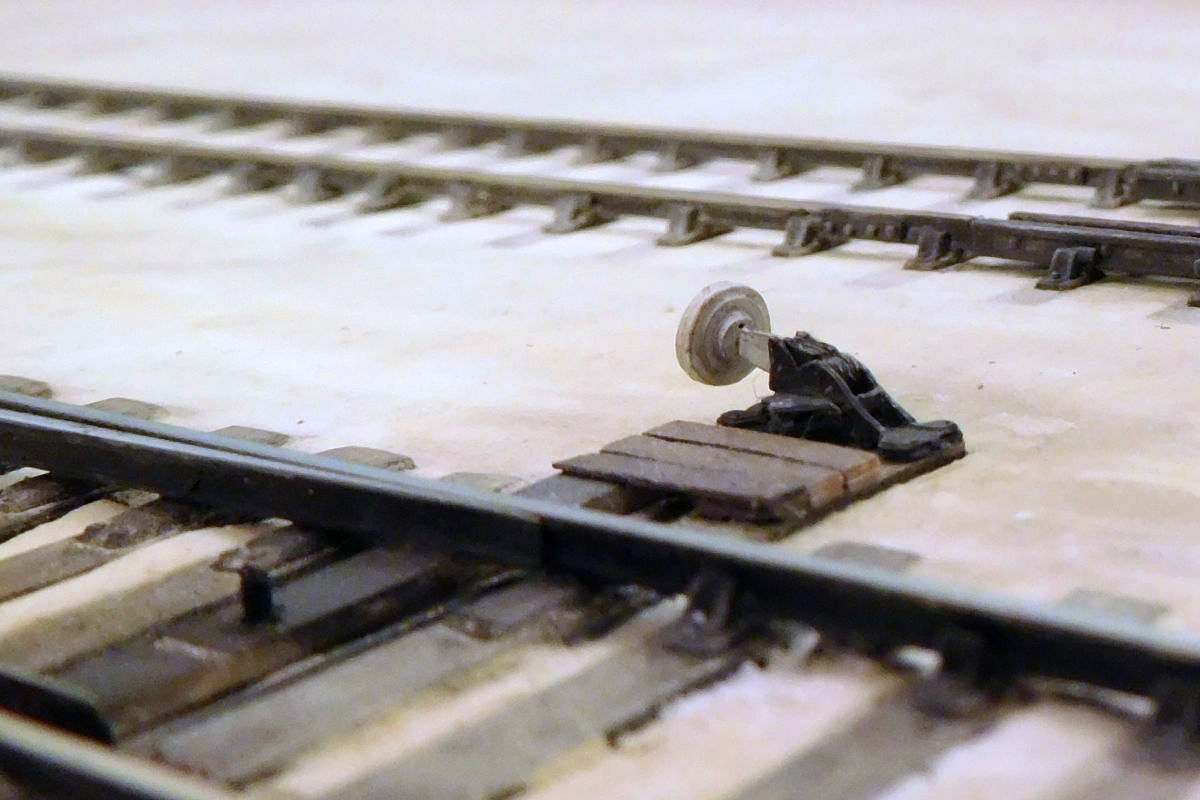
I've also made some point levers, originally from the Southwark Models range, now available from Roxey Mouldings. They appeared around 1900 and can be seen in some sidings, yards and sheds of the period. There were two types and the kit allows for both. I chose the simplest type.


28081969599_c491e3ed81_o.jpg


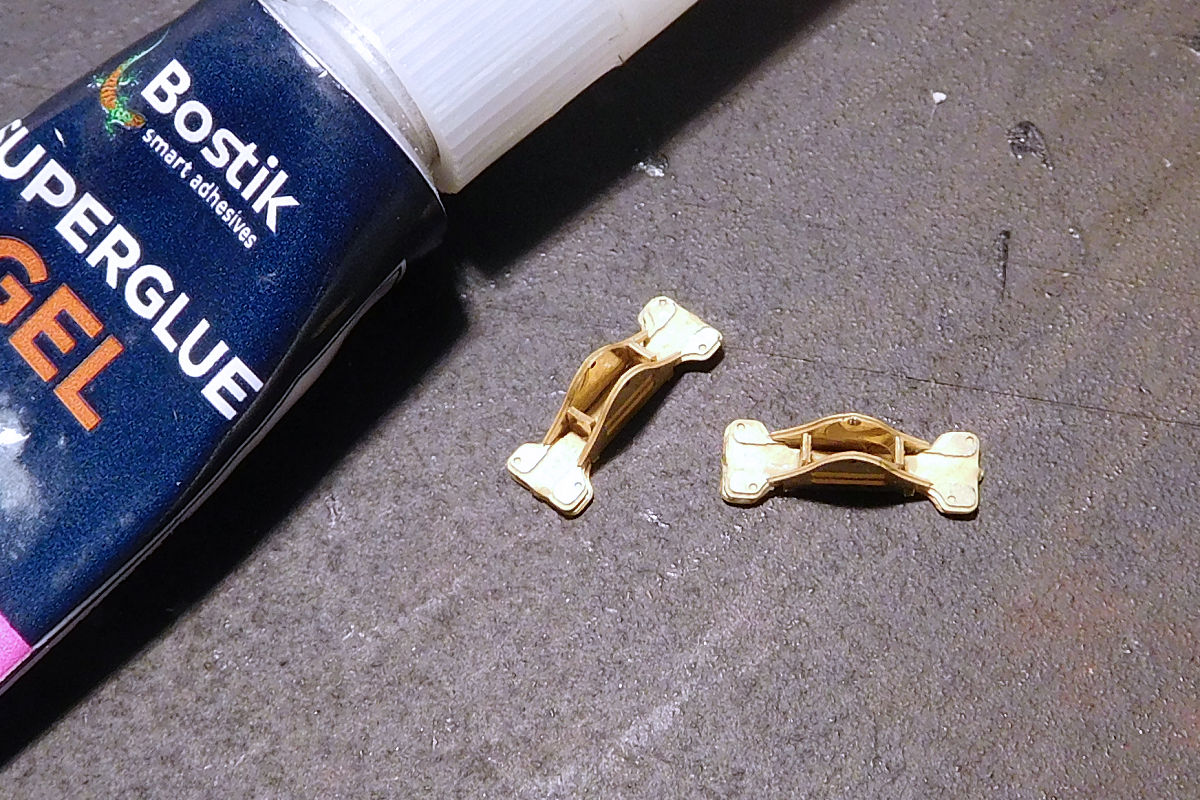
I chickened out on the soldering. Gel type superglue worked fine though.


38962805295_3ce83fa49a_o.jpg


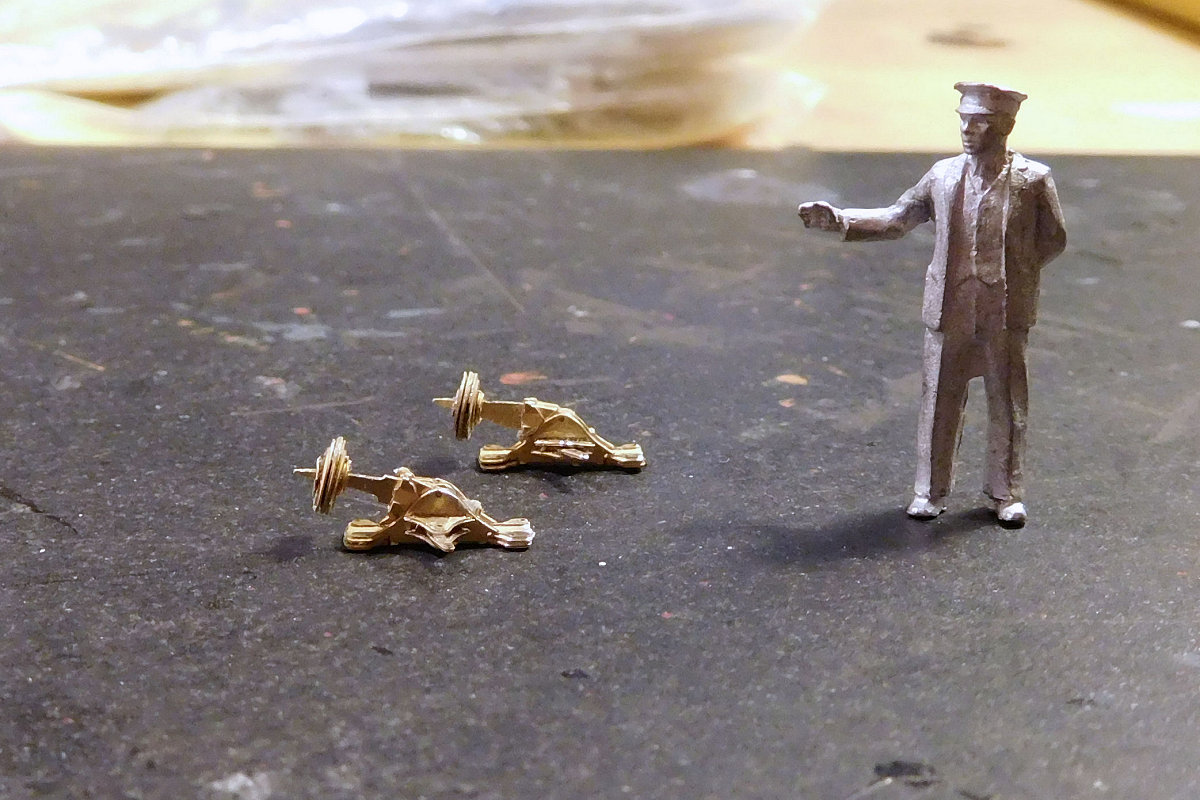
The only issue I had was with the weights, which are built up from layers. They do need opening out, and the handles need slimming down to accept them properly. As you can see, I struggled a bit with this.


39019530840_e82c533ea6_o.jpg


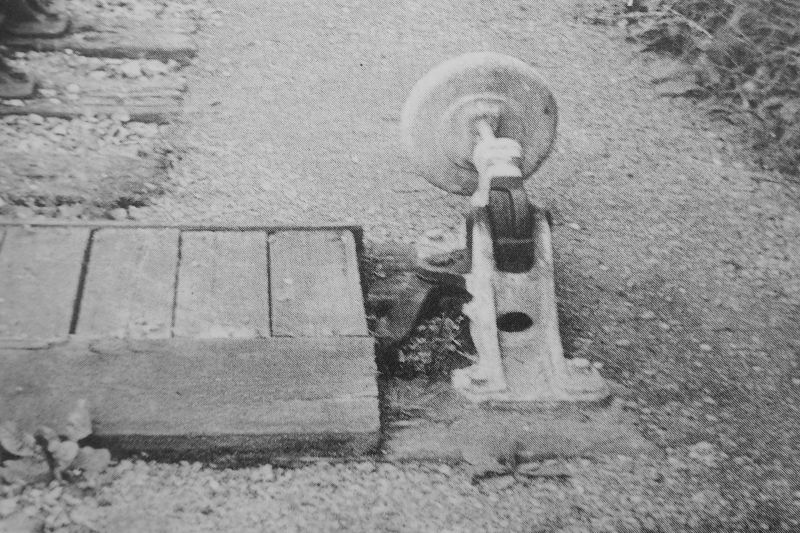
This cropped detail from a larger photo shows how the levers tended to be fitted on extended timbers, with the rodding often - but not always - boarded over. The boards were arranged in various ways, sometimes parallel to the track, sometimes perpendicular to it.


39019530940_cc165f0f26_o.jpg


I wanted to suggest something rudimentary so went for this arrangement, although these low shots suggest that I should perhaps add some boards at the side. I wonder how shunting horses navigated the levers?


40144810404_64c66c62d8_o.jpg


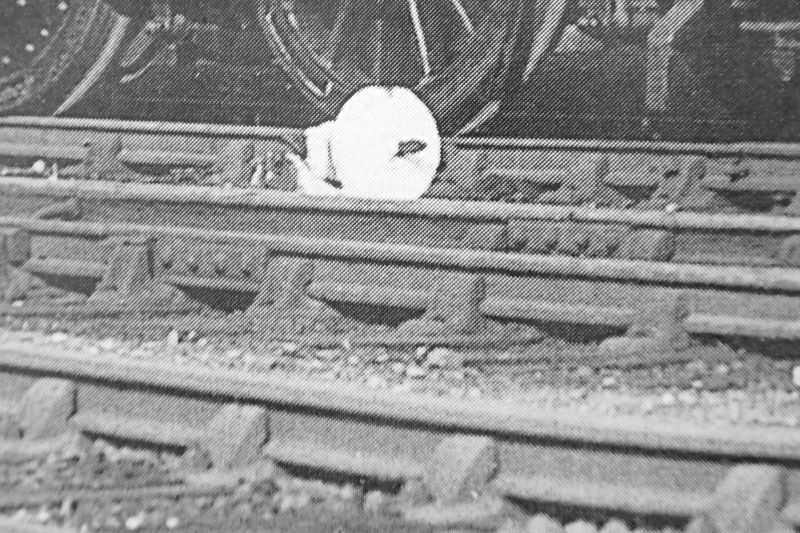
Another crop here, showing what seems to have been the standard painting scheme, ie weight and main lever was white, the rest was black (including the tip!).


26959761038_348b0d9abe_o.jpg


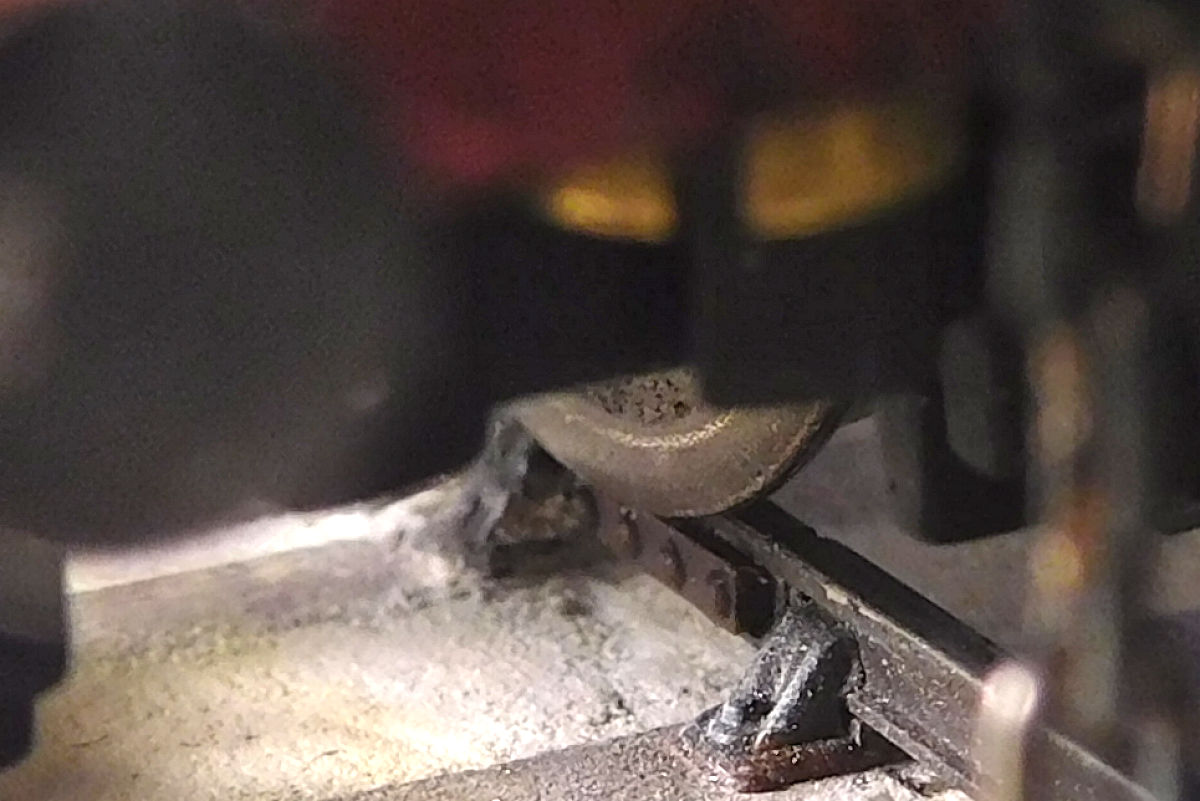
The points - so nicely built by John Jones - use a moving timber as tie bar. I laid the boards to accommodate this, so that the timber slides below the boards. I really must trim that pin!


39019530870_99d336978e_o.jpg


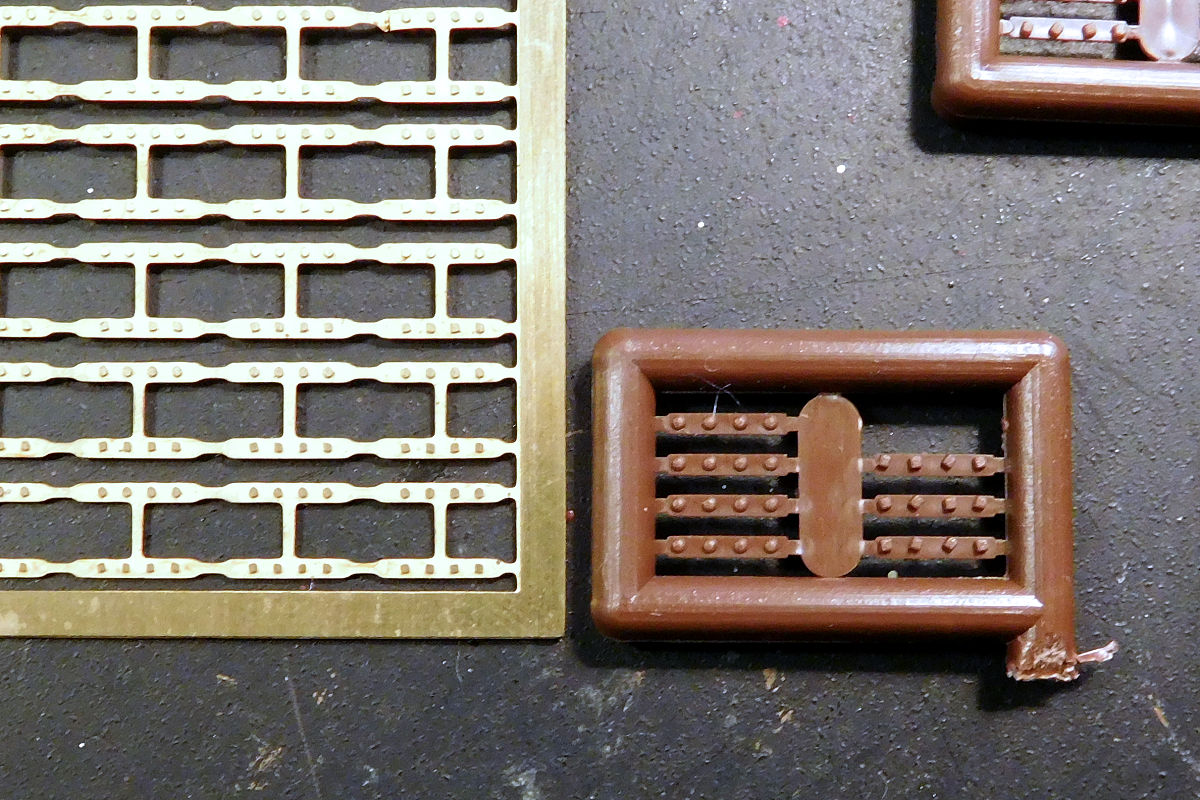
I've also added some fishplates. On my last layout I used the etched ones on the left, but felt that they were virtually unnoticeable. So I decided to experiment and use the plastic variant this time, which has more pronounced moulding. These are intended mainly for isolating gaps, so a slight modification of the rear side was needed.


25958009397_346939607a_o.jpg


But alas, I hadn't thought it through. The result looks OK from a distance, but in close-up they appear quite thick. Of course it doesn't help that there is no actual rail join in this case!


26959760898_054495de31_o.jpg


I also had problems with wheels bumping on them, so had to file them down a bit. I'm not blaming the product, it's probably due to my incorrect use of them. This is what happens when irreverent amateurs try to be clever with finescale products :pardon:


39019530710_f91a1106fd_o.jpg


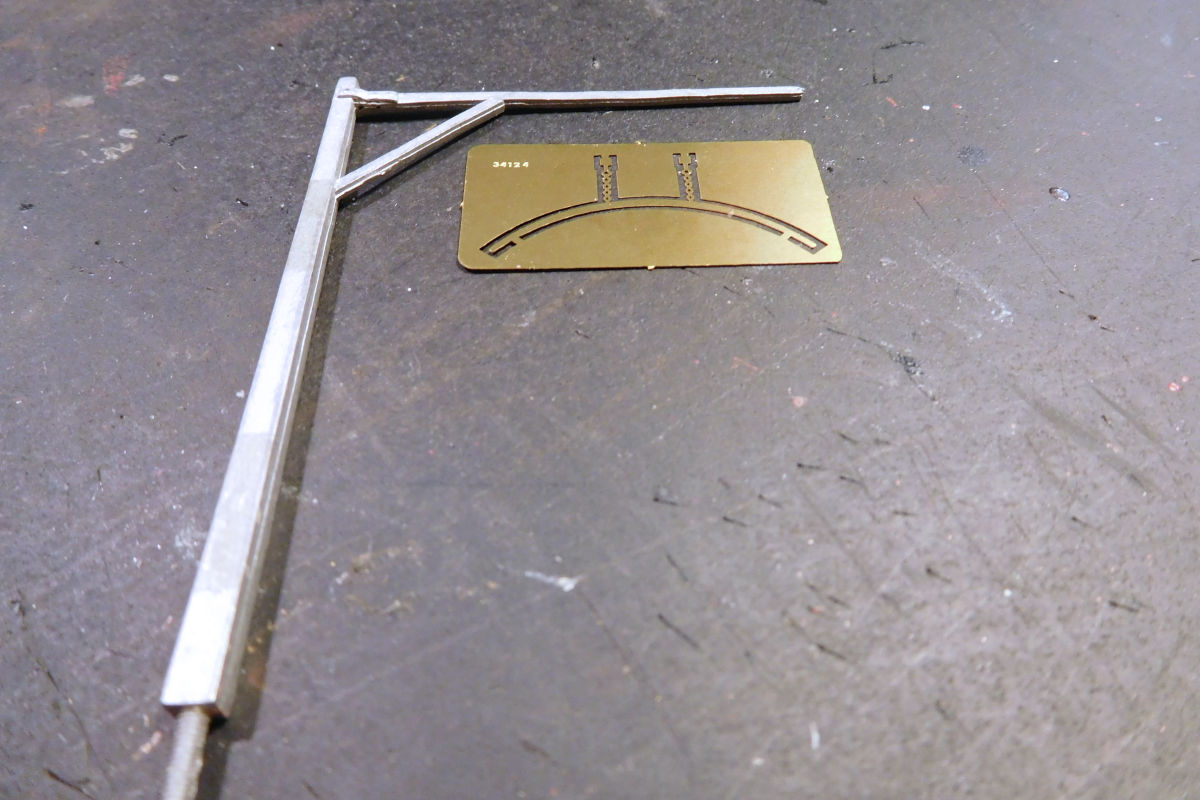
A loading gauge has also been made, using the Smiths kit of the simple, early variant.


39934889265_f2bc08d85a_o.jpg


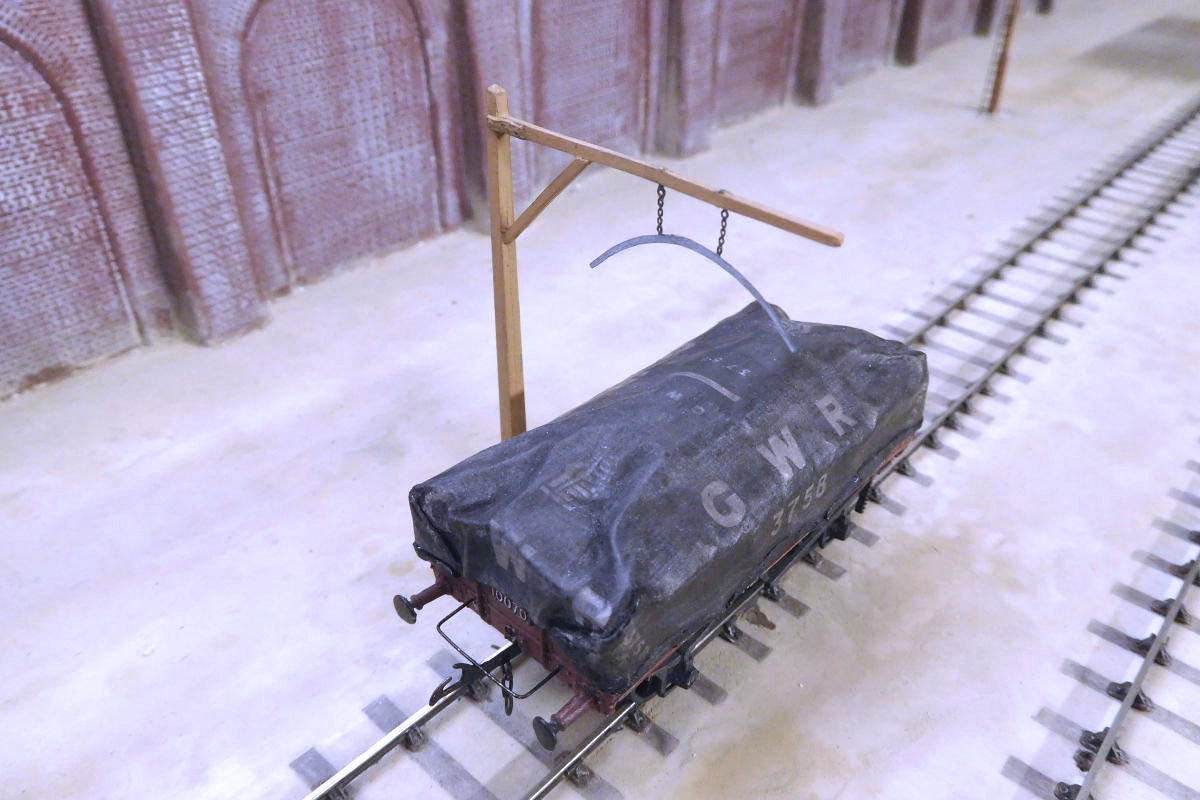
The light stone livery may be a little controversial, as many modellers paint them white. However...


39934888645_ee9569c219_o.jpg


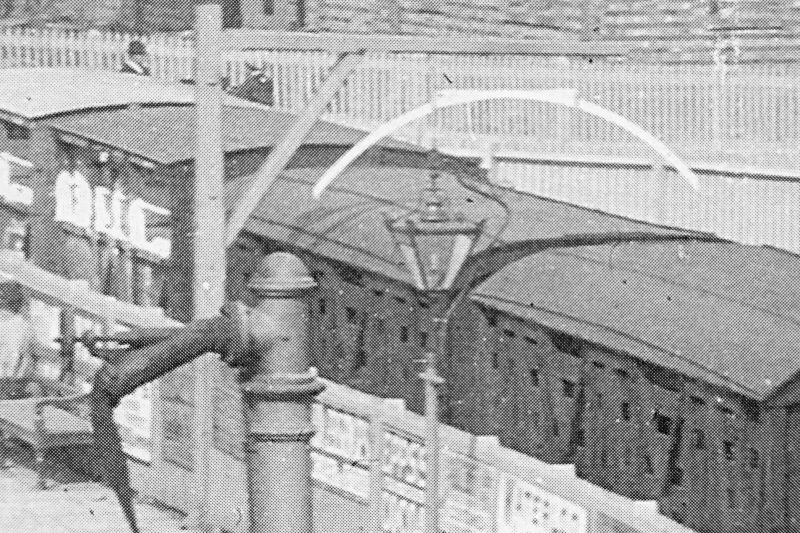
...looking at photos from the period suggests light stone on this type. Above is one example cropped from a larger photo, PM me for others. Stephen Williams' Great Western Branchline Modelling is onto something similar in his livery guide (Vol 2 p71). He says dark stone for base of post and white for the rest, but adds that some may have been all over light stone. Could it be a period thing, or was there perhaps a difference between wooden and metal types?


40120384144_6e78a24a00_o.jpg


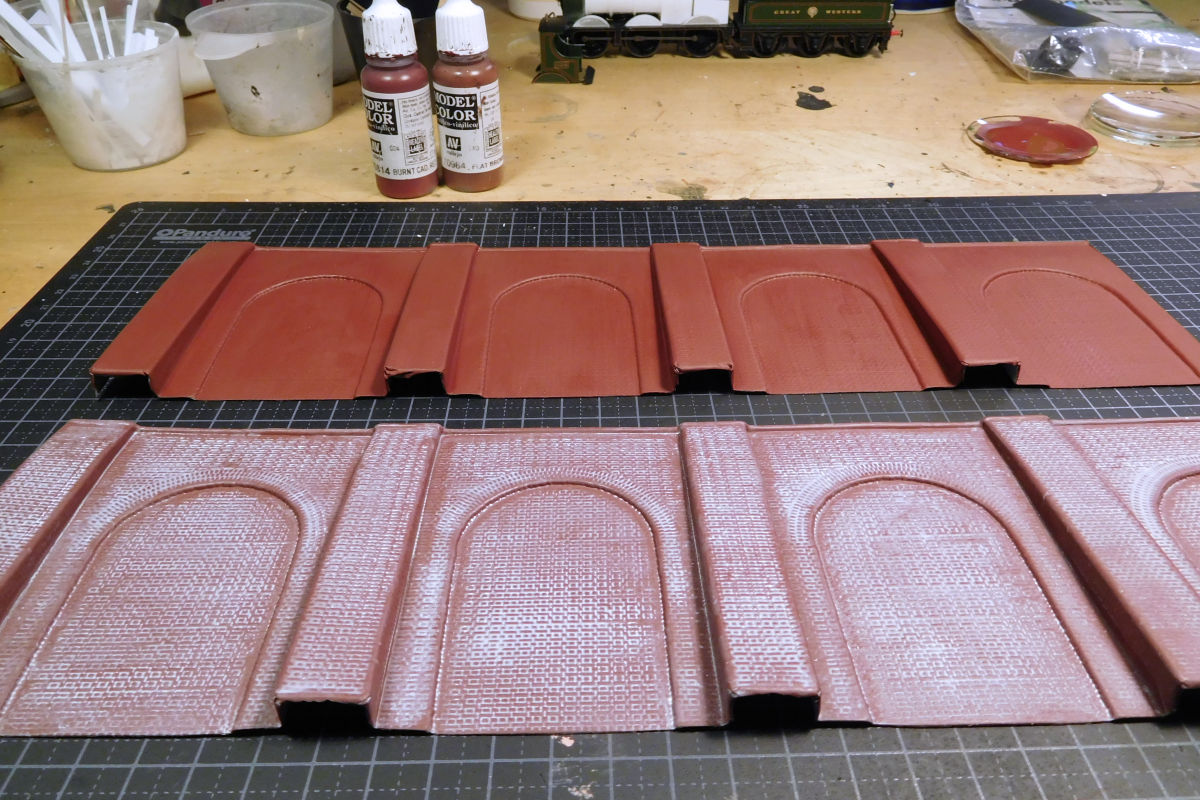
Finally, a note on the backscene. After much back and forth, I ended up with my usual solution: A simple embankment wall. Once again I used the vacuum formed product from Langley. It isn't particularly well detailed but I feel it works OK as an unobtrusive background that adds to the atmosphere but doesn't steal the show. Such heavy infrastructure may seem like overkill for a handful of sidings, but I wanted to avoid a rural look, and indicate that we are seeing the margins of a larger yard and station.


39934853055_efeec3316b_o.jpg


The embankment wall thereby forms a recurring feature across all my 3 Farthing layouts, as seen in the medley of photos above. I’m hoping this will help emphasise that each layout shows a small part of the same overall station. So if you think it is all becoming a bit repetitive, I have achieved my goal.... :D

  • Like 19
  • Agree 1

22 Comments


Recommended Comments

Lovely work as usual Mikkel.


Once again you have shown me how to complete those small details when I get that far, I have most of those bits & pieces waiting to be assembled.


As for repetitive. i could never find Farthing like that as I thoroughly enjoy every visit.


Jim

Link to comment
  • RMweb Gold

I think the wall looks great! Looks as if it could even be reduced in height (either with a knife or by burying a few courses of brickwork in the scenery) without too much trouble.

Link to comment
  • RMweb Premium

That's really rather lovely.

Good work sir!

Can I ask what colour you paint the sides of your rails?

Link to comment
  • RMweb Gold

Lovely work as usual Mikkel.


Once again you have shown me how to complete those small details when I get that far, I have most of those bits & pieces waiting to be assembled.


As for repetitive. i could never find Farthing like that as I thoroughly enjoy every visit.


Jim


Thanks Jim! For a scenery expert like yourself it must all look rather bare. I promise I'll add some grass here and there!


PS: It's wise to be wary of my construction methods, I have a habit of learning things the hard way :-)


I think the wall looks great! Looks as if it could even be reduced in height (either with a knife or by burying a few courses of brickwork in the scenery) without too much trouble.


Hi Ian, yes the Langley walls can be reduced in height quite easily. I've found that ordinary kitchen scissors actually worked best, as the material is so flexible that it's difficult to keep the knife/scalpel on course. Below is an example of the walls reduced in height from below, on one of the other layouts:


  P1166303bsmallb.jpg

Link to comment
  • RMweb Gold

That's really rather lovely.

Good work sir!

Can I ask what colour you paint the sides of your rails?


Thanks Andrew. The rails and buffer stops are painted with a Vallejo colour called "German Cam. Black Brown" with a bit of extra black added to darken it. This is then dry brushed with Vallejo "Pale Sand". The dry brushing is important as it makes the brown appear darker and adds a more metallic look. The stops have received a bit of rust weathering powder too.


VAL822-350x325.jpgVAL837-350x325.jpg

Link to comment
  • RMweb Premium

Lovely modelling as ever Mikkel. You get a subdued tone to the paintwork which I think is very realistic and photographs well. 


I had the same problem with plastic fishplates on the inner rails fouling flanges. Perhaps they would clear p4 . I ended up using etched on the inside of rails, even then they needed a trim to fit snugly into the rail profile. 

Link to comment

Hi Mikkel,


All of the above !


I'm pleased to see the point levers being modelled, I have some from them in 7mm and although not made up as yet I feel there may be a similar problem, as you have pointed out. They certainly make a nice addition when used correctly, as you have done.


ATB


Grahame


p.s. Love using the Vallejo range too.

Link to comment
  • RMweb Gold

Lovely modelling as ever Mikkel. You get a subdued tone to the paintwork which I think is very realistic and photographs well. 


I had the same problem with plastic fishplates on the inner rails fouling flanges. Perhaps they would clear p4 . I ended up using etched on the inside of rails, even then they needed a trim to fit snugly into the rail profile. 


Thanks Dave, and good to know you had the same experience with the plastic fishplates. I think I'll copy you and replace the inside ones with the etched ones.


Hi Mikkel,


All of the above !


I'm pleased to see the point levers being modelled, I have some from them in 7mm and although not made up as yet I feel there may be a similar problem, as you have pointed out. They certainly make a nice addition when used correctly, as you have done.


ATB


Grahame


p.s. Love using the Vallejo range too.


Thanks Grahame, I've been wondering how the weights are made on the 7mm version of the levers. The photo on the Roxey site suggests that they are more sturdy than the 4mm ones, which are built up from layers.


D299 noted and approved!


It's the same one you keep seeing though. I think I have another kit. Not that I need more foreign wagons for this period, but the D299 is special!

Link to comment
  • RMweb Gold

Oh I do enjoy an update from Farthing! That loading gauge certainly looks right in light stone to me and makes the white loading gauge bar stand out which I guess was the whole idea:-) I also really like the way you’ve brought the groundwork right up to the level of the sleeper tops, completely prototypical but rarely modelled.


Lovely stuff as usual Mikkel!


Thanks very much Dave. I have ambivalent feelings about the groundwork around the sleepers. On the goods depot layout I think it worked well, but on this layout there are places where the transition from sleepers to earth is a bit *too* smooth/flush for my liking.  Lesson learnt.

Link to comment
  • RMweb Gold

Love that track detailing. A great addition to your beautiful layout.


Thanks very much Job. Not the most exciting details maybe, but enjoyable enough to do.

Link to comment
  • RMweb Gold

Terrific stuff Mikkel - always happy to read an update on Farthing...especially as the black mist starts to descend on the weekend and Monday is looming ;)


Some great detail work there and pictures too.


Colour and tones all just look ‘right’...nice work :good:

Link to comment
  • RMweb Gold

Terrific stuff Mikkel - always happy to read an update on Farthing...especially as the black mist starts to descend on the weekend and Monday is looming ;)


Some great detail work there and pictures too.


Colour and tones all just look ‘right’...nice work :good:

Thanks Pete. Yes, Sunday evenings can lower the spirits - best time of the week for a bit of escapism!


Got the flu now, too. Us European males really are a pathetic lot :-) 

Link to comment
  • RMweb Gold


Got the flu now, too. Us European males really are a pathetic lot :-)


:( I wish you a speedy recovery.


Sounds like you need time off work...to work on the layout :jester:

Link to comment
  • RMweb Gold

:( I wish you a speedy recovery. Sounds like you need time off work...to work on the layout :jester:


We have good laws for parental leave here, but it would be interesting to see what happens if I ask for railway modelling leave!


Lovely work! Duncan


Thanks Duncan, I had various grand plans for joining this layout to the others, but while it is still an option in the future I have decided that for now I will just move ahead as originally planned. Sometimes we over-think things.

Link to comment
  • RMweb Gold

Mikkel,

Lots of nice touches there.  Did I read on a thread somewhere they put score marks where the fishplates are to make it look like two rails joined together.  Probably only visible in a cruel close up though.  The brick wall as a back scene is a clever thought.

Link to comment
  • RMweb Gold

Thanks Chris. On my last layout I drew a thin line with a marker, it didn't seem to affect pick up. But the score marks sound like a better idea. I didn't think it would be noticeable but in the close ups it really is! 

Link to comment

Create an account or sign in to comment

You need to be a member in order to leave a comment

Create an account

Sign up for a new account in our community. It's easy!

Register a new account

Sign in

Already have an account? Sign in here.

Sign In Now

×
×
  • Create New...