

TomE
-
Posts
2,804 -
Joined
-
Last visited
-
Days Won
1
Content Type
Profiles
Forums
Blogs
Gallery
Events
Exhibition Layout Details
Store
Blog Comments posted by TomE
-
-

Many thanks Ben!
Tom.
-
Hi Will.
The PPM looks awesome! It's turned out really well. Is it still designed with printed sides in mind?
Tom
-
 1
1
-
-
Thanks Will!
I think the fence will need to be a custom etch. I haven't been able to find any with the same inverted U along the top available commercially. The panels you can see in the photo above are the same as that along the embankment, just welded to feet so they can be moved around (Has flashback to setting out lots of fence panels
 )
)Tom.
-
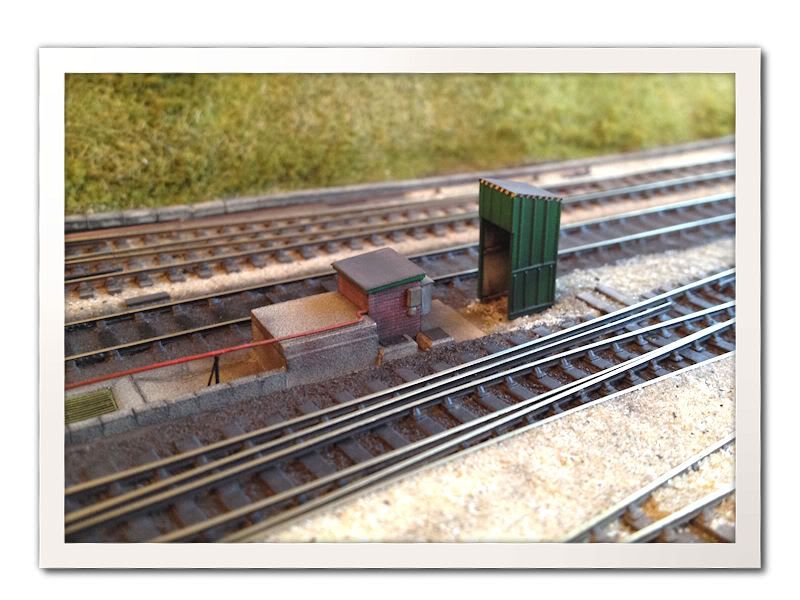
Thanks all for the comments. They are much appreciated!
This afternoon I've put together the shelter for the diesel fuel pump. Just the pump itself to make now, which I'll do tomorrow hopefully!
Thanks again,
Tom.
-
1
-
-

Those boxpok wheels look very nice! Are they designed for something specific?
Tom.
-
1
-
-
Thanks Stephen!
Cheers Pete. Have to say though, I prefer the burns from wire twisting to the burn I gave myself this afternoon soldering point rodding!
Tom
-
Thanks all!
Will, The red strip was masked with Tamyia tape and painted.
Tom.
-

Hi Pete.
From that final photo, looks like you've cracked it...............
 Looking good!
Hope the stock is all salvageable. Been there, got the spare parts!
Tom.
-
2
-
-

Nice to see someone else using the 2mm S A fishplates! Well worth the effort of fitting them I think.
Nice work with the buffer stops too

Tom.
-
1
-
-
Thanks for that Ian. Scaling was the next thing to figure out, and along with a useful video that Will sent, it looks like it won't be too difficult. I just need to get the dimensions for the actual bridge now!
Tom.
-
Hi David.
I haven't tried the 'new' Kleer yet. When I found out they were changing it, I raided Tesco and have quite a few bottles of the old formula in reserve!
It may be that the new version just needs a little longer to dry out completely, or might need to be applied more sparingly?
Tom.
-
1
-
-
Thanks Stephen!
I'd never done any CAD work before the column above and if I can do it, then anyone can!! Google Sketchup seems more than adequate for simple things like this too, rather than having to learn a more complex program
Tom.
-
Hi Bryn.
looks like you've got it nailed! Looking excellent
I find the Kleer does loose its glossy appearance after a while, but if not some Matt Varnish would take care of that.
Looking forward to seeing more!
Tom.
-
1
-
-
Excellent, I notice you have already found the 'colour in' button too!Any attempt at using Sketchup needs a simple task like this as an 'icebreaker'.. then you will fly as you realise it can do locomotives, griddle cars.... etc!
One step at a time I think Will! Although I might be tempted to have a go at some Griddle car sides once I've fully got the hang of it!
You have decided to include the footbridge as part of your context now then?
Thanks Pete.
I am going to include the bridge. I think it will very quickly become a key feature of the location and it also quite a nice feature to model!
Cheers,
Tom.
-
Hi Nate.
Haven't tried it myself, but I don't see it being a massive problem. Technically, you would have to narrow the Easitrac to match the N Gauge Peco track, but we're talking 0.42 of a mm here, or 0.21mm each side, so you would probably find you could easily achieve this by just joining the line with normal Peco fishplates.
There is a Finer N gauge track system under development, progress on which can be seen here : http://www.ngaugeforum.co.uk/SMFN/index.php?topic=3280.0
No connection other than an interested observer!
One thing I would say is if you start using Easitrac and get to grips with constructing point work (which is not as difficult as people think thanks to the jigs available), you will find it very difficult to go back to Peco!
Tom.
-
Hi Will.
That 139 is looking pretty darned impressive! It's certainly come a long way since that first resin version! I'll definitely have one of these under 'it’s my railway and I’ll run what I want' rules, even though the real thing didn't really get on very well on the MHR!
Looking forward to seeing the print!
Tom.
P.S. EEN gauge. Sounds vaguely Yorkshire, appropriately
-
Hi Missy
I think putting all three together might be the cause of the problem. You probably wouldn't see an engine such 'Prince' next to a Pannier in real life, so you are looking at it slightly out of context. Put 'Prince' in appropriate surroundings and I think that impression of the size being wrong possibly won't be such a problem. That's my thoughts anyway!
Lovely work as always. NG isn't really my thing, but that's some mighty fine etching you have there!
Tom
-
Novel way of planning out tree locations Pete!
The balls range up to 45mm in diameter, and there are a few which reminded me of Cadbury's creme eggs...which unfortunately, I can't find here
I wouldn't worry too much about not being able to find those, you'll just get goo everywhere when you insert the cocktail stick in the bottom!
Tom.
-
They're multiplying!
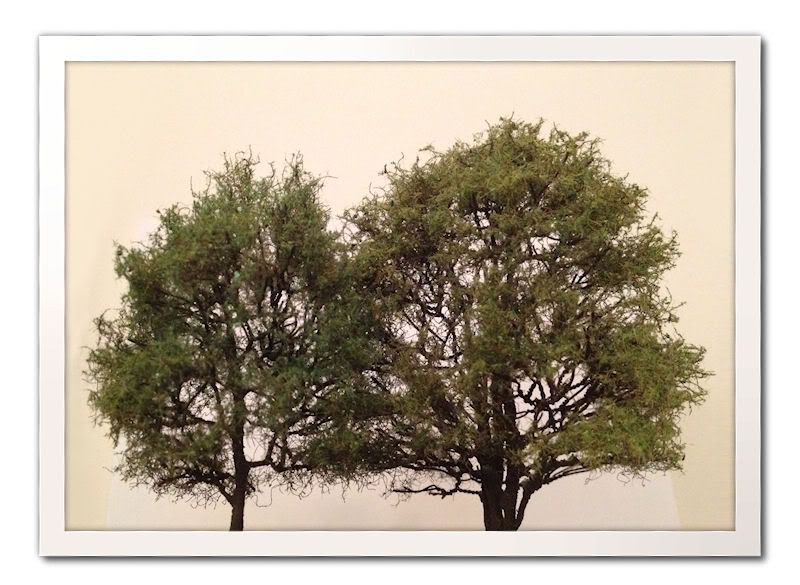
Tom
-
4
-
-
Thanks John!
For the polyfibre I use superglue. A dab on a few branches at a time then a small clump of fibres is pushed on. Once dry, the bulk of the fibres are pulled away leaving just those which took to the glue. The fibres can be on the curly side, but if you stretch them out a little, they become straighter. The flock is attached using spray mount applied to the outside edges only, so you don't end up flocking the entire trunk at the same time!
Tom.
-
1
-
-
I've found that if you apply the Kleer close to the point, capillary action will draw it through the ballast without you actually having to apply any around point blades or other sensitive areas. If it doesn't quite make it, just add another drop and it will eventually! If you do get any where you don't want it, then a piece of kitchen roll comes in handy for soaking any excess up!
Tom.
-
1
-
-
Thanks Bryn!
Good look with the Treemendus Powder. How were you planning to fix it in place? I've only ever used Johnson's Kleer dripped on to it with the end of a paint brush, which it seems to take really well with no disturbance, but i'f you are spraying it you might need to be careful it doesn't blow it all out of position, its quite fine stuff!
Tom.
-
Looking nice Tom - Impressed that you are happy to twist wire and spend this much time perfecting it...I have resorted to buying mine as I need between 50 - 100 and life's too short.
Thanks Pete! Luckily I only need around 20 or so trees for the section I'm modelling. About 3 less than planned since they cut down some to make way for the new footbridge! If it were much more than that I probably would have looked for a commercial soloution also!
Tom.
-
1
-
-
Hi Steven.
I got the wire from ebay, but only because I couldn't find a suitably thin florists wire locally. I used 24swg for the main trunks, and 28swg (.38mm) for the wire which forms the branches.
I would have a read through this thread for some more inspiration. This guy has the method nailed, and some of the trees he produces are incredible!
http://www.modelrail...read.php?t=5015
This particular tree probably only took a few hours, but it was spread out over a few weeks.
Cheers,
Tom.
-
1
-


Finished with the track and point-work building
in Valentin's Blog
A blog by Valentin in RMweb Blogs
Posted
Thats some lovely flowing trackwork you have there! Very nice indeed.
Tom.