


SteveBedding
-
Posts
356 -
Joined
-
Last visited
-
Days Won
1
Content Type
Profiles
Forums
Blogs
Gallery
Events
Exhibition Layout Details
Store
Blog Comments posted by SteveBedding
-
-
Such a simple but elegant solution - look forward to seeing it in operation this weekend

-

I'll second Kris' "Wow" !
You say that you think it has been slow going, but from what we can see it definitely is worth it - you have certainly captured the character and futuristic lines of the prototype
 . Hopefully we'll have WSI back up and wired in time for you to run it...
 -
Oh what a lovely idea
- if only I could justify 'Sibyl' my beloved and cherishes '69 Austin 1100 on my layout... ...but the Calne Branch closed before she was built 
-
Looking excellent Kris - pleased to hear the sculptamold finally dried
-

Hello Nigel,
As a relative newcomer to the black art of 2FS, I have found that some of the 'instructions' to be a bit daunting at first
; however, as has been said, they do get easier with practice. I just looked at the 2-333 instructions and yes they are quite complex to begin with - I started with 2-361 (9'0" w/b with GWR DC brake) which appears to be considerably simpler... ...though with less illustrations .There are many on RMweb who are involved with 2FS who can help / encourage when things get 'challenging' - I have found them all to be of great help in progressing my modelling, and retaining my sanity when it all goes completely wrong.
-
Now if you are really looking for a building 'challenge'...


...then you've got the complete 'set'

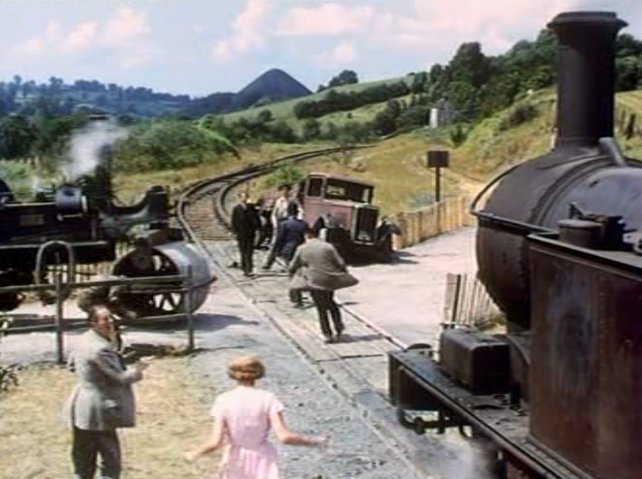
(PS don't get me started on the other great railway classic - The Great St Trinian's Train Robbery
 )
) -
Yes, yes, yes... ...you just know that it makes sense...
-
...mind you, what I know about icing a cake I could write on the back of my hand...
[slight diversion off topic...
 - part of my selection criteria for SWMBO#2:1) Must like trains...2) Must cook...
I must have got lucky second time round as a) SWMBO#2 likes trains and n-gauge in particular (she's learning slowly about being converted to 2mmFS...), and B) she's a trained chef
end of diversion].
Back to the classics; how about this for a cameo somewhere on the 'back' of the layout (where the 'straight' joins the 'curve', furthest from window)...
...and just to keep the inspirational mojo flowing

...a suggestion for an Autocoach interior?
-
...Travelling at about half speed my Hymek takes about 1:30 to travel a complete circuit. This is about a scale 3/4 mile, so a scale speed of about 30 mph. Going much faster than this makes the train appear to travel much to fast through the Avonwick section...
Surely, that's still too fast - I think the historical precedent was clearly defined in the Titfield Thunderbolt - not to exceed an avarage speed of 25mph...
-
Looking very nice Kris.
The addition of paint to the scultptamold does seem to make a big difference in reducing that brilliant white glow! Though, 6 days does seem to be a bit long to dry out - I think you may have put it on a bit thick... ... I think this is an oportunity to learn from your experience
Just how long does it take to get round the layout at a 'reasonable' speed? I'm sure you could get dizzy in your swivel chair if you try to follow a train thats going too fast
- more importantly - is the chair the one offered in the Not the Nine O'Clock News sketch on business negotiations.... ? -
Hi Steve.
What Brass plates are you on about? Do you mean the bogie sideframes? If so Allen of Worsley works is etching some for me so hopefully I will have them soon.
Missy
Oops - I was having a senior moment
. By brass plates I meant the very nice bracket that you had used to fit the motor... ...and for some unknown reason I had thought the body only came down as far as a line level with the buffers. Having looked back over previous entries (particularly Part VIII) shows that the side skirts (for better word) actually have the details already etched in......I should have just assumed that you would have had it covered
-
Coming on nicely - although you say you're mojo isn't all there, it hasn't affected the quality of the work.
How are you going to 'detail' the sides of those brass plates - I know that just about each one of the railcars was different in some respect, but I I thought that the 'bit underneath' had some detailing (grills?)

Keep working at it - It will be interesting to see your one alongside a Farish version...
-

Looking good Kris and nice to see more progress happing on Avonwick
. Just where is the good farmer and Daisy, are they busy at work, or wandering off round the rest of the trackbed 'supervising'?The sculptamold does look good with the colouring added - how long did it take to dry eventually?
Nice work Kris....Pity its Gods Wonderful Railway really!
Chris - "spherical objects" is all I can say to your disparaging comment
. There is only one railway worth modelling and it isn't Red! (OK so maybe some of the diesel hydraulic D800s and Westerns were later, but that doesn't count  (...I'll admit that Midland does come a close second though...)
 -
Looking very nice Pete, your fixed magnets seem to work rather well! From the pictures it looks like you've missed off the 'tongue' on the couplings which I thought was required for the delayed effect but it doesn't seem to stop them working nicely
.Do you intend to 'colour' the DGs or are you just going to leave them as brass?
(PS Is the ski jump intentional?
) -
The Giant is the right colour for the early 50's - all crimson. It does look very bright in comparison...
Thanks for putting me straight - I know very little about early BR
 . I looks great in that 'striking' colour - I've got one (or was it a Monster?) to build but fortunately, that's going to be nice 'dull' brown....
 -
Ah yes, I'd forgotten about Farmer Giles and Daisy, it all comes back to me from your original posts in the dim and distant past... ...on an RMweb far, far away...
The bridge is looking very nice, the additional depth to the sides does not detract and would not be 'noticable' if you hadn't posted the pictures of the original
; when you put the additional curved courses of bricks over the arch, it will blend in even more. The bogies on the B-Set look very nice (I'm guessing that you've done both of them now) and the coupling looks fine, but, is the colour of the Giant right? -

Good to see you back Mikkel - I had found The Farthing Layouts on the previous RMweb and found your attention to detail in producing the atmosphere to be absolutely astounding
.I'll keep looking to watch your progress - learning from a master
-

I saw St Ruth at the Expo and was mighty impressed - that's some fiddle yard/sector plat you have there
. I have always had a fondness for the old western hydraulics, especially the D800 Warships (though I have no idea why  ) so your avatar brings a to my face...
I'll watch this with interest so keep it coming please (especially the pictures - warts & all
) -
If you look at the paper bits as stuck to the body, they have been designed in Paint Shop Pro, white areas are areas that will remain as metal, the black areas, such as the windows, are black. Blue and red areas can then be added to part etch lines to bend, as if you were folding a scored piece of card.
Thanks for the clarification Will - makes a lot of sense
I had a look at that etching company's website, unfortunately it doesn't give much information. I'll be interested in seeing how things work out with them. -
Will,
This has been a fascinating project - it's amazing what can be achieved when scratch building
. How / where are you planning on making the etched parts? -
Missy
Glad to see you did finally 'decide' to build your own chassis - and very nice it looks too
The clean neatness and simplicity is most impressive and is certainly worth further consideration as a way to 'adapt' the Farish Railcar (for those of us who don't have your sculpturing skills in building the etched body... )How are you going to do the side frames on the drive units?
Steve
-

That is impressive!
 :clapping_mini:
 -
If I really wanted to have my favourite steamer then it would have to be a Q1...but I guess IKB will turn in his grave at the thought of that on a GW branchline
Fully understandable! However my justification for a Q1 on a GWR branchline is that in wartime anything could happen... I'm pretty certain that it didn't actually happen, but there's no reason why a Q1 hauling a load of AEROs (thats a GWR propellor wagon) in to Calne couldn't have happened
; The RAF stations at Yatesbury and Lyneham, and the Maintenance Unit at Melksham could easily justify the potential for such a routing.If you're running a 'steam special' in the 80's, well, the world is your oyster when it comes to picking excuses...
-
Technically speaking, 4' 7.5" works out at 9.52mm, and there is a new 9.5mm driving wheel in the Association range - watch out that the flange still fits the body though. Similar argument for the 14XX, wghere 10.5mm is the true scale equivalent.
I also believe that the famine of 9mm drivers is now over, or if not, will very shortly be.
Chris Higgs
I stand corrected
. Whilst I'm still getting to the point where I need them, I have been getting increasingly concerned over the shortages with the 9mm drivers since they are the predominantly required size needed for GWR conversions (57xx/8750, 45xx, 42xx etc) - having a complete mental block, I never considered that 9.5mm would be a more accurate fit (but as you noted, the flange clearence will need to be considered).Thanks again, that's two useful bits of info I've learnt today


coombe junction - moorswater + 1?...
in coombe junction - moorswater
A blog by bcnPete in RMweb Blogs
Posted
Well it looks like a done deal then - I'm guessing that there were probably a few more when you first considered the extension but they appeared to have mitigated/ignored! (and frankly your second negative is no excuse - surely you can justify the odd Cornish pixie in the forest...).
As Kris said "You know that it makes sense don't you"